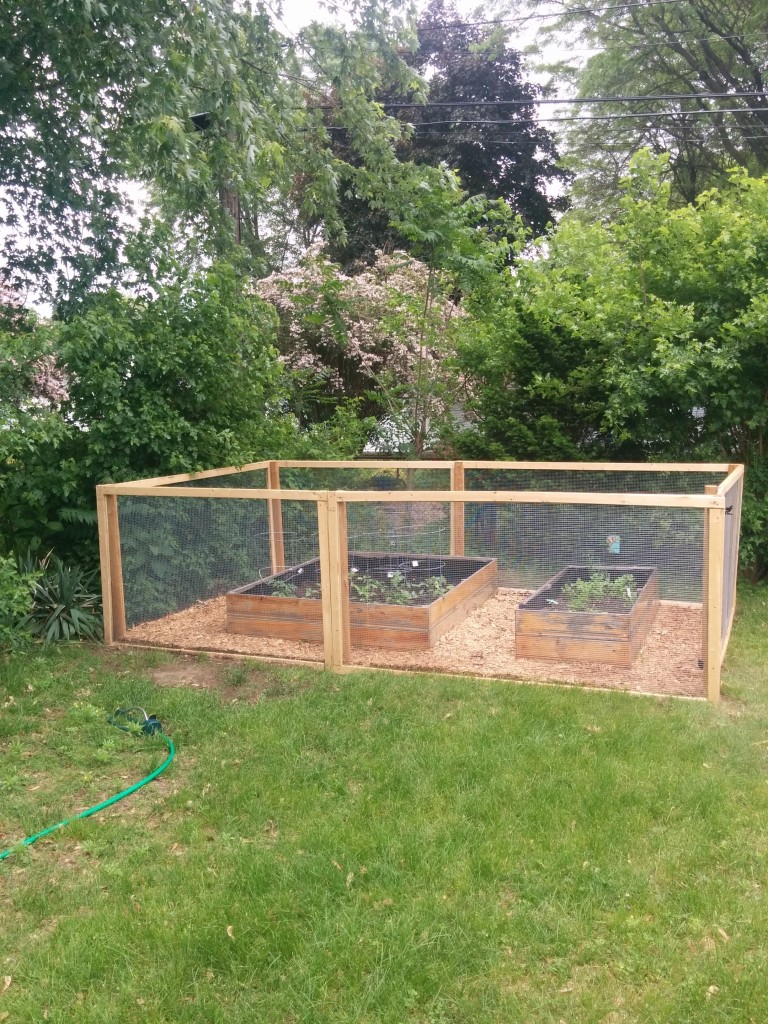
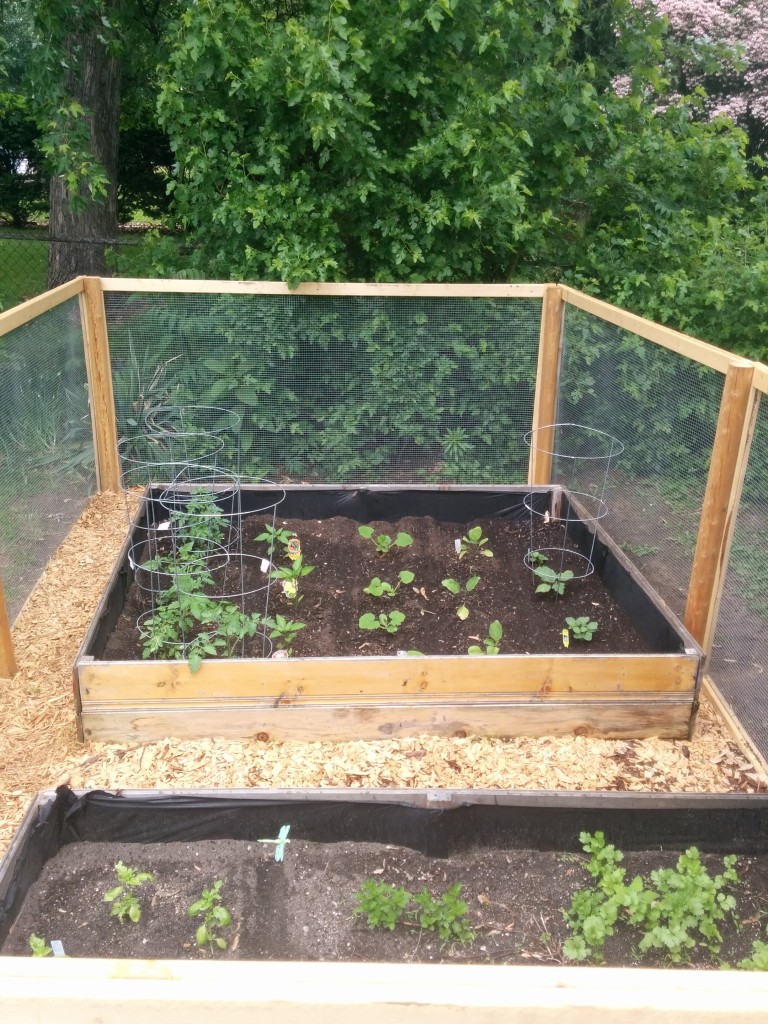
If you read our previous blog post on how to build a raised garden bed on a budget, then you might be wondering how we have kept our harvest safe from unwanted visitors. Initially we went with a cheap fence made of galvanized poultry netting but after many missing tomatoes and half-bitten squash we decided that the next year we would spend a bit more to have a quality fence. We wanted a roomy enclosed space with easy access for us to plant but sturdy and tall enough to keep the demon bunnies out. I soon sketched out a blueprint for my imagined firewall and got to work making it a reality. I will warn you that it is a bit on the pricier side but it’s a sound fence that’s practical and aesthetically pleasing. Shall we get to work?


Our sorry excuse of a fence
Supplies for an 12ft x 8ft garden fence
8 2.5 x 2.5 x 8ft ($27.79)
24 2 x 4 x 8ft ($80.88)
1 1/2 x 4ft x 25ft Hardware Cloth ($38.98)
1 box Wood Screws ($6.26)
1 Fence Door Hardware ($15.98)
Tools
Staple Gun
Post Hole Digger
Miter Saw or Hand Saw
Power Drill
Directions
- Design a template for your fence because this saves you on both time and money. The desired size of the enclosure will dictate how much wood you will need and in turn how much you will spend. I can’t stress enough how important the planning phase is for any successful project.
- Cut the 2.5 x 2.5 x 8ft timber to 7 ft. 5ft of the timber is for the fence sections since the hardware cloth is only 4ft tall and the remaining 2ft is going into the holes you will dig to secure the fence.
- Using the post digger, dig seven holes (3 on each side and an extra one for the door) about 2 ft deep. I did not use cement to secure the timber posts because I find it unnecessary but feel free to use cement if you like!
- Once you have dug your post holes, insert the timber poles leaving 5ft above the ground. Make sure the poles are level by laying a 2×4 or a longer piece of wood across the posts while placing a level on top of it.
- The next step is to assemble the sides of the fence by using the 24 pieces of 2x4in x 8ft pieces to make rectangular frames:
- Cut a total of four 2 x 4 x 8ft to a height of 5 ft (current they are 8 ft). These will be the vertical sides of your frame. The hardware cloth is 4 ft and that is your height unless you want the hardware cloth to be shorter.
- Cut a total of four 2 x 4 x 8ft to your desired width. I cut mine to 6 ft because I needed the width of the fence horizontally to be 12ft.
- Now that you have four 4ft and four 6ft pieces lay them out according to the design in Figure 1. You must follow that design if you want to keep the fence sturdily joined together. This also keeps the ends from bending.
- Lay the hardware cloth flat on top of your bottom piece of your boards (see Figure 2 ) and fasten using your staple gun.
- Proceed by laying the top pieces of your board over the hardware cloth/bottom frame and join the boards together using wood screws (see Figure 3).
- Flip the completed fence frame gently and screw the other side as well (see Figure 4).
- Repeat Step 5 until you have enough sections to enclose your garden. I needed to repeat the step six times. If you are unsure about your calculations try attaching your fence side to the post first and proceed by building then attaching rather than building all the sides and attaching them at the end.
- Now you can attach the completed fence sides to your 5ft timbers posts using a drill and wood screws.
- Create a basic door using the leftover 2 x 4 x 8ft by cutting them until you have two 2ft and four 5ft pieces. Align the four 5ft pieces on the ground vertically and make sure the space between them is even. Place the two 2ft pieces one closer to the top and one closer to the the bottom, using wood screws to secure them. Last but not least cut a piece of hardware cloth to the size of your door and install it on the backside of the door. I used basic fence door hardware for the hinges and lock. Installation manual is included in the packing and is very straightforward.
- For an overall cleaner look, use mulch, wood chips or small stones between the garden bed(s) and fence.
- Enjoy the fruits of your hard labor without bunny or deer bite marks.

Figure 1 – Bottom, Top & Hardware Cloth
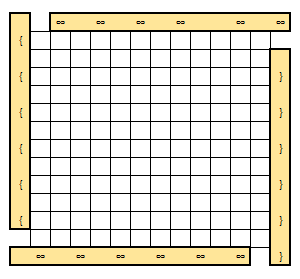
Figure 2 (Spacing for visualization)
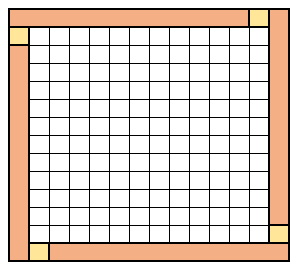
Figure 3 (w/o spacing)
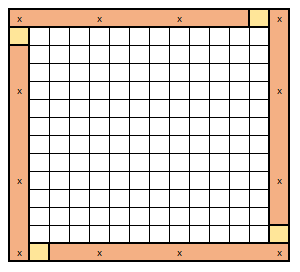
Figure 4 (w/o spacing)


If you liked this post please follow us and share!


6 thoughts on “Build your Own Garden Fence”