


In the three wonderful years we’ve lived in our starter home, we’ve done many DIY projects, with our kitchen renovation being the biggest. So it should come as no surprise that we have a TON to write about. I’ve written about many of the more involved aspects of our DIY kitchen project in other posts but one feature I have not talked about is the LED lighting I installed under our open shelving. This was one of the more exciting parts of the whole project for me because I think LED lighting looks cool in kitchens (let’s be real…it does) and I liked the idea of having some light around when navigating the kitchen for a late night snack. Not to mention, LED lighting is such a simple and inexpensive addition that can really brighten up a space. Researching online and reading through DIY forums gave me an idea of what I needed to do and helped me to settle on the perfect product. There are many brands of LED lights out there but I purchased the Tingkam Waterproof 5m 5050 SMD RGB LED Strips which had great reviews on Amazon and some really cool features including a range of colors and lighting options. The installation was fairly straightforward and despite costing only $20, the lighting and adhesive were high quality. We are 6 months out from our renovation and have not had a single problem, thankfully.

If you are considering installing LED lighting under open shelving, there are a few things you will need to consider. 1) Is there an accessible power outlet where you can plug-in the connected LEDs nearby? 2) Are there large spaces between the shelves where you will be installing the LEDS under? If there is a significant space between shelves, you will need to cut and splice wires using the LED connectors and extension cable. You will also need to think about aesthetics. 3) Where will you hide the extension cable(s)? Because I planned to incorporate LED lighting during the design stage of our kitchen renovation, I was able to do the electrical work and run the cable through the wall before I got to drywalling and tiling the backsplash over it. Once you’ve settled these minor issues, you’re all set to install the lights. Here’s what you’ll need:
Supplies
Lights $20.39
LED Connectors $9.49
LED Extension Cable $7.99
Butt Splice Connectors $6.55

Image via Amazon
Directions
- Measure your shelf and cut the LED strips according to the length of your shelf. For the specific LED lights I purchased, you can cut the strip along every 3 LEDs where there is a scissor line (figure 1).
- Connect your LED strips using the LED connectors (figure 2). If your shelves have a wall or other obstacle between them and you can’t just run them continuously you will need the extension cable listed under the supply section. Make sure to measure the space between the shelves before you connect the LED strips together so you know what length to cut your extension cable. To connect your lights to the extension cable you need to splice the wires (see figure 2).
- Splicing: 1) Peel back the LED strip to reveal the copper stripes and connect them to the waterproof clasp of the LED connectors. 2) Cut the connector wire in half and separate the black, red, blue, and green wires so that you can align them with the corresponding colored wires on the extension cable (figure 3). 3) You can either crimp the wires together using the butt splice connectors or twist and tape them with electrical wire (figure 4).
- Once you are done splicing the LEDs, you can secure the lights to the bottom of the shelves using the self-adhesive backing. To get the best results, make sure your surface is completely dry and clean. If you are planning on hiding the wires then disconnect the LED lighting strips before you adhere them to the shelf and run the wires through the walls as needed (see figures 5-6).
- Now you can plug the LED lights in and enjoy experimenting with all the colors and settings (figures 7-8).

figure 1
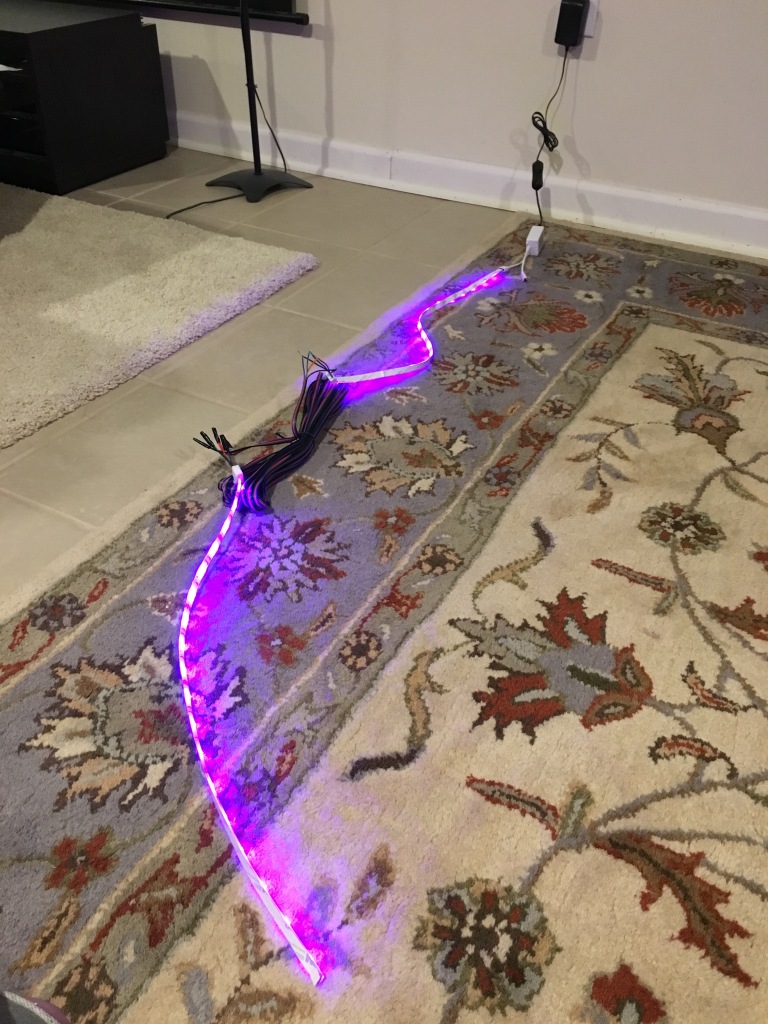
figure 2
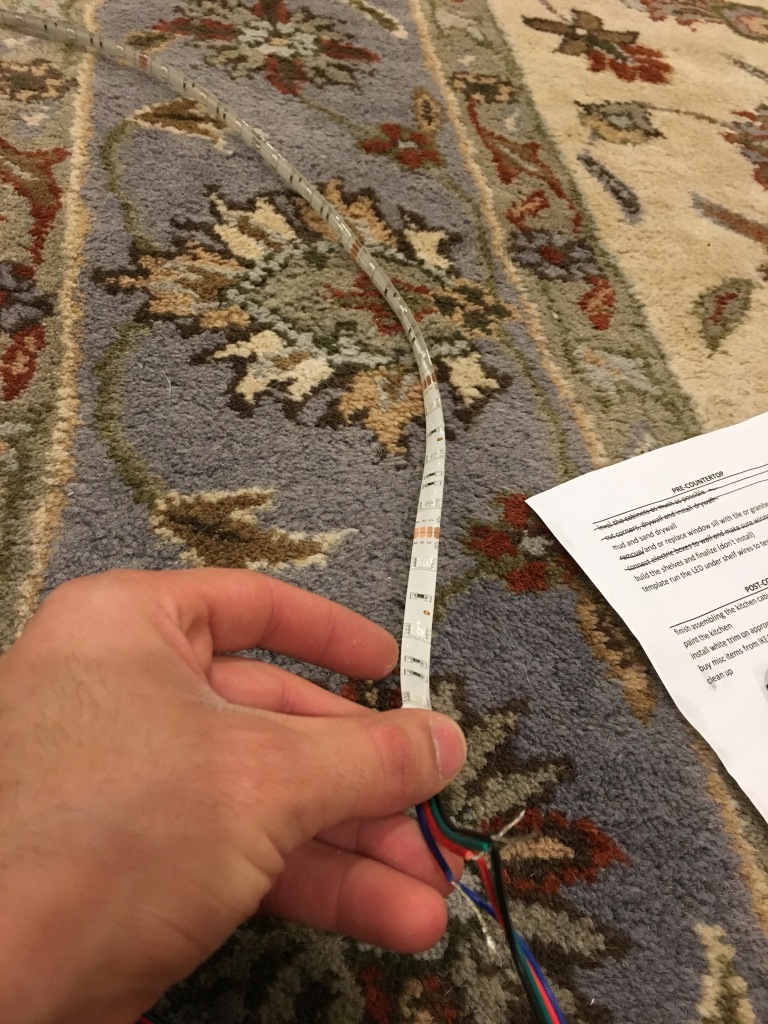
figure 3

figure 4

figure 5

figure 6

figure 7

figure 8
Have you incorporated or considered incorporating LED lighting into any of your home renovation projects? Let us know in the comments below!
If you liked this post please follow us and share!
![]()

12 thoughts on “Kitchen Undershelf LED Lighting”