Organizing for Your Lifestyle: Strategies for Developing Sustainable Organizing Solutions

Let’s be real. Maintaining a clean house most days is a challenge in itself. Now add two young children and school and we are looking at nearly impossible. But we manage somehow. Believe it or not, the hardest part is not having to pick up after our little ones but rather picking up in a timely manner. In order to do that, one needs to be…dun..dun..dun.. yep, you guessed it. ORGANIZED! Since both my husband and I are in school this semester, we figured it was high time we got our house sustainably organized once and for all. Of course, it doesn’t hurt to get a little bit of help.

IMG_5906

In her book Organizing for your Lifestyle, Jane Stoller offers inspiration and practical advice for tackling any organization project from the smallest closet to the biggest room. The first chapter is a general overview of organization philosophy covering the very basics including the health and cost benefits of organizing as well as organization approaches such as minimalism. After that expect to dive straight in. My favorite part of the book is the way in which it is organized; each chapter serves as a guide to a different space. As someone who suffers from indecisivism (is that a thing?) I can tell you that knowing where to start is the most stressful part so following a list definitely helped eliminate that stress. Here’s how the book is split up:

  1. Closet
  2. Bathroom
  3. Kitchen
  4. Travel
  5. Books
  6. Storage Room

Suddenly, a good pre-New Year’s purging doesn’t sound too bad now does it?! Today I’m sharing five of my favorite practical tips from the book and how I’m applying them as we tackle our organizational woes.

1. Have a date with your closet every year. Jane recommends evaluating and reorganizing your closet twice annually as “this will help you to stay fully in control of what you have, and knowledgeable about what you need, while ensuring that no excess clothing outstays its welcome.” We recently tackled the kid’s closet and ended up donating a TON of stuff they had outgrown that was taking up valuable space. After seeing how much space this opened up, I added reminders to my calendar to do this on a quarterly basis.

IMG_5909

2. Think in terms of frequency of use. Mentally sorting out your belongings into daily use/weekly use/sparse use really puts things into perspective and allows you to tailor your organization system to your practical needs so that you have what you need when you need it. This has been really helpful in our bathroom as I have tried to make sure that we have easy access to the things we use every day like toothpaste and shampoo whereas medications that are used infrequently are tucked away out of sight.

3. “Organize so your mother (or father) can cook in your kitchen.” This one really stood out to me because the kitchen is the heart of our home. If you don’t have easy access to basic tools and ingredients while cooking then you’re wasting valuable time during meal prep. Imagining someone else using your kitchen is a great exercise for thinking about the efficiency of your space. I used the opportunity to remove some unwanted gadgets, dinnerware, and Tupperware out of circulation to make room for things that I actually use and need.

IMG_5743

4. Find a balance between function and aesthetics. What works for one person or family doesn’t work for everyone and that’s okay. It’s up to you to find a solution that is both functional and visually appealing for your needs (sometimes function will trump aesthetics and that’s also okay). This issue came up for me while I sifted through my scarf collection. Although I can see how the variety of colors and patterns hanging together on a wall can be visually unappealing, this strategy has proven to be the most practical for my lifestyle because it offers easy open access to all my scarves.

IMG_5969

5. Make organizing a lifestyle. This is by far the most important advice because it requires you to think in the long term. With this philosophy, organizing is no longer about buying storage containers or fancy systems but rather about asking yourself, “how can I stay organized?” The answer, I think, will lie in a happy medium between a designated system, daily practices, monthly maintenance, and a quarterly assessment of successes and failures. To help us along through this process, I’ve created a diagram to envision what this would look like.

Organizing Chart

We are by no means completely organized because we haven’t had the time to tackle all of these spaces in one sitting but we have been thinking through these tips as we slowly organize our home corner by corner. These strategies have certainly helped me be more intentional about finding sustainable organization solutions and I look forward to sharing more as we work on making our home better organized. If you want more organizing inspiration as well as tips and tricks on the specifics of storage, folding, and labeling, you can find Jane’s book here.

If you enjoyed this read, please share and follow!

Instagram

signature3


One Room Challenge: Week 7 |Simple Office Makeover Reveal

Today is the big day friends! Although we weren’t able to keep up with the weekly progress posts for our One Room Challenge, we still managed to finish the room on time (hooray!). If you’re just tuning in here for the very first time and don’t know what The One Room Challenge™ is, it’s a widely anticipated biannual event every April and October, hosted by Lisa of Calling It Home, in which twenty design bloggers take the challenge of transforming a space in just six weeks. Every Wednesday, the designers document their process while sharing their sources and professional advice. On Thursdays, guest bloggers, like us, can play along and support other guest bloggers that are also tackling a room renovation. As you may already know, we were working on an office makeover for my brother and sister-in-law because although we love DIYing, we couldn’t handle the stress of doing our own home renovation while both of us are in school.

ORC GP
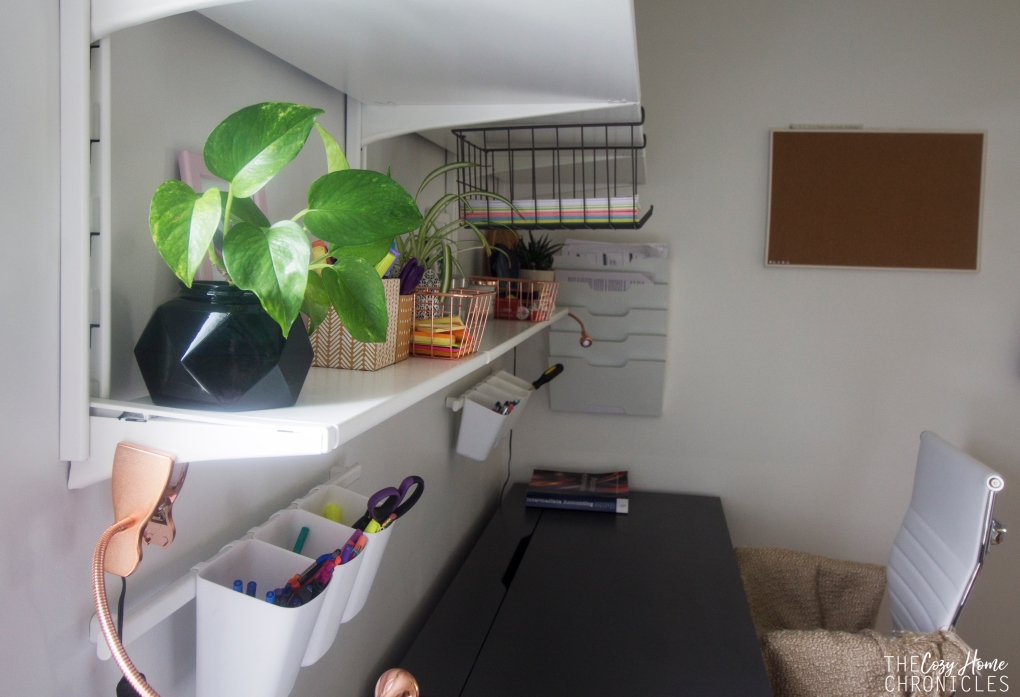
Don’t worry I’m not going to chit chat too much. The whole point of this post is to see a satisfying transformation and we will get to that in just a minute. Of course we also want this post to be inspirational and informative so following the before and afters we will give an overview of the changes this project entailed, the cost, and our sources. If you don’t even remember how this project began you can refer to weeks
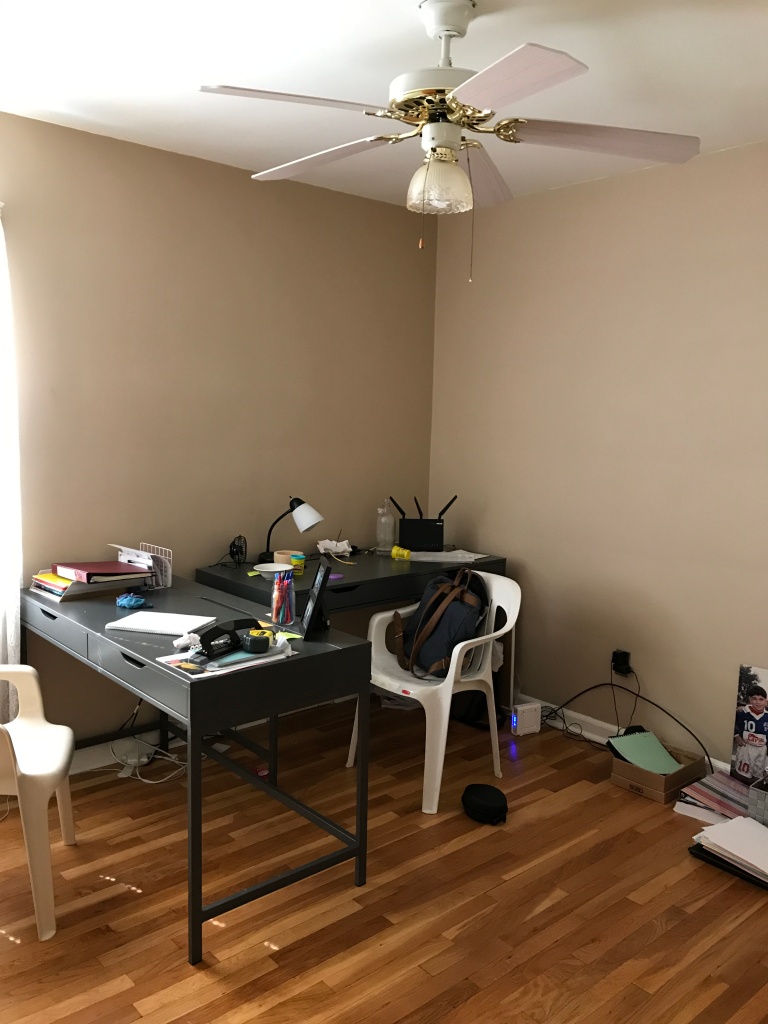
 one, two, and three for a quick reminder.

BEFORE: A DARK & SAD ROOM

IMG_5608

IMG_5607

AFTER: WORK SPACE GOALS

IMG_7365

IMG_7355


IMG_7361

IMG_7377

IMG_7121

So how did we get from A to Z? Never underestimate the power of a fresh coat of paint. In our opinion it is the cheapest, easiest, and most impactful way to transform a space. My sister-in-law wanted a bright and modern space so we went with Behr in Ultra White for a fresh clean look. Another impactful thing we did was to take down the vintage lace curtains and replace them with brand new blinds that I purchased from IKEA for $2 each (yes you read that correctly). Let’s just say it pays to lurk in the last chance section!

IMG_7371

Replacing the fan light with a modern ceiling light from IKEA for $30 also dramatically changed the look of the office. The black fixture really complemented the gray desks and the hardwood floors and brought in much needed light. Of course one of the most expensive purchases was the Algot system which we added for shelf space above the desks. While we did toy around with the idea of building custom shelving, we decided in the end that spending a little more on a system that could be adjustable to changing needs would be the smartest choice. For $85, it was well worth the investment and provided the perfect amount of space for organizing books, supplies, and for styling decor. The best part about this transformation was that nothing was difficult to do; painting, installing shelving, replacing the light fixture, all of these required no super special tools or skill sets (which means you could do it too!). 

IMG_7385

We could not be happier with how this room turned out. Considering our crazy schedules and all the stress in our lives, I think we did a pretty good job of bringing  our simple vision to life. We wanted a fresh, inspiring space with bohemian elements (patterned rug, copper accents, plants) and I think we definitely pulled that off. While we are very happy with the final look of the room, there are still some areas of improvement that we will probably return to. One of them is wire control. We definitely want to find a way to conceal and minimize the tangling of the printer, desk lamp, and laptop cords. We also want to add a little more color and character to the rest of the walls. I think this is something that will naturally come as my brother and sister-in-law live in the space and identify what speaks to their style. In that sense, I don’t mind the empty walls as much because I think of it as their decor journey has only just begun. I also thought it would be nice to have a fun little reading corner complete with fancy shmancy floor pillows but it looks like that will have to wait.


Sources


Ceiling Light $29.99 | Office Chair  $84.99 |Shelving  $85| Rug $69.99| Desk Lamp $12.99 Magazine Rack $14.99 |Vase $2.99 | Plants $2.99| Hanging Storage $4.36| Frames $.99

As you can see, many of the items we purchased are both accessible and reasonably priced for the average home DIYer. We took advantage of many deals to save big including using a 10% off coupon from Wayfair and thrifting to keep our makeover well under $500. The rug was my sister’s belated birthday gift to my brother for the renovation so all we really had to purchase was the shelving, chairs, lighting and accessories. This came out to about $350. For the decorating I was a little savvier as I relied on some thrifty finds like a set of 4 wall baskets for $1.99 and free printable wall art (tropical palm leaf and keep pushing on).

IMG_7199


All in all, it’s been another successful One Room Challenge and we can’t wait for the next one 🙂

Any questions? Thoughts? We would love to hear from you in the comments below. Don’t forget to check out everyone else’s final reveal posts and as always, if you liked this post please follow us and share!

Instagram

signature3


Simple California Sushi Bowls

We LOVE sushi. What we don’t love, however, are all the dangerous ingredients hidden in restaurant-made sushi. The artificial colors in the surimi, the alcohol  and high-fructose corn syrup in the unagi, the MSG in the soy sauce. Many think of sushi as a healthy option but when you break it down, it becomes clear that these ingredients are far from clean and healthy. So what’s a sushi lover with little time to do? Make homemade sushi bowls of course!

IMG_7063

As you know, both my husband and I are in graduate school so the less time we can spend to have a filling and healthy meal on the table, the better! While I enjoy making sushi rolls every once in a while, I really don’t have time for it with my schedule. This is why I’ve been working on meal plans with little time investment but big impact. With a little bit of preparation, this meal can easily come together in under 30 minutes. 20 minutes for the rice to cook and cool while you cut up the vegetables and make the crab salad. That is it! For the crab salad, we use a surimi that is made from Alaska pollock and is free of alcohol, artificial colors, and phosphates. You can make this recipe even healthier by substituting the sushi rice with brown rice or cauliflower rice and using a larger variety of vegetable toppings including carrots and daikon. Either way you’ll have one amazing bowl packed with all the flavor of a California roll for a fraction of the cost and in no time at all!

IMG_7022

Simple California Sushi Bowls

  • Difficulty: Easy
  • Print

Ingredients
2 cups sushi rice (subsitute brown rice or cauliflower rice)
2 cups cold water
2 tablespoons rice vinegar
1 tablespoon sugar
1/2 tablespoon salt
12 oz. flake style surimi (we use Simply Surimi)
2 tablespoons mayonnaise (more if you like it creamier)
1 teaspoon Sriracha (more if you like it spicier)

Toppings
Cucumbers
Avocado
Scallions
Sesame Seeds
Nori

Note: This recipe makes between 4-6 sushi bowl servings depending on how big your serving size is. If you’re an individual making this recipe, it is enough to have you covered for a week of lunches. If you’re a family of four, it will take care of one meal time.

Directions

  1. Prepare your sushi rice by rinsing the rice in a bowl under cold water until the water becomes clear (about 3 times).
  2. In a medium saucepan bring the rice and 2 cups of water to a boil, then reduce the heat to low and cover. Cook for 15 minutes then remove from the heat and let stand for 5 minutes while you prepare the vinegar and sugar mix.
  3. While the rice is cooking you can dice your toppings and prepare the crab salad as outlined in step 6.
  4. Combine rice vinegar, sugar, and salt in a small bowl then pop it in the microwave for 30 seconds.
  5. Transfer the rice to a large wooden or glass bowl and add the vinegar mixture, folding gently to coat the grains. The rice is now ready for assembling the sushi bowls.
  6. In a food processor, pulse the surimi until you get a shredded texture. Then pour into a mixing bowl and add the mayo and Sriracha. Adjust to the level creaminess and heat depending on your taste.
  7. Assemble your sushi bowls by layering the sushi rice base and topping with the crab salad, nori, cucumbers, avocado, scallions, and sesame seeds. Serve alongside spicy mayo and soy sauce.

IMG_7002

IMG_7011

IMG_7053

IMG_7062

If you liked this post please follow us and share!

Instagram

signature3


Keeping it Cozy: Simple ways to add warmth to your home

With Halloween behind us and Thanksgiving ahead, we are inevitably inching closer to the end of the year and to even colder weather (brrrr… just the thought makes us cold). The good news, however, is that there are a few simple ways to kick the coziness factor of your home up a few notches and I’ll be sharing them with you in this post. It really doesn’t take much to make a space inviting and cozy. No matter what your style is, if you can envision yourself curling up with a good book or good company and forget all your troubles then you’re doing something right. The fall and winter seasons makes this more of necessity because there’s less going out and more staying in. The last thing you want is to be sitting in is an uninspiring space all winter. Plus with the many holidays around the corner, you’ll definitely want a welcoming space where your family can gather. Here are just a few ideas that you can implement today:

Bring out the throws. Nothing says warmth like a soft, fluffy throw. A throw hanging out on your sofa is a nice invitation to relax and feel right at home after a long busy day.

IMG_6342

Light it up.  Candles and string lights add a warm, cozy glow to any space especially when it’s cold outside. Furthermore, the scent of your home can really make or break the mood. Try burning or diffusing fragrances that are meaningful to you. Some of our favorites include cotton, balsam fir, orange, and vanilla.
IMG_6373
IMG_6345

Warm drinks at the ready. Whether you’re a coffee or tea or hot cocoa drinker, having a tray or cart set up for an evening sip-a-thon will transform your space from cozy to COZY. I mean, who doesn’t dream of relaxing in their home with a warm mug of their favorite beverage in hand?
IMG_6419

As you can see, I’ve been thinking quite a bit about how we can make our home a little cozier for the winter. During my browsing adventures, I came across many home decor items that I found both beautiful and cozy so I put them all in a mood board for you  with sources included. For now, my plan is to add winter greenery with some fairy lighting but our living room always feels cooler in the winter even with the heat on so I thought it would be nice to have a TV stand with fireplace. One can dream, am I right? Anyways, I hope you find inspiration in our little collection and in our simple tips for making your space cozy for this winter season.

Keep it Cozy Post

Sources: 1. Wayfair | 2. H&M Home | 3. IKEA | 4. Amazon | 5. H&M Home | 6. IKEA | 7. Target | 8. H&M Home

What are some ways you like to make your space cozy for the changing seasons? Tell us in the comments below and as always, if you liked this post please follow us and share!

Instagram

signature3