One Room Challenge: Week 1|Bathroom Renovation Preparations

We are super excited to share that this year we will be participating in our first ever One Room Challenge! Hosted by Lisa of Calling It HomeThe One Room Challenge™, is a widely anticipated biannual event every April and October in which twenty design bloggers take the challenge of transforming a space in just six weeks. Every Wednesday, the designers document their process while sharing their sources and professional advice. On Thursdays, guest bloggers, like us, can play along and support other guest bloggers that are also tackling a room renovation. We have been wanting to participate for a while now but last year we started our kitchen renovation much later than anticipated and so we weren’t able to play along.  We really hope we can get this bathroom done in the six week period but with two kids under the age of two and graduate school on our plates that is a tall order. We are diving right in regardless.

ORCLast week, in anticipation of this event, we shared two design boards and some bathrooms for inspiration. You can check them out here. We spent the last two days completely emptying out our bathroom and relocating to the bathroom downstairs. With me gearing up to start dissertation fieldwork this summer and my husband starting his MBA soon, we decided this project could not wait any longer because life will just get busier. Besides getting it done in under six weeks, we also need to stick to a tight budget. Challenge accepted.

Alright! Here’s what our bathroom looks like now:

IMG_1136

IMG_1138

IMG_1141

IMG_1144

IMG_1147

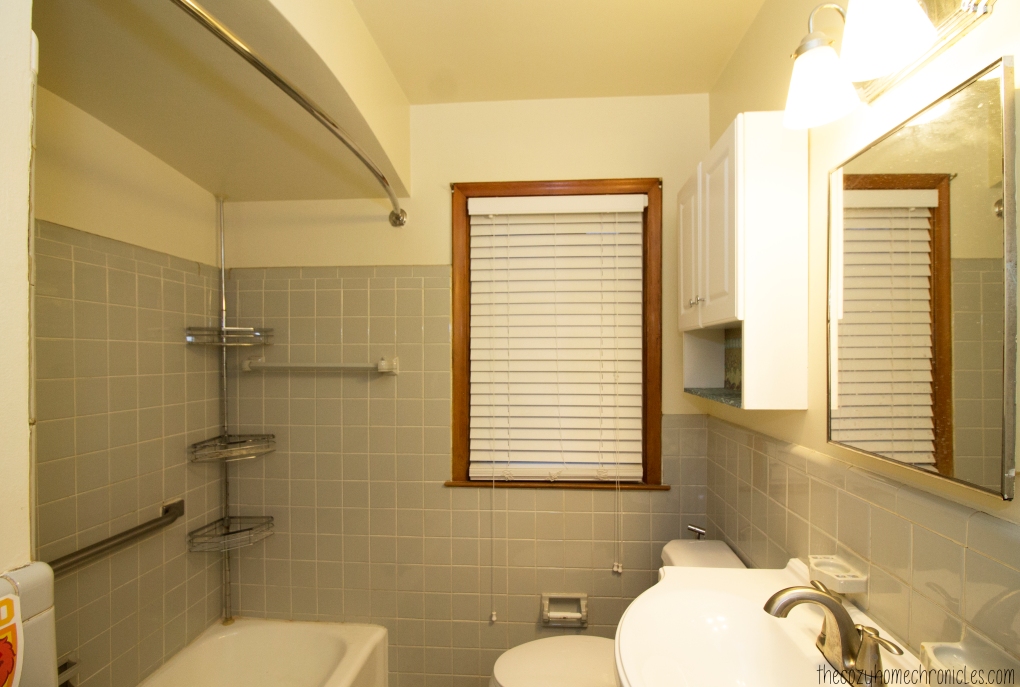
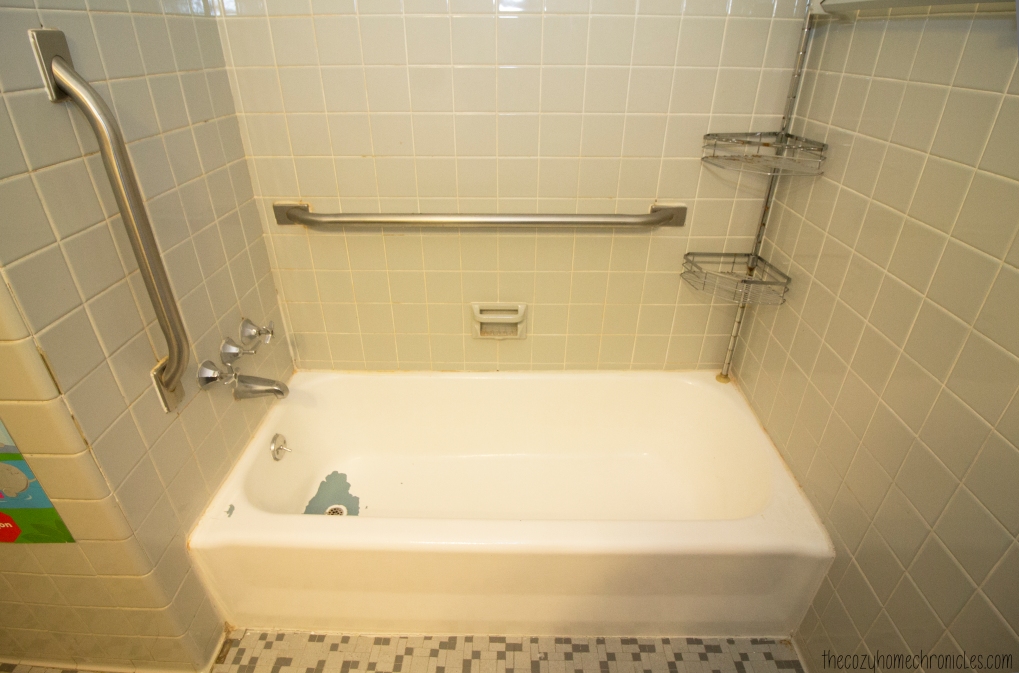
Ugh.  So much YELLOW. As a photographer, the urge to edit these images was intense but I wanted to capture the space exactly as is so we can all enjoy the final transformation. The wall tiles are still in great condition but they make the space so dark. We really want a bright clean look that white subway tile will definitely give.

4548dc7e-0269-4621-829d-718bb55c38b1_1000

We started some of the demolition today by taking out the toilet, sink, and vanity. The tub will be next to go followed by the tile and then it’s all rebuilding from there. We still haven’t fully settled on the floor tile, accent wall tile, and vanity but we will be deciding in the next day or so. The feedback we have received from readers, family, and friends has overwhelmingly been in favor of Design Board #2 which is interesting because we are leaning toward white marble floors and black fixtures. I guess you will just have to tune in next week to see where we are in the process. You can also follow along on Instagram @thecozyhomechronicles for the latest behind-the-scenes and videos of our progress. Until next week 🙂

If you liked this post please follow us and share!

Instagram


National DIY Day Celebration

IMG_1096 NDD

Happy Monday Friends 🙂 Yesterday, April 2nd, we celebrated National DIY Day by gathering with a group of awesome volunteers to build raised garden beds for a local community garden. If you are unfamiliar with National DIY Day, it is a day founded by Craft Box Girls two years ago as a way to bring people together and celebrate creativity. Last year, people all over the world were celebrating April 2nd, some as far as Australia!

As DIY Day Ambassadors we wanted to use our DIY skills for a good cause and so we teamed up with Zaman International, a non-profit humanitarian organization committed to addressing the basic needs and empowerment of marginalized women and children locally and internationally, to host the event. Since their foundation, they have provided essential needs to more than 180,000 clients in Southeast Michigan. In April 2016, Zaman moved into a 40,500 square foot Hope for Humanity Center in Inkster, Michigan. Aside from launching a Food Pantry, Zaman was recently accepted into the Feeding Inkster Community Garden Program which provides seeds, plant starters, garden tools (as available), and technical assistance for the creation and harvesting of a community garden. They are expected to ensure low-income community residents receive harvested, fresh produce in a timely manner. With not much viable land near their warehouse, we stepped in to build and decorate raised beds that will allow them to grow their fruits, vegetables, and herbs. We will be returning early next month to fill the beds up with 2 inches of gravel, soil, and plants but until then we just wanted to share a little bit about our first successful event. There were a few minor hiccups and delays but overall we are very pleased with the end result.

With a team of 10 volunteers were able to put together four 4ft x 8ft beds in just a few short hours. Two local Home Depots were generous enough to provide $25 vouchers to help with the cost of supplies like the screws, paint, and weed-blocker while the Craftbox Girls sponsored the cost of the wood to build the beds. A friend with a background in interior design and art, came up with a few cool designs that were easy to paint and added a fun splash of color to the garden beds. Scroll on down to see pictures from the event and be sure to check back in with us next month when we return to complete the project. If you’re feeling inspired and want to build your own raised bed for your dream summer garden, head on over to our very own post that covers just that. If there’s anything we hope people take away from National DIY Day, it’s this: The ability to create is part of what makes us human. We all have it in us and anyone can unlock that potential and  create anything, if only they set their mind to do it.

IMG_1018

IMG_1030

IMG_1029

IMG_1022

IMG_1044

IMG_1055

IMG_1089

IMG_1096

IMG_1095

If you liked this post please follow us and share!

Instagram


DIY Framed Chalkboard Wall

Our son is getting to the age where he can almost color without trying to eat his markers and crayons (the keyword there is almost), however, he still attempts to scribble on the wall any chance he gets. Despite getting him a small IKEA table for all of his creative pursuits, he seems not to want to be confined to paper so we figured if coloring on the walls is what he wants then coloring on the walls he shall get. We have always been admirers of chalkboards…the rustic kind that you see in old schoolhouses in black and white movies. We figured a chalkboard would not only be nice for doodling and writing the dinner menu on but also as a fun educational medium to teach letters, words, and concepts.

IMG_9985

We did toy around with the idea of painting an entire wall, which has become popular these days, but in the end we decided a 6ft x 3ft area was plenty of space for all of us to use. Plus since we chose to put it in the hallway, adjacent to the kitchen, we wanted to preserve some wall space just in case we wanted to add wall art or organizers for a command center in the future. The awesome thing about making your own chalkboard wall is that for $10 of chalkboard paint, you can get a little over 100 sq. ft of coverage. That’s a steal when you consider that chalkboards the size of small picture frames are going for that and much more. The other really nice thing is that you can frame the painted area to achieve that authentic chalkboard look and you can do so using any type of wood you like in any stain you want. We went with an inexpensive white moulding from Home Depot that we nailed directly to the wall. We’ve come across DIY framed chalkboards that involve painting another medium and then hanging it up. Not only is a large chalkboard heavy and impractical to hang but it would be dangerous if you have little ones in your life. Just something to think about if you are not sure how you feel about painting a wall with chalkboard paint.

The only thing you need to be mindful of is if you have kids in the house then you will want to time your painting after their bedtime so the paint can dry without handprints all over it. Other than that, this chalkboard wall is super easy to put together and loads of fun. Our son loves scribbling on it, I love practicing my handlettering, and of course baba loves leaving silly doodles for us to wake up to. Yes, we are not ashamed to admit it… this chalkboard was as much for us as it was for our son.

Supplies
Chalkboard Paint ($9.67)
Wood Moulding
Trim Nails

Tools
Paint Roller
Paint Tray
Paint Tray Liner
Blue Painters Tape
Hammer

Chalk options
Chalkboard Wall Safe Markers ($12.95)
Regular Chalk from IKEA  ($0.99)

Note: If you end up taking on this project using similar dimensions to our chalkboard then know that you will have leftover paint. Don’t you fret though, we will probably come up with another DIY project to make use of it.

IMG_9973.jpg

Directions
1. Measure the area you want to paint and outline the area with pencil.
2. Apply the painter’s tape over your outline, pressing down firmly as you go so you don’t have any air pockets where the paint can seep through.
3. Mix the paint using a paint stick and pour 1/4 of the paint in the paint tray.
4. Gently dip your paint roller in and start painting your designated area in a “W” pattern. Make sure you don’t use too much paint on your roller as it will start dripping and take away from the smooth surface of the board.
5. Let dry for 4 hours before applying a second coat.
6. After the final coat is painted, let it set for 3 days (per instructions on the paint container) before writing on it.
7. Test your new board with the writing medium of your choice: old-fashioned chalk or chalkboard marker.

IMG_2460

IMG_2465

IMG_3138

IMG_9929

IMG_9954

IMG_9988 copy


Have you been wanting to put up a chalkboard wall? If so, what’s been stopping you?

If you liked this post please follow us and share!

Instagram


DIY Spring Succulent Wreath

img_0143
Can you believe it’s March already?! I mean just last year we were gearing up to begin our kitchen renovation and now here we are off on new adventures and projects. Spring is certainly in the air here in Michigan as we have had several days of 55 degree weather in the last few weeks. We are now preparing to usher spring into our home and what better way than to spruce up our entrance. I was recently at Jo-Ann Fabrics getting ideas for some upcoming projects and I came across several pretty spring wreaths covered in moss, crawling vines, foliage, and succulents. These wreaths screamed Lord of the Rings (big fans here if you hadn’t figured that out already) but the price…they ranged from $30-$60! I knew I could make one for much less and that’s exactly what I did (with a lot more succulents too). This is such an easy and fun project and it really made the door stand out with a pop of earthy green. This wreath is also the perfect project to make with children and can even be turned into a learning activity. Our son, who is almost two years old, had so much fun picking up the succulents and moving them around as I tried to settle on the final design.

In other news, we are super excited to share that were chosen to be ambassadors for National DIY Day which is coming up on April 2nd. Aside from this post, we will have some more fun DIYs coming your way in the spirit of celebrating creativity and crafting. We will also be hosting a local event in the Metro Detroit area, building raised garden beds for a community garden (stay tuned for more info). And speaking of DIYing for a good cause… As National DIY DAY ambassadors we are proud to support AdoptAClassroom.org and their mission to give teachers a hand by providing much-needed classroom materials so that their students can learn and succeed. National DIY DAY and The Cozy Home Chronicles are committed to supporting classrooms and providing tools for students and teachers to enhance the creative learning experience.

You can support AdoptAClassroom.org by Texting a Donation Today! Text the word “Give” to (678) 582-8594 and you will be prompted through a secure system to make a donation of your choice!

Alrightie, let’s make that wreath!

Supplies
18′ Grapevine Wreath ($4.99)
Succulent Mat ($4.99)
Moss rocks ($3.49)
Greenery of your choice ($4.99-$9.99)
Hot glue gun & glue sticks

Total Cost: $23.45 + tax

I purchased my supplies from Michaels over the course of a few weeks and used my coupons to put my wreath at well under $20. From the greenery I purchased, I had enough leftover to make another wreath if I just purchase more succulents and a grapevine wreath. So for the price of a store-bought wreath, you can basically make two or even three wreaths.

img_0132

img_0151

Directions:

  1. Collect your succulents, moss rocks, and greenery and start placing them on your grapevine wreath until you are happy with the arrangement. You might have to move things around several times to get the desired look.
  2. Once you have settled on your design, you will need to glue each piece in place using a generous amount of hot glue, embedding the stem deep into the vine, and holding down for 20-25 seconds until firmly in place.
  3. Once all the pieces have been glued down and any excess strands of glue have been removed, you can hang your wreath on a hook or door wreath hanger.

IMG_3495

IMG_0160

IMG_0166

Share your spring stories with us below and If you liked this post please follow us and share!

Instagram


IKEA Hack: DIY Rustic Bread Tin Box

img_9537

We eat A LOT of bread… possibly too much of it but we are hobbits so that’s probably not going to change anytime soon. Although we finished renovating our kitchen this past May, there is still some work to be done in terms of organizing and decorating. One of the things that needed to get checked off of our to-do list was finding a way to preserve and store our leftover bread. When we searched for bread storage online, we immediately fell in love with the charm of those rustic farmhouse bread tins. Of course it would have been easy to click purchase and have one delivered straight to our doorstep for $45 but where’s the fun in that? Instead we took our time getting ideas until we came up with an easy DIY bread tin. Not only is it way cheaper than any bread tin you’ll find in store but it’s super easy to make and customizable too. IKEA has two different tin options that you can use for this project and both are under $15. 

The Beromlig that we settled on came with two sizes for $8.99 and we used the larger one to make the bread tin box (we will probably turn the smaller one into a cookie tin). That’s a steal considering simple tins like the one pictured below on wayfair.com are going for $26.99 at sale price. Besides the choice of tin, you also have the option to pick any font you want. We went for a classic look with “Old School Alphabet” stencils that we found at a local Michaels. Lastly, you’ll need to settle on an ink color from the many pretty shades that are out there. Why permanent marker you ask? Well we did try acrylic paint and it peeled off too easily. Although permanent marker can come off with rubbing alcohol (we checked!), it does not come off with a gentle wiping using a wet cloth. I suppose you can use spray paint or some other fancy medium but for a simple and inexpensive home decor item,a  good old Sharpie will do the trick. Alright, let’s get started!custom_imageMaterials
Beromlig Storage Tin
 or Hemsmak
Letter stencils
Permanent marker
Washi or painter’s tape

img_9524-copy

Directions

1. Wipe the inside and outside of the tin clean with a damp cloth and dry thoroughly.
2. Arrange and level your letters on the tin and tape them in place using washi or painter’s tape.
3. Fill in the letters with any color permanent ink you choose.
4. Let dry for 10 minutes before removing the stencils.
5. Find a happy place for your bread box and fill with delicious breads 🙂

img_9485

img_9497-copy

img_9527

img_9515-1

What projects and adventures are you working on right now? Please join the conversation below in our comment section, we would love to hear from you!

If you liked this post please follow us and share!

Instagram


Kitchen Undershelf LED Lighting

led-lighting

In the three wonderful years we’ve lived in our starter home, we’ve done many DIY projects, with our kitchen renovation being the biggest. So it should come as no surprise that we have a TON to write about. I’ve written about many of the more involved aspects of our DIY kitchen project in other posts but one feature I have not talked about is the LED lighting I installed under our open shelving. This was one of the more exciting parts of the whole project for me because I think LED lighting looks cool in kitchens (let’s be real…it does) and I liked the idea of having some light around when navigating the kitchen for a late night snack. Not to mention, LED lighting is such a simple and inexpensive addition that can really brighten up a space. Researching online and reading through DIY forums gave me an idea of what I needed to do and helped me to settle on the perfect product. There are many brands of LED lights out there but I purchased the Tingkam Waterproof 5m 5050 SMD RGB LED Strips which had great reviews on Amazon and some really cool features including a range of colors and lighting options. The installation was fairly straightforward and despite costing only $20, the lighting and adhesive were high quality. We are 6 months out from our renovation and have not had a single problem, thankfully.

img_0465

If you are considering installing LED lighting under open shelving, there are a few things you will need to consider. 1) Is there an accessible power outlet where you can plug-in the connected LEDs nearby? 2) Are there large spaces between the shelves where you will be installing the LEDS under? If there is a significant space between shelves, you will need to cut and splice wires using the LED connectors and extension cable. You will also need to think about aesthetics. 3) Where will you hide the extension cable(s)? Because I planned to incorporate LED lighting during the design stage of our kitchen renovation, I was able to do the electrical work and run the cable through the wall before I got to drywalling and tiling the backsplash over it. Once you’ve settled these minor issues, you’re all set to install the lights. Here’s what you’ll need:

Supplies
Lights $20.39
LED Connectors $9.49
LED Extension Cable
 $7.99
Butt Splice Connectors $6.55

71tval3m8ll-_sl1500_

Image via Amazon

Directions

  1.  Measure your shelf and cut the LED strips according to the length of your shelf. For the specific LED lights I purchased, you can cut the strip along every 3 LEDs where there is a scissor line (figure 1).
  2. Connect your LED strips using the LED connectors (figure 2). If your shelves have a wall or other obstacle between them and you can’t just run them continuously you will need the extension cable listed under the supply section. Make sure to measure the space between the shelves before you connect the LED strips together so you know what length to cut your extension cable. To connect your lights to the extension cable you need to splice the wires (see figure 2).
  3. Splicing: 1) Peel back the LED strip to reveal the copper stripes and connect them to the waterproof clasp of the LED connectors. 2) Cut the connector wire in half and separate the black, red, blue, and green wires so that you can align them with the corresponding colored wires on the extension cable (figure 3). 3) You can either crimp the wires together using the butt splice connectors or twist and tape them with electrical wire (figure 4).
  4. Once you are done splicing the LEDs, you can secure the lights to the bottom of the shelves using the self-adhesive backing. To get the best results, make sure your surface is completely dry and clean. If you are planning on hiding the wires then disconnect the LED lighting strips before you adhere them to the shelf and run the wires through the walls as needed (see figures 5-6).
  5. Now you can plug the LED lights in and enjoy experimenting with all the colors and settings (figures 7-8).
img_0985

figure 1

img_0991

figure 2

img_0984

figure 3

img_1141

figure 4

img_1012

figure 5

led

figure 6

img_8899

figure 7

img_8894

figure 8

Have you incorporated or considered incorporating LED lighting into any of your home renovation projects? Let us know in the comments below!

If you liked this post please follow us and share!

Instagram


Dress your plants: DIY Washi Tape Planter Art

ujb

This month, the wonderful Igor and Judith at Urban Jungle Bloggers are on the lookout for creative, inspiring and unusual planters for dressing up plants. We took this as a challenge to transform our neutral, minimalist IKEA pots into something a bit more bright and cheery for our eclectic space. Plus with the holidays around the corner, we thought it would be nice to offer a simple DIY gift idea for that special plant-lover in your life.

We’ve seen many cool Washi Tape projects before but had never attempted one until now. Not only is Washi Tape super versatile but the variety of colors, patterns, and textures it comes in makes for endless crafting possibilities. Aside from the planters, tape, and scissors, all you really need for this project is your imagination. To get your creative juices flowing, we are sharing the simple designs we came up with when we put our scissors to the tape. Although it was tedious, we found it much easier to work with smaller pieces of tape with regards to the curvature of the pot (hence the mosaic look!). Despite the time it took, we really enjoyed watching the abstract design emerge as we added piece by piece. 

Supplies
Planters
Washi Tape
Scissors
Mod Podge

IMG_8264.jpg

Directions
1. Design your planters. There’s no limit to what you can think up and create.
2. Cut and stick your Washi Tape pieces on the planter according to your design.
3. Seal your design with Mod Podge.

img_8281

img_8280-1

img_8286


img_8283

img_8269
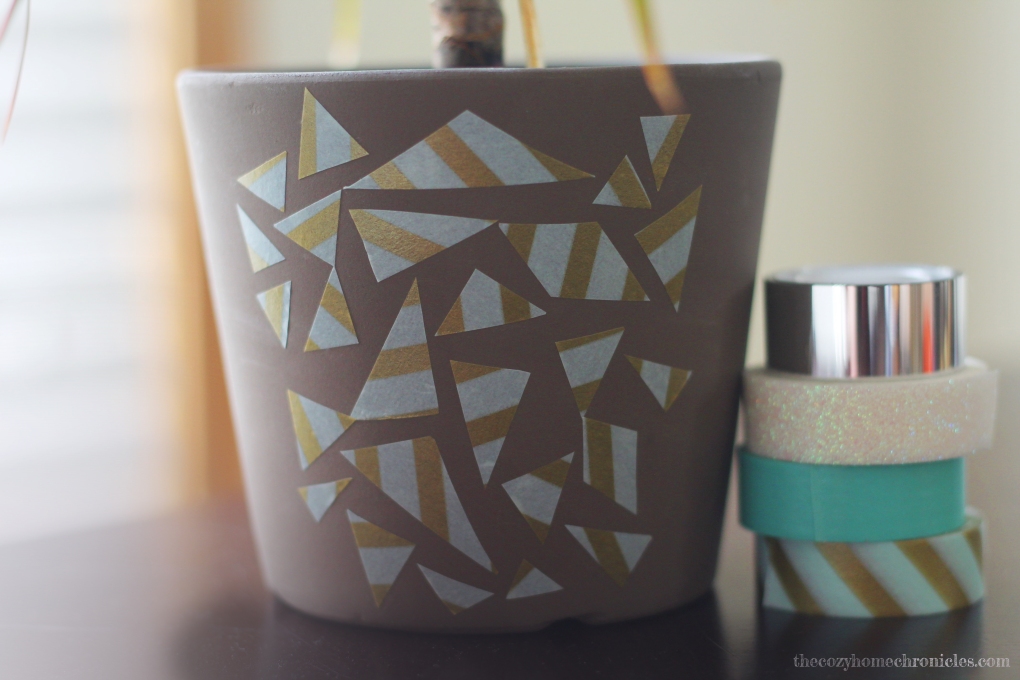
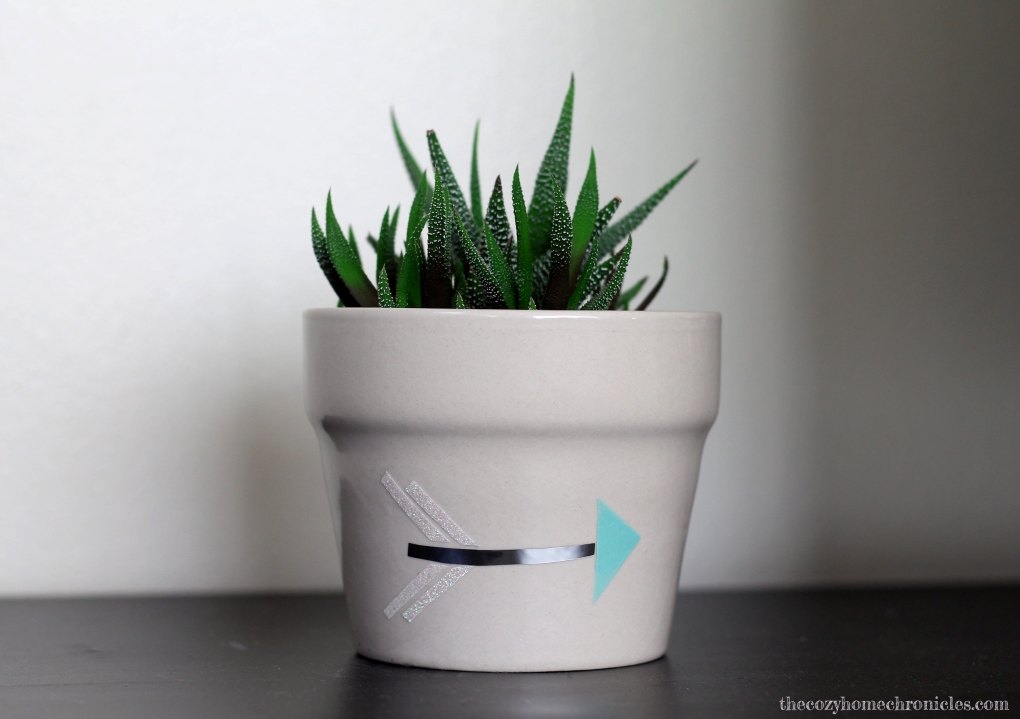
What are some ideas you have for decorating planters in your home? If you attempt this project please do share the finished product with us on instagram under #chcdiy 🙂

If you liked this post please follow us and share!

Instagram


DIY Upcycled Candles

img_7917

It’s that chilly, cozy time of year and you’re reaching to light up those festive candle scents; earthy pine, spicy cinnamon apple, warm vanilla cookie. That is, until you realize your candles are nearly dead from last season’s use. You can barely fit your hand in to light the wick at the bottom of the jar and even if you can, the wick is completely burnt out. We recently found ourselves in a similar situation with a significant collection of useless but oh-so-amazing-smelling candles that still had plenty of wax in them. Rather than being wasteful and tossing them out, we assessed our inventory and devised a plan to revive them. Using small mason jars leftover from our baby shower last year, we made new candles out of the old ones, layering some our favorite scents for a colorful look. With new wicks, pretty glass jars, and some TLC, you too can have your favorite candle(s) brought back to life!

Supplies
Dead candles
Glass mason jars (or any cool glass container of your choice-here’s your chance to get creative!)
Large pot with boiling water
Candle wicks


img_7922


Directions
1. Fill a large pot with just enough water to submerge the candle jar(s) halfway, place on the stove, and bring to a boil.
2. Turn the fire on low and carefully place your candle jars in the pot until the wax is completely melted.

img_7933

3. Using tongs, remove the old wicks from the melted candle jars and dispose of them.

img_7938

4. Dip a new wick in the melted wax and place it at the bottom of your new jar/container.

img_7945

5. Let it cool and solidify.
6. Secure the wick in place so that it is standing straight up when you pour the melted wax in the jar.
7. Using an oven mitten or kitchen towel for protection, remove the melted candle jars from the pot and pour the hot wax into your newly prepared jar/container.

img_7950

8. Lay the candle on a flat surface to set and harden. If you want this process to happen more quickly then put your candle on a tray and pop it in the fridge.
9. Once your first layer has solidified, pour the next layer.

img_7957

10. Repeat steps 7-9 until you’ve filled your jar.
11. Trim the wick.

img_8096

It’s seriously that easy! We made these for our home but with a pretty container these can make beautiful gifts for friends or loved ones. I mean, who doesn’t love candles?

What do you do with your old, dying candles? We would love to hear from you! And as always…

If you liked this post please follow us and share!

Instagram


DIY Squeaky Bed Fix

IMG_3555

A squeaky bed can be a real nuisance. When my wife was studying for her PhD qualifying examinations this past winter, she would stay up really late while the baby and I would sleep together much earlier. When she would finally join us at 2 or 3 in the morning, she always woke us up crawling into bed with a loud creak. After weeks of interrupted sleep and having to soothe a disgruntled baby, I finally decided to look into resolving this rather “loud” issue.

A little investigation led me to the main culprit: the bed’s boxspring. When I opened up the boxspring, I was surprised by how flimsy it was. It was basically a big cardboard box framed with wood. The smartest option it seemed was to replace the cardboard and reinforce the structure of the box using sturdy, quality plywood and screws. It was a fairly easy and inexpensive project (under $40) that has successfully eliminated all squeaks and creaks (hooray!). You can even do it for cheaper if you go with a thinner plywood board but I wanted something a bit thicker. So if you’re looking to fix a squeaky bed and are not sure about completely replacing the boxspring or trying other suggestions like lubricating the springs, open the boxspring up first and see what you’re dealing with. If the material looks cheap, chances are this fix is the right one for you.

Supplies
(2) Sheathing Plywood Boards 
Wood or Drywall Screws
Liquid Nail 

Tools
Staple Gun
Gloves
Caulk Gun
Flat Head Screwdriver

Directions

1. Measure the boxspring and head over to Home Depot to purchase and custom cut the plywood for your bed frame size. I had the plywood cut for a queen-sized boxspring: 60 inches wide by 80 inches long (see Figure 1). For me to get an exact size I purchased 2 plywood boards and had them cut so each piece was exactly half (30in x 80in) of my queen bed frame size.

2. Remove your mattress and flip the boxspring frame over to remove the staples and nails from the corners of the cover attached to the frame along with the cardboard until all that remains is the wooden frame (see Figure 2).

3. Investigate the frame to make sure the studs are sturdy. Also, double check to see if the original nails/screws are in good condition. If you find any weak links go ahead and add more screws to tighten the joints.

4. Apply liquid nail liberally along your frame taking care to stay in the center to prevent the glue from oozing out of the sides when you place the plywood boards (see Figure 3).

5. Immediately place the custom cut boards on the freshly glued frame. Do this one board at a time so you don’t make a mistake aligning the plywood to the boxspring frame (see Figure 4).

6. After you have placed the plywood boards on top of the boxspring frame, go ahead and secure the plywood to the frame using wood screws. I left a foot of space between each screw and made sure to drill the screws into the boxspring frame and not into empty space (see Figure 5 & 6).

7. Let the glue dry for at least an hour.

8. Cut the corners of the plywood off at an angle if they extend beyond the frame as it can be a hazard and get in the way of completing step 9.(see Figure 7a & 7b).

9.  Using a staple gun, secure the fabric cover over the boxspring (see Figure 8).

10. Catch up on your beauty sleep with squeak and creak-free slumber.

IMG_0497 copy

Figure 1

IMG_0498 copy

Figure 2

IMG_0501 copy

Figure 3

IMG_0502 copy

Figure 4

IMG_0504 copy

Figure 5

IMG_0505 copy

Figure 6

IMG_0506 copy

Figure 7a

IMG_0507 copy

Figure 7b

IMG_0509 copy

Figure 8

If you liked this post please follow us and share!

Instagram


Ramadan Decor: Moon-Phase Garland

The month of Ramadan is set to begin this week and I have been brainstorming countless ways to make it more special and festive for our family. Decorating is obviously one really fun way to do this (especially if you have young children) but it seems the selection of Ramadan decor out there is a bit too generic (think green and white and palm trees). Since as Muslims we follow a lunar calendar, and Ramadan begins and ends with the sighting of the new moon, I thought it would be really nice to capture the beauty of phases of the moon. Not only is this garland super cute and simple to put together but making it is a great way to bring the family together for a creative activity that inspires reflection on the wonders of astronomy.

IMG_2167

Supplies
Paper (plain white textured and assorted colors)
Acrylic paints (Any shades of gray, white, clear glitter, and yellow)
Paint brush and foam brushes
Scissors
String
Adhesives (tape and glue)
Mini clothespins
Glitter

Directions

IMG_2073

Gather your supplies

IMG_2087

On the textured white paper, paint with the foam brushes beginning with the darkest gray colors and ending with white.

IMG_2091

Make sure you let each layer dry before painting the next. By the time you are done, you will have a pattern that resembles the surface of the moon.

IMG_2092

Cut out  6 circles to the size of your liking. You don’t want them too big so the garland doesn’t droop when you hang it. My circles had a radius of about 2 inches.

IMG_2099

Cut 5 of your 6 circles down until you have the 9 moon phases. These pieces will be arranged just like this on the garland.

IMG_2105

Cut out some rustic looking stars and decorate with glitter (optional) and arrange the pieces for assembly.

IMG_2146

Using glue, tape, clothespins (or a combination of them), assemble your stars and moons on a sturdy piece of string, making sure they are evenly spaced.

IMG_2157

Hang up your beautiful garland prominently in your family room.


IMG_2167.jpg

Enjoy the lovely view!

“Indeed, in the creation of the heavens and the earth and the alternation of the night and the day are signs for those of understanding [3:190].”

If you liked this post please follow us and share!

Instagram