Cozy Kitchen Series Part 3: Installation

Welcome to the third and final post (kind of) of our kitchen renovation series. For those who followed us through Cozy Kitchen Series Part 1: Planning and Cozy Kitchen Series Part 2: Demolition, we are excited to share a visual diary of how we installed the flooring, cabinetry, drywall, and backsplash before the final cleanup and reveal. We hope that our journey has inspired you to hold off on calling a contractor (for some things) and tap into your inner-handyman/woman and your inner-interior designer 🙂

Flooring
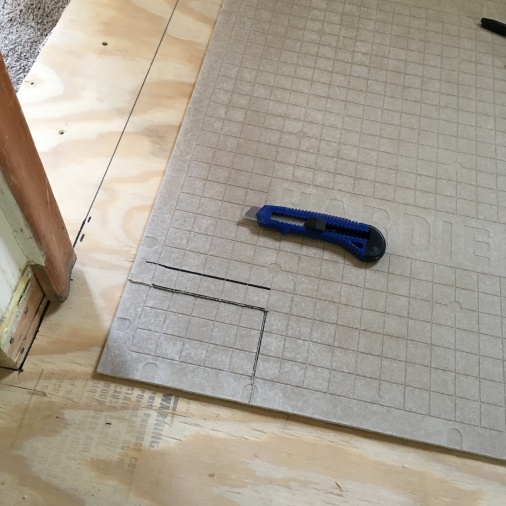
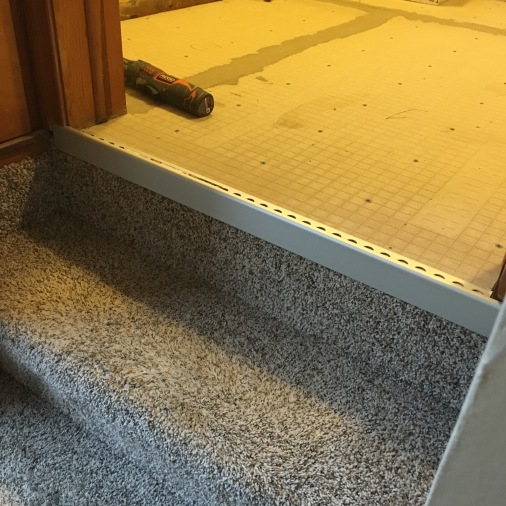
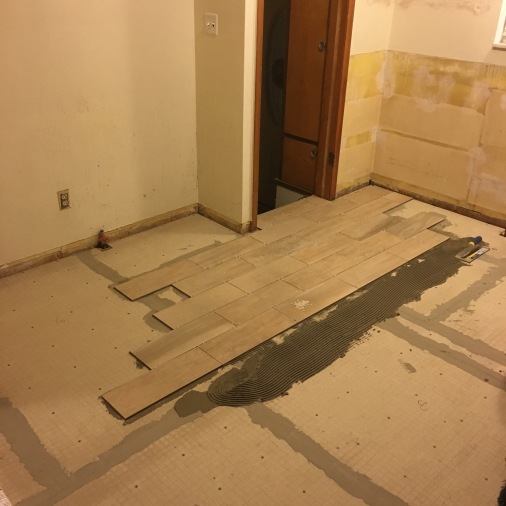
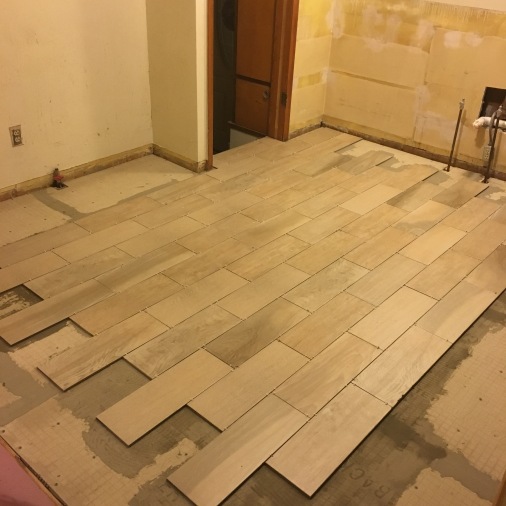
When starting a home renovation project, you want to make sure that the base of the space (aka the floor) is completely flat and level. If it is not, everything installed on top of it will be crooked, which will distort the look of the space. On top of that, you will create more work for yourself because your cabinets will need extra shimming and so on. For a more detailed how-to on tiling please refer to my basement tile post  Don’t Fear the Tile to help you with this step.

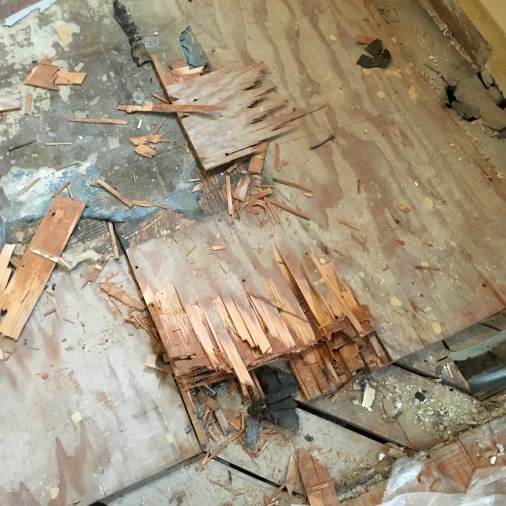
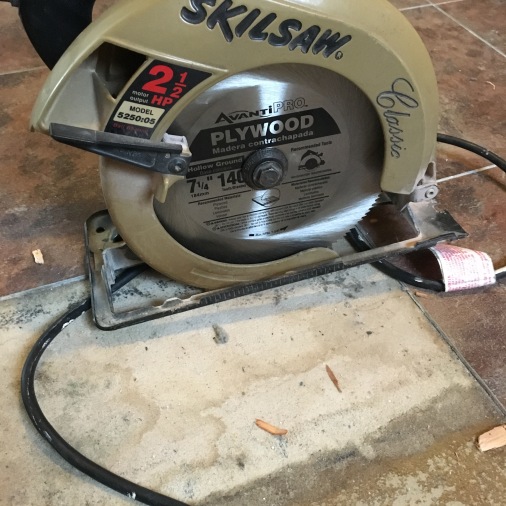
Although I had tiled before, I had never dealt with the removal of laminate tile. I’m not sure if it was the way it was installed but it was a pain! So much so that I had to remove the entire plywood subfloor beneath it. At first, I thought I could remove the laminate and salvage the plywood subfloor so that I could install the cement boards and tile on top of it. Things, however, didn’t go according to plan. The subfloor was so damaged that I had to purchase a circular saw in order to cut out the laminate and plywood subfloor to replace it completely. It was a messy and time-consuming task that I was not prepared for. This is why I think it’s very important that you are aware of and flexible enough to deal with the unexpected.

Cabinetry
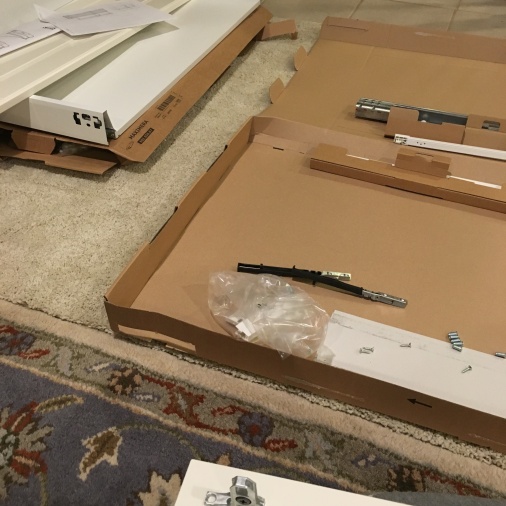
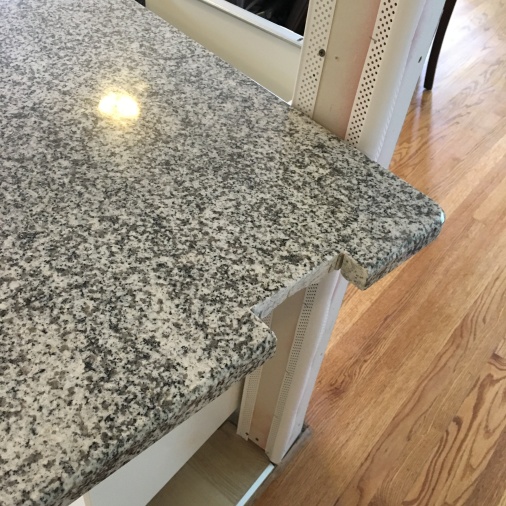
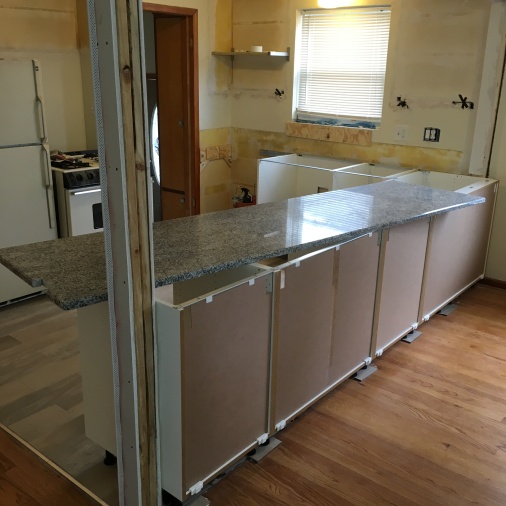
Because we purchased our cabinets from IKEA, assembly was a big part of this project. You do have the option of choosing an IKEA-approved contractor to handle the installation if you don’t have the time to do it yourself, but the instructions are pretty self-explanatory and the cabinets aren’t difficult to assemble at all. It took me between 3-4 hours to assemble all 7 of the cabinets and once I had assembled one, the rest were a breeze. One thing to note here is that if you are not installing them right away, you will need sufficient space to assemble and store them until you are ready. Lucky for us we had the basement to do this in, which helped us keep the kitchen clutter free. If you have a clean attached garage that would work great too. After I assembled the cabinets and installed them in the correct order on our freshly tiled floors, the countertop people from Home Depot came out to measure for the countertop and later installed it when it was cut and ready (it was a two week wait in case you’re wondering). Some things you just leave to the professionals!

Drywall
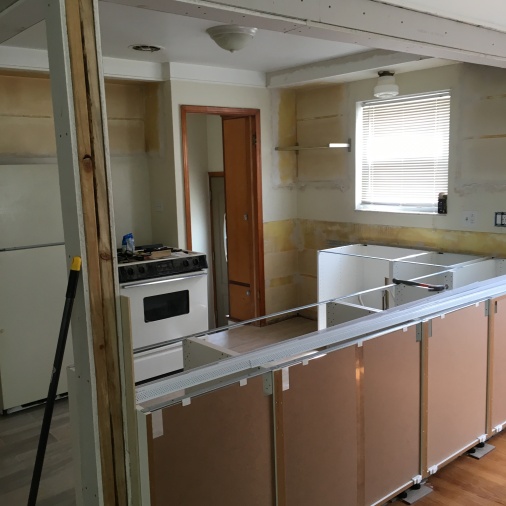
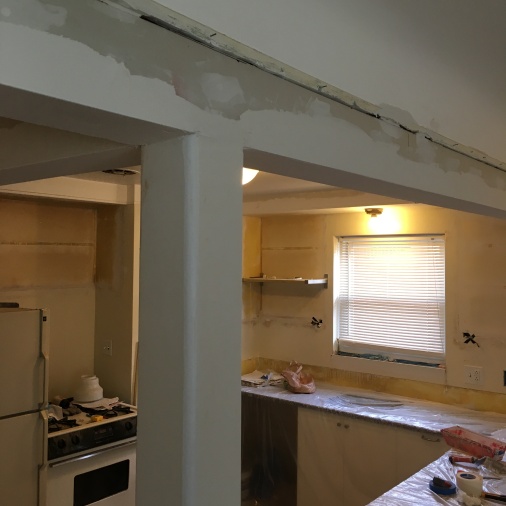
I didn’t have too much to drywall for this kitchen except for some patches behind the sink, the hideous hole in the ceiling “vent” that needed covering, and around the supporting beams and walls that were torn down. Drywalling is quick and easy until you get to the mudding and sanding part. The awesome thing is you can pretty much drywall an entire room in a few hours and be done with it. The rough part of drywalling is needing to apply mud to the seams and sanding them 3 times until all the separate pieces look like one big seamless wall. Other than the fact that you need some strong arms to get you through the sanding, there isn’t much required of you to be able to put up drywall. But if you don’t feel confident and you have no experience drywalling then YouTube can be your best friend 😉

Below is a graphic that sums up the steps of drywalling courtesy of This Old House.

finishing-drywall-overlg

Backsplash
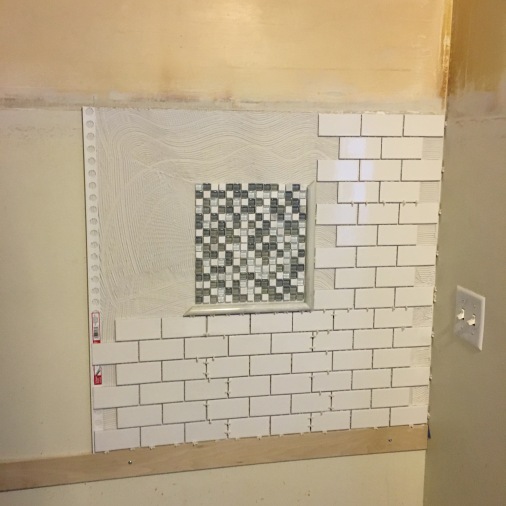
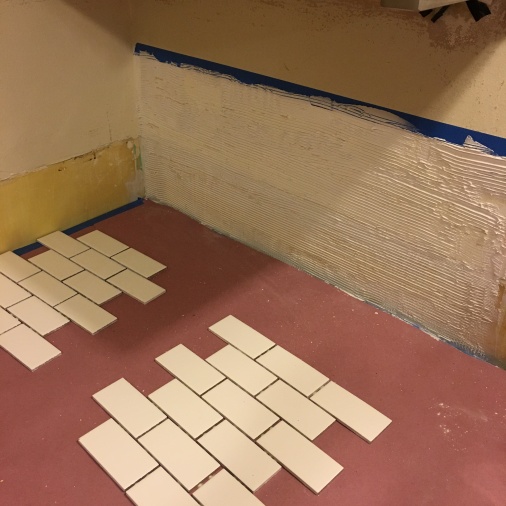
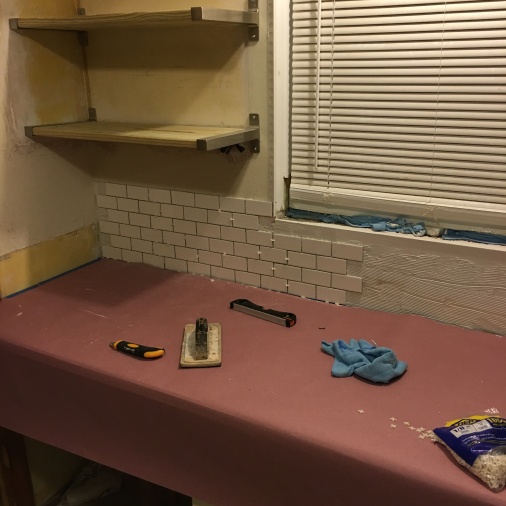
This would have been my favorite step if it wasn’t for the self-imposed due date. I worked around the clock for 2 weekends to finish this part of the project. Again, you can refer to our tile post Don’t Fear the Tile if you aren’t familiar with tiling. The only difference when tiling a kitchen backsplash wall is that you need to be careful with your application of tile adhesive/mastic. Because gravity will be working against you, you will have to score the surface with a blade before applying a light amount of adhesive and laying down the tiles. For me the hardest part of backsplash tiling was our indecisiveness. Yes, indecisiveness. We seriously went back and forth for weeks trying to settle on a backsplash tile. There were just too many beautiful ones to choose from! After considering our countertop design and the look we were going for, we finally settled on white subway tile for under $3/sq. ft with a strip of bluish/grayish accent tile. We didn’t originally plan to tile an entire wall but as we got closer to installing the backsplash, we realized it would look really nice to have a feature wall where our window and open shelving would be.

Well, there you have it! A detailed overview of our kitchen renovation and all the planning and work that went into it. Of course, as a homeowner, there is no such thing as being completely done with work around the house. We are still figuring out some things like how to organize all our stuff and what to replace our main light fixture with but we are so happy with the results and we really mean it when we say, you can totally do something like this if you wanted to. I know we promised a full kitchen reveal but I decided to put that in a separate post so that you aren’t overloaded with images. Check back tomorrow for the final reveal and in the meantime, feel free to ask for clarification, support, budgeting advice; basically anything kitchen-renovation related and we will be happy to answer you to the best of our ability.

If you liked this post please follow us and share!

Instagram


Cloth Diapering Newbies: Part III

IMG_8987

Time to dive a little deeper into the world of cloth diapering. In this post we will be discussing, in much greater detail, how to wash and dry cloth diapers, inserts, and wipes based on what has worked for us. The most important yet often overlooked step in diaper laundry is the daily maintenance of cloth diaper cleanliness. It’s like the unsung hero of cloth diaper laundry. If you want your diapers to last longer and look clean, the last thing you want to do is have poop dry and crust on them until laundry day. Anytime there is poop involved, we recommend that you rinse the diaper immediately. Not to mention how gross it would be having a bunch of poop sloshing around in the wash. This is why in our first post we mentioned having a diaper sprayer or bidet. We use the sprayer to rinse off any debris immediately into the toilet and let the diapers hang over our laundry sink until laundry day. As a result, we have not had any major diaper stains. In fact, the only stains we have are from Desitin, not poop. Basically, we never put poopy diapers in the diaper pail so what you will read below is based on care for diapers that don’t have a significant amount of poo on them. On a side note, if you have not read our previous post and are considering using flushable liners, we suggest you read it and think twice. Unfortunately, there is no magic way around getting your hands dirty if you cloth diaper…unless you are prepared to pay up.

Another part of daily diaper maintenance is something that will just make your life easier on laundry day. Instead of waiting until the day of to separate the inserts from the diapers (assuming you are using pocket diapers like us), try pulling out the insert immediately after you change the diaper as you put it into the diaper pail. We make sure to do that so on laundry day there is no extra sorting. We literally dump all the contents of the diaper pail bag (inserts, diapers, and cloth wipes) straight into the washer and toss the bag in right after. It can’t get any easier than that. So now that that’s squared away, let’s get to the washing details.

First things first. Laundry detergent. One of the things we wondered about was what kind of detergent to use especially for something going directly on baby’s bum. The options are many from Seventh Generation, The Honest Co., Burt’s Bees, Babyganicf, etc. and all have minimal ingredients (scented with essential oils) and no harsh chemicals, which is perfect for diaper laundry. We settled on a brand called Ecos because it fit the criteria of being chemical-free, it had built-in softener, and being available at Costco meant the price was just right. So far we have zero complaints; it delivers stain free laundry that smells great and is budget friendly. Score!

350-520576-847__1


Washing

Cloth diaper laundry is surprisingly easy and straightforward. There is no special cycle or real need for several washes (unless you’re not rinsing the poop right way). The important thing to know here is that you should always wash your diapers, inserts, and cloth wipes on cold.  There is no reason to use warm/hot water unless you have some seriously messy diapers. Even then, try not to do that too often as frequent washing in warm/hot water can ruin the leakproof ability of the diapers. We did not try this to know, but if you’re spending all that money on cloth diapers you’ll probably want to play it safe and follow the manufacturers’ suggestions. Although it is subjective and hard to measure, we have not noticed any difference in absorbency (excessively leaky diapers or a drastic change in the number of diapers we use daily). Babies will always leak. Our baby leaked with pampers and seventh generation disposables and he leaks through cloth diapers. It’s just because he pees a lot and not because cloth diapers are not as absorbent.

Here are the exact settings we use for our wash cycle:

  • Wash Mode – Normal Cotton
  • Wash Time – 60-100 Minutes
  • Wash Temperature – Cold (30°)
  • Wash Soil Level – Medium or Heavy (depends on the situation)

img_0118

Drying

Once the wash cycle is complete you will want to separate the diapers from the inserts and cloth wipes. Go ahead and throw the inserts and wipes (and the diaper pail bags if you washed them) into the dryer. We set our dryer to 1 hour on medium heat and they turn out perfectly dry and smelling fresh. You really do not want to exceed medium heat because you can shrink and ruin your inserts. If you are in need of diapers immediately, toss them in the dryer afterwards on “Air Dry”. It will take time but not as much as hanging them to dry.

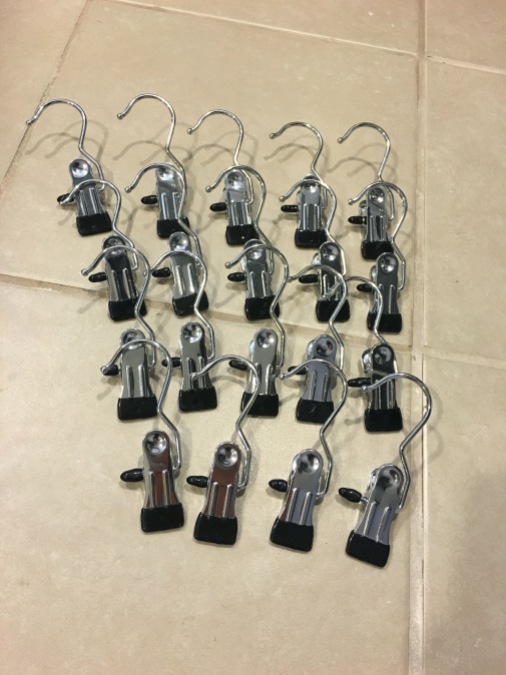
For drying the diapers, it is best to hang them on a rack somewhere where there is a draft or fresh air. If you are blessed to live where there is good sunny weather, you can hang them outside. Our weather doesn’t accommodate this luxury 8 months of the year so we installed a wall drying rack in our laundry room. Our setup (see below) cost around $40: $20 for the hook hangers by J.S. Hanger ( iPow is another good brand on Amazon) and $20 for the Grundtal Drying Rack by Ikea. Ikea has several cheaper options that are portable and foldable but if you’re looking to save space, a wall set-up is the way to go.

IMG_8356

IMG_8363

IMG_8359

Once your diapers have fully dried (around 3-4 hours), all that’s left to do is grab a helper, stuff your inserts back into the diaper, and lay your prepared diapers back on the changing table shelf for use again. Our baby loves the bright colors of his diapers so we usually sit all together in the nursery and talk about our day while we stuff the diapers and baby rolls around playing with his diapers. Cloth diapering is definitely not as “quick and easy” as disposable diapering but because it is meaningful to us we find ways to cultivate cozy moments around the routines that come with it.

IMG_9500

Our adorable helper

This concludes our cloth diapering series in terms of what you need to get started and how to maintain a cloth diapering lifestyle. Yes, it’s a bit of extra maintenance and laundry but it is not overly taxing or impossible. That is our takeaway message. We hope that if you are on the fence or hesitant about cloth diapering, you now feel it is something you can totally do (because it is)! While we have only been cloth diapering full-time for 6 months, we have had a very positive experience so far. There is still much to learn and reflect on and we will likely do a reflection/update post in the near future as we continue this journey. Until then, if you have any questions or comments we would love to hear from you!

If you liked this post please follow us and share!