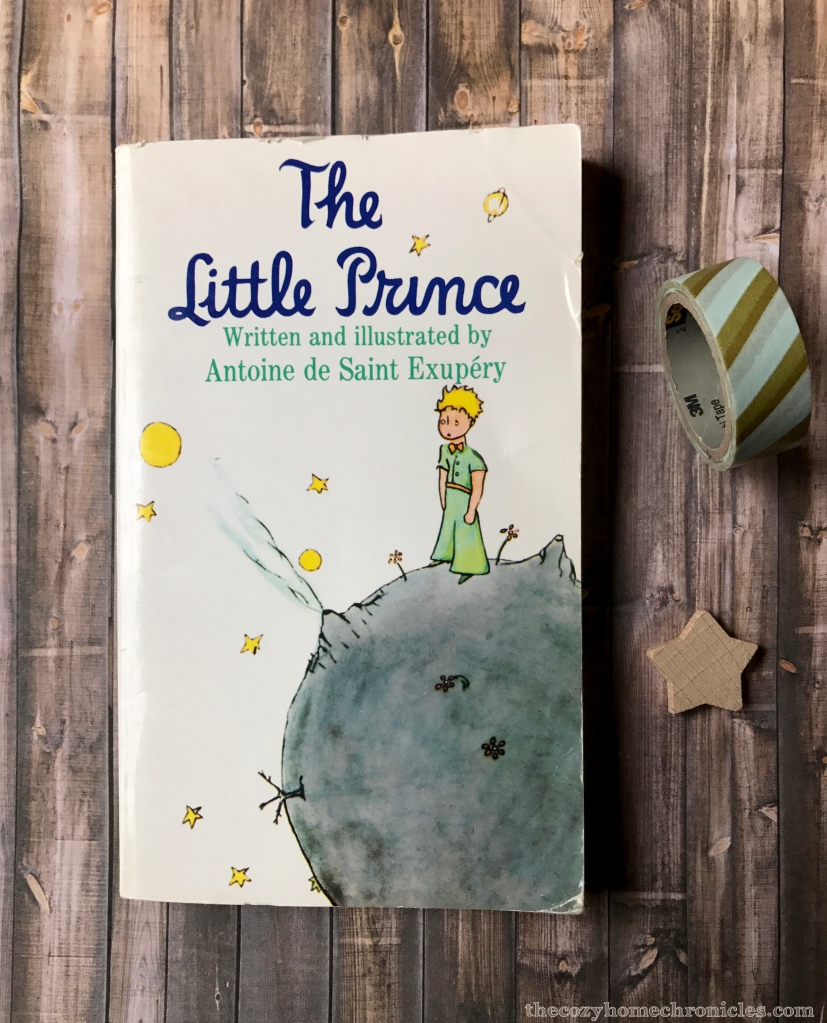
Our DIY Ramadan: Ramadan Banner & Tablescape Inspiration

Hello lovely readers! If you are coming here from Mint Candy Designs, hello and welcome to our blog. It’s always wonderful to have new faces around here 🙂 With Ramadan just around the corner, we are excited to share with you some simple ways to decorate your home and make the spirit of Ramadan manifest in your heart and home. Last year, we shared different ways to add festive and colorful touches to the dining table, where you gather to break bread after a long day of fasting. This year, we teamed up with some talented home bloggers to bring you creative DIYs that you can do to welcome this beautiful month into your home.

“There’s hidden sweetness in the stomach’s emptiness.”-Rumi
IMG_3035
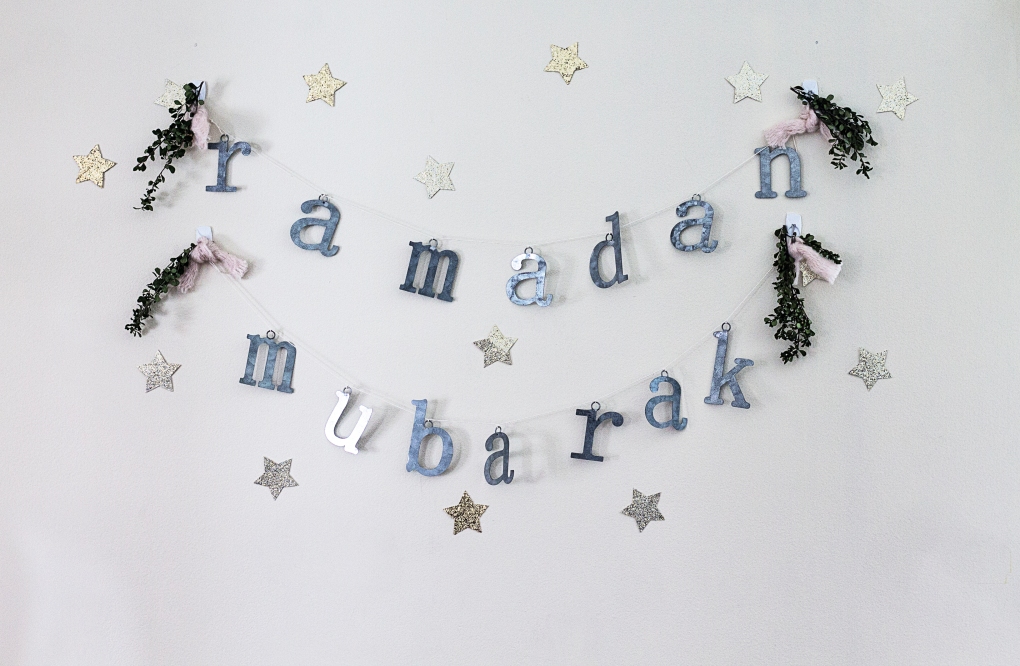
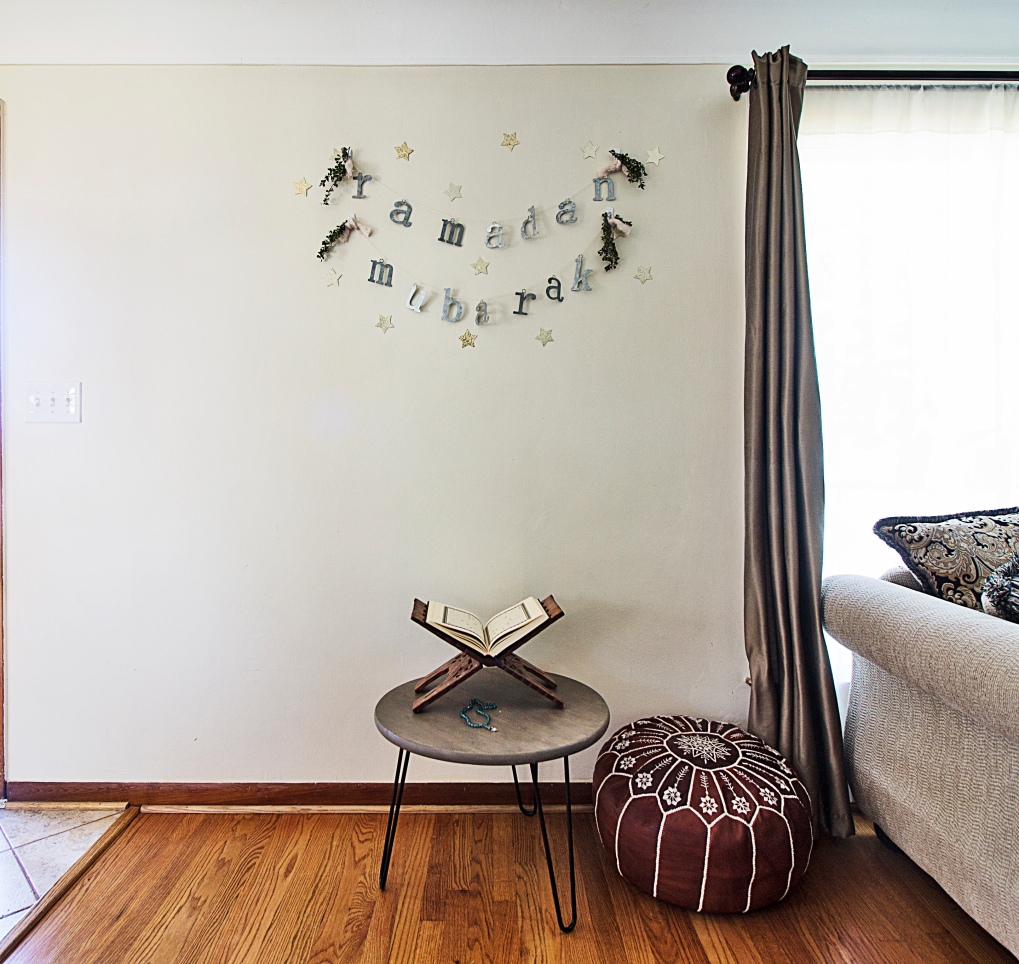
The feature of this post is a minimalist Ramadan banner and backdrop that I created near the front entrance of our home. I think it’s a beautiful welcoming statement for family and iftar guests and it makes the perfect backdrop for any family photos. It’s also super easy to make!

IMG_3238 wwm

For the Ramadan banner, here’s what you’ll need:
galvanized letters
natural cord
scissors
measuring tape

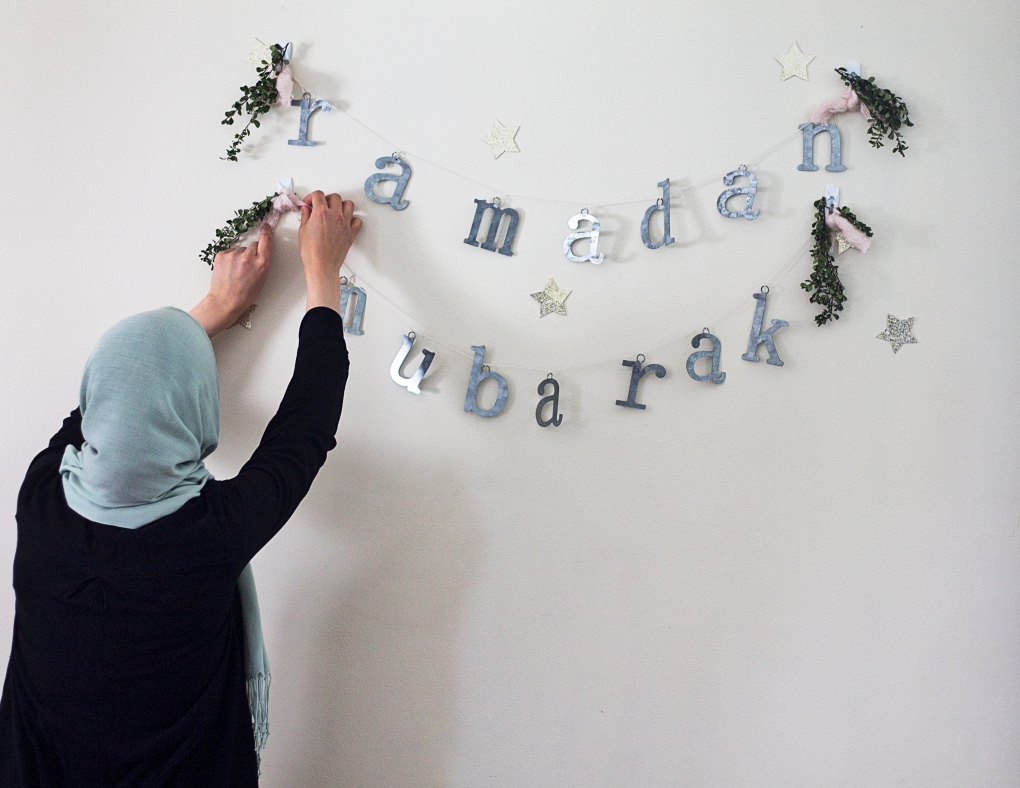
You can actually use any type of materials for the letters. I chose galvanized tin because they were on clearance at Jo-Anns and I wanted something more sustainable and long-lasting. I was tempted to spray paint the letters gold but in the end decided I liked the rustic, industrial look. To make the sign, all you need to do is arrange your letters spelling RAMADAN MUBARAK. Measure equal spaces between each letter (I did 5 inches) and secure each letter to the cord with a double knot. When you’re finished, create a loop at each end of the cord so you can hang the banner easily on a hook.
IMG_3105

To complete the backdrop simply cut out stars from glittered card stock and stick them to the wall using washi tape. You can also tie ribbon or yarn to cover up the command hooks and add a touch of green with any stems of your choice (eucalyptus, myrtle, grevillea, huckleberry).
IMG_3160

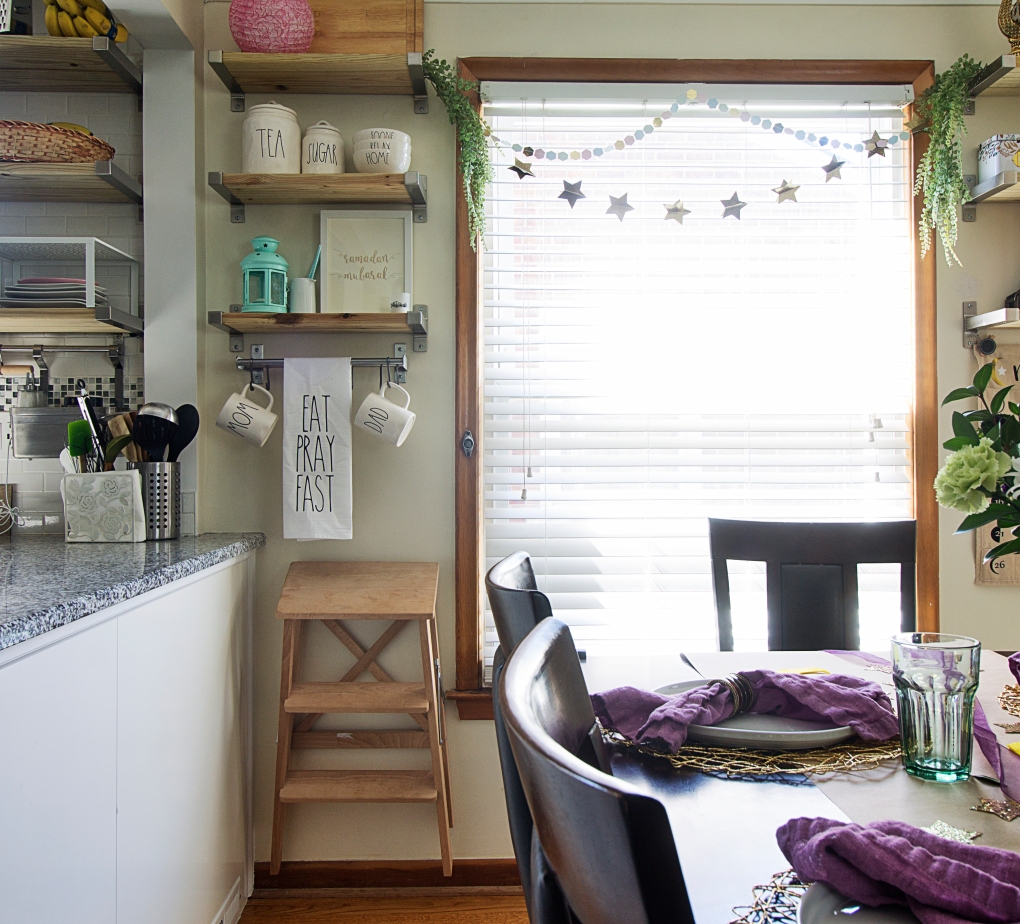
I also spruced up the dining area by hanging up garland and faux greenery. On our open shelving I created a simple display with a lantern and a gold foil Ramadan Mubarak print.
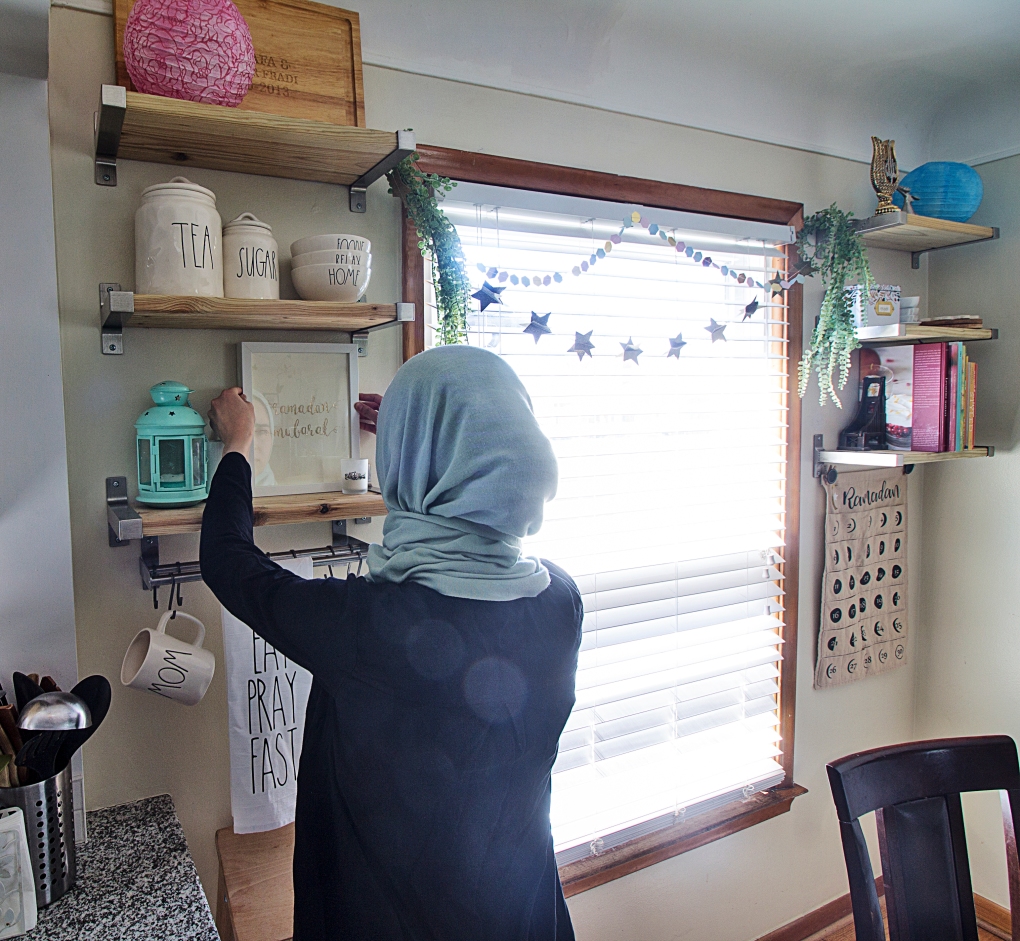
IMG_3054

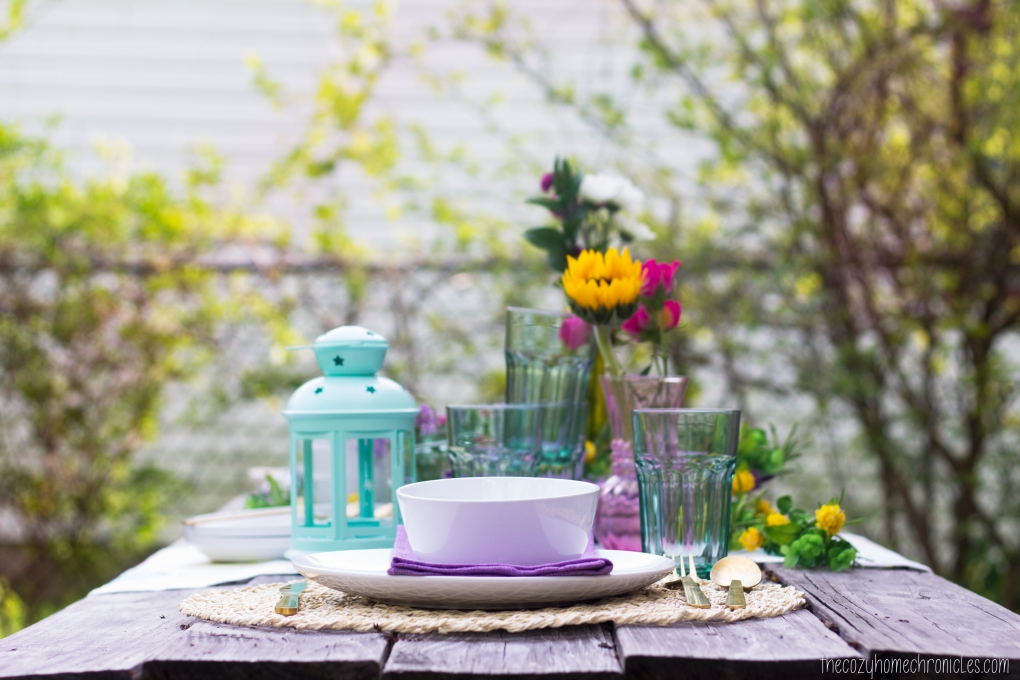
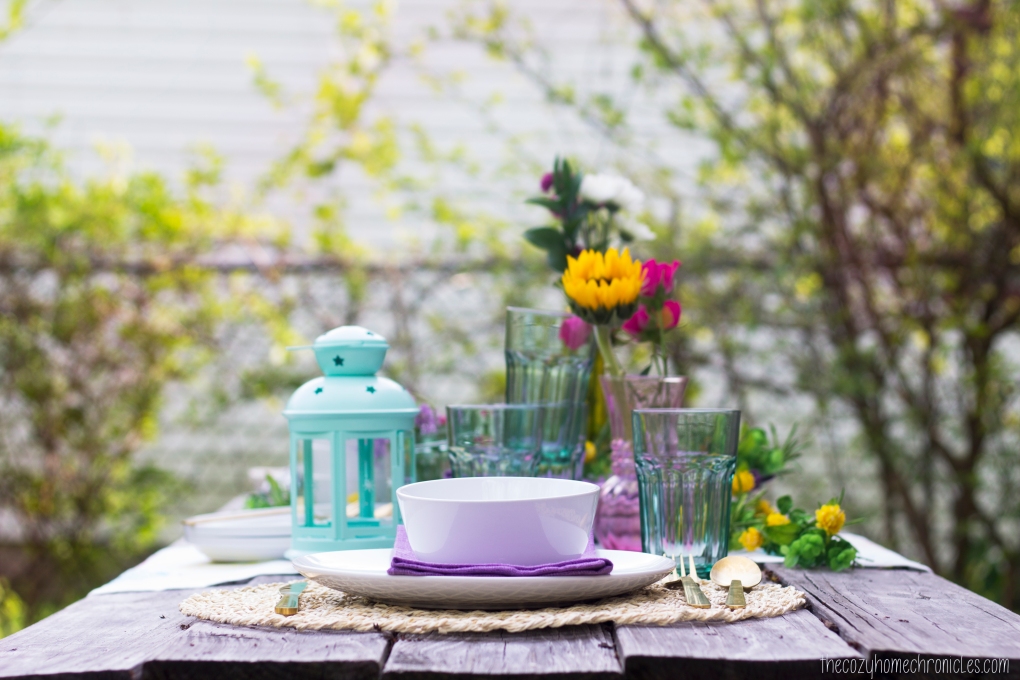
I hung up our Ramadan advent calendar from Handmade Beginnings  where I’ll put something fun for the kiddos throughout the month. For the table I pulled out the turquoise glasses and purple linens I purchased from IKEA on clearance last year. Unfortunately they no longer offer those specific products (or if they do the colors are different) so I’ll link what alternatives they have below. For the napkins, my source link takes you to a conscious minimalist cotton napkin from H&M.
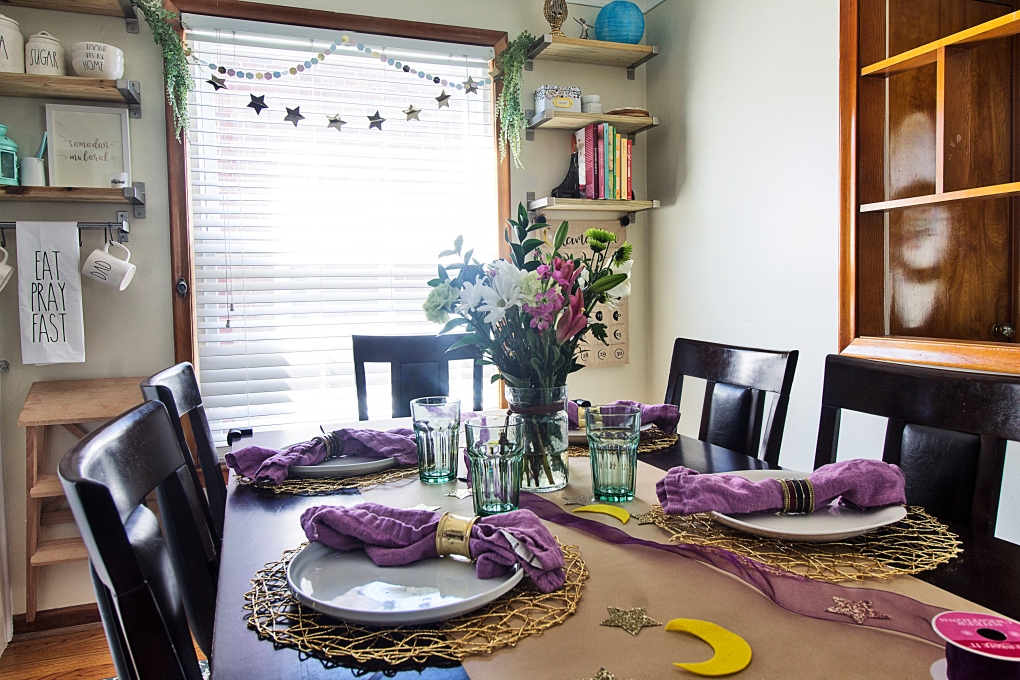
IMG_3033

 The only new things I purchased for this look were the gold placemats, the craft paper for the table-runner, and the glitter card stock to make the stars for the embellishments. I got the idea for the craft paper table runner from a Pinterest tablescape for Thanksgiving. I think it’s a nice screen-free way to keep children occupied with coloring and you can even write down your own reflections throughout the month. For an extra pop of color, never underestimate the power of fresh flowers. If you’re blessed with a beautiful flower garden then make it a family tradition and go flower picking right before iftar. If not, a local market or a Trader Joe’s would be a good option for gorgeous and reasonably-priced florals.


Sources:

Gold Placemat $1.99 | Craft Roll  $4.79 |Glitter Cardstock  $1.99| Ramadan Print $5.00 | Kitchen Towel $8.00 | Cotton Napkins $3.99 | Turquoise Glass $0.99 | Lantern $3.99

You can also find my sources of inspiration for these looks here on our Pinterest boards:

What did you think of the final result? Would you make this Ramadan banner? If you’re looking for more Ramadan decor inspiration then you’ll definitely want to head on over to my friend at Nimistyle and see her DIY Doily Table Runner and Gratitude Wall. Also don’t forget to check out the rest of the lovely DIYs in the Blog Hop linked below!
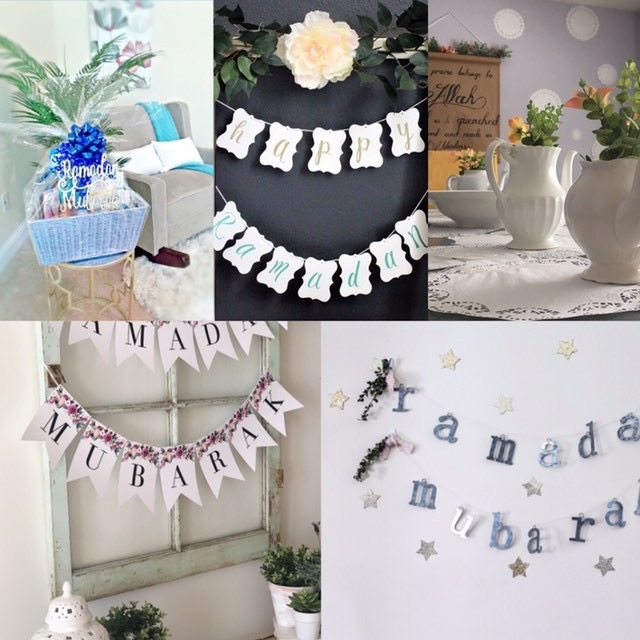
IMG_3677

Nimi Style | Amna B Interiors | Simply in Control | Mint Candy Designs | Zair Zabr Play

Last but not least, my friend Amanda and I put together our first Ramadan Ebook. It’s an idea that we’ve been sitting on for a while but this year we took a leap and tried to make it a reality. It’s nothing fancy but it’s a helpful resource filled with meal ideas and recipe links, decor tips, a checklist to help get you organized and even a few simple, mindful challenges for you to try. The best part is it’s available for free download right here:

Ramadan Ready Ebook

Amanda's Plate & The Cozy Home Chronicles

As always if you loved this post, please follow us and share. And for those who celebrate,  Ramadan Mubarak!

signature3


Organizing for Your Lifestyle: Strategies for Developing Sustainable Organizing Solutions

Let’s be real. Maintaining a clean house most days is a challenge in itself. Now add two young children and school and we are looking at nearly impossible. But we manage somehow. Believe it or not, the hardest part is not having to pick up after our little ones but rather picking up in a timely manner. In order to do that, one needs to be…dun..dun..dun.. yep, you guessed it. ORGANIZED! Since both my husband and I are in school this semester, we figured it was high time we got our house sustainably organized once and for all. Of course, it doesn’t hurt to get a little bit of help.
IMG_5906

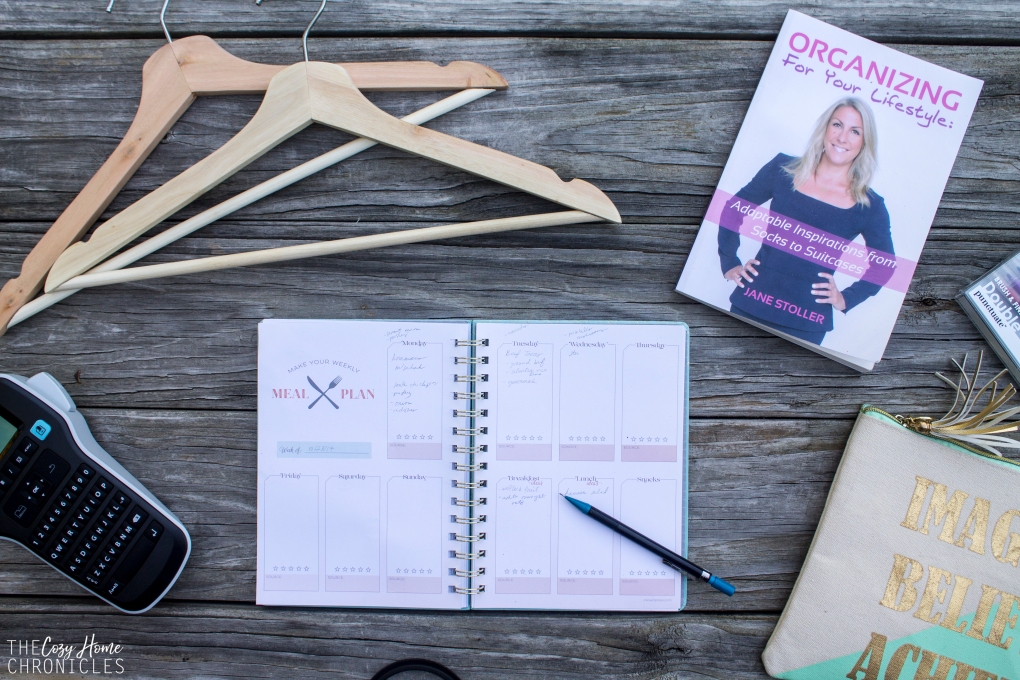
In her book Organizing for your Lifestyle, Jane Stoller offers inspiration and practical advice for tackling any organization project from the smallest closet to the biggest room. The first chapter is a general overview of organization philosophy covering the very basics including the health and cost benefits of organizing as well as organization approaches such as minimalism. After that expect to dive straight in. My favorite part of the book is the way in which it is organized; each chapter serves as a guide to a different space. As someone who suffers from indecisivism (is that a thing?) I can tell you that knowing where to start is the most stressful part so following a list definitely helped eliminate that stress. Here’s how the book is split up:

  1. Closet
  2. Bathroom
  3. Kitchen
  4. Travel
  5. Books
  6. Storage Room

Suddenly, a good pre-New Year’s purging doesn’t sound too bad now does it?! Today I’m sharing five of my favorite practical tips from the book and how I’m applying them as we tackle our organizational woes.

1. Have a date with your closet every year. Jane recommends evaluating and reorganizing your closet twice annually as “this will help you to stay fully in control of what you have, and knowledgeable about what you need, while ensuring that no excess clothing outstays its welcome.” We recently tackled the kid’s closet and ended up donating a TON of stuff they had outgrown that was taking up valuable space. After seeing how much space this opened up, I added reminders to my calendar to do this on a quarterly basis.

IMG_5909

2. Think in terms of frequency of use. Mentally sorting out your belongings into daily use/weekly use/sparse use really puts things into perspective and allows you to tailor your organization system to your practical needs so that you have what you need when you need it. This has been really helpful in our bathroom as I have tried to make sure that we have easy access to the things we use every day like toothpaste and shampoo whereas medications that are used infrequently are tucked away out of sight.

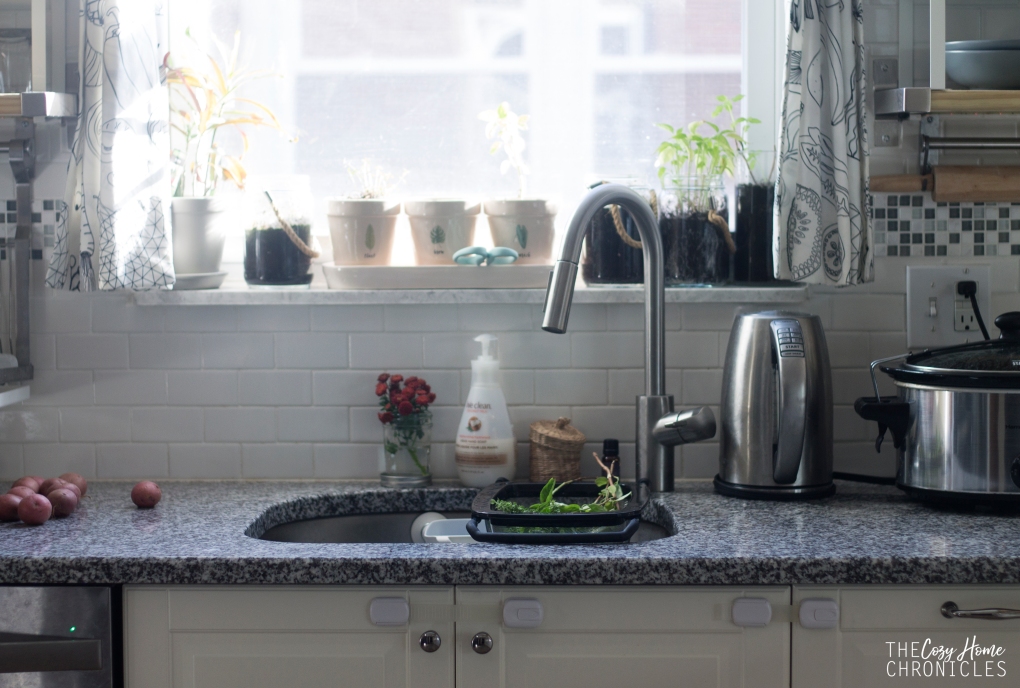
3. “Organize so your mother (or father) can cook in your kitchen.” This one really stood out to me because the kitchen is the heart of our home. If you don’t have easy access to basic tools and ingredients while cooking then you’re wasting valuable time during meal prep. Imagining someone else using your kitchen is a great exercise for thinking about the efficiency of your space. I used the opportunity to remove some unwanted gadgets, dinnerware, and Tupperware out of circulation to make room for things that I actually use and need.

IMG_5743

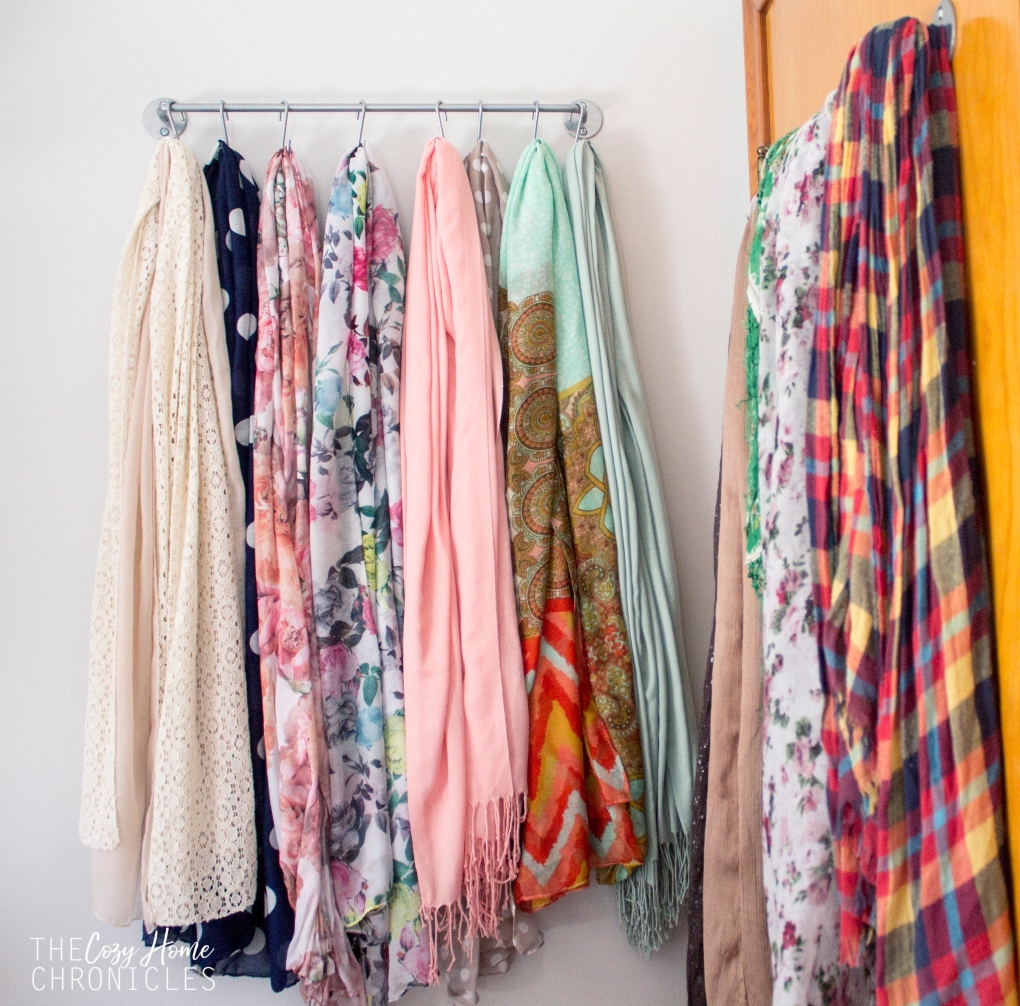
4. Find a balance between function and aesthetics. What works for one person or family doesn’t work for everyone and that’s okay. It’s up to you to find a solution that is both functional and visually appealing for your needs (sometimes function will trump aesthetics and that’s also okay). This issue came up for me while I sifted through my scarf collection. Although I can see how the variety of colors and patterns hanging together on a wall can be visually unappealing, this strategy has proven to be the most practical for my lifestyle because it offers easy open access to all my scarves.

IMG_5969

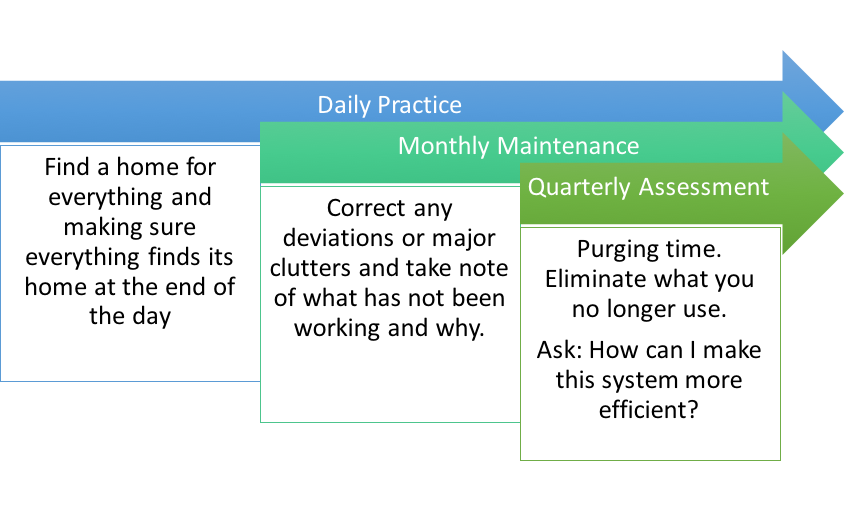
5. Make organizing a lifestyle. This is by far the most important advice because it requires you to think in the long term. With this philosophy, organizing is no longer about buying storage containers or fancy systems but rather about asking yourself, “how can I stay organized?” The answer, I think, will lie in a happy medium between a designated system, daily practices, monthly maintenance, and a quarterly assessment of successes and failures. To help us along through this process, I’ve created a diagram to envision what this would look like.

Organizing Chart

We are by no means completely organized because we haven’t had the time to tackle all of these spaces in one sitting but we have been thinking through these tips as we slowly organize our home corner by corner. These strategies have certainly helped me be more intentional about finding sustainable organization solutions and I look forward to sharing more as we work on making our home better organized. If you want more organizing inspiration as well as tips and tricks on the specifics of storage, folding, and labeling, you can find Jane’s book here.

If you enjoyed this read, please share and follow!

Instagram

signature3


Getting the heart and home ready for Ramadan

IMG_1964

It’s been a busy year for us and we are very grateful for all the fun projects and renovations we were able to do. However, with Ramadan just around the corner, we want to wind down a bit and focus on family and spirituality. It’s hard to believe that our babies are growing so fast (our son is turning two in just a month and our daughter will be turning 7 months) but now that they’re more attentive and communicative, we want to make the month extra special so they can grow up with fond and happy memories of our Ramadans together. For us, Ramadan is a month for reflection and growth. We enter this month as warriors, much like Paulo Coehlo’s Warriors of Light:

“Warriors of light are not perfect.Their beauty lies in accepting this fact and still desiring to grow and to learn.”

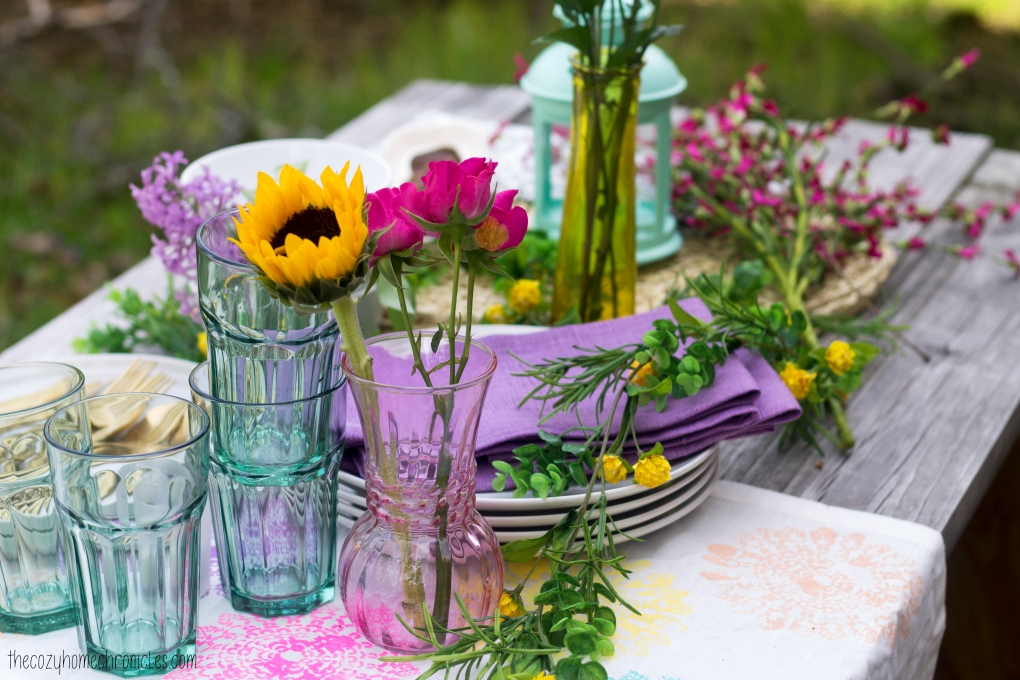
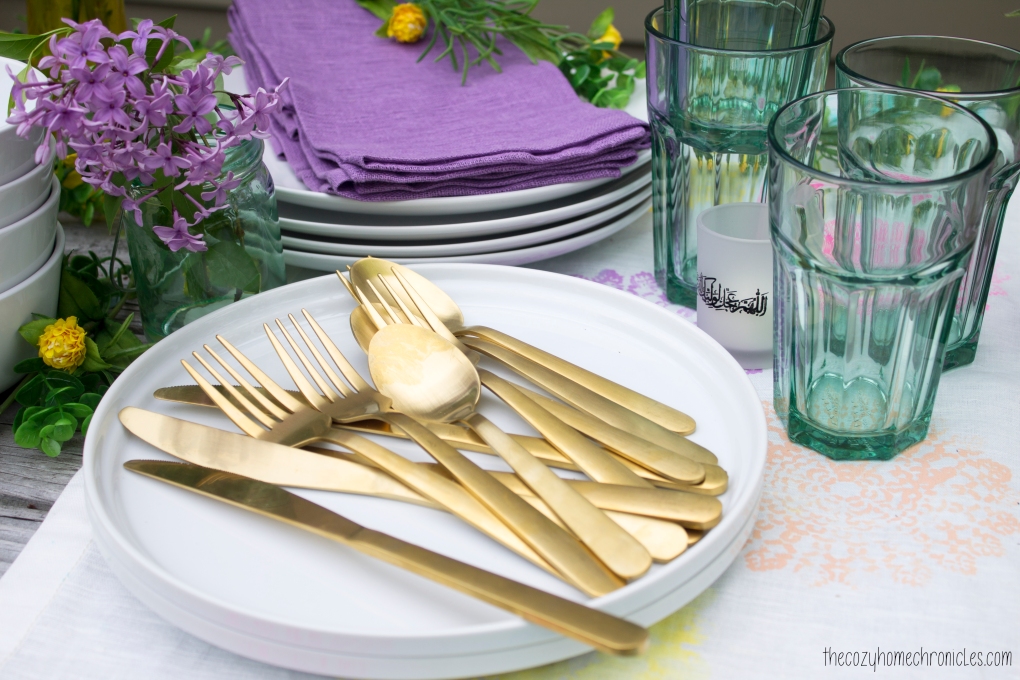
I wanted to capture this free-spirited approach in decorating our home and this sort of transformed into a colorful bohemian style tablescape since the dinning area is really where the family comes together to break bread and unwind after a long day of fasting. In this post I’ll be sharing some decor inspiration from our Ramadan preparations, including a family-friendly DIY project and a free printable you can frame to either hang up or place on your dinning table.

IMG_1898

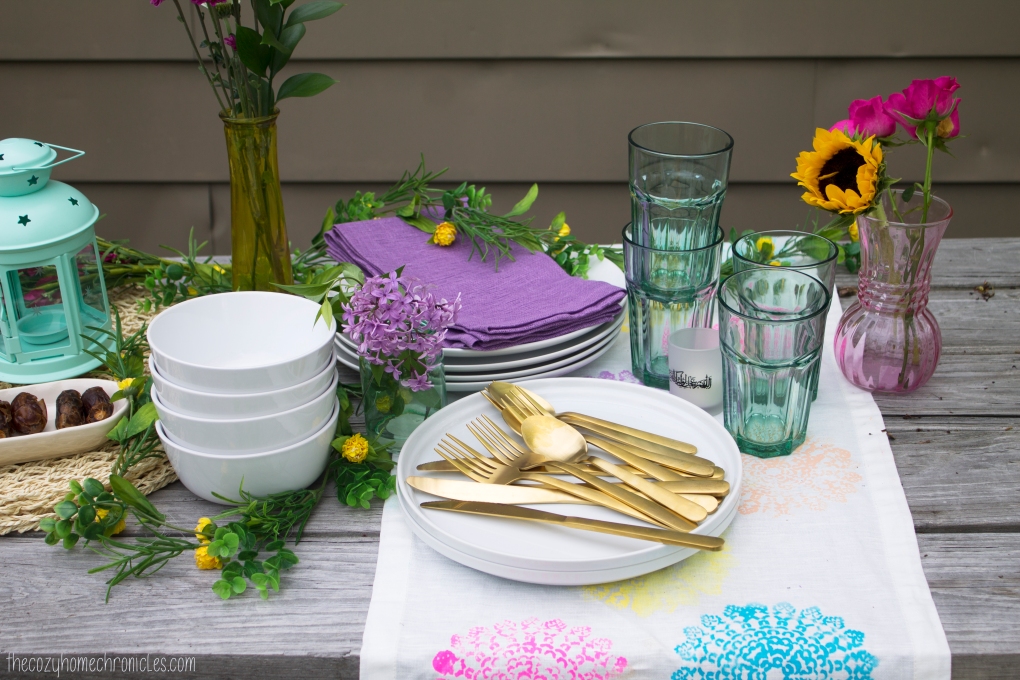
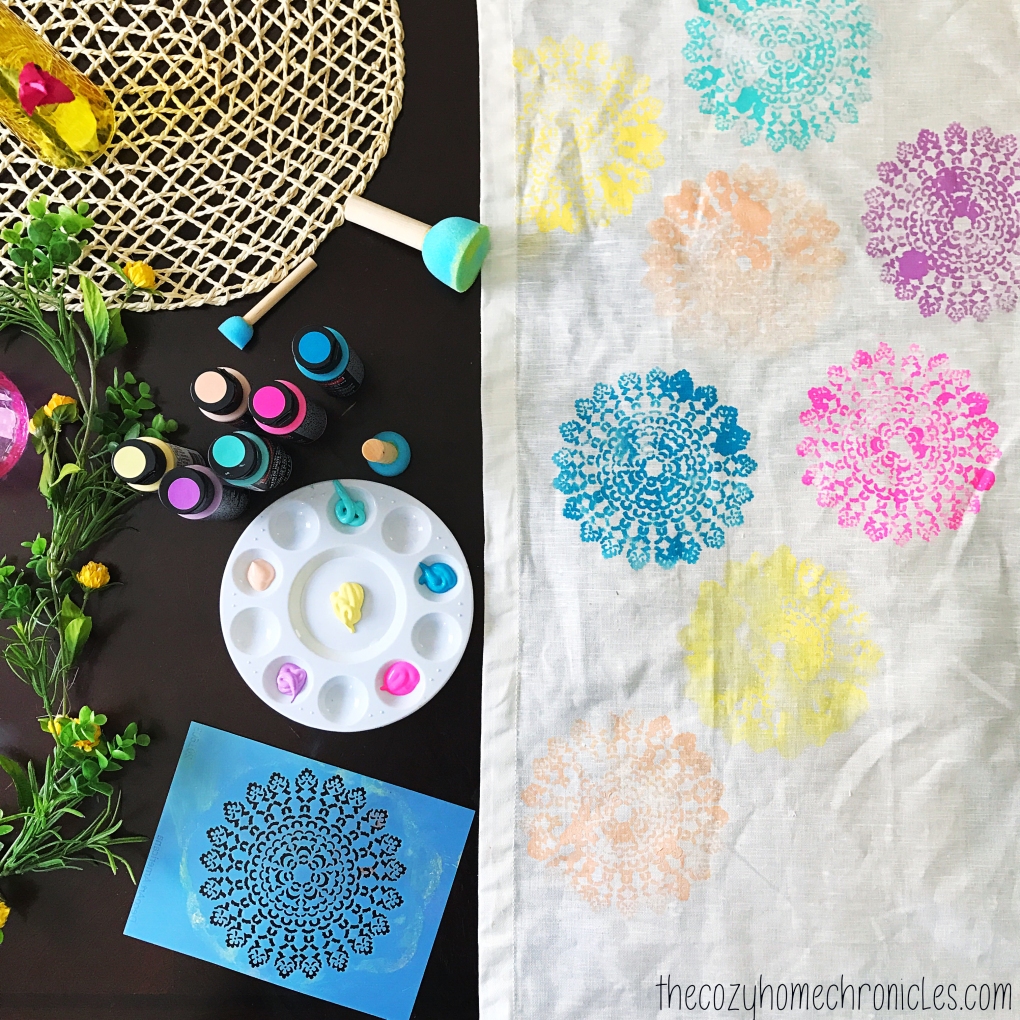
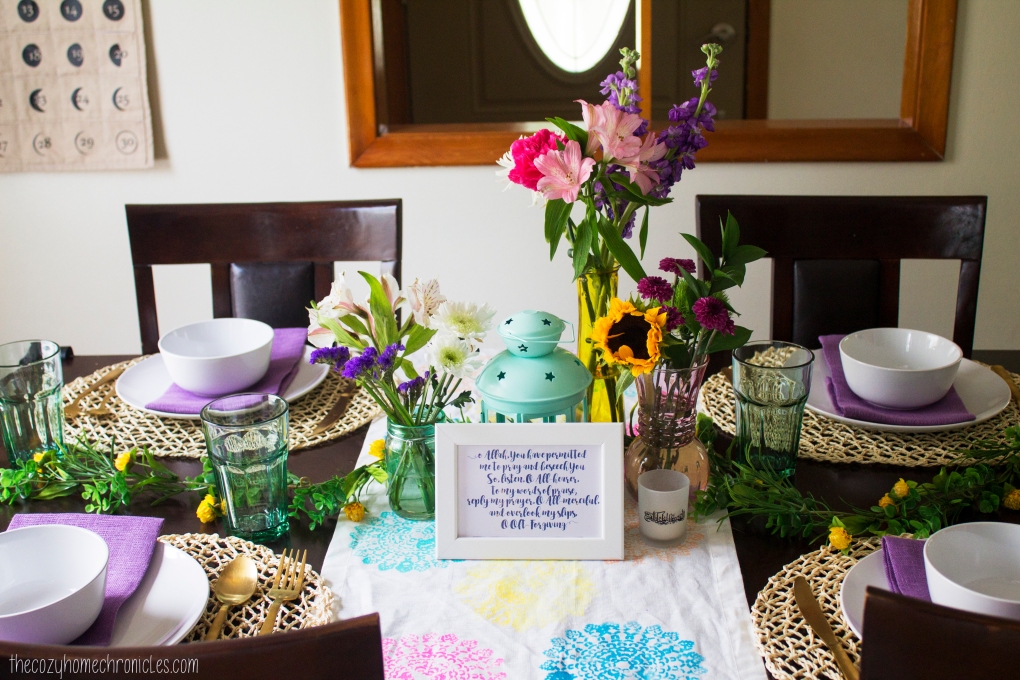
This tablescape looks a lot fancier than it is. At the heart of it is a DIY Table Runner which is super easy to put together. I even had my son help out with the painting and he had a blast! All you’ll need is an inexpensive white table runner, a mandala or doily stencil, acrylic paint for fabric, and stencil brushes. The rest is self-explanatory. I probably could have done a much better job but I was painting with a toddler so we got a little carried away with dipping the brush in paint.

IMG_6103

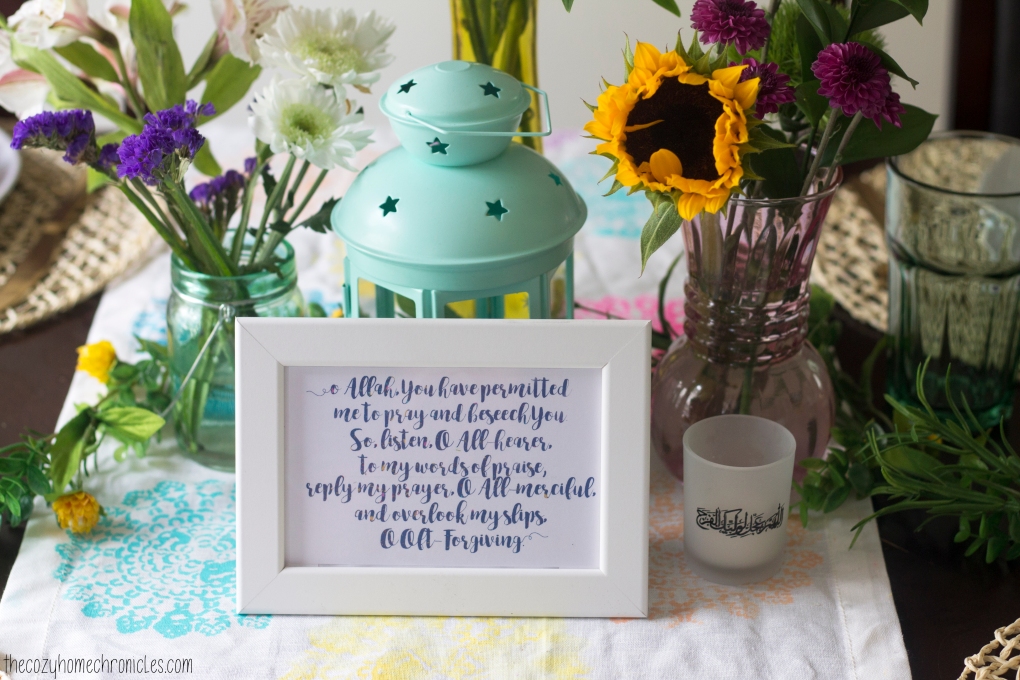
Besides the table runner, all you’ll need to achieve this look are a variety of colorful vases (and/or ornate lanterns) filled with fresh summer flowers. The vases you see in the images are ones that I thrifted from a local Goodwill for $3 total. The spirit of Ramadan is also about humility so I didn’t want to create a space that was too extravagant or wasteful. I arranged the vases along the table, intertwined with crawling vine garland ( I bought on clearance) and in between these pretty palm leaf placemats. I also created a framed quote art out of one of our favorite supplications that we listen to just before iftar time. I wanted it to be a reminder on the table that aside from all the delicious food we get to eat, Ramadan is so much more than that. It is about reconnecting with God and softening our hearts so that we can be better, more empathetic human beings.

IMG_1969

IMG_1925

IMG_1900

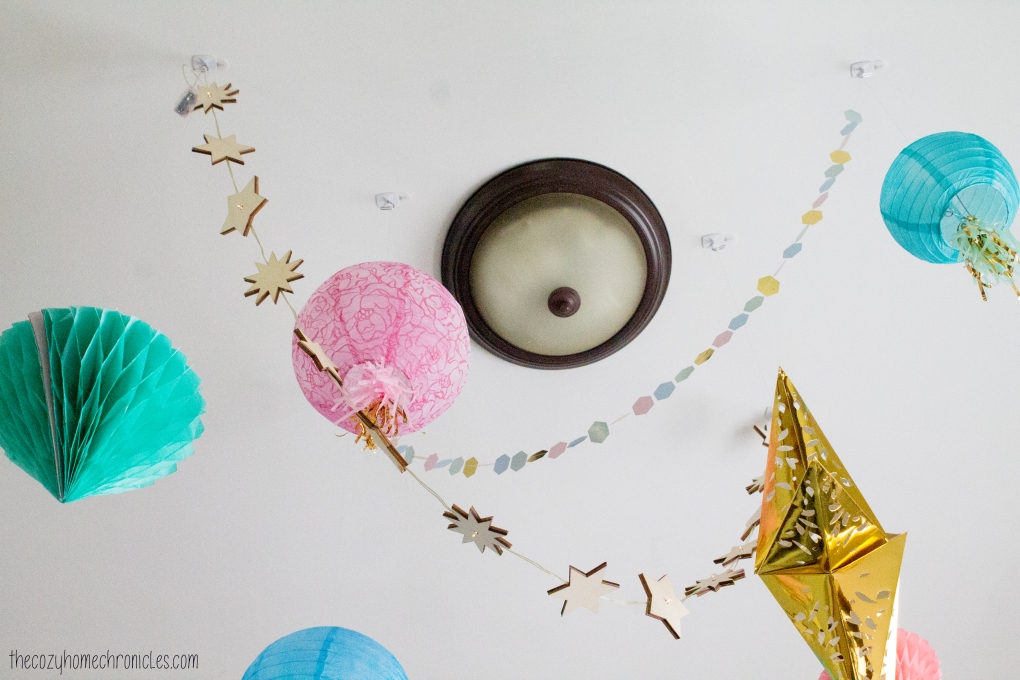
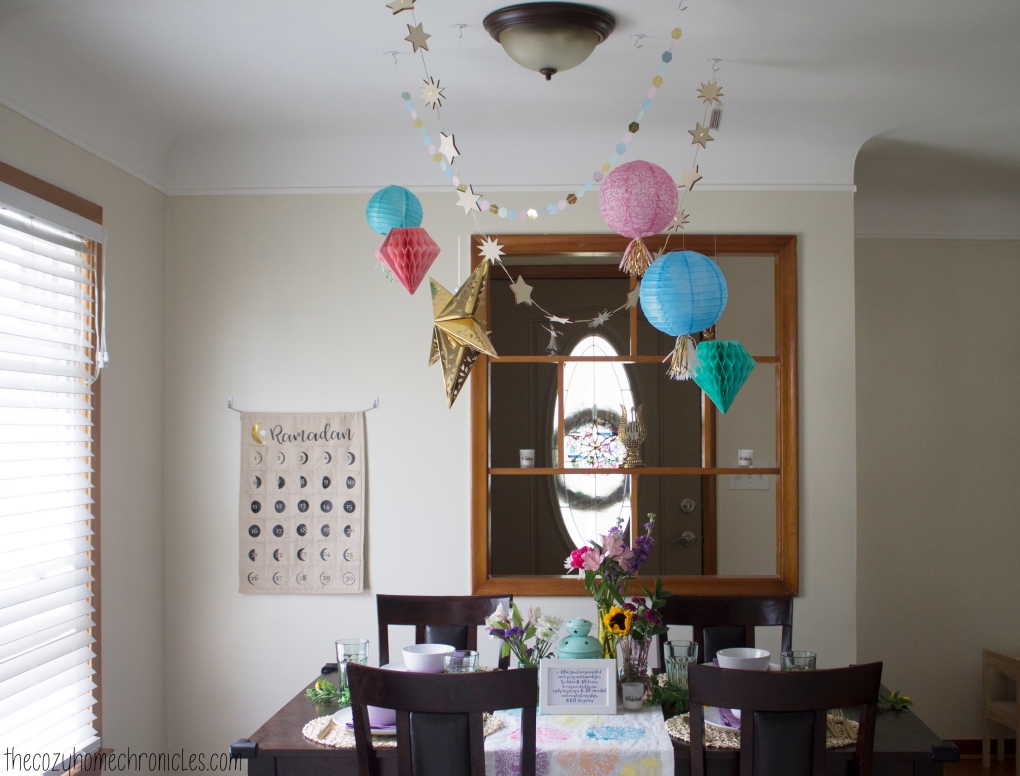
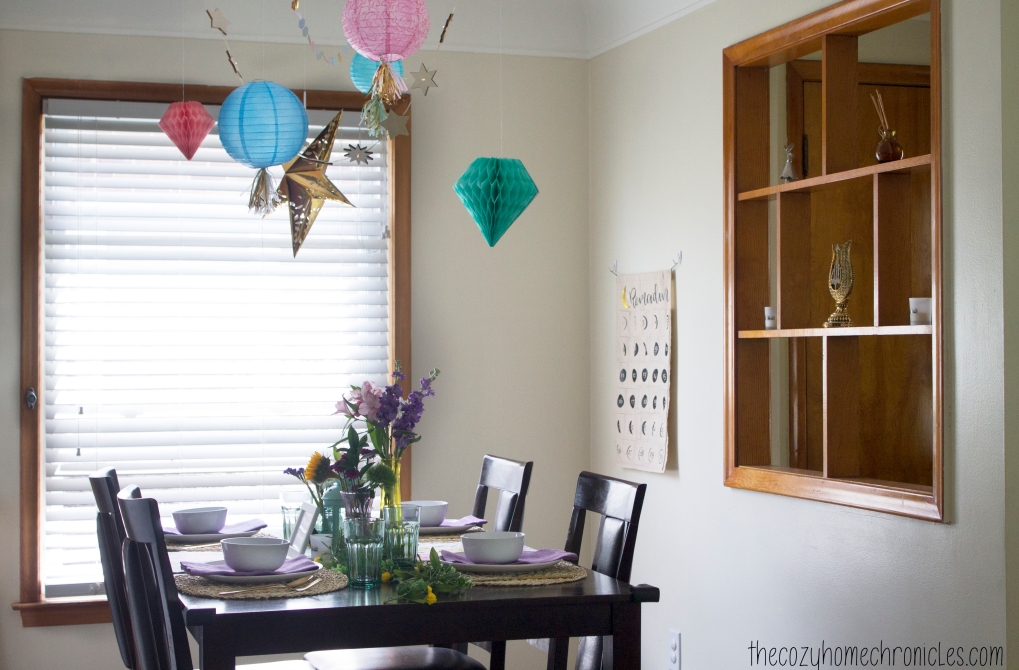
In the home, I hung up lanterns and garland from the ceiling that I had purchased in a hanging decor kit from Michaels. The colors matched up very nicely with the bohemian color palette I had saved on Pinterest. Decorating with family is such a wonderful way to build memories and traditions. My son was very excited about standing on the table with me to hang these up and it put the biggest smile on my face seeing him gush with joy as he pulled out the tape from the dispenser in an effort to “help me.”

IMG_2024

On the wall behind the dinning table, I hung up a Ramadan advent calendar that I purchased from Handmade Beginnings. Not only is it beautiful but it’s perfect for making each day interactive and for making the countdown to Eid fun and exciting for little ones. Since my children are still young, I am choosing an activity that is simple and age appropriate. I found these free Ramadan coloring pages on Crayola’s website so what I plan to do is get a 30+ count marker or crayon set and put a different color in each  of the calendar’s pouches. Each day we will pull out a new color and work on our Ramadan page and hopefully by the end of the month (and just in time for Eid) we will have a pretty piece of art to hang up 🙂

IMG_1985

IMG_1994

There you have it. An expensive and simple way to add a colorful touch to your table and home for Ramadan. I really wanted a space that was special, vibrant, and cozy for our family and our dinner guests and I’m really happy with how it turned out.

IMG_2002

What do you think? What are your favorite ways to make Ramadan special for your family?

Free Download:  Ramadan Printable_Color |Ramadan Printable_Black


If you liked this post please follow us and share!

Instagram


DIY Framed Chalkboard Wall

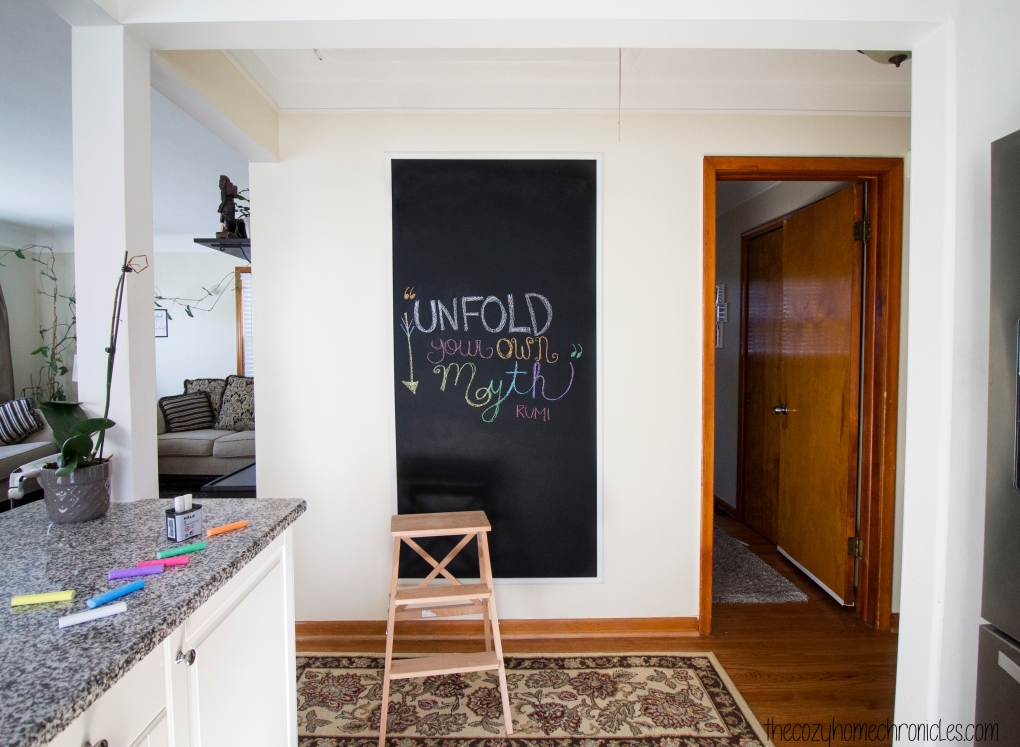
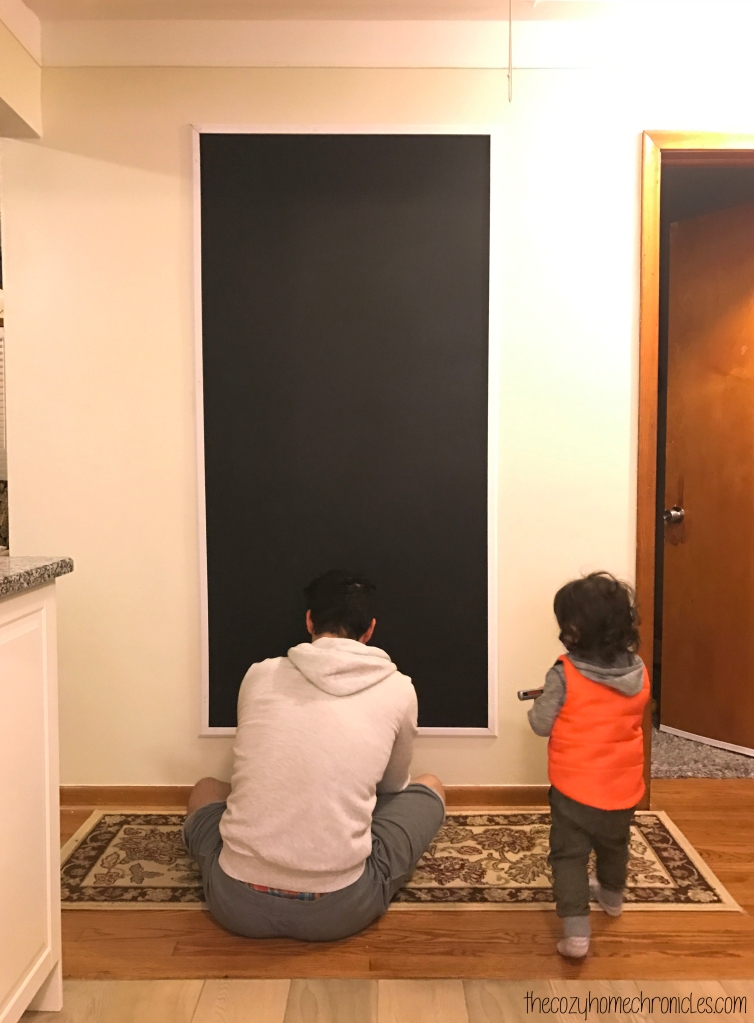
Our son is getting to the age where he can almost color without trying to eat his markers and crayons (the keyword there is almost), however, he still attempts to scribble on the wall any chance he gets. Despite getting him a small IKEA table for all of his creative pursuits, he seems not to want to be confined to paper so we figured if coloring on the walls is what he wants then coloring on the walls he shall get. We have always been admirers of chalkboards…the rustic kind that you see in old schoolhouses in black and white movies. We figured a chalkboard would not only be nice for doodling and writing the dinner menu on but also as a fun educational medium to teach letters, words, and concepts.

IMG_9985

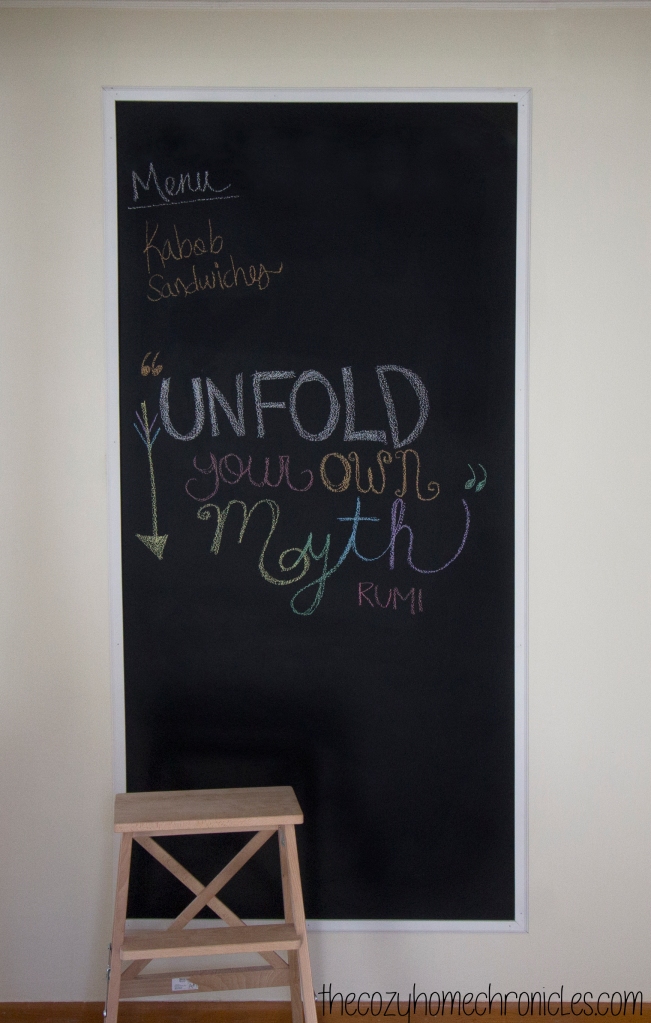
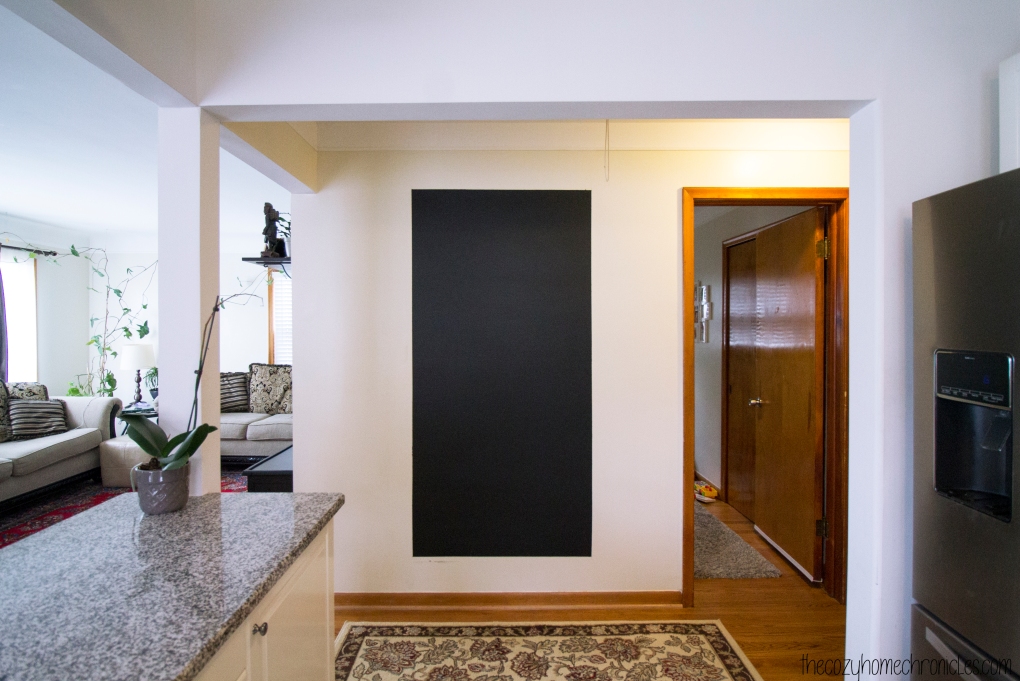
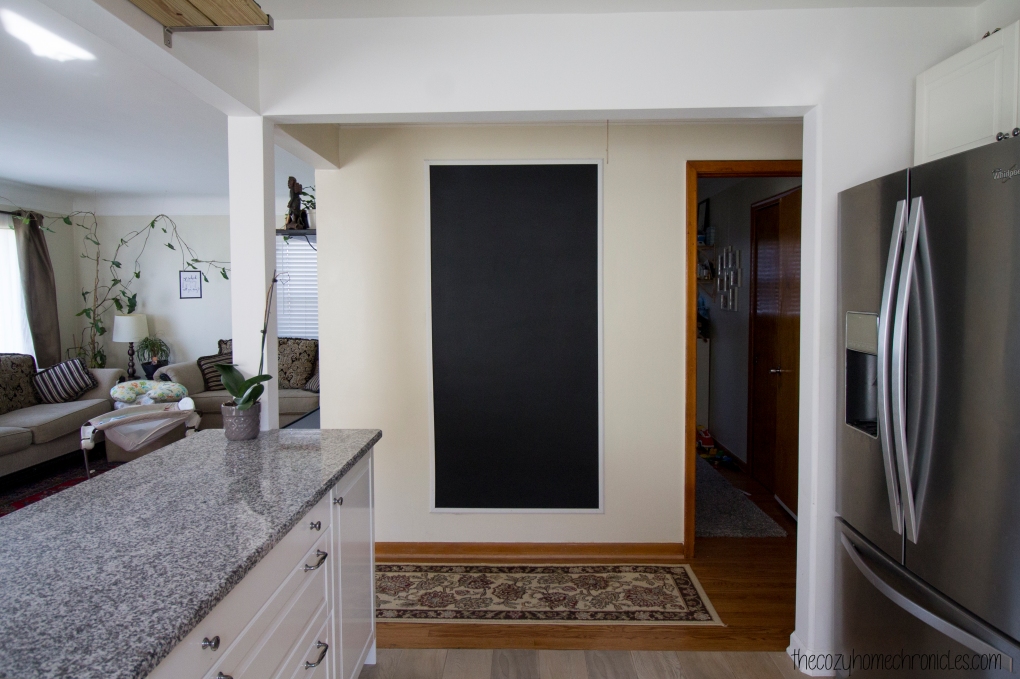
We did toy around with the idea of painting an entire wall, which has become popular these days, but in the end we decided a 6ft x 3ft area was plenty of space for all of us to use. Plus since we chose to put it in the hallway, adjacent to the kitchen, we wanted to preserve some wall space just in case we wanted to add wall art or organizers for a command center in the future. The awesome thing about making your own chalkboard wall is that for $10 of chalkboard paint, you can get a little over 100 sq. ft of coverage. That’s a steal when you consider that chalkboards the size of small picture frames are going for that and much more. The other really nice thing is that you can frame the painted area to achieve that authentic chalkboard look and you can do so using any type of wood you like in any stain you want. We went with an inexpensive white moulding from Home Depot that we nailed directly to the wall. We’ve come across DIY framed chalkboards that involve painting another medium and then hanging it up. Not only is a large chalkboard heavy and impractical to hang but it would be dangerous if you have little ones in your life. Just something to think about if you are not sure how you feel about painting a wall with chalkboard paint.

The only thing you need to be mindful of is if you have kids in the house then you will want to time your painting after their bedtime so the paint can dry without handprints all over it. Other than that, this chalkboard wall is super easy to put together and loads of fun. Our son loves scribbling on it, I love practicing my handlettering, and of course baba loves leaving silly doodles for us to wake up to. Yes, we are not ashamed to admit it… this chalkboard was as much for us as it was for our son.

Supplies
Chalkboard Paint ($9.67)
Wood Moulding
Trim Nails

Tools
Paint Roller
Paint Tray
Paint Tray Liner
Blue Painters Tape
Hammer

Chalk options
Chalkboard Wall Safe Markers ($12.95)
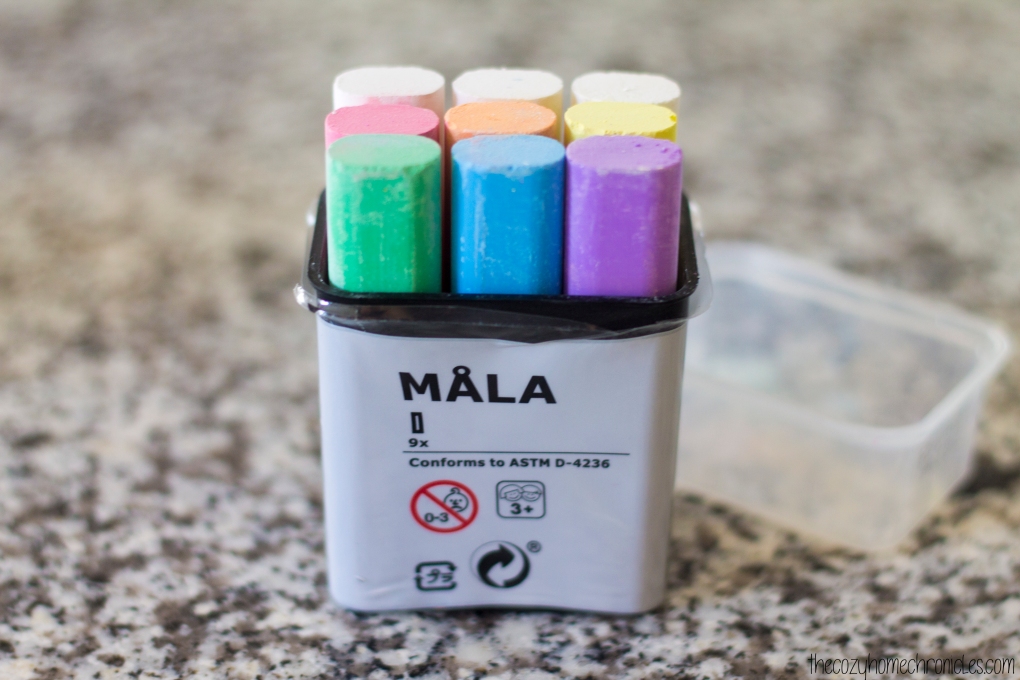
Regular Chalk from IKEA  ($0.99)

Note: If you end up taking on this project using similar dimensions to our chalkboard then know that you will have leftover paint. Don’t you fret though, we will probably come up with another DIY project to make use of it.

IMG_9973.jpg

Directions
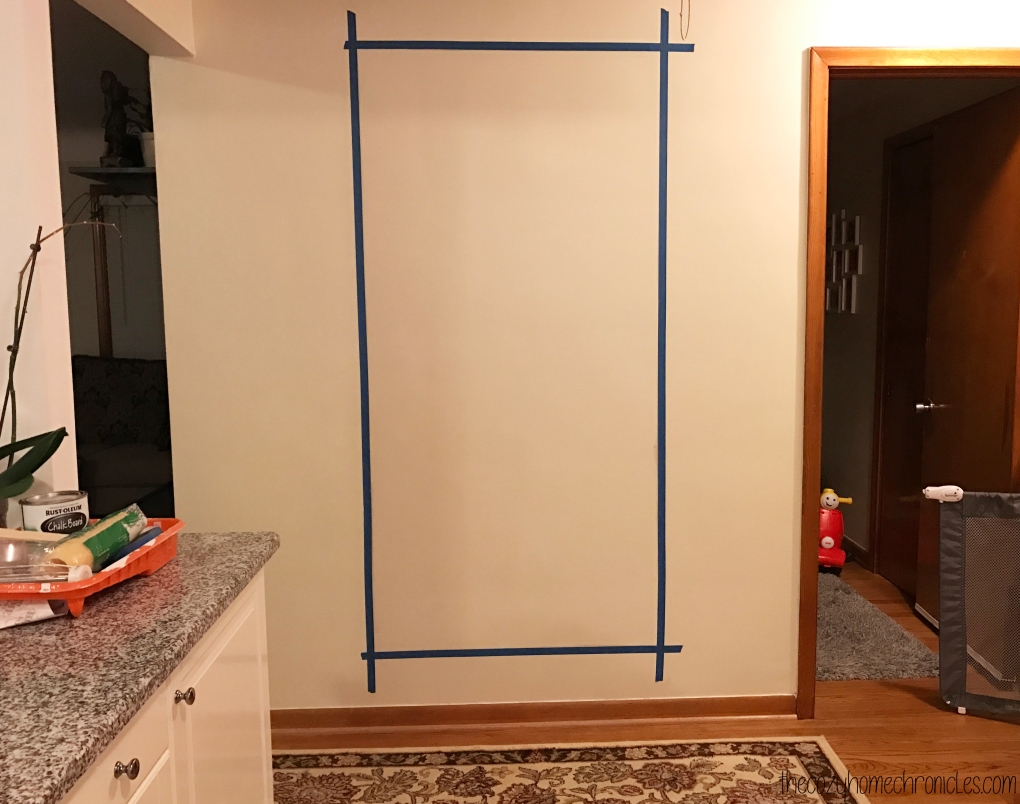
1. Measure the area you want to paint and outline the area with pencil.
2. Apply the painter’s tape over your outline, pressing down firmly as you go so you don’t have any air pockets where the paint can seep through.
3. Mix the paint using a paint stick and pour 1/4 of the paint in the paint tray.
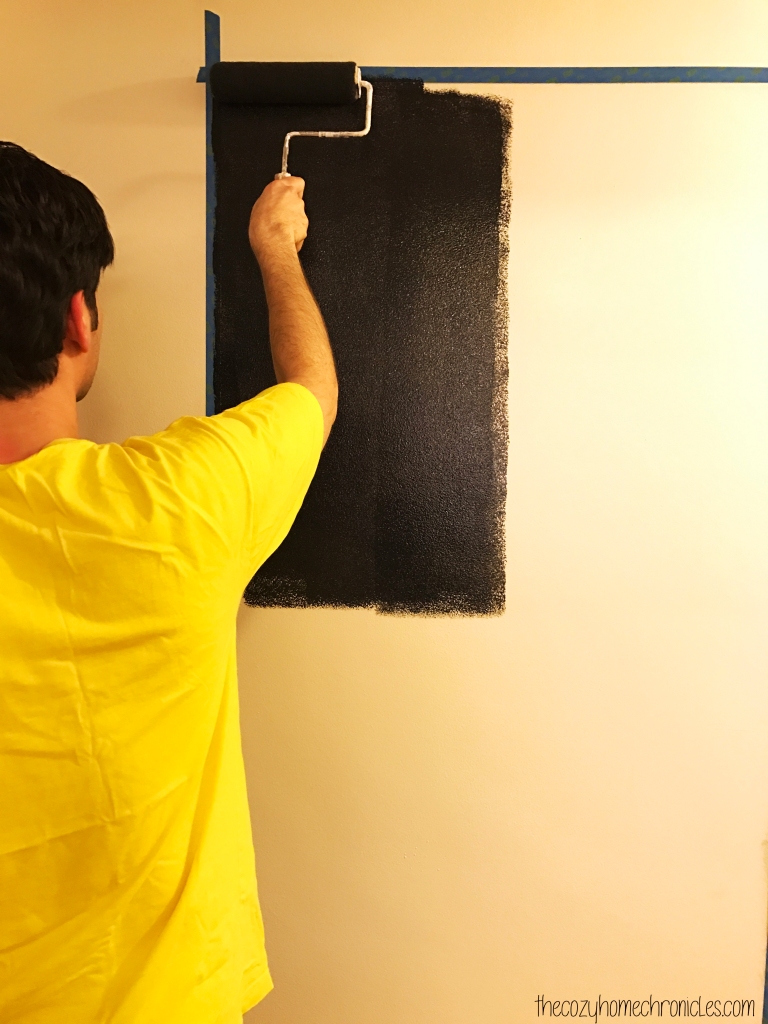
4. Gently dip your paint roller in and start painting your designated area in a “W” pattern. Make sure you don’t use too much paint on your roller as it will start dripping and take away from the smooth surface of the board.
5. Let dry for 4 hours before applying a second coat.
6. After the final coat is painted, let it set for 3 days (per instructions on the paint container) before writing on it.
7. Test your new board with the writing medium of your choice: old-fashioned chalk or chalkboard marker.

IMG_2460

IMG_2465

IMG_3138

IMG_9929

IMG_9954

IMG_9988 copy


Have you been wanting to put up a chalkboard wall? If so, what’s been stopping you?

If you liked this post please follow us and share!

Instagram


Celestial Themed Nursery

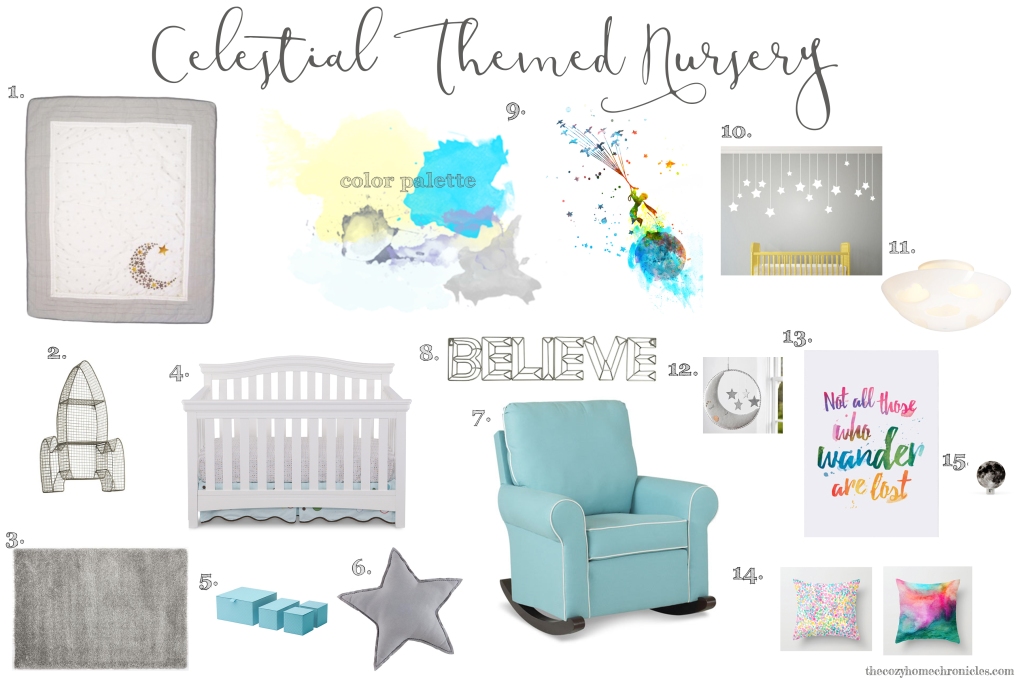
Today we are doing something new while throwing it back to a project we completed before we started blogging: the nursery. When we first found out we were having a baby, we knew instantly that we wanted to create a celestial-themed nursery. My husband and I have always been astronomy nerds; we own a telescope, we’ve dabbled with astrophotography at the Headlands International Dark Sky Park, and we just love the sense of peace and mystery that the cosmos invoke (insert Interstellar Soundtrack here). The theme for the room really started coming together when we started thinking about words to describe the space we wanted to create: whimsical, colorful, adventurous. If those words were a color scheme, it would kind of look like this:

colorblast

We thought of children’s books that could fit in our theme and exemplified these adjectives. The one that stuck out was Le Petit Prince (The Little Prince) by Antoine de Saint-Exupery. Although we both didn’t read the book until we were adults, it really left a deep impression on us. We loved the profound wisdom and simplicity of the story but it was the childlike innocence and way of looking at the world that we found most beautiful. We wanted the nursery to inspire the inner-child in all of us.

img_2552

Naturally, I turned to Etsy for Little Prince inspiration and I found it in the form of a watercolor print based on a scene from the book. The colors in print were just so pretty so I contacted the shop owner and had a custom order made that included one of our favorite quotes from the book.

il_570xn-760340885_4psi

Everything else in the room was pretty much designed around this print’s color scheme. We ended up painting an accent wall with Behr’s Rise and Shine and putting up silver and deep yellow star and moon decals. We went with white furniture, a plush silver rug, and celestial-themed bedding from Babies R Us. While many people use design boards to collect inspiration for designing a space, we’ve put together a design board based on the space we created for those who are interested in designing a whimsical, celestial-inspired nursery. This board was created in part by things we do have in our own nursery (which is basically a playroom now) but it also includes things that we don’t have but find inspiring and beautiful. It’s fascinating to think that all of this was sparked by a piece of artwork based off of a children’s book but it just goes to show you how amazing the human imagination is.

nursery-recovered


Sources
1. Petite Tresor Nuit Bedding Set
2. Rocket Shelf
3. Silver Shag Rug
4. Delta Bennington Bell Crib
5. Pallra Light Blue Box Set
6. Star Pillow
7. Cape Cod Rocking Chair
8. Believe Wall Decor
9. Le Petit Prince Watercolor Print
10. Star Wall Decals
11. Skojig Ceiling Lamp
12. Dream Ring Moon & Stars Mobile
13. Not All Those Who Wander Are Lost Watercolor Print
14. Colorful Watercolor Pillows
15. Moon Night Light

We will eventually get around to doing a house tour but until then this design board will do. Not only was it super fun to make but it is great practice for when we start to brainstorm and think about the bathroom that we will be remodeling later this year. Have you ever put a design board together? Share your experience in the comments below and…

If you liked this post please follow us and share!

Instagram


Inspirational Wallpaper: December

letitsnow

Ahhh December…one of the busiest times of the year. Don’t worry, we will make this brief. We just wanted to wish all our readers a very blessed holiday season (no matter what you celebrate) and to those of you that are students, we wish you the very best of luck on your final exams (we know how you feel). We will have a few more posts to wrap up 2016 but we are looking forward to sharing another wonderful year with you (God willing). And believe it or not, we are actually hoping for some snow. Cheers!

For download and Printing: letitsnow

If you liked this post please follow us and share!

Instagram


Inspirational Wallpaper: October

IMG_4638 copy.jpg

October. It’s the beginning of the end but also a beginning in its own right. Despite the earth slowly decaying before our very eyes, it’s a magnificent site to behold. Brilliant fiery hues of red, orange, and yellow take the place of green as the air becomes crisper and cooler. Let us welcome all change as we welcome the warm colors of autumn. Because autumn is so much more than pumpkin-spiced lattes and apple crisp (those are nice, don’t get me wrong). It’s about preparing for the growth and rebirth that will come after the cycle of life and decay has completed itself. What a thought to end the week on huh? Happy Friday and Cheers 🙂

For download and printing: hello-autumn

If you liked this post please follow us and share!


Inspirational Wallpaper: September

With labor day weekend behind us and work and a new school year ahead, let us remember to be kind and empathetic to everyone we encounter. It’s difficult to imagine sending my baby off to school, but if today was that day I think I would share these wise words:

“To be yourself in a world that is constantly trying to make you something else is the greatest accomplishment.” -Ralph Waldo Emerson

Life is difficult enough as it is so let’s embrace our uniqueness and allow others to do the same. Happy September! We wish everyone a wonderful, fresh start to autumn 🙂

img_4700

September Wallpaper


Inspirational Wallpaper: May

Firstly, Happy Mother’s Day to all the beautiful and strong women out there that we call mom. Having almost survived our first year of parenthood, we are truly humbled by all the sacrifices you make every single day. I know we are a bit late for our May wallpaper post but hey, better late than never! We were in Vancouver and Seattle when April passed us by so we forgot all about our April post. Oops. To make up for it, the wallpaper I’m sharing for free download is a shot I took in Vancouver’s Stanley Park. The lighting and colors were just too perfect so it didn’t need a quote. Here’s to bright and cheery May days 🙂

Sunlit Japanese Maple

Sunlit Stanley Park