Home Theater System on a Budget

IMG_9367

So after many years of renting apartments and one-story condos, I finally had my own place.  And what do you do when you discover that you have an empty basement? You build your own Home Theater! Right? Because, why not?

If you need more convincing, here are some reasons why building a home theater might be a great idea:

  • You enjoy television and gaming on big(ger) screens
  • You thoroughly want to enjoy your movie nights (think Lord of The Rings Epicness)
  • You don’t want a TV with average sound quality
  • You can’t afford a 120″ HDTV because last time you checked you didn’t have $130k to burnVizio 120 inch Tv.PNG

If any of those reasons resonated with you, you might be happy to hear that with a bit of elbow grease, you too can have the home theater of your dreams without the ridiculous price tag. Let’s get started!

Total Cost = $1,370 (tax not included)
Setup Time = 2-3 hours

What you’ll need

Note: You will always find “better” and more expensive products out there. What I have is a balanced system that allows for a great picture and sound at a very reasonable price.

Tools
Builder’s level
Pencil
Power Drill
Screws
Screwdriver
Allen Wrench
Drywall Anchors
A helping hand

Preparations and Planning

  • This design is for a 10×10 space and the sound system we chose has the perfect wiring for this size space. If you are working with a larger space you might want to pay attention to that.
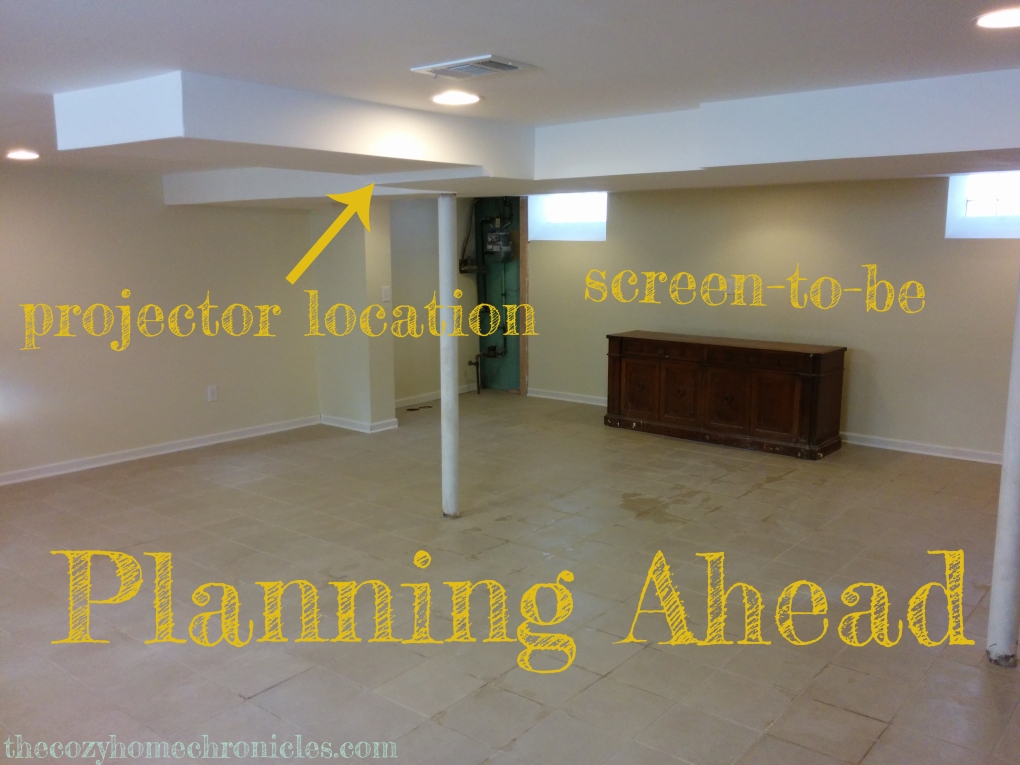
  • Designate a location for your projector where you will have a distance of at least 7-10ft from the screen to ensure an enjoyable viewing experience. I positioned the projector 10ft away from the wall that I wanted to install the screen on and I am very happy with the quality of the picture.
  • Decide if you want to have your projector mounted to the ceiling or have it portable. If you choose the portable route, you will need some kind of stand to position the projector on when in use. I went with the ceiling mount for safety and aesthetic purposes so you will find directions for ceiling installation further down.
  • Make sure you have an electrical outlet to plug your projector into especially if you are going to mount it to the ceiling. I installed one while I was finishing the basement because I knew that I eventually wanted to put up a projector.
  • When it comes to adjusting distance, viewing angle, focus and such, the benQ projector I picked has an enormous amount of configurations. So why benQ, you ask? Because most projectors won’t be as flexible when it comes to positioning! This projector will allow you to zoom in/out and shift the lens, which is very helpful when you don’t have the perfect room or space to set up a projector.
IMG_20140427_130039

Directions

A. Projector (if you are not attaching it to the ceiling you can skip to part B)

  1. These steps will cover fastening the projector to the ceiling mount. Note that the mount bracket comes with two separate parts that connect (see figure 1). The top piece is for securing to the ceiling wall and the bottom piece (the mount arms) is for securing to the projector.
  2. The first step requires you to connect the projector to the mount arms very carefully [The entire mount bracket comes with an extendable metal bar that is helpful if you have a high ceiling. I installed this in the basement (low ceiling) so there was no need for the extender. If you look at the above picture for the mount, you can see that there are 3 mount options. I went with the first one which skips adding the extender to the mount and installs the bottom mount piece directly to the top piece]. This was by far the longest and most time consuming step in this project and requires a great deal of patience and care to install the screws, through the holes in the arms, into the projector. You will need to tighten them well without damaging the projector’s pre-screwed holes. I was able to install 3 screws on the arms and skipped the fourth because it was difficult to align the 4th arm to the projector. Is it sturdy though? Even with just two screws I wouldn’t be worried.

    Mount with new labels

    Figure 1

  3. After deciding on where you want to install the projector [I made sure there was a wooden bracket/stud where I was mounting the projector] you will need to hold the top mount piece in position and trace the holes with a pencil.
  4. Proceed to drill two small holes over your marks then hold up the top mount piece while you drill it securely in place with the screws. [Note that you can adjust the projector using the tilt and rotation adjustment options in the top piece so don’t worry if it isn’t 100% level as you are mounting it. As long as you are aligned with the wall in front of you, you will be fine.]
  5. Once you have finished securing the top piece of the mount to the ceiling you can hook the two pieces (top piece+bottom with projector) together and tighten using the allen wrench. Now on to the screen!
    Projection design.PNG

    Figure 2

B.  Projector Screen

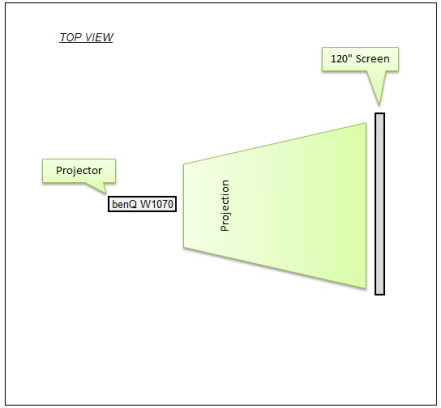
  1. Next you will need to install the 120 inch projector screen. You first need to make sure it is positioned in the center focal point of your projector (see figure 2). Once you have your position all set, you will need to mark with a pencil the upper right and left corners of the wall where you will secure the projector screen ends.
  2. Drill a hole in each of the marks you made (2 total) and screw a drywall anchor in each hole.
  3. When you have finished you will need to use a screwdriver to gently screw two heavy duty screws in place, leaving 1/2 inch distance between the wall and the screw head. Now, with a helping hand, hook the projector screen end caps (see figure 3) onto the screws. Make sure the screen is level horizontally and vertically against the wall.

    Screen install.jpg

    Figure 3

  4. At this point you can turn on the projector and fine tune the alignment on the ceiling mount bracket. You can also fine tune the zoom on the projector. This will be different for every installation since the distance to the screen, the projector height and mount is never identical.

C. Surround Sound System

  1. Installing the 5.1 surround sound system isn’t complicated as the package comes with all the wiring you need. Here’s what comes in the box: 4 Satellite Speakers, 1 Center Speaker, 1 Subwoofer, 5 black & 5 red tip wires + Subwoofer Cable
  2. Connect each of the four satellite speakers to a speaker stand and place one satellite speaker in each corner of the space. Connect the wires from each speaker to your main sound system.
  3. Install the center speaker right below your projector screen and find a good location for your subwoofer. The manufacturer recommends a close (but not too close) location to your seating area. See figure 4 for reference on how I placed my speakers and subwoofer.

    Speaker setup

    Figure 4

  4. After installing and connecting all your wires back to the main system, you will have to turn it on and open the sound settings to adjust everything. This can take 15-20 minutes to get it right.
  5. Using your projector as a screen, assign every speaker a location. For example: Satellite speaker #3 is the Front Left speaker while Satellite speaker #4 is the Front Right speaker and so on. After doing this for all the speakers, you have to fine tune the sound by using a Sound Level device [or if you are a smartphone owner just download one of the many free apps on iOS or Android] to calibrate the speakers. To do this properly, you will need to be sitting in the middle of the space where you are installing the speakers. The Denon guide will walk you through this step-by-step if you get stuck.
  6. Last but not least connect the 15 ft HDMI cable from the projector to the Denon sound system. From there, connect the second HDMI cable from the Denon sound system to your Blu-ray, Apple TV, Xbox or whatever it is that you are using and turn on your devices to make sure it’s all working fine.

IMG_9141

Once you are done with the setup, all that is left to do is clean up and complete your space with a nice rug (to hide all the wires), comfy seating, decor, and a budget friendly Ikea TV stand (to hide your central speaker and organize any devices, games, or DVDs you have).

IMG_20140615_154914

Of course, don’t forget to take a moment to…

IMG_20140615_154901

Now call up some friends or family, pop some popcorn, pull out FIFA 16′ or Inception and revel in the thought that you will never need to spend money at the movies again. Seriously, we have only gone out a couple times in the two years since we put this together and that was for The Hobbit and Interstellar! Let us know what you think about this project and if it is something you would consider doing. Until next post, may an evening star shine down upon you 😉

IMG_9368

Below are two short clips showing the sound, picture and overall setup taken with an iPhone 6s.

Home Theater Demo #1 from sammyandsufi

Home Theater Demo #2 from sammyandsufi

If you liked this post please follow us and share!


DIY: Scarf Hanger/ Wall Art

IMG_8924

If you’re like me and wear scarves daily, you likely have tried everything to keep them organized. All in vain. Whether folded away in a drawer or strung up away in your closet on some fancy loop hanger, the end result is always the same. Utter chaos. The drawer scenario is just a hot mess unless you don’t mind the daily maintenance of folding and refolding all the scarves you’ve dug through to find the one that matches your outfit. The loop hanger is simply impractical if you have more than 5 scarves, especially if they are longer in length. If you can actually fill every loop, it becomes very heavy to pull out and eerily resembles Cousin Itt. Does this sound familiar?

cousin it

Tell me your closet scarf hanger doesn’t look like this.

So I was organizing my closet this past summer when I realized that something had to be done about my scarf disaster. I thought about what I really wanted: a clean and aesthetically-pleasing look, easy accessibility, and fairly effortless organization/maintanence. And economical. I wasn’t about to build a walk-in closet for my scarf collection. After a visit to Michaels, Hobby Lobby, and Ikea for inspiration, I decided that I wanted to hang my scarves out in the open. I ran it by my husband first just to make sure he was okay with the thought of my scarves hanging up visibly on our bedroom wall. I told him that I imagined it as an art piece; like a tapestry… made of scarves. He was totally on board and actually thought it would look pretty cool. The design I had in mind was a linear arrangement, so I settled on a simple steel rail from Ikea to achieve the look. If you want to get fancy there are no shortage of options but I figured, since the scarves cover up the rail, it didn’t really matter what the rail looks like. Plus, the whole point of a DIY is not to throw away more money. I really wanted to make this solution cheaper than your basic scarf hanger/organizer and I can proudly say that it is. Lastly, I didn’t want to be a scarf hoarder so I went through my collection and donated whatever I hadn’t worn in the last year or two. For that reason, I went with two small rails that fit between 10-12 scarves each. If you have a bigger collection, by all means, go with a bigger rail. Without further ado, here’s what you’ll need and how to put it all together.

Total Cost= $5.98 (2 Bygel rails)
Completion Time= 20 minutes


NOTE: There are a number of ways to hang your scarves up on a rail. All you need is a bit of creativity.  I started first by hooking them up with the complimentary Bygel S-hooks (they’re only $0.99 for a 10-pack) but I just didn’t like the way it looked. Personal preference. You might try it and find that you like it way better than looping them around the rail. Do what you think looks good and makes for easy accessibility.

IMG_9097

What you’ll need:
Bygel rail (Ikea)
Bygel S-hooks (optional)
Builder’s level
Pencil
Power Drill
Screws (4 per rail)
Screwdriver
Drywall Anchors (This pack comes with screws so no need to buy them separately)
Creativity

Directions:

  1. Pick out a good location to place your rails. You’ll want somewhere with easy access: free of obstacles and not too high because you will want to be able to reach your scarves without straining yourself. Most importantly you’ll want a space where hanging scarves won’t look odd.
  2. Once you’ve picked your spot, hold up the rail with the Builder’s level, making sure it’s straight, and mark with your pencil where you will drill your holes.
  3. Drill very small holes over each of your markings and then use a screwdriver to secure your drywall anchors in the wall.
  4. Hold up your rail, aligning the holes in the rail to the now anchored holes and screw in the rails. It’s really that easy!
  5. Get in touch with your artsy side and organize your scarves into whatever pattern or design you like.

IMG_89276. Once you have settled on your design, all that’s left to do is to hang up your scarves and enjoy the awesomeness that is hassle-free scarf organization.

IMG_8960

As I mentioned above, I tried the look first with hooks but wasn’t too crazy about it so I took them down and looped my scarves around the rail. Other than that it was smooth sailing. I ended up installing two rails: 1) on the wall and 2) on the back of the door. Since the one on the wall was going to be a central piece of the room, I opted to showcase my floral, pastel, and colorful scarves to accent the light gray and lavender walls we have.  I’d be lying, though, if I told you I didn’t have any hesitations about how this would turn out but I am happy to report that I love the result. Any thoughts? I would love to hear your comments and suggestions about scarf organization. What has worked or not worked for you? Would you put up something like this?

If you liked this post please follow us and share!


Cloth Diapering Newbies: Part II

IMG_8851

If you read our last post (Cloth Diapering Newbies Part I) and feel like you warmed up to the idea of using or switching to cloth diapers but still have some hesitation about the daily ins and outs of cloth diapering, then this post is for you. So you are considering buying a stash of diapers, how many do you need? How often do you have to wash them? And how do you store the smelly demons until you wash them? If these are the questions you’re having, keep reading. We hope to have answers for you!

How many diapers does a baby need a day?

Newborn babies poop and pee constantly so you will need between 8-12 diapers a day since you’ll be changing them about every two hours. As our baby got older he started averaging around 8-10 a day and did not need more than two changes throughout the night. We have diapers specifically set up for bedtime that we place two inserts in and for the most part he gets through the night without leaking (10:30pm-7:30am). Basically if you’re planning to cloth diaper on a full time basis and do laundry every 3rd day, like us, you will need to have around 32 diapers at the minimum. By the time it’s laundry day, our baby has gone through around 24-27 diapers which leaves us with 5-8 diapers while the rest make their way through the wash. This leads us to the next question…

How often do I need to do diaper laundry?

As I mentioned above, we try to wash our diapers in the morning every 3rd day. So if we wash them Monday morning we won’t do laundry again until Thursday. Every now and then, we will do an extra load a week but for the most part we wash them 2-3 times per week. The more diapers you have the less often you have to wash them but even with our humble stash of 32 we are able to make it work. To think of it another way, we usually know it’s time to do laundry when we have 5 folded diapers left on our changing table shelf. By the time the remaining 27 diapers are washed and dried (5hours later), baby has gone through about 3 diapers so we always have a cushion of 2 diapers. If you decide on a smaller stash, say 24-28 diapers, you will probably have to do laundry every other day. It really comes down to what you are comfortable doing and what you can afford.

“I heard about these wonderful things called ‘flushable diaper liners,’ should I buy them?” Can I flush them down the toilet?

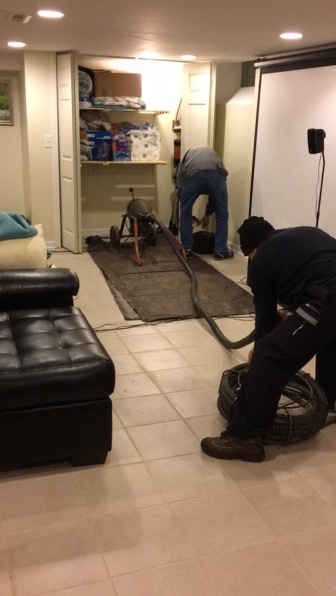
No, no and no! Just no. Cloth diaper liners are technically (and in a perfect world which doesn’t exist) a way to keep your diapers from getting stained and keep you from having to clean them more vigorously by hand.Yes, the labels say FLUSHABLE, but NO, they ARE NOT SAFE FOR A NORMAL SEWAGE LINE! We speak from personal experience and a nice $200 to the plumber who snaked out 4 months of these liners. They were clearly not biodegradable like they said they were. We should have known when they made it through our washer and dryer on accident but we naively trusted the label. Would you flush baby wipes or Clorox wipes down the toilet? If your answer is no then you wouldn’t want to do that for these as the material they are made out of is pretty much the same. In other words, don’t waste your time or money on these. If you’re going to cloth diaper, you have to be okay with occasionally getting your hands dirty.
 

What type of diaper pail should I get? Will it keep the lovely scent of poop away?

There are many diaper pails out there that are made specifically for cloth diapers. We’ve seen people use your everyday trash cans but we personally did not want to take a chance with the smell. After a bit of research we decided to go with the Dekor Plus because we liked its design with 2 flaps, which helps to keep the nursery odor-free. The only downside to the Dekor is that because cloth diapers are bulkier than disposable diapers, it fills a lot more quickly. Which means diaper laundry every 2-3 days. We personally don’t mind and it’s a sacrifice we are willing to make but if doing laundry that often is not in your plans then cloth diapering might not be for you. Other than that we would personally recommend getting the Dekor pail and purchasing the 2-pack Cloth Diaper Pail Liner to go along with it.

These pail liners are machine washable-we just empty the diapers & inserts into the washer and toss the bag in right after. And since there are two, you’ll always have a liner in the pail even when it’s laundry day.

We also recommend getting a wet bag to keep in your diaper bag to contain dirty cloth diapers when you’re out of the house. We have one that came with our set of Adovely diapers but you can purchase one separately for pretty cheap like this Diaper For A Change, Inc on Amazon.

What about the water bill that will come crashing down on me like the hammer of Thor?? 

I work in finance so I know my numbers. I had always heard the retort that cloth diapers don’t save money or the environment because of the use and cost of water. This is simply a myth. After we switched to cloth diapers, I created a schedule in excel keeping track of how many times we washed our diapers in a week. Turned out we were averaging around 2-3 laundry days a week for a total of 12 a month. The damage?  Our water bill has gone up on average between $5-10 a month. This is nothing compared to the cost and waste of baby wipes and the plastic bags to contain them.

So what now?

If, after all this,  you’re still seriously considering cloth diapering but are not sure if your lifestyle can accommodate the washing and drying of cloth diapers then check back soon for Part III which will cover all the specifics of what diaper laundry entails. Our hope is that if you really feel strongly about cloth diapering but find it intimidating, you no longer will.

If you liked this post please follow us and share!


Easy Chocolate-Walnut Biscotti

IMG_8775

We love our tea time and nothing beats tea time except tea time + yummy homemade goodies. These chocolate-walnut biscotti are the perfect accompaniment to tea and coffee: sweet, but not too sweet, and crunchy and nutty and perfect for dunking. They’re also super easy to whip up. We always have fresh walnuts on hand so that’s what I used but you can substitute any nut really. Just be prepared for these addicting treats to become a permanent feature (and highlight) of your cozy morning or evening tea-ventures.

IMG_8758

Easy Chocolate Walnut Biscotti

  • Difficulty: Easy
  • Print

Ingredients
2 cups of all-purpose flour
3/4 cup of sugar
1 1/2 teaspoons baking powder
1/4 teaspoon salt
1 stick of butter (room temperature)
2 large eggs
1 cup of chopped walnuts
1/2 cup of semi-sweet or dark chocolate chips

Directions

  1. Preheat your oven to 350 degrees Fahrenheit and line a baking sheet with parchment paper.
  2. In one bowl, beat the sugar, salt, butter, and eggs (one at a time) until smooth.
  3. Pour in the sifted flour and baking powder and mix well until it forms a dough-like consistency. As the mixing becomes more difficult, I flour my hands and knead until smooth.
  4. Add in the walnuts and chocolate and knead by hand for a few minutes until the nuts and chocolate are evenly spread throughout the dough.
  5. Place your dough on the baking sheet and shape it into a log (about 12 inches long, 2 inches thick) using your hands.
  6. Bake until light golden brown about 30-40 minutes. Let cool for 20 minutes.
  7. On a cutting board, cut your log into 1/2 inch thick slices using a sharp serrated knife. I also cut these slices in half as I like my biscotti more bite size.
  8. Place each slice side-up on the baking sheet and return to the oven to bake for another 15-20 minutes or until a deeper golden brown.
  9. Move your biscotti to a rack and let them cool.
  10. Brew some delicious tea or coffee and enjoy 🙂

IMG_8824

If you liked this post please follow us and share!


Install a kitchenette in less than 4 hours

IMG_8409

Back to some exciting DIY for this week’s blog post.

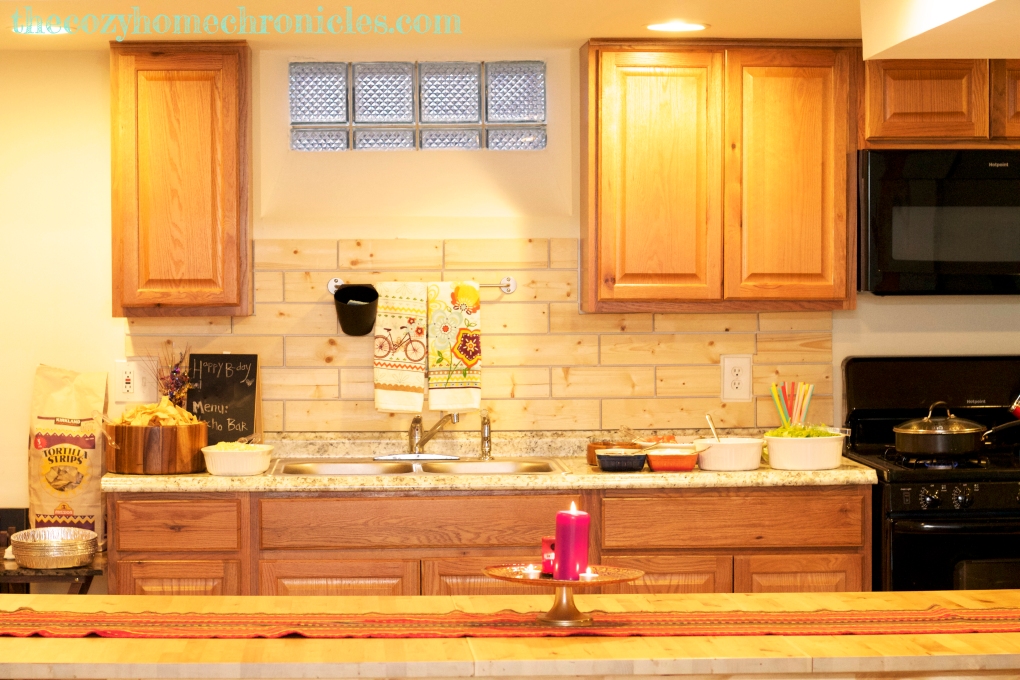
From the minute we decided our house was “the one,” we knew that we would be finishing our basement. Creating a space where we could host family and friends was something super important to us, so it was a no brainer that we would need a small kitchen to warm up food and stock our ice cold Izzes and Dr. Betters for those game nights and birthdays. In just 4 hours on a Memorial Day Weekend, my wife and I put together a little kitchenette for the basement. So if you’re looking for tips or inspiration on how to install a kitchenette or replace a small-sized kitchen, follow along as we go through all the details of how we purchased, prepared, and put it all together in record time.

Total Cost (Cabinets, Countertop, and Sink)= $1,037.94
Prep Time: 3-4 hours
Dry Time: 8-24 hours

Cost Breakdown
Counter-top (8ft) = $95
Counter-top Endcaps = $12.98
Base Cabinet (36in) = $195
Base Sink Cabinet (36in) = $136
Base Cabinet (12in) $99
All-in-one Double Sink = $119
Top Cabinet (36in) = $209
Top Cabinet (30in) = $83.30
Top Cabinet (12in) = $73
Cabinet Screws = $8.26
Painter’s Tape = $3.93
Liquid Nails = $3.47

Tools you will need
Jigsaw (Ryobi)
Power Drill
Tape Measure
Light Hammer
Marking Pencil
Shims
Builder’s Level

Plans and Preparations
Before we get into the installation process there is one super important step to pulling this off successfully: PLANNING. The planning step involves three parts:

  1. Measuring your space
  2. Designing your kitchen
  3. Picking out cabinets and appliances

When it comes to designing the space you have to remember that things can spiral out of control if you don’t measure accurately and purchase standard cabinets that can be installed against the studs in the walls. If you don’t have a stud-finder, invest in one. They last forever and cost only around $20. We used the Ikea kitchen designer tool (it’s free) to input the measurements of the space (ceiling height, walls, door, etc) and figure out how many cabinets we would need. For our design we opted for a simple, straight clean line with a rustic farm table across.

After we settled on the design, we picked out our countertop and wood cabinets (in medium oak) from the Home Depot in-store selection. They had a 10ft and a 8ft long countertop but we opted for the 8ft because we did not want our kitchenette to be bigger than 7ft.  Home Depot has a really nice selection of laminate countertops with a faux marble look and 1) if you’re working on a tight budget or 2) you don’t care because it’s just a basement kitchen, this is the route to go! We did call a contractor for an estimate on granite countertops and it would have cost us a pretty penny so we decided we would save that for when we remodel the main floor kitchen. Plus for the cost of the granite alone, we were able to do a decent sized kitchen.

Countertop pic 1

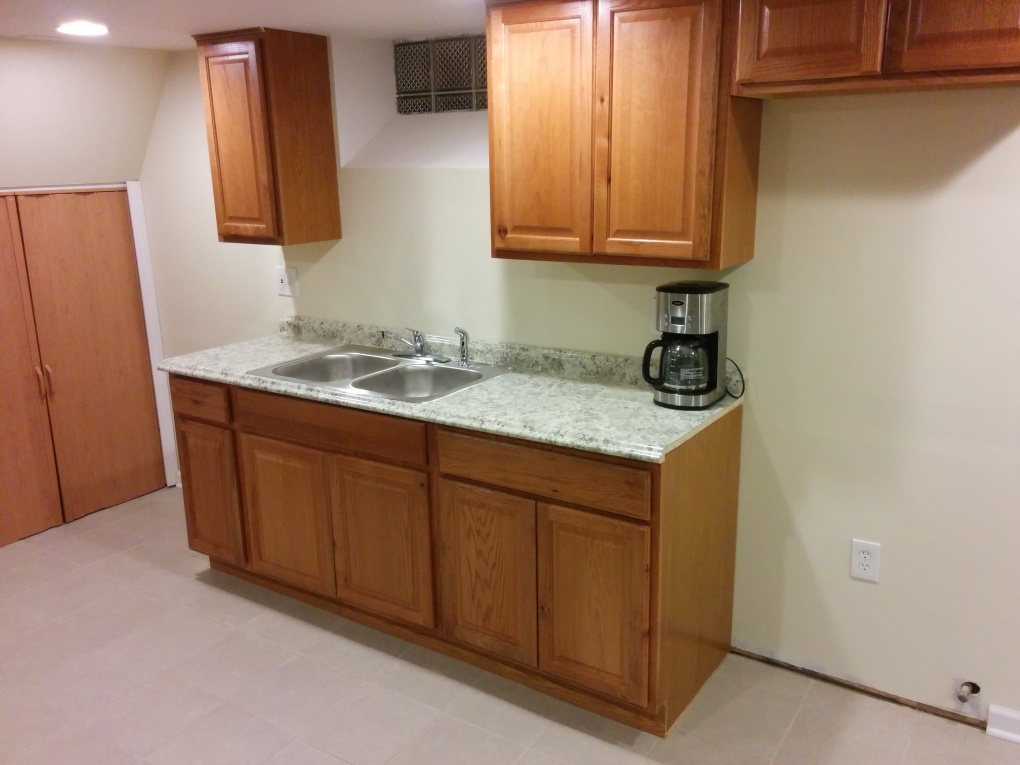
For the base cabinets we purchased (2) 36 inch and (1) 12 inch cabinet which put us at 84 inches (7ft). Below is the order in which we aligned them per our design. Note that one of the 36 inch base cabinets is a sink base cabinet, which means that it is intended for use with a sink installed on top and thus lacks a drawer.

For the top wall cabinets we purchased a 12 inch, a 30 inch and a 36 inch cabinet.

Once you have your measurements, the final design, and cabinets & countertop, you can begin the simple installation process.

Installation

1. This first step is ESSENTIAL. You will  need to make sure all the cabinets are LEVEL as you place and fasten them. I cannot emphasize the importance of this.

2. Find the studs in the wall and fasten the cabinets against the wall using two cabinet wood screws for each cabinet (one on top and one the bottom). After fastening them to the wall, you will have to secure them together using the wood screws (see picture below courtesy of Home Depot)  join cabinets

3. Once all of the cabinets are secured in place, you can begin to 1) cut the counter-top to the desired length and 2) cut out the area for the sink.IMG_20140803_140939Before you cut the counter-top, make sure you have it fastened to a solid surface and completely stable.

  • Measure the counter-top at least twice to make sure you are going to cut it at the right place and mark very clearly on the unfinished side where you will cut it. WARNING: If this step gets ignored you will have to buy another counter-top, there is no way around it.
  • You will also need to measure the finished side and lay painter’s tape over your marks. This is necessary so that the jigsaw does not damage the finished surface when you are making the cuts (see pictures below).
  • To cut out the area for the sink, I drilled a small hole in one corner of the markings so I would be able to use the jigsaw from that starting position. If you don’t do this, it will be really hard to cut through in the middle of the countertop.

IMG_20140803_142512IMG_20140803_142714IMG_20140803_144140

4. Once all your cuts are made, you can go ahead and glue the countertop to the base cabinets using a generous application of Liquid Nails. (Note: make sure you don’t scratch the countertop when flipping it or when placing it on a different surface.)

5. If you’ve chosen to include a sink in your plans as we have, you can install this after the glued countertop has dried (minimum 8 hours). 99% of all-in-one sinks come with directions so follow them closely as each sink may be different. Our sink came with fasteners at the bottom that you twist and adjust easily against the countertop. It was super easy and didn’t take us more than 10 minutes to put in. To get the sink running we hired a professional plumber to connect things at a later time.IMG_20140803_144230IMG_20140803_212644

6. Finish up the space with your choice of appliances and an awesome Ikea table and you are all set to start planning your next dinner party or movie night 🙂

Reflections and Tips

  • Can’t decide on a design? A Sunday stroll through Ikea’s kitchen showroom with some hot sticky Kanelbullar is the perfect way to get inspired.
  • Plan your project ahead of time to coincide with big savings offered by major retailers. As I mentioned earlier, we did our kitchen on Memorial Day Weekend so we got a great deal on our cabinets(15-25 % off the listing price) and appliances. Labor Day and Black Friday are also great times to plan around.
  • When designing your kitchen, choose a layout that takes advantage of pre-existing plumbing (and electrical outlets) so you are not stuck hiring a plumber to do costly rerouting.
  • Installing a kitchen sink is a little tricky and you can either do it before or after you finalize the countertop. I did this step after I had glued the countertop to the base cabinets which meant I had to work in a tight, cramped space. If I had the chance to do this installation again, I would install the sink before mounting it and gluing it to the base cabinets.

If you liked this post please follow us and share!

signature3