Build your Own Garden Fence

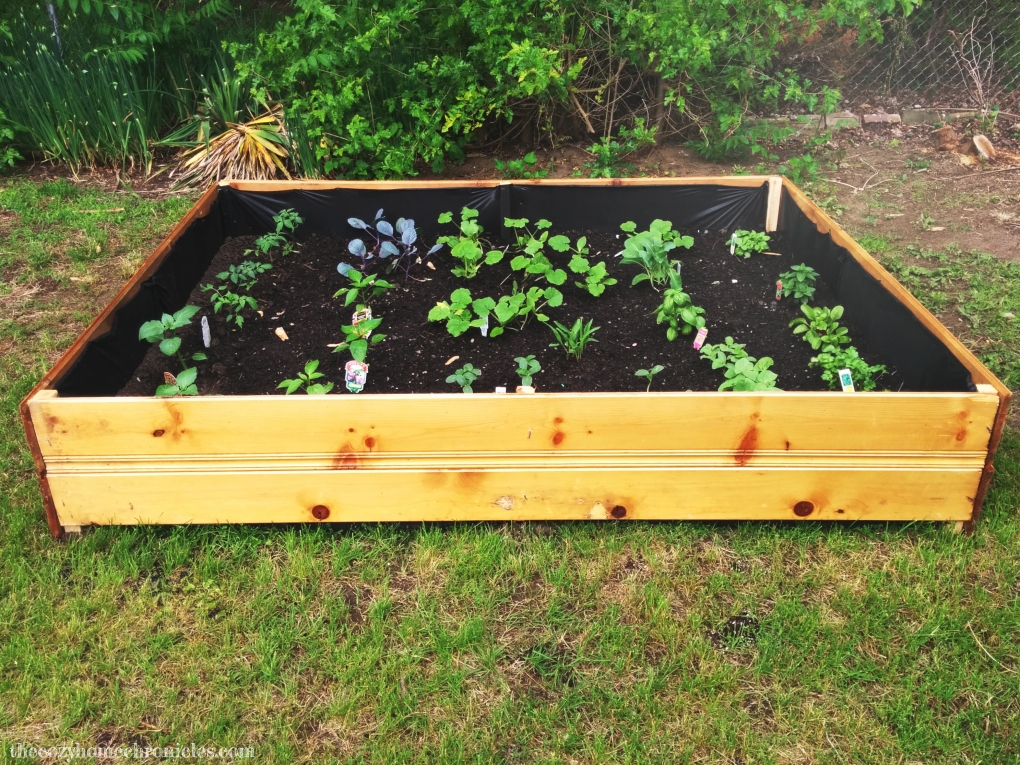
If you read our previous blog post on how to build a raised garden bed on a budget, then you might be wondering how we have kept our harvest safe from unwanted visitors. Initially we went with a cheap fence made of galvanized poultry netting but after many missing tomatoes and half-bitten squash we decided that the next year we would spend a bit more to have a quality fence. We wanted a roomy enclosed space with easy access for us to plant but sturdy and tall enough to keep the demon bunnies out. I soon sketched out a blueprint for my imagined firewall and got to work making it a reality. I will warn you that it is a bit on the pricier side but it’s a sound fence that’s practical and aesthetically pleasing. Shall we get to work?


IMG_20140720_201426

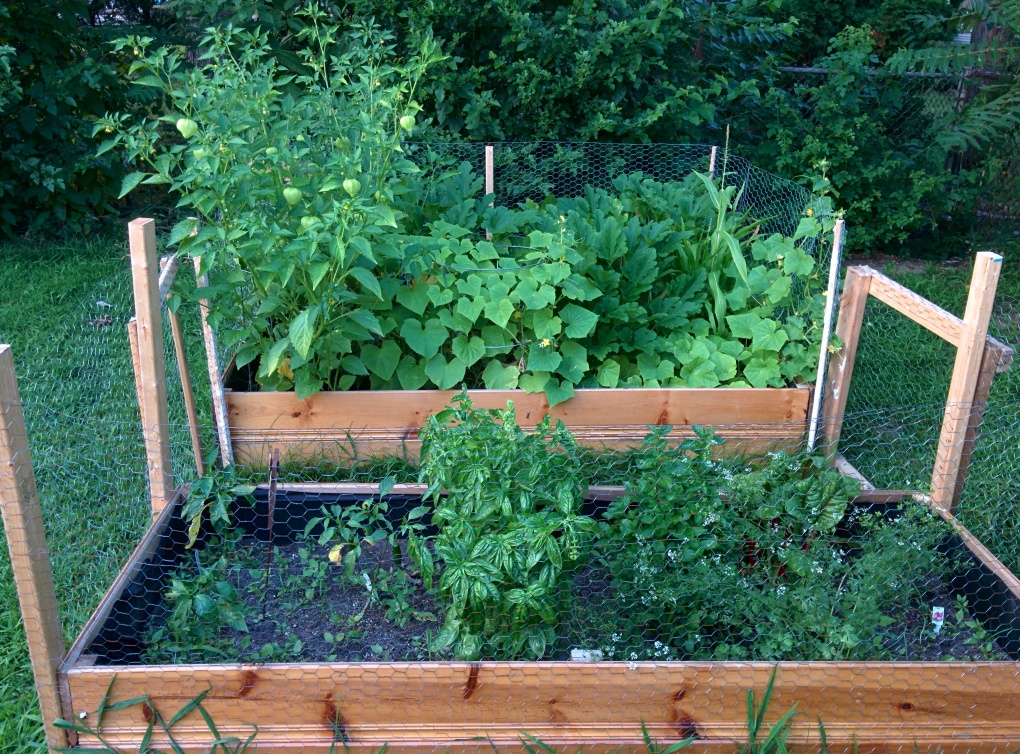
Our sorry excuse of a fence

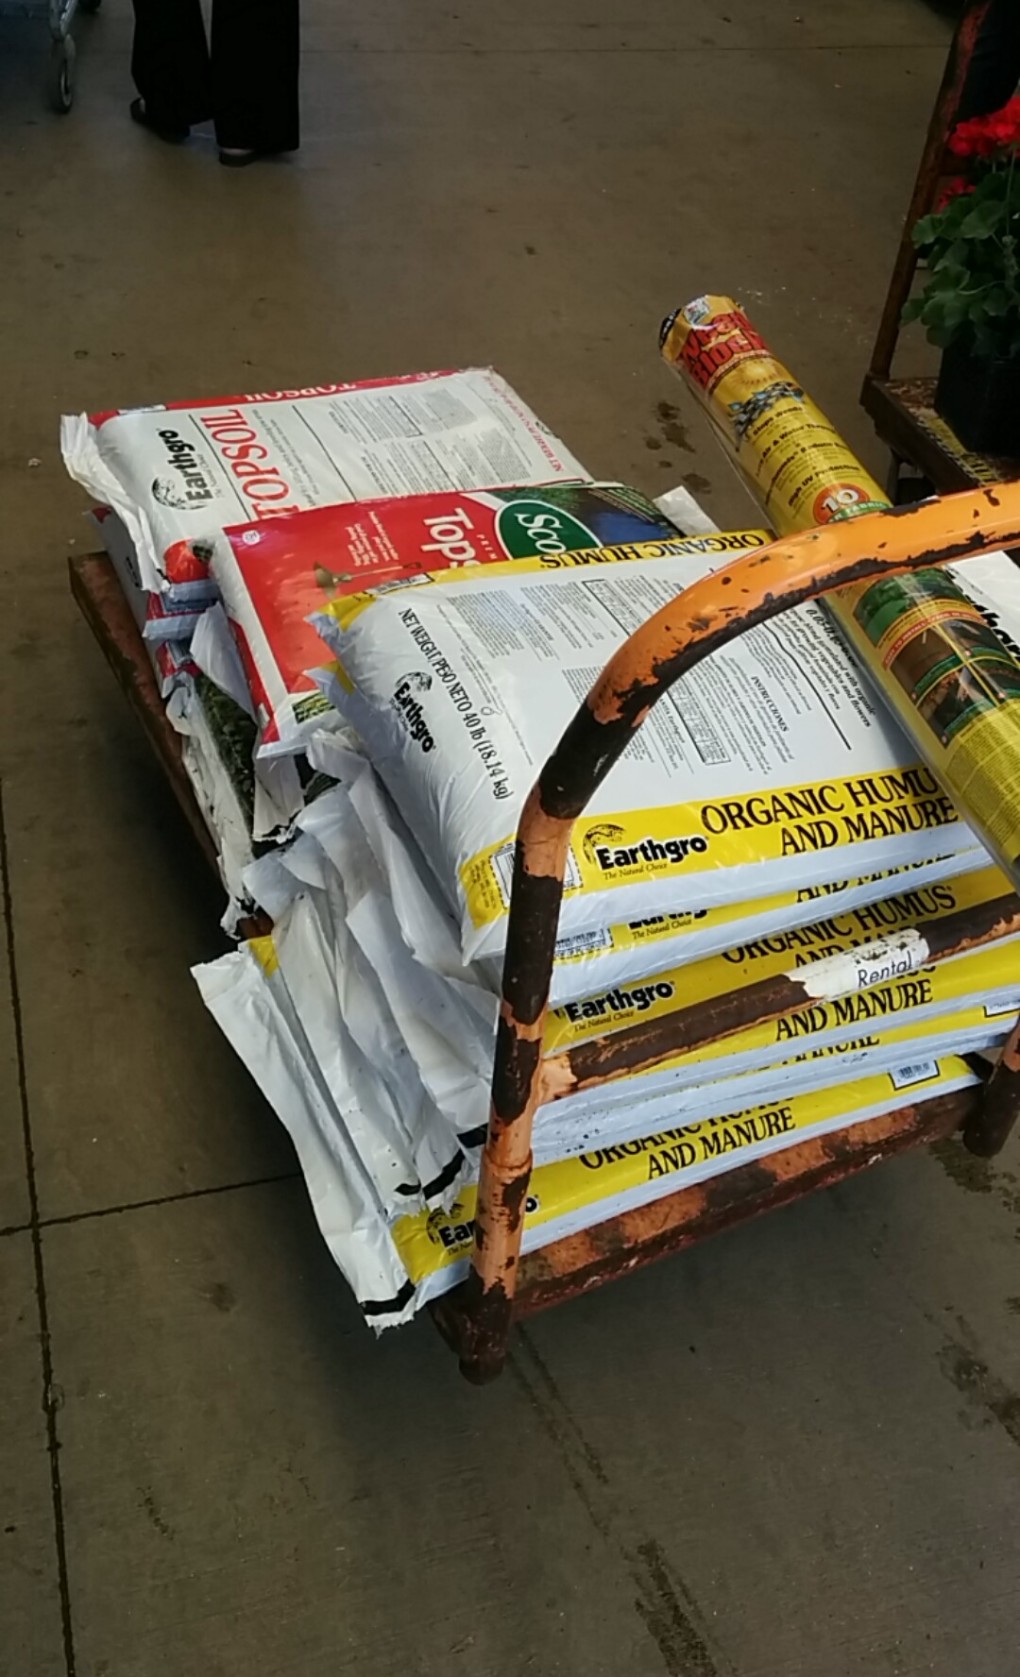
Supplies for an 12ft x 8ft garden fence
2.5 x 2.5 x 8ft  ($27.79)
24 2 x 4 x 8ft ($80.88)
1/2 x 4ft x 25ft Hardware Cloth ($38.98)
1 box Wood Screws ($6.26)
1 Fence Door Hardware ($15.98)

Tools
Staple Gun
Post Hole Digger
Miter Saw or Hand Saw
Power Drill

Directions

  1. Design a template for your fence because this saves you on both time and money. The desired size of the enclosure will dictate how much wood you will need and in turn how much you will spend. I can’t stress enough how important the planning phase is for any successful project.
  2. Cut the 2.5 x 2.5 x 8ft timber to 7 ft. 5ft of the timber is for the fence sections since the hardware cloth is only 4ft tall and the remaining 2ft is going into the holes you will dig to secure the fence.
  3. Using the post digger, dig seven holes (3 on each side and an extra one for the door) about 2 ft deep. I did not use cement to secure the timber posts because I find it unnecessary but feel free to use cement if you like!
  4. Once you have dug your post holes, insert the timber poles leaving 5ft above the ground. Make sure the poles are level by laying a 2×4 or a longer piece of wood across the posts while placing a level on top of it.
  5. The next step is to assemble the sides of the fence by using the 24 pieces of 2x4in x 8ft pieces to make rectangular frames:
    • Cut a total of four 2 x 4 x 8ft to a height of 5 ft (current they are 8 ft). These will be the vertical sides of your frame. The hardware cloth is 4 ft and that is your height unless you want the hardware cloth to be shorter.
    • Cut a total of four 2 x 4 x 8ft to your desired width. I cut mine to 6 ft because I needed the width of the fence horizontally to be 12ft.
    • Now that you have four 4ft and four 6ft pieces lay them out according to the design in Figure 1.  You must follow that design if you want to keep the fence sturdily joined together. This also keeps the ends from bending.
    • Lay the hardware cloth flat on top of your bottom piece of your boards (see Figure 2 ) and fasten using your staple gun.
    • Proceed by laying the top pieces of your board over the hardware cloth/bottom frame and join the boards together using wood screws (see Figure 3).
    • Flip the completed fence frame gently and screw the other side as well (see Figure 4).
  6. Repeat Step 5 until you have enough sections to enclose your garden. I needed to repeat the  step six times. If you are unsure about your calculations try attaching your fence side to the post first and proceed by building then attaching rather than building all the sides and attaching them at the end.
  7. Now you can attach the completed fence sides to your 5ft timbers posts using a drill and wood screws.
  8. Create a basic door using the leftover 2 x 4 x 8ft by cutting them until you have two 2ft and four 5ft pieces. Align the four 5ft pieces on the ground vertically and make sure the space between them is even. Place the two 2ft pieces one closer to the top and one closer to the the bottom, using wood screws to secure them. Last but not least cut a piece of hardware cloth to the size of your door and install it on the backside of the door. I used basic fence door hardware for the hinges and lock. Installation manual is included in the packing and is very straightforward.
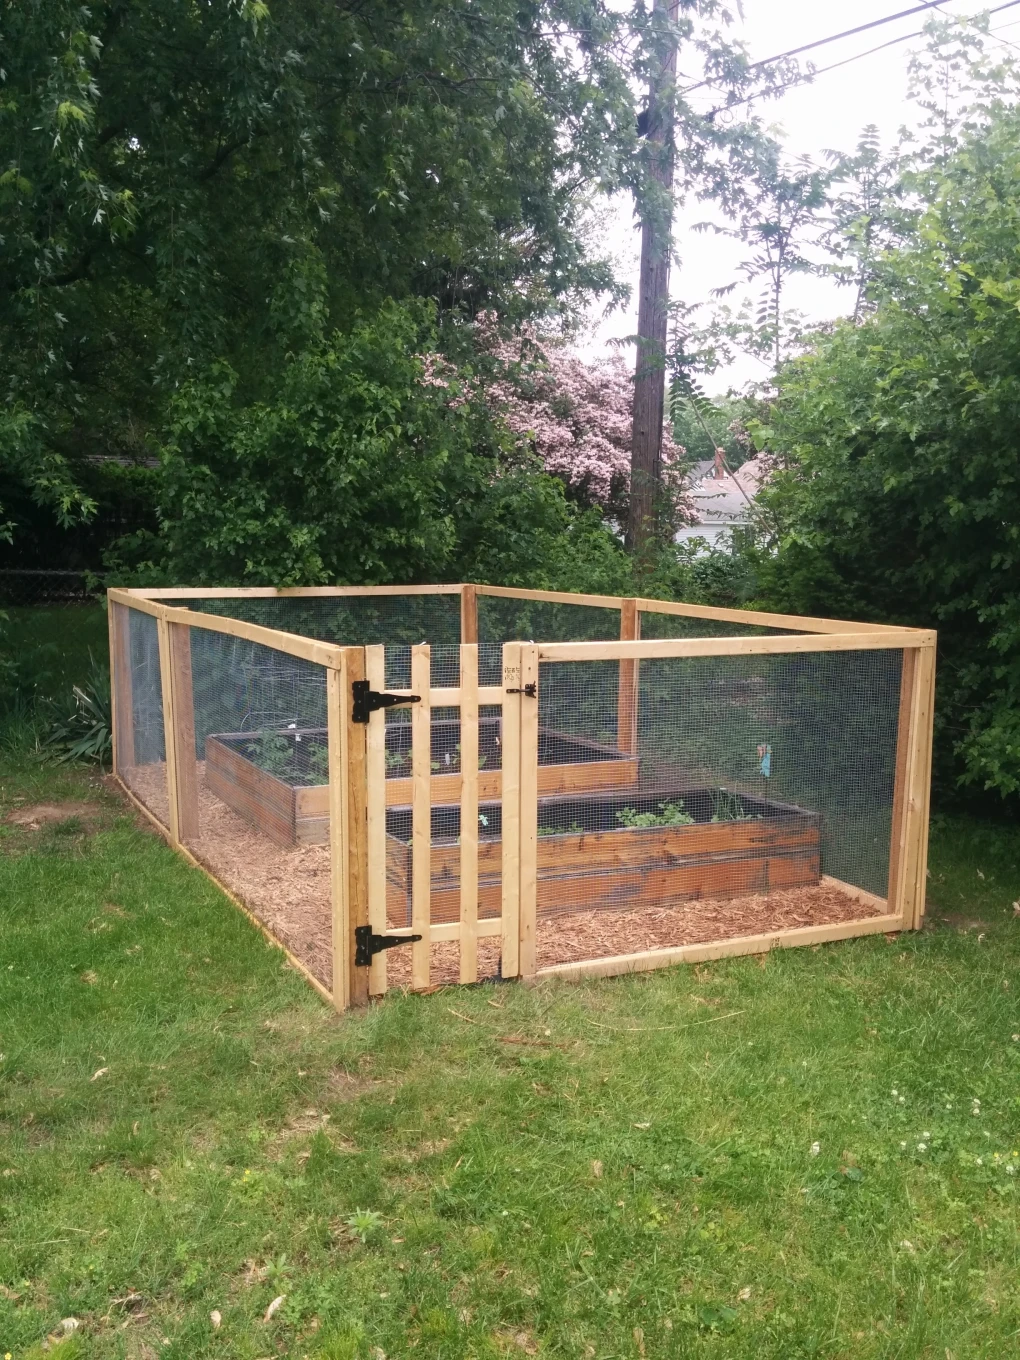
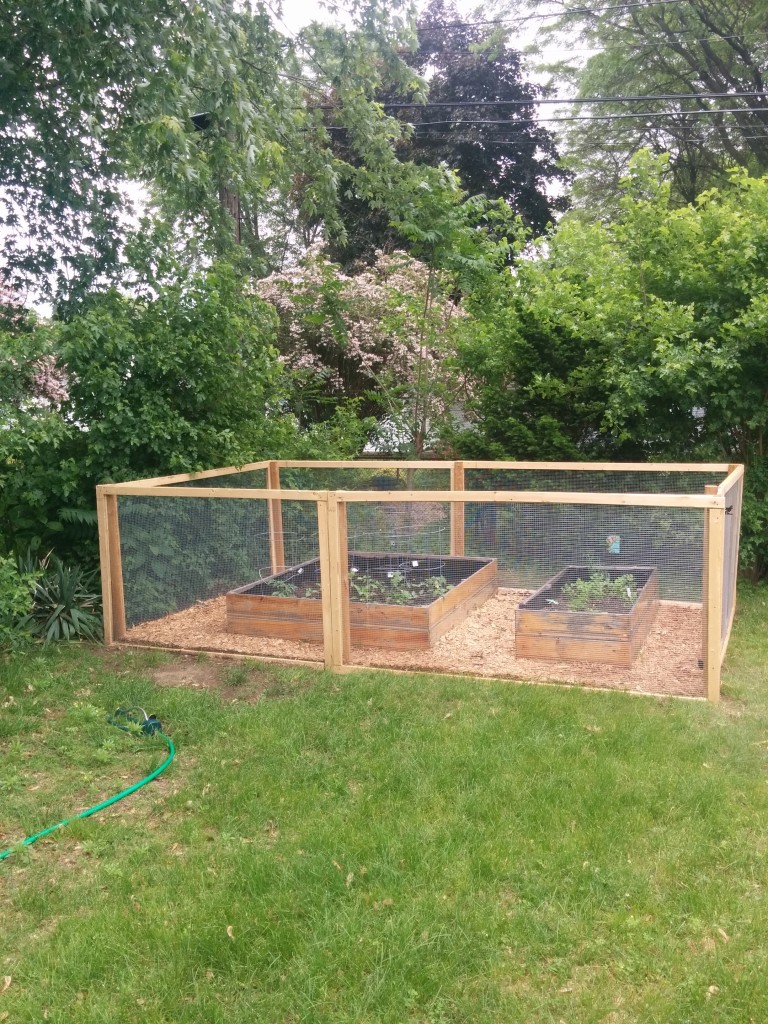
  9. For an overall cleaner look, use mulch, wood chips or small stones between the garden bed(s) and fence.
  10. Enjoy the fruits of your hard labor without bunny or deer bite marks.
    newfence

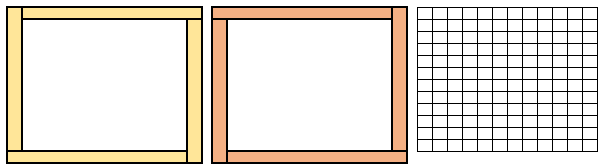
    Figure 1 – Bottom, Top & Hardware Cloth

    fencedesign2

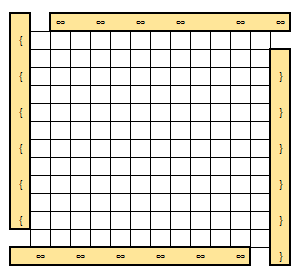
    Figure 2 (Spacing for visualization)

    fencedesign3

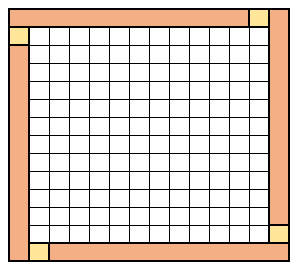
    Figure 3 (w/o spacing)

    fencedesign4

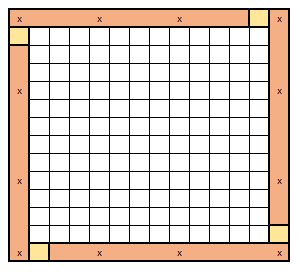
    Figure 4 (w/o spacing)

IMG_20150529_125008IMG_20150529_125016IMG_20150529_125023IMG_20150623_132751

If you liked this post please follow us and share!

Instagram


Build Your Own Raised Garden Bed

Spring is finally in the air here in Michigan and we are getting closer and closer to planting season, one of our favorite times of the year. Gardening for us is just so fun and fulfilling because it connects us to the beauty of nurturing and growth. If this is the year you decided to try your hand at gardening then starting with a raised bed might be the way to go. A custom raised vegetable/fruit/herb garden is not only easy to make but it takes a lot of the hassle out of gardening in terms of weeding and messes. It also makes for a beautiful backyard feature and less back-bending and back-breaking work.

garden bed copy copy

You can go about this project a couple different ways but the instructions I have provided in this post are for store-bought wood from your local Home Depot or Lowe’s. For our garden beds, we upcyled wood panels that we had stored in our garage from our early basement renovation and we personally recommend this route if you have unused wood just lying around. There is something extra rewarding about repurposing items and reducing waste and what better time to do that than during the environmentally conscience activity of gardening. Of course you can always buy a raised garden bed but where’s the fun in that? Not to mention, a store-bought garden bed can run anywhere from $100-$250 depending on the size and material. If you buy the wood yourself, you can have a similar garden bed for half the price and if you go the upcycling route it will cost you nearly nothing.

Costco Garden Bed

Costco – $107.50 / one

Home Depot Garden Bed

Home Depot – $99.19 / one

Lowes Garden Bed

Lowe’s – $118.00 / one


Now that we have you convinced (hopefully) to build your own garden bed, here’s what you’ll need:

Supplies for an 8ft x 8ft garden bed
2in x 6in x 8ft ($60)
2in x 2in x 8ft ($7.50)
Weed Blocker ($9.97)
1 box Wood Screws ($6.58)
Patience ($0.00)
Green Thumb (Priceless)

Note: I did not include the amount and price of soil in the supply list because that will really depend on the size of your bed. If you are unsure, this soil calculator is super helpful!

Tools
Staple Gun
Post Hole Digger
Miter Saw or Hand Saw
Power Drill

Directions

  1. Design the layout of your raised garden bed based on the shape and dimensions you want. Our wood panels were 6 ft long so our garden bed ended up being 6ft x 6ft.
  2. If you chose a rectangular design and want to make cuts to the 2x6x8’s (or any other wood you are using), now would be the time to do so using a miter or hand saw. If you want a square 8ft x 8ft layout then just leave them as is. These pieces will be the side panels of your garden bed.
  3. Cut your 2x2x8s so that you end up with a total of six 2ft pieces (you’ll have some wood leftover). These will be the legs of your garden bed. You may notice that the garden legs are longer than the side panels and that is intended. The extra foot of leg is for planting the garden bed firmly in the ground.
  4. Next, you will attach the side panels of your garden bed to the legs.The first thing you want to do is lay out two 2x6x8 pieces horizontally and parallel to each other so that there are no gaps between them. At equal intervals, starting precisely from the corner, attach the garden bed legs (2x2x2) to the sides using your drill. You will need 6 screws to do this: 1 in each of the two panels for each of the three legs.
  5. Repeat step 4 using two more 2x6x8s and the remaining 3 legs.
  6. Now you can complete the garden bed by connecting the remaining panels perpendicular to the side panels with the legs to form your square or rectangle. Make sure that the legs are on the inside of the garden bed. Once you have put together all the boards, your garden bed should look like the final image in the 3D model below.
  7. Use the post hole digger and dig 6 holes for your legs, making sure you measure the distances accurately between the legs so you won’t have to struggle putting them into the ground.
  8. Now you can go ahead and place the garden bed legs into their corresponding holes.
  9. This is an optional step but one we found helped drastically reduce the weeds. Lay the weed blocker down at the bottom of the garden bed and use a staple gun to fasten it to the sides of the bed. Do the same thing across all sides of the garden bed making sure to cover the entire surface area.
  10. Fill your garden bed with the soil mixture of your choice and you are all set to plant whatever your heart desires 🙂

And for the visual learner…

garden bed 1
garden bed 2
garden bed 3
garden bed 4
garden bed 5
garden bed 6

Snapchat-20140523061353IMG_20140523_184812IMG_20140523_190343Snapchat-20140523012215garden bed copy copy

Now sit back and enjoy the harvest to come.

If you liked this post please follow us and share!

Instagram


Inspirational Wallpaper: May

Firstly, Happy Mother’s Day to all the beautiful and strong women out there that we call mom. Having almost survived our first year of parenthood, we are truly humbled by all the sacrifices you make every single day. I know we are a bit late for our May wallpaper post but hey, better late than never! We were in Vancouver and Seattle when April passed us by so we forgot all about our April post. Oops. To make up for it, the wallpaper I’m sharing for free download is a shot I took in Vancouver’s Stanley Park. The lighting and colors were just too perfect so it didn’t need a quote. Here’s to bright and cheery May days 🙂

Sunlit Japanese Maple

Sunlit Stanley Park


Don’t Fear the Tile

IMG_20140427_130054
I know we have been MIA but for good reason. We recently started remodeling our kitchen and we are doing pretty much everything ourselves from demolition to tiling to cabinet installation (which means some fun new posts coming soon). This means writing has been on hold for the most part as we juggle chasing after our kinetic 10-month old in between piles of schoolwork and construction. This is a post we have been wanting to do for a while but we just weren’t sure how we felt about encouraging you to tile on your own. Maybe our first tiling success was a fluke, we thought. Considering how many people furrowed their brows over the thought of us tiling, you can’t blame us for being cautious. But having tiled our entire basement in 2014 and now our kitchen in 2016, we are confident enough to encourage you to skip the contractor and try tiling for yourself. So if you’re getting ready to start a major renovation and are thinking about picking up your phone to dial a contractor, stop for a moment and listen to what we have to say. It’s normal to be skeptical about your handy skills and worry that an attempted DIY would end badly for you. You know? That worst case scenario that pops in your head telling you your work will be so bad you’ll have to pay twice as much because you will need to hire someone to fix it up. While that might be true for some things, it is not the case for tiling. Yeah, yeah, we know what you’re thinking. We had plenty of people tell us we were crazy for wanting to tile the basement ourselves. “It will be so uneven,” they said. Not so. We are nowhere near professionals and prior to renovating our basement we had not installed a single tile in our lives. Not only were we able to tile a 1,000 square feet on our own but we did a dang fine job too. With the both of us (plus my father-in-law and brother-in-law helping on occasion) putting in a couple hours of labor after work hours, we were able to complete the project in 5 days. With our kitchen remodel, I was able to tile and grout a 10×11 kitchen in just 2 days working after work hours. Still not convinced? Keep reading to see just how easy it is. And if budget is important, get ready for some major savings!

Supplies
Tiles
Mortar
Grout
Tile Spacers

Tools
Power Drill
Mixing Paddle
Big Trowel
Small Trowel
Rubber Grout Float
Level
Cleaning Sponges
Grout Sealer
Empty Buckets
Clean towels or rags

Below is a more detailed explanation and cost-breakdown of the supplies we picked out:

Because we were tiling our basement, we wanted tiles that were both durable and inexpensive. After a bit of research, we settled on TrafficMaster from Home Depot for $0.57 a square foot.  For the 1,000 square feet area we tiled, we ended up buying 68 cases of tile, which put us at $582. Always buy an extra case of tiles to have as backup in case some break or you need to replace some in the future.

tiles

For the mortar, we settled on VersaBond Gray 50 lb. Fortified Thin-Set Mortar which cost us $14.47 a bag. Since each bag covers 100 square feet, we purchased 11 bags (to be on the safe side) for a total cost of $160. Below are the pictures from Home Depot’s website for this product.

The trickiest part about selecting grout (that stuff that goes between the tiles) is making sure that the color matches with the tile. After some back and forth, I settled on the Polyblend #380 Haystack 25 lb. Sanded Grout from Home Depot. Each bag ($14.49) covers around 680 square feet so I bought 2 of them for a total of $29.

Last but not least, I went with the 3/16 inch Job-Tough Tombstone Style Tile Spaces (500- Pack) from Home Depot for the cute little tile spacers. They go for $6 a pack and can be enough unless you plan on finishing the tiles in 1 day, then we recommend you buy 2 packs for a total of $12.

Labor: By putting in the elbow grease yourself, you can save anywhere from $2-3 a square foot. Just to give you an idea-for a 1,000 square foot space that amounts to $2000-$3000 in savings. For a smaller space like a kitchen, the savings can be anywhere from $200-$300. Hey, every penny counts when you’re dropping 10K on a kitchen right?

Note: If you need to cut any tiles you will need a small manual or electric tile cutter (ex. QEP Rip Ceramic Tile Cutter @ $30).

Directions

Read More