

February is coming to an end and we are a tad bit in disbelief. I know, this seems like a reoccurring theme over here but during this busy season of our life it’s difficult to fully grasp how quickly the time is flying. We did take some time off for a family vacation (there’s a post in the works) in January and it was just what we needed to reset for this new year but when we came back we dove head first into our semesters and it took some time to get back on our feet. We are now back in the groove of things and excited to share what we have been working on. Last month I was lucky to be a part of Salvage Dior’s January Creative Team on Instagram where each week I, along with my four teammates, were responsible for creating something new for our homes that fit within the following themes: 1) Upcycle, 2) On the Wall, 3) Child’s Play, 4) Coffee Table Decor. In this post I’ll be sharing the project I completed for the first week, an upcycled tea tin turned planter.

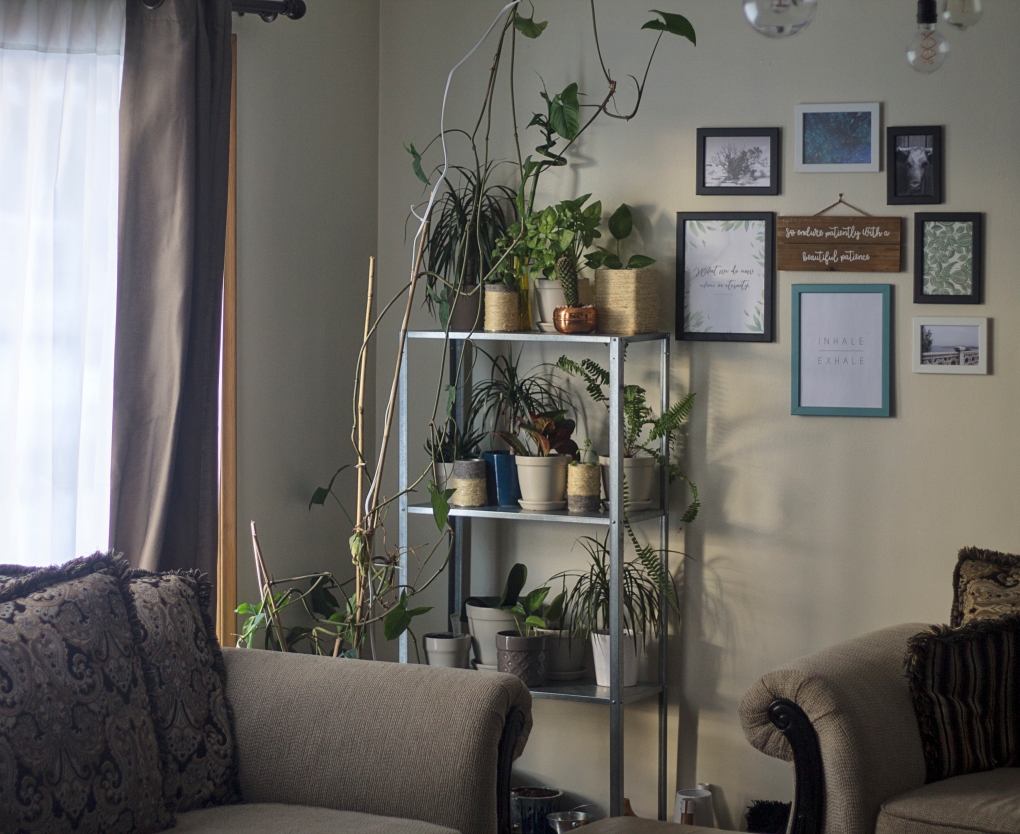
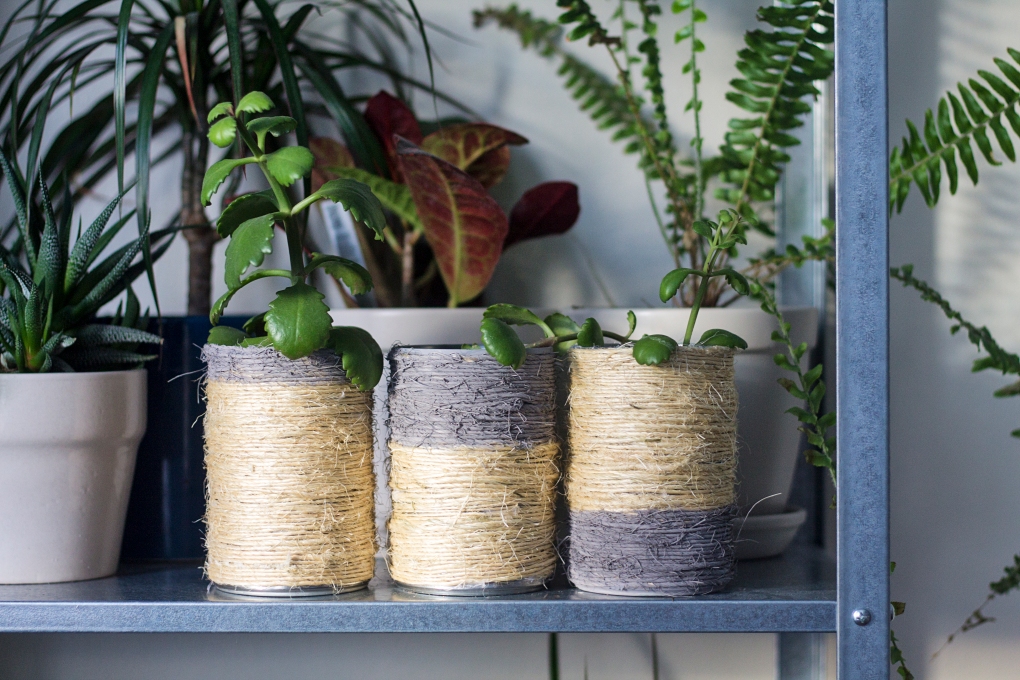
Loose leaf tea is something we drink quite a bit of in our home and I’m always left wondering what to do with the tins once they’re through. In the past I’ve used them as storage for spices and knick knacks but this time I wanted something a bit more creative. At the time we were also revamping our plant corner so I thought it would be nice to make some new planters for the Pothos and Sedum I was growing hydroponically. I was inspired by the recent trend in natural fiber textiles and wanted to create that woven look to contrast with the industrial shelving we chose for the plant’s display. If I wanted to buy what I was looking for, I could have easily spent anywhere from $6-25 a pot depending on the size. Instead, I was able to make this tea tin planter and some tin can planters for $0 because I had everything already on hand. The only thing that you would probably need to buy if you’re not DIY nerds like us is the bundling twine but that itself is very inexpensive ($3.98 for 525 feet). Alright, let’s make a planter!


If you are an avid DIYer, you most likely have a glue gun in your arsenal of crafting tools.


DIY Upcycled Tea Tin Planter
Materials
Tea tins or tin cans, washed and dried
Bundling twine
Hot glue-sticks
Milk Paint (optional)
Tools
Glue Gun
Scissors
Drill (or a hammer and nail)
Directions
- Heat your glue gun and in the meantime use your drill to place drainage holes in the bottom of your tin. You can also use a hammer and a nail to do this or you can skip this step and just make sure to include a layer of small rocks beneath your soil for water drainage.
- Glue the end of the bundling twine to the side of your tin at the very bottom and begin wrapping the twine around, making sure to glue the first 3 coils to the tin and to each other. As you wrap the twine, be sure to push the coils down tightly to close any gaps and give your planter a neat, elegant look.
- Continue wrapping the twine around, stopping midway to glue the coils down. Wind the twine around the tin until you reach the top and then cut the twine to length.
- Uncoil the twine a couple turns, then rewind it tightly against the tin using hot glue to secure the top two coils to the tin and to the adjoining coils.
- Take your scissors and trim off any noticeable twine hairs sticking out (see the time-lapse video below). At this point you can paint the planter and let it dry or go straight to planting and styling it!
If you liked this post and found it inspiring, we would love if you shared it. For more related content, you can find us on Instagram where we share more of our day-to-day and Pinterest where we share our ideas and inspiration. If you have any thoughts or suggestions about this DIY project, feel free to leave a comment below. And as always…


11 thoughts on “DIY Upcycled Tea Tin Planter”