Low Waste Eid Volume 3

Hello friends! I know I haven’t been very active on this blog and there is a good reason for that. Between my daughter’s food allergy treatment program which has us flying to California every 3 months and me still writing my dissertation, it’s hard to find time to write here. One thing that I do make time for is trying to live more sustainably which I share on my instagram page. That journey has led me down many paths and projects and I’m excited to be sharing this one with you. I started Low Waste Eid three years ago as a way to showcase and encourage a slower, more conscientious approach to celebrating Eid; an approach that is part of the ethos of our faith. Each year I am awed by the creativity and thoughtfulness of the contributors and this year is no exception.  As you will come to see, it is perfectly possible to decorate and gift in a socially responsible way. All you need is a bit of imagination and resourcefulness. I am looking forward to writing more consistently about my low waste journey when life gets a little less chaotic but in the meantime, you can download the ebook guide full of low waste gift ideas and decor below.

If you enjoyed this guide, please share it with your family and friends and please show these wonderful contributors your support by following them on instagram and engaging with their content.


Amanie
Anaam
Ayesha
Farhana
Hadeel
Hana
Malika
Momina
Nada
Nida
Sadia


DIY Ramadan Salt Dough Ornaments

The month of Ramadan is just around the corner and this year is a busy time for us as we are expecting baby #3 in July. As you may already know, decorating the home for Ramadan is something we do every year and this year is no exception. We are, however, trying to be more conscious of our waste so I’m really focusing on using what we have and making what we don’t. That’s why I’m super excited to share this DIY Ramadan craft project featuring With a Spin’s cookie cutters. This project makes use of everyday ingredients in your pantry, can be customized to your style, and the finished product can be used year after year. Now that’s what I call a win-win-win. While, I love neutral minimalist tones, the kids wanted vibrant colors so that’s what we went with. The decorating possibilities are truly endless. Let’s make some salt dough ornaments!

Ingredients
2 cups all-purpose flour
1 cup salt
1 cup warm water

Tools
Lantern cookie cutter set
Islamic shape cookie cutter set
Rolling pin
Baking sheet

Directions

  1. Mix warm water into flour and salt mixture to form a dough. Knead for 10 minutes until smooth.
  2. Roll out dough about 1/4-1/2 inch thick and cut out desired shapes. Use a toothpick or skewer to punch a hole near the top of the shape for the string.
  3. Place shapes on a baking sheet and bake for 5 hours at 200 F.
  4. Let cool overnight and paint with acrylic or craft paint.
  5. Thread with string to make individual ornaments for hanging or string several together to make a festive garland.

That’s it! This is such a simple and fun craft to make with the kids and a wonderful way to get them involved in the Ramadan spirit. If you liked this craft and found it inspiring, we would love if you shared it. If you make this DIY, be sure to share a picture of your creation and tag us on Instagram @thecozyhomechronicles.

For more related content, you can find us on Instagram where we share more of our day-to-day and Pinterest where we share our ideas and inspiration. If you have any thoughts or suggestions about this DIY project, feel free to leave a comment below. And as always…


Our DIY Ramadan: Ramadan Banner & Tablescape Inspiration

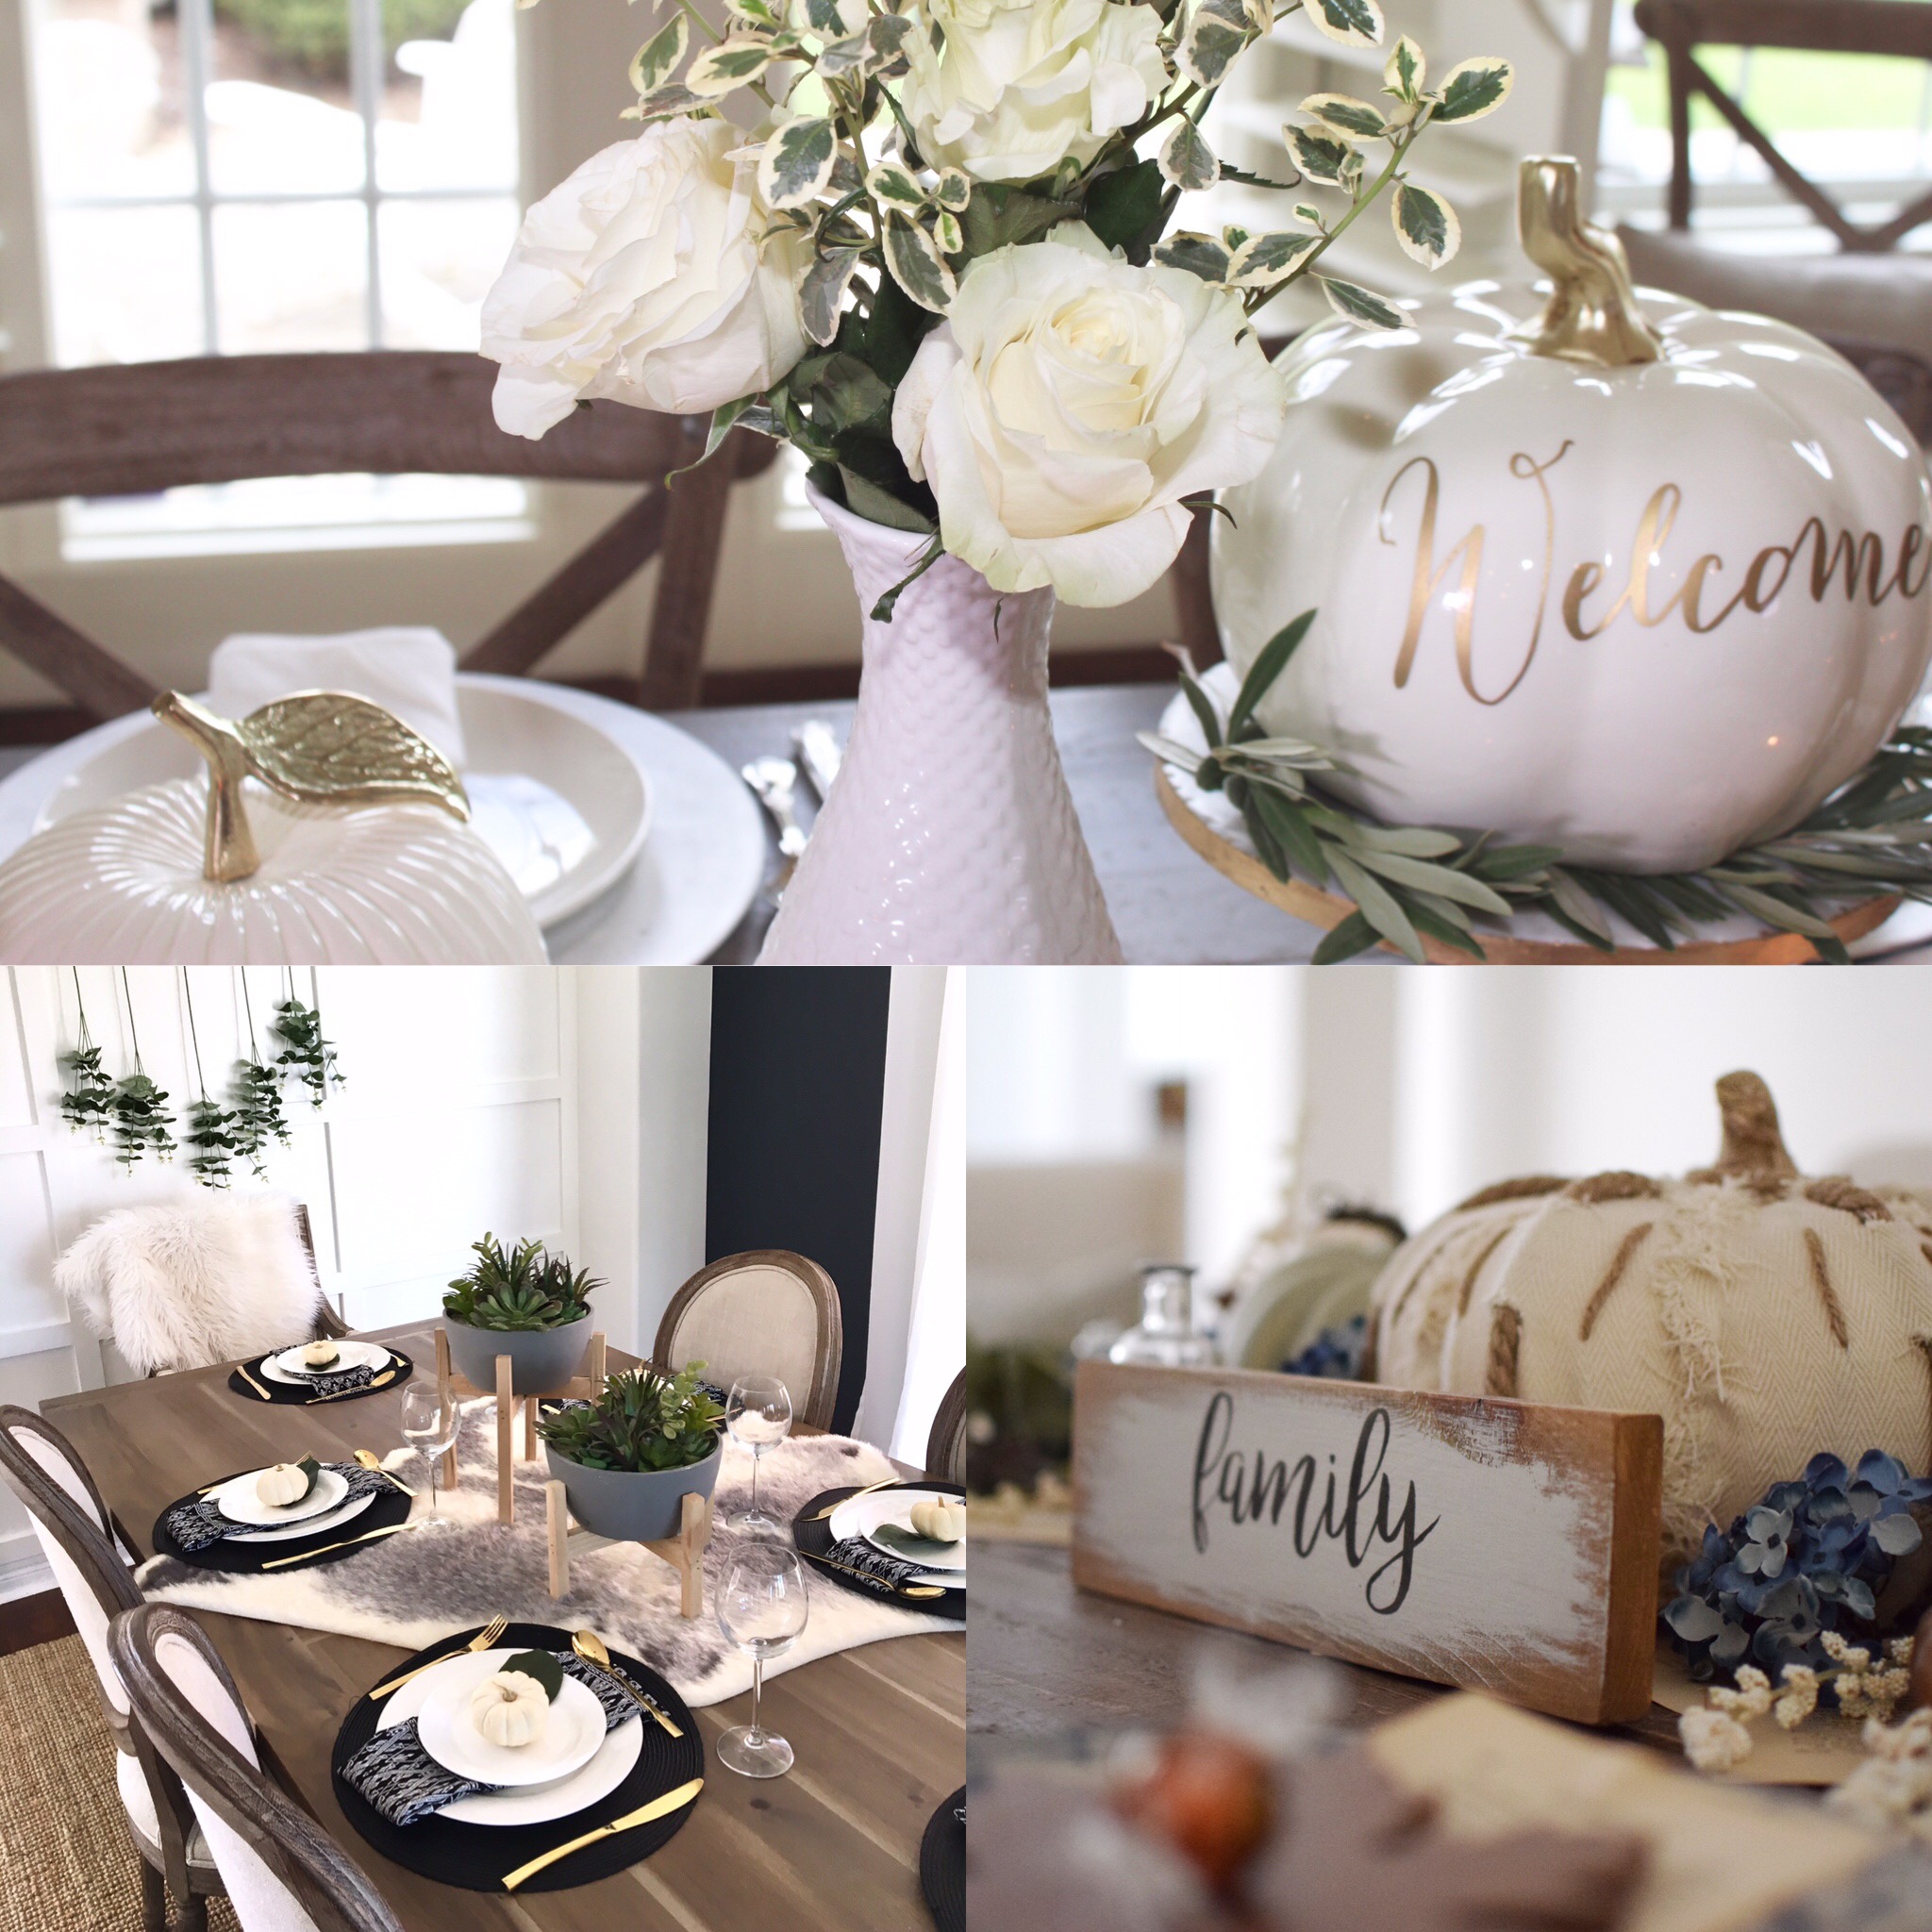
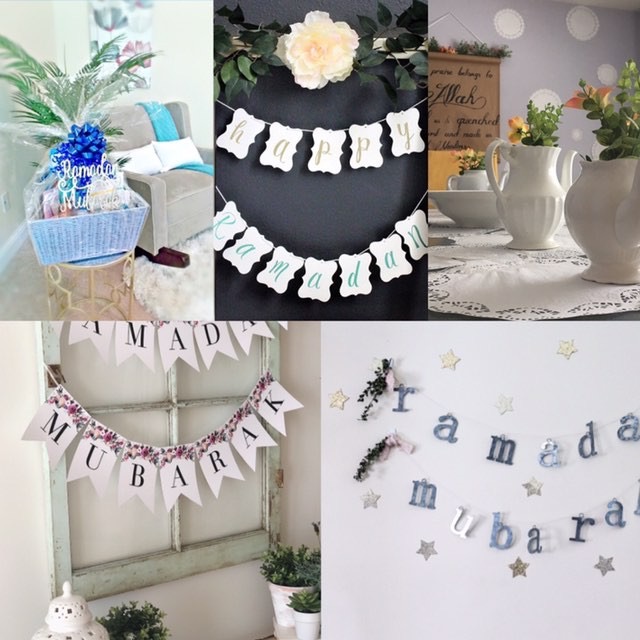
Hello lovely readers! If you are coming here from Mint Candy Designs, hello and welcome to our blog. It’s always wonderful to have new faces around here 🙂 With Ramadan just around the corner, we are excited to share with you some simple ways to decorate your home and make the spirit of Ramadan manifest in your heart and home. Last year, we shared different ways to add festive and colorful touches to the dining table, where you gather to break bread after a long day of fasting. This year, we teamed up with some talented home bloggers to bring you creative DIYs that you can do to welcome this beautiful month into your home.

“There’s hidden sweetness in the stomach’s emptiness.”-Rumi

IMG_3035
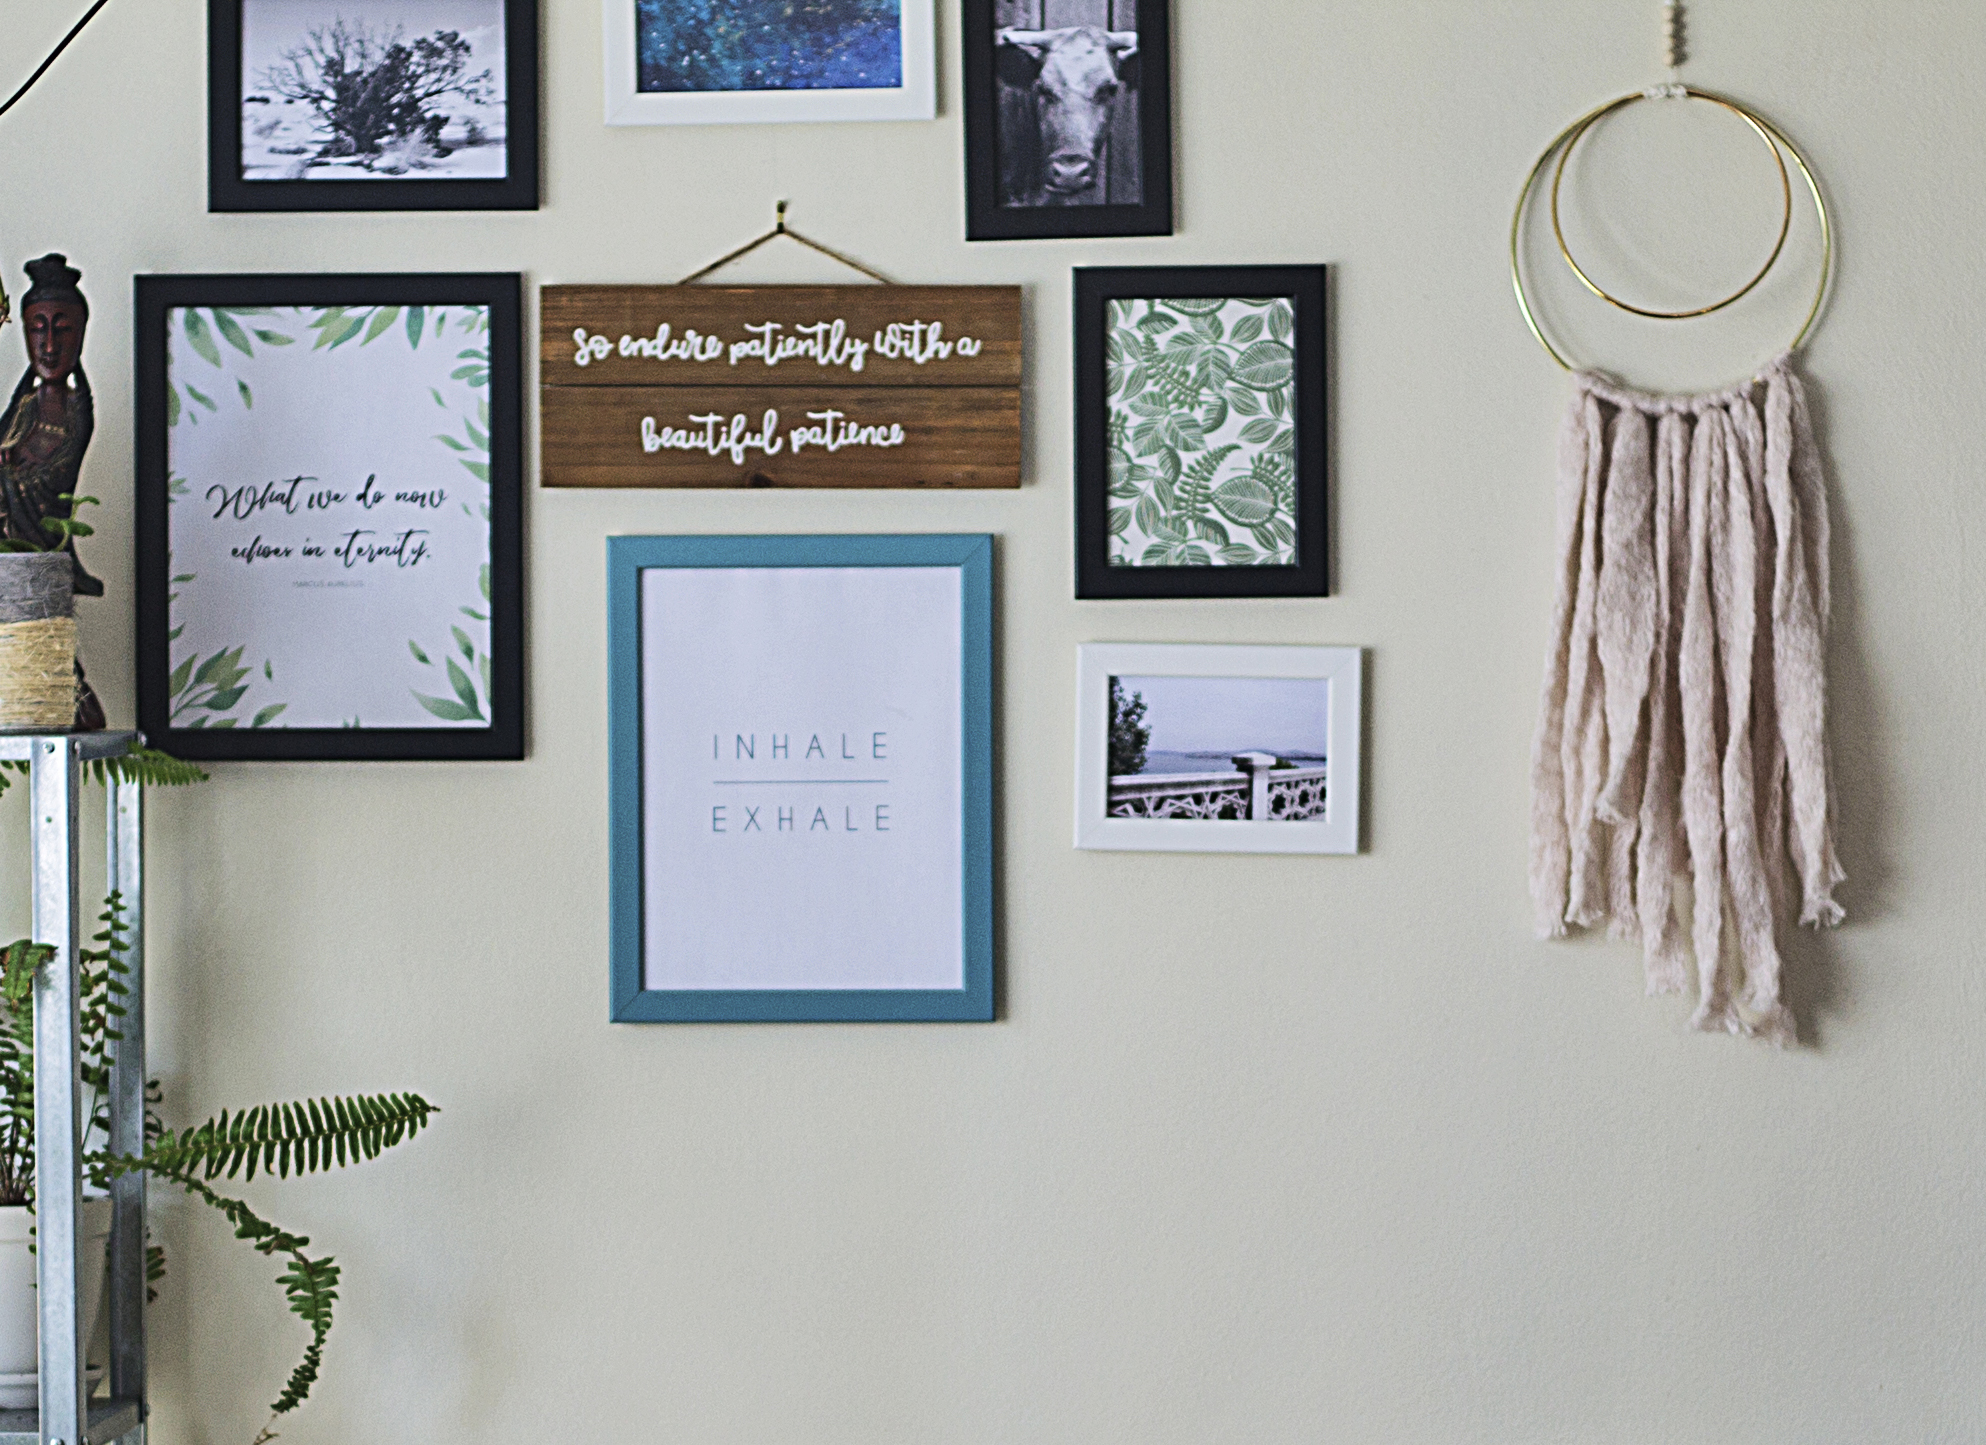
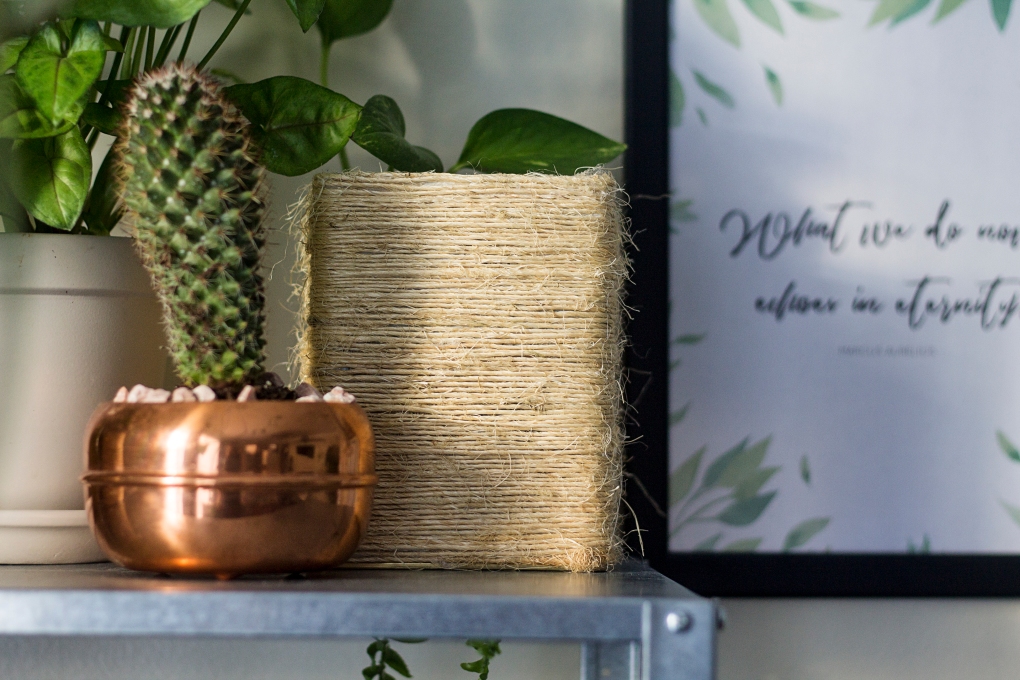
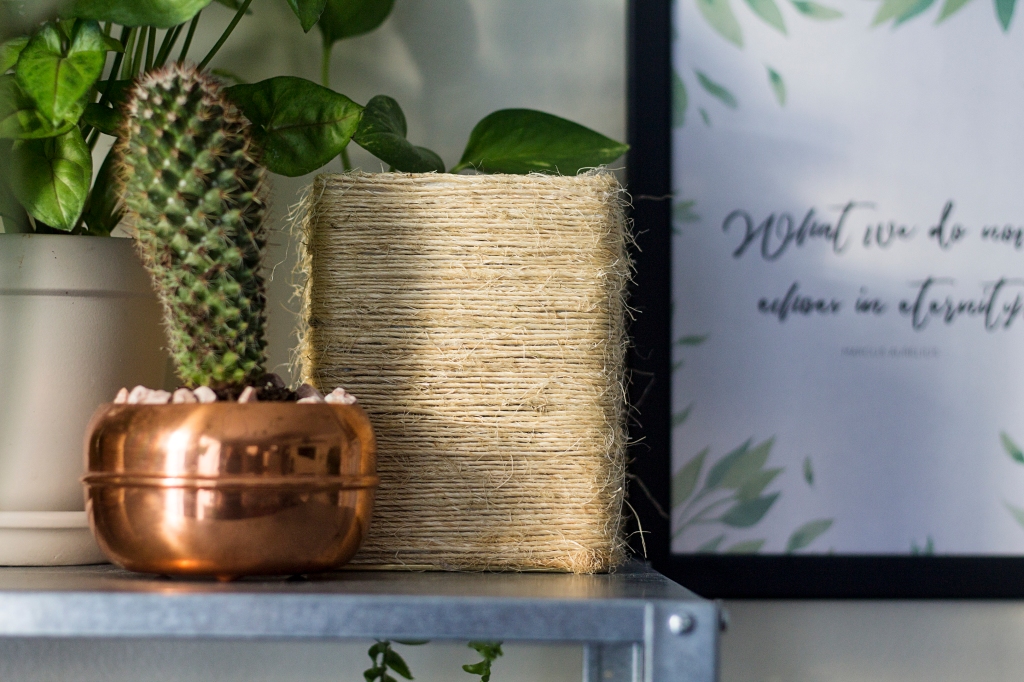
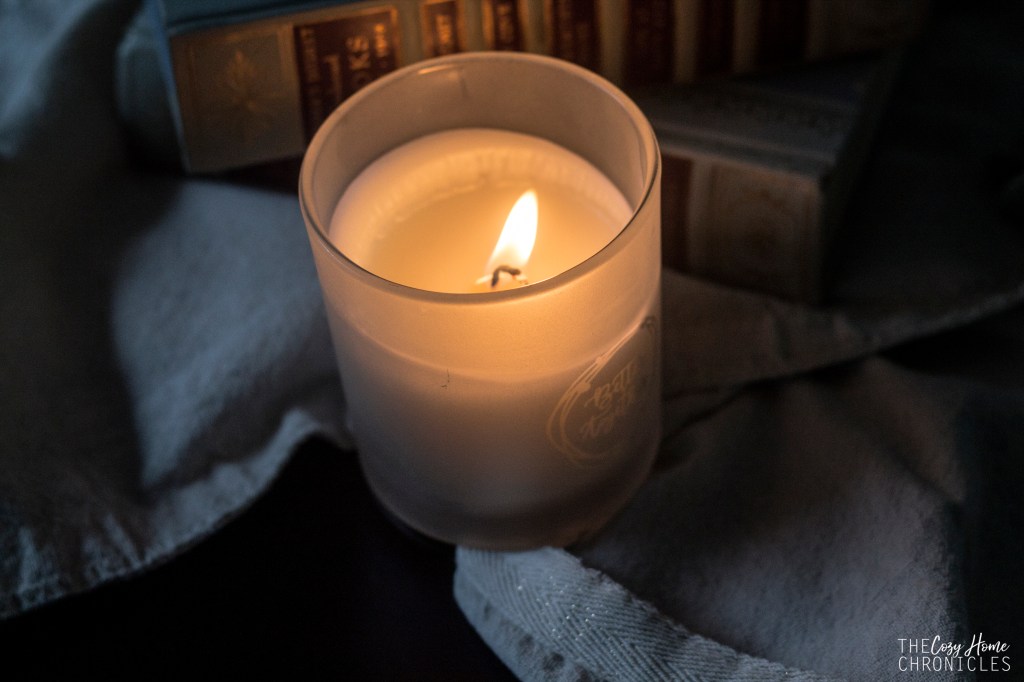
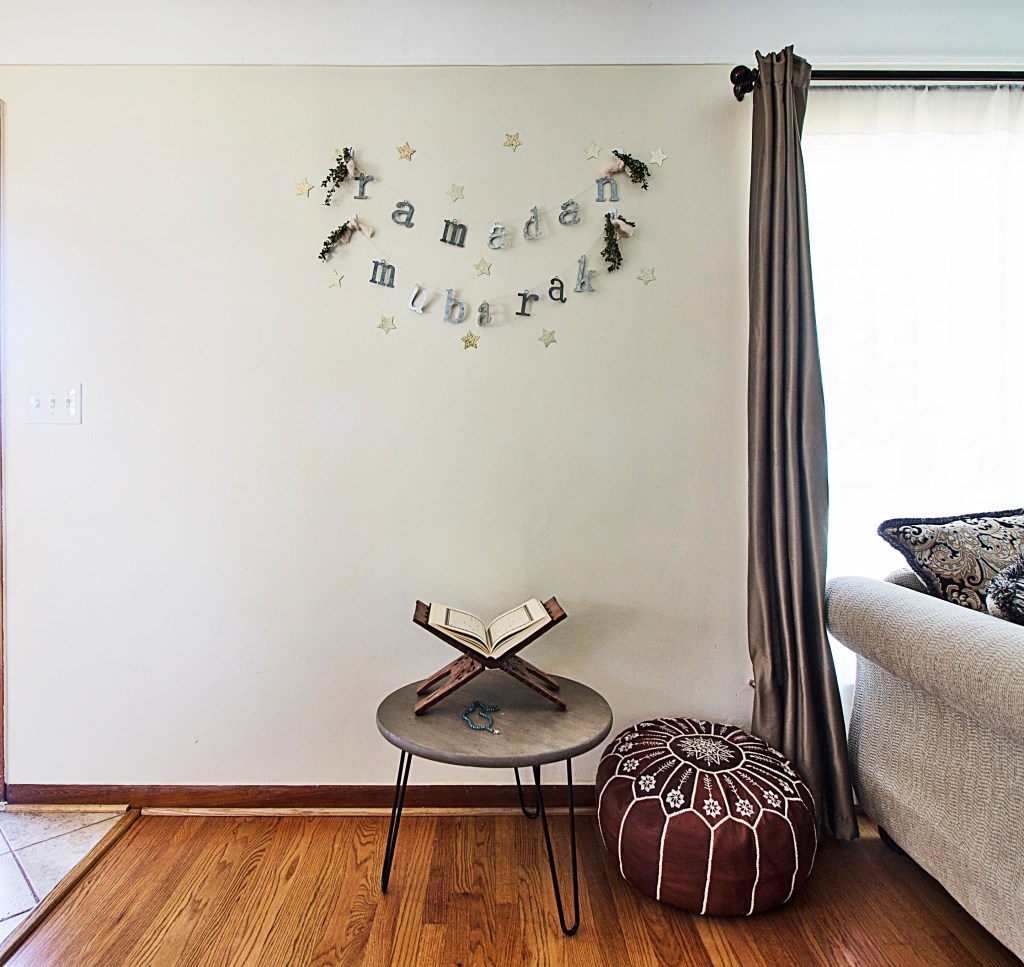
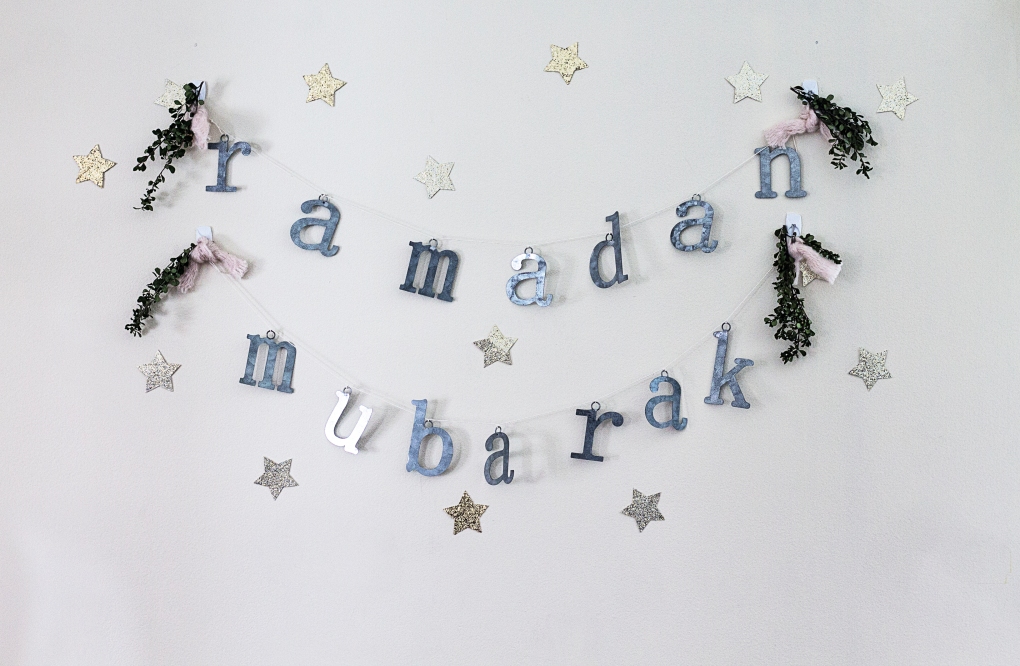
The feature of this post is a minimalist Ramadan banner and backdrop that I created near the front entrance of our home. I think it’s a beautiful welcoming statement for family and iftar guests and it makes the perfect backdrop for any family photos. It’s also super easy to make!

IMG_3238 wwm

For the Ramadan banner, here’s what you’ll need:
galvanized letters
natural cord
scissors
measuring tape

You can actually use any type of materials for the letters. I chose galvanized tin because they were on clearance at Jo-Anns and I wanted something more sustainable and long-lasting. I was tempted to spray paint the letters gold but in the end decided I liked the rustic, industrial look. To make the sign, all you need to do is arrange your letters spelling RAMADAN MUBARAK. Measure equal spaces between each letter (I did 5 inches) and secure each letter to the cord with a double knot. When you’re finished, create a loop at each end of the cord so you can hang the banner easily on a hook.

IMG_3105

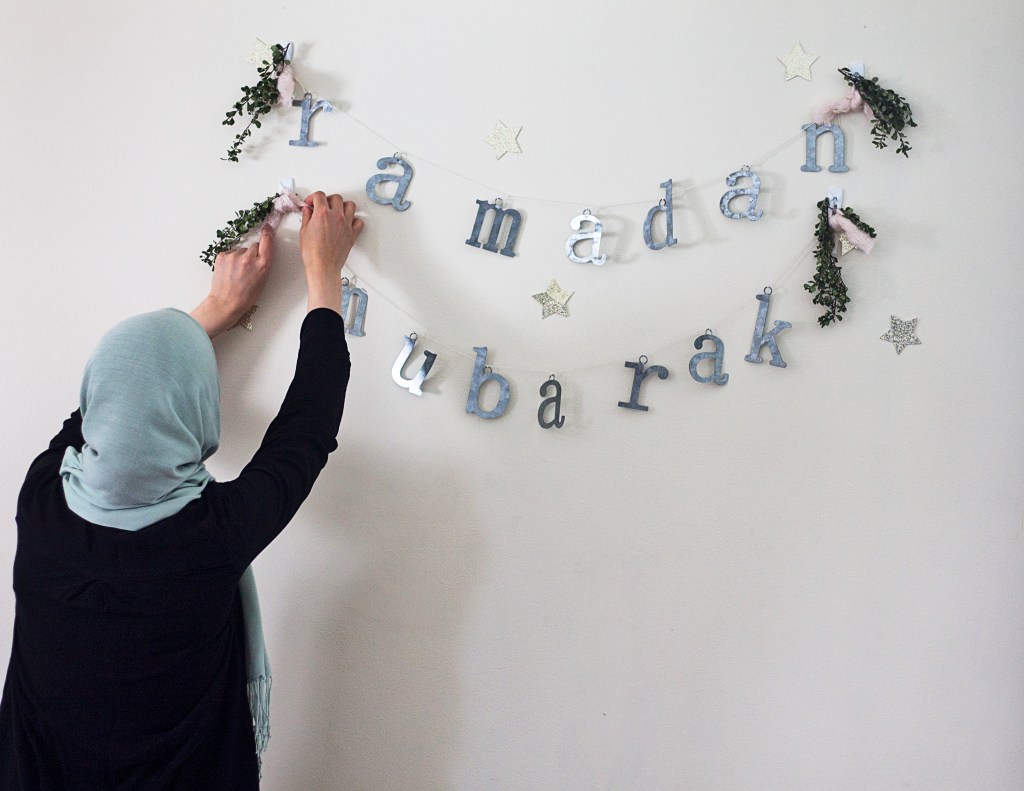
To complete the backdrop simply cut out stars from glittered card stock and stick them to the wall using washi tape. You can also tie ribbon or yarn to cover up the command hooks and add a touch of green with any stems of your choice (eucalyptus, myrtle, grevillea, huckleberry).

IMG_3160

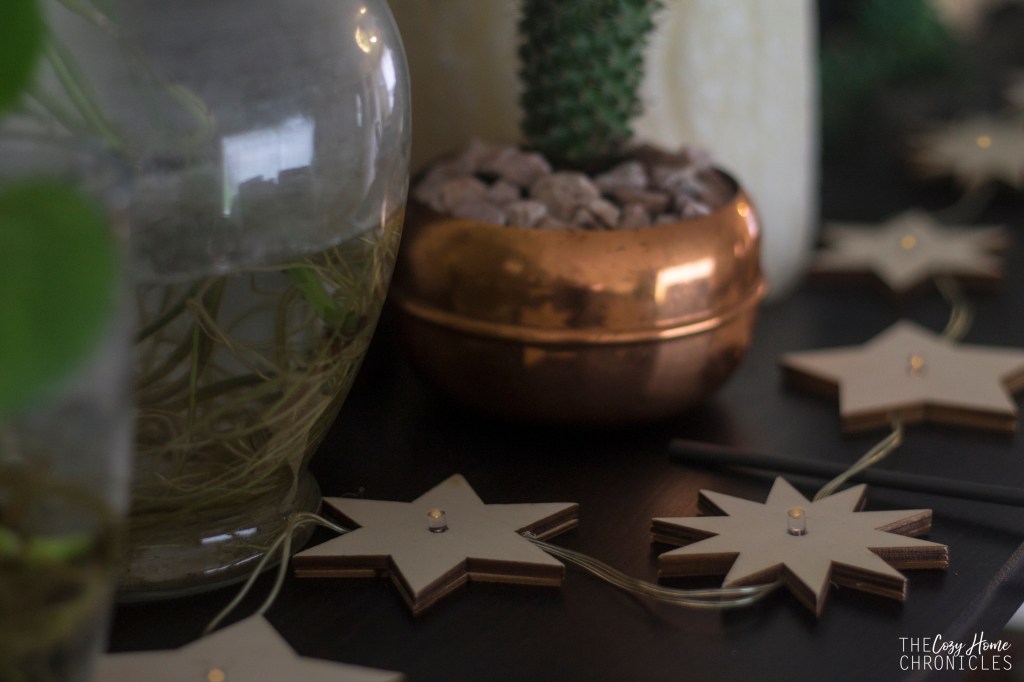
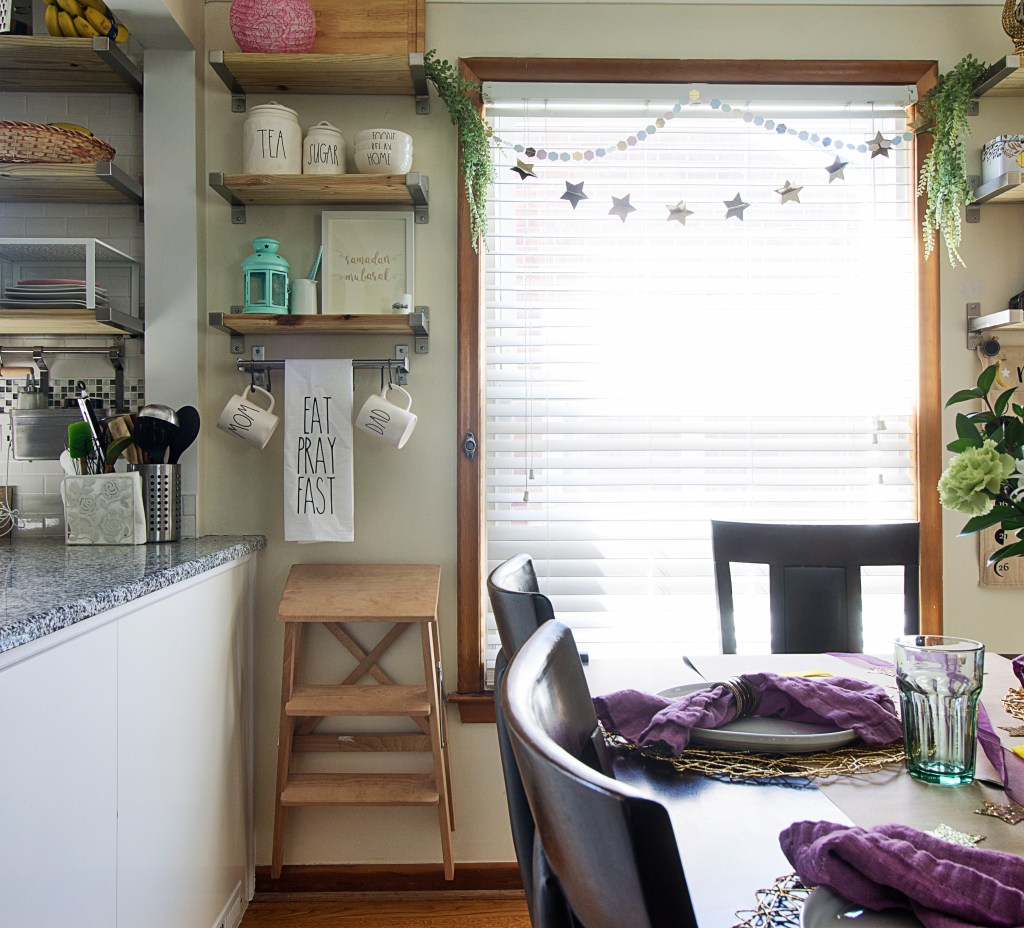
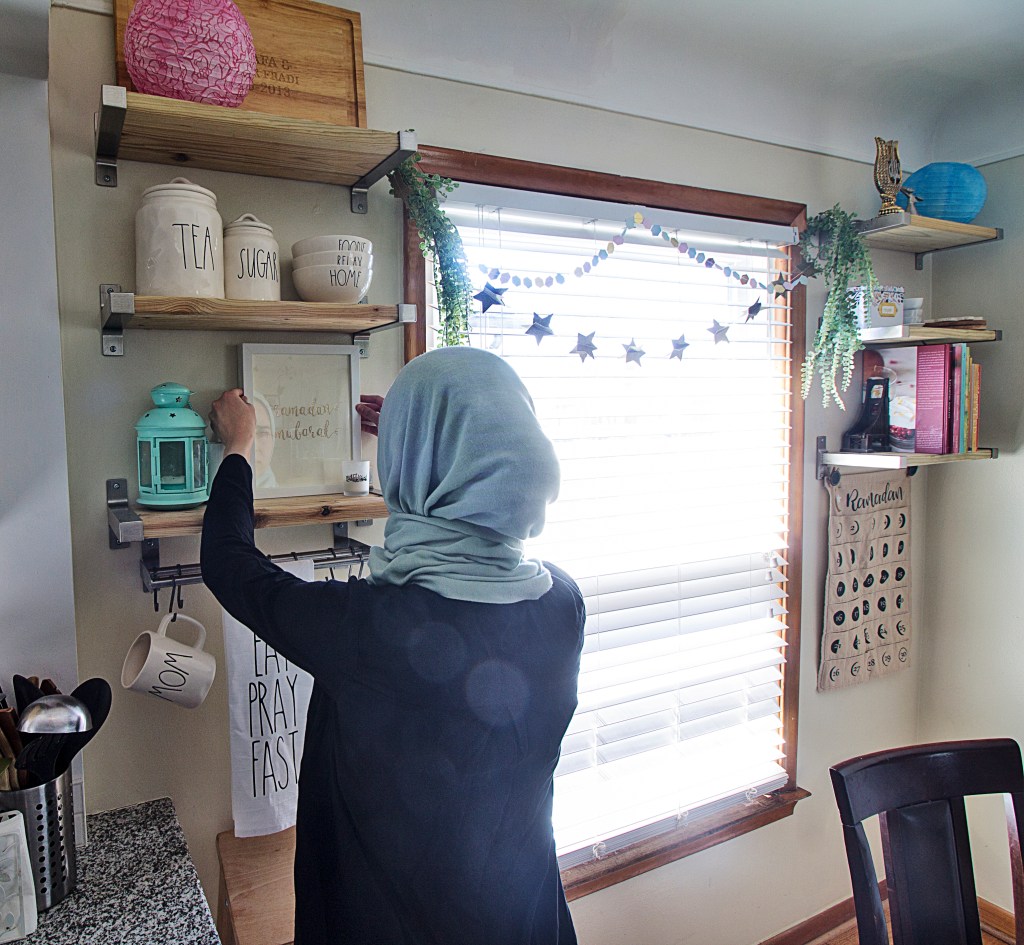
I also spruced up the dining area by hanging up garland and faux greenery. On our open shelving I created a simple display with a lantern and a gold foil Ramadan Mubarak print.

IMG_3054

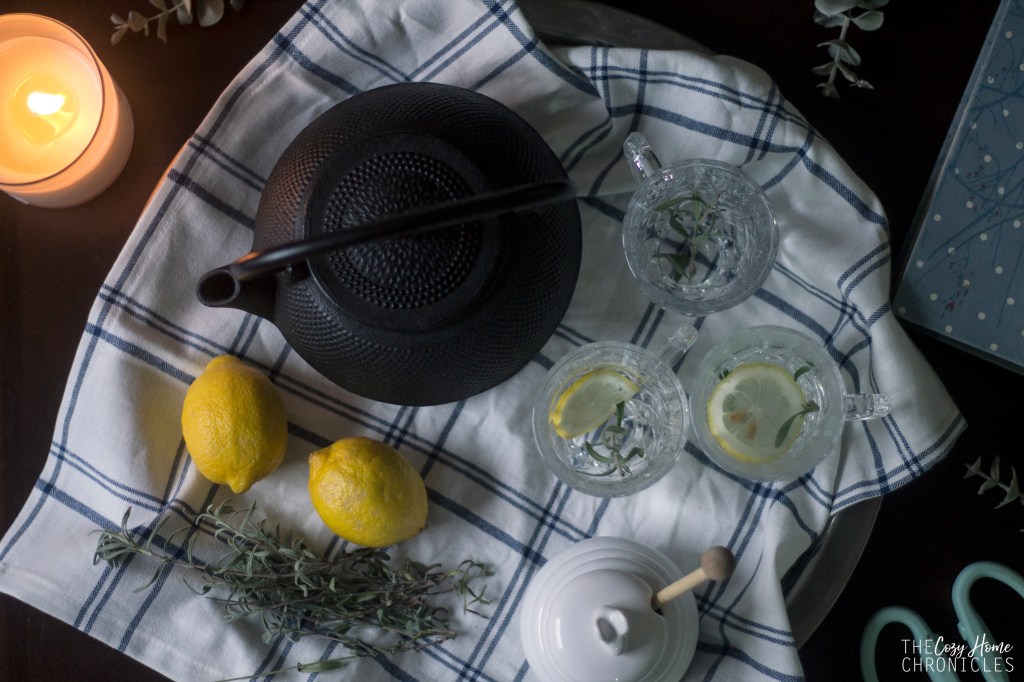
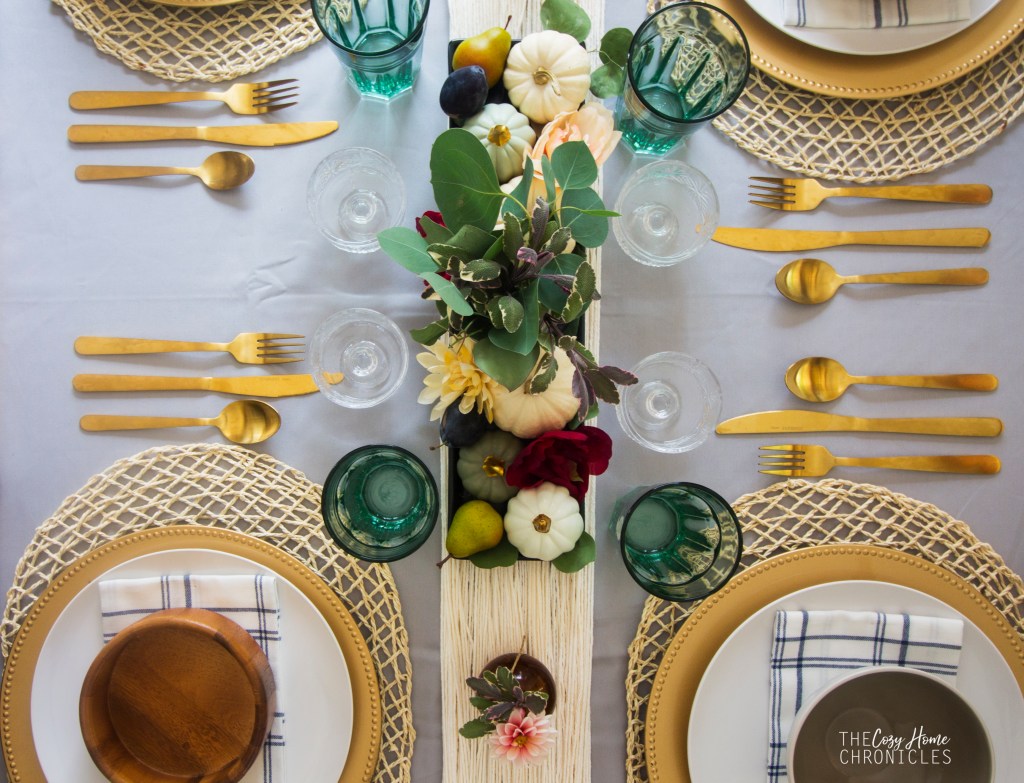
I hung up our Ramadan advent calendar from Handmade Beginnings  where I’ll put something fun for the kiddos throughout the month. For the table I pulled out the turquoise glasses and purple linens I purchased from IKEA on clearance last year. Unfortunately they no longer offer those specific products (or if they do the colors are different) so I’ll link what alternatives they have below. For the napkins, my source link takes you to a conscious minimalist cotton napkin from H&M.

IMG_3033

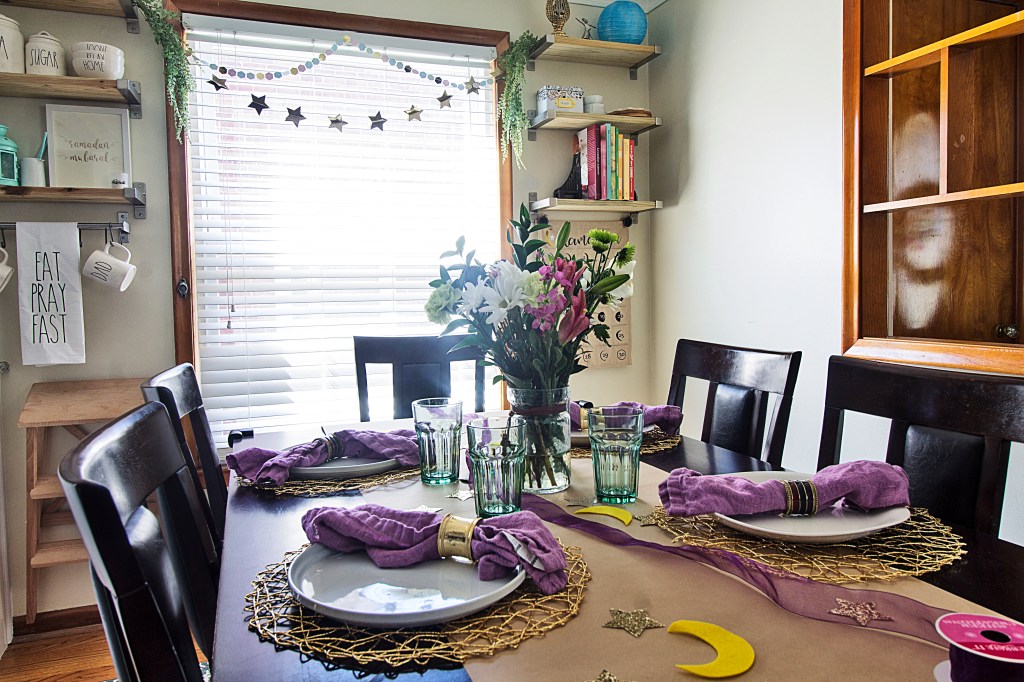
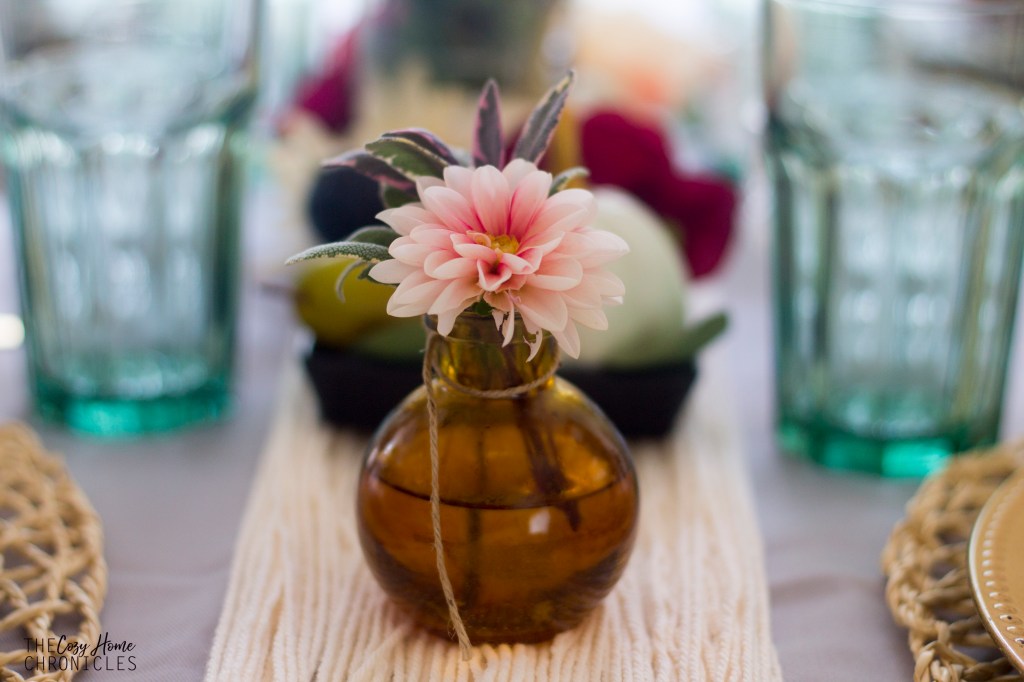
 The only new things I purchased for this look were the gold placemats, the craft paper for the table-runner, and the glitter card stock to make the stars for the embellishments. I got the idea for the craft paper table runner from a Pinterest tablescape for Thanksgiving. I think it’s a nice screen-free way to keep children occupied with coloring and you can even write down your own reflections throughout the month. For an extra pop of color, never underestimate the power of fresh flowers. If you’re blessed with a beautiful flower garden then make it a family tradition and go flower picking right before iftar. If not, a local market or a Trader Joe’s would be a good option for gorgeous and reasonably-priced florals.


Sources:

Gold Placemat $1.99 | Craft Roll  $4.79 |Glitter Cardstock  $1.99| Ramadan Print $5.00 | Kitchen Towel $8.00 | Cotton Napkins $3.99 | Turquoise Glass $0.99 | Lantern $3.99

You can also find my sources of inspiration for these looks here on our Pinterest boards:

What did you think of the final result? Would you make this Ramadan banner? If you’re looking for more Ramadan decor inspiration then you’ll definitely want to head on over to my friend at Nimistyle and see her DIY Doily Table Runner and Gratitude Wall. Also don’t forget to check out the rest of the lovely DIYs in the Blog Hop linked below!

IMG_3677

Nimi Style | Amna B Interiors | Simply in Control | Mint Candy Designs | Zair Zabr Play

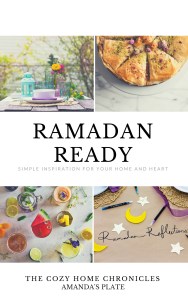
Last but not least, my friend Amanda and I put together our first Ramadan Ebook. It’s an idea that we’ve been sitting on for a while but this year we took a leap and tried to make it a reality. It’s nothing fancy but it’s a helpful resource filled with meal ideas and recipe links, decor tips, a checklist to help get you organized and even a few simple, mindful challenges for you to try. The best part is it’s available for free download right here:

Ramadan Ready Ebook

Amanda's Plate & The Cozy Home Chronicles

As always if you loved this post, please follow us and share. And for those who celebrate,  Ramadan Mubarak!

signature3


DIY Anthropologie-Inspired Fringe Wall Art

Earlier last month, I shared a DIY upcycling project that I created for a four week creative challenge that I participated in back in January. In this post, I’ll be showing you how to make my decor for week two’s challenge “On the Wall.” First let me start by saying that while I love my own creative process, one thing I really enjoy is the challenge of recreating products that already exist for much cheaper. Seriously, if you’ve ever wanted something that was way out of your price range but thought maybe you could make it at home then I’m your person! Like, if there was a career path or job title for Expert Home Decor Replicator, I’d be the first in line but until such a day here I am making copycat Anthropologie wall art for my own home and blog.

39685805_004_b1

Image via Anthropologie

Do you want to take a guess how much these Solar System Wall Art pieces are going for? Do you even want to know? Try $78-$198. Yep, you read that correctly. How about making one for less than $20? If that’s a yes and you want to know just how, keep on reading for the full scoop. Here’s what you’ll need:

Materials
Gold Floral Hoops or Macrame Rings
Natural cord
Wooden or stone beads
Premier Jazz Yarn


Note: For this specific design, I used 2 floral hoops: a 6in and an 8in. I also used the jazzy yarn in the color “mushroom.” You can use any color or even a variety of colors to create a custom piece for your space. 

Directions

  1. Hold the two gold rings parallel so they’re touching (small ring inside the large) and tie them together using the natural cord. Wind the cord around the rings until the rings are secure and then double knot the cord leaving at least 7 inches for the beads and loop. For extra security, you can add a dab of hot glue to the knot.
  2. String the wood beads on the cord, secure with a knot, and create a small loop for hanging.
  3. Cut out 6-10 strands of the premier jazz yarn, keeping in mind that you want each strand to be twice as long as the final fringe since you’ll be folding it over. I wanted a staggered look so I cut out different sizes ranging from 20-35 inches (actually between 10-17inches).
  4. On the bottom end of the larger ring, secure the yarn by folding the strands in half and pulling the strands of the yarn over the ring and through the loop (see images below).
  5. Pull to tighten and trim the strands to your liking. Now hang and enjoy the view 🙂


anthropologiewallart

This was such a simple DIY wall decor and it really added a nice touch to our eclectic space. Would you make something like this for your home? Let us know in the comments below and as always, if you found this inspiring we would love it if you shared.

IMG_9856

signature3


DIY Upcycled Tea Tin Planter


February is coming to an end and we are a tad bit in disbelief. I know, this seems like a reoccurring theme over here but during this busy season of our life it’s difficult to fully grasp how quickly the time is flying. We did take some time off for a family vacation (there’s a post in the works) in January and it was just what we needed to reset for this new year but when we came back we dove head first into our semesters and it took some time to get back on our feet. We are now back in the groove of things and excited to share what we have been working on. Last month I was lucky to be a part of Salvage Dior’s January Creative Team on Instagram where each week I, along with my four teammates, were responsible for creating something new for our homes that fit within the following themes: 1) Upcycle, 2) On the Wall, 3) Child’s Play, 4) Coffee Table Decor. In this post I’ll be sharing the project I completed for the first week, an upcycled tea tin turned planter.

IMG_8994

Loose leaf tea is something we drink quite a bit of in our home and I’m always left wondering what to do with the tins once they’re through. In the past I’ve used them as storage for spices and knick knacks but this time I wanted something a bit more creative. At the time we were also revamping our plant corner so I thought it would be nice to make some new planters for the Pothos and Sedum I was growing hydroponically. I was inspired by the recent trend in natural fiber textiles and wanted to create that woven look to contrast with the industrial shelving we chose for the plant’s display. If I wanted to buy what I was looking for, I could have easily spent anywhere from $6-25 a pot depending on the size. Instead, I was able to make this tea tin planter and some tin can planters for $0 because I had everything already on hand. The only thing that you would probably need to buy if you’re not DIY nerds like us is the bundling twine but that itself is very inexpensive ($3.98 for 525 feet). Alright, let’s make a planter!


If you are an avid DIYer, you most likely have a glue gun in your arsenal of crafting tools.

eb_loose_2

DIY Upcycled Tea Tin Planter

  • Difficulty: Easy
  • Print

Materials
Tea tins or tin cans, washed and dried
Bundling twine
Hot glue-sticks
Milk Paint (optional)

Tools
Glue Gun
Scissors
Drill (or a hammer and nail)

Directions

  1. Heat your glue gun and in the meantime use your drill to place drainage holes in the bottom of your tin. You can also use a hammer and a nail to do this or you can skip this step and just make sure to include a layer of small rocks beneath your soil for water drainage.
  2.  Glue the end of the bundling twine to the side of your tin at the very bottom and begin wrapping the twine around, making sure to glue the first 3 coils to the tin and to each other. As you wrap the twine, be sure to push the coils down tightly to close any gaps and give your planter a neat, elegant look.
  3. Continue wrapping the twine around, stopping midway to glue the coils down. Wind the twine around the tin until you reach the top and then cut the twine to length.
  4. Uncoil the twine a couple turns, then rewind it tightly against the tin using hot glue to secure the top two coils to the tin and to the adjoining coils.
  5. Take your scissors and trim off any noticeable twine hairs sticking out (see the time-lapse video below). At this point you can paint the planter and let it dry or go straight to planting and styling it!

IMG_8984

IMG_8998

If you liked this post and found it inspiring, we would love if you shared it. For more related content, you can find us on Instagram where we share more of our day-to-day and Pinterest where we share our ideas and inspiration. If you have any thoughts or suggestions about this DIY project, feel free to leave a comment below. And as always…

signature3


Keeping it Cozy: Simple ways to add warmth to your home

With Halloween behind us and Thanksgiving ahead, we are inevitably inching closer to the end of the year and to even colder weather (brrrr… just the thought makes us cold). The good news, however, is that there are a few simple ways to kick the coziness factor of your home up a few notches and I’ll be sharing them with you in this post. It really doesn’t take much to make a space inviting and cozy. No matter what your style is, if you can envision yourself curling up with a good book or good company and forget all your troubles then you’re doing something right. The fall and winter seasons makes this more of necessity because there’s less going out and more staying in. The last thing you want is to be sitting in is an uninspiring space all winter. Plus with the many holidays around the corner, you’ll definitely want a welcoming space where your family can gather. Here are just a few ideas that you can implement today:

Bring out the throws. Nothing says warmth like a soft, fluffy throw. A throw hanging out on your sofa is a nice invitation to relax and feel right at home after a long busy day.

IMG_6342

Light it up.  Candles and string lights add a warm, cozy glow to any space especially when it’s cold outside. Furthermore, the scent of your home can really make or break the mood. Try burning or diffusing fragrances that are meaningful to you. Some of our favorites include cotton, balsam fir, orange, and vanilla.
IMG_6373
IMG_6345

Warm drinks at the ready. Whether you’re a coffee or tea or hot cocoa drinker, having a tray or cart set up for an evening sip-a-thon will transform your space from cozy to COZY. I mean, who doesn’t dream of relaxing in their home with a warm mug of their favorite beverage in hand?
IMG_6419

As you can see, I’ve been thinking quite a bit about how we can make our home a little cozier for the winter. During my browsing adventures, I came across many home decor items that I found both beautiful and cozy so I put them all in a mood board for you  with sources included. For now, my plan is to add winter greenery with some fairy lighting but our living room always feels cooler in the winter even with the heat on so I thought it would be nice to have a TV stand with fireplace. One can dream, am I right? Anyways, I hope you find inspiration in our little collection and in our simple tips for making your space cozy for this winter season.

Keep it Cozy Post

Sources: 1. Wayfair | 2. H&M Home | 3. IKEA | 4. Amazon | 5. H&M Home | 6. IKEA | 7. Target | 8. H&M Home

What are some ways you like to make your space cozy for the changing seasons? Tell us in the comments below and as always, if you liked this post please follow us and share!

Instagram

signature3


DIY Fall Harvest Wreath

IMG_5649

How is it already October?! In less than one month our daughter (aka Hobbit #2) will be turning one years old and we are feeling all the feels 😦 It doesn’t help that our days are filled with schoolwork and housework, with little time for much else. However, that doesn’t mean we can’t find a way to usher in one of our favorite seasons. As you’ve probably gleaned from our autumn tablescape post, we are really digging the more muted and subtle fall colors (think burgundy, peaches, grayish greens) and I really wanted to celebrate those colors in the form of a welcoming wreath. Between Michaels, Target, and Dollar Tree, I found all the elements that perfectly captured the look I was going for. I dare even say, “I nailed it.” My sister-in-law found it hard to believe that something so pretty could be made from Dollar Tree florals but it can and for well under $10 and 30 minutes too. So if you’re looking for ways to make a beautiful autumn statement but are tight on time and money then this is the perfect project for you 🙂 If you want to see how it’s made then you’re in luck because tomorrow I’ll be collaborating with the CraftBox Girls to bring you a live tutorial at 12 pm EST.  Be sure to tune in, say hello, and get some crafting inspiration 🙂

Supplies
18′ Grapevine Wreath ($3)
Faux Florals ($5)
Faux Pears ($5)
Eucalyptus ($3)
Hot glue gun & glue sticks

Total Cost: $16 + tax

IMG_5627

Pro tip: Don’t forget to use the Michaels app for coupons. I always use my coupon to save 40% off any regular priced item. With the supplies that I purchased, I was able to make 2 wreathes for the price of 1 putting the total cost per wreath at under $10.

IMG_5609

Directions:

  1. Collect your florals, eucalyptus, and faux fruit and start placing them around your grapevine wreath until you are happy with the arrangement. You might have to move things around several times to get the desired look.
  2. Once you have settled on your design, you will need to glue each piece in place using a generous amount of hot glue, embedding the stem deep into the vine, and holding down for 20-25 seconds until firmly in place.
  3. Once all the pieces have been glued down and any excess strands of glue have been removed, you can hang your wreath on a hook or door wreath hanger.

IMG_5681

IMG_5669

IMG_5674

IMG_5672

Share your autumn stories with us below and if you liked this post please follow us and share!

Instagram


Falling into Autumn

Photo 2017-09-12, 4 12 12 PM

If you are coming here from Happy Haute Home, hello and welcome to our blog. It’s always wonderful to have new faces around here 🙂 Today we are excited to share with you our autumn tablescape which includes a fun and simple DIY table runner. Autumn is such a lovely time of year and I really wanted to create a space that celebrates the beautiful colors of the season while inspiring quiet introspection. Each season offers plenty to reflect on but there is nothing quite like reflecting on your harvest (physically and spiritually) and thinking about what can be improved upon for the next cycle when you begin anew.

“Every tree, every growing thing as it grows, says this truth, you harvest what you sow.”-Rumi

IMG_4417

If you haven’t guessed already from our latest home decor posts and Instagram feed, we are a tad into the bohemian look. Taken to it’s extreme, however, the boho theme can tend toward maximalism and appear a bit cluttered for our taste so I sought to create a clean design based on some of our favorite bohemian colors and elements: greenery, gold, yarn, textured glass, palm leaf, and patterned fabric.

IMG_4363

IMG_4367

IMG_4415

To pull this look together, I relied mostly on what I had lying around our home. For each place setting, I simply layered palm leaf placemats with gold chargers, white plates, and checkered napkins atop. For the centerpiece, I placed a small glass cup filled with eucalyptus and sage in the middle of a black candle dish and arranged white pumpkins, faux florals and pears, and real plums all around. For colorful touches, I included teal glassware, textured crystal, and gold flatware. I used my old amber essential oil diffuser bottles to showcase the dahlias and sage from our garden. The only thing I purposefully purchased for this tablescape (other than pumpkins) were the napkins. I really liked the flannel pattern and the farmhouse vibes they exuded, not to mention they were fairly inexpensive. For your convenience, I’ve included a list of the main sources down below for the all items I knew off the top of my head.


IMG_4397

Of course my favorite part of this whole tablescape is the table runner that I made. I am happy to report that the finished product turned out exactly as I had pictured: an oversized tassel. All you will need to make this table runner is wool yarn and scissors. Simply unspool the yarn and cut into strips longer than the length of the table. The hardest part is making sure not to tangle the yarn as you lay the pieces side by side. When you’re happy with the width of your table runner (I used three rolls of yarn) then tie each of the ends together and voila!

IMG_4386

IMG_4428

Sources:
Checkered napkins: Target |$3
Faux Pears: Target|$5
Palm Leaf Placemat: IKEA|$3
Gold Charger: Dollar Store| $1
Eucalyptus: Trader Joes| $3
White Pumpkins: Farmers Market| $2

What do you think of the final result? I know it doesn’t include the fiery red, yellow, and orange hues normally associated with fall but we actually find it quite refreshing. I’ll be using this very same color palette to make an autumn wreath early next month so stay tuned for that. If you’re looking for more autumn decor inspiration that’s subtle and beautiful then you’ll definitely want to head on over to my friend at Harlow and Thistle and see her creative display. Also don’t forget to check out the rest of the stunning tablescapes in the Falling into Autumn Blog Hop linked below!


Happy Haute Home | Harlow and Thistle | Mint Candy Designs | Live Laugh and Craft | The Cozy Home Chronicles


DIY Garden Lattice Light Fixture

IMG_3179

After finishing our crazy and exhausting 6-week bathroom renovation challenge in May, you would think we would wait just a littttle bit longer before DIYing again. But, nope. We just can’t help ourselves. It seems there is never a shortage of problems that need creative solutions and for us one of those problems has been the lack of adequate lighting in the living room. For the last four years we have made do with two lamps on our end tables and let’s just say, the amount of light they offered left much to be desired. Making our own light fixture has been a goal of ours and so we have been mulling ideas over for quite some time. All we knew was that we definitely wanted something that gave off rustic, jungalow, boho vibes. When I thought of inspiration that embodied these elements, my mind always went back to the same place: The lobby of a hotel in Philadelphia where I stayed for an anthropology conference.

IMG_6043

We also wanted something inexpensive; something we could make out of upcycled and thrifted materials. It didn’t take long for us to settle on the garden lattice sitting abandoned at the back of our garage. Not only did it give us the look we were going for but it also helped us solve another design problem: what to do with the overgrown arrowhead vine taking over the living room. And then, almost in what could only be described as divine intervention, something possessed my husband to stop at a garage sale where he found this set of 5 really cool Edison bulbs for $5 (normally they would go for around $7 a bulb). A few Home Depot trips later and we had settled on how to hang our new fixture. The funnest part of this whole process was seeing our random ideas become a reality. We are just so happy with the finished product and we love that it feels like a rustic garden in our living room. We like it so much, we just may consider putting another one up above the dining table 😉 Alrightie, here’s what you’ll need to make this fixture:

Supplies
Pressure Treated Lattice
(6) Ceiling Hooks – VersaHook
(10) Heavy Duty Cable Ties or Loop Wire and clamps*
(6) Metal Bolt – Everbilt 3/8 in. Eye Bolt with Nut
10 Vintage or LED Edison light bulbs
10 String Light socket
Faux Foliage

*Important: For safety purposes, make sure to use commercial cable ties with a tensile strength of at least 40 pounds or you risk the fixture falling down.

IMG_3170

Directions: 

  1. Cut the lattice to the desired size (we did 3ft wide by 5ft long) with a hand saw.
  2. On the lattice, choose 6 symmetrical points for hanging support and drill a hole for each. Secure the 3/8in eye bolts in each of the six holes.
  3. String the cable ties through the eye bolts and loop until completely secure. This is very important. You must not be able to open the loop or slide the tie back through the head.
  4. Measuring according to the location of the eye bolts on the lattice, drill 6 corresponding holes into the ceiling.
  5. Insert drywall anchors into the ceiling holes and secure the ceiling hooks by twisting.
  6. Just for a test run, install your fixture base by hanging the cable tie loops on the ceiling hooks. If everything looks good and sturdy then take it down and proceed with the next steps.
  7. Now for the fun part! Weave your string light sockets through the lattice and secure the wire in place with the remaining cable ties (you can use more if you like).
  8. Decorate your light fixture by arranging your faux foliage around the lattice either by weaving the stems through the lattice or using glue or a staple gun for a more permanent fix. Make sure to place the foliage a good distance away from the light bulbs or they can burn.
  9. Install your completed fixture by hanging the cable tie loops on the ceiling hooks.
  10. Finally, screw in your Edison bulbs, plug in the light, and enjoy the beautiful view!


IMG_3164

IMG_3171

With the lattice and the Edison bulbs as the base, you can customize this fixture for any home decor style with just a coat of paint and greenery of your choice. You can hang flower stems, eucalyptus, lavender, air plants, etc… The creative possibilities are endless. If you do attempt to make this, be sure to share and tag us so we can see 🙂

If you liked this post please follow us and share!

Instagram


Celestial Themed Nursery

Today we are doing something new while throwing it back to a project we completed before we started blogging: the nursery. When we first found out we were having a baby, we knew instantly that we wanted to create a celestial-themed nursery. My husband and I have always been astronomy nerds; we own a telescope, we’ve dabbled with astrophotography at the Headlands International Dark Sky Park, and we just love the sense of peace and mystery that the cosmos invoke (insert Interstellar Soundtrack here). The theme for the room really started coming together when we started thinking about words to describe the space we wanted to create: whimsical, colorful, adventurous. If those words were a color scheme, it would kind of look like this:

colorblast

We thought of children’s books that could fit in our theme and exemplified these adjectives. The one that stuck out was Le Petit Prince (The Little Prince) by Antoine de Saint-Exupery. Although we both didn’t read the book until we were adults, it really left a deep impression on us. We loved the profound wisdom and simplicity of the story but it was the childlike innocence and way of looking at the world that we found most beautiful. We wanted the nursery to inspire the inner-child in all of us.

img_2552

Naturally, I turned to Etsy for Little Prince inspiration and I found it in the form of a watercolor print based on a scene from the book. The colors in print were just so pretty so I contacted the shop owner and had a custom order made that included one of our favorite quotes from the book.

il_570xn-760340885_4psi

Everything else in the room was pretty much designed around this print’s color scheme. We ended up painting an accent wall with Behr’s Rise and Shine and putting up silver and deep yellow star and moon decals. We went with white furniture, a plush silver rug, and celestial-themed bedding from Babies R Us. While many people use design boards to collect inspiration for designing a space, we’ve put together a design board based on the space we created for those who are interested in designing a whimsical, celestial-inspired nursery. This board was created in part by things we do have in our own nursery (which is basically a playroom now) but it also includes things that we don’t have but find inspiring and beautiful. It’s fascinating to think that all of this was sparked by a piece of artwork based off of a children’s book but it just goes to show you how amazing the human imagination is.

nursery-recovered


Sources
1. Petite Tresor Nuit Bedding Set
2. Rocket Shelf
3. Silver Shag Rug
4. Delta Bennington Bell Crib
5. Pallra Light Blue Box Set
6. Star Pillow
7. Cape Cod Rocking Chair
8. Believe Wall Decor
9. Le Petit Prince Watercolor Print
10. Star Wall Decals
11. Skojig Ceiling Lamp
12. Dream Ring Moon & Stars Mobile
13. Not All Those Who Wander Are Lost Watercolor Print
14. Colorful Watercolor Pillows
15. Moon Night Light

We will eventually get around to doing a house tour but until then this design board will do. Not only was it super fun to make but it is great practice for when we start to brainstorm and think about the bathroom that we will be remodeling later this year. Have you ever put a design board together? Share your experience in the comments below and…

If you liked this post please follow us and share!

Instagram