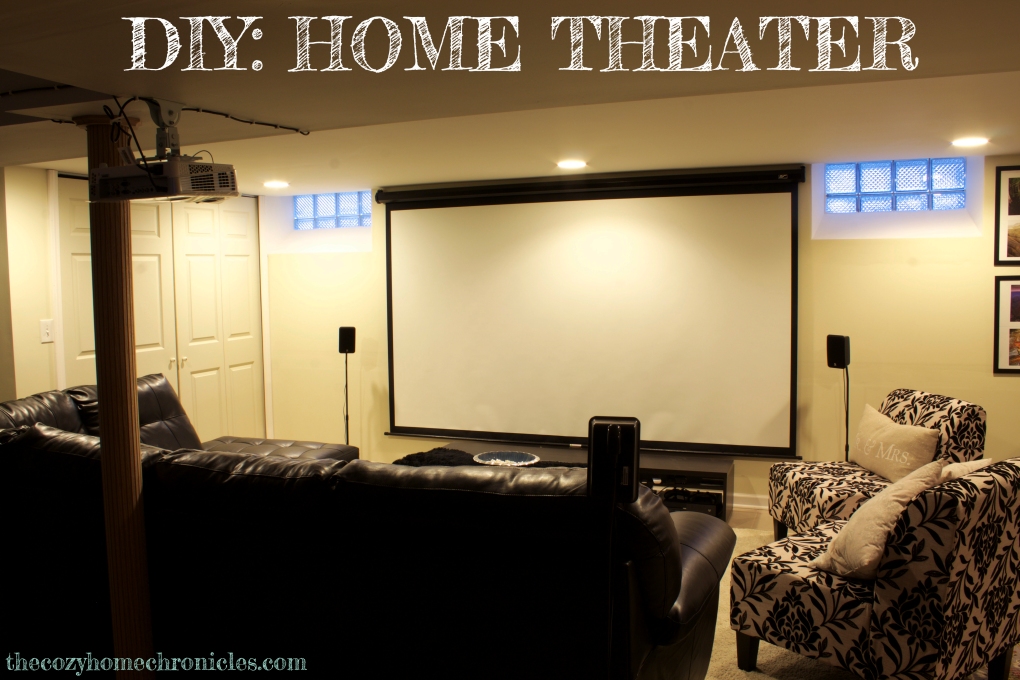
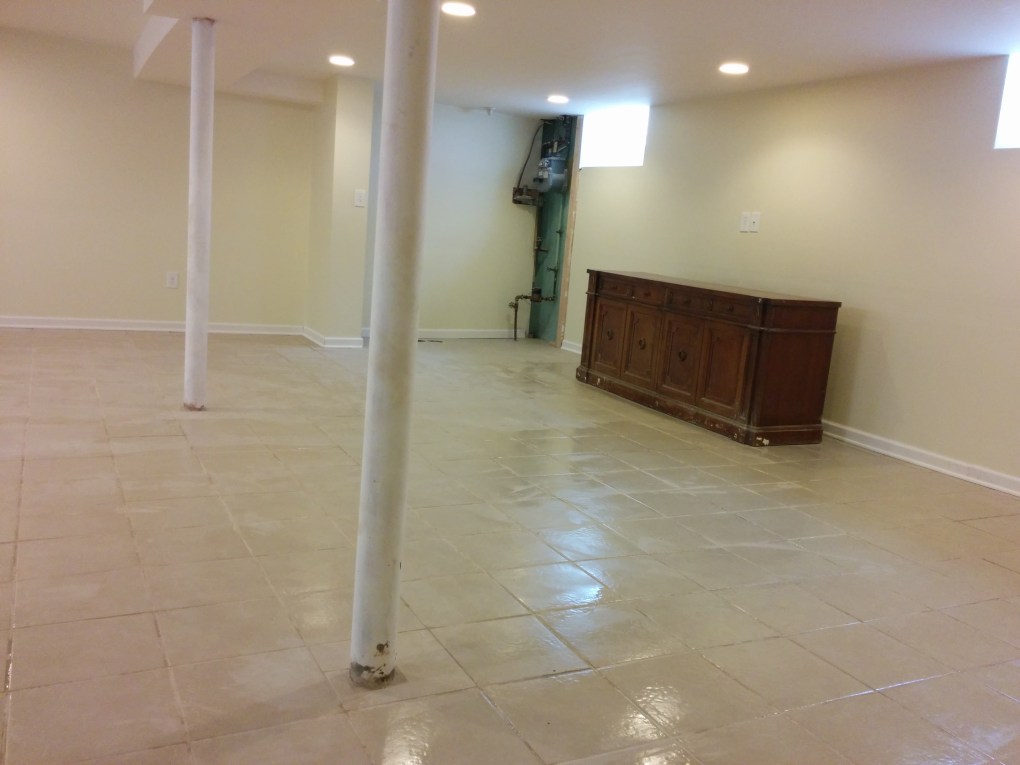
So after many years of renting apartments and one-story condos, I finally had my own place. And what do you do when you discover that you have an empty basement? You build your own Home Theater! Right? Because, why not?
If you need more convincing, here are some reasons why building a home theater might be a great idea:
- You enjoy television and gaming on big(ger) screens
- You thoroughly want to enjoy your movie nights (think Lord of The Rings Epicness)
- You don’t want a TV with average sound quality
- You can’t afford a 120″ HDTV because last time you checked you didn’t have $130k to burn

If any of those reasons resonated with you, you might be happy to hear that with a bit of elbow grease, you too can have the home theater of your dreams without the ridiculous price tag. Let’s get started!
Total Cost = $1,370 (tax not included)
Setup Time = 2-3 hours
What you’ll need

figure 1
Note: You will always find “better” and more expensive products out there. What I have is a balanced system that allows for a great picture and sound at a very reasonable price.
Tools
Builder’s level
Pencil
Power Drill
Screws
Screwdriver
Allen Wrench
Drywall Anchors
A helping hand
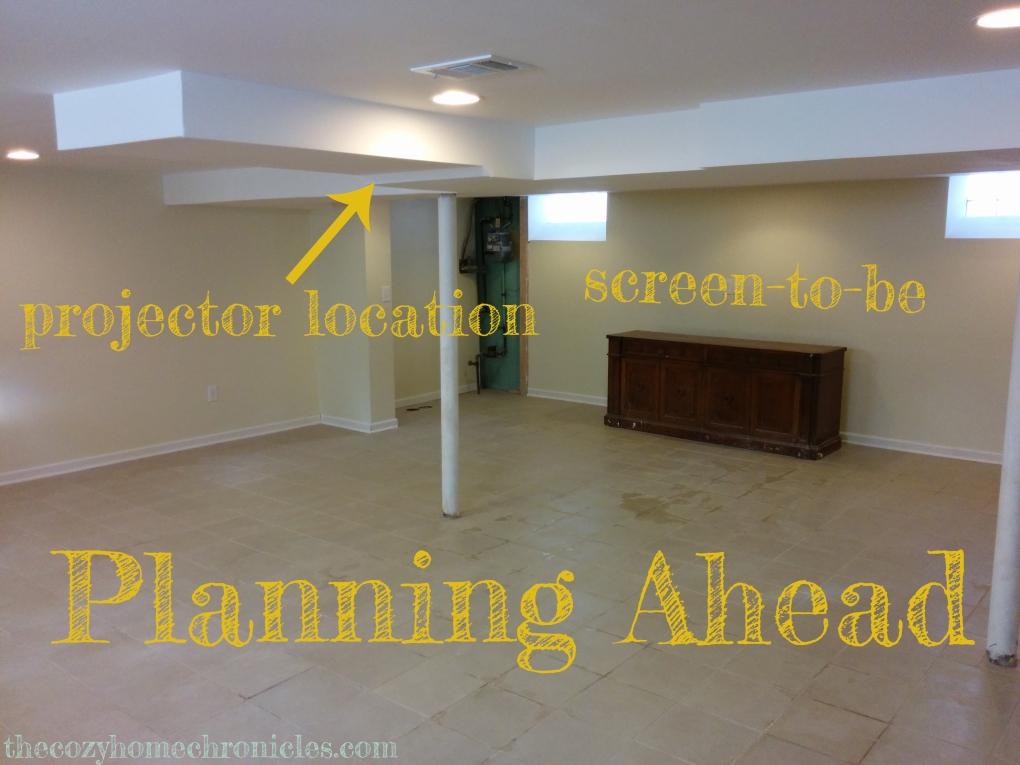
Preparations and Planning
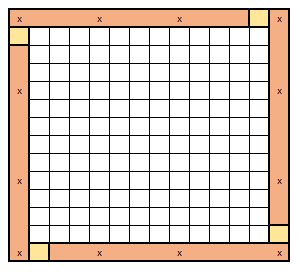
- This design is for a 10×10 space and the sound system we chose has the perfect wiring for this size space. If you are working with a larger space you might want to pay attention to that.
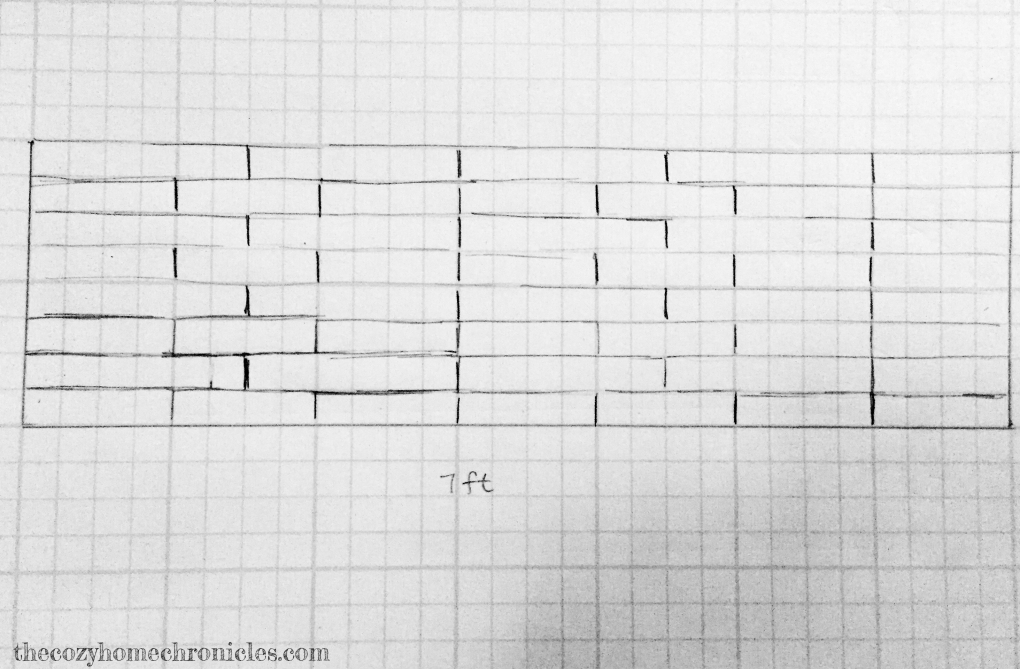
- Designate a location for your projector where you will have a distance of at least 7-10ft from the screen to ensure an enjoyable viewing experience. I positioned the projector 10ft away from the wall that I wanted to install the screen on and I am very happy with the quality of the picture.
- Decide if you want to have your projector mounted to the ceiling or have it portable. If you choose the portable route, you will need some kind of stand to position the projector on when in use. I went with the ceiling mount for safety and aesthetic purposes so you will find directions for ceiling installation further down.
- Make sure you have an electrical outlet to plug your projector into especially if you are going to mount it to the ceiling. I installed one while I was finishing the basement because I knew that I eventually wanted to put up a projector.
- When it comes to adjusting distance, viewing angle, focus and such, the benQ projector I picked has an enormous amount of configurations. So why benQ, you ask? Because most projectors won’t be as flexible when it comes to positioning! This projector will allow you to zoom in/out and shift the lens, which is very helpful when you don’t have the perfect room or space to set up a projector.
Directions
A. Projector (if you are not attaching it to the ceiling you can skip to part B)
- These steps will cover fastening the projector to the ceiling mount. Note that the mount bracket comes with two separate parts that connect (see figure 1). The top piece is for securing to the ceiling wall and the bottom piece (the mount arms) is for securing to the projector.
- The first step requires you to connect the projector to the mount arms very carefully [The entire mount bracket comes with an extendable metal bar that is helpful if you have a high ceiling. I installed this in the basement (low ceiling) so there was no need for the extender. If you look at the above picture for the mount, you can see that there are 3 mount options. I went with the first one which skips adding the extender to the mount and installs the bottom mount piece directly to the top piece]. This was by far the longest and most time consuming step in this project and requires a great deal of patience and care to install the screws, through the holes in the arms, into the projector. You will need to tighten them well without damaging the projector’s pre-screwed holes. I was able to install 3 screws on the arms and skipped the fourth because it was difficult to align the 4th arm to the projector. Is it sturdy though? Even with just two screws I wouldn’t be worried.
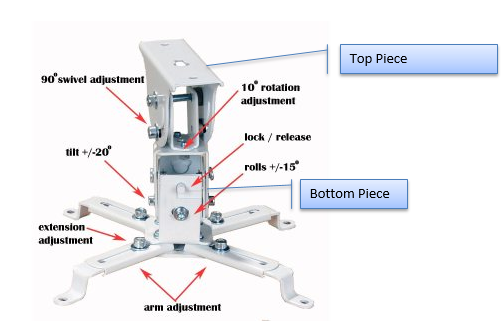
Figure 1
- After deciding on where you want to install the projector [I made sure there was a wooden bracket/stud where I was mounting the projector] you will need to hold the top mount piece in position and trace the holes with a pencil.
- Proceed to drill two small holes over your marks then hold up the top mount piece while you drill it securely in place with the screws. [Note that you can adjust the projector using the tilt and rotation adjustment options in the top piece so don’t worry if it isn’t 100% level as you are mounting it. As long as you are aligned with the wall in front of you, you will be fine.]
- Once you have finished securing the top piece of the mount to the ceiling you can hook the two pieces (top piece+bottom with projector) together and tighten using the allen wrench. Now on to the screen!
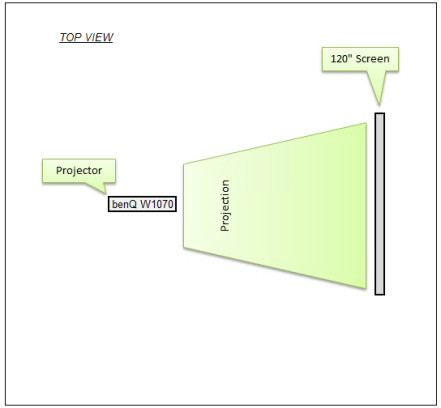
Figure 2
B. Projector Screen
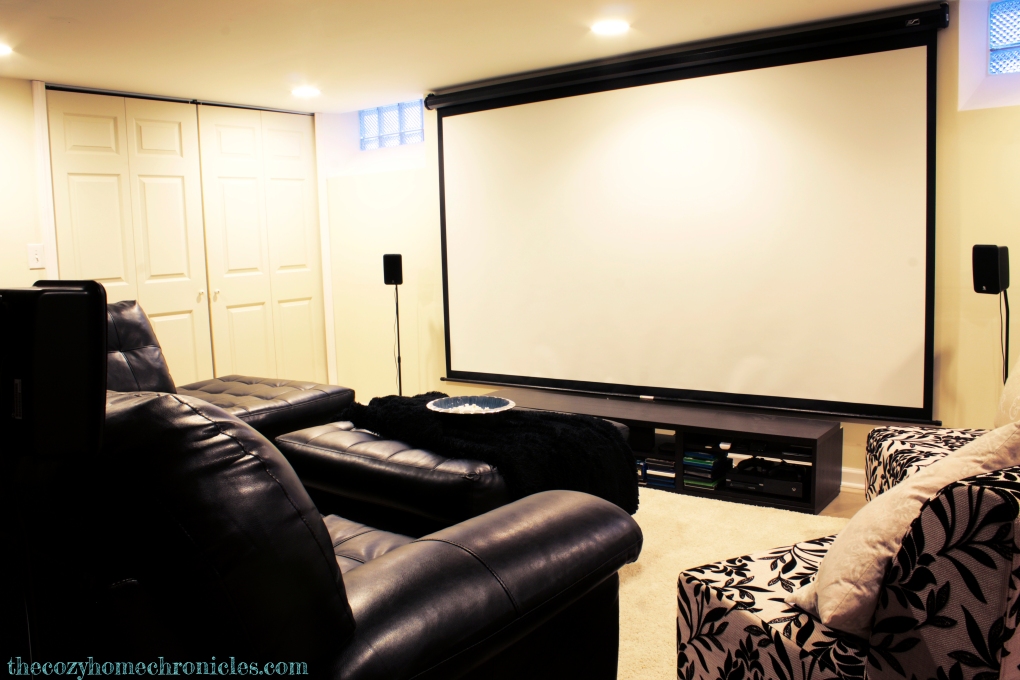
- Next you will need to install the 120 inch projector screen. You first need to make sure it is positioned in the center focal point of your projector (see figure 2). Once you have your position all set, you will need to mark with a pencil the upper right and left corners of the wall where you will secure the projector screen ends.
- Drill a hole in each of the marks you made (2 total) and screw a drywall anchor in each hole.
- When you have finished you will need to use a screwdriver to gently screw two heavy duty screws in place, leaving 1/2 inch distance between the wall and the screw head. Now, with a helping hand, hook the projector screen end caps (see figure 3) onto the screws. Make sure the screen is level horizontally and vertically against the wall.
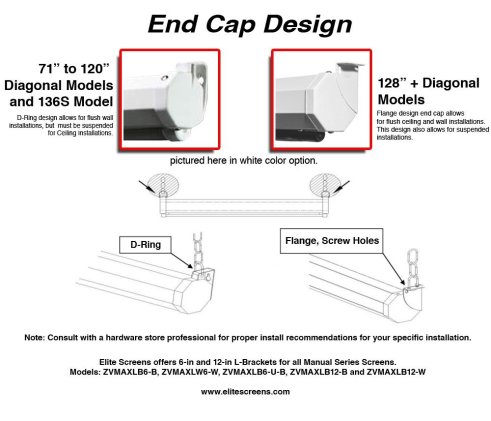
Figure 3
- At this point you can turn on the projector and fine tune the alignment on the ceiling mount bracket. You can also fine tune the zoom on the projector. This will be different for every installation since the distance to the screen, the projector height and mount is never identical.
C. Surround Sound System
- Installing the 5.1 surround sound system isn’t complicated as the package comes with all the wiring you need. Here’s what comes in the box: 4 Satellite Speakers, 1 Center Speaker, 1 Subwoofer, 5 black & 5 red tip wires + Subwoofer Cable
- Connect each of the four satellite speakers to a speaker stand and place one satellite speaker in each corner of the space. Connect the wires from each speaker to your main sound system.
- Install the center speaker right below your projector screen and find a good location for your subwoofer. The manufacturer recommends a close (but not too close) location to your seating area. See figure 4 for reference on how I placed my speakers and subwoofer.
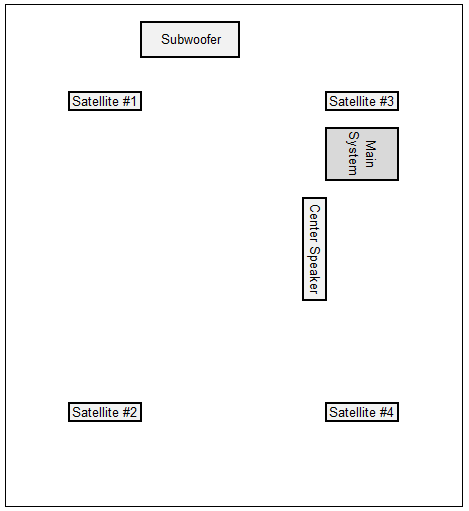
Figure 4
- After installing and connecting all your wires back to the main system, you will have to turn it on and open the sound settings to adjust everything. This can take 15-20 minutes to get it right.
- Using your projector as a screen, assign every speaker a location. For example: Satellite speaker #3 is the Front Left speaker while Satellite speaker #4 is the Front Right speaker and so on. After doing this for all the speakers, you have to fine tune the sound by using a Sound Level device [or if you are a smartphone owner just download one of the many free apps on iOS or Android] to calibrate the speakers. To do this properly, you will need to be sitting in the middle of the space where you are installing the speakers. The Denon guide will walk you through this step-by-step if you get stuck.
- Last but not least connect the 15 ft HDMI cable from the projector to the Denon sound system. From there, connect the second HDMI cable from the Denon sound system to your Blu-ray, Apple TV, Xbox or whatever it is that you are using and turn on your devices to make sure it’s all working fine.
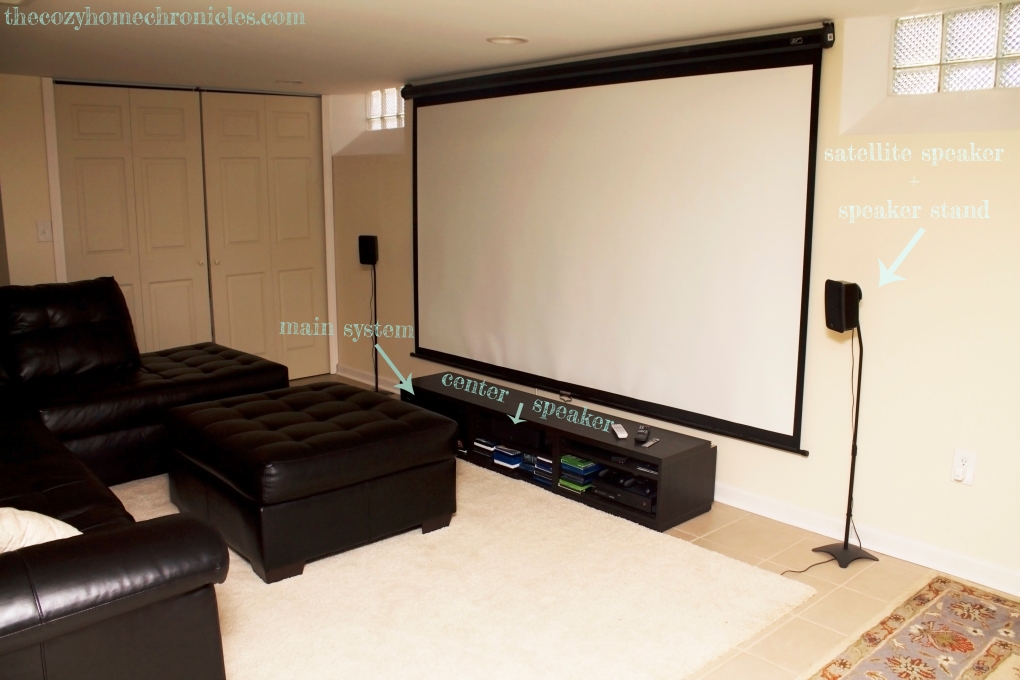
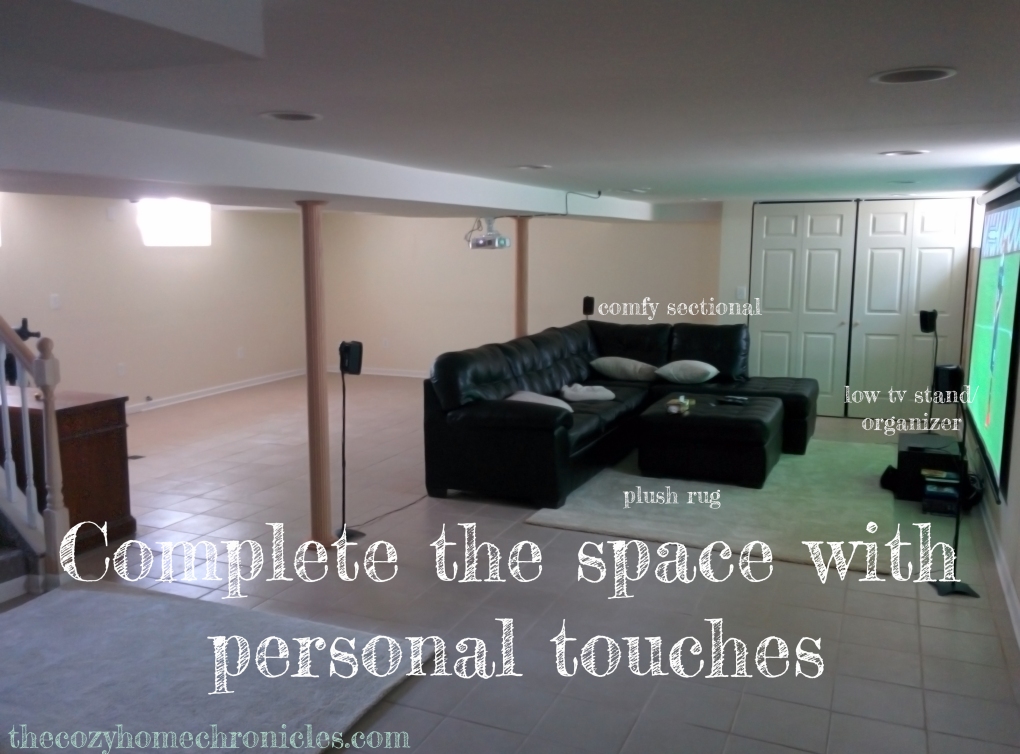
Once you are done with the setup, all that is left to do is clean up and complete your space with a nice rug (to hide all the wires), comfy seating, decor, and a budget friendly Ikea TV stand (to hide your central speaker and organize any devices, games, or DVDs you have).
Of course, don’t forget to take a moment to…
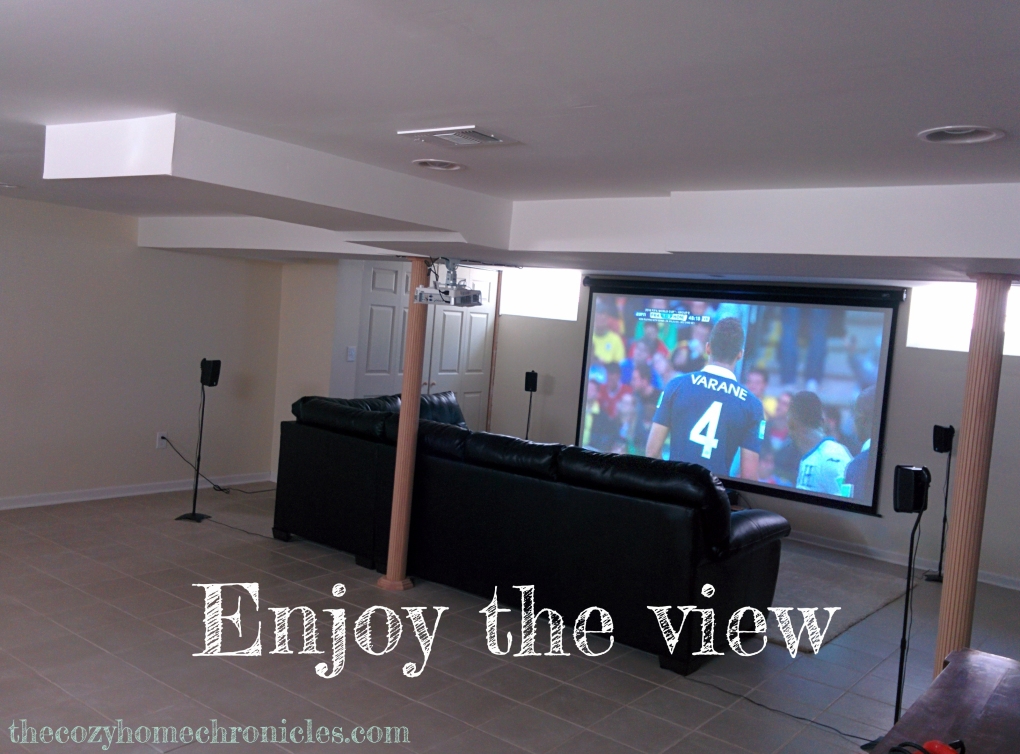
Now call up some friends or family, pop some popcorn, pull out FIFA 16′ or Inception and revel in the thought that you will never need to spend money at the movies again. Seriously, we have only gone out a couple times in the two years since we put this together and that was for The Hobbit and Interstellar! Let us know what you think about this project and if it is something you would consider doing. Until next post, may an evening star shine down upon you 😉
Below are two short clips showing the sound, picture and overall setup taken with an iPhone 6s.
Home Theater Demo #1 from sammyandsufi
Home Theater Demo #2 from sammyandsufi
If you liked this post please follow us and share!


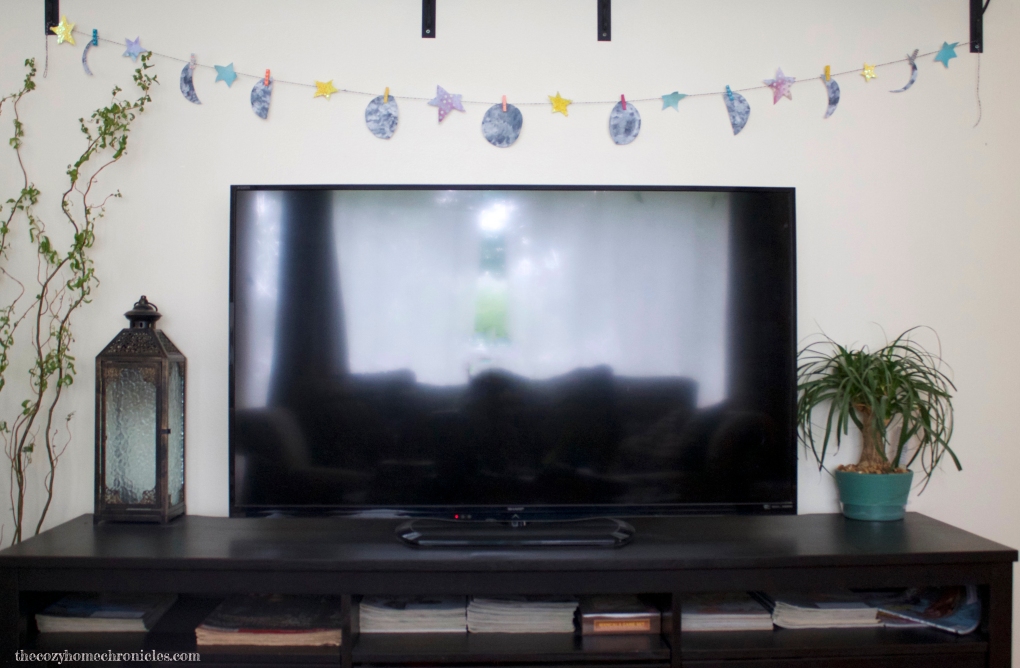


 Last but not least, throw down some plush