How We Flipped and Sold a Home in Less than Two Months

We never planned on flipping a home, it kind of just happened. The short story is that we helped a family member buy a home that they ended up realizing was not right for them. We know, that can be quite a costly mistake. Luckily, the home was in excellent condition and the housing market was doing great so we sat down with our realtor who suggested we fix 5 simple things to get the home sold as soon as possible. And it worked! It really worked! Within a month, we had the home listed and shortly after had secured a buyer. So today we are sharing the simple things we did to get the ball rolling and how much it cost us. It’s probably important we note that we are not realtors or contractors, just a couple of avid DIYers with a tad bit of crazy in us 🙂

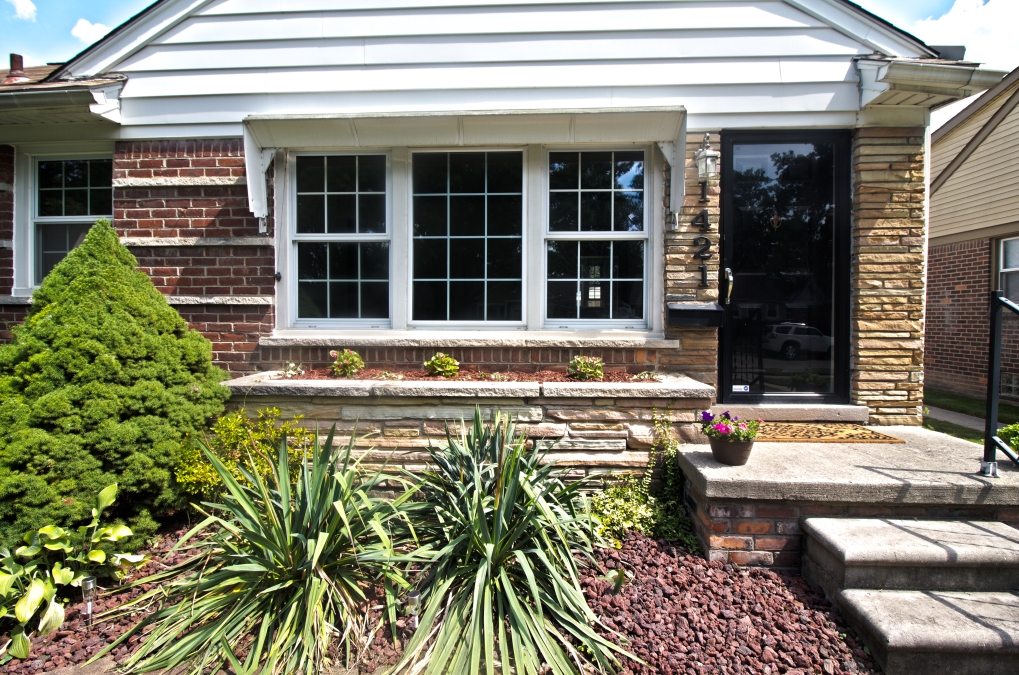
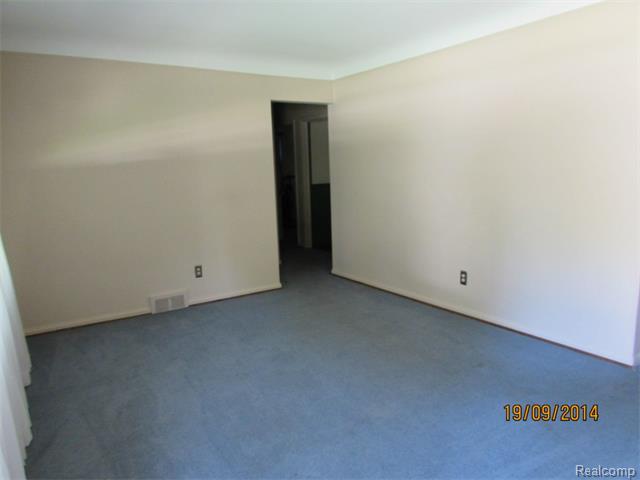
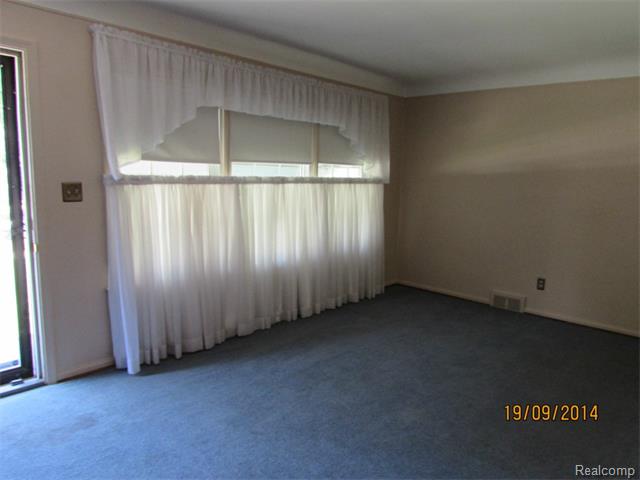
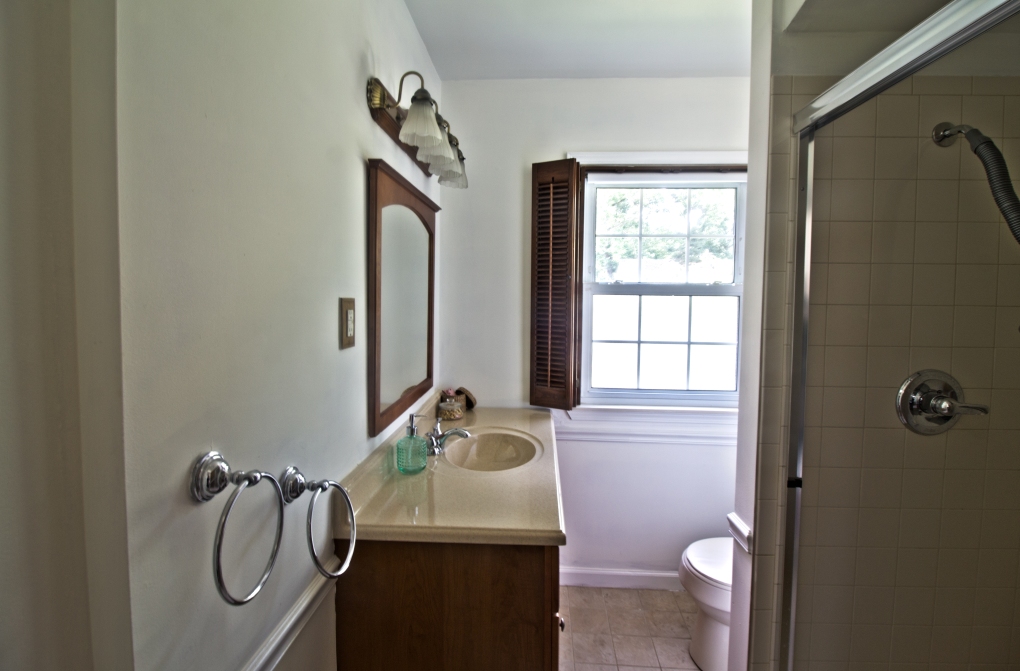
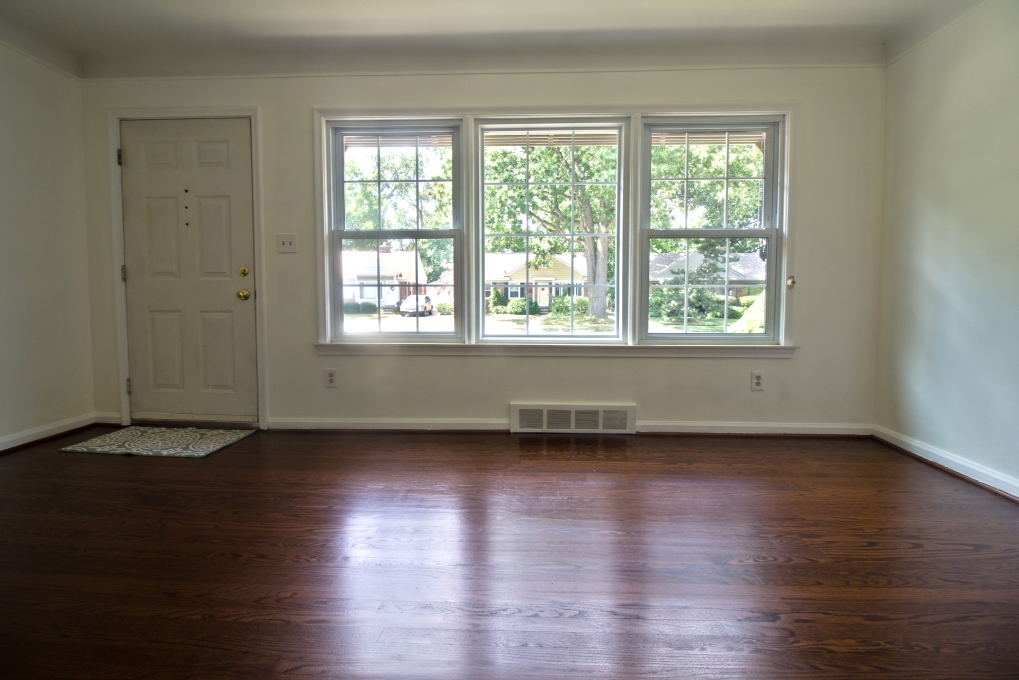
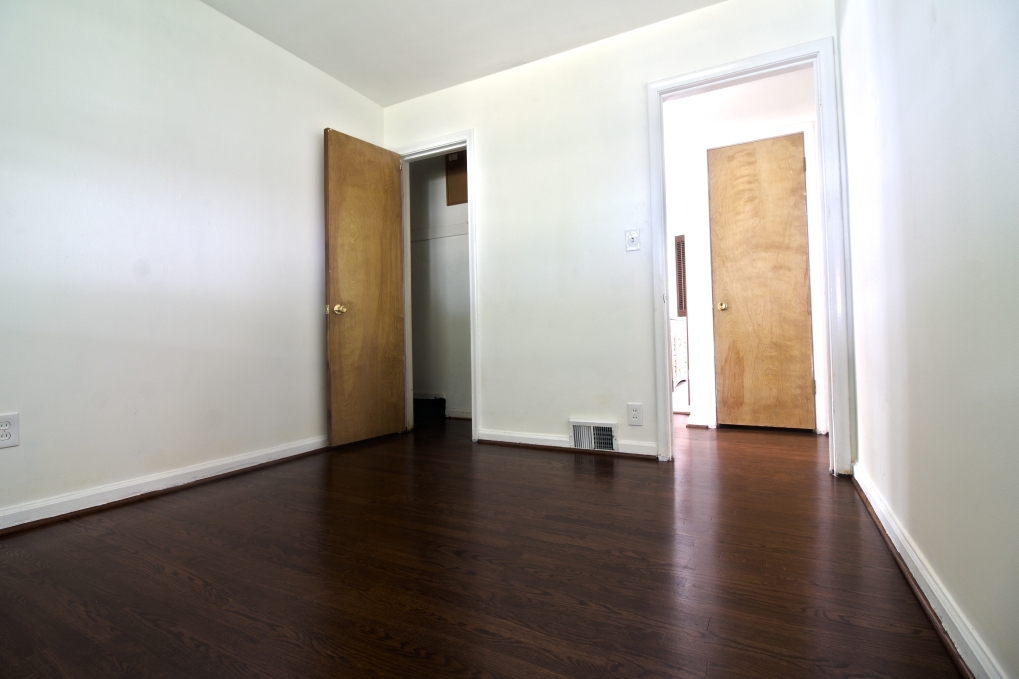
Here are the pictures of the home from the original listing prior to us doing anything:

215063318_2_0
215063318_3_0
215063318_5_0
215063318_9_0
215063318_11_0

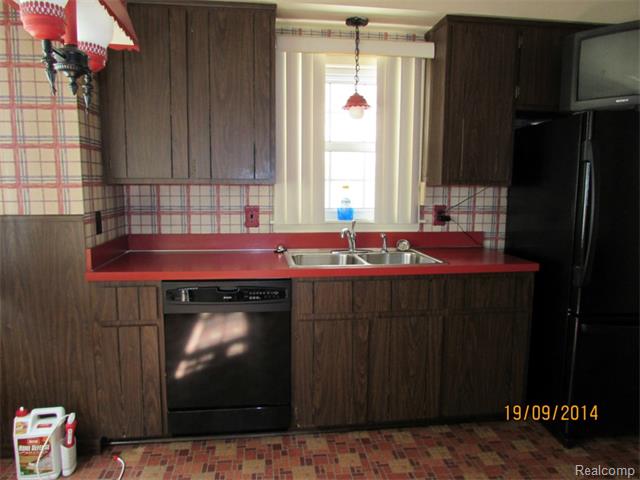
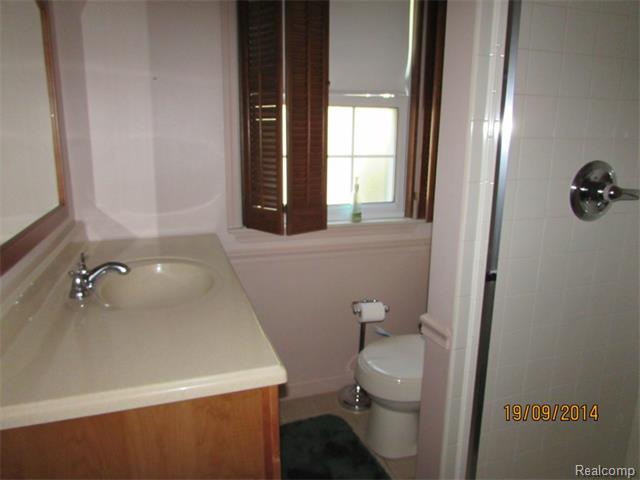
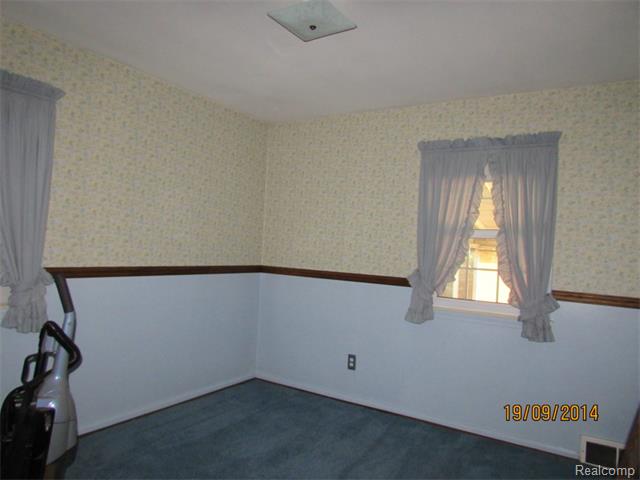
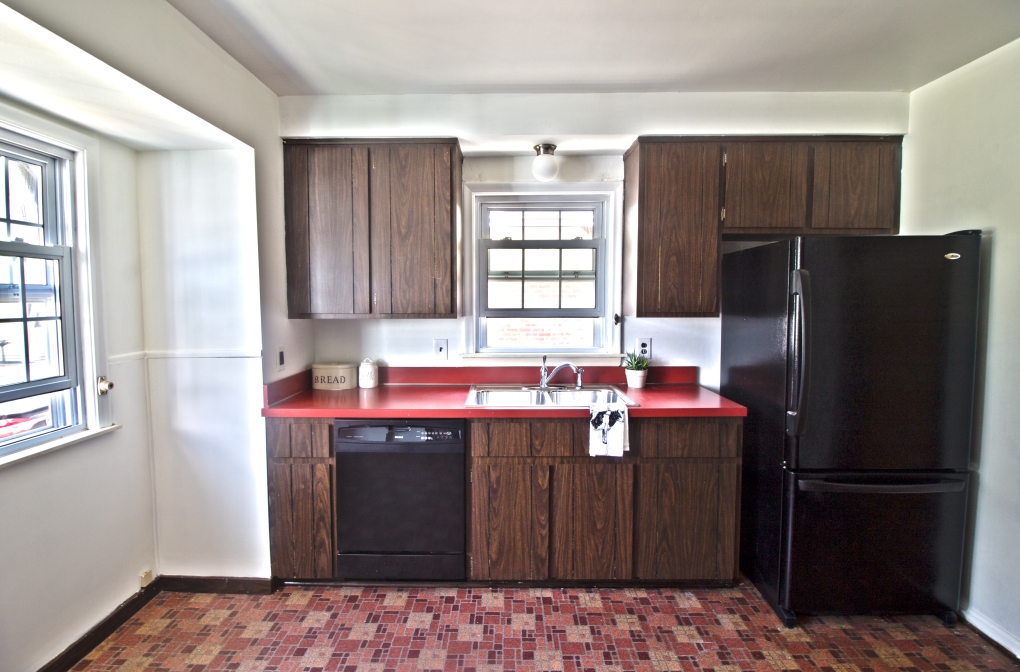
These are the five things that were recommended we change:

  1. Remove carpet and wallpaper
  2. Add a fresh coat of paint
  3. Finish hardwood floors
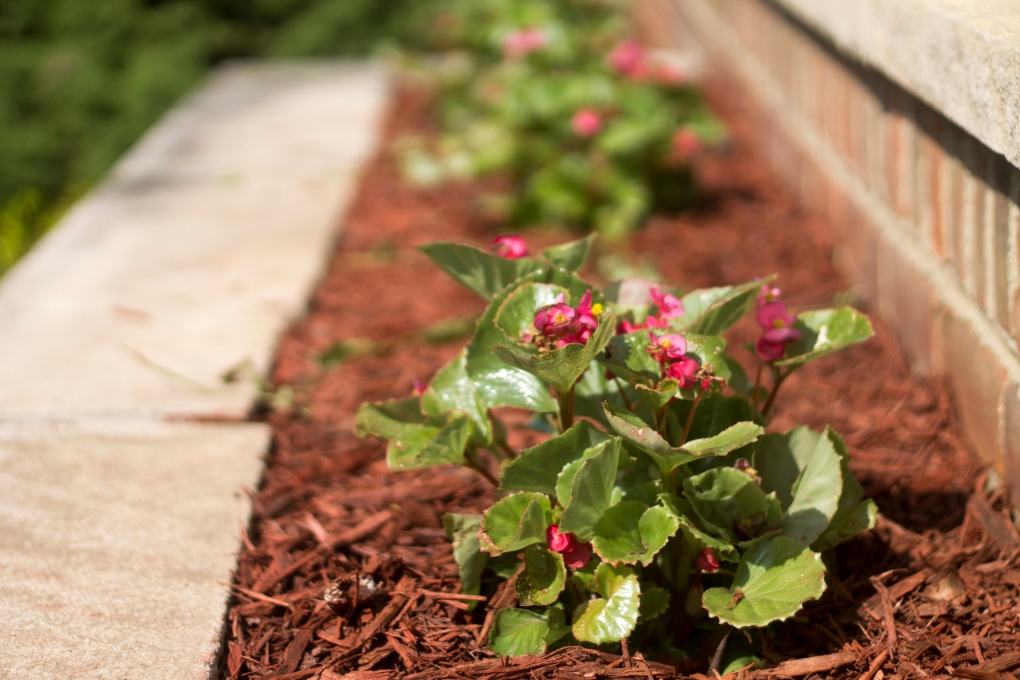
  4. Landscaping
  5. Professional cleaning

We also went a little above and beyond by adding a few items for styling purposes. These included a kitchen towel and plant in the kitchen, a welcome mat outside the front door, and a towel, soap dispenser, and some decorative items in the bathroom.

We didn’t do much DIYing here because of time constraints with our school so instead we hired people to take care of most of the labor. Below is a breakdown of each job and the cost associated with it:

  • City Inspection: $300 – The city inspection consists of all matters related to city code and regulation. They come in and make sure everything is up to standard and request that you update what is not so you can get a COO (Certificate of Occupancy) which you need if you are selling the house.
  • Painter: $1800 – We requested a handful of quotes and went with the mid-range contractor that had between 5-10 years of experience. Most of the cost was for removing the old wallpaper from the entire main floor. The patching up and painting wasn’t as bad as we initially thought.
  • Flooring Company: $ 1700 – This cost was a deal compared to the other quotes we got. The flooring contractor removed the old carpet and refinished the hardwood floors in approximately a week’s time. Be aware that the cost could be higher if you have flooring problems or need wooden trim and/or shoehorn installed.
  • Electrician: $250 – We needed an electrician to remove and replace all the 3-prong outlets to 2-prong because they were not grounded. Another minor thing he did was make sure that all of our wiring was up to code in the garage and outside the house.
  • Professional Cleaning: $150 – To sell the house and truly bring out the beauty of the space we hired a local cleaning company to polish up the home just before it hit the market for showings.
  • TLC: $100 – After we got all of the above done we decided to caulk to make sure corners, windows and all doors were sealed and correctly adjusted to their frames.
  • Landscaping and Decor: $150 –  You can’t go wrong with mulch, flowers and lava stones to make the landscape pop. We also purchased a nice outdoor welcome mat and indoor mat for potential buyers to feel a sense of home.

TOTAL: $4,450

We really wish we had the time to do these updates ourselves, but it would have been too overwhelming and would have taken us much longer. If we did do some of the things ourselves such as the painting and cleaning then we would have saved quite a bit of money, although we did recoup the costs with the sale of the home. The important thing to note is that it doesn’t take much to get a home move-in ready even if there’s a kitchen or bathroom that could use some updating.  If you have a similar project you’re diving into or are considering becoming a house flipper, now you know what it takes to get a home with good bones flipped and sold in no time at all. Now for the part you’ve all been waiting for…….the reveal:

FrontDoor

Kitchen2

BTHRM

Living Room

Bedroom1A2

Landscaping

Have you ever flipped a home or considered flipping a home? Let us know in the comments below. We can’t wait to share our next exciting project with you so if you don’t want to miss out be sure to follow us here and on instagram for the latest and greatest. signature3


DIY Upcycled Brown Paper Bag Gift Wrap

It’s finally the holiday weekend and that means we are inching ever closer to the start of 2018. We recently hit our 2 year blogging anniversary earlier this month and we thought it would be nice to celebrate with a short reflection and a makeover of the first post that ever went up on this blog. Why? Because sometimes, in the nitty gritty of blogging we can find ourselves questioning it all and in our tunnel vision of self-pity and negativity, we forget how far we have come. Comparison isn’t so bad when you’re looking at yourself and everyone loves a good before and after so here is ours.

IMG_8421

IMG_7538

As you can see clearly, our styling and photography has drastically improved in the last two years. Our first post was written in 2015 just a week before Christmas and right before I was about to dive into a week of hell taking my PhD qualifying examinations (a 7 day, 40+ page writing endeavor). Since that first post, we have connected with some wonderful bloggers, participated in two One Room Challenges, built a small but amazing community, and even wrote our first sponsored blog post.  There have been many times this year when we would feel frustrated with our engagement or turn-around time and even question what kind of blog we were aiming to be but looking back to our first post, I think the answer has always been there. DIYing is obviously something we are very passionate about as well as striving to live as simply and sustainably as possible and that’s exactly the commitment that our first post embodies. In this post, we will be sharing our revamped post with a little twist; using stencils to create beautiful gift wrap designs. For those of you who waited until last minute to wrap your gifts, you’ll want to hold off on that last minute Target run because this is such a simple way to add a personal touch to your gift wrapping and for next to no cost at all (depending on what your craft supply stash looks like). The wonderful thing about this gift-wrap is that it’s not just for Christmas; you can customize it to fit any holiday or occasion year round.

IMG_7551

Supplies
Brown paper bag
Scissors
Stencils
Metallic Paint Marker, paint pens, or sharpies
Twine
Embellishments such as eucalyptus, flowers, pine cones, etc..

IMG_7527

Directions

  1. Flatten your brown paper bag and cut down to the size you need.
  2. With a metallic paint pen, stencil in the blank side of the bag using the pattern of your choosing.
  3. Place your thoughtful gift inside and wrap nicely.
  4. Embellish with rustic twine, eucalyptus, pine cones, or holly.

IMG_7536

As you can see, I was going for a minimalist/bohemian look (surprise, surprise) with the copper and white pattern, twine, and eucalyptus accent. It’s almost too pretty to open!

IMG_7546

So what does 2018 hold for us? It’s been really hard to answer this question because life is pretty busy with two kids and graduate school on our plates. We do know that we love what we do and we love sharing it with you. We hope that we can continue growing; growing ourselves, our skills, and our blog and hopefully inspiring you all along the way. We can say for certain that we will definitely be sharing more DIY projects, simple family recipes, our simple living journey, and parenting adventures but whether we can keep up with our 50 blog posts/year productivity will remain to be seen. If there are topics you would like to see more of here on The Cozy Home Chronicles, please feel free to leave your suggestions in the comments below. And for those of you new bloggers, those considering starting blogs, or even veteran bloggers wondering “what’s the point?”, keep on dreaming and working towards those dreams with your eyes on the journey and not solely on the destination.

“Tell your heart that the fear of suffering is worse than the suffering itself. And that no heart has ever suffered when it goes in search of its dreams, because every second of the search is a second’s encounter with God and with eternity.”-Paulo Coehlo, The Alchemist

signature3