Low Waste Eid Volume 3

Hello friends! I know I haven’t been very active on this blog and there is a good reason for that. Between my daughter’s food allergy treatment program which has us flying to California every 3 months and me still writing my dissertation, it’s hard to find time to write here. One thing that I do make time for is trying to live more sustainably which I share on my instagram page. That journey has led me down many paths and projects and I’m excited to be sharing this one with you. I started Low Waste Eid three years ago as a way to showcase and encourage a slower, more conscientious approach to celebrating Eid; an approach that is part of the ethos of our faith. Each year I am awed by the creativity and thoughtfulness of the contributors and this year is no exception.  As you will come to see, it is perfectly possible to decorate and gift in a socially responsible way. All you need is a bit of imagination and resourcefulness. I am looking forward to writing more consistently about my low waste journey when life gets a little less chaotic but in the meantime, you can download the ebook guide full of low waste gift ideas and decor below.

If you enjoyed this guide, please share it with your family and friends and please show these wonderful contributors your support by following them on instagram and engaging with their content.


Amanie
Anaam
Ayesha
Farhana
Hadeel
Hana
Malika
Momina
Nada
Nida
Sadia


The UpSkill Project Community Workshop

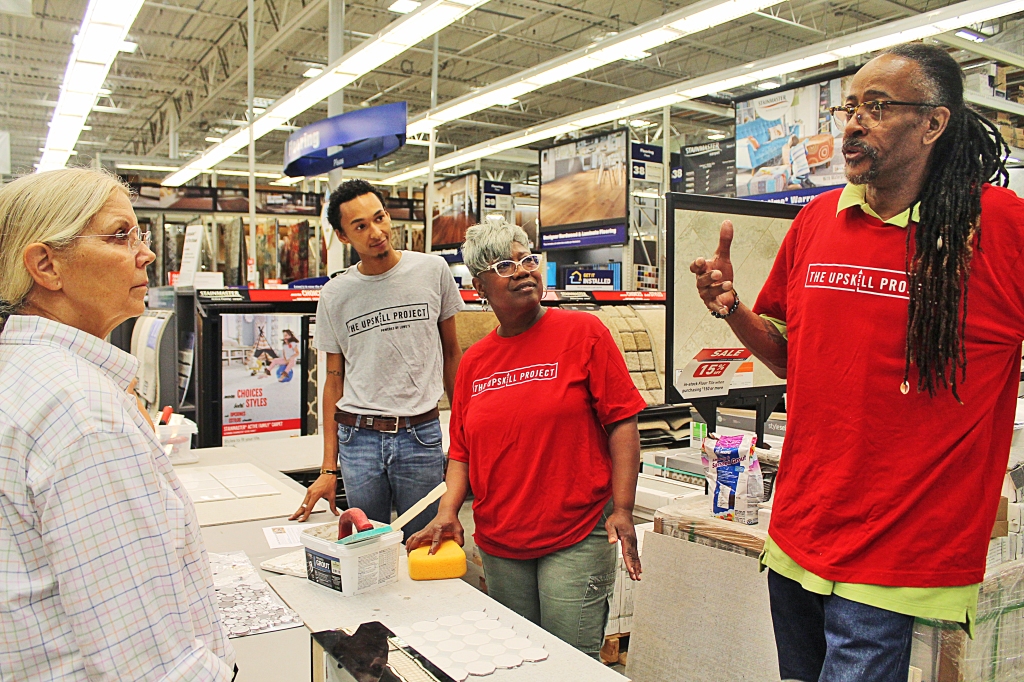
Three weekends ago, I had the privilege of attending and documenting The UpSkill Project Community Workshop which was held at the Warren, Michigan Lowe’s on a stormy Saturday. It was my 30th birthday weekend and I could think of no better way to celebrate than to be doing what I love…DIYing of course!

IMG_7574

The workshop was set up to be a hands on learning experience for homeowners wishing to pick up basic home improvement skills and I can’t express enough what an amazing opportunity this was. I love that Lowe’s is inspiring and educating homeowners through this platform! I learned so much from the Lowe’s experts that day and I’m so excited to share some of that with you in this post. Shall we dive right in?

IMG_7569

Drywall

Drywall dings and dents are a common household issue with a very simple solution. Lowe’s has this nifty drywall repair kit that comes complete with spackling, a putty knife, and a sander. All you need to do is gently spread the spackle over the hole until it’s covered. This particular spackle is made to go on pink and turn white when it’s dry so you know when it’s time to sand. For larger holes, you will need to place the self-adhesive mesh patch over the hole before covering with the spackle. Once you’ve sanded the surface until it’s smooth, you can go ahead and paint over the patch up. It’s that easy!

IMG_7581
Painting

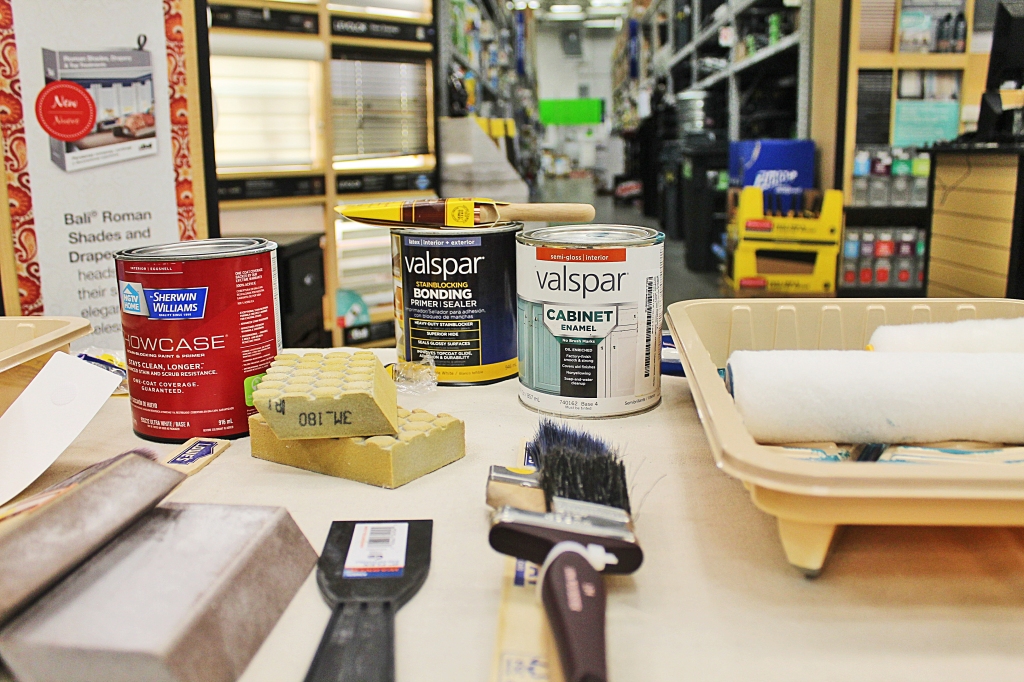
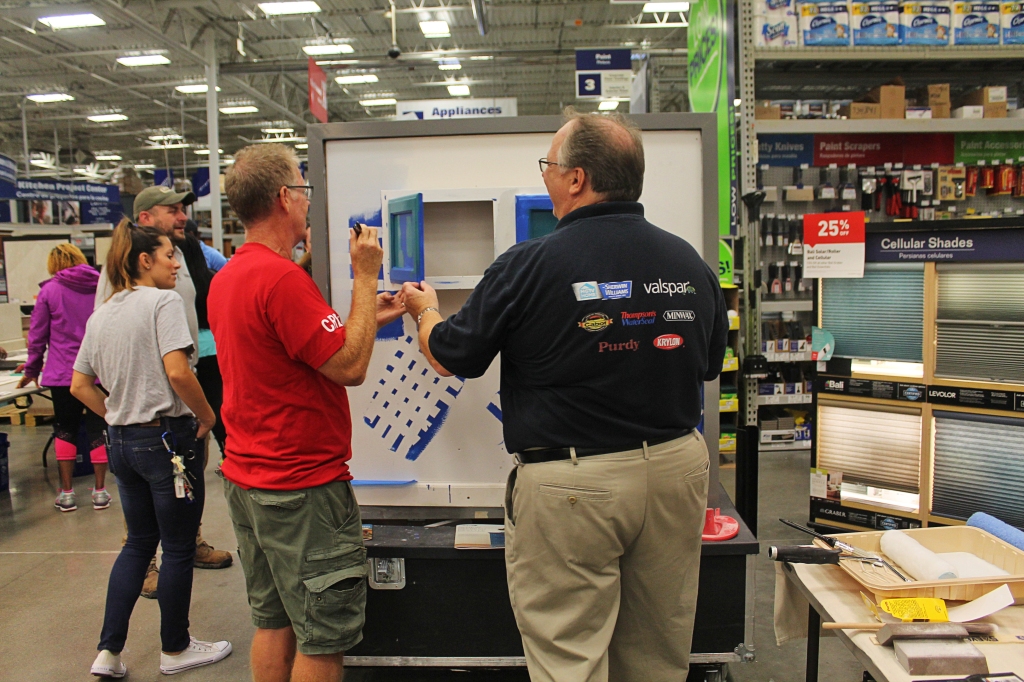
Painting is something we’ve done quite a bit of for our home renovation projects but it wasn’t until this workshop that I realized I was doing it all wrong. Prior to this workshop, I would paint the wall with a roller first and then use a brush to finish the corners and edges. I learned from Ray that it should be the other way around: paint your corners and edges first then go over with the roller. Oops. I definitely see this method resulting in a much more professional-looking paint job. It looks like I might have to revisit some of my old paint jobs!

IMG_7567

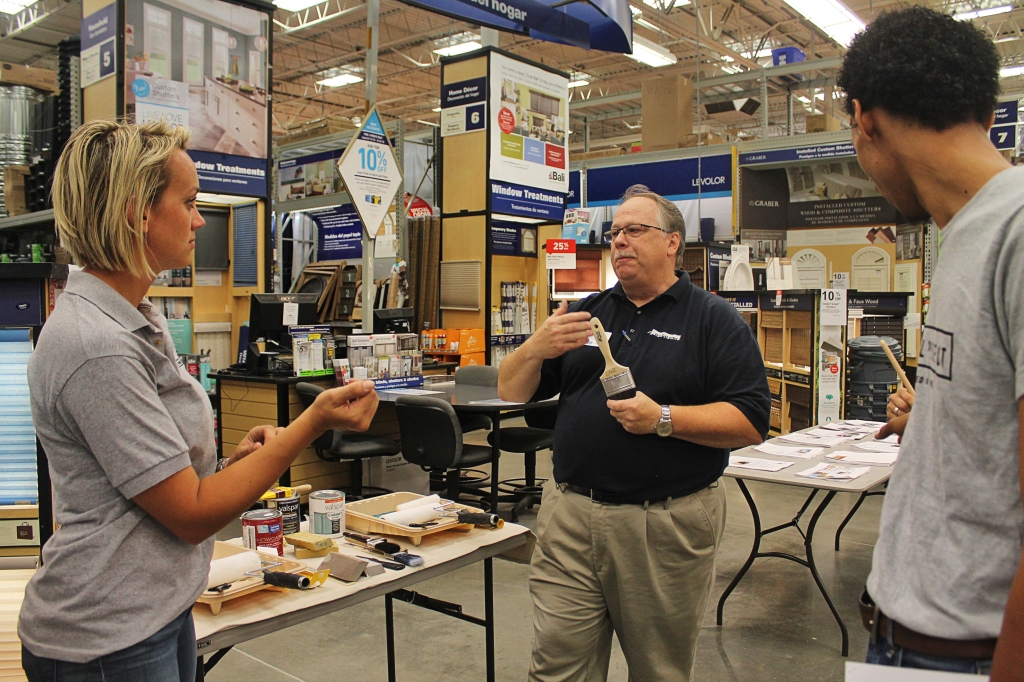
The other important thing I learned is that the quality of the brush really matters! Ray, who is a passionate paint manufacturer, said he would actually advise sacrificing the quality of paint over the quality of the brush. He went on to show us the difference between the two brush’s bristles and let participants see for themselves as they got to paint a kitchen cabinet.

IMG_7566

Let me tell you, the Purdy brush we got to test out was amazing! All those times I was frustrated with my paint job and I thought it was just me. Now I know it was the cheap brush I was using and I can’t wait to implement these simple tips for my next paint job!

IMG_7565


Tiling

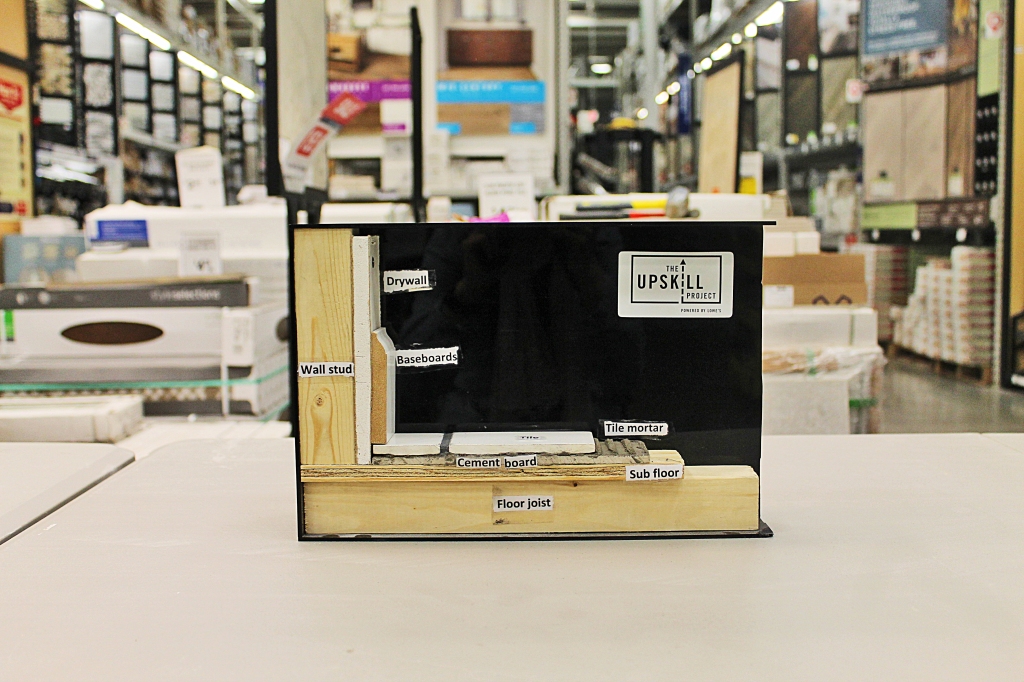
Tiling is another skill we are familiar with as we have renovated our basement, kitchen, and bathroom in the past. Of course, that doesn’t mean we did everything perfectly so I’m sharing some of the useful reminders I learned. One of the cool resources Lowe’s had on display was this cross-section of the wall and tile. Many of the participants didn’t know that you couldn’t just tile over existing tile so Andrew, one of The UpSkill Project teachers, explained what subflooring was and the importance of the cement board under the tile. I learned about something called self-leveling concrete which you can pour to create a smooth, even surface for tiling. I wish I had known about this when we were tiling our basement!

IMG_7557

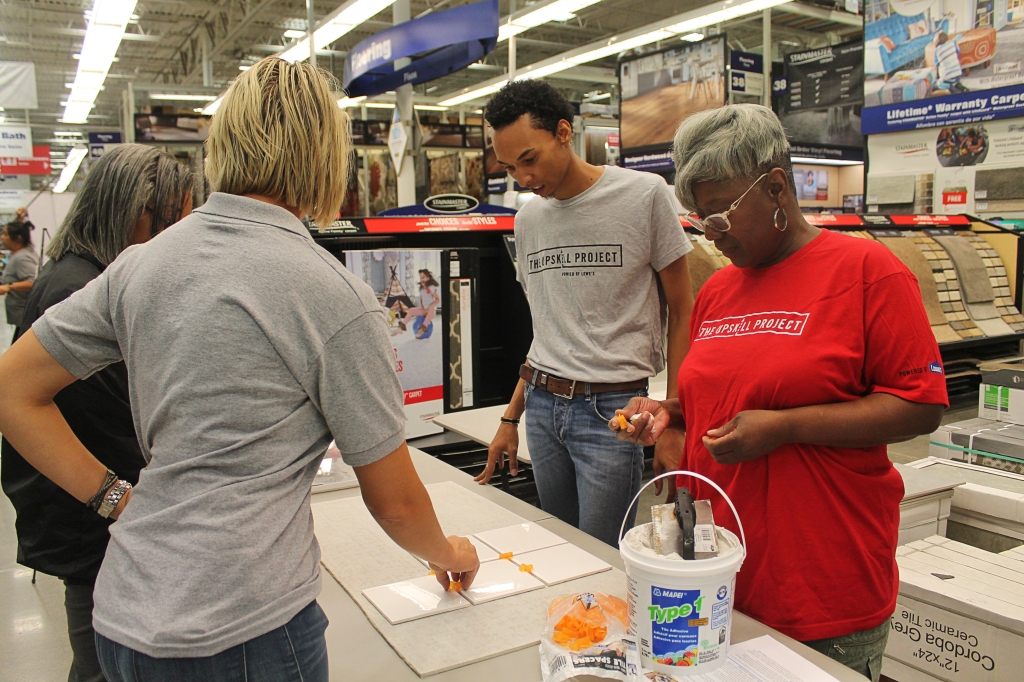
Participants were able to practice laying tile spacers, backsplash tile, tile adhesive, and grout. 

IMG_7572

The Lowe’s experts recommended a pre-mixed grout for an even finish and stressed the importance of wiping the tiles consistently with a grouting sponge to prevent a hazy film from forming. The pre-mixed grout is something I wish I had used in our bathroom because of the variability in grout color that can result from small changes in water content.

IMG_7561

Plumbing

Plumbing was probably one of the more intimidating skills for participants, me included. I’ve always let my husband handle that part of our renovation projects. After this, however, I think I’m pretty confident I can swap out a vanity and sink. You’ll just have to remember to disconnect the water supply lines prior to starting and to keep a bucket under the sink during the P-trap removal. If you don’t, let’s just say you’ll find yourself in a very messy situation.

IMG_7584
Aside from learning these four skills, Lowe’s had a table set up with lots of useful pamphlets covering everything from tool buying guides to DIY laminate floor installation. You better believe I walked out of that workshop with a stack of pamphlets. I also really enjoyed meeting the other UpSkillers and watching them bond over sharing their DIY projects with each other.

IMG_7575
To be honest, I had been in a creative slump up to this point but after this workshop I was so inspired to find a new DIY project to tackle! What about you guys? If you’re getting ready to take on a new home project, we would love to hear about it in the comments below. If you have specific questions about any of the skills I discussed, you can also leave them in the comments below and we will point you in the right direction. You can always go into your neighborhood Lowe’s and ask a Red Vest associate for help as well. As always, if you loved this post and found it helpful, we would appreciate it if you would like it and share it.

signature3


This post is sponsored by Lowes. The thoughts and opinions are my own.


How to Build a Paved Patio with The Upskill Project

Back in May, I wrote about The UpSkill Project Contest where homeowners could submit a short video describing a DIY project they needed help with. Five local residents would receive $2000 in Lowe’s credit to purchase supplies along with a team of experts to help get the project done in just two days!

UpSkill_Horzntl_endorsed_k

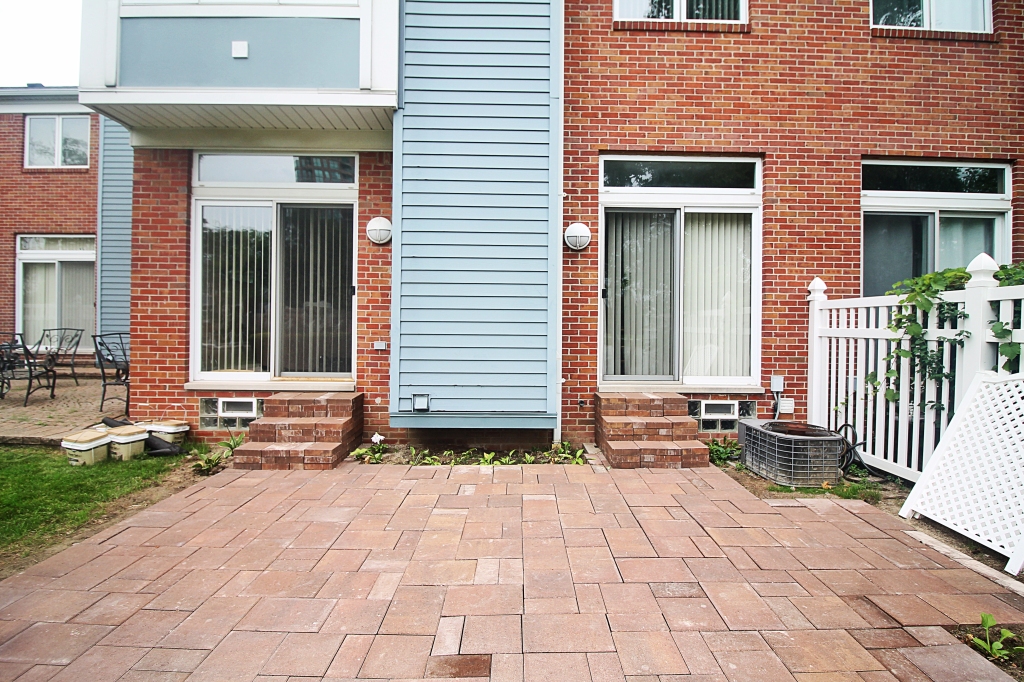
This summer, I got to partner with Lowe’s to document one of the resident’s project transformations. And not just any project…a paved brick patio! You all know how much we love gardening and the outdoors so being able to learn how to do build a patio from the ground up and share it with you was a dream come true.

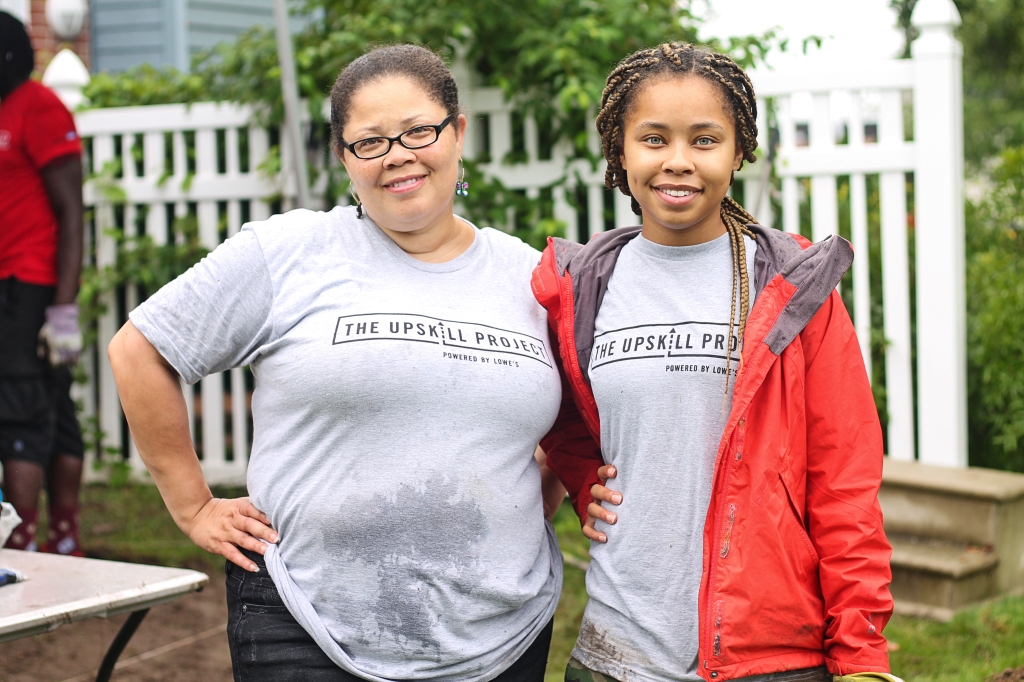
Meet Hattie and her mother, Dr. Tyra.
IMG_7383

Hattie was actually called to help her aunt record her UpSkill Project Contest entry when her aunt convinced her to submit one herself at the last minute. Knowing that her mother had been wanting a patio for the last two years, but would never justify spending on herself when she could help others, Hattie felt her mother deserved a space to entertain and have friends and family over. You can imagine just how excited her mother was when she found out she was finally going to get that patio. Dr. Tyra LOVES cooking and entertaining; so much so that she cooked the team a dream breakfast on the second morning of the project.

IMG_7500

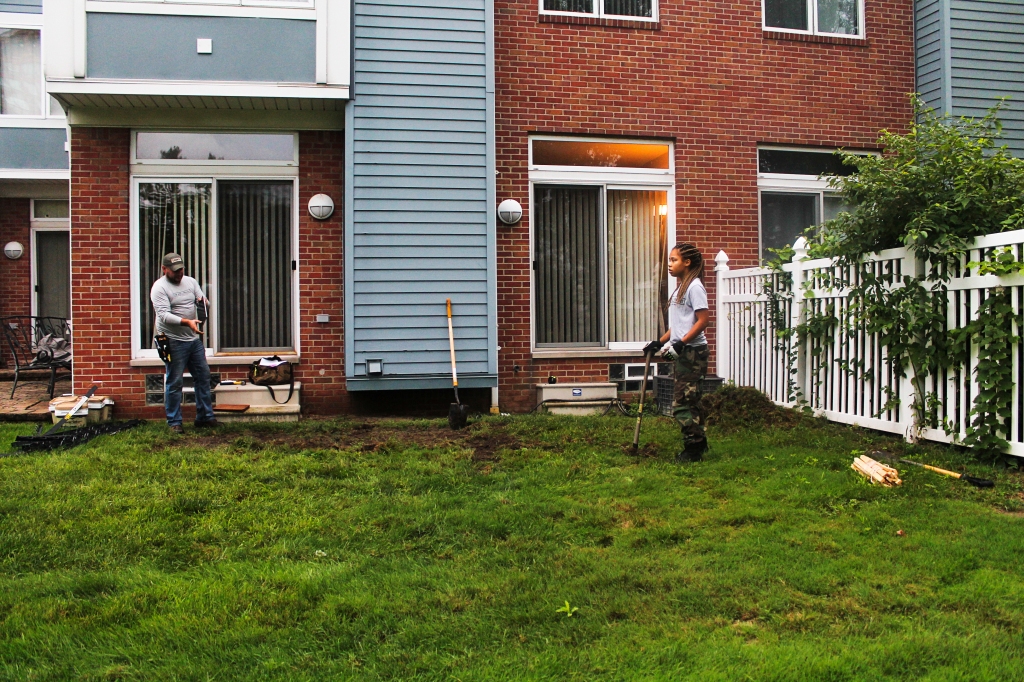
We all love a good before and after, so here’s what the space looked like prior to the start of any work. Nothing fancy, just an empty patch of grass.
IMG_7336

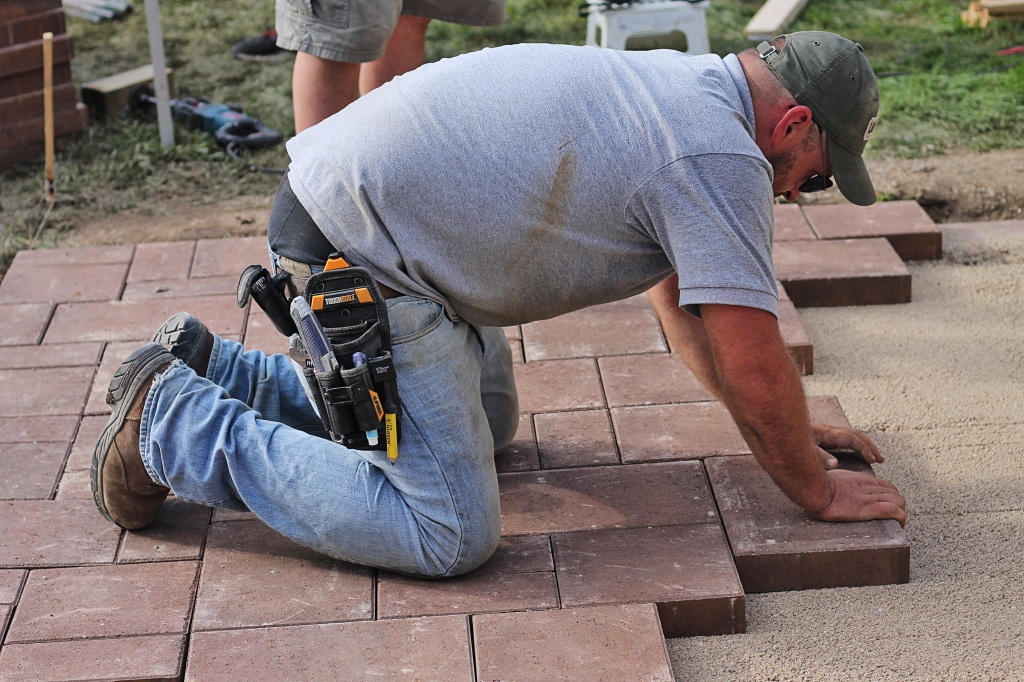
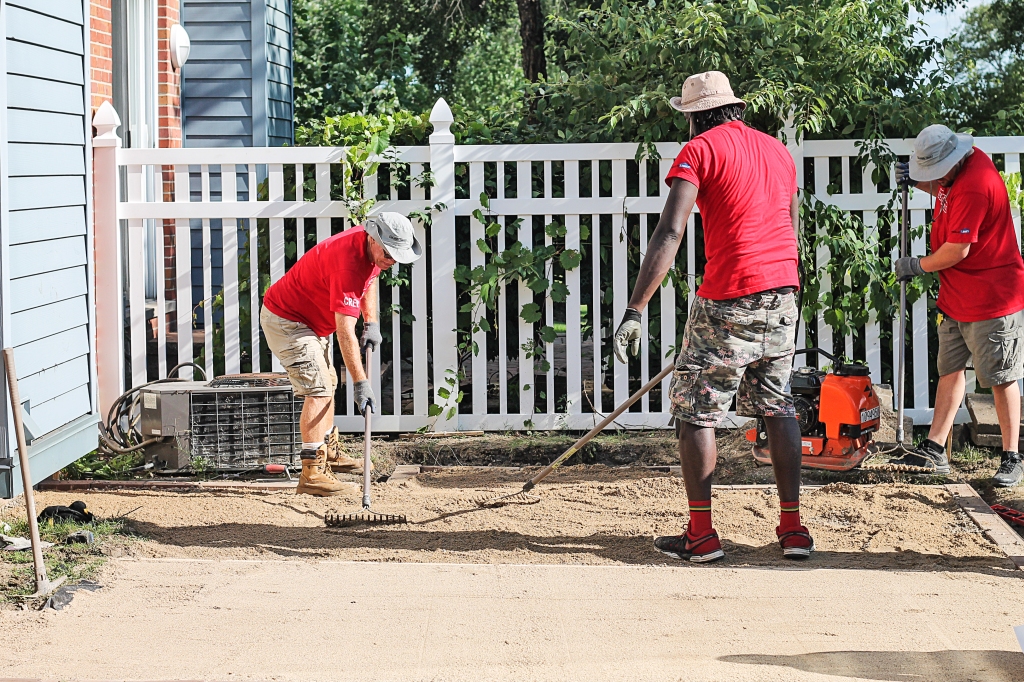
Leading the team through the patio building was Andrew who is a carpenter by trade and has his Bachelor of Fine Arts in Sculpture. How cool is that?! The Red Vests Eric, John, and Zach were from a local Lowe’s in the Gardening and Outdoor Department. Everyone worked so well together and by the end of the project I felt like I was in the company of friends.
IMG_7547

IMG_7520

Of course it wasn’t all fun and games so today I’m sharing some of the important things I learned about building a paved patio:

You can’t just wing it!

The first and most important step when it comes to building a patio is design and planning. Settling on a design (how large the area should be, what shape, what kind of pavers, etc.) will dictate how much materials you’ll need which in turn will determine your cost. The materials are quite heavy so you’ll want to have everything calculated in advance to prevent any running back and forth to the store picking up heavy materials.

IMG_7343
Touch things once.

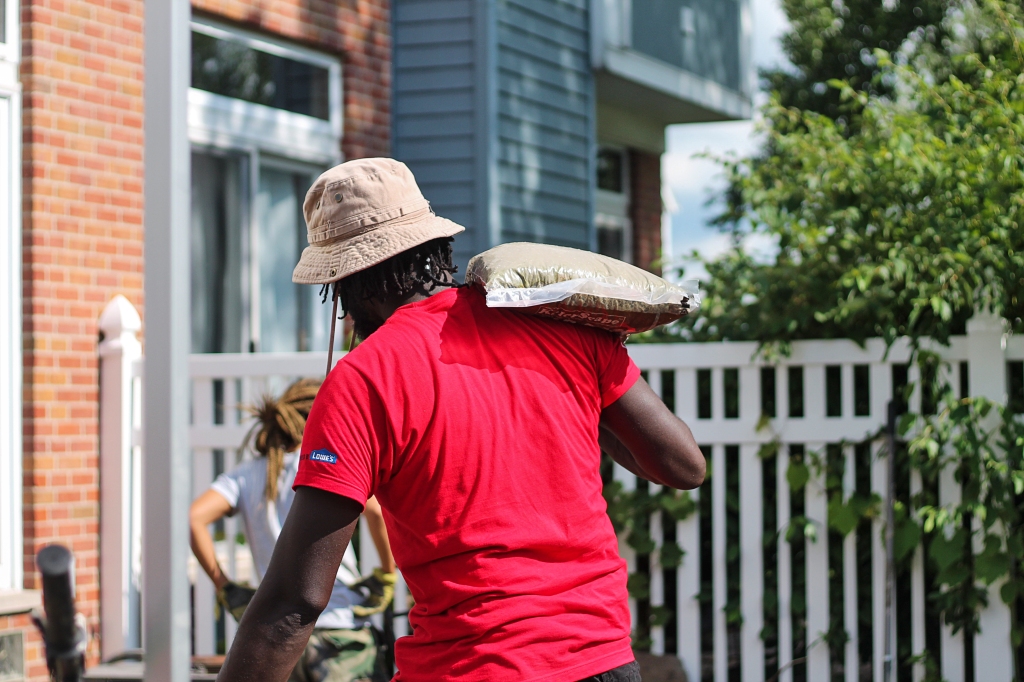
This very valuable advice was given to me by one of the Red Vests, Eric, when he saw that the materials were delivered to the front of the garage instead of to the backyard. To save yourself time and energy, have your patio materials close to your work site so you’re not having to haul things more than you need to. This also includes clean up. It’s important to have your tools for removal and your method of disposal arranged prior to starting your project so the process runs smoothly and you don’t have to move debris twice.
IMG_7413

If you see rain in the forecast, abort the mission.

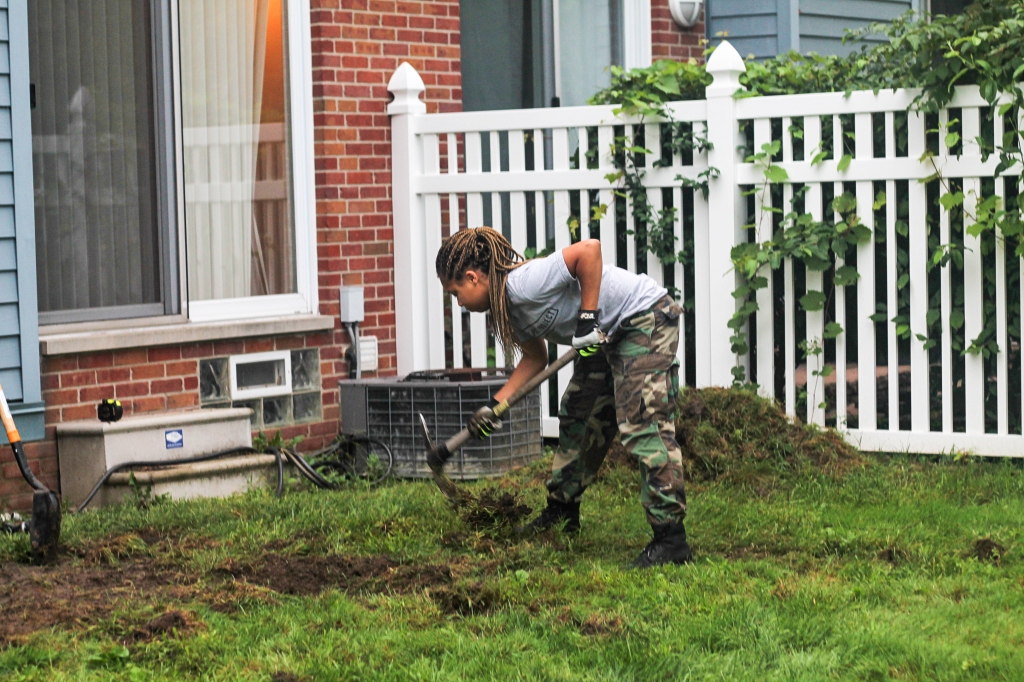
Or simply wait until the weather clears up. A wet ground can really interfere with the compacting process which is super important for a level and solid patio. The rain on the first day of this  project threw us a serious curveball and delayed the completion of the patio. There is a silver lining to the rain, however, if you’re not in a hurry to finish your project. A wet ground makes it much easier to pull out the grass so if it’s raining you can still begin the sod removal phase of your project. Just be sure to let the ground dry sufficiently before moving on.
IMG_7338
Assemble a team.

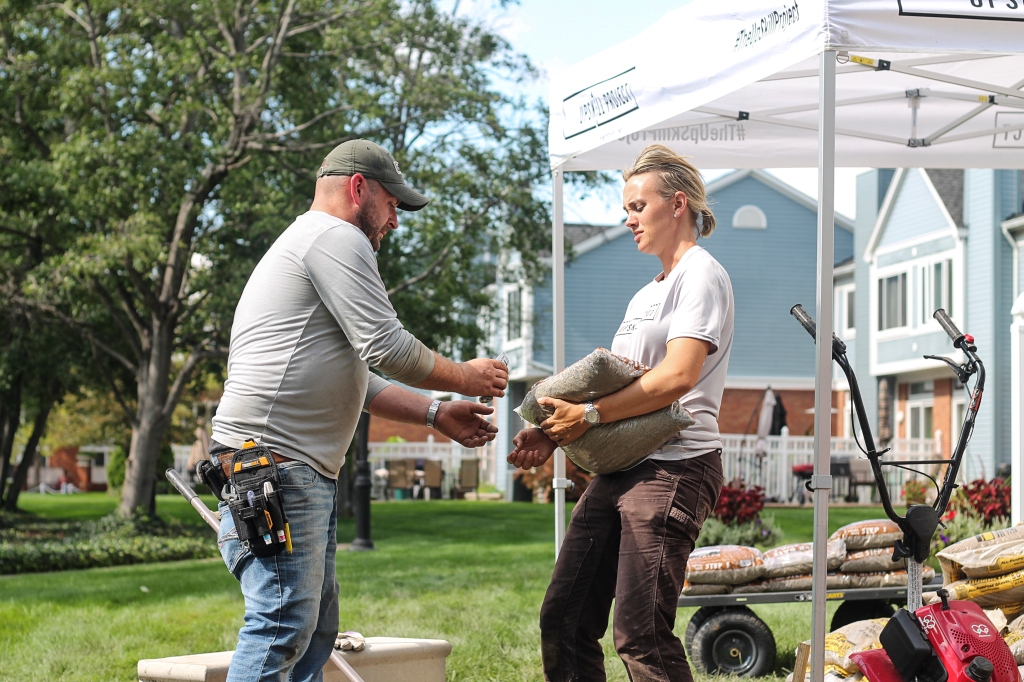
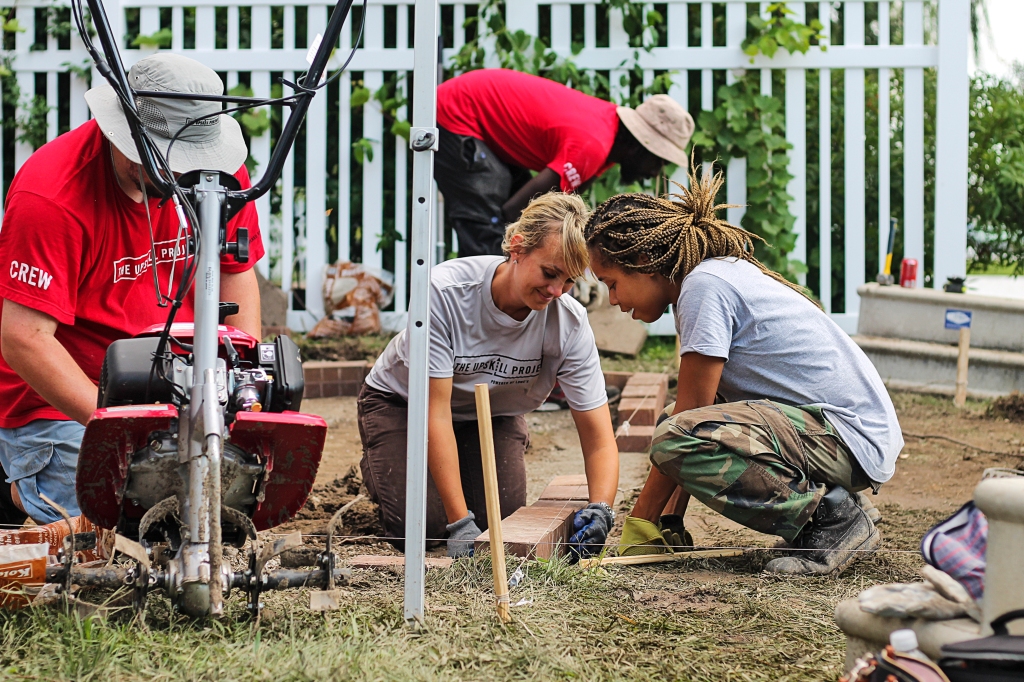
There’s nothing overly technical about building a paved patio but you should know that it is very labor intensive. From stripping the sod to pouring and compacting gravel to laying the pavers, each step requires quite a bit of upper body strength. If you want to build a patio in the shortest amount of time without burning out quickly, you’ll definitely want a team of 3-5 members to help spread out the workload.
IMG_7408

IMG_7445

Compact, Compact, Compact.

I can’t stress enough how important it is to begin with a sturdy and level foundation. To achieve this, you will need to compact several times at each of the following stages:

  1. After you’ve dug out the grass for your patio
  2. After you’ve poured Paver Base Step 1
  3. After you’ve poured Paver Base Step 2

IMG_7426

Start by building a retaining wall

The first pavers you’ll want to lay are the outside ones along the perimeter. More importantly, you’ll want to secure the wall with glue and recess framing to prevent the bricks from extending outward as you continue to compact the gravel and sand. The retaining wall is two brick pavers high and must take into account sloping to prevent water from collecting in your patio. Once the wall is built, you can begin setting the pavers down working toward the middle of the patio area from one end to the other. 

IMG_7454

Don’t forget the landscape fabric.

This is pretty self explanatory. If you don’t want weeds bursting through your patio then this is a crucial step that you’ll want to do once the earth is level just before you begin to pour paver base step 1.

IMG_7505

Once you begin to install the pavers, it’s pretty much smooth sailing from there. All you have to do is make sure to tap the pavers with a rubber mallet and periodically check to make sure they are all level. You also want to leave a space about 1/4 of an inch wide between the pavers for the polymeric sand to be poured. Once you’ve filled all the cracks with polymeric sand, you’ll mist the patio to harden the sand and join the pavers together. Once it’s dry, you can finally furnish and enjoy your patio!

IMG_7542

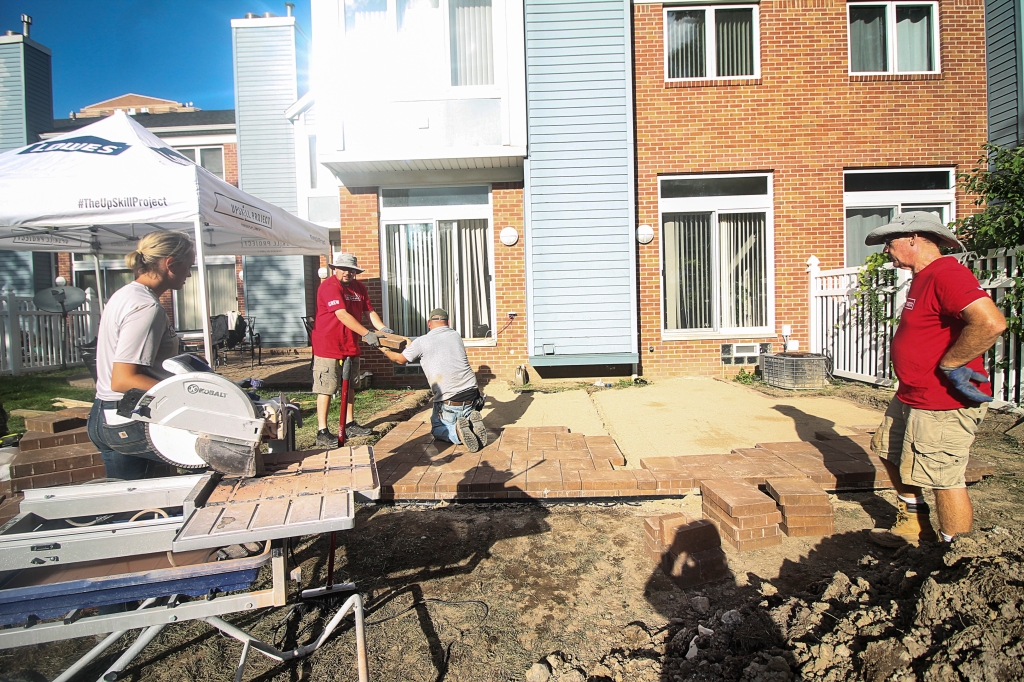
Now that doesn’t sound so bad, does it?! If you’re thinking of doing a paved patio yourself, here are the materials and tools you’ll need to get the job done.
IMG_7551

Materials

Paver Base Step 1
Paver Sand Step 2
Paver Set
Brick Paver

Tools

Tamper
Box Beam Level
Knee Pads
Steel Pick Mattock
Kobalt Long Handle Shovel
Smooth Rubber Mallet
Landscape Fabric
Kobalt Tabletop Saw

IMG_7871

IMG_7878
If you want to see behind the scene footage from the project Do Days, you can check out our Instagram story in the highlights entitled “DIY Patio.” If you loved reading about how to build a patio then you’ll definitely want to check back for our upcoming post on the UpSkill Workshop where I’ll share lots of helpful home DIY skills that I learned. And if you found this post helpful, we’d appreciate it if you would like it and share.

signature3

This post is sponsored by Lowes. The thoughts and opinions are my own.


How We Flipped and Sold a Home in Less than Two Months

We never planned on flipping a home, it kind of just happened. The short story is that we helped a family member buy a home that they ended up realizing was not right for them. We know, that can be quite a costly mistake. Luckily, the home was in excellent condition and the housing market was doing great so we sat down with our realtor who suggested we fix 5 simple things to get the home sold as soon as possible. And it worked! It really worked! Within a month, we had the home listed and shortly after had secured a buyer. So today we are sharing the simple things we did to get the ball rolling and how much it cost us. It’s probably important we note that we are not realtors or contractors, just a couple of avid DIYers with a tad bit of crazy in us 🙂

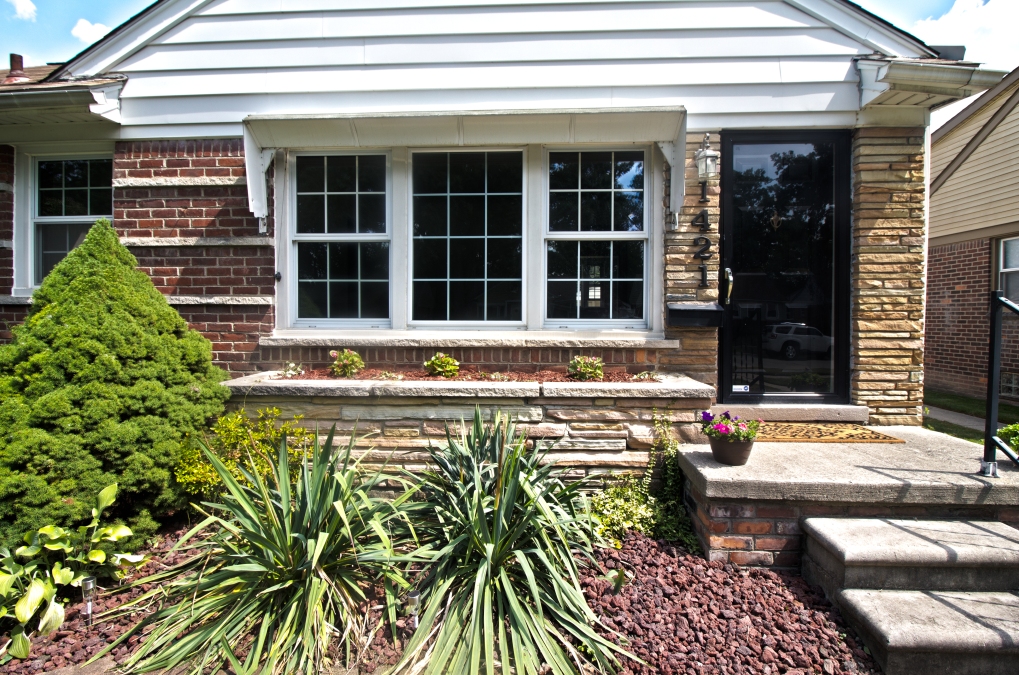
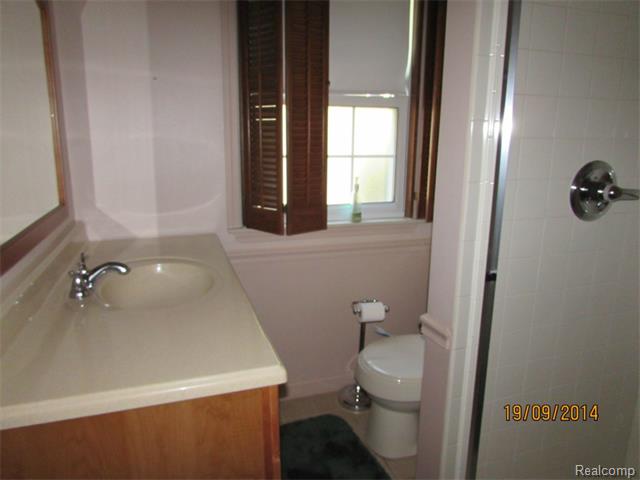
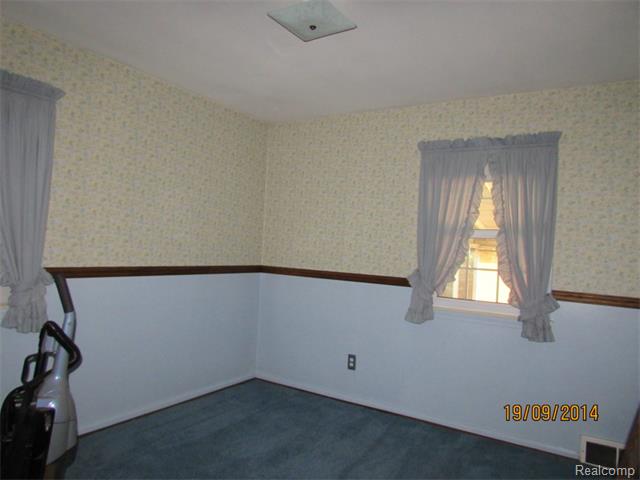
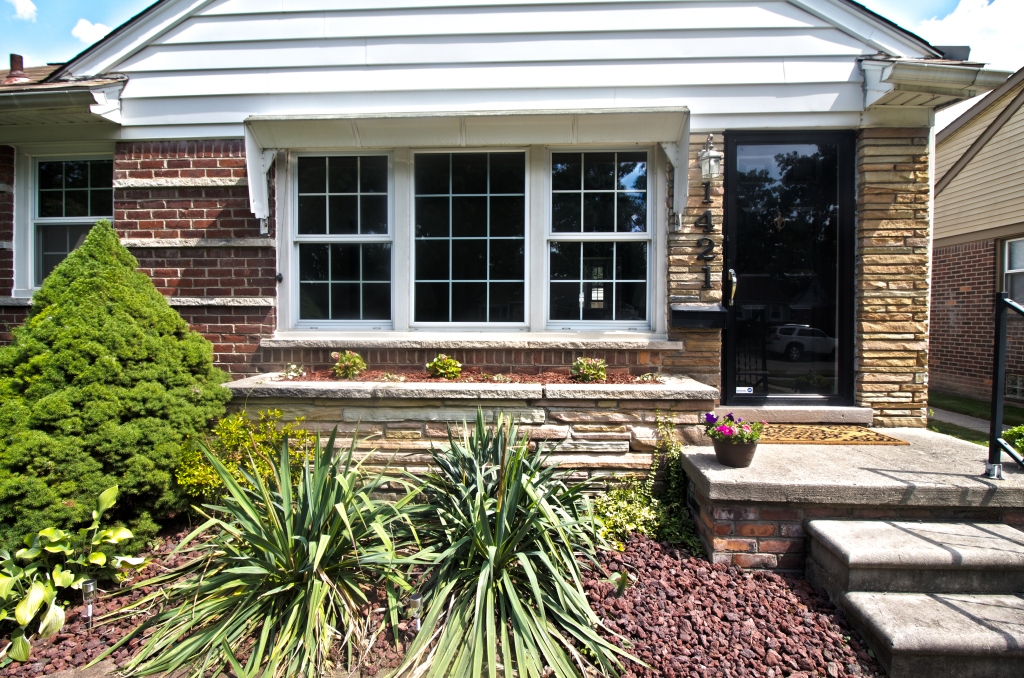
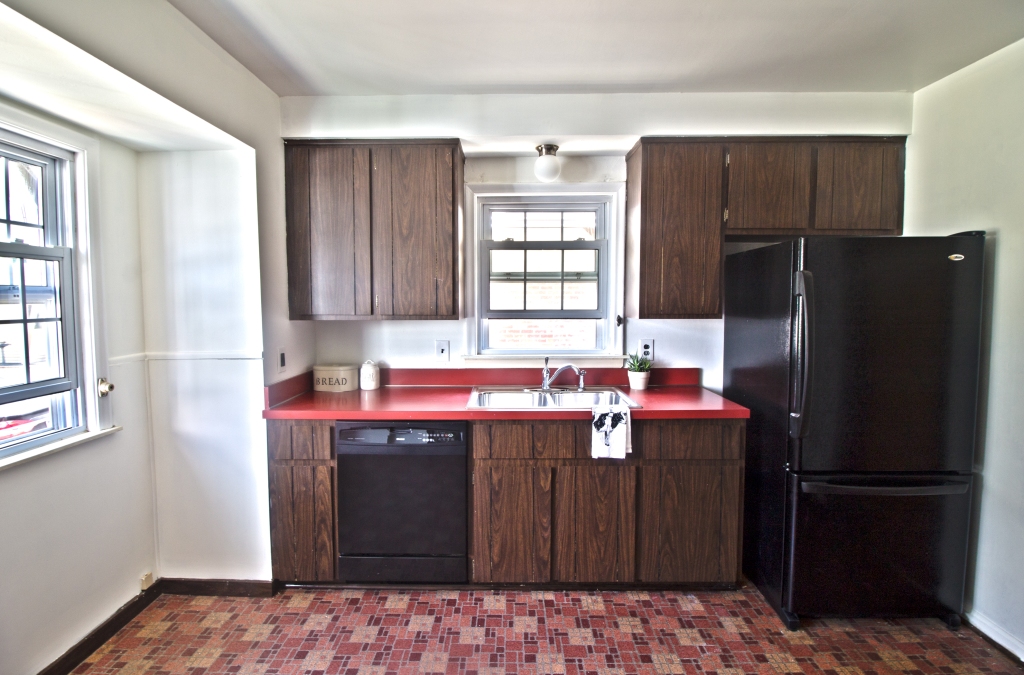
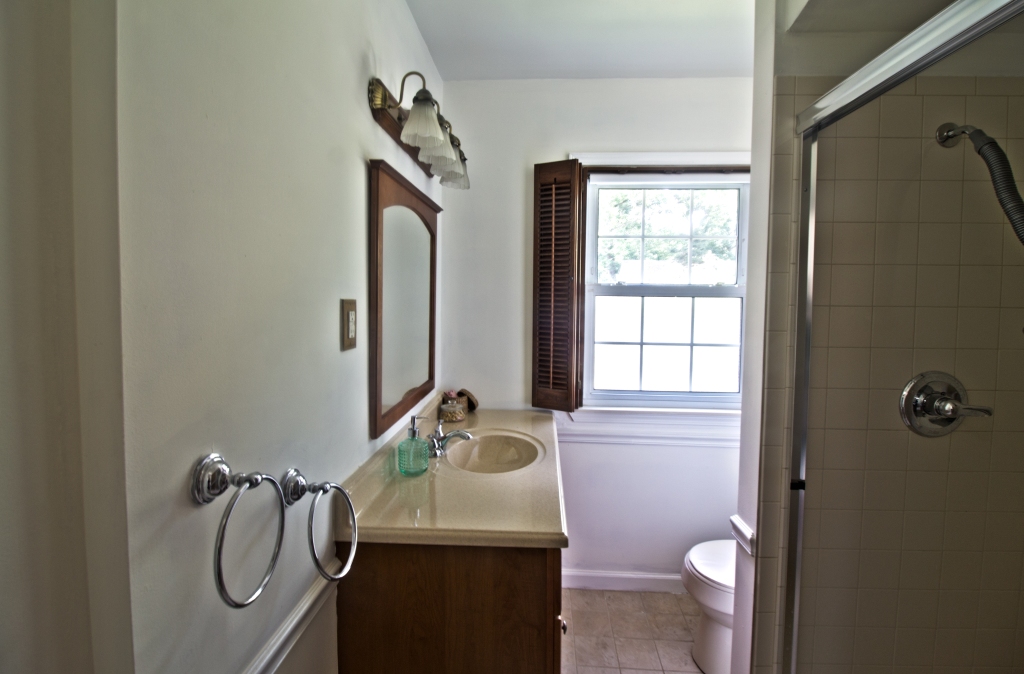
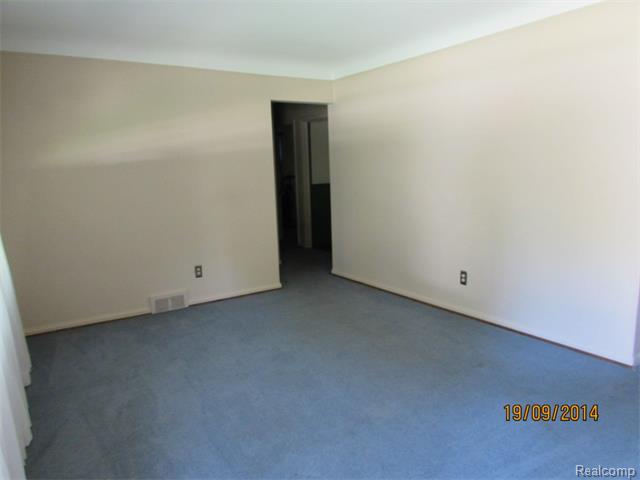
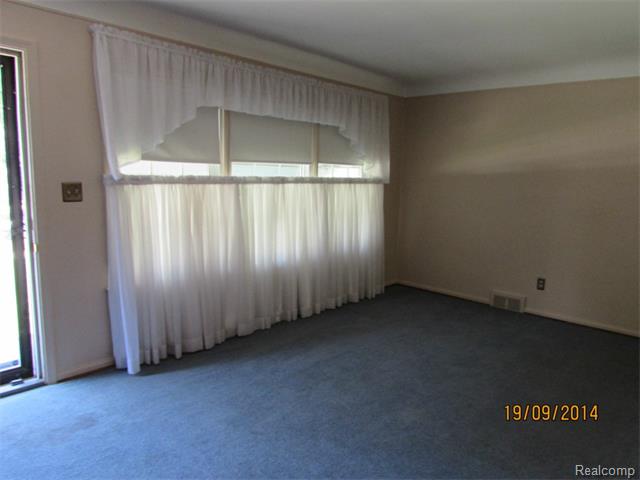
Here are the pictures of the home from the original listing prior to us doing anything:

215063318_2_0
215063318_3_0
215063318_5_0
215063318_9_0
215063318_11_0

These are the five things that were recommended we change:

  1. Remove carpet and wallpaper
  2. Add a fresh coat of paint
  3. Finish hardwood floors
  4. Landscaping
  5. Professional cleaning

We also went a little above and beyond by adding a few items for styling purposes. These included a kitchen towel and plant in the kitchen, a welcome mat outside the front door, and a towel, soap dispenser, and some decorative items in the bathroom.

We didn’t do much DIYing here because of time constraints with our school so instead we hired people to take care of most of the labor. Below is a breakdown of each job and the cost associated with it:

  • City Inspection: $300 – The city inspection consists of all matters related to city code and regulation. They come in and make sure everything is up to standard and request that you update what is not so you can get a COO (Certificate of Occupancy) which you need if you are selling the house.
  • Painter: $1800 – We requested a handful of quotes and went with the mid-range contractor that had between 5-10 years of experience. Most of the cost was for removing the old wallpaper from the entire main floor. The patching up and painting wasn’t as bad as we initially thought.
  • Flooring Company: $ 1700 – This cost was a deal compared to the other quotes we got. The flooring contractor removed the old carpet and refinished the hardwood floors in approximately a week’s time. Be aware that the cost could be higher if you have flooring problems or need wooden trim and/or shoehorn installed.
  • Electrician: $250 – We needed an electrician to remove and replace all the 3-prong outlets to 2-prong because they were not grounded. Another minor thing he did was make sure that all of our wiring was up to code in the garage and outside the house.
  • Professional Cleaning: $150 – To sell the house and truly bring out the beauty of the space we hired a local cleaning company to polish up the home just before it hit the market for showings.
  • TLC: $100 – After we got all of the above done we decided to caulk to make sure corners, windows and all doors were sealed and correctly adjusted to their frames.
  • Landscaping and Decor: $150 –  You can’t go wrong with mulch, flowers and lava stones to make the landscape pop. We also purchased a nice outdoor welcome mat and indoor mat for potential buyers to feel a sense of home.

TOTAL: $4,450

We really wish we had the time to do these updates ourselves, but it would have been too overwhelming and would have taken us much longer. If we did do some of the things ourselves such as the painting and cleaning then we would have saved quite a bit of money, although we did recoup the costs with the sale of the home. The important thing to note is that it doesn’t take much to get a home move-in ready even if there’s a kitchen or bathroom that could use some updating.  If you have a similar project you’re diving into or are considering becoming a house flipper, now you know what it takes to get a home with good bones flipped and sold in no time at all. Now for the part you’ve all been waiting for…….the reveal:

FrontDoor

Kitchen2

BTHRM

Living Room

Bedroom1A2

Landscaping

Have you ever flipped a home or considered flipping a home? Let us know in the comments below. We can’t wait to share our next exciting project with you so if you don’t want to miss out be sure to follow us here and on instagram for the latest and greatest. signature3


Our DIY Home Journey + The Upskill Project

This probably should have been the first post on our blog but I figured it’s never too late to share our rather interesting DIY home backstory. You see, the idea of renovating our home ourselves never even crossed our mind. I mean don’t get me wrong, we are pretty handy and creative (heck, we DIYed our wedding) but we just assumed that home repairs were way out of our league. So like every clueless new homeowner, we called contractors to help us with the very basics and then some. Things went pretty smoothly until one day the contractor working on our basement announced that he had a family emergency overseas that he needed to attend to. I think he saw the panic in our eyes because he calmly responded, “Look, I first learned this trade by watching others in a very short amount of time. You don’t have to be a genius to do this line of work, anyone can do this.” He then spent the next few days before his departure demonstrating and explaining how to put up studs, mud drywall, and lay tile. He even left us with his tools! Those simple words of encouragement and instruction were enough to spark something within us. Although, it took us some time to finish our basement, the internal transformation happened immediately.

That’s how we got a taste for home DIYing. Every year since, we have tackled a major home project and we even started this blog as a way to share our home journey because we are passionate about DIYing and home life. When we experienced the joy of confidently working together on our home, we wanted to share that with YOU because we truly believe that ANYONE can do these things. We are living proof. Just take a look at the pictures of our home from our first showing compared to what it is today. Doesn’t it make your DIY senses tingle?

That’s why we are super excited to share that we are partnering with Lowe’s for The Upskill Project contest running in Detroit from May 7th-21st. So if you have a home project that you’ve been wanting to undertake but are reluctant because of the costs or because your skills leave much to be desired, then this contest is for you! Lowe’s is offering up to five lucky people the chance to win a $2,000 Lowe’s gift card for their project along with expert help to guide and teach the skills needed to complete your project. We know from experience just how crucial a little bit of guidance is and that is why this movement resonates with us so much. It’s all about empowering homeowners and giving them the skills, confidence, and inspiration they need to tackle any home project.

UpSkill_Horzntl_endorsed_k

To enter, all you need to do is submit a video answering the following questions:

  1. What is your project?
  2. What skills do you need to complete your project?
  3. What would having those skills mean to you?

Simple enough, right?! We’ll be there to help and document one winner’s project progress along the way.  And if you’re not a lucky winner, you’ll still have the opportunity to learn the skills you need at a free workshop hosted at a local Lowe’s on August 25th. This workshop is an invaluable opportunity to learn important homeowner skills such as painting, tiling, plumbing, and general tool use. Did I mention we will also be there too? So mark your calendars and get ready for a date with your new DIY BFFs.

IMG_6067If you’re not in the Detroit area and want to enter the contest, don’t fret because The UpSkill Project is coming to a number of cities across the country throughout the year. You can click here and scroll down for a full list.

All right, what are you waiting for?! Want to enter this contest? Start brainstorming and share this contest with your friends! We want to see what cool projects you have envisioned for your home! Maybe you want to build a rain garden? Or renovate your peach 1950’s bathroom? Whatever it is, may the odds be ever in your favor.

signature3

Disclaimer: NO PURCH NECESSARY.  Homeowners and renters (with property owner’s permission) in eligible ZIPs only.  Rules/Entry details here: http://bit.ly/2Gvud8k. Ends 5/21/18. 

This post is sponsored by Lowes. The thoughts and opinions are my own.


DIY Upcycled Tea Tin Planter


February is coming to an end and we are a tad bit in disbelief. I know, this seems like a reoccurring theme over here but during this busy season of our life it’s difficult to fully grasp how quickly the time is flying. We did take some time off for a family vacation (there’s a post in the works) in January and it was just what we needed to reset for this new year but when we came back we dove head first into our semesters and it took some time to get back on our feet. We are now back in the groove of things and excited to share what we have been working on. Last month I was lucky to be a part of Salvage Dior’s January Creative Team on Instagram where each week I, along with my four teammates, were responsible for creating something new for our homes that fit within the following themes: 1) Upcycle, 2) On the Wall, 3) Child’s Play, 4) Coffee Table Decor. In this post I’ll be sharing the project I completed for the first week, an upcycled tea tin turned planter.

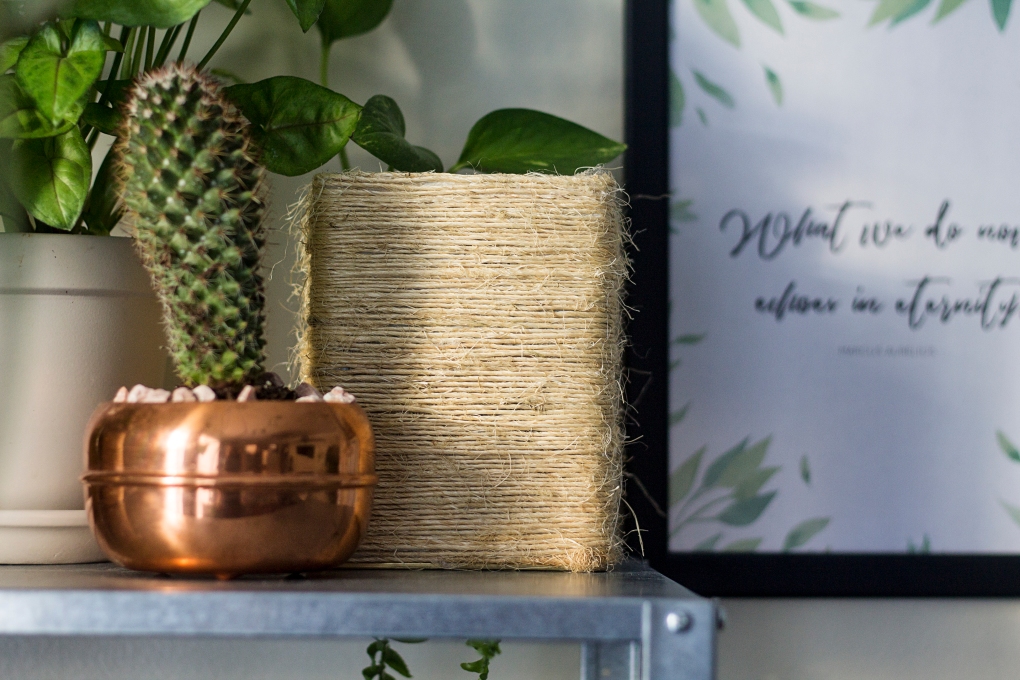
IMG_8994

Loose leaf tea is something we drink quite a bit of in our home and I’m always left wondering what to do with the tins once they’re through. In the past I’ve used them as storage for spices and knick knacks but this time I wanted something a bit more creative. At the time we were also revamping our plant corner so I thought it would be nice to make some new planters for the Pothos and Sedum I was growing hydroponically. I was inspired by the recent trend in natural fiber textiles and wanted to create that woven look to contrast with the industrial shelving we chose for the plant’s display. If I wanted to buy what I was looking for, I could have easily spent anywhere from $6-25 a pot depending on the size. Instead, I was able to make this tea tin planter and some tin can planters for $0 because I had everything already on hand. The only thing that you would probably need to buy if you’re not DIY nerds like us is the bundling twine but that itself is very inexpensive ($3.98 for 525 feet). Alright, let’s make a planter!


If you are an avid DIYer, you most likely have a glue gun in your arsenal of crafting tools.

eb_loose_2

DIY Upcycled Tea Tin Planter

  • Difficulty: Easy
  • Print

Materials
Tea tins or tin cans, washed and dried
Bundling twine
Hot glue-sticks
Milk Paint (optional)

Tools
Glue Gun
Scissors
Drill (or a hammer and nail)

Directions

  1. Heat your glue gun and in the meantime use your drill to place drainage holes in the bottom of your tin. You can also use a hammer and a nail to do this or you can skip this step and just make sure to include a layer of small rocks beneath your soil for water drainage.
  2.  Glue the end of the bundling twine to the side of your tin at the very bottom and begin wrapping the twine around, making sure to glue the first 3 coils to the tin and to each other. As you wrap the twine, be sure to push the coils down tightly to close any gaps and give your planter a neat, elegant look.
  3. Continue wrapping the twine around, stopping midway to glue the coils down. Wind the twine around the tin until you reach the top and then cut the twine to length.
  4. Uncoil the twine a couple turns, then rewind it tightly against the tin using hot glue to secure the top two coils to the tin and to the adjoining coils.
  5. Take your scissors and trim off any noticeable twine hairs sticking out (see the time-lapse video below). At this point you can paint the planter and let it dry or go straight to planting and styling it!

IMG_8984

IMG_8998

If you liked this post and found it inspiring, we would love if you shared it. For more related content, you can find us on Instagram where we share more of our day-to-day and Pinterest where we share our ideas and inspiration. If you have any thoughts or suggestions about this DIY project, feel free to leave a comment below. And as always…
signature3


Family Finance: A Simple Budget Overview

Finance Image

Hello friends! Today’s post is going be different than the usual and it might even seem a little off topic because it’s about numbers (my favorite subject). As a financial analyst, budgeting is a subject near and dear to my heart and something I have been wanting to write about for a while now. While it doesn’t fit the usual cozy home posts of DIY projects and healthy recipes, it is something that is essential to the kind of lifestyle we write about. Sound budgeting not only reduces stress but it is absolutely necessary for eating healthy, saving for the future, and investing in quality experiences (just to name a few).

pexels-photo-616849

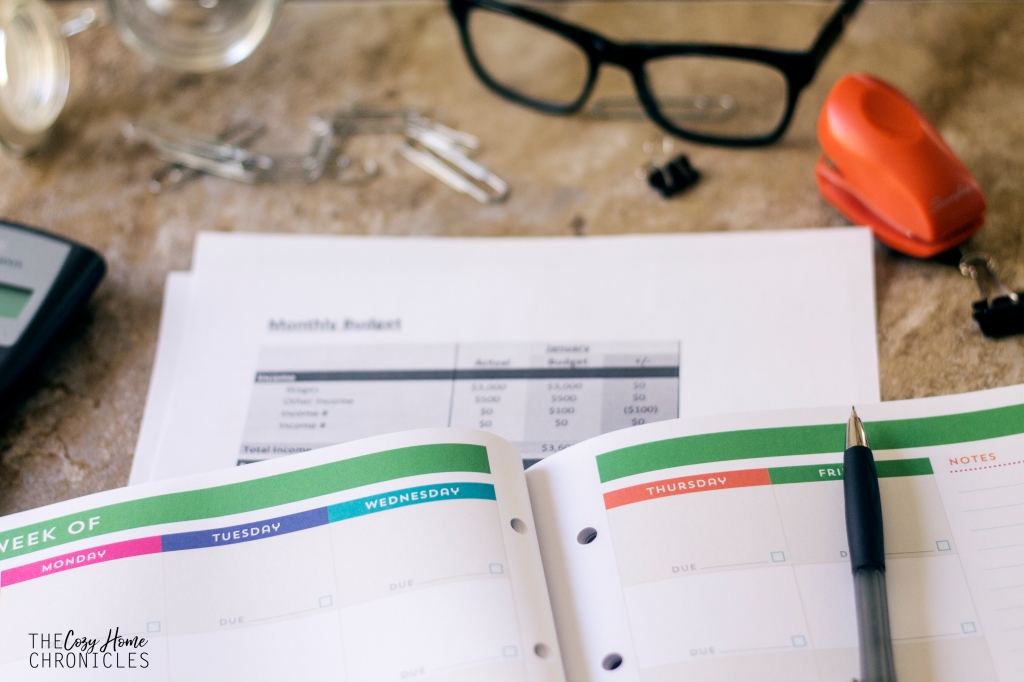
Although life is busy with two kids and endless responsibilities, I try to make sure that my wife and I are on the same page when it comes to our finances. While talking about money sometimes gets a bad rap in certain cultures (it can be taken for stinginess or greed) the reality is that money is an important aspect of life that, when managed properly, can be a real source of strength for your family.  With the New Year just around the corner, I wanted to write a series of posts that would be helpful for those looking to review and improve their financial stability by acquainting them with some basic concepts, tools, and resources to budget better, save more, and stress less. In this first post, I will discuss a simple approach to budgeting that will involve choosing a methodology for budgeting and tracking that is comfortable and realistic for you and your lifestyle. Let’s get started!

Agenda

  • Choose a methodology for budgeting that is realistic
  • Find and maximize your budgeting strategy to free up time for other activities
  • Help you commit to a new financial awareness

1. Cash vs. Credit: Choose a spending system
There are many blogs and websites out there that tout the merits of using cash-only while vilifying credit cards as enablers of mismanagement. While there is some truth to this, there are many benefits to using credit cards especially when used alongside online budgeting platforms. I am a firm believer of using a hybrid system and as of right now we have an 80/20 split between credit and cash respectively. Choosing a system is important because it will dictate how you track your numbers.  For example, if you decide to use mostly credit like we do, along with an online budgeting platform, much of the work in terms of tracking numbers will be done for you automatically. Another benefit of using credit is being able to take advantage of cash-back or point bonus systems that many well-known credit card companies offer. While your budget will dictate to some extent what your spending system will look like, it’s important to envision how you’re comfortable spending so you can get into a rhythm that works for your lifestyle and fits into tracking and accountability.

IMG_8342

2. Written vs. Digital: Tracking your numbers
Aside from choosing a spending system, it’s also important to pick your preference when it comes to keeping track of your income and expenses. There are many budgeting apps and free online software’s such as Mint, YNABGoogle Sheets, and Microsoft Excel to name a few. I use Excel because I always have but if I didn’t have access to it then Google Sheets would be a more than capable replacement. If you can’t see yourself committing to updating a sheet every day or two on the computer then stick to good old pen and paper (you can find PDF expense trackers here). If you’re not into tracking at all then you might want to really consider an online system like MINT or YNAB. All you need to sign up is a valid e-mail address and the rest is simply adding your financial account information.  Mint is a free platform while YNAB is free for some people such as college students (more on their pricing structure here). The most important thing is that you choose a medium that is comfortable for you so that you can be consistent and disciplined.

Now that you have an idea of what kind of spending system you’d like and how you want to keep track of your numbers, let’s do a very basic run through of how to calculate a budget.

IMG_8360

3. Fixed vs. Variable Expenses: Determining your Budget

Fixed expenses: A fixed expense is one that you can’t change and tends to stay around the same dollar amount every month. Mortgage payments, apartment rent, and car lease payments are all examples of fixed expenses.

Variable expenses: A variable expense is something that changes from month to month based on different factors. Groceries, clothing, entertainment, and gifts would be examples of variable expenses because you decide how much to spend to some degree.

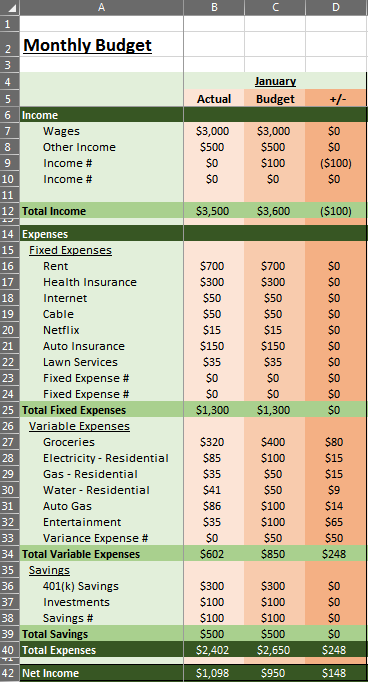
To determine your monthly budget, you will need to calculate your expenses (fixed + variable) and subtract them from your monthly income. I have provided a sample Excel  sheet template below for downloading to show you how this is done. As you can see, there are three sections: income, fixed expenses, and variable expenses. If you want to follow along using the custom budget template that I created, go ahead and start by inputting your  income first followed by your expenses. In this example, the income is $3500/month, total expenses are $2402, and there is a positive balance of $1098.

Budget Template Img

You can adjust the expense categories to more accurately reflect your family’s lifestyle but I tried to include a diverse list of expenses to give you an idea of what to account for. If you’re totally clueless on what you’re spending on or even how much you spend on basic things like groceries, I suggest you try a 30-day trial period where you diligently track each and every expense. This will help acquaint you with your spending habits and allow you to identify practices that are not budget-friendly. For example, if your grocery expense is much higher than you’re comfortable with and you’d really like to be saving for say a post-graduation trip then you might want to adopt practices like meal planning and meal prepping to work alongside your budgeting approach. While you do want to be as accurate as possible when accounting for your spending, you don’t want to be too extreme to the point that you’re tracking every penny unless you are in a very tight situation. Once you’ve figured out you’re spending habits, created a budget, and have begun tracking your monthly expenses you are now able to do the fun part of analyzing your data and working towards saving and investing.

IMG_8349

Now with the basics down, it will be much easier for me to share some of my tips and tricks for saving monthly, planning trips, and investing in the future. I have a few posts planned out for this series already; one to cover college savings funds and another to cover the advantages of memberships like Amazon Prime and Costco. As I said early on in this post, finance is a subject that I am very passionate about so if there’s something you’d like to see covered in this series then please don’t hesitate to contact us either through email or by leaving a message in the comments below. We hope this post was the spark you needed to rethink your budget and saving strategies for 2018. As always, if you liked this post please follow us and share!

Instagram

signature3


One Room Challenge: Week 7 |Simple Office Makeover Reveal

Today is the big day friends! Although we weren’t able to keep up with the weekly progress posts for our One Room Challenge, we still managed to finish the room on time (hooray!). If you’re just tuning in here for the very first time and don’t know what The One Room Challenge™ is, it’s a widely anticipated biannual event every April and October, hosted by Lisa of Calling It Home, in which twenty design bloggers take the challenge of transforming a space in just six weeks. Every Wednesday, the designers document their process while sharing their sources and professional advice. On Thursdays, guest bloggers, like us, can play along and support other guest bloggers that are also tackling a room renovation. As you may already know, we were working on an office makeover for my brother and sister-in-law because although we love DIYing, we couldn’t handle the stress of doing our own home renovation while both of us are in school.

ORC GPDon’t worry I’m not going to chit chat too much. The whole point of this post is to see a satisfying transformation and we will get to that in just a minute. Of course we also want this post to be inspirational and informative so following the before and afters we will give an overview of the changes this project entailed, the cost, and our sources. If you don’t even remember how this project began you can refer to weeks one, two, and three for a quick reminder.
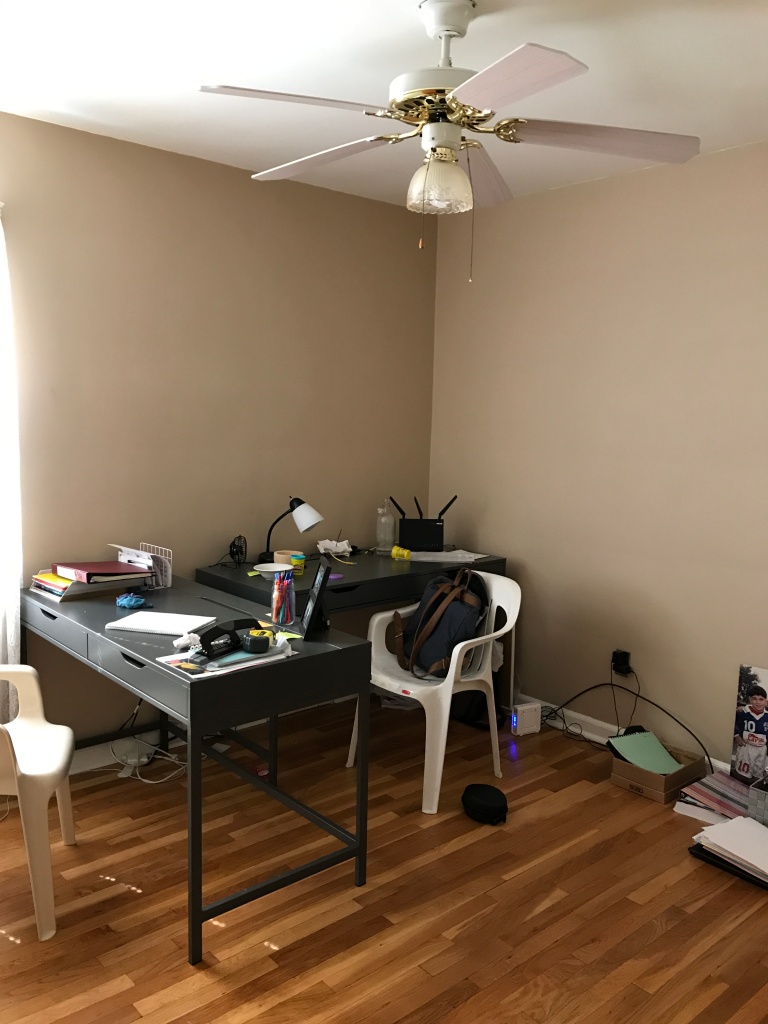
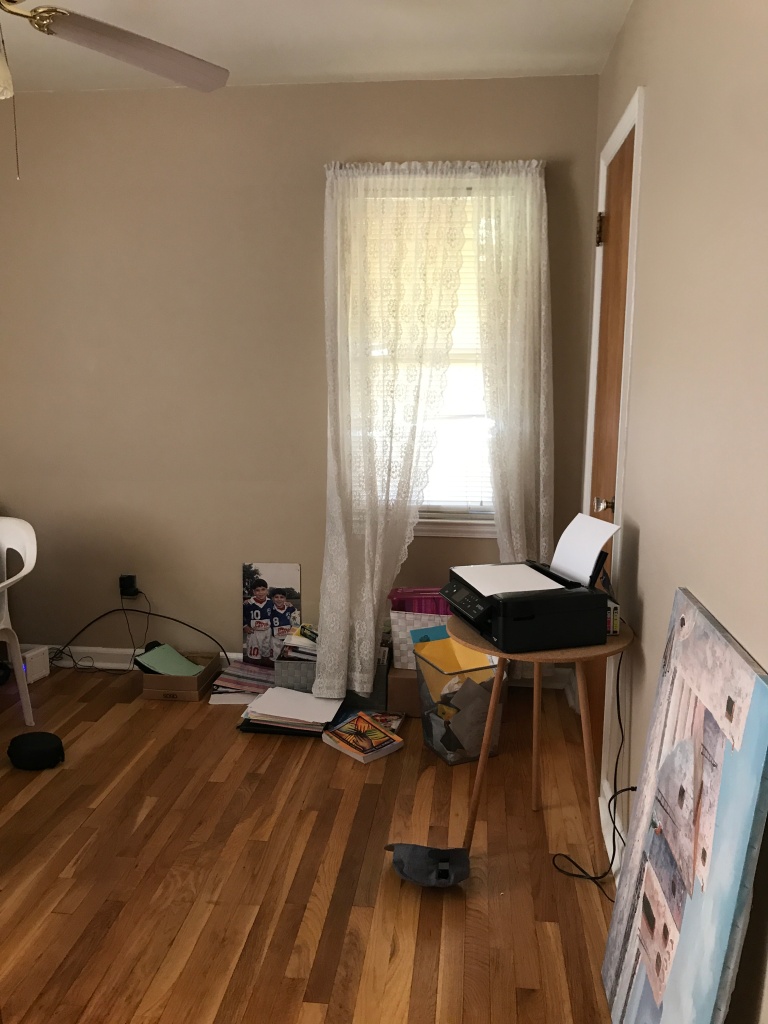
BEFORE: A DARK & SAD ROOM

IMG_5608

IMG_5607

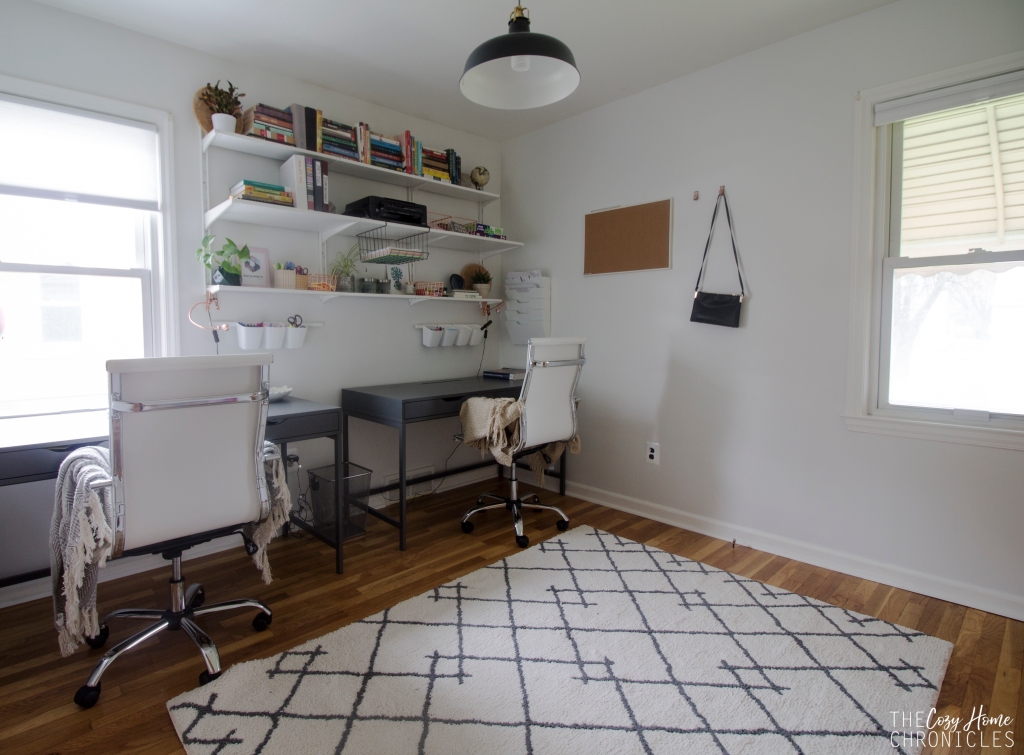
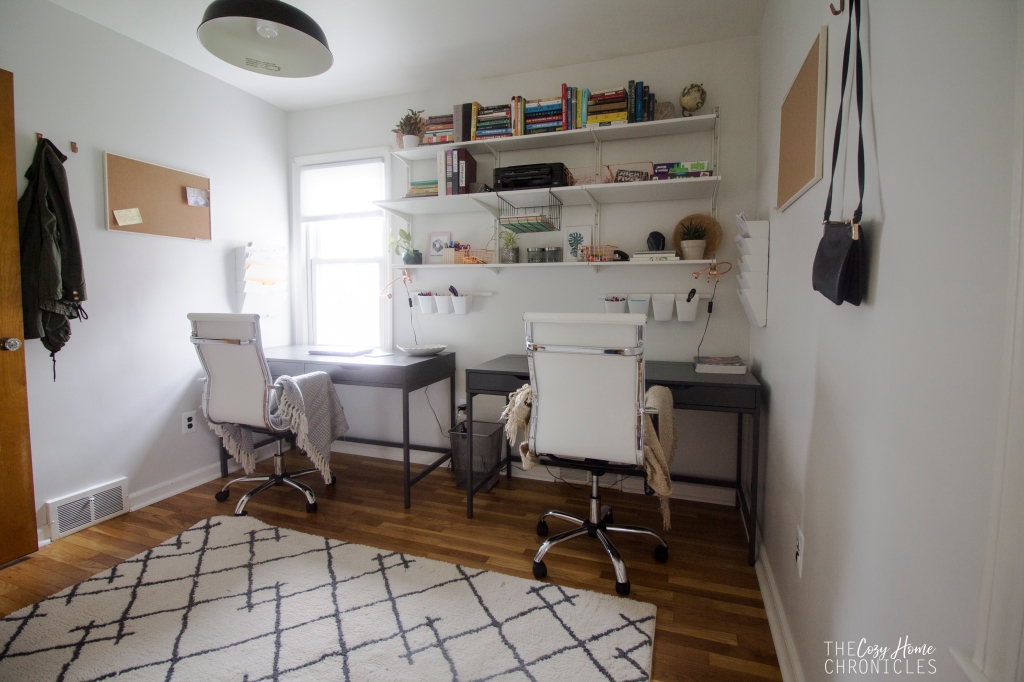
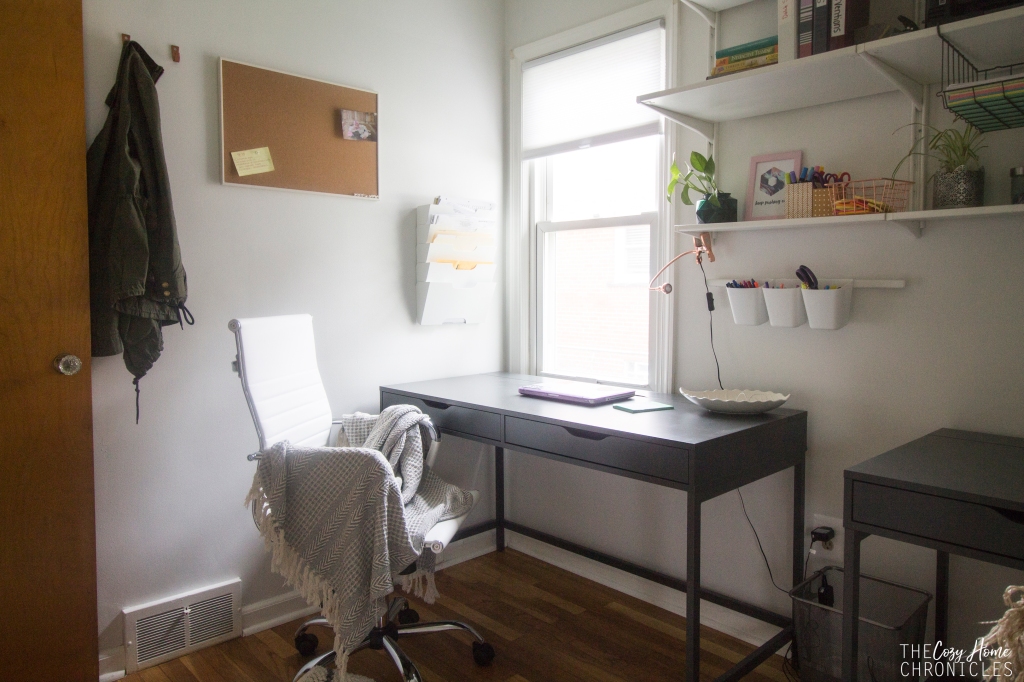
AFTER: WORK SPACE GOALS

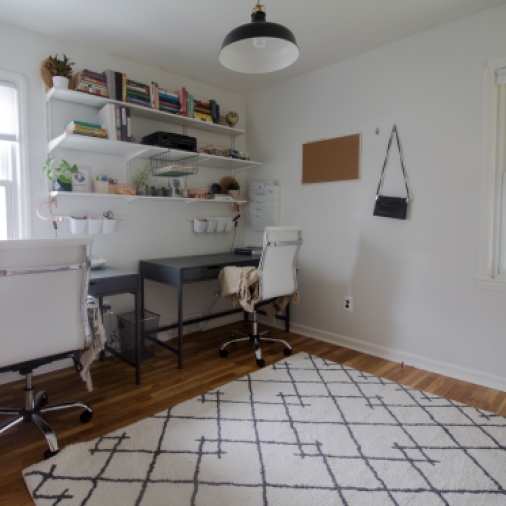
IMG_7365

IMG_7355


IMG_7361

IMG_7377

IMG_7121

So how did we get from A to Z? Never underestimate the power of a fresh coat of paint. In our opinion it is the cheapest, easiest, and most impactful way to transform a space. My sister-in-law wanted a bright and modern space so we went with Behr in Ultra White for a fresh clean look. Another impactful thing we did was to take down the vintage lace curtains and replace them with brand new blinds that I purchased from IKEA for $2 each (yes you read that correctly). Let’s just say it pays to lurk in the last chance section!

IMG_7371

Replacing the fan light with a modern ceiling light from IKEA for $30 also dramatically changed the look of the office. The black fixture really complemented the gray desks and the hardwood floors and brought in much needed light. Of course one of the most expensive purchases was the Algot system which we added for shelf space above the desks. While we did toy around with the idea of building custom shelving, we decided in the end that spending a little more on a system that could be adjustable to changing needs would be the smartest choice. For $85, it was well worth the investment and provided the perfect amount of space for organizing books, supplies, and for styling decor. The best part about this transformation was that nothing was difficult to do; painting, installing shelving, replacing the light fixture, all of these required no super special tools or skill sets (which means you could do it too!). 

IMG_7385

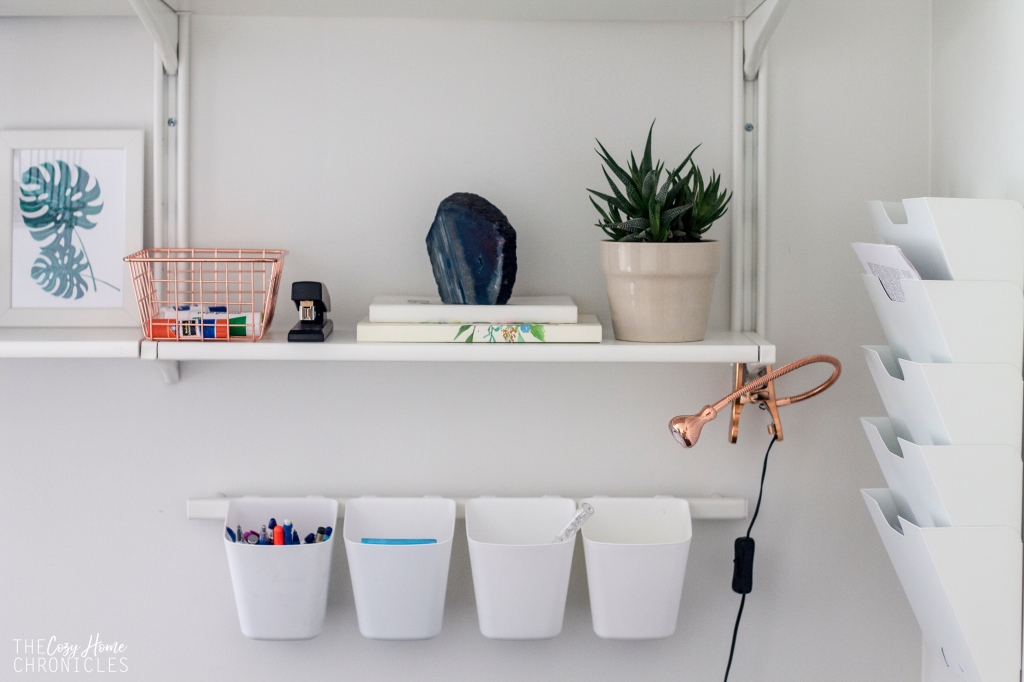
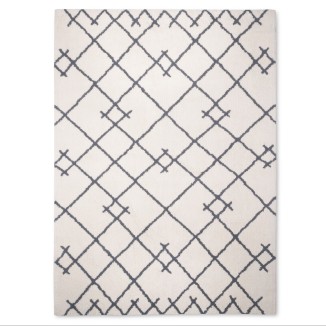
We could not be happier with how this room turned out. Considering our crazy schedules and all the stress in our lives, I think we did a pretty good job of bringing  our simple vision to life. We wanted a fresh, inspiring space with bohemian elements (patterned rug, copper accents, plants) and I think we definitely pulled that off. While we are very happy with the final look of the room, there are still some areas of improvement that we will probably return to. One of them is wire control. We definitely want to find a way to conceal and minimize the tangling of the printer, desk lamp, and laptop cords. We also want to add a little more color and character to the rest of the walls. I think this is something that will naturally come as my brother and sister-in-law live in the space and identify what speaks to their style. In that sense, I don’t mind the empty walls as much because I think of it as their decor journey has only just begun. I also thought it would be nice to have a fun little reading corner complete with fancy shmancy floor pillows but it looks like that will have to wait.


Sources


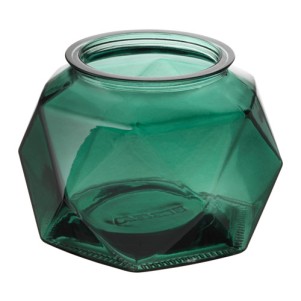
Ceiling Light $29.99 | Office Chair  $84.99 |Shelving  $85| Rug $69.99| Desk Lamp $12.99 Magazine Rack $14.99 |Vase $2.99 | Plants $2.99| Hanging Storage $4.36| Frames $.99

As you can see, many of the items we purchased are both accessible and reasonably priced for the average home DIYer. We took advantage of many deals to save big including using a 10% off coupon from Wayfair and thrifting to keep our makeover well under $500. The rug was my sister’s belated birthday gift to my brother for the renovation so all we really had to purchase was the shelving, chairs, lighting and accessories. This came out to about $350. For the decorating I was a little savvier as I relied on some thrifty finds like a set of 4 wall baskets for $1.99 and free printable wall art (tropical palm leaf and keep pushing on).

IMG_7199


All in all, it’s been another successful One Room Challenge and we can’t wait for the next one 🙂

Any questions? Thoughts? We would love to hear from you in the comments below. Don’t forget to check out everyone else’s final reveal posts and as always, if you liked this post please follow us and share!

Instagram

signature3


Keeping it Cozy: Simple ways to add warmth to your home

With Halloween behind us and Thanksgiving ahead, we are inevitably inching closer to the end of the year and to even colder weather (brrrr… just the thought makes us cold). The good news, however, is that there are a few simple ways to kick the coziness factor of your home up a few notches and I’ll be sharing them with you in this post. It really doesn’t take much to make a space inviting and cozy. No matter what your style is, if you can envision yourself curling up with a good book or good company and forget all your troubles then you’re doing something right. The fall and winter seasons makes this more of necessity because there’s less going out and more staying in. The last thing you want is to be sitting in is an uninspiring space all winter. Plus with the many holidays around the corner, you’ll definitely want a welcoming space where your family can gather. Here are just a few ideas that you can implement today:

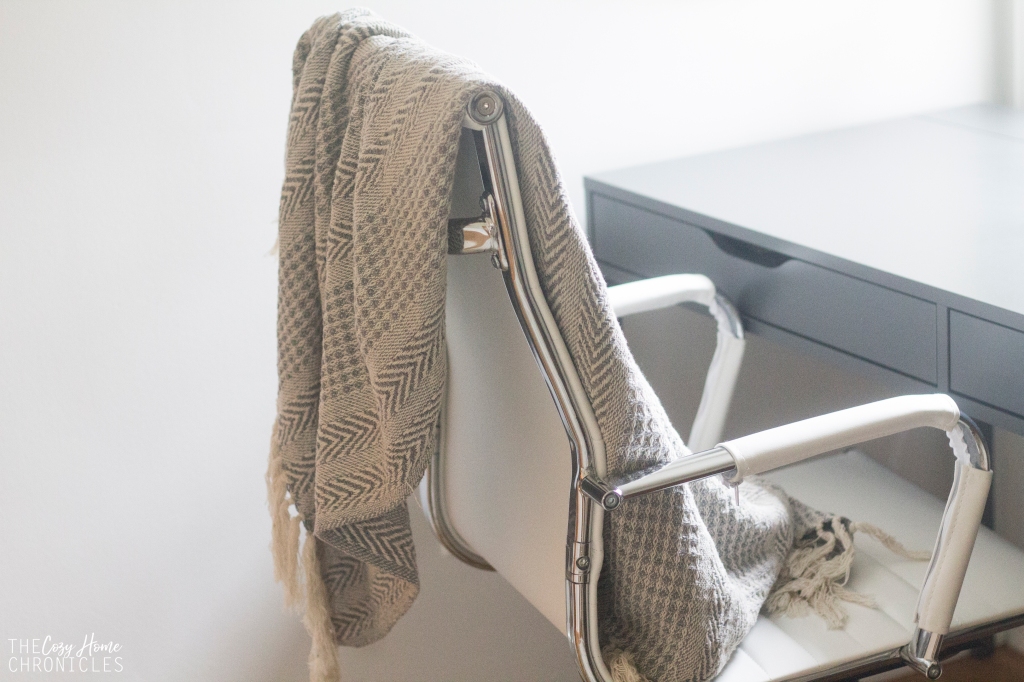
Bring out the throws. Nothing says warmth like a soft, fluffy throw. A throw hanging out on your sofa is a nice invitation to relax and feel right at home after a long busy day.

IMG_6342

Light it up.  Candles and string lights add a warm, cozy glow to any space especially when it’s cold outside. Furthermore, the scent of your home can really make or break the mood. Try burning or diffusing fragrances that are meaningful to you. Some of our favorites include cotton, balsam fir, orange, and vanilla.
IMG_6373
IMG_6345

Warm drinks at the ready. Whether you’re a coffee or tea or hot cocoa drinker, having a tray or cart set up for an evening sip-a-thon will transform your space from cozy to COZY. I mean, who doesn’t dream of relaxing in their home with a warm mug of their favorite beverage in hand?
IMG_6419

As you can see, I’ve been thinking quite a bit about how we can make our home a little cozier for the winter. During my browsing adventures, I came across many home decor items that I found both beautiful and cozy so I put them all in a mood board for you  with sources included. For now, my plan is to add winter greenery with some fairy lighting but our living room always feels cooler in the winter even with the heat on so I thought it would be nice to have a TV stand with fireplace. One can dream, am I right? Anyways, I hope you find inspiration in our little collection and in our simple tips for making your space cozy for this winter season.

Keep it Cozy Post

Sources: 1. Wayfair | 2. H&M Home | 3. IKEA | 4. Amazon | 5. H&M Home | 6. IKEA | 7. Target | 8. H&M Home

What are some ways you like to make your space cozy for the changing seasons? Tell us in the comments below and as always, if you liked this post please follow us and share!

Instagram

signature3


DIY Fall Harvest Wreath

IMG_5649

How is it already October?! In less than one month our daughter (aka Hobbit #2) will be turning one years old and we are feeling all the feels 😦 It doesn’t help that our days are filled with schoolwork and housework, with little time for much else. However, that doesn’t mean we can’t find a way to usher in one of our favorite seasons. As you’ve probably gleaned from our autumn tablescape post, we are really digging the more muted and subtle fall colors (think burgundy, peaches, grayish greens) and I really wanted to celebrate those colors in the form of a welcoming wreath. Between Michaels, Target, and Dollar Tree, I found all the elements that perfectly captured the look I was going for. I dare even say, “I nailed it.” My sister-in-law found it hard to believe that something so pretty could be made from Dollar Tree florals but it can and for well under $10 and 30 minutes too. So if you’re looking for ways to make a beautiful autumn statement but are tight on time and money then this is the perfect project for you 🙂 If you want to see how it’s made then you’re in luck because tomorrow I’ll be collaborating with the CraftBox Girls to bring you a live tutorial at 12 pm EST.  Be sure to tune in, say hello, and get some crafting inspiration 🙂

Supplies
18′ Grapevine Wreath ($3)
Faux Florals ($5)
Faux Pears ($5)
Eucalyptus ($3)
Hot glue gun & glue sticks

Total Cost: $16 + tax

IMG_5627

Pro tip: Don’t forget to use the Michaels app for coupons. I always use my coupon to save 40% off any regular priced item. With the supplies that I purchased, I was able to make 2 wreathes for the price of 1 putting the total cost per wreath at under $10.

IMG_5609

Directions:

  1. Collect your florals, eucalyptus, and faux fruit and start placing them around your grapevine wreath until you are happy with the arrangement. You might have to move things around several times to get the desired look.
  2. Once you have settled on your design, you will need to glue each piece in place using a generous amount of hot glue, embedding the stem deep into the vine, and holding down for 20-25 seconds until firmly in place.
  3. Once all the pieces have been glued down and any excess strands of glue have been removed, you can hang your wreath on a hook or door wreath hanger.

IMG_5681

IMG_5669

IMG_5674

IMG_5672

Share your autumn stories with us below and if you liked this post please follow us and share!

Instagram