The UpSkill Project Community Workshop

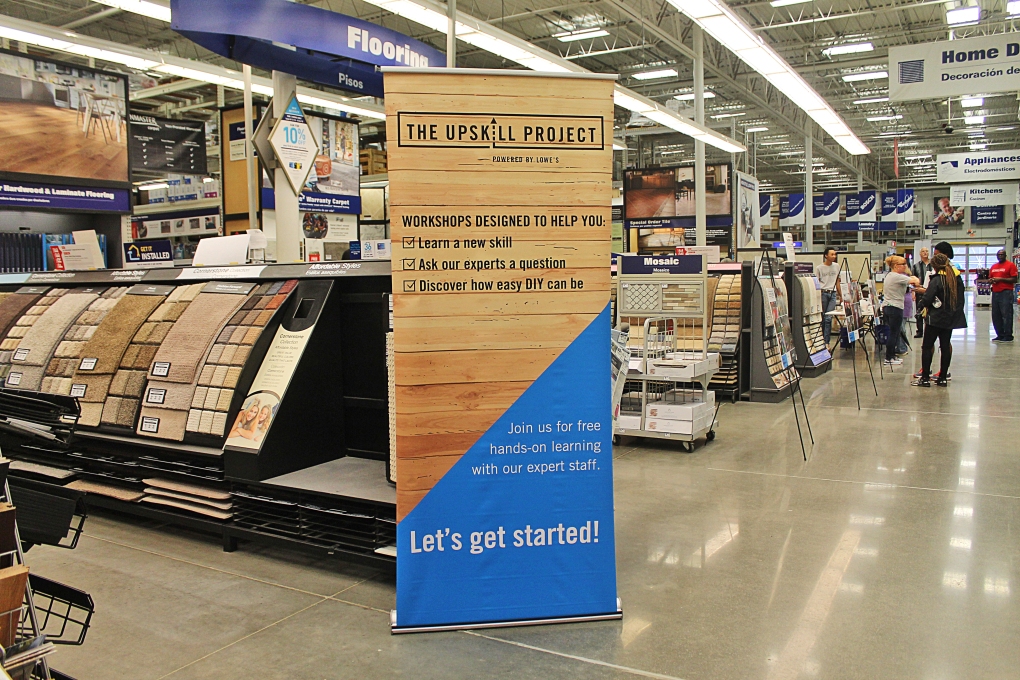
Three weekends ago, I had the privilege of attending and documenting The UpSkill Project Community Workshop which was held at the Warren, Michigan Lowe’s on a stormy Saturday. It was my 30th birthday weekend and I could think of no better way to celebrate than to be doing what I love…DIYing of course!
IMG_7574

The workshop was set up to be a hands on learning experience for homeowners wishing to pick up basic home improvement skills and I can’t express enough what an amazing opportunity this was. I love that Lowe’s is inspiring and educating homeowners through this platform! I learned so much from the Lowe’s experts that day and I’m so excited to share some of that with you in this post. Shall we dive right in?

IMG_7569

Drywall

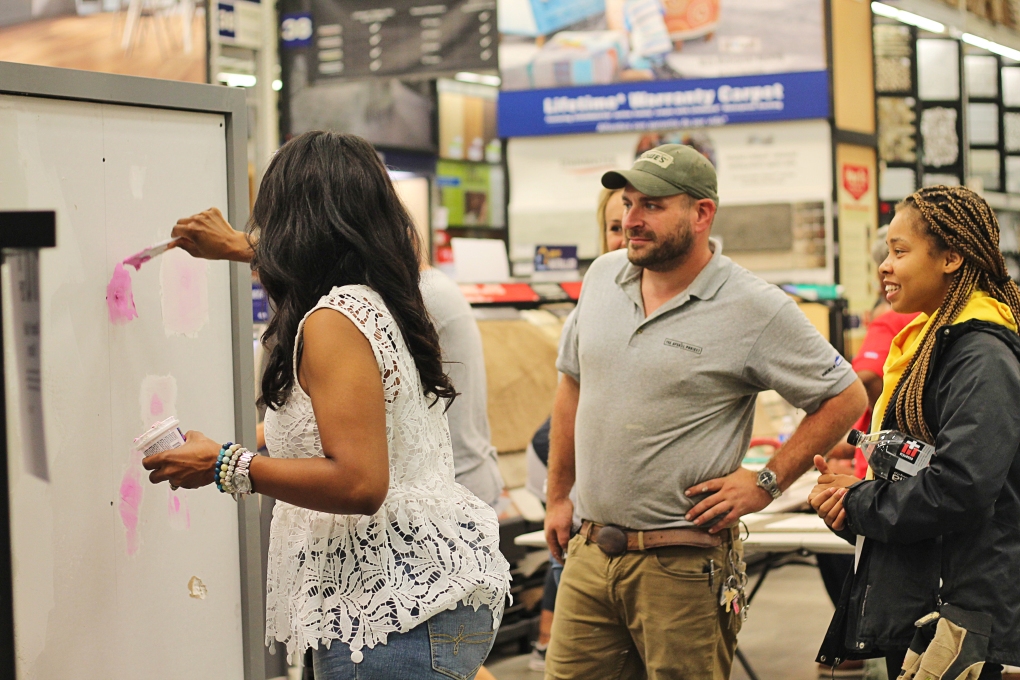
Drywall dings and dents are a common household issue with a very simple solution. Lowe’s has this nifty drywall repair kit that comes complete with spackling, a putty knife, and a sander. All you need to do is gently spread the spackle over the hole until it’s covered. This particular spackle is made to go on pink and turn white when it’s dry so you know when it’s time to sand. For larger holes, you will need to place the self-adhesive mesh patch over the hole before covering with the spackle. Once you’ve sanded the surface until it’s smooth, you can go ahead and paint over the patch up. It’s that easy!
IMG_7581
Painting

Painting is something we’ve done quite a bit of for our home renovation projects but it wasn’t until this workshop that I realized I was doing it all wrong. Prior to this workshop, I would paint the wall with a roller first and then use a brush to finish the corners and edges. I learned from Ray that it should be the other way around: paint your corners and edges first then go over with the roller. Oops. I definitely see this method resulting in a much more professional-looking paint job. It looks like I might have to revisit some of my old paint jobs!

IMG_7567

The other important thing I learned is that the quality of the brush really matters! Ray, who is a passionate paint manufacturer, said he would actually advise sacrificing the quality of paint over the quality of the brush. He went on to show us the difference between the two brush’s bristles and let participants see for themselves as they got to paint a kitchen cabinet.

IMG_7566

Let me tell you, the Purdy brush we got to test out was amazing! All those times I was frustrated with my paint job and I thought it was just me. Now I know it was the cheap brush I was using and I can’t wait to implement these simple tips for my next paint job!

IMG_7565


Tiling

Tiling is another skill we are familiar with as we have renovated our basement, kitchen, and bathroom in the past. Of course, that doesn’t mean we did everything perfectly so I’m sharing some of the useful reminders I learned. One of the cool resources Lowe’s had on display was this cross-section of the wall and tile. Many of the participants didn’t know that you couldn’t just tile over existing tile so Andrew, one of The UpSkill Project teachers, explained what subflooring was and the importance of the cement board under the tile. I learned about something called self-leveling concrete which you can pour to create a smooth, even surface for tiling. I wish I had known about this when we were tiling our basement!

IMG_7557

Participants were able to practice laying tile spacers, backsplash tile, tile adhesive, and grout. 

IMG_7572

The Lowe’s experts recommended a pre-mixed grout for an even finish and stressed the importance of wiping the tiles consistently with a grouting sponge to prevent a hazy film from forming. The pre-mixed grout is something I wish I had used in our bathroom because of the variability in grout color that can result from small changes in water content.

IMG_7561

Plumbing

Plumbing was probably one of the more intimidating skills for participants, me included. I’ve always let my husband handle that part of our renovation projects. After this, however, I think I’m pretty confident I can swap out a vanity and sink. You’ll just have to remember to disconnect the water supply lines prior to starting and to keep a bucket under the sink during the P-trap removal. If you don’t, let’s just say you’ll find yourself in a very messy situation.

IMG_7584
Aside from learning these four skills, Lowe’s had a table set up with lots of useful pamphlets covering everything from tool buying guides to DIY laminate floor installation. You better believe I walked out of that workshop with a stack of pamphlets. I also really enjoyed meeting the other UpSkillers and watching them bond over sharing their DIY projects with each other.

IMG_7575
To be honest, I had been in a creative slump up to this point but after this workshop I was so inspired to find a new DIY project to tackle! What about you guys? If you’re getting ready to take on a new home project, we would love to hear about it in the comments below. If you have specific questions about any of the skills I discussed, you can also leave them in the comments below and we will point you in the right direction. You can always go into your neighborhood Lowe’s and ask a Red Vest associate for help as well. As always, if you loved this post and found it helpful, we would appreciate it if you would like it and share it.

signature3


This post is sponsored by Lowes. The thoughts and opinions are my own.


How We Flipped and Sold a Home in Less than Two Months

We never planned on flipping a home, it kind of just happened. The short story is that we helped a family member buy a home that they ended up realizing was not right for them. We know, that can be quite a costly mistake. Luckily, the home was in excellent condition and the housing market was doing great so we sat down with our realtor who suggested we fix 5 simple things to get the home sold as soon as possible. And it worked! It really worked! Within a month, we had the home listed and shortly after had secured a buyer. So today we are sharing the simple things we did to get the ball rolling and how much it cost us. It’s probably important we note that we are not realtors or contractors, just a couple of avid DIYers with a tad bit of crazy in us 🙂

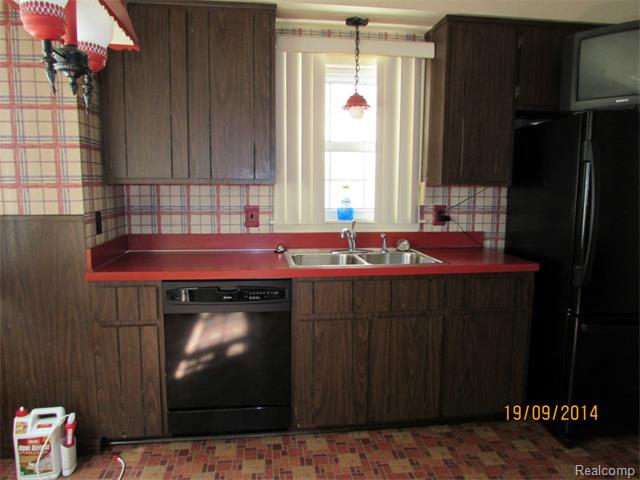
Here are the pictures of the home from the original listing prior to us doing anything:

215063318_2_0
215063318_3_0
215063318_5_0
215063318_9_0
215063318_11_0

These are the five things that were recommended we change:

  1. Remove carpet and wallpaper
  2. Add a fresh coat of paint
  3. Finish hardwood floors
  4. Landscaping
  5. Professional cleaning

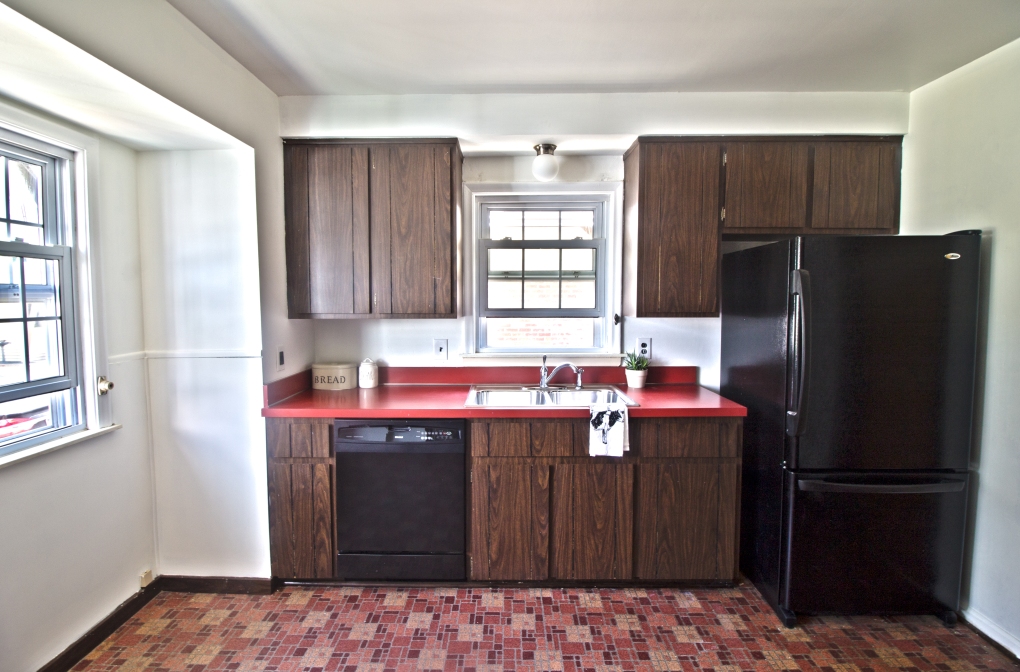
We also went a little above and beyond by adding a few items for styling purposes. These included a kitchen towel and plant in the kitchen, a welcome mat outside the front door, and a towel, soap dispenser, and some decorative items in the bathroom.

We didn’t do much DIYing here because of time constraints with our school so instead we hired people to take care of most of the labor. Below is a breakdown of each job and the cost associated with it:

  • City Inspection: $300 – The city inspection consists of all matters related to city code and regulation. They come in and make sure everything is up to standard and request that you update what is not so you can get a COO (Certificate of Occupancy) which you need if you are selling the house.
  • Painter: $1800 – We requested a handful of quotes and went with the mid-range contractor that had between 5-10 years of experience. Most of the cost was for removing the old wallpaper from the entire main floor. The patching up and painting wasn’t as bad as we initially thought.
  • Flooring Company: $ 1700 – This cost was a deal compared to the other quotes we got. The flooring contractor removed the old carpet and refinished the hardwood floors in approximately a week’s time. Be aware that the cost could be higher if you have flooring problems or need wooden trim and/or shoehorn installed.
  • Electrician: $250 – We needed an electrician to remove and replace all the 3-prong outlets to 2-prong because they were not grounded. Another minor thing he did was make sure that all of our wiring was up to code in the garage and outside the house.
  • Professional Cleaning: $150 – To sell the house and truly bring out the beauty of the space we hired a local cleaning company to polish up the home just before it hit the market for showings.
  • TLC: $100 – After we got all of the above done we decided to caulk to make sure corners, windows and all doors were sealed and correctly adjusted to their frames.
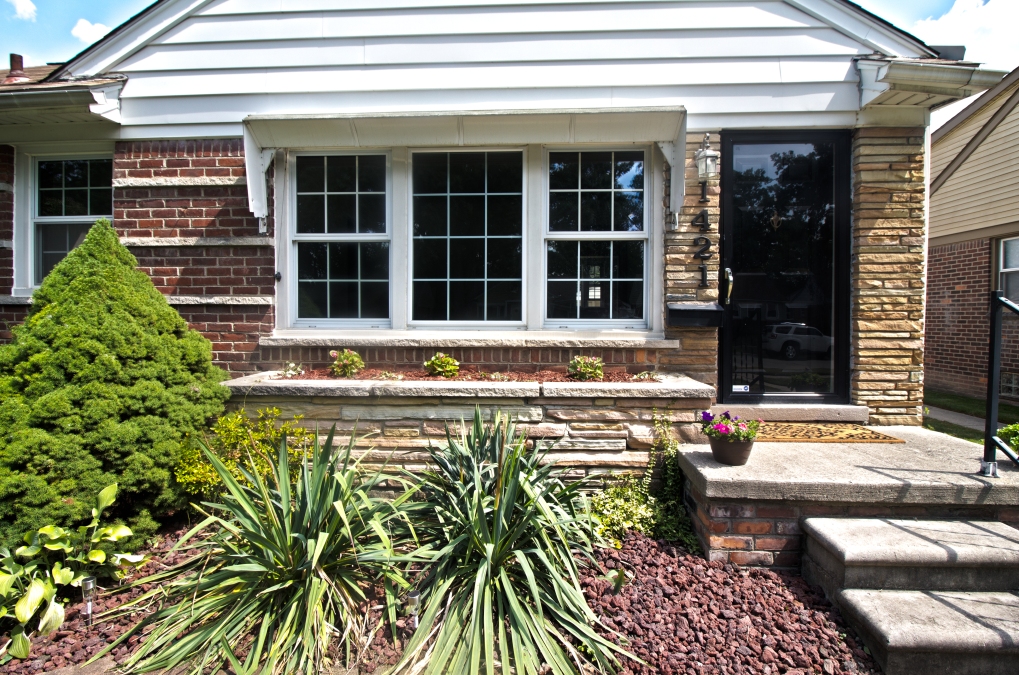
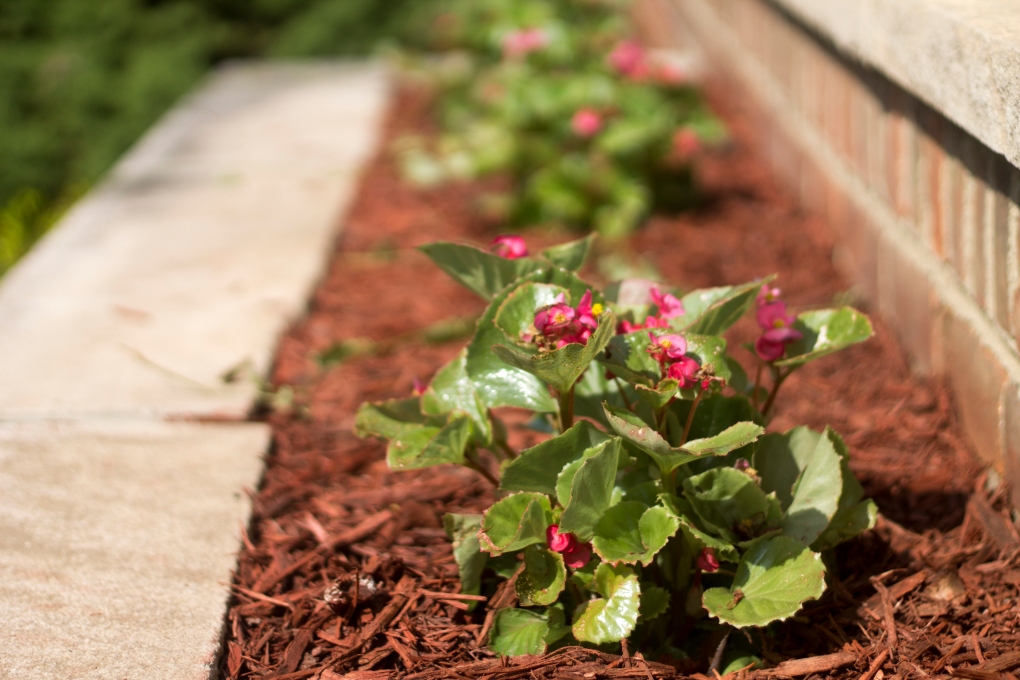
  • Landscaping and Decor: $150 –  You can’t go wrong with mulch, flowers and lava stones to make the landscape pop. We also purchased a nice outdoor welcome mat and indoor mat for potential buyers to feel a sense of home.

TOTAL: $4,450

We really wish we had the time to do these updates ourselves, but it would have been too overwhelming and would have taken us much longer. If we did do some of the things ourselves such as the painting and cleaning then we would have saved quite a bit of money, although we did recoup the costs with the sale of the home. The important thing to note is that it doesn’t take much to get a home move-in ready even if there’s a kitchen or bathroom that could use some updating.  If you have a similar project you’re diving into or are considering becoming a house flipper, now you know what it takes to get a home with good bones flipped and sold in no time at all. Now for the part you’ve all been waiting for…….the reveal:

FrontDoor

Kitchen2

BTHRM

Living Room

Bedroom1A2

Landscaping

Have you ever flipped a home or considered flipping a home? Let us know in the comments below. We can’t wait to share our next exciting project with you so if you don’t want to miss out be sure to follow us here and on instagram for the latest and greatest. signature3


Our DIY Home Journey + The Upskill Project

This probably should have been the first post on our blog but I figured it’s never too late to share our rather interesting DIY home backstory. You see, the idea of renovating our home ourselves never even crossed our mind. I mean don’t get me wrong, we are pretty handy and creative (heck, we DIYed our wedding) but we just assumed that home repairs were way out of our league. So like every clueless new homeowner, we called contractors to help us with the very basics and then some. Things went pretty smoothly until one day the contractor working on our basement announced that he had a family emergency overseas that he needed to attend to. I think he saw the panic in our eyes because he calmly responded, “Look, I first learned this trade by watching others in a very short amount of time. You don’t have to be a genius to do this line of work, anyone can do this.” He then spent the next few days before his departure demonstrating and explaining how to put up studs, mud drywall, and lay tile. He even left us with his tools! Those simple words of encouragement and instruction were enough to spark something within us. Although, it took us some time to finish our basement, the internal transformation happened immediately.

That’s how we got a taste for home DIYing. Every year since, we have tackled a major home project and we even started this blog as a way to share our home journey because we are passionate about DIYing and home life. When we experienced the joy of confidently working together on our home, we wanted to share that with YOU because we truly believe that ANYONE can do these things. We are living proof. Just take a look at the pictures of our home from our first showing compared to what it is today. Doesn’t it make your DIY senses tingle?

That’s why we are super excited to share that we are partnering with Lowe’s for The Upskill Project contest running in Detroit from May 7th-21st. So if you have a home project that you’ve been wanting to undertake but are reluctant because of the costs or because your skills leave much to be desired, then this contest is for you! Lowe’s is offering up to five lucky people the chance to win a $2,000 Lowe’s gift card for their project along with expert help to guide and teach the skills needed to complete your project. We know from experience just how crucial a little bit of guidance is and that is why this movement resonates with us so much. It’s all about empowering homeowners and giving them the skills, confidence, and inspiration they need to tackle any home project.

UpSkill_Horzntl_endorsed_k

To enter, all you need to do is submit a video answering the following questions:

  1. What is your project?
  2. What skills do you need to complete your project?
  3. What would having those skills mean to you?

Simple enough, right?! We’ll be there to help and document one winner’s project progress along the way.  And if you’re not a lucky winner, you’ll still have the opportunity to learn the skills you need at a free workshop hosted at a local Lowe’s on August 25th. This workshop is an invaluable opportunity to learn important homeowner skills such as painting, tiling, plumbing, and general tool use. Did I mention we will also be there too? So mark your calendars and get ready for a date with your new DIY BFFs.

IMG_6067If you’re not in the Detroit area and want to enter the contest, don’t fret because The UpSkill Project is coming to a number of cities across the country throughout the year. You can click here and scroll down for a full list.

All right, what are you waiting for?! Want to enter this contest? Start brainstorming and share this contest with your friends! We want to see what cool projects you have envisioned for your home! Maybe you want to build a rain garden? Or renovate your peach 1950’s bathroom? Whatever it is, may the odds be ever in your favor.

signature3

Disclaimer: NO PURCH NECESSARY.  Homeowners and renters (with property owner’s permission) in eligible ZIPs only.  Rules/Entry details here: http://bit.ly/2Gvud8k. Ends 5/21/18. 

This post is sponsored by Lowes. The thoughts and opinions are my own.


DIY Upcycled Tea Tin Planter


February is coming to an end and we are a tad bit in disbelief. I know, this seems like a reoccurring theme over here but during this busy season of our life it’s difficult to fully grasp how quickly the time is flying. We did take some time off for a family vacation (there’s a post in the works) in January and it was just what we needed to reset for this new year but when we came back we dove head first into our semesters and it took some time to get back on our feet. We are now back in the groove of things and excited to share what we have been working on. Last month I was lucky to be a part of Salvage Dior’s January Creative Team on Instagram where each week I, along with my four teammates, were responsible for creating something new for our homes that fit within the following themes: 1) Upcycle, 2) On the Wall, 3) Child’s Play, 4) Coffee Table Decor. In this post I’ll be sharing the project I completed for the first week, an upcycled tea tin turned planter.

IMG_8994

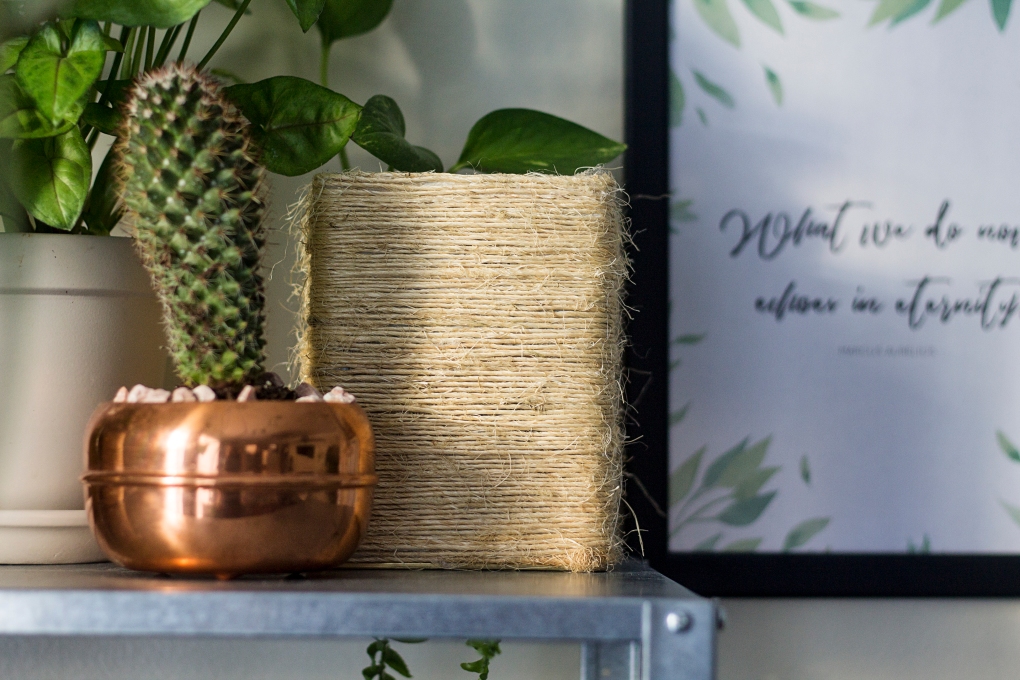
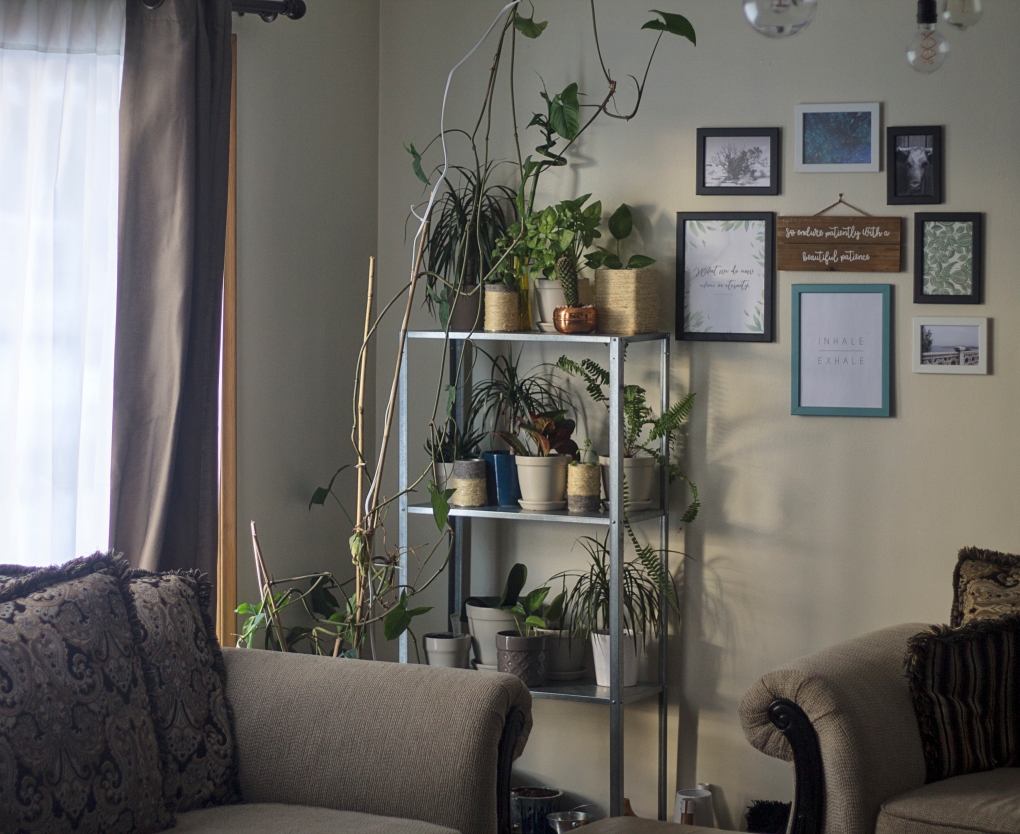
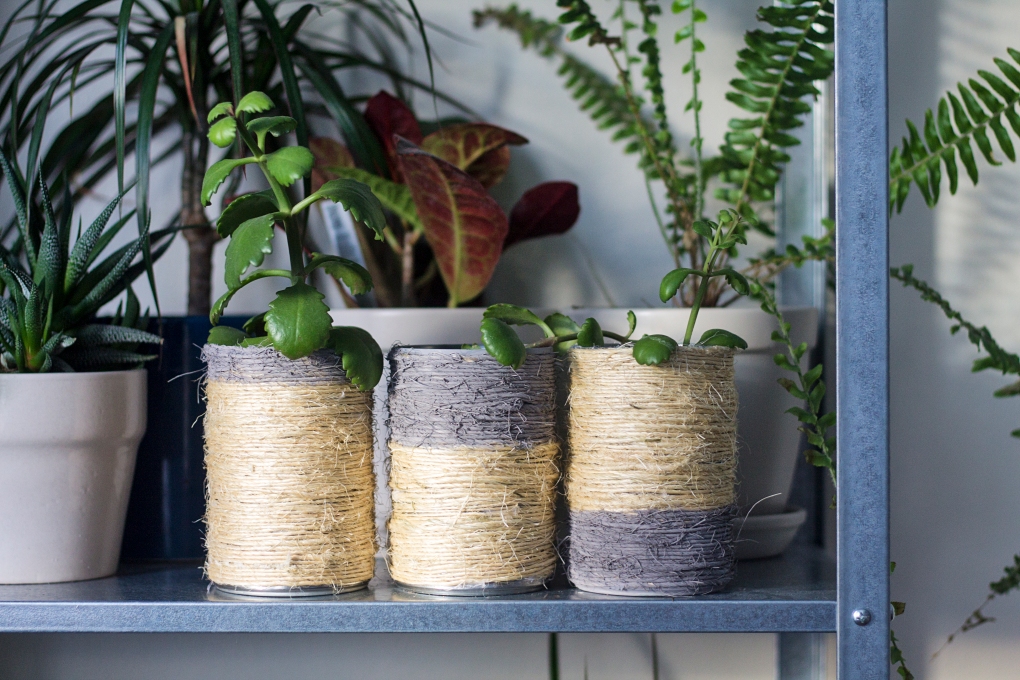
Loose leaf tea is something we drink quite a bit of in our home and I’m always left wondering what to do with the tins once they’re through. In the past I’ve used them as storage for spices and knick knacks but this time I wanted something a bit more creative. At the time we were also revamping our plant corner so I thought it would be nice to make some new planters for the Pothos and Sedum I was growing hydroponically. I was inspired by the recent trend in natural fiber textiles and wanted to create that woven look to contrast with the industrial shelving we chose for the plant’s display. If I wanted to buy what I was looking for, I could have easily spent anywhere from $6-25 a pot depending on the size. Instead, I was able to make this tea tin planter and some tin can planters for $0 because I had everything already on hand. The only thing that you would probably need to buy if you’re not DIY nerds like us is the bundling twine but that itself is very inexpensive ($3.98 for 525 feet). Alright, let’s make a planter!


If you are an avid DIYer, you most likely have a glue gun in your arsenal of crafting tools.

eb_loose_2

DIY Upcycled Tea Tin Planter

  • Difficulty: Easy
  • Print

Materials
Tea tins or tin cans, washed and dried
Bundling twine
Hot glue-sticks
Milk Paint (optional)

Tools
Glue Gun
Scissors
Drill (or a hammer and nail)

Directions

  1. Heat your glue gun and in the meantime use your drill to place drainage holes in the bottom of your tin. You can also use a hammer and a nail to do this or you can skip this step and just make sure to include a layer of small rocks beneath your soil for water drainage.
  2.  Glue the end of the bundling twine to the side of your tin at the very bottom and begin wrapping the twine around, making sure to glue the first 3 coils to the tin and to each other. As you wrap the twine, be sure to push the coils down tightly to close any gaps and give your planter a neat, elegant look.
  3. Continue wrapping the twine around, stopping midway to glue the coils down. Wind the twine around the tin until you reach the top and then cut the twine to length.
  4. Uncoil the twine a couple turns, then rewind it tightly against the tin using hot glue to secure the top two coils to the tin and to the adjoining coils.
  5. Take your scissors and trim off any noticeable twine hairs sticking out (see the time-lapse video below). At this point you can paint the planter and let it dry or go straight to planting and styling it!

IMG_8984

IMG_8998

If you liked this post and found it inspiring, we would love if you shared it. For more related content, you can find us on Instagram where we share more of our day-to-day and Pinterest where we share our ideas and inspiration. If you have any thoughts or suggestions about this DIY project, feel free to leave a comment below. And as always…

signature3


DIY Fall Harvest Wreath

IMG_5649

How is it already October?! In less than one month our daughter (aka Hobbit #2) will be turning one years old and we are feeling all the feels 😦 It doesn’t help that our days are filled with schoolwork and housework, with little time for much else. However, that doesn’t mean we can’t find a way to usher in one of our favorite seasons. As you’ve probably gleaned from our autumn tablescape post, we are really digging the more muted and subtle fall colors (think burgundy, peaches, grayish greens) and I really wanted to celebrate those colors in the form of a welcoming wreath. Between Michaels, Target, and Dollar Tree, I found all the elements that perfectly captured the look I was going for. I dare even say, “I nailed it.” My sister-in-law found it hard to believe that something so pretty could be made from Dollar Tree florals but it can and for well under $10 and 30 minutes too. So if you’re looking for ways to make a beautiful autumn statement but are tight on time and money then this is the perfect project for you 🙂 If you want to see how it’s made then you’re in luck because tomorrow I’ll be collaborating with the CraftBox Girls to bring you a live tutorial at 12 pm EST.  Be sure to tune in, say hello, and get some crafting inspiration 🙂

Supplies
18′ Grapevine Wreath ($3)
Faux Florals ($5)
Faux Pears ($5)
Eucalyptus ($3)
Hot glue gun & glue sticks

Total Cost: $16 + tax

IMG_5627

Pro tip: Don’t forget to use the Michaels app for coupons. I always use my coupon to save 40% off any regular priced item. With the supplies that I purchased, I was able to make 2 wreathes for the price of 1 putting the total cost per wreath at under $10.

IMG_5609

Directions:

  1. Collect your florals, eucalyptus, and faux fruit and start placing them around your grapevine wreath until you are happy with the arrangement. You might have to move things around several times to get the desired look.
  2. Once you have settled on your design, you will need to glue each piece in place using a generous amount of hot glue, embedding the stem deep into the vine, and holding down for 20-25 seconds until firmly in place.
  3. Once all the pieces have been glued down and any excess strands of glue have been removed, you can hang your wreath on a hook or door wreath hanger.

IMG_5681

IMG_5669

IMG_5674

IMG_5672

Share your autumn stories with us below and if you liked this post please follow us and share!

Instagram


Laundry Room Remodel with IKEA’s Algot System

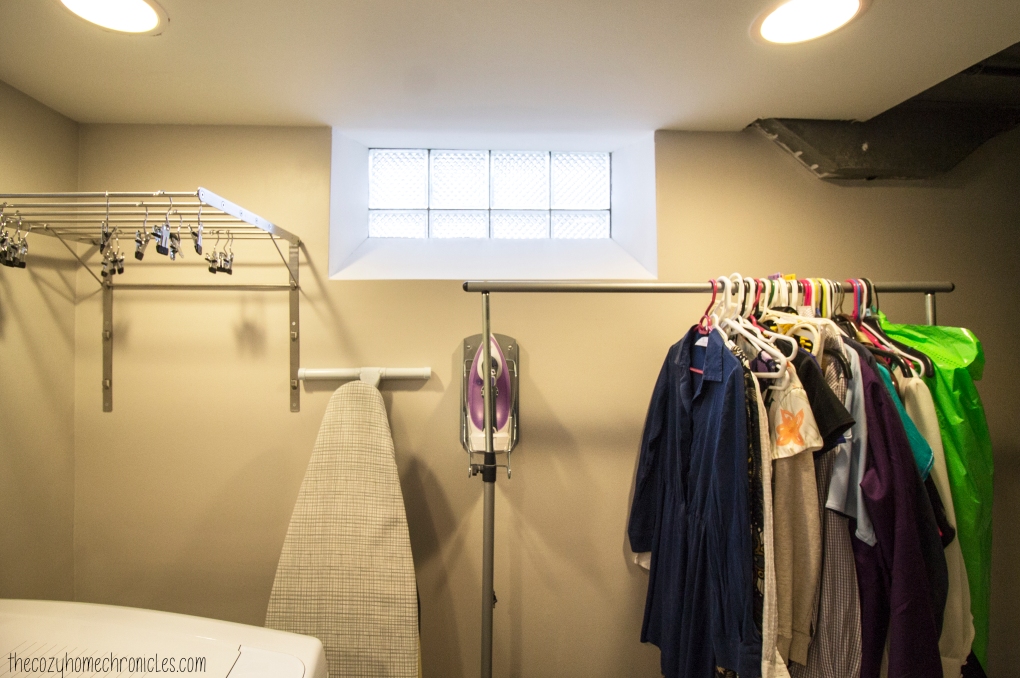
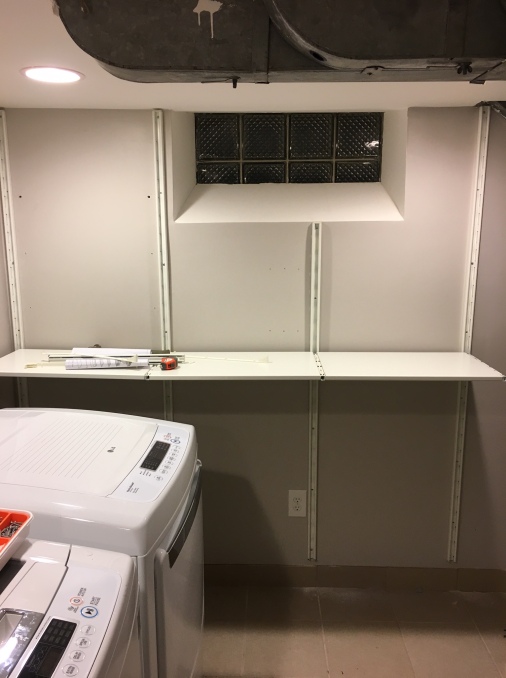
As you may be well aware of, maintaining a home requires not only constant work but some level of organization in order to cultivate a sense of peace and stability. Sometimes organization can be found through specific practices such as meal planning or journaling, other times it can be found in the design of a space that maximizes storage and efficiency. In our home we try to maintain a happy balance between both practice and design. Before having children, doing laundry was manageable because we could fold and put our clothes away in our bedroom without any interruptions. Now with two little ones, we can’t afford to bring the laundry up to fold unless we want our clothes scattered all over the main floor. We found that even though we had scheduled days for doing specific loads, our laundry room was just not equipped to deal with us sorting, folding, hanging, and ironing our clothing in one space. There was no counter-space to fold and no shelving to store laundry baskets and cleaning supplies. Something had to be done!

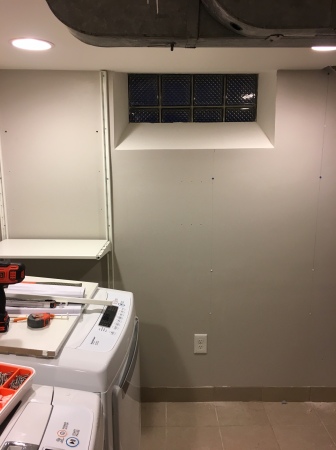
Here’s what our laundry room looked like before:

IMG_9673

IMG_9682

IMG_9680

IMG_9678

When we first bought our house, there was virtually no laundry room. There was just an old washer and dryer sitting in a dark and dusty, cement-walled basement. When we finished our basement in 2014, we made sure to include a space for laundry although we never put much more than a shelf and a sink cabinet. Fast forward to three years later and the realization that our laundry room was wasting valuable space. After much research and number crunching we decided that IKEA’s Algot system provided us with all of the features we were looking for at a very reasonable price. The Algot has a variety of options that accommodate any need from hanging rods to pull out drawers to drying racks. We are very familiar with the system because we had used it to replace our master bedroom and nursery closets but had never considered using it on an open wall. Until now.

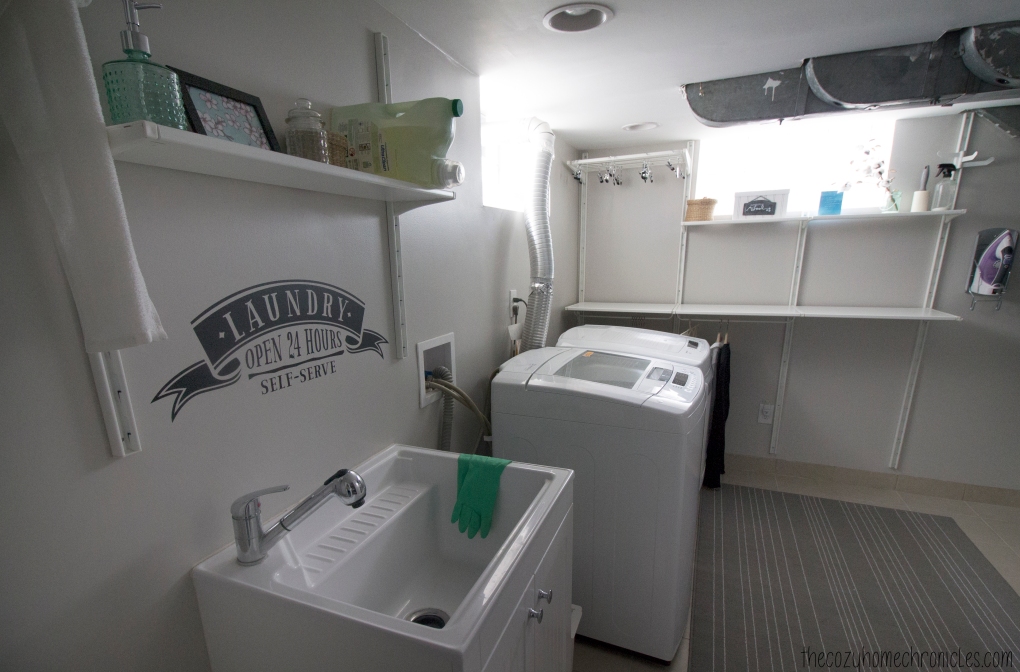
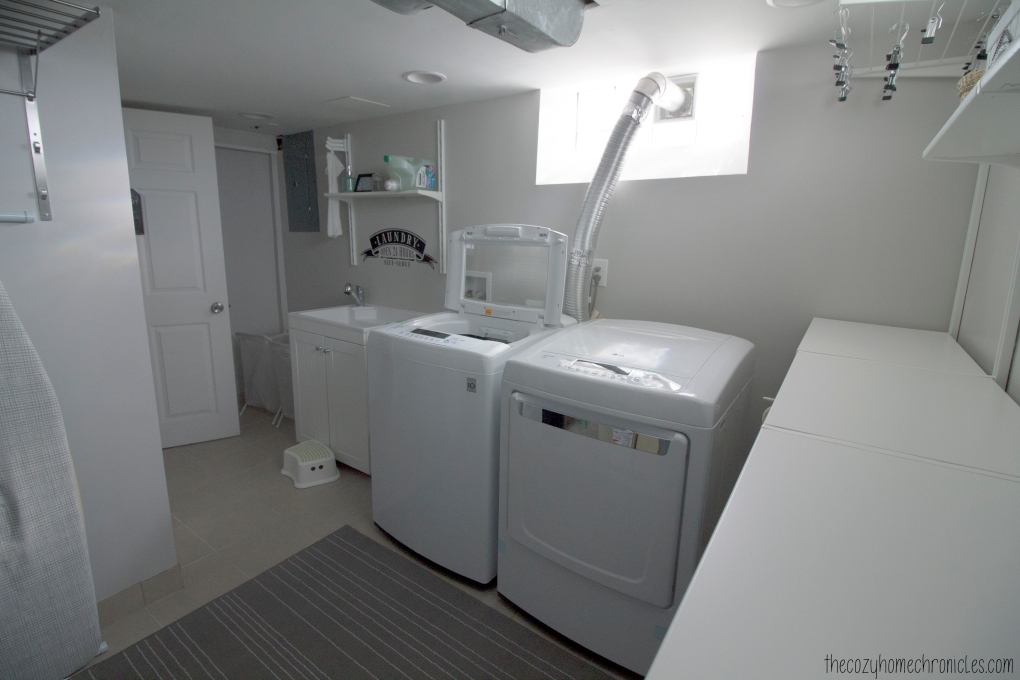
In total, we spent $177 for the design we chose and we are very happy with the outcome. The system gave us the shelf space, hanging space, and counter space we desperately needed to deal effectively with laundry all in one space. If you are considering this system but are hesitant about what it will cost you, you can get 100% accurate pricing by designing your space through the Algot planner.

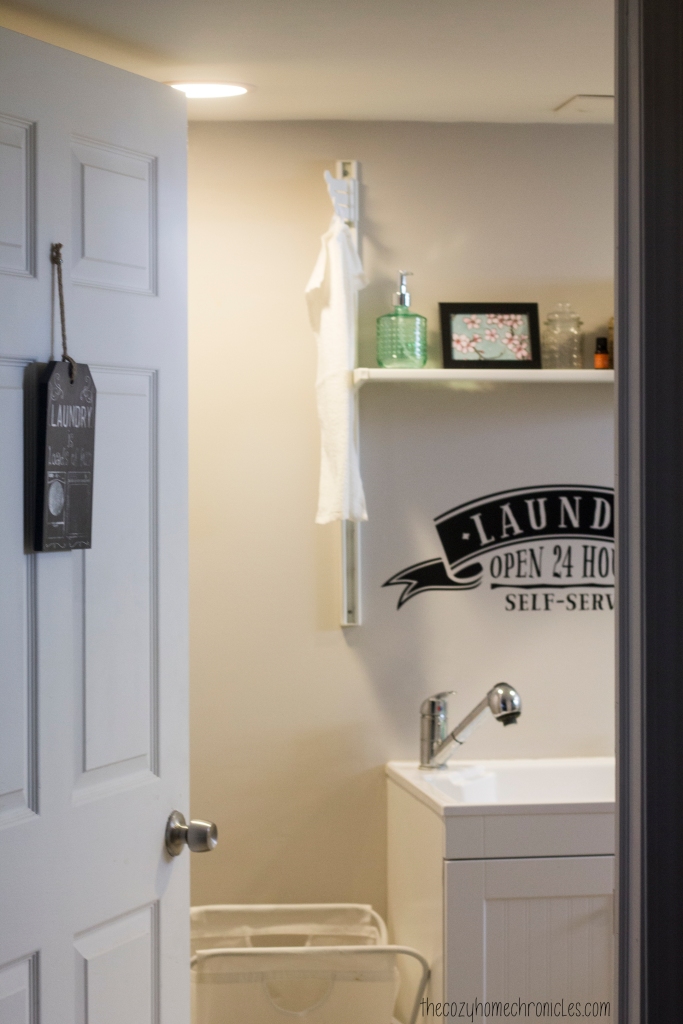
Here’s what our laundry room looks like after:

IMG_1006

IMG_1293

IMG_1355

IMG_1338

IMG_1344

Of course a remodel wouldn’t be complete without some fresh new decor. Not only did we want a space that is efficient but we also wanted one that is cozy and pleasant to work in. Below we are sharing some of our favorite, simple decor ideas.

IMG_1349

  1. Laundry Wall Decal: We had such a hard time settling on one from MyDandelionDecal’s impressive 5-star rated shop but in the end chose a piece that was classic and inviting. The lovely shop owner has set up a 20% off code exclusively for our readers so if you’re interested in supporting a small business while decorating your home, the code is COZYCHRONICLE20
  2. DIY Wool Dryer Ball Basket:  Since we do not use dryer sheets, we needed something to keep our dryer balls from rolling all over the place. Armed with a paint pen, a clearance-priced metal plaque, and a white crate, I was able to put together this adorable storage box for under $10.
  3. IKEA Ljusnan Seagrass Baskets: These baskets add such a rustic touch and are perfect for storing clothes pins and essential oils.
  4. DIY Framed Wall Print: IKEA’s $0.99 Fiskbo Frame meets Michael’s $0.69 scrapbook paper for an inexpensive pop of color and pattern.
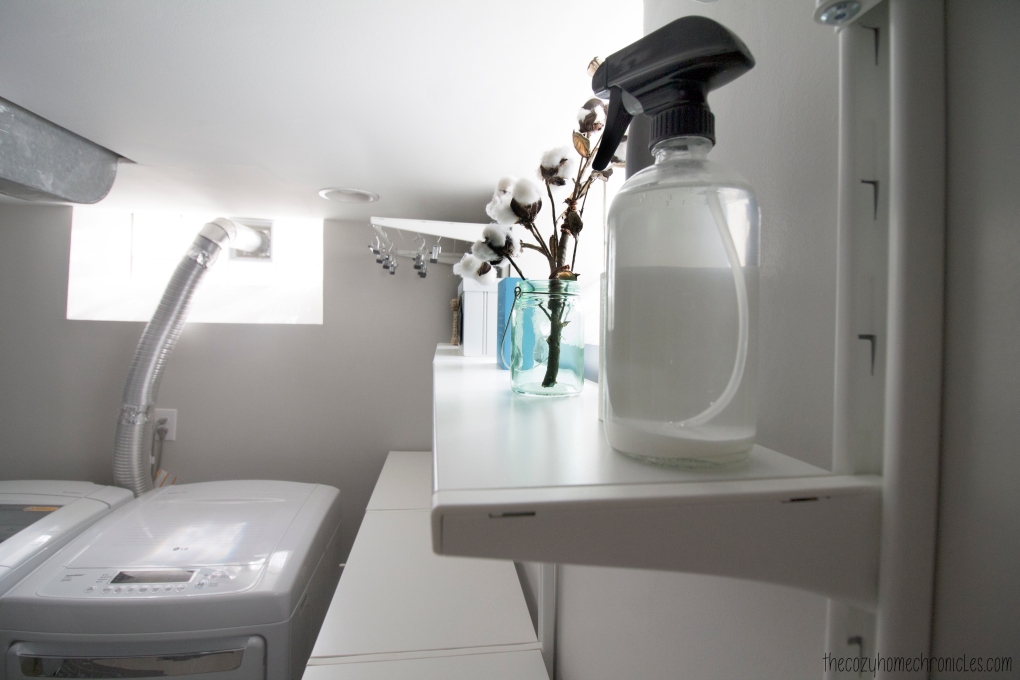
  5. Cotton Stem Bouquet: Who else thinks fresh cotton when they think of laundry? This inexpensive mint green jar is the perfect pair to Kirkland’s cotton stem.

IMG_3532

IMG_1004

IMG_0997

As with all things in our home, this laundry room is still a work in progress. One thing that we still have yet to do is designate and design a corner for our cleaning tools. In due time! At this stage in our busy lives, however, this update gives us all the things we needed. It just goes to show you, a space doesn’t have to be fancy to get the job done.

If you liked this post please follow us and share!

Instagram


DIY Framed Chalkboard Wall

Our son is getting to the age where he can almost color without trying to eat his markers and crayons (the keyword there is almost), however, he still attempts to scribble on the wall any chance he gets. Despite getting him a small IKEA table for all of his creative pursuits, he seems not to want to be confined to paper so we figured if coloring on the walls is what he wants then coloring on the walls he shall get. We have always been admirers of chalkboards…the rustic kind that you see in old schoolhouses in black and white movies. We figured a chalkboard would not only be nice for doodling and writing the dinner menu on but also as a fun educational medium to teach letters, words, and concepts.

IMG_9985

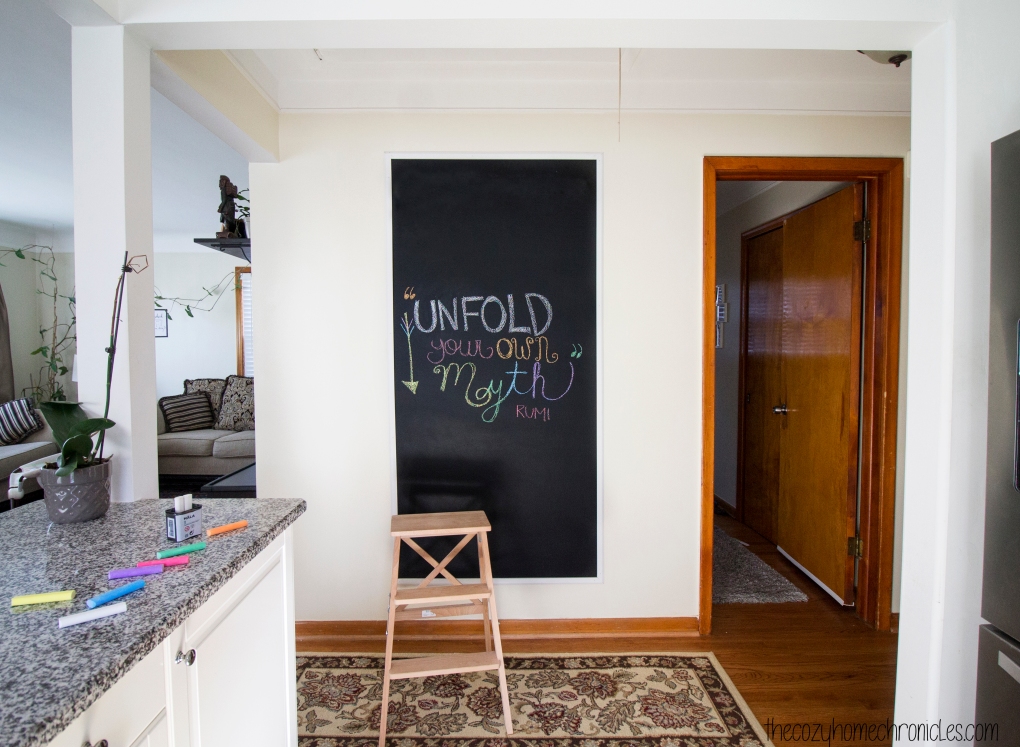
We did toy around with the idea of painting an entire wall, which has become popular these days, but in the end we decided a 6ft x 3ft area was plenty of space for all of us to use. Plus since we chose to put it in the hallway, adjacent to the kitchen, we wanted to preserve some wall space just in case we wanted to add wall art or organizers for a command center in the future. The awesome thing about making your own chalkboard wall is that for $10 of chalkboard paint, you can get a little over 100 sq. ft of coverage. That’s a steal when you consider that chalkboards the size of small picture frames are going for that and much more. The other really nice thing is that you can frame the painted area to achieve that authentic chalkboard look and you can do so using any type of wood you like in any stain you want. We went with an inexpensive white moulding from Home Depot that we nailed directly to the wall. We’ve come across DIY framed chalkboards that involve painting another medium and then hanging it up. Not only is a large chalkboard heavy and impractical to hang but it would be dangerous if you have little ones in your life. Just something to think about if you are not sure how you feel about painting a wall with chalkboard paint.

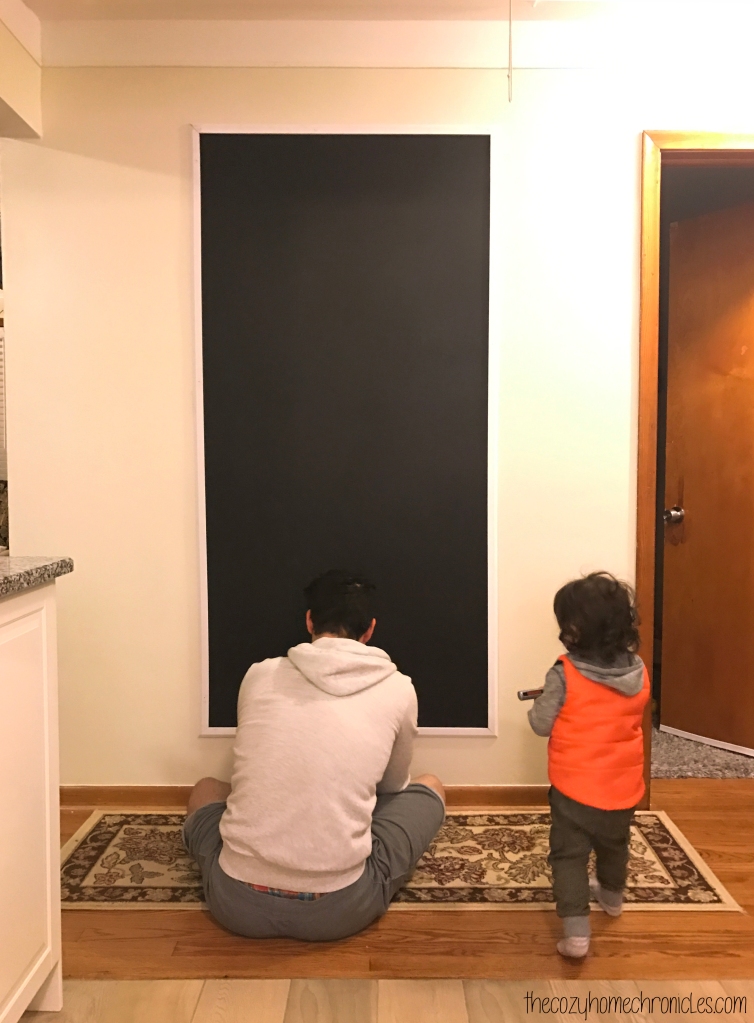
The only thing you need to be mindful of is if you have kids in the house then you will want to time your painting after their bedtime so the paint can dry without handprints all over it. Other than that, this chalkboard wall is super easy to put together and loads of fun. Our son loves scribbling on it, I love practicing my handlettering, and of course baba loves leaving silly doodles for us to wake up to. Yes, we are not ashamed to admit it… this chalkboard was as much for us as it was for our son.

Supplies
Chalkboard Paint ($9.67)
Wood Moulding
Trim Nails

Tools
Paint Roller
Paint Tray
Paint Tray Liner
Blue Painters Tape
Hammer

Chalk options
Chalkboard Wall Safe Markers ($12.95)
Regular Chalk from IKEA  ($0.99)

Note: If you end up taking on this project using similar dimensions to our chalkboard then know that you will have leftover paint. Don’t you fret though, we will probably come up with another DIY project to make use of it.

IMG_9973.jpg

Directions
1. Measure the area you want to paint and outline the area with pencil.
2. Apply the painter’s tape over your outline, pressing down firmly as you go so you don’t have any air pockets where the paint can seep through.
3. Mix the paint using a paint stick and pour 1/4 of the paint in the paint tray.
4. Gently dip your paint roller in and start painting your designated area in a “W” pattern. Make sure you don’t use too much paint on your roller as it will start dripping and take away from the smooth surface of the board.
5. Let dry for 4 hours before applying a second coat.
6. After the final coat is painted, let it set for 3 days (per instructions on the paint container) before writing on it.
7. Test your new board with the writing medium of your choice: old-fashioned chalk or chalkboard marker.

IMG_2460

IMG_2465

IMG_3138

IMG_9929

IMG_9954

IMG_9988 copy


Have you been wanting to put up a chalkboard wall? If so, what’s been stopping you?

If you liked this post please follow us and share!

Instagram


IKEA Hack: DIY Rustic Bread Tin Box

img_9537

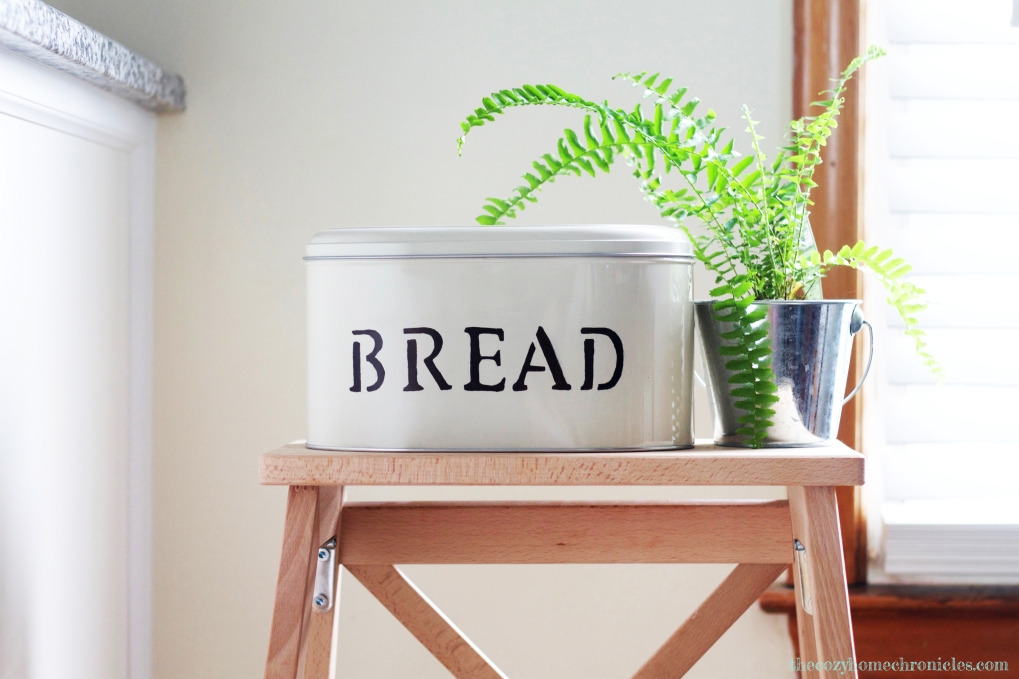
We eat A LOT of bread… possibly too much of it but we are hobbits so that’s probably not going to change anytime soon. Although we finished renovating our kitchen this past May, there is still some work to be done in terms of organizing and decorating. One of the things that needed to get checked off of our to-do list was finding a way to preserve and store our leftover bread. When we searched for bread storage online, we immediately fell in love with the charm of those rustic farmhouse bread tins. Of course it would have been easy to click purchase and have one delivered straight to our doorstep for $45 but where’s the fun in that? Instead we took our time getting ideas until we came up with an easy DIY bread tin. Not only is it way cheaper than any bread tin you’ll find in store but it’s super easy to make and customizable too. IKEA has two different tin options that you can use for this project and both are under $15. 

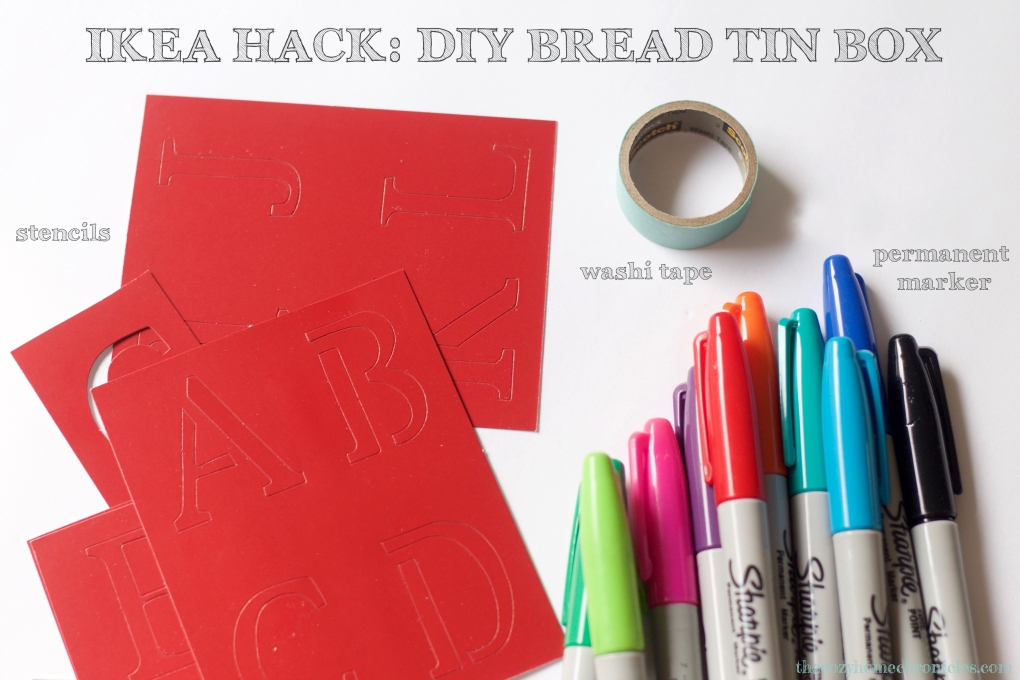
The Beromlig that we settled on came with two sizes for $8.99 and we used the larger one to make the bread tin box (we will probably turn the smaller one into a cookie tin). That’s a steal considering simple tins like the one pictured below on wayfair.com are going for $26.99 at sale price. Besides the choice of tin, you also have the option to pick any font you want. We went for a classic look with “Old School Alphabet” stencils that we found at a local Michaels. Lastly, you’ll need to settle on an ink color from the many pretty shades that are out there. Why permanent marker you ask? Well we did try acrylic paint and it peeled off too easily. Although permanent marker can come off with rubbing alcohol (we checked!), it does not come off with a gentle wiping using a wet cloth. I suppose you can use spray paint or some other fancy medium but for a simple and inexpensive home decor item,a  good old Sharpie will do the trick. Alright, let’s get started!custom_imageMaterials
Beromlig Storage Tin
 or Hemsmak
Letter stencils
Permanent marker
Washi or painter’s tape

img_9524-copy

Directions

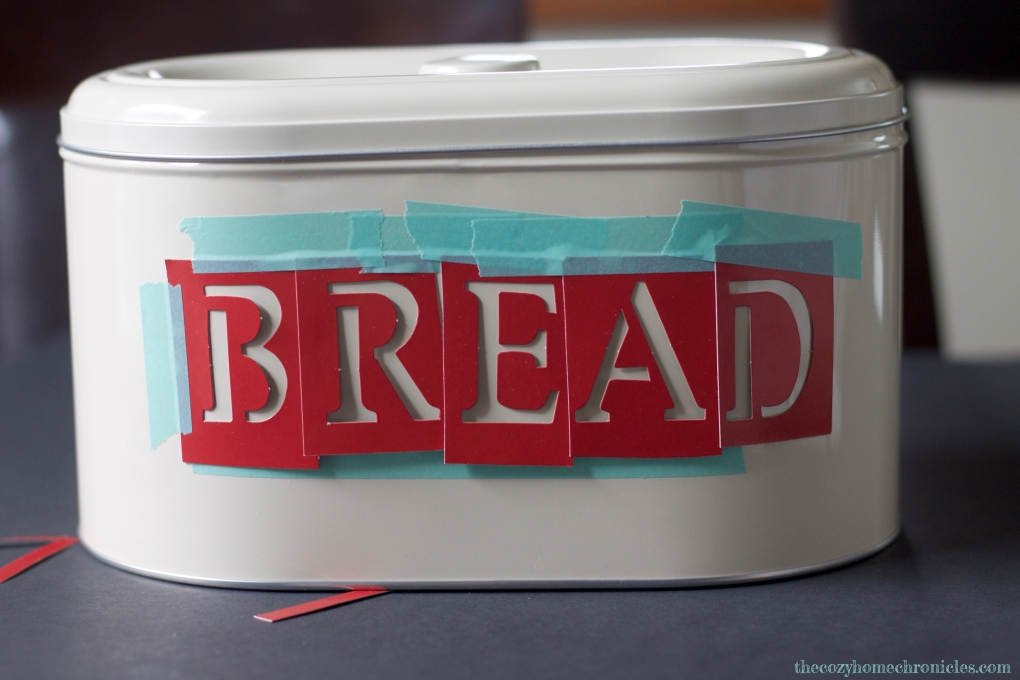
1. Wipe the inside and outside of the tin clean with a damp cloth and dry thoroughly.
2. Arrange and level your letters on the tin and tape them in place using washi or painter’s tape.
3. Fill in the letters with any color permanent ink you choose.
4. Let dry for 10 minutes before removing the stencils.
5. Find a happy place for your bread box and fill with delicious breads 🙂

img_9485

img_9497-copy

img_9527

img_9515-1

What projects and adventures are you working on right now? Please join the conversation below in our comment section, we would love to hear from you!

If you liked this post please follow us and share!

Instagram


DIY Upcycled Candles

img_7917

It’s that chilly, cozy time of year and you’re reaching to light up those festive candle scents; earthy pine, spicy cinnamon apple, warm vanilla cookie. That is, until you realize your candles are nearly dead from last season’s use. You can barely fit your hand in to light the wick at the bottom of the jar and even if you can, the wick is completely burnt out. We recently found ourselves in a similar situation with a significant collection of useless but oh-so-amazing-smelling candles that still had plenty of wax in them. Rather than being wasteful and tossing them out, we assessed our inventory and devised a plan to revive them. Using small mason jars leftover from our baby shower last year, we made new candles out of the old ones, layering some our favorite scents for a colorful look. With new wicks, pretty glass jars, and some TLC, you too can have your favorite candle(s) brought back to life!

Supplies
Dead candles
Glass mason jars (or any cool glass container of your choice-here’s your chance to get creative!)
Large pot with boiling water
Candle wicks


img_7922


Directions
1. Fill a large pot with just enough water to submerge the candle jar(s) halfway, place on the stove, and bring to a boil.
2. Turn the fire on low and carefully place your candle jars in the pot until the wax is completely melted.

img_7933

3. Using tongs, remove the old wicks from the melted candle jars and dispose of them.

img_7938

4. Dip a new wick in the melted wax and place it at the bottom of your new jar/container.

img_7945

5. Let it cool and solidify.
6. Secure the wick in place so that it is standing straight up when you pour the melted wax in the jar.
7. Using an oven mitten or kitchen towel for protection, remove the melted candle jars from the pot and pour the hot wax into your newly prepared jar/container.

img_7950

8. Lay the candle on a flat surface to set and harden. If you want this process to happen more quickly then put your candle on a tray and pop it in the fridge.
9. Once your first layer has solidified, pour the next layer.

img_7957

10. Repeat steps 7-9 until you’ve filled your jar.
11. Trim the wick.

img_8096

It’s seriously that easy! We made these for our home but with a pretty container these can make beautiful gifts for friends or loved ones. I mean, who doesn’t love candles?

What do you do with your old, dying candles? We would love to hear from you! And as always…

If you liked this post please follow us and share!

Instagram


Cozy Kitchen Series Part 1: Planning

This is the first post in a series we will be doing covering our DIY kitchen renovation project that took us around 3 months to complete (working the weekends and some evenings). In this post we will discuss everything planning-related from brainstorming and design to calculating the cost of the finished project. We will also cover the timeline we envisioned for the duration of this renovation and how to realistically plan.

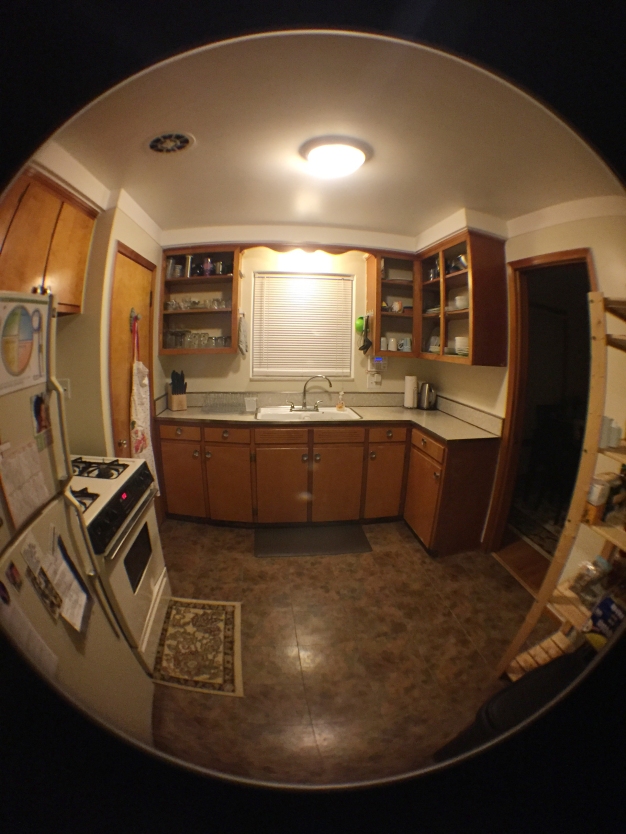
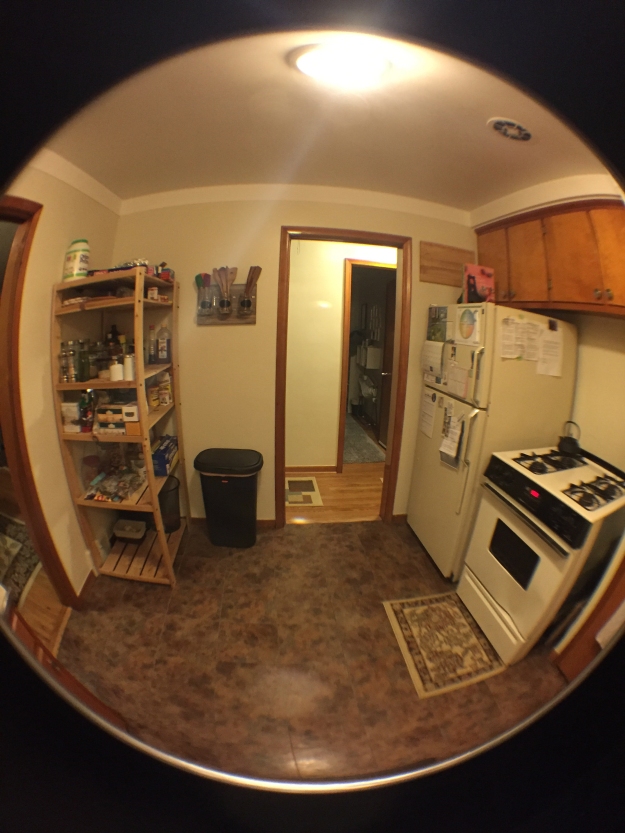
Just to give you an idea of the disaster we were working with, I’ve included some pictures below. My wife had taken some with her DSLR but can’t seem to find them so these fisheye view iPhone photos will have to do.

IMG_8984

IMG_8997

IMG_8996

IMG_8991

As you can see, there is not a lot of counter-space or any space for storage/keeping the kitchen organized. We also did not have a dishwasher which was fine until we had a baby and time became a luxury. The “hood” for the stove (if you can even call it that) was this disgusting hole in the ceiling that looked awful and was completely useless in circulating air. Aside from all that, it was just dimly lit, cramped, and uninspiring. But that was soon to change…

Brainstorming

This step is one I’m sure many of you are familiar with.  If you’ve ever walked through IKEA thinking to yourself, “this would look great in my house!” then you have partaken in the process of brainstorming. This is pretty much what we did for about six months before we began the serious design stage. We looked everywhere for style and layout inspiration including Houzz, Home Depot, Lowes, Pinterest, Instagram, IKEA, etc… The key is to save your ideas somewhere so that when you begin the designing process you have a better idea of what you want and don’t want. Throughout this process, we made sure to pay attention to four things: aesthetics, organization, functionality, and layout. As  I mentioned earlier we had barely any counter-space or storage space. For us, this was a major priority so we knew right away that to achieve the results we wanted, we would need to tear down the wall between the kitchen and dinning room.

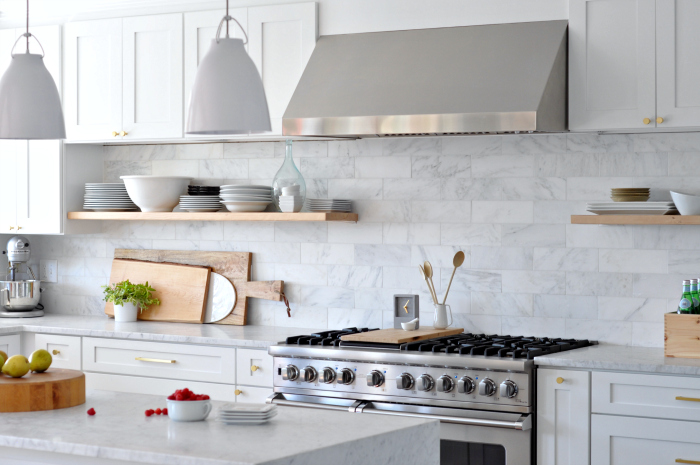
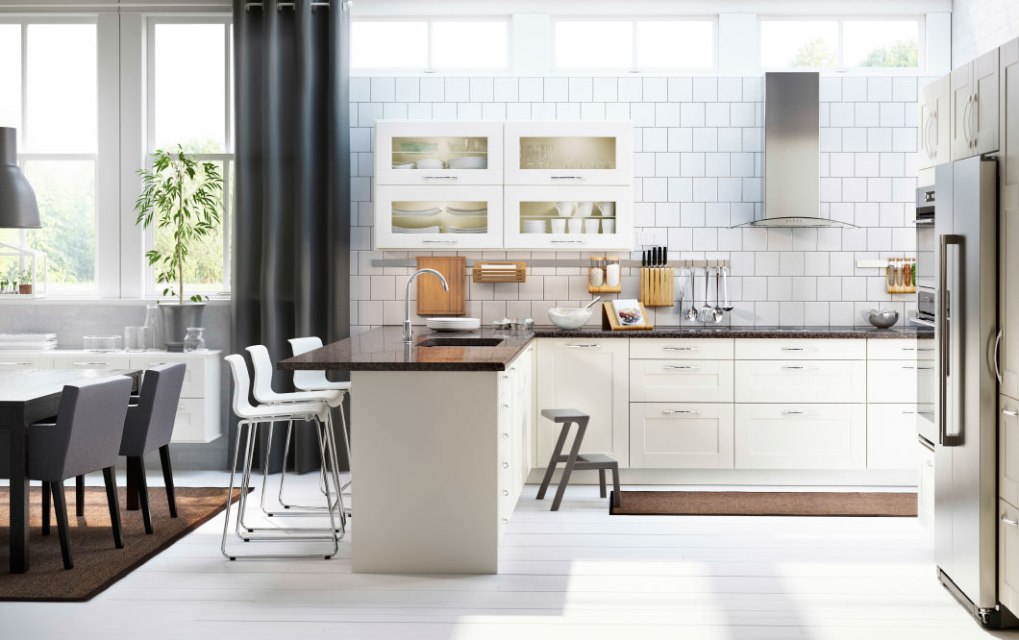
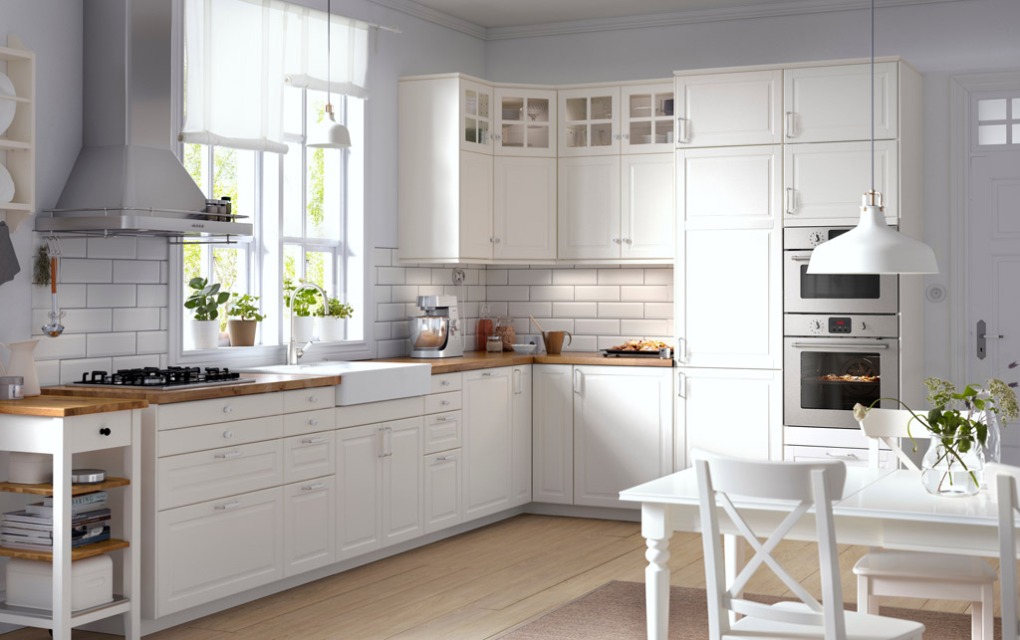
Aside from that, we looked to other kitchens and blogs and dissected every minute detail. Here are some kitchens that we shared with each other throughout the brainstorming process. We made sure to tell each other what we liked about each kitchen so that we could begin to narrow things down.

open-white-kitchen

Open shelving was something that kept coming up over and over again in all the kitchens we shared with each other.  We just really loved how it opened up a space and made for easy access to everyday kitchenware. Image credit: House updated

20153_cosk09a_01_PH123795

ikea-traditional-looks-meet-modern-versatility__1364299411904-s4

We also picked up on the fact that most of the kitchens we liked were white with wooden accents. We rarely chose a kitchen that had dark cabinets so we knew right away that wasn’t our style. We wanted clean and bright and cheery. Image credits: IKEA

IMG_20151125_194156

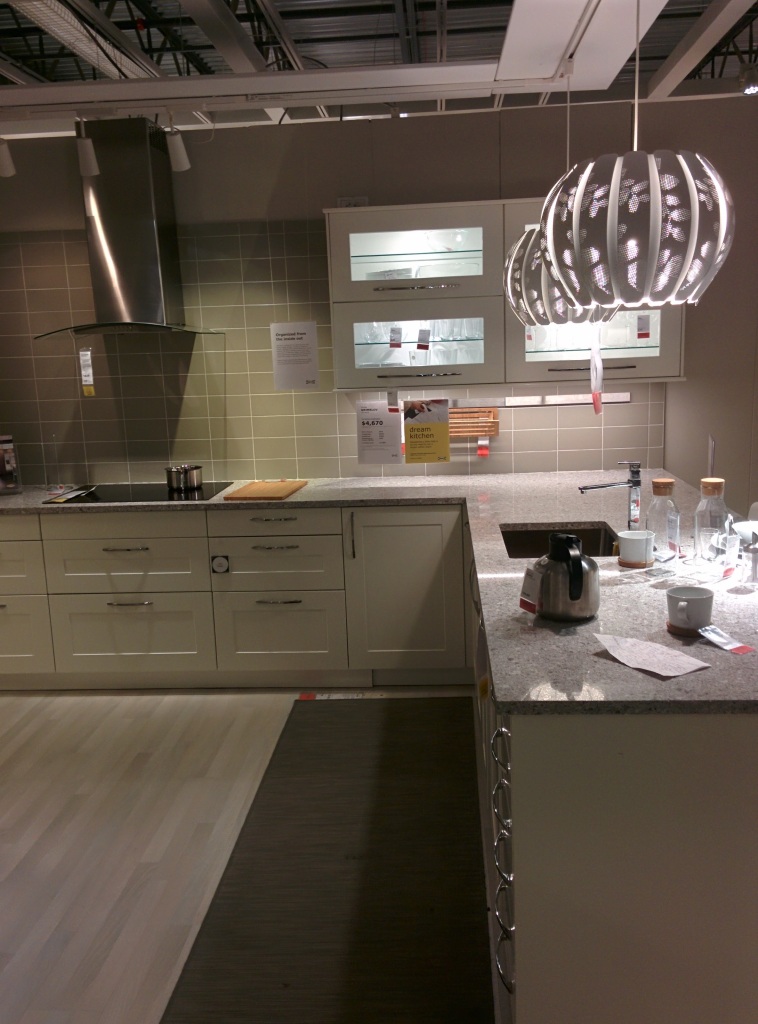
A few months earlier we had stumbled on a kitchen in one of IKEA’s showrooms that we found practical based on our dimensions and layout so we captured some pictures just in case we wanted to make it a reality (hint: we did). We also realized here we liked the idea of grayish flooring with white cabinetry.

White-Granite-Countertops

We really went back and forth on countertops because both light and dark work really nicely with white cabinets. To pull all the elements together including the stainless steel appliances and gray floors, we decided on a light countertop with splashes of gray and black. Image credit: Artszipper

Design

After the brainstorming stage, and once we were ready to put our imaginations onto paper, I measured our kitchen to get a sense of the dimensions we would be working with. I did this as thoroughly as I possibly could to ensure the correct fit for cabinets, shelving, and fixtures. Even if you feel like you’re just getting started and playing around, remember that accurate measurement makes for accurate budgeting.

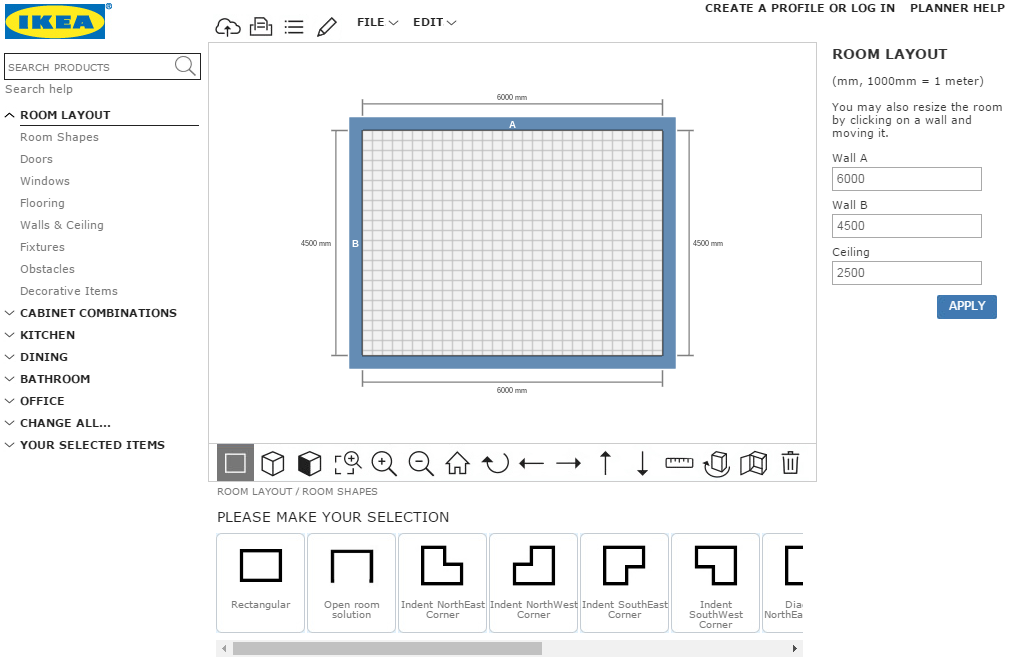
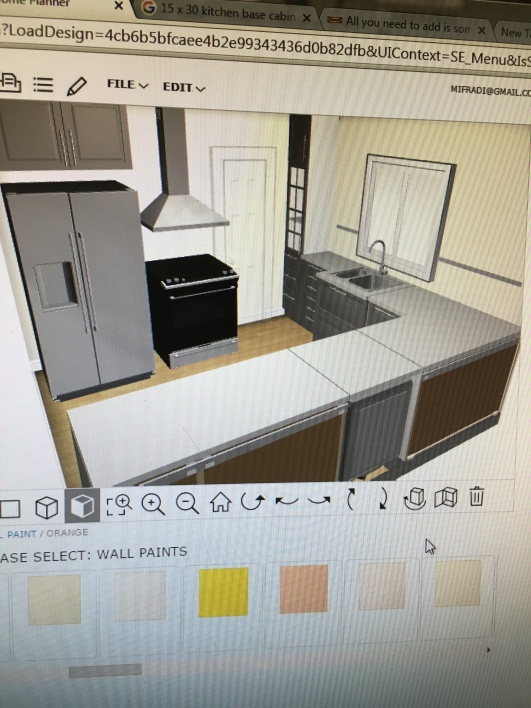
There are many planning softwares to choose from but I settled on using IKEA’s online Kitchen Planner software which is pretty user-friendly. Once I inputted the measurements for the walls, the windows, doors, ceiling, etc (see Figure 1) I began tinkering with the layout of the kitchen and adding cabinets like a madman. I managed to come up with my first design draft (see Figure 2) in no time and was pretty pumped to print it and review with my wife. Here is where the fun begins! Why, you ask? Because you will most likely change your first draft…many, many times.

ikea kitchen planner

Figure 1


IMG_0366

Figure 2

After many revisions we settled on a design similar to the model kitchen we liked in IKEA’s showroom. We then took our design to IKEA where we talked to one of their kitchen specialists who helped us remove unnecessary items and add cool little features like dampers so the cabinets don’t slam when you shut them. In the end, the final design we purchased was quite different from our initial draft and that’s completely okay. With a bit of number crunching, which I’ll talk about below, I realized it was cheaper to buy certain things externally so our Ikea purchase did not include a countertop, appliances, or flooring. For those looking for detailed information on what IKEA offers, follow this link to their informational PDF.

Budget Breakdown:

As a finance guy, I enjoy crunching numbers and shopping around to get the best possible deal. To be successful in that regard, however, it’s important to start with a clear maximum budget and have a 10% buffer for unexpected expenses that may arise. So for example, if you’re planning on spending 10k, set aside 1,000 for miscellaneous costs. We ended up going slightly over budget because of structural issues our engineer did not account for early on but I saved a lot by doing most of the labor. To give you an idea of where our money went, I’ve included a breakdown below.

1. Kitchen cabinets from IKEA (7 cabinets): $2,700
2. Appliances bundled from Lowes and Sears: $3,800
3. Granite countertop custom ordered from Home Depot with an undermount sink: $2,200
4. Flooring, drywall, paint, and misc. tools from Home Depot: $1,000
5. Outside labor for taking down a wall: $2,500
6. Permits: $900
Approximate Total: $13,100

Timeline

Finally, let’s talk about time. It can be very easy (unless it’s just me) to underestimate how long work takes. Sure, I can tile a kitchen in a day or two but not when I have a day job, a baby, and other endless responsibilities. This doesn’t even include the time for the ordering and delivery of cabinets, appliances, and countertops. On top of that you have to account for any hiccups you may face and be flexible so that you don’t get discouraged or burnt out easily. I know it’s laughable but I’m sharing this unrealistic timeline I had created so you don’t make the same mistake I did. Whether you’re planning on doing the labor yourself or hiring someone, make sure you are clear about your expectations and then ask yourself if you are being realistic. Many contractors don’t just take one job at a time so don’t expect a full kitchen to be up in a week. HGTV is not real life. In my case, I got stuck waiting a week to resolve the structural issues that came up and then another week to replace the subflooring when I attempted to remove the vinyl tile. It also didn’t help that my wife was going through terrible morning sickness so I couldn’t leave the baby with her to work on the kitchen when I got home.

Project Purchase Dates (Home Depot and IKEA): 3/19/2016
Project Start Date: 04/04/2016
Wall Removal: 4/9/2016
Wall Plaster and Cleanup: 4/9 – 4/10/2016
Floor Installation : 4/10-4/11/2016
Base Cabinet Installation: 4/12/2016
Countertop re-measurement: 4/12/2016
Backsplash tiling:4/15-4/16/2016
Shelf installation:4/18-4/20/2016
Appliance delivery: 4/23/2016
Countertop Installation: 4/26/2016
Project End Date: 5/01/2016

In the end, the month I had envisioned became three and I can confidently say it would not have been so stressful if I didn’t start out with ridiculously unrealistic expectations. So take it from me and go easy on yourself. It’s not the end of the world if you don’t finish within your time frame and if you don’t chances are your time frame was the problem, not you.

If you enjoyed this post then stay tuned for more in the Cozy Kitchen Series which will cover the order of operations and the big reveal 🙂 As always, if you liked this post please follow us and shareAnd if you have any questions or comments we would love to hear from you.

IMG_0878

Sneak Peek: Kitchen Tiling

Instagram