DIY Anthropologie-Inspired Fringe Wall Art

Earlier last month, I shared a DIY upcycling project that I created for a four week creative challenge that I participated in back in January. In this post, I’ll be showing you how to make my decor for week two’s challenge “On the Wall.” First let me start by saying that while I love my own creative process, one thing I really enjoy is the challenge of recreating products that already exist for much cheaper. Seriously, if you’ve ever wanted something that was way out of your price range but thought maybe you could make it at home then I’m your person! Like, if there was a career path or job title for Expert Home Decor Replicator, I’d be the first in line but until such a day here I am making copycat Anthropologie wall art for my own home and blog.

39685805_004_b1

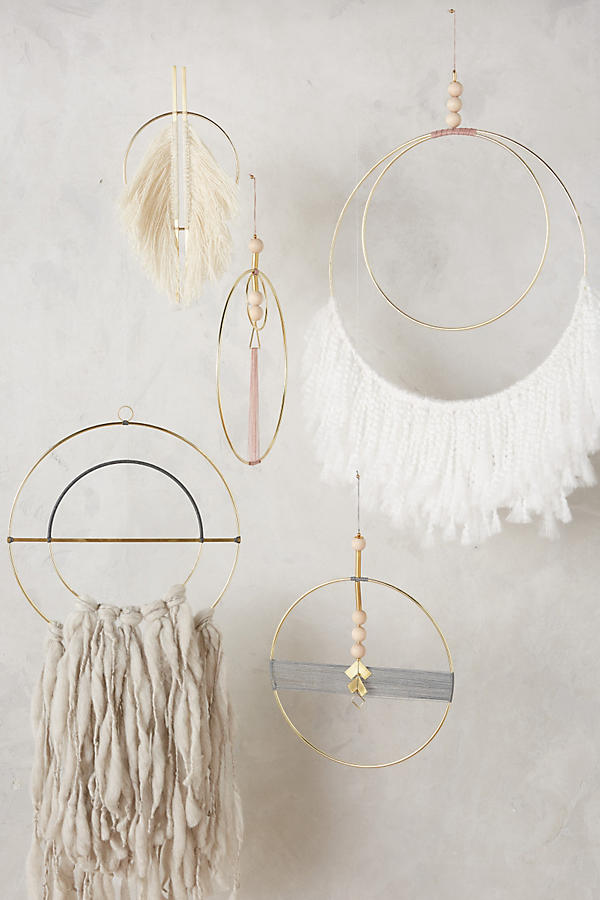
Image via Anthropologie

Do you want to take a guess how much these Solar System Wall Art pieces are going for? Do you even want to know? Try $78-$198. Yep, you read that correctly. How about making one for less than $20? If that’s a yes and you want to know just how, keep on reading for the full scoop. Here’s what you’ll need:
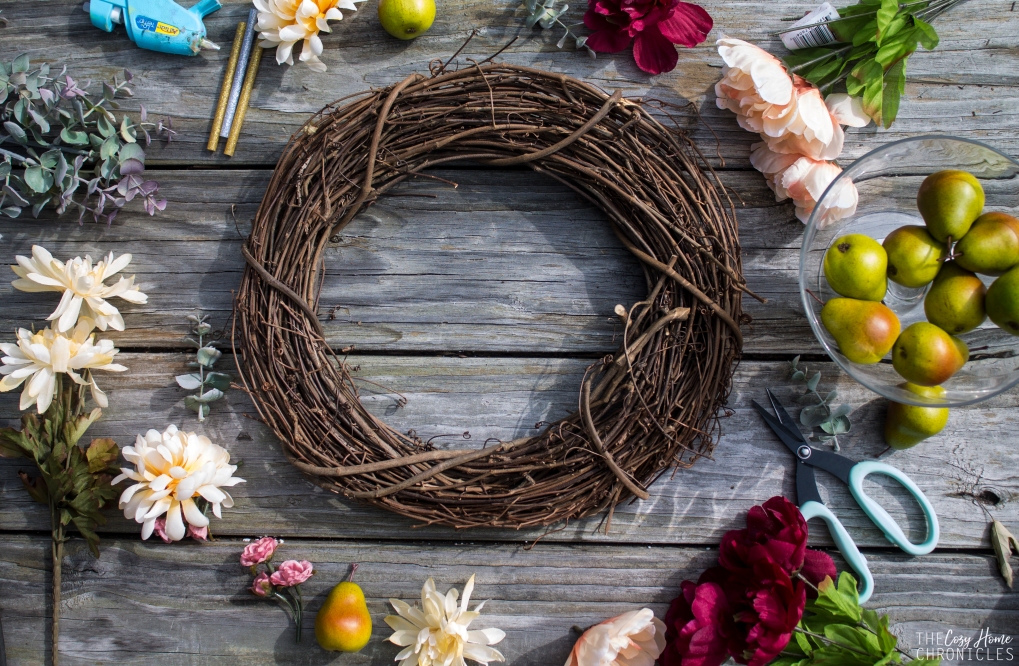
Materials
Gold Floral Hoops or Macrame Rings
Natural cord
Wooden or stone beads
Premier Jazz Yarn


Note: For this specific design, I used 2 floral hoops: a 6in and an 8in. I also used the jazzy yarn in the color “mushroom.” You can use any color or even a variety of colors to create a custom piece for your space. 

Directions

  1. Hold the two gold rings parallel so they’re touching (small ring inside the large) and tie them together using the natural cord. Wind the cord around the rings until the rings are secure and then double knot the cord leaving at least 7 inches for the beads and loop. For extra security, you can add a dab of hot glue to the knot.
  2. String the wood beads on the cord, secure with a knot, and create a small loop for hanging.
  3. Cut out 6-10 strands of the premier jazz yarn, keeping in mind that you want each strand to be twice as long as the final fringe since you’ll be folding it over. I wanted a staggered look so I cut out different sizes ranging from 20-35 inches (actually between 10-17inches).
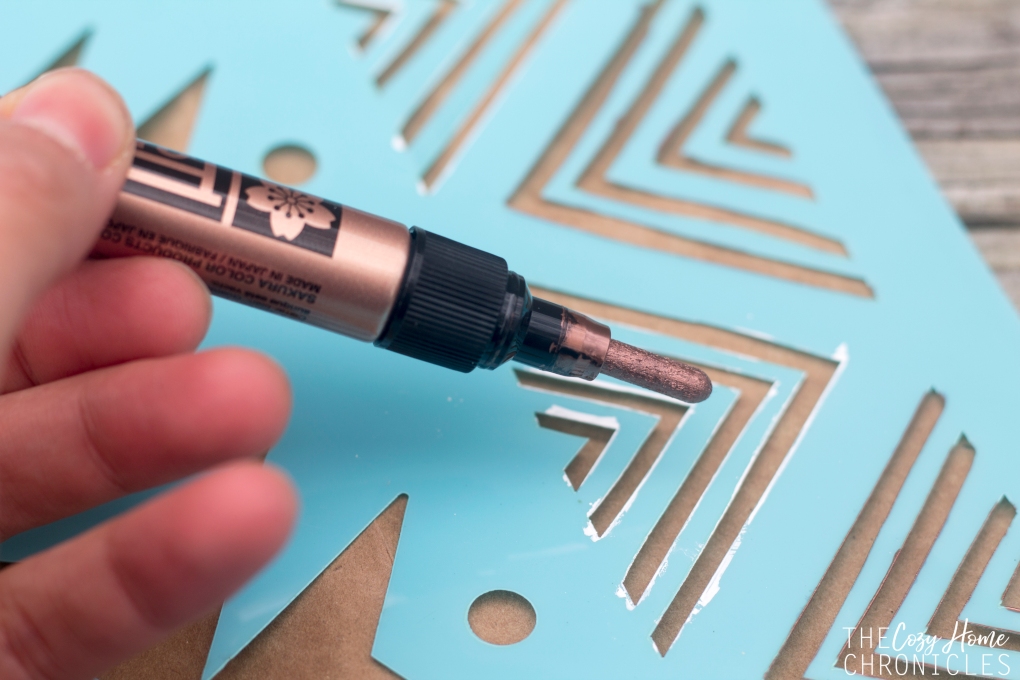
  4. On the bottom end of the larger ring, secure the yarn by folding the strands in half and pulling the strands of the yarn over the ring and through the loop (see images below).
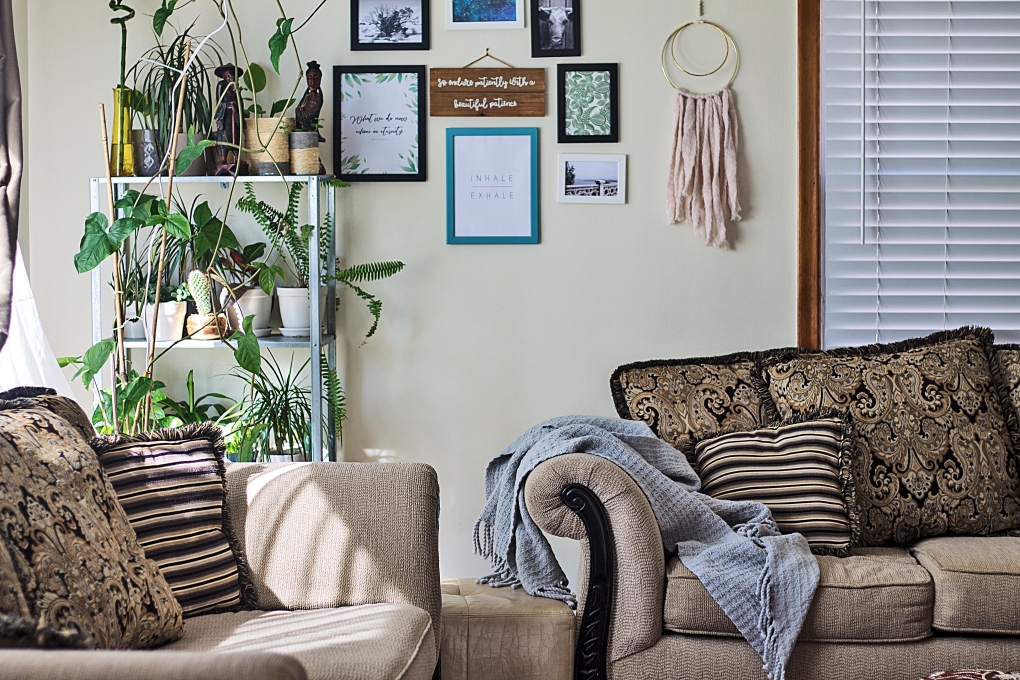
  5. Pull to tighten and trim the strands to your liking. Now hang and enjoy the view 🙂


anthropologiewallart

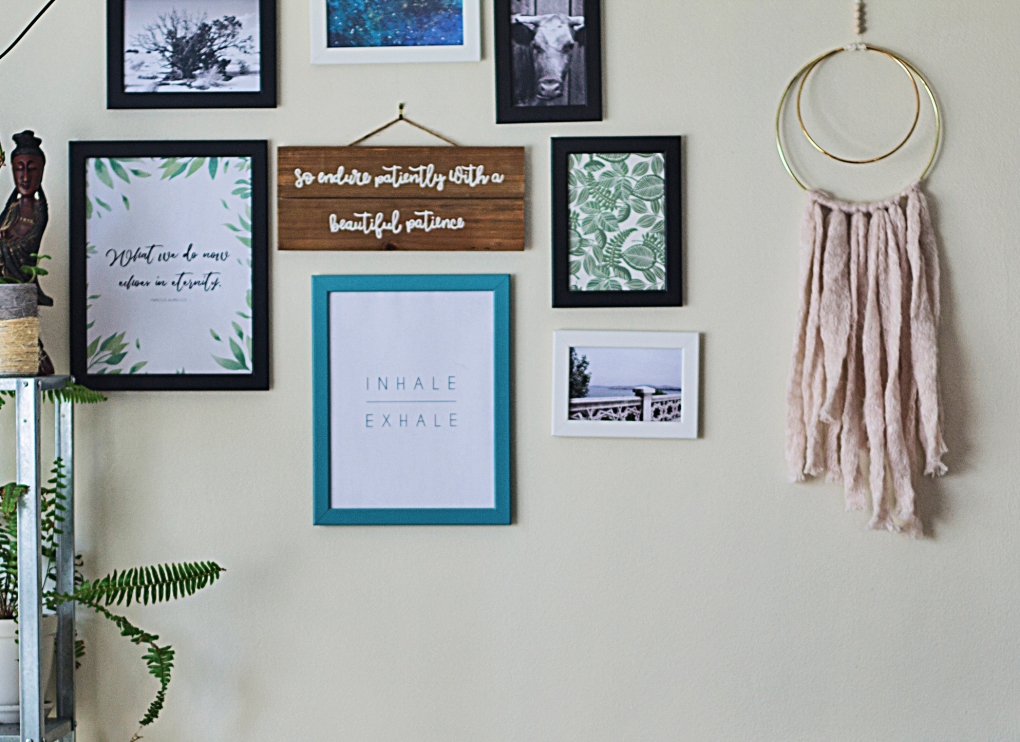
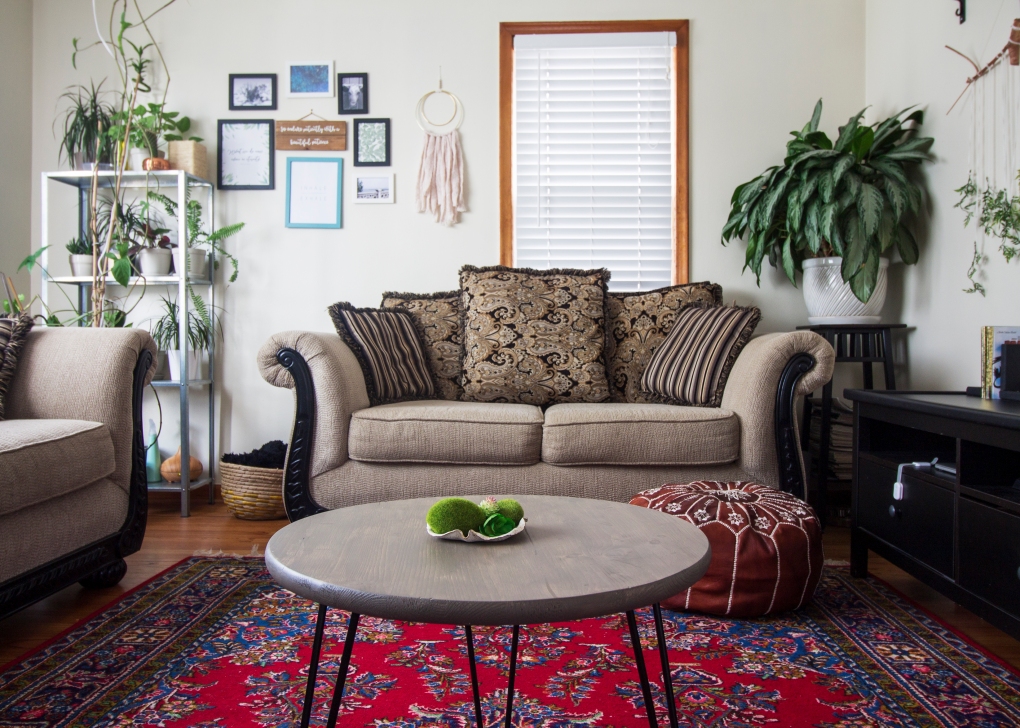
This was such a simple DIY wall decor and it really added a nice touch to our eclectic space. Would you make something like this for your home? Let us know in the comments below and as always, if you found this inspiring we would love it if you shared.

IMG_9856

signature3


DIY Upcycled Tea Tin Planter


February is coming to an end and we are a tad bit in disbelief. I know, this seems like a reoccurring theme over here but during this busy season of our life it’s difficult to fully grasp how quickly the time is flying. We did take some time off for a family vacation (there’s a post in the works) in January and it was just what we needed to reset for this new year but when we came back we dove head first into our semesters and it took some time to get back on our feet. We are now back in the groove of things and excited to share what we have been working on. Last month I was lucky to be a part of Salvage Dior’s January Creative Team on Instagram where each week I, along with my four teammates, were responsible for creating something new for our homes that fit within the following themes: 1) Upcycle, 2) On the Wall, 3) Child’s Play, 4) Coffee Table Decor. In this post I’ll be sharing the project I completed for the first week, an upcycled tea tin turned planter.

IMG_8994

Loose leaf tea is something we drink quite a bit of in our home and I’m always left wondering what to do with the tins once they’re through. In the past I’ve used them as storage for spices and knick knacks but this time I wanted something a bit more creative. At the time we were also revamping our plant corner so I thought it would be nice to make some new planters for the Pothos and Sedum I was growing hydroponically. I was inspired by the recent trend in natural fiber textiles and wanted to create that woven look to contrast with the industrial shelving we chose for the plant’s display. If I wanted to buy what I was looking for, I could have easily spent anywhere from $6-25 a pot depending on the size. Instead, I was able to make this tea tin planter and some tin can planters for $0 because I had everything already on hand. The only thing that you would probably need to buy if you’re not DIY nerds like us is the bundling twine but that itself is very inexpensive ($3.98 for 525 feet). Alright, let’s make a planter!


If you are an avid DIYer, you most likely have a glue gun in your arsenal of crafting tools.

eb_loose_2

DIY Upcycled Tea Tin Planter

  • Difficulty: Easy
  • Print

Materials
Tea tins or tin cans, washed and dried
Bundling twine
Hot glue-sticks
Milk Paint (optional)

Tools
Glue Gun
Scissors
Drill (or a hammer and nail)

Directions

  1. Heat your glue gun and in the meantime use your drill to place drainage holes in the bottom of your tin. You can also use a hammer and a nail to do this or you can skip this step and just make sure to include a layer of small rocks beneath your soil for water drainage.
  2.  Glue the end of the bundling twine to the side of your tin at the very bottom and begin wrapping the twine around, making sure to glue the first 3 coils to the tin and to each other. As you wrap the twine, be sure to push the coils down tightly to close any gaps and give your planter a neat, elegant look.
  3. Continue wrapping the twine around, stopping midway to glue the coils down. Wind the twine around the tin until you reach the top and then cut the twine to length.
  4. Uncoil the twine a couple turns, then rewind it tightly against the tin using hot glue to secure the top two coils to the tin and to the adjoining coils.
  5. Take your scissors and trim off any noticeable twine hairs sticking out (see the time-lapse video below). At this point you can paint the planter and let it dry or go straight to planting and styling it!

IMG_8984

IMG_8998

If you liked this post and found it inspiring, we would love if you shared it. For more related content, you can find us on Instagram where we share more of our day-to-day and Pinterest where we share our ideas and inspiration. If you have any thoughts or suggestions about this DIY project, feel free to leave a comment below. And as always…

signature3


DIY Upcycled Brown Paper Bag Gift Wrap

It’s finally the holiday weekend and that means we are inching ever closer to the start of 2018. We recently hit our 2 year blogging anniversary earlier this month and we thought it would be nice to celebrate with a short reflection and a makeover of the first post that ever went up on this blog. Why? Because sometimes, in the nitty gritty of blogging we can find ourselves questioning it all and in our tunnel vision of self-pity and negativity, we forget how far we have come. Comparison isn’t so bad when you’re looking at yourself and everyone loves a good before and after so here is ours.

IMG_8421

IMG_7538

As you can see clearly, our styling and photography has drastically improved in the last two years. Our first post was written in 2015 just a week before Christmas and right before I was about to dive into a week of hell taking my PhD qualifying examinations (a 7 day, 40+ page writing endeavor). Since that first post, we have connected with some wonderful bloggers, participated in two One Room Challenges, built a small but amazing community, and even wrote our first sponsored blog post.  There have been many times this year when we would feel frustrated with our engagement or turn-around time and even question what kind of blog we were aiming to be but looking back to our first post, I think the answer has always been there. DIYing is obviously something we are very passionate about as well as striving to live as simply and sustainably as possible and that’s exactly the commitment that our first post embodies. In this post, we will be sharing our revamped post with a little twist; using stencils to create beautiful gift wrap designs. For those of you who waited until last minute to wrap your gifts, you’ll want to hold off on that last minute Target run because this is such a simple way to add a personal touch to your gift wrapping and for next to no cost at all (depending on what your craft supply stash looks like). The wonderful thing about this gift-wrap is that it’s not just for Christmas; you can customize it to fit any holiday or occasion year round.

IMG_7551

Supplies
Brown paper bag
Scissors
Stencils
Metallic Paint Marker, paint pens, or sharpies
Twine
Embellishments such as eucalyptus, flowers, pine cones, etc..

IMG_7527

Directions

  1. Flatten your brown paper bag and cut down to the size you need.
  2. With a metallic paint pen, stencil in the blank side of the bag using the pattern of your choosing.
  3. Place your thoughtful gift inside and wrap nicely.
  4. Embellish with rustic twine, eucalyptus, pine cones, or holly.

IMG_7536

As you can see, I was going for a minimalist/bohemian look (surprise, surprise) with the copper and white pattern, twine, and eucalyptus accent. It’s almost too pretty to open!

IMG_7546

So what does 2018 hold for us? It’s been really hard to answer this question because life is pretty busy with two kids and graduate school on our plates. We do know that we love what we do and we love sharing it with you. We hope that we can continue growing; growing ourselves, our skills, and our blog and hopefully inspiring you all along the way. We can say for certain that we will definitely be sharing more DIY projects, simple family recipes, our simple living journey, and parenting adventures but whether we can keep up with our 50 blog posts/year productivity will remain to be seen. If there are topics you would like to see more of here on The Cozy Home Chronicles, please feel free to leave your suggestions in the comments below. And for those of you new bloggers, those considering starting blogs, or even veteran bloggers wondering “what’s the point?”, keep on dreaming and working towards those dreams with your eyes on the journey and not solely on the destination.

“Tell your heart that the fear of suffering is worse than the suffering itself. And that no heart has ever suffered when it goes in search of its dreams, because every second of the search is a second’s encounter with God and with eternity.”-Paulo Coehlo, The Alchemist

signature3


One Room Challenge: Week 2 | Primed to Paint

Hello Friends and welcome to Week 2 of our One Room Challenge Office Makeover. It’s been a busy and rough week (our son got sick with some kind of stomach bug and we are running in the Detroit Free Press Marathon on Sunday) so we are a bit behind schedule. Because of the relatively small scale of work needed for this room, we are not really worried about finishing on time.

ORC GPHosted by Lisa of Calling It Home,  The One Room Challenge™, is a widely anticipated biannual event every April and October in which twenty design bloggers take the challenge of transforming a space in just six weeks. Every Wednesday, the designers document their progress while sharing their sources and professional advice. On Thursdays, guest bloggers, like us, can play along and support other guest bloggers that are also tackling a room renovation.

IMG_6165

IMG_6169

IMG_6170

IMG_1306

IMG_6076

As far as this week’s progress goes, we did manage to have the room emptied and primed (thanks little bro). Although it’s hard to tell in the pictures above, the primed walls give a small glimpse of how light paint will transform the feel of the room. And speaking of paint colors, after much deliberation at our local Home Depot, my sister in-law and I decided to go with Behr’s Ultra-Pure White. I think it will offer the blank canvas we need to build a space that is inviting and inspiring to work in. To get an idea of what this might look like in a room, you can read here about this once “color of the month.” All rightie, here’s what the rest of the schedule looks like now:

WEEK 1: Empty office, tape around the walls and windows, and paint

WEEK 2: Paint walls, install shelving and organization systems

WEEK 3: Change light fixture

WEEK 4: Install window treatments

WEEK 5: Organizing, styling, and decorating

WEEK 6: Cleaning and Final Reveal

Be sure to check back next week for more updates on this fun office project! And as always, if you liked this post please follow us and share!

Instagram


signature3


DIY Fall Harvest Wreath

IMG_5649

How is it already October?! In less than one month our daughter (aka Hobbit #2) will be turning one years old and we are feeling all the feels 😦 It doesn’t help that our days are filled with schoolwork and housework, with little time for much else. However, that doesn’t mean we can’t find a way to usher in one of our favorite seasons. As you’ve probably gleaned from our autumn tablescape post, we are really digging the more muted and subtle fall colors (think burgundy, peaches, grayish greens) and I really wanted to celebrate those colors in the form of a welcoming wreath. Between Michaels, Target, and Dollar Tree, I found all the elements that perfectly captured the look I was going for. I dare even say, “I nailed it.” My sister-in-law found it hard to believe that something so pretty could be made from Dollar Tree florals but it can and for well under $10 and 30 minutes too. So if you’re looking for ways to make a beautiful autumn statement but are tight on time and money then this is the perfect project for you 🙂 If you want to see how it’s made then you’re in luck because tomorrow I’ll be collaborating with the CraftBox Girls to bring you a live tutorial at 12 pm EST.  Be sure to tune in, say hello, and get some crafting inspiration 🙂

Supplies
18′ Grapevine Wreath ($3)
Faux Florals ($5)
Faux Pears ($5)
Eucalyptus ($3)
Hot glue gun & glue sticks

Total Cost: $16 + tax

IMG_5627

Pro tip: Don’t forget to use the Michaels app for coupons. I always use my coupon to save 40% off any regular priced item. With the supplies that I purchased, I was able to make 2 wreathes for the price of 1 putting the total cost per wreath at under $10.

IMG_5609

Directions:

  1. Collect your florals, eucalyptus, and faux fruit and start placing them around your grapevine wreath until you are happy with the arrangement. You might have to move things around several times to get the desired look.
  2. Once you have settled on your design, you will need to glue each piece in place using a generous amount of hot glue, embedding the stem deep into the vine, and holding down for 20-25 seconds until firmly in place.
  3. Once all the pieces have been glued down and any excess strands of glue have been removed, you can hang your wreath on a hook or door wreath hanger.

IMG_5681

IMG_5669

IMG_5674

IMG_5672

Share your autumn stories with us below and if you liked this post please follow us and share!

Instagram


One Room Challenge: Week 6|Bathroom Renovation Reveal

Yesterday marked week 6 of Calling It Home’s One Room Challenge™ and that means it’s reveal time! We are so excited to share the results with you and see what other awesome bloggers have done. Seriously, after you’re done with this post go check out some of the other transformations. You will not be disappointed!

ORC
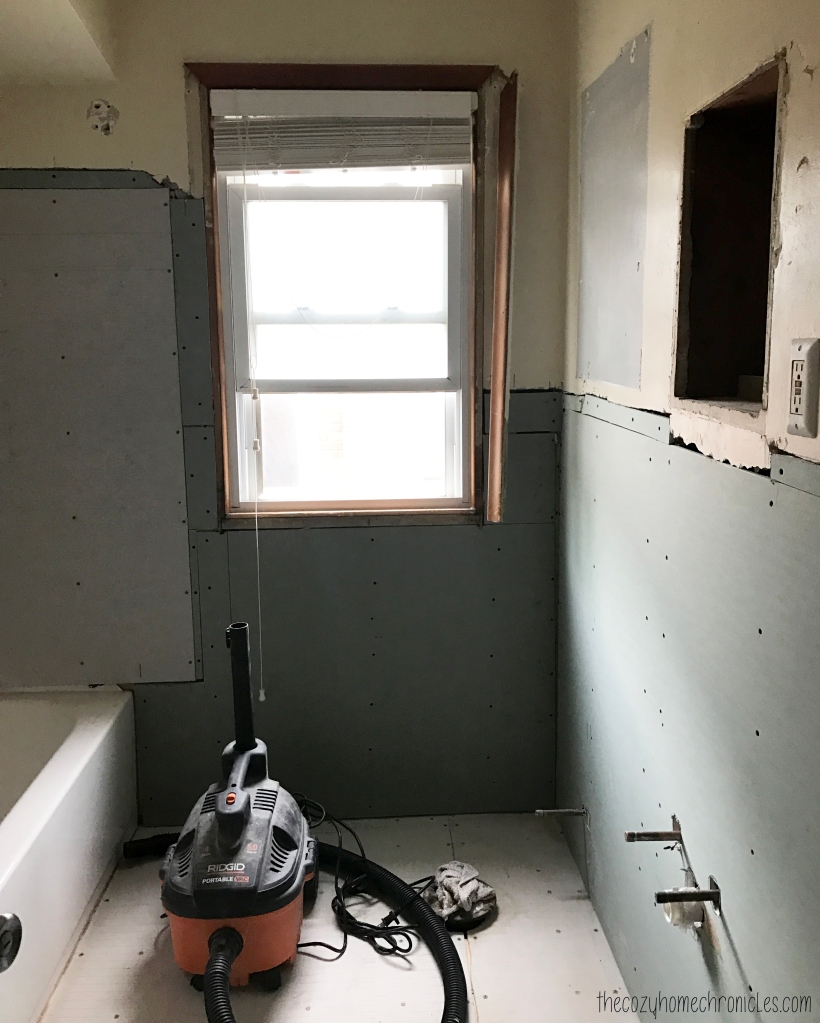
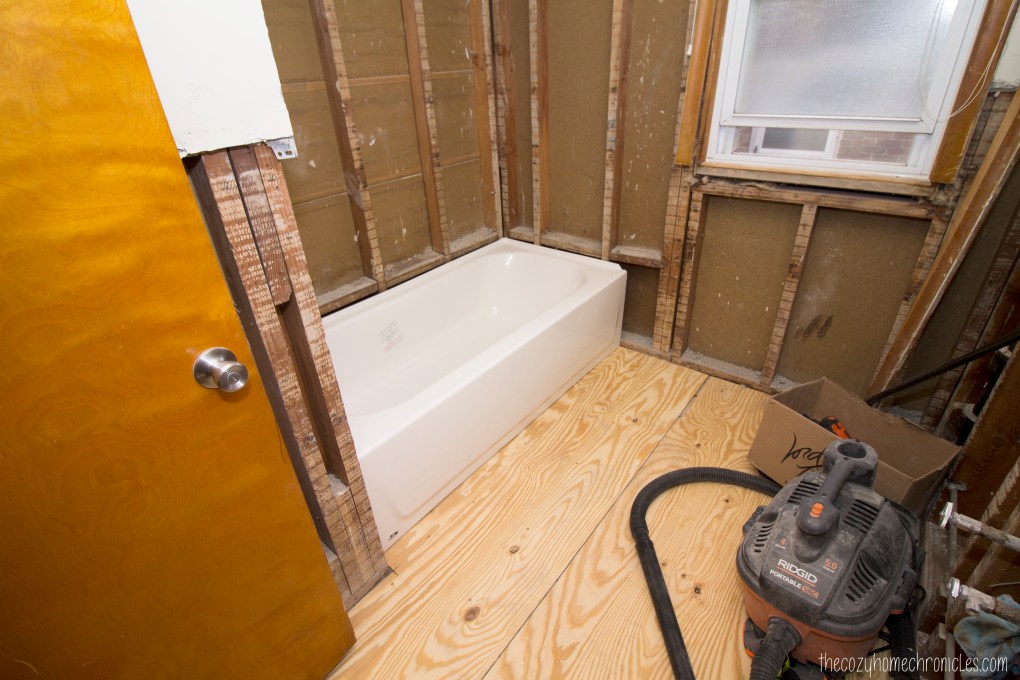
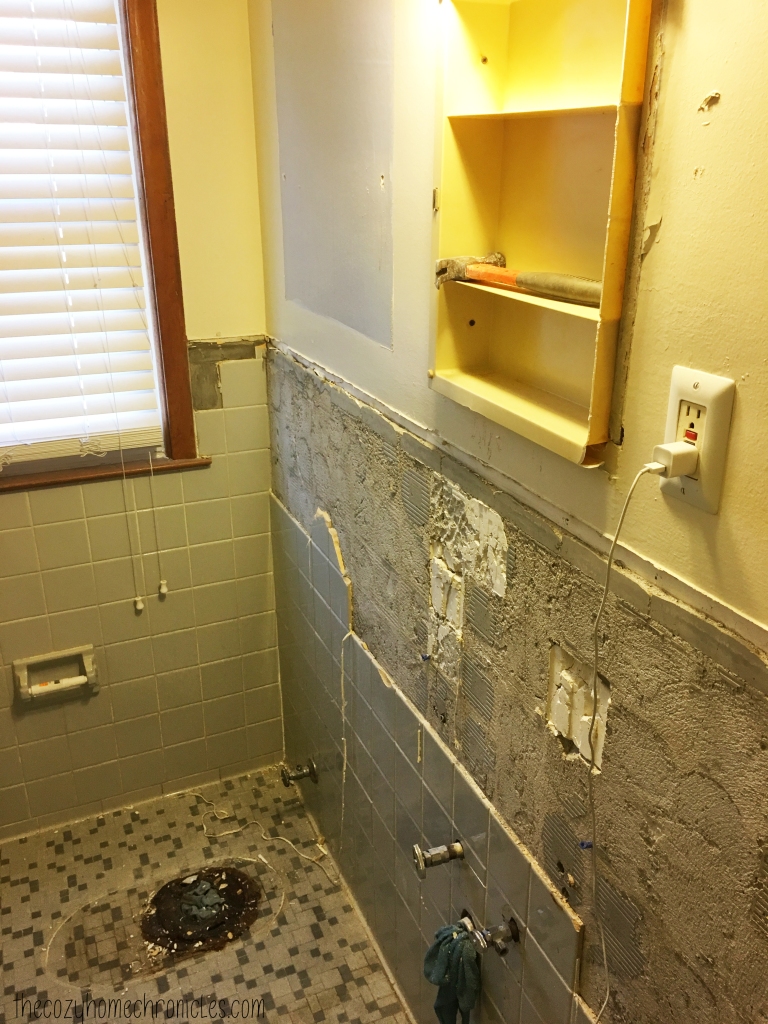
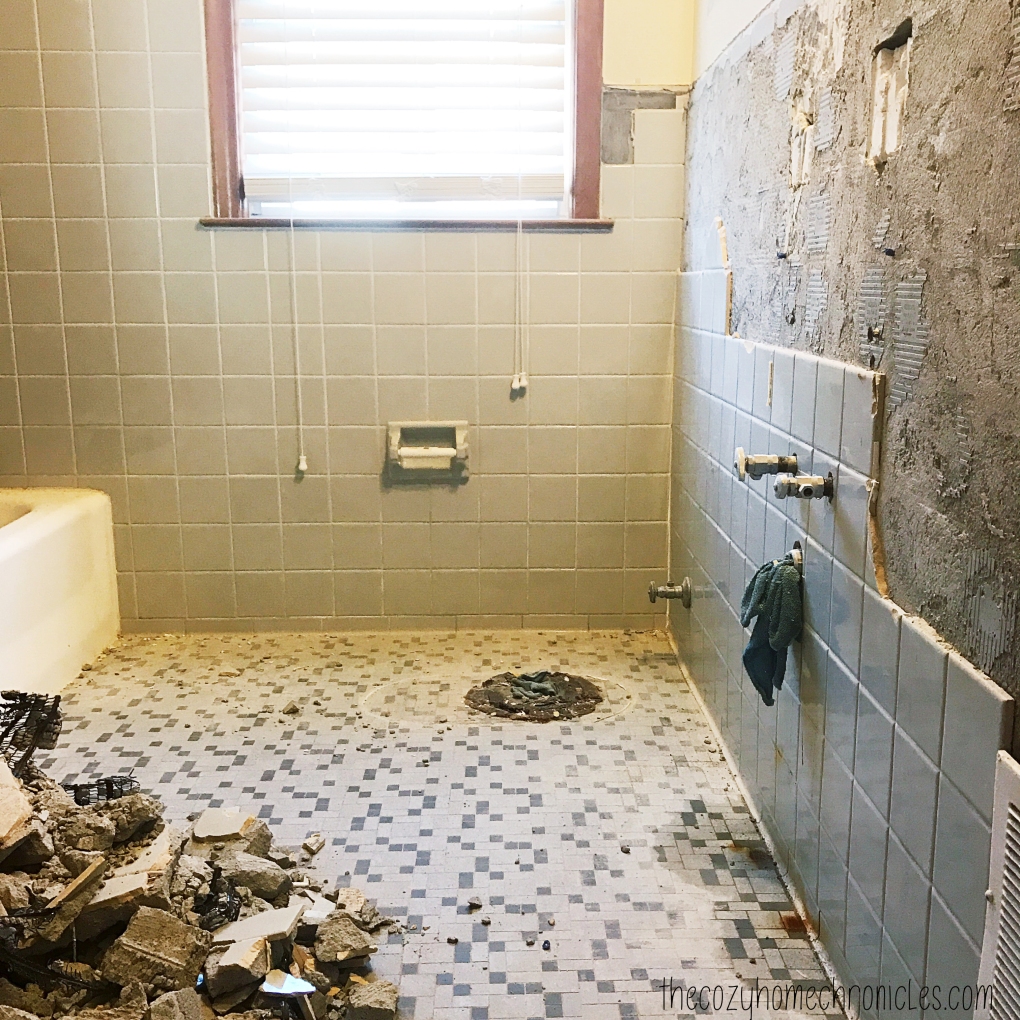
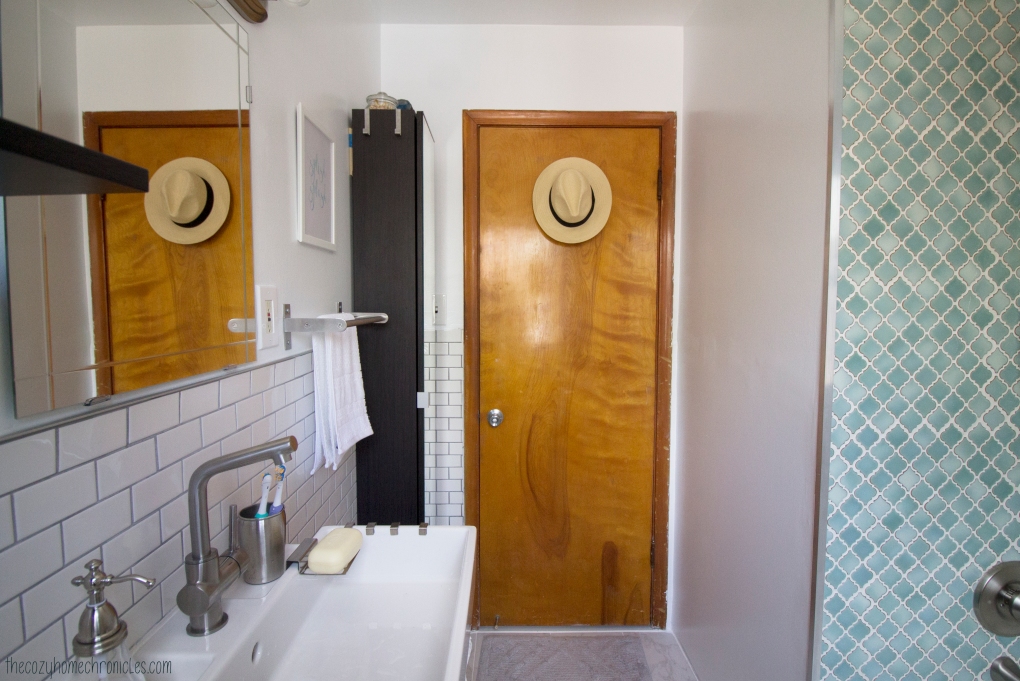
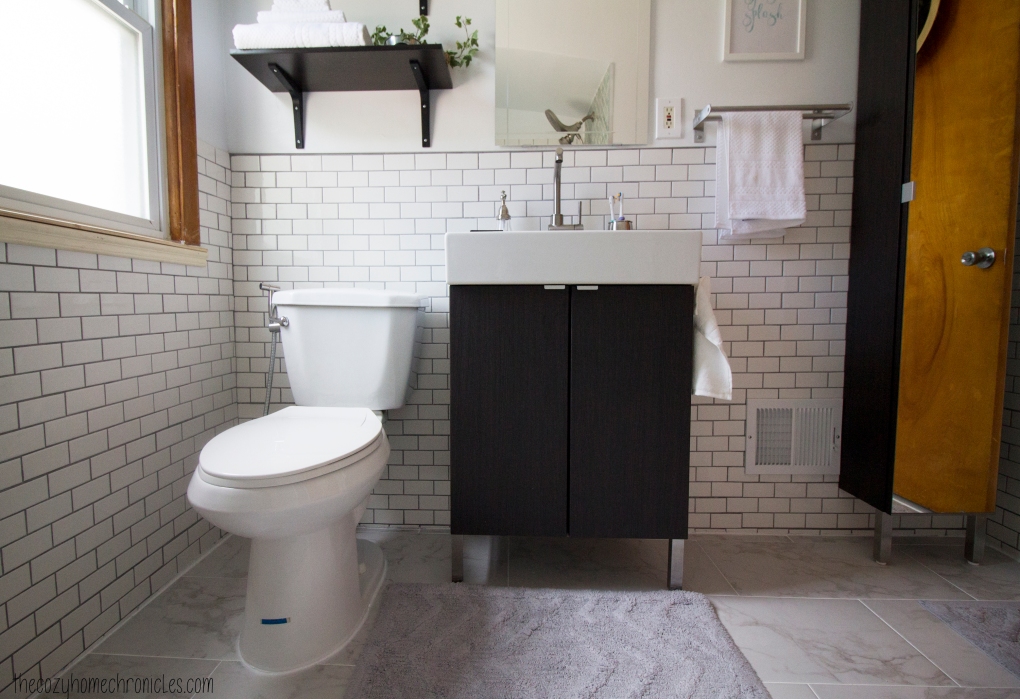
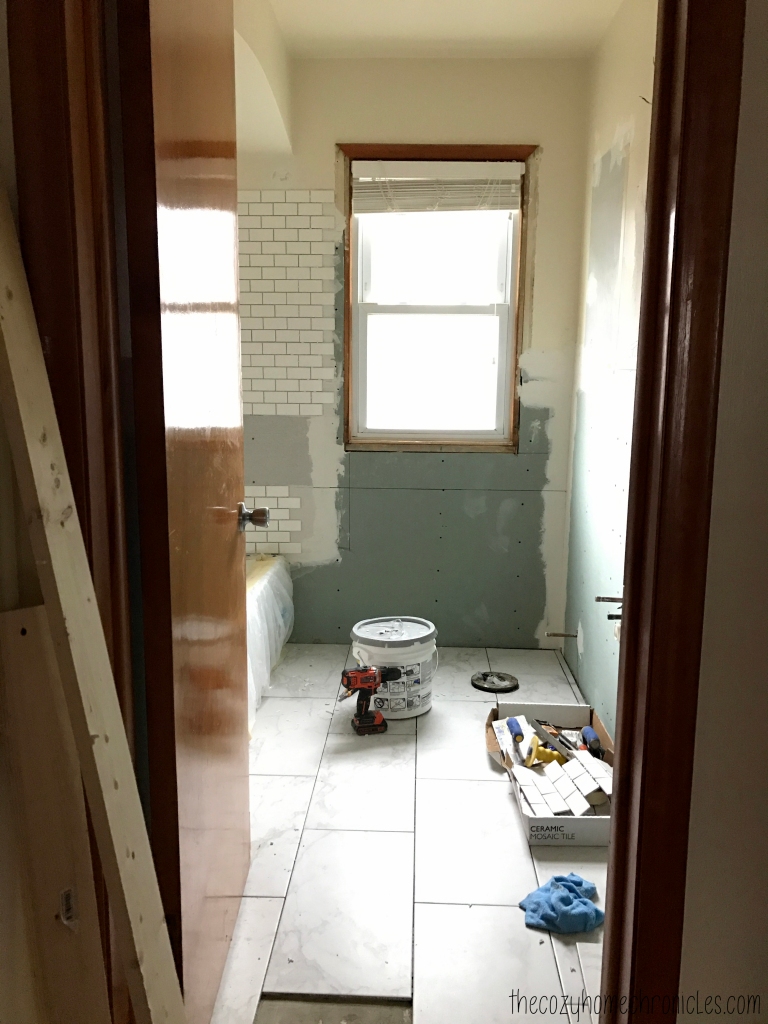
I wasn’t able to take pictures sooner because we were out of the house yesterday and we have guests staying with us but I finally got around to it this morning. We thought we would have a little more time to decorate but time is up! There are still a few things we will be finishing up this weekend including installing the glass shower door, putting in the toilet paper bar (which will be back in stock at IKEA on May 14th), and staining the new window sill moulding but the bathroom is fully functional and oh so awesome. We also realized that we had not been properly linking up our posts to the Calling It Home site and we were a little discouraged that we had done all this work for nothing. But this renovation isn’t for everyone else. It’s for us.  All the sweat and blood (literally) that went into this project was for our family’s comfort and so before we get to the reveal, we thought we would recap our six weeks of hard work.

IMG_1136

Week 1 | Bathroom Renovation Preparation

IMG_1590Week 2 | Bathroom Renovation Demolition

IMG_1597Week 3 | Laying the Foundation for Tile

IMG_6453Week 4 | Mudding and Tiling a Bathroom

IMG_6526Week 5 | Tiling and Decorating a Bathroom

If you’ve been following along, you’ll know that we ran into some issues that cost us precious time. Because of that, we literally spent every day this last week working well into the early morning hours in order to finish on time. In just one week, we grouted and sealed the entire bathroom, primed and painted the walls, assembled and installed the vanity and storage cabinet, installed shelving and lighting, cleaned and caulked everything, and had the plumber come and connect the plumbing. Was it worth it? Totally! Although some features were not our first choice, we are very happy with the results. As you will see soon, our bathroom is unrecognizable. The white subway and Carrara marble tile totally brightened up and opened up the space. It looks so much bigger! Our favorite part, however, is the accent wall in the shower. We cannot wait to bathe the babies and enjoy the beautiful view. Without further ado…

.

.

.

.

IMG_2123

IMG_2064

IMG_2034

IMG_2052

IMG_2037

IMG_2067

IMG_2058

IMG_2099

IMG_2093

What do you think of the transformation? We would love to hear from you in the comments below. You can also follow along on Instagram @thecozyhomechronicles for other fun DIYs and projects. Up next is our summer garden 🙂

If you liked this post please follow us and share!

Instagram


One Room Challenge: Week 5|Tiling and Decor Inspiration

Today marks week 5 of Calling It Home’s One Room Challenge™ and that means we are less than one week away from the final reveal. We thought we would have a little more finished this week but with a grant application deadline that my wife needed to submit for, things got pushed to the side. As of now, all the tile has been laid on the floor and walls and we are getting ready to grout tomorrow. We have had our fair share of cuts and bruises (not to mention fatigue) but we are finally nearing the finish line and are so excited to share with you.

All right! Here’s what we have left to do:

1. Grout and clean the haze

3. Prime and paint the non-tiled walls

4. Install vanity, toilet, storage cabinet, and other accessories

5. Decorate and style

ORC

Progress:
Einstein was really on to something when he came up with his theory of relativity. It’s seriously hard to believe that we have been working on this project for a month now! To recap: We demoed and gutted the bathroom, installed the new bathtub and had the pipes replaced, installed new cement boards and insulation, mudded and tiled everything. Tiling was not hard but it was tedious because of all the cuts I had to make. The good news is that grouting shouldn’t take more than a few hours (if we can actually settle on a grout color). After that the plan is to do minor touch-ups to the drywall and then prime and paint. If all goes according to schedule, we hope to install the vanity this weekend and get the bathroom ready for the final photoshoot.

IMG_6526

IMG_6537

IMG_6551

IMG_6608

IMG_6689

This past weekend we went and picked out our bathroom furniture from IKEA and it was a bit more difficult than we had anticipated. The vanity series that we really liked only came in two depths: 11″ and 19″. Both of these were on the extreme ends of what we wanted. Ideally, we were looking for something around 15-16″ to maximize storage efficiency and spaciousness. We found exactly that but in a color that we weren’t so sure about. In the end we had to make the sacrifice and go with this one in black-brown. The major upside to this was the vanity sink. Every single thing about the sink that comes with this vanity series is beautiful and perfect. Okay, I know I’m talking about a sink here but it truly is a thing to behold.

lillangen-sink-white__0381414_PE556140_S4
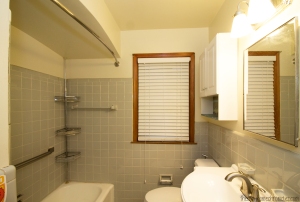
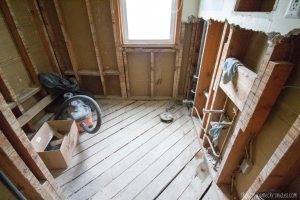
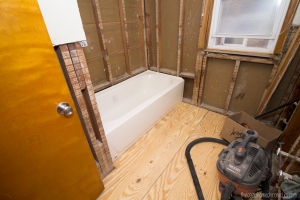
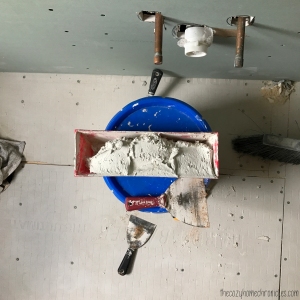
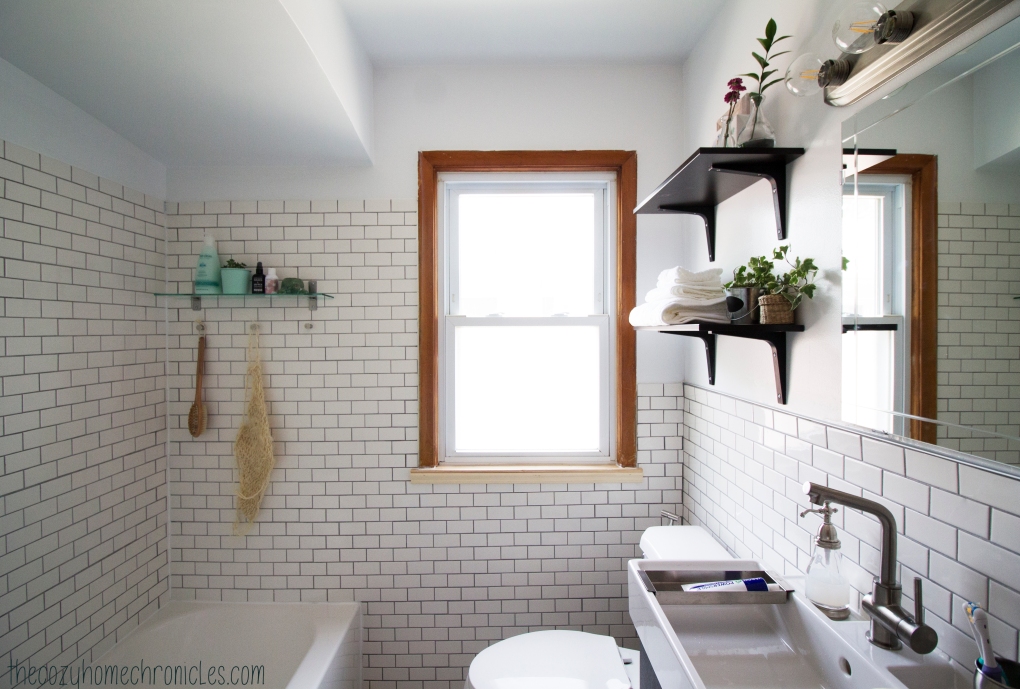
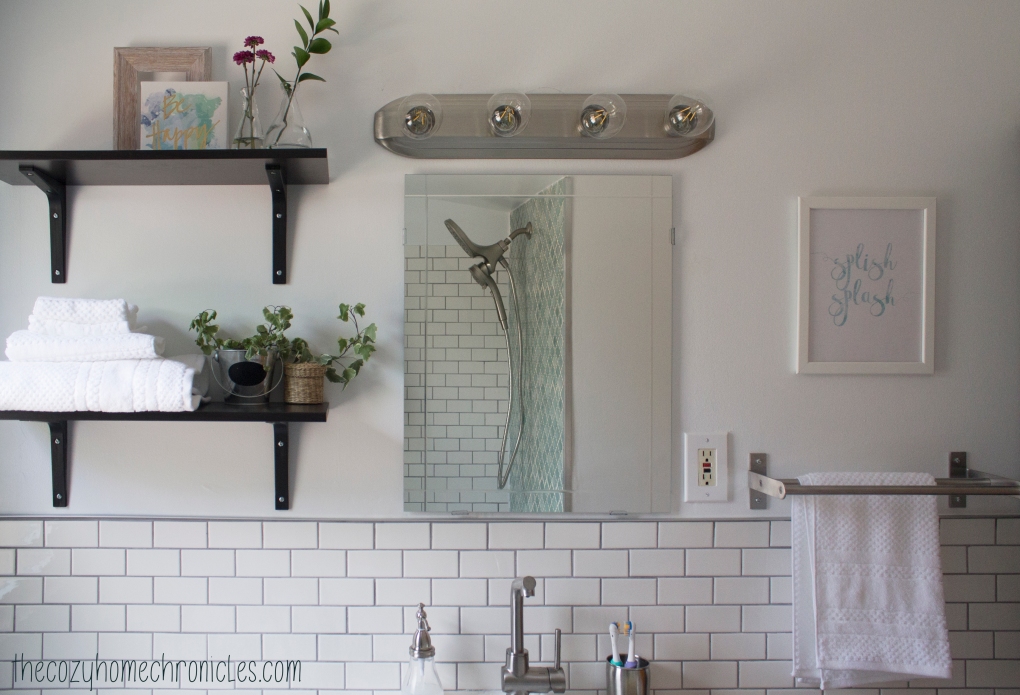
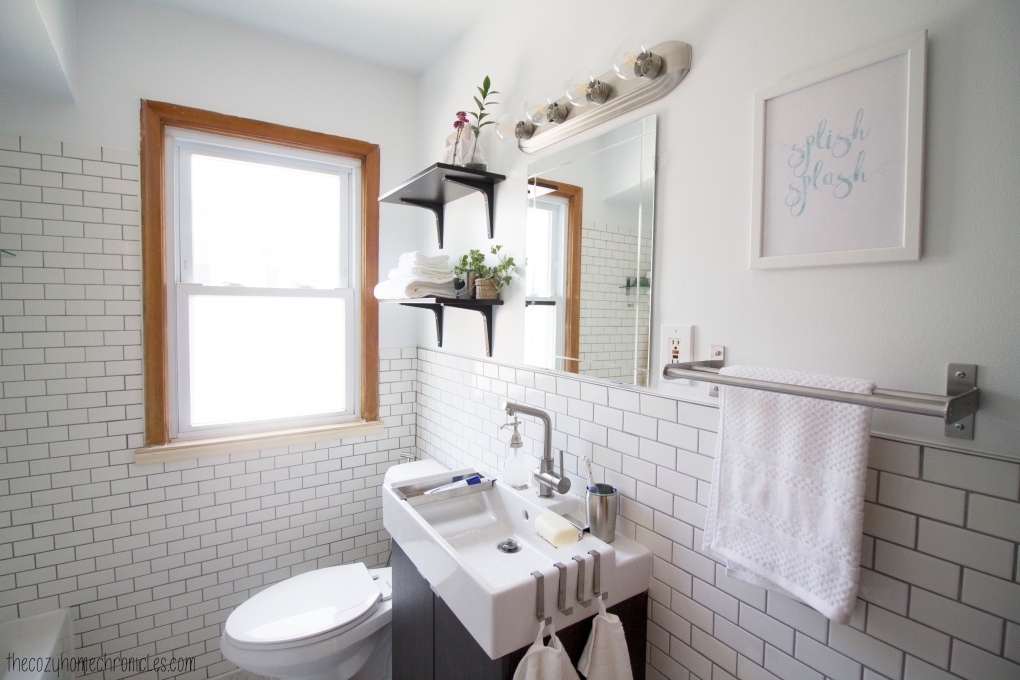
The light fixture was something else that we had to settle on this week and we went with an inexpensive bath bar light and these awesome filament globe bulbs. It might look simple but with the specific lightbulbs we chose,  it looks really cool.

Decor Inspiration:
We put together a mood board of inspiring decor items from IKEA, Target, Etsy, Urban Outfitters, and Anthropologie. We are not going to necessarily buy all of these things but creating this helped us decide on the look that we are going for: something earth-inspired, calming, and with a splash of color.

bathroom inspo

At the center of the mood board is a quote art that my wife made herself. It’s something our son always says when he’s splashing around in the bath and we thought it would make for a nice bathroom wall decor. We are also providing it to you as a free download printable. Think of it is a gift of appreciation for putting up with us and our crazy projects all this time 🙂

Printable Wall Art: splishsplash

Anyways, we could have shown you more progress shots but we will save that for next week. There’s nothing worse than a trailer that gives away a movie’s plot. The accent wall turned out more amazing than we could have thought so we will just let you revel in that thought until you can see it for yourself in next week’s final post.

Would you like to see our progress as it unfolds? You can also follow along on Instagram @thecozyhomechronicles for behind-the-scene videos!

If you liked this post please follow us and share!

Instagram


One Room Challenge: Week 4|Mudding and Tiling a Bathroom

We are hitting week 4 of  The One Room Challenge™ and that means we are less than two weeks away from the final reveal. Yikes! All the cement boards are completely up on the floors and walls and we are mudding as I speak (type). In other news, our accent wall tile arrived! And boy are we happy with the product. If you’ve been following along, you’ll know that we were torn about what color to go with for our planned accent wall in the shower. We had to order it online and we made the split decision to go with the mint green arabesque from Home Depot. It was a gamble to order online because pictures can be very deceiving but luckily these Merola tiles are more gorgeous than we could have imagined.

All right! Here’s what we have left to do:

1. Tile and grout
2. Install the vanity
3. Install the medicine cabinet
4. Connect the toilet and sink
5. Decorate

ORC

IMG_6449

Progress:
I know it’s been a slow first few weeks but we are feeling the fire now and desperately trying to finish on time. This past week was spent cutting and installing cement boards on the floors and walls. We also got rid of the debris from the demolition over the weekend. The city that we live in opens the dump to the public on the third Saturday of every month, which is awesome because you can dump all types of material except hazardous chemicals. It’s super convenient and the timing couldn’t have been more perfect. On the down side, I managed to get a nice scar on my jaw when a mesh wire from the cement boards caught my skin. Ouch!

Once the mud dries we will sand and then thoroughly remove all the dust so that we can begin tiling tomorrow. We will start with the floors first and then do the walls. Next week, we will be sharing a design board of some decor ideas and a fun little printable we have been putting together for wall art. Until next time 🙂

IMG_6453

IMG_6471

IMG_6469

Would you like to see our progress as it unfolds? You can also follow along on Instagram @thecozyhomechronicles for behind-the-scene videos!

If you liked this post please follow us and share!

Instagram


One Room Challenge: Week 3|Laying the Foundation for Tile

We are hitting week 3 of The One Room Challenge™ and boy has it been rough! We just finally finished the demolition this past weekend and up until an hour ago our bathroom was completely gutted. Right now we are seriously questioning if we can finish on time and that’s been a bit disheartening but we are pumped to make it happen. It’s called a challenge for a reason, right?! In this post we will be sharing why our progress has been slow as well as some mistakes that we made so that you can avoid them.

ORC

IMG_6067

Progress:
As you know from last week’s update, we had some hiccups with the walls because the tile wasn’t chipping away easily so we made the decision to take everything out all the way down to the studs. If you follow along on our Instagram stories, you might have seen how we completely demolished the walls and the floor in the bathroom. We also took out that hideous 300-pound blue tub (with help of course…that is why you have brother-in-laws!). With the walls and floors gone, we layed down the moisture barrier and plywood so that we can install the cement boards and tile. We have our plumber guy coming first thing tomorrow morning to replace some corroded pipes and get the bathtub and shower head/faucets all set up. Replacing plumbing wasn’t in our budget but now that we’ve gotten this far it doesn’t make sense to build something new on a faulty foundation. And those pipes were clearly nearing the end. Once the plumbing is all set, we can begin tiling!

IMG_5931

IMG_5960

Issues & Concerns:
The reason that our demolition took two weeks (besides that we are doing this in the evenings with two kids) is that the removal of the tile proved to be much more labor intensive and involved than we had anticipated. This was an issue we had little control over. There is one blunder that we made, however, that cost us unnecessary delays. The bathtub. You see, there’s not much you can do without your bathub in place. During the entire brainstorming and design stage of this project, we focused entirely on the tile, vanity, and lighting and we completely neglected the bathtub! We just assumed that we could walk into a local Home Depot and leave with a reasonably-priced, 5-star tub. Yeah, no. Once we started looking into reviews and the different types (cast-iron vs. steel) we became so overwhelmed. Many of the good ones were not available in-store and would have cost us another 1-2 weeks of time if we ordered online. In the end we settled on a tub that had decent reviews and was available in-store. The awesome thing about it is that it is 2 inches deeper than standard bathtubs. It is now sitting in the bathroom so that the plumber can set it up and we can finally begin putting this room back together again. The lesson in all of this? If you’re ever considering doing a bathroom renovation on a tight schedule then have a bathtub selected and a plumber arranged to come before you start.

IMG_1590

IMG_6156

IMG_1597

Would you like to see our progress as it unfolds? You can also follow along on Instagram @thecozyhomechronicles for behind-the-scene videos!

If you liked this post please follow us and share!

Instagram


One Room Challenge: Week 2|Bathroom Renovation Demolition

Good evening friends! Today is exactly one week since we started our bathroom renovation project in conjunction with The One Room Challenge™ and so far we are still in the demolition stage. In this post we will be sharing our progress and where we stand currently. To be honest, I thought we would be done with the demolition by now but we all got sick and needed to take it easy. I didn’t want to be a hero and push myself past my limit so I took off the last two days. Slow and steady wins the race.

ORCProgress:
If you follow along on our Instagram stories, you might have seen that we already removed the toilet and the vanity over the weekend. The last major piece we need to take out is our bright blue 1950’s tub. We managed to remove the majority of wall tile from the existing cement boards only to realize that the mortar isn’t coming off as we had imagined. Considering the age of the bathroom, I’m not all too surprised. The good news is that we are a little more settled on the tile we will be using. After a recent trip to Home Depot, we really fell in love with this Carrara Matte tile for our floors. With white subway tile for the walls, it’s going to look great!

IMG_5529

IMG_5554

Issues/Concerns:
Since I will not be sticking to the original plan of leaving the cement boards, I had to purchase a new blade for the angle grinder so we can cut through the cement boards and take them out piece by piece. Removing everything all the way to the studs is both a good thing and a bad thing. The good is that we will redo the bathroom with all new construction materials, we will be able to do a clean, solid job from beginning to end. The bad is that we will have to spend more $$$ on purchasing drywall and new cement backer boards. Considering that this bathroom is a small space, the additional expenses shouldn’t exceed $250 (and this is considering that I will also have to remove and replace the subfloor with new plywood & moisture barrier). We just really wanted to challenge ourselves to do this renovation on an extreme (but realistic) budget so we could inspire others who might not otherwise consider renovating because of the cost.

All this fun stuff with the walls and floor removal, which I had hoped I wouldn’t have to deal with, will add between 1-2 weeks to the job. As is the case with any renovation project, you have to be prepared for stumbling blocks and plan accordingly. Despite our setbacks, I think we will still make it out in 6 weeks. We sometimes get discouraged thinking it will take that long, so we have to keep reminding ourselves that we have day jobs and two little ones and that’s why we can’t just finish it as quickly as we would like. Until next week 🙂

IMG_2598

IMG_3028

IMG_5470

IMG_5467

You can also follow along on Instagram @thecozyhomechronicles for the latest behind-the-scenes and videos of our progress.

If you liked this post please follow us and share!

Instagram