Organizing for Your Lifestyle: Strategies for Developing Sustainable Organizing Solutions

Let’s be real. Maintaining a clean house most days is a challenge in itself. Now add two young children and school and we are looking at nearly impossible. But we manage somehow. Believe it or not, the hardest part is not having to pick up after our little ones but rather picking up in a timely manner. In order to do that, one needs to be…dun..dun..dun.. yep, you guessed it. ORGANIZED! Since both my husband and I are in school this semester, we figured it was high time we got our house sustainably organized once and for all. Of course, it doesn’t hurt to get a little bit of help.

IMG_5906

In her book Organizing for your Lifestyle, Jane Stoller offers inspiration and practical advice for tackling any organization project from the smallest closet to the biggest room. The first chapter is a general overview of organization philosophy covering the very basics including the health and cost benefits of organizing as well as organization approaches such as minimalism. After that expect to dive straight in. My favorite part of the book is the way in which it is organized; each chapter serves as a guide to a different space. As someone who suffers from indecisivism (is that a thing?) I can tell you that knowing where to start is the most stressful part so following a list definitely helped eliminate that stress. Here’s how the book is split up:

  1. Closet
  2. Bathroom
  3. Kitchen
  4. Travel
  5. Books
  6. Storage Room

Suddenly, a good pre-New Year’s purging doesn’t sound too bad now does it?! Today I’m sharing five of my favorite practical tips from the book and how I’m applying them as we tackle our organizational woes.

1. Have a date with your closet every year. Jane recommends evaluating and reorganizing your closet twice annually as “this will help you to stay fully in control of what you have, and knowledgeable about what you need, while ensuring that no excess clothing outstays its welcome.” We recently tackled the kid’s closet and ended up donating a TON of stuff they had outgrown that was taking up valuable space. After seeing how much space this opened up, I added reminders to my calendar to do this on a quarterly basis.
IMG_5909

2. Think in terms of frequency of use. Mentally sorting out your belongings into daily use/weekly use/sparse use really puts things into perspective and allows you to tailor your organization system to your practical needs so that you have what you need when you need it. This has been really helpful in our bathroom as I have tried to make sure that we have easy access to the things we use every day like toothpaste and shampoo whereas medications that are used infrequently are tucked away out of sight.

3. “Organize so your mother (or father) can cook in your kitchen.” This one really stood out to me because the kitchen is the heart of our home. If you don’t have easy access to basic tools and ingredients while cooking then you’re wasting valuable time during meal prep. Imagining someone else using your kitchen is a great exercise for thinking about the efficiency of your space. I used the opportunity to remove some unwanted gadgets, dinnerware, and Tupperware out of circulation to make room for things that I actually use and need.

IMG_5743

4. Find a balance between function and aesthetics. What works for one person or family doesn’t work for everyone and that’s okay. It’s up to you to find a solution that is both functional and visually appealing for your needs (sometimes function will trump aesthetics and that’s also okay). This issue came up for me while I sifted through my scarf collection. Although I can see how the variety of colors and patterns hanging together on a wall can be visually unappealing, this strategy has proven to be the most practical for my lifestyle because it offers easy open access to all my scarves.

IMG_5969

5. Make organizing a lifestyle. This is by far the most important advice because it requires you to think in the long term. With this philosophy, organizing is no longer about buying storage containers or fancy systems but rather about asking yourself, “how can I stay organized?” The answer, I think, will lie in a happy medium between a designated system, daily practices, monthly maintenance, and a quarterly assessment of successes and failures. To help us along through this process, I’ve created a diagram to envision what this would look like.

Organizing Chart

We are by no means completely organized because we haven’t had the time to tackle all of these spaces in one sitting but we have been thinking through these tips as we slowly organize our home corner by corner. These strategies have certainly helped me be more intentional about finding sustainable organization solutions and I look forward to sharing more as we work on making our home better organized. If you want more organizing inspiration as well as tips and tricks on the specifics of storage, folding, and labeling, you can find Jane’s book here.

If you enjoyed this read, please share and follow!

Instagram

signature3


Potty Training Before Age 2

Happy Monday friends! Our little hobbit just turned two years old last week (sobs) and we are getting ready to take potty training to the next level. I’ve struggled to write about this topic for a while now because 1) The first time I told someone I was potty training it felt like everything went south, and 2) It hasn’t been completely successful. I am, however, trying to look at the positives as we take the next step, so I wanted to share what has worked and what hasn’t.

IMG_1171

We started potty training our son the week before he turned one. I was super determined (clearly) and our doctor had told us that some cultures were successful in training children by 15 months of age. I wanted to be that parent. And things, surprisingly, went very well from the beginning. We had used sign language with our son from a very early age and he had picked the signs up fairly quickly. The potty sign was no exception. It’s easy to start the association early on because babies don’t hide the fact that they’re going. So every time he would start turning red like a tomato or make pushing sounds, I would acknowledge the sounds he was making while signing for potty. After a few weeks, he was signaling to us whenever he needed to go. It was seriously the coolest thing ever until he started manipulating us and using the sign (and sound effects!) to try to get out of his highchair or nap time or anything really. Actually it was pretty hilarious but that’s beside the point. Anyways, the only problem was that his signing to go only covered pooping, which is where we are still at today. I think it’s just that peeing is so effortless, he doesn’t give it much thought or know how to make the distinction yet.

IMG_1169

It certainly has been nice not needing to change poopy toddler diapers (with the exception of a few accidents) but now that we’ve been going to the potty for almost a year, I really want to get him fully trained in the next few weeks. I try not to be too hard on myself but I do put the blame on me for not having fully trained him. I think what he really needed (and still needs) is a few days in just underwear so that he can make the mistake of peeing and learn not to. I was unable to give him that opportunity when the fatigue started kicking in during my second pregnancy and it’s hard now that I’m juggling life with another baby. I’d have to be constantly on top of him so he doesn’t pee on any rugs and with a 8-month old in my arms, that’s difficult to do. All this is not to say that we didn’t have any success at all. Many people don’t start until 2 or 3 so I’m happy with where we are at now. There are some things, besides the signing, that I know have made this journey much easier so if you’re thinking about starting to potty train you might want to consider these things.

Potty Training

  1. Create a happy space. This is something we try to do everyday in our home but we very consciously made an effort to create a comfortable space he could feel was his. Even though it was just a small corner of the bathroom, it was his potty haven complete with his own colorful hand towel and bathroom mat
  2. Make it fun. This goes hand in hand with the making of the space. At first we would keep and rotate a few special toys in the bathroom. That way, he was always excited to go to the potty so he could play with those specific ones. We would also play DJ and let him listen to a song of choice, which basically turned into “Ants Go Marching” on repeat all day, everyday. When he turned 18-months, my mom got him an Elmo and Superhero Potty Book which we have kept in there as well. Now he enjoys going to the potty because he loves being read a story. We also had a special soap dispenser just for him and he enjoyed using it to wash his hands after a successful go. These small and simple touches have made for a smooth potty training experience for all of us.
  3. Give encouragement and rewards. Stickers can be your best friend. We definitely didn’t want to bribe our son with sweets or toys but we did want to give him recognition that he was doing an awesome job. The potty book he received came with a sticker chart and stickers that we hung up behind the bathroom door. Each time he would successfully tell us and go in his potty, he would get to put up a sticker on his chart. This somehow grew into sticker collecting and whenever we go out to Michaels or Target, we let him pick out his own stickers to put up. High-fives, hugs, clapping, and calling dada to share in excitement over another bowel movement are also wonderful gestures that have allowed us to express how proud of him we are.

We did make the switch from cloth diapers (little sis is using them now) to pull-ups several months ago so we are hoping there is an end in sight. He does and can pee in his potty but he just hasn’t gotten to the point where he tells us each and every time he needs to pee. As he gets older and his vocabulary expands, we are sure it will be a matter of time before it clicks. We made plans for this weekend to finally remove all the rugs in the living area and have him in underwear for an extended period of time. Our fingers are crossed and we could certainly use all the luck we can get 😉

Have you tried potty training before the age of 2? What tips and tricks worked for you? Let us know in the comments below. And as always..

If you liked this post please follow us and share!

Instagram


DIY Framed Chalkboard Wall

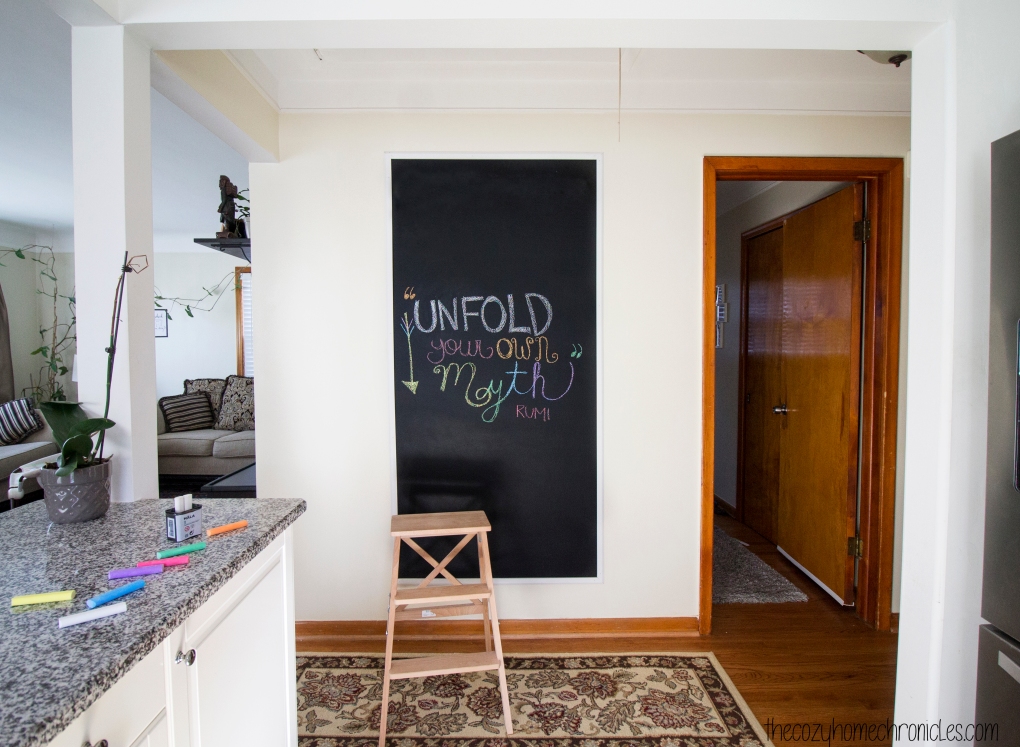
Our son is getting to the age where he can almost color without trying to eat his markers and crayons (the keyword there is almost), however, he still attempts to scribble on the wall any chance he gets. Despite getting him a small IKEA table for all of his creative pursuits, he seems not to want to be confined to paper so we figured if coloring on the walls is what he wants then coloring on the walls he shall get. We have always been admirers of chalkboards…the rustic kind that you see in old schoolhouses in black and white movies. We figured a chalkboard would not only be nice for doodling and writing the dinner menu on but also as a fun educational medium to teach letters, words, and concepts.

IMG_9985

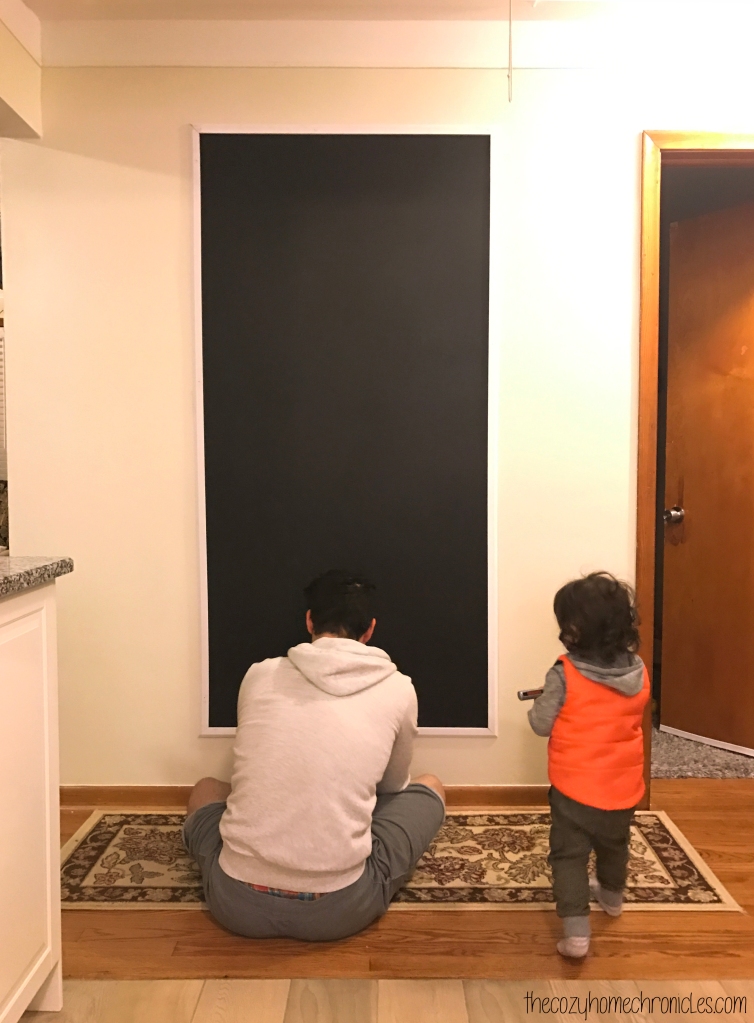
We did toy around with the idea of painting an entire wall, which has become popular these days, but in the end we decided a 6ft x 3ft area was plenty of space for all of us to use. Plus since we chose to put it in the hallway, adjacent to the kitchen, we wanted to preserve some wall space just in case we wanted to add wall art or organizers for a command center in the future. The awesome thing about making your own chalkboard wall is that for $10 of chalkboard paint, you can get a little over 100 sq. ft of coverage. That’s a steal when you consider that chalkboards the size of small picture frames are going for that and much more. The other really nice thing is that you can frame the painted area to achieve that authentic chalkboard look and you can do so using any type of wood you like in any stain you want. We went with an inexpensive white moulding from Home Depot that we nailed directly to the wall. We’ve come across DIY framed chalkboards that involve painting another medium and then hanging it up. Not only is a large chalkboard heavy and impractical to hang but it would be dangerous if you have little ones in your life. Just something to think about if you are not sure how you feel about painting a wall with chalkboard paint.

The only thing you need to be mindful of is if you have kids in the house then you will want to time your painting after their bedtime so the paint can dry without handprints all over it. Other than that, this chalkboard wall is super easy to put together and loads of fun. Our son loves scribbling on it, I love practicing my handlettering, and of course baba loves leaving silly doodles for us to wake up to. Yes, we are not ashamed to admit it… this chalkboard was as much for us as it was for our son.

Supplies
Chalkboard Paint ($9.67)
Wood Moulding
Trim Nails

Tools
Paint Roller
Paint Tray
Paint Tray Liner
Blue Painters Tape
Hammer

Chalk options
Chalkboard Wall Safe Markers ($12.95)
Regular Chalk from IKEA  ($0.99)

Note: If you end up taking on this project using similar dimensions to our chalkboard then know that you will have leftover paint. Don’t you fret though, we will probably come up with another DIY project to make use of it.

IMG_9973.jpg

Directions
1. Measure the area you want to paint and outline the area with pencil.
2. Apply the painter’s tape over your outline, pressing down firmly as you go so you don’t have any air pockets where the paint can seep through.
3. Mix the paint using a paint stick and pour 1/4 of the paint in the paint tray.
4. Gently dip your paint roller in and start painting your designated area in a “W” pattern. Make sure you don’t use too much paint on your roller as it will start dripping and take away from the smooth surface of the board.
5. Let dry for 4 hours before applying a second coat.
6. After the final coat is painted, let it set for 3 days (per instructions on the paint container) before writing on it.
7. Test your new board with the writing medium of your choice: old-fashioned chalk or chalkboard marker.

IMG_2460

IMG_2465

IMG_3138

IMG_9929

IMG_9954

IMG_9988 copy


Have you been wanting to put up a chalkboard wall? If so, what’s been stopping you?

If you liked this post please follow us and share!

Instagram


Mindful Homekeeping Series: Seventh Generation

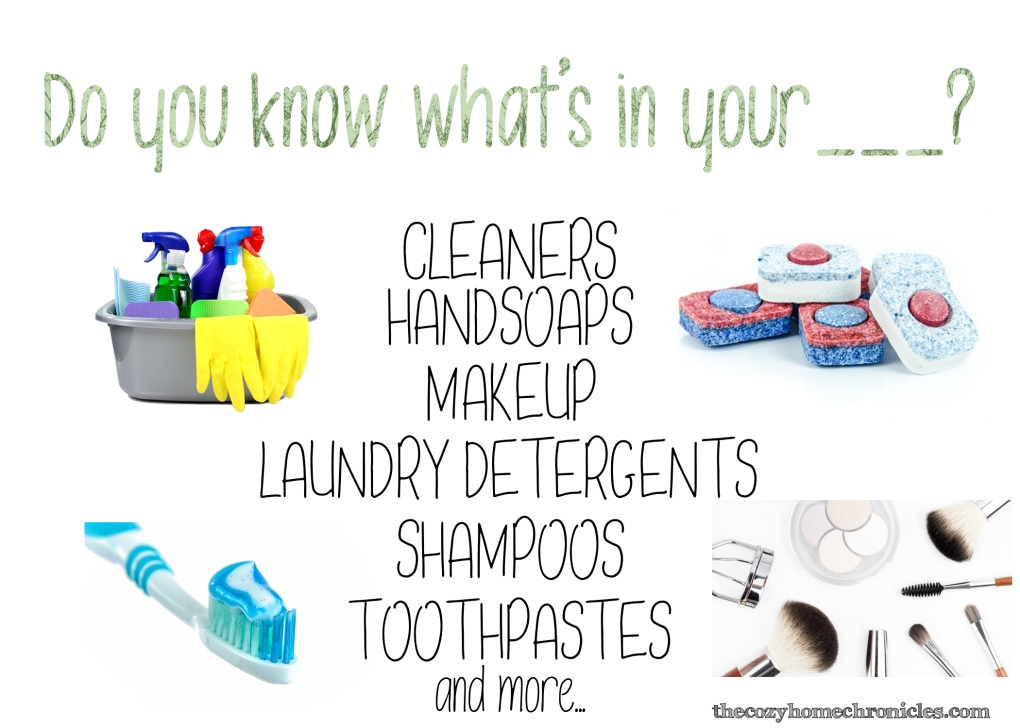
If you’ve been following along on our blog, you know that we do try to reduce our negative environmental impact any way we can through things like cloth diapering and upcycling, to name a few. This journey has been challenging especially because we live in a country where food, clothing, hygiene products, cleaning supplies, etc. are readily available to us for super cheap. The circumstances we live in are such that we almost have no reason to give our consumption and excess a second thought. But we should and we must. Fortunately there are people and companies out there who are engaging in this conversation and raising the important questions we need to be asking ourselves both as consumers and as citizens of this beautiful planet. This post is the first in a series we are calling Mindful Homekeeping which will cover simple homekeeping practices, DIY ideas, and products that are mindful of the environment, body, mind, and soul.

mindful-homekeeping

Image Sources: Cleaning01 available under CC BY-SA 3.0 NY and Pexels

One company inspiring civic action is Seventh Generation with their Generation Good initiative. Generation Good is essentially an online community for parents and non-parents alike, who care about their environmental impact, to share ideas and support one another, test out products, and participate in green forum discussions ranging from baby nutrition to gardening. Once you register, you are taken to a dashboard populated with various surveys and activities. Completing the surveys and participating in activities and forum discussions earns you points which in turn earns you more activities and sometimes free stuff (wohoo).

IMG_9180 copy.jpg

As a participating member, I received a free Baby Care Kit (diaper, lotion, wipes) , 2 trial packs of Free & Clear wipes, and three coupons for a total of $4 savings on Seventh Generation products. With the coupons, I purchased Seventh Generation Hand Soap from Target. All-in-all we enjoyed using the products and found them to be “greener” than many of the products out there in terms of the plant-based ingredients they use and their packaging. Our favorite product was definitely the coconut lotion which smells AMAZING! While we loved the texture and feel of the diapers and wipes, they were unfortunately non-biodegradable, making them not a sustainable alternative to cloth diapering.

FullSizeRender.jpg

Despite these issues, Seventh Generation and their Generation Good initiative deserve major credit for not only encouraging the conversation on social responsibility but for providing a platform where it can happen and where they can listen to their consumers. Sure they’re not perfect (who is?) but what they offer is a great start. For your convenience, we have compiled a list of five Seventh Generation products (along with links to their pricing at Target) that we would consider buying because of their high rating by the Environmental Working Group. If you are ever unsure about the health or environmental impact of a particular company or product, the EWG is an excellent and invaluable resource for deciphering labels and learning to make safer, healthier consumer choices. These following Seventh Generation products were given an A rating by the EWG:

  1. Natural Dishwasher Detergent
  2. Laundry Detergent
  3. Multi-surface Disinfectant
  4. Toilet Bowl Cleaner
  5. Tub & Tile Cleaner

The important thing is that companies like Seventh Generation are offering alternatives to the unhealthy status-quo household and baby products. For that reason, we highly recommend you check out their products and consider participating in Generation Good.

What are your favorite “green” homekeeping products? Let us know in the comments below or share on instagram using #mindfulhomekeeping

If you liked this post please follow us and share!

Instagram

Note: This is not a sponsored post. This is purely our opinion regarding our experiences using the Generation Good Platform and some Seventh Generation products.