5 Strategies and Resources for Keeping Toddlers Screen-Free

Happy New Year friends! We hope all of you had a blessed holiday with your loved ones and we wish everyone peace, success, and happiness in 2018. Things are crazy busy here as we are preparing for a family vacation to Florida this weekend. I’ll be honest, between the kids being sick early last month and the holidays, they have seen far more screen time in December alone than they have in a year (we used to be strict about this but that’s for another post). And boy are we ready to detox and resume our screen-free daily routines once we get back. If reducing your child/children’s screen-time is one of your new year resolutions then you’re in luck because I have 5 simple strategies and a handful of fun resources to help get you on track for just that.

“Play is the beginning of knowledge.” -George Dorsey.

IMG_8856

  1. Identify what they like and stick with it. I know this may seem like common sense but living in this age of information overload, it can be difficult to filter through everything to decide what’s applicable and what’s not. Not everything that works for other children may work for yours and that’s okay. The best way to get to know your child is to try a range of different activities with them and see what keeps their short attention span occupied. Chances are you already have an idea without needing to do much investigating. My son is currently really into play dough, Mega Bloks, and dragons at the moment and is very active so if I’m going to get frustrated that he’s not sitting down for a coloring activity for more than 5 minutes, I can’t blame anyone but myself. It doesn’t mean that we don’t try other activities but for the sake of my schedule, I only do things like cooking or reading for school when my children are engaged with an activity for the long haul.
  2. Make a weekly activity plan. With all things in life, if you have an outline or plan of action then you’re more likely to follow through with it. If you are really committed to screen-free quality time then try investing 15-30 minutes on the weekend to brainstorming and arranging for activities during the week. You don’t have to be doing crazy chemistry lab experiments to make it fun. As you’ll come to see in the links I’m sharing below, it doesn’t take much to make children happy. I also want to add the disclaimer that an activity plan should be treated more like a guide rather than a strict schedule. It should be a way for you to think through your day and have activities on hand when you need them most.
  3. Talk it up. Sometimes for kids it’s less about the activity and more about the presentation. Maybe that’s just my experience with my kids but I feel they definitely pick up on my enthusiasm. I don’t have numbers to back up this claim but I find that my son is more engaged when I’ve talked about the activity beforehand. For example, if I were to ask him “prepare me something delicious to eat” while giving him his play kitchen tools, he would spend more time playing than if I were to just dump them on the floor and tell him, “here, play with this.”
  4. Limit accessibility and rotate activities to keep things interesting. In other words if you got it, don’t flaunt it. You will be surprised at what a huge difference it makes if you hide some toys away…because let’s face it, every parent is familiar with what happens when everything is accessible: toys strewn everywhere and bored, restless children. Not the funnest combination. Try taking some toys out of circulation and bringing them out in rotation when you sense boredom. Our MegaBloks, puzzles, and an array of large toy vehicles are stored way high up on a shelf and when I  bring them down, my son definitely relishes every moment.
  5. Don’t be afraid to make a mess. Okay maybe this is not what you want to hear but trust me. I’m not talking trash the house messy but more along the lines of confined chaos. There are plenty of activities that I’ll list below that allow children to really explore and be messy without you having a disaster on your hands. I don’t know what it is about messes but kids love making them and if they’re happy and occupied then you will be too 🙂

IMG_8861

With that being said, I’m sharing a list of fun activities that we have tried and enjoyed as well as some amazing resources that I turn to when planning out activities for the kids. I’m also linking our Pinterest board as I do pin fun toddler activities as I come across them for inspiration. I feel like I should state again that the point of this post isn’t that you must have scheduled activities in a curriculum sense but rather a collection of activities suitable for play. Children should be free to explore and play and the activities you choose should exemplify that philosophy.

“Do not keep children to their studies by compulsion but by play.” -Plato

Sensory and Fine Motor Activities

  1. Make homemade play dough and model/build/cut with cookie cutters
  2. Thread pipe cleaners through a colander or box with holes
  3. Freeze toys in water and do an ice excavation
  4. Make colorful squishy gel bags with glitter and beads
  5. Pom Pom Ball Color Sorting

“Messy” Activities

  1. Go dumpster diving for lost toys in a cardboard box
  2. Create a dry pasta/rice/lentil construction site
  3. Paint with shaving cream on a plastic bin lid
  4. Make a scoop and pour activity station with containers and random objects
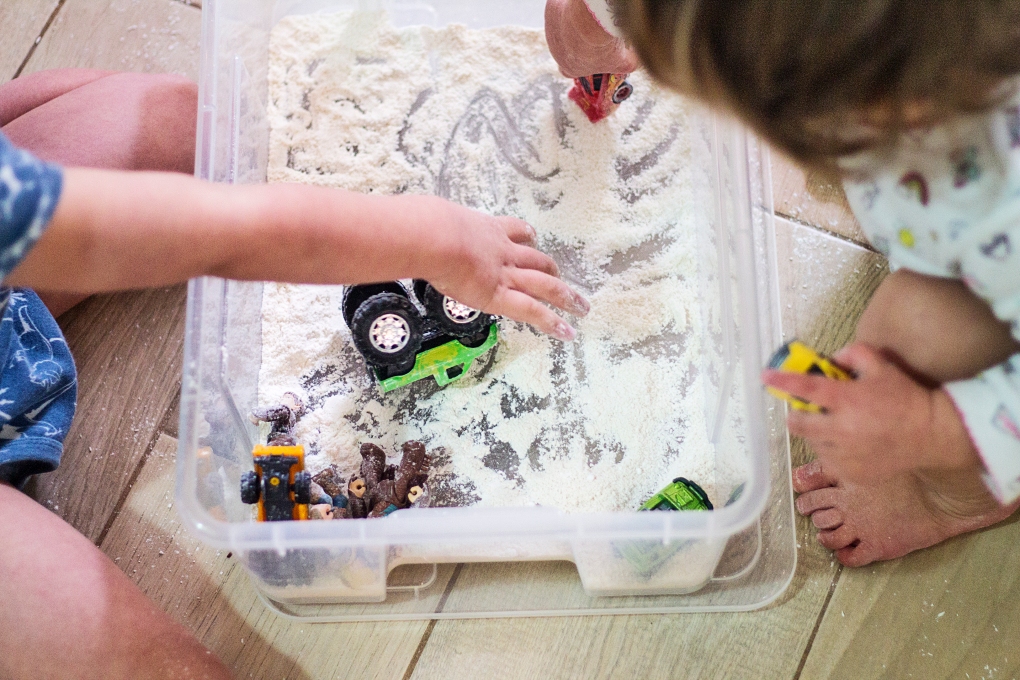
  5. Pour flour and shredded coconut in a bin with small cars for a snowy ride

Physical Activities

  1. Set up a simple indoor obstacle course with everyday objects
  2. Have a color-themed scavenger hunt with this song
  3. Have an alphabet or number scavenger hunt
  4. Set up a bubble machine and chase after bubbles to pop them.
  5. Blow up balloons and play balloon tennis, volleyball, or soccer.

Imaginative Play

  1. Make a play boat from a cardboard box and pretend you’re fishing or escaping sharks
  2. Give children kitchen tools and utensils to play chef
  3. Play veterinarian or doctor with sick action figures and stuffed animals
  4. Build a tent from blankets and go pretend camping
  5. Host a pretend picnic or tea party for their toys

IMG_8937

These are just some of the MANY activities out there and there are plenty more waiting to be discovered or created by you to fit your child’s needs (Disclaimer: All the activities I’ve listed are intended to be done with adult supervision even if they don’t necessarily require your active participation). I hope this post is a good starting point for helping you feel less overwhelmed and more capable of keeping your children engaged and occupied without resorting to screens. To help me get organized and plan better (and help you do the same), I’ve created a weekly activity plan to fill out to help guide me through my days at home. The image below is just an example of how you can fill it out but you’ll want to do so according to your own daily rhythms and routines, interests and likes. I also included a column for time but I do not adhere to it strictly and you can completely ignore it all together if you want. The time column is more to remember fixed moments of the day such as snack time, lunch, and nap time. I want to also add that I think it’s very important to be flexible and not hold yourself to unreasonable and unattainable scheduling expectations because this isn’t school.

Weekly toddler planWeekly Activity Plan Free Download

IMG_8945

Once you have downloaded this blank activity guide, you can visit the links below to get started planning your days with your little one(s). While I’m no child psychologist or educator, I think that it’s good to have a balance of diverse activities; literacy, sensory/fine motor, physical activity, and imaginative play. The best part about designing your day is you get to customize activities that blend motor skills, creativity, and learning (science, math, language, etc.) in ways that are fun and appealing to your child. The last thing children need is to be lectured classroom-style. If there are specific concepts that you would like them to be learning then write them down in the “focus” section. This will help you be mindful of your learning goals so you can incorporate them up during activities and moments throughout your day. Alright, let’s get planning!

Resources for Activity Planning

  1.  Hands on As We Grow
  2. Busy Toddler
  3. Fun at Home With Kids
  4. The stay-at-home-mom survival guide
  5. Meri Cherry
  6. Toddler Approved
  7. Playtivities

If you liked this post and found it helpful, we would love it if you would share. For more related content, you can find us on Instagram where we share more of our day-to-day and Pinterest where we share our ideas and inspiration. If you have any thoughts or suggestions about this topic, feel free to leave a comment down below. And as always…

signature3


Potty Training Before Age 2

Happy Monday friends! Our little hobbit just turned two years old last week (sobs) and we are getting ready to take potty training to the next level. I’ve struggled to write about this topic for a while now because 1) The first time I told someone I was potty training it felt like everything went south, and 2) It hasn’t been completely successful. I am, however, trying to look at the positives as we take the next step, so I wanted to share what has worked and what hasn’t.

IMG_1171

We started potty training our son the week before he turned one. I was super determined (clearly) and our doctor had told us that some cultures were successful in training children by 15 months of age. I wanted to be that parent. And things, surprisingly, went very well from the beginning. We had used sign language with our son from a very early age and he had picked the signs up fairly quickly. The potty sign was no exception. It’s easy to start the association early on because babies don’t hide the fact that they’re going. So every time he would start turning red like a tomato or make pushing sounds, I would acknowledge the sounds he was making while signing for potty. After a few weeks, he was signaling to us whenever he needed to go. It was seriously the coolest thing ever until he started manipulating us and using the sign (and sound effects!) to try to get out of his highchair or nap time or anything really. Actually it was pretty hilarious but that’s beside the point. Anyways, the only problem was that his signing to go only covered pooping, which is where we are still at today. I think it’s just that peeing is so effortless, he doesn’t give it much thought or know how to make the distinction yet.

IMG_1169

It certainly has been nice not needing to change poopy toddler diapers (with the exception of a few accidents) but now that we’ve been going to the potty for almost a year, I really want to get him fully trained in the next few weeks. I try not to be too hard on myself but I do put the blame on me for not having fully trained him. I think what he really needed (and still needs) is a few days in just underwear so that he can make the mistake of peeing and learn not to. I was unable to give him that opportunity when the fatigue started kicking in during my second pregnancy and it’s hard now that I’m juggling life with another baby. I’d have to be constantly on top of him so he doesn’t pee on any rugs and with a 8-month old in my arms, that’s difficult to do. All this is not to say that we didn’t have any success at all. Many people don’t start until 2 or 3 so I’m happy with where we are at now. There are some things, besides the signing, that I know have made this journey much easier so if you’re thinking about starting to potty train you might want to consider these things.

Potty Training

  1. Create a happy space. This is something we try to do everyday in our home but we very consciously made an effort to create a comfortable space he could feel was his. Even though it was just a small corner of the bathroom, it was his potty haven complete with his own colorful hand towel and bathroom mat
  2. Make it fun. This goes hand in hand with the making of the space. At first we would keep and rotate a few special toys in the bathroom. That way, he was always excited to go to the potty so he could play with those specific ones. We would also play DJ and let him listen to a song of choice, which basically turned into “Ants Go Marching” on repeat all day, everyday. When he turned 18-months, my mom got him an Elmo and Superhero Potty Book which we have kept in there as well. Now he enjoys going to the potty because he loves being read a story. We also had a special soap dispenser just for him and he enjoyed using it to wash his hands after a successful go. These small and simple touches have made for a smooth potty training experience for all of us.
  3. Give encouragement and rewards. Stickers can be your best friend. We definitely didn’t want to bribe our son with sweets or toys but we did want to give him recognition that he was doing an awesome job. The potty book he received came with a sticker chart and stickers that we hung up behind the bathroom door. Each time he would successfully tell us and go in his potty, he would get to put up a sticker on his chart. This somehow grew into sticker collecting and whenever we go out to Michaels or Target, we let him pick out his own stickers to put up. High-fives, hugs, clapping, and calling dada to share in excitement over another bowel movement are also wonderful gestures that have allowed us to express how proud of him we are.

We did make the switch from cloth diapers (little sis is using them now) to pull-ups several months ago so we are hoping there is an end in sight. He does and can pee in his potty but he just hasn’t gotten to the point where he tells us each and every time he needs to pee. As he gets older and his vocabulary expands, we are sure it will be a matter of time before it clicks. We made plans for this weekend to finally remove all the rugs in the living area and have him in underwear for an extended period of time. Our fingers are crossed and we could certainly use all the luck we can get 😉

Have you tried potty training before the age of 2? What tips and tricks worked for you? Let us know in the comments below. And as always..

If you liked this post please follow us and share!

Instagram


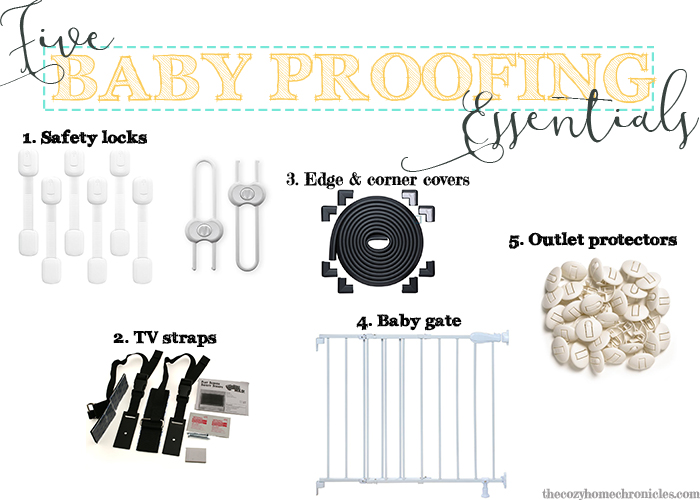
Five Baby Proofing Essentials

babyproofing

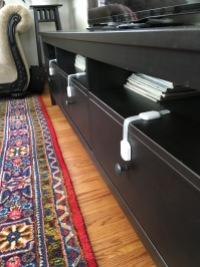
As parents, we can tell you that there is no greater joy than seeing your baby reach his or her first milestones. First solid food, first words, first steps…they all pale in comparison to that exhilarating moment when your child opens their first cupboard or drawer. Not! Depending on what you store in your cupboards and drawers that moment can be absolutely terrifying. We recently upgraded our baby-proofing gear because our son is now climbing to reach those off-limit spaces so we wanted to write a post covering the basics of getting the home ready for that mischievous explorer in your life. For those of you who have someone going around opening drawers; pulling out utensils, clothes, and God knows what, or even attempting to climb TV stands or dinning tables then this post is just for you. Here are five basic contraptions that you’ll need to baby proof your home, along with a glimpse of what they look like in our house and a shopping list of the specific products we went with.

1. Safety locks for keeping those adorable fingers out of drawers, cabinets, appliances, and trouble!

2. Flat TV straps to prevent your television from tipping forward and causing a serious injury (God forbid).

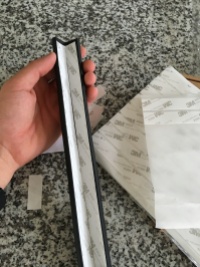
3. Edge and corner covers to cushion the blow when your child’s head collides with the furniture (because there’s a high chance it will…more than once).

4. Baby safety gate(s) to keep your little ones contained and away from the danger of stairs.

img_1091

5. Outlet Protectors…because the last thing you want to be worrying about are fingers and objects getting jammed in sockets.

img_1128

Baby Proof Shopping List
1. Safety locks: Sure Basics & Babies R US
2. TV Straps: QuakeHOLD
3. Edge and Corner Covers: Roving Cove
4. Baby Gate: Summer Infant
5. Outlet Protectors: Safety 1st

This is by no means a comprehensive list but we have installed all of these products and have found life with our hobbit to be much more manageable. They’re not the most stylish looking contraptions but they are easy to install and definitely get the job done. Of course, nothing works better than your own two eyes so being alert and using common sense is the best way to eliminate any baby hazards in your home.

What are your must-have baby-proofing gadgets? Let us know in the comments below. And as always…

If you liked this post please follow us and share!

Instagram


Bed-share, don’t care

IMG_3871 (1)

Our useless, empty crib.

Bed-sharing. It’s one of those things that elicits strong reactions of admonition from family members, co-workers, and total strangers alike. “You let him sleep in your bed?! You need to fix that!” I can’t tell you the number of times I have heard this and while it’s natural to feel doubt about parenting choices, I am here to unapologetically say that we have absolutely no regrets with our choice to bed-share. I am no scientist or doctor and while I am aware of the research on both sides of the debate regarding the benefits and risks of bed-sharing, the anthropologist in me continues to question the status-quo cultural presumptions (particularly American) that treat bed-sharing as an unfortunate lapse in judgement at best and potential child abuse at worst. Says who babies need their own rooms and beds to grow into independent, self-sufficient adults? And what kind of “independence” are we talking about? If that means being able to play on their own and let you leave the house without batting an eyelash then my son is as independent as they get.

I, however, did not write this as an argument for or against bed-sharing because I really believe only a parent can know what’s best for their  family and lifestyle. I am writing this brief reflection to add my voice to a conversation on bed-sharing that has been particularly negative, a conversation that is built on fear and shame (as if new parents don’t have enough stress to deal with). I’ll never forget, as a new mom, feeling guilt whenever I had to reveal to people that our son slept with us. I would internally grimace in anticipation of the response, almost acknowledging that it was a problem we were putting off fixing. That is until I found comfort in friends (mostly anthropologists-surprise, surprise) who understood and had either bed-shared or knew someone who did. But I could never shake the thought of why I felt that sense of embarrassment and why it mattered to so many people where my baby slept. So here’s to all the guilt-ridden mommas and daddas out there that need a little reminder of something they know to be true deep down inside: bed-sharing is absolutely magical. And just in case you forgot, here are three reasons why you know you would do it all over again.

bed-share

1) Welcome to parenthood where the work is plenty and the sleep is little. If you have ever had to wake up to feed an infant, you know that it happens several times a night. Interrupted sleep is the norm. So you can either make things harder on yourself by getting out of your warm, comfy bed and walk down a dark hallway to attend to your little one OR you can have your baby right next to you able to help him or herself and doze right back off so that you can too.

2) Babies make the best wake up calls. Dings and beeps on your phone or alarm clock are just dreadful reminders that it’s time to be an adult again. Babies, on the other hand, are the perfect reminders of all things beautiful in life: wondrous curiosity, a hunger for exploration, carefree joy. There is nothing more wonderful than waking up to the sound of silly babbles in your ear, soft little fingers playing with your face, and slobbery drool dripping down your cheeks. Nothing.

3) Baby cuddles. Enough said. My son is a keep-your-hands-off-me explorer by day and a snuggly, cuddle-bug by night. I can’t get enough of the smell of his hair and the way he kicks me at night to make sure I’m still there. I know this might sound super morbid but the average life expectancy of an American adult is 76 or 81 depending on your sex so if you do the math you’ll realize they’re only cute and small enough to snuggle in bed with for less than 5% of their life. Now if that doesn’t make your heart melt and want to hold them tighter, I don’t know what will.

If you liked this post please follow us and share!

Instagram


Reflections on a year of cloth-diapering

Our little hobbit turned one yesterday (where did the time go?!) and we have been reflecting all week on the year that has passed. It certainly wasn’t easy. There were so many things we had to learn and many more sleepless nights but we loved every minute of our first year as parents. One of our proud parent highlights of the year was our very positive experience with cloth-diapering. After one year of successful cloth-diapering we highly recommend it to anyone and everyone considering it. However, that doesn’t mean we didn’t learn a thing or two along the way so here we present to you 5 things we wish we knew or did from the beginning to make our cloth-diaper journey a bit smoother and less stressful.

CD3

 1. Print a schedule and keep track of laundry days

When you have a million other things to juggle it’s quite easy to forget the last time you did the diaper laundry. Trust us, it’s not so fun when you realize you’re out of diapers as you are preparing baby for bedtime. Keeping a schedule helps you keep the load of remembering off your shoulders and clean diapers on hand when you need them most.

2. A little bit of bleach goes a long way

Over time cloth diapers eventually start to smell even if you wash them consistently. Whether it’s ammonia or bacteria build-up, the smell can be extremely unpleasant and linger after several washes. Don’t worry, it’s not  necessarily something you are doing wrong. You just need to switch things up and find something that gets the smell out. We started adding a small amount of bleach to our cycles just once or twice a month and it was like hitting the reset button. The diapers not only smelled great but looked bright and clean too! Be careful not to overdo it with the bleach though. After all, it is a harmful chemical and should only be used sparingly.

3. Diaper liners will be your friend when baby starts solids

Remember when we wrote a post about how diaper liners sucked because they ruined our plumbing? While we still don’t recommend them for flushing, they definitely come in handy when your little one starts pooping solids. After several weeks of rinsing smeared poo off the inside of diapers, we decided to bring back the liners and we haven’t looked back since. Just toss the liner with the poo in the pail and you are good to go. No extra whiffing or rinsing required.

4. Some diaper rash creams leave stains

This one just bothers us because we had kept our diapers in such great condition for so long. If you’re like us and you care about keeping your diapers looking clean then know that certain diaper rash creams (non-water soluble like Desitin) don’t wash away. At least we haven’t yet discovered a way to get rid of them. We are definitely going to be using these diapers again for a baby #2 but if you are planning on selling them once you are done (we know many do) then this is something you might want to watch out for.

5. It’s okay to cheat once in a while

If you’re going on vacation or out longer than a few hours and you don’t have access to a diaper pail or laundry machine just go with disposables. That is unless you’re taking an extra luggage to haul back some reeking souvenirs. My brother got married recently and rather than lugging around a bag for dirty diapers to makeup, pictures, and the reception, we opted to use disposable diapers that day for the convenience. I’ll admit I did feel guilty but I eventually got over it. Look, you will have circumstances where it will be near impossible to cloth diaper and that’s completely okay. Don’t be too hard on yourself, cloth-diapering was never meant to make your life difficult.

CD2

If you already cloth diaper these will just have made you nod your head in agreement (we hope) but if you are just starting out then we really hope you find these tips helpful. And if you have any questions or comments we would love to hear from you 🙂 Until next time.

If you liked this post please follow us and share!

Instagram


Cloth Diapering Newbies: Part III

IMG_8987

Time to dive a little deeper into the world of cloth diapering. In this post we will be discussing, in much greater detail, how to wash and dry cloth diapers, inserts, and wipes based on what has worked for us. The most important yet often overlooked step in diaper laundry is the daily maintenance of cloth diaper cleanliness. It’s like the unsung hero of cloth diaper laundry. If you want your diapers to last longer and look clean, the last thing you want to do is have poop dry and crust on them until laundry day. Anytime there is poop involved, we recommend that you rinse the diaper immediately. Not to mention how gross it would be having a bunch of poop sloshing around in the wash. This is why in our first post we mentioned having a diaper sprayer or bidet. We use the sprayer to rinse off any debris immediately into the toilet and let the diapers hang over our laundry sink until laundry day. As a result, we have not had any major diaper stains. In fact, the only stains we have are from Desitin, not poop. Basically, we never put poopy diapers in the diaper pail so what you will read below is based on care for diapers that don’t have a significant amount of poo on them. On a side note, if you have not read our previous post and are considering using flushable liners, we suggest you read it and think twice. Unfortunately, there is no magic way around getting your hands dirty if you cloth diaper…unless you are prepared to pay up.

Another part of daily diaper maintenance is something that will just make your life easier on laundry day. Instead of waiting until the day of to separate the inserts from the diapers (assuming you are using pocket diapers like us), try pulling out the insert immediately after you change the diaper as you put it into the diaper pail. We make sure to do that so on laundry day there is no extra sorting. We literally dump all the contents of the diaper pail bag (inserts, diapers, and cloth wipes) straight into the washer and toss the bag in right after. It can’t get any easier than that. So now that that’s squared away, let’s get to the washing details.

First things first. Laundry detergent. One of the things we wondered about was what kind of detergent to use especially for something going directly on baby’s bum. The options are many from Seventh Generation, The Honest Co., Burt’s Bees, Babyganicf, etc. and all have minimal ingredients (scented with essential oils) and no harsh chemicals, which is perfect for diaper laundry. We settled on a brand called Ecos because it fit the criteria of being chemical-free, it had built-in softener, and being available at Costco meant the price was just right. So far we have zero complaints; it delivers stain free laundry that smells great and is budget friendly. Score!

350-520576-847__1


Washing

Cloth diaper laundry is surprisingly easy and straightforward. There is no special cycle or real need for several washes (unless you’re not rinsing the poop right way). The important thing to know here is that you should always wash your diapers, inserts, and cloth wipes on cold.  There is no reason to use warm/hot water unless you have some seriously messy diapers. Even then, try not to do that too often as frequent washing in warm/hot water can ruin the leakproof ability of the diapers. We did not try this to know, but if you’re spending all that money on cloth diapers you’ll probably want to play it safe and follow the manufacturers’ suggestions. Although it is subjective and hard to measure, we have not noticed any difference in absorbency (excessively leaky diapers or a drastic change in the number of diapers we use daily). Babies will always leak. Our baby leaked with pampers and seventh generation disposables and he leaks through cloth diapers. It’s just because he pees a lot and not because cloth diapers are not as absorbent.

Here are the exact settings we use for our wash cycle:

  • Wash Mode – Normal Cotton
  • Wash Time – 60-100 Minutes
  • Wash Temperature – Cold (30°)
  • Wash Soil Level – Medium or Heavy (depends on the situation)

img_0118

Drying

Once the wash cycle is complete you will want to separate the diapers from the inserts and cloth wipes. Go ahead and throw the inserts and wipes (and the diaper pail bags if you washed them) into the dryer. We set our dryer to 1 hour on medium heat and they turn out perfectly dry and smelling fresh. You really do not want to exceed medium heat because you can shrink and ruin your inserts. If you are in need of diapers immediately, toss them in the dryer afterwards on “Air Dry”. It will take time but not as much as hanging them to dry.

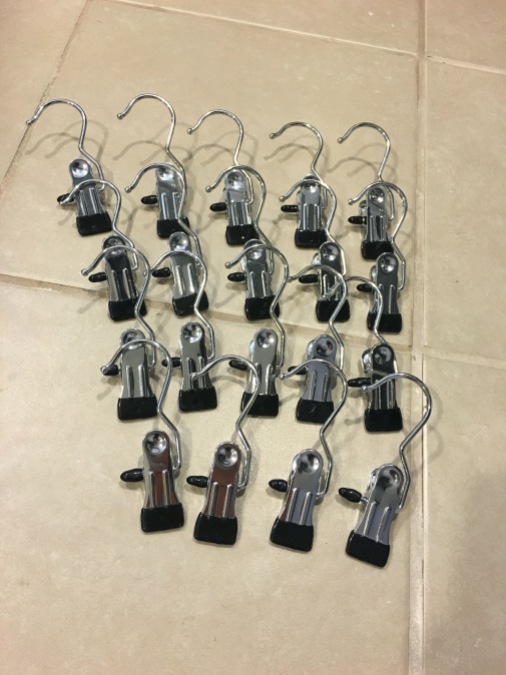
For drying the diapers, it is best to hang them on a rack somewhere where there is a draft or fresh air. If you are blessed to live where there is good sunny weather, you can hang them outside. Our weather doesn’t accommodate this luxury 8 months of the year so we installed a wall drying rack in our laundry room. Our setup (see below) cost around $40: $20 for the hook hangers by J.S. Hanger ( iPow is another good brand on Amazon) and $20 for the Grundtal Drying Rack by Ikea. Ikea has several cheaper options that are portable and foldable but if you’re looking to save space, a wall set-up is the way to go.

IMG_8356

IMG_8363

IMG_8359

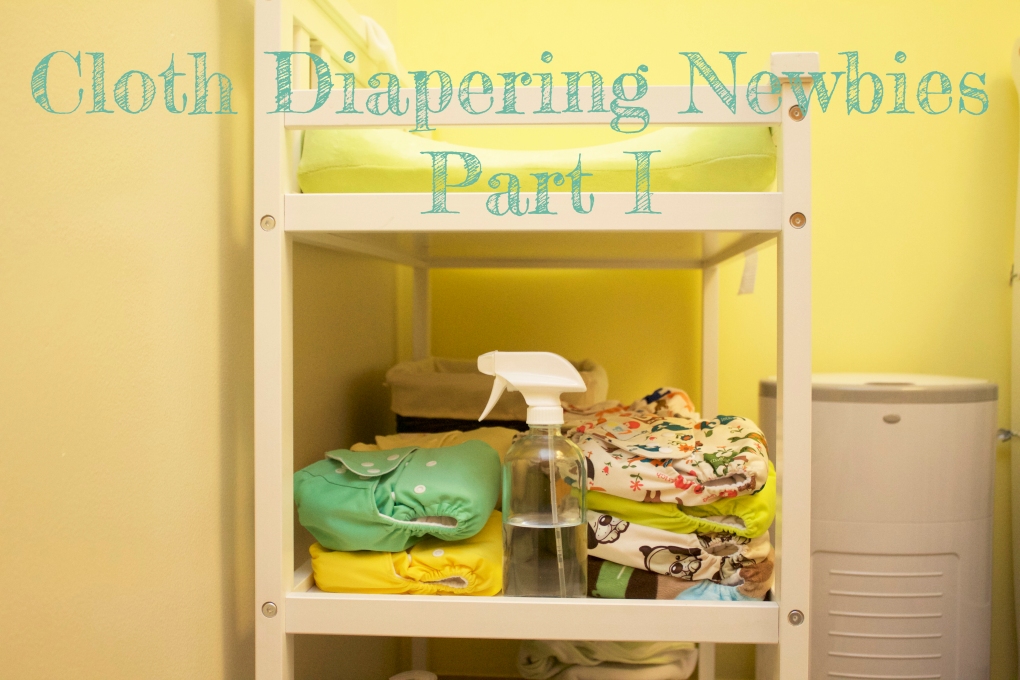
Once your diapers have fully dried (around 3-4 hours), all that’s left to do is grab a helper, stuff your inserts back into the diaper, and lay your prepared diapers back on the changing table shelf for use again. Our baby loves the bright colors of his diapers so we usually sit all together in the nursery and talk about our day while we stuff the diapers and baby rolls around playing with his diapers. Cloth diapering is definitely not as “quick and easy” as disposable diapering but because it is meaningful to us we find ways to cultivate cozy moments around the routines that come with it.

IMG_9500

Our adorable helper

This concludes our cloth diapering series in terms of what you need to get started and how to maintain a cloth diapering lifestyle. Yes, it’s a bit of extra maintenance and laundry but it is not overly taxing or impossible. That is our takeaway message. We hope that if you are on the fence or hesitant about cloth diapering, you now feel it is something you can totally do (because it is)! While we have only been cloth diapering full-time for 6 months, we have had a very positive experience so far. There is still much to learn and reflect on and we will likely do a reflection/update post in the near future as we continue this journey. Until then, if you have any questions or comments we would love to hear from you!

If you liked this post please follow us and share!


Cloth Diapering Newbies: Part I

CD post

For all of you soon-to-be and current parents wondering what is the deal with CLOTH diapers, here is our spin. We will split this topic into several posts because let me tell you: There is a lot of ground to cover. Most of the useful information we found on cloth diapers came from Youtube. But who has time to sit and watch several 20 minute long instructional videos? Not to mention, we had to dig around a lot because much of the information was scattered around. How many diapers to buy? How much is it going to cost? We hope that we can give you the answers you seek and more. This first post will be about why cloth diapering, what kinds of products are out there, and how much things are going to cost. A little back story to clarify our position before we start.

  • We had our first baby in June of 2015 and before that the cloth diaper question had come up quite a bit in our circle. We looked further into it and decided it was something we felt strongly about doing.
  • Our baby arrived six weeks earlier than his due date and was too tiny to fit into cloth diapers. We basically had to use disposable diapers until his thighs were chunky enough to fit in and it’s been nothing but a positive experience ever since.
  • We strive to be conscious consumers on all levels. Just because you can buy anything and everything in this day and age, doesn’t mean you should.
  • So why not disposable diapers? The thought of us adding some 7,000+ diapers to pile up in growing landfills did just not sit well with us. Not to mention the idea of literally throwing away between $1600-$2200 of hard-earned money that could go toward baby’s college fund.
  • Last but not least, cloth diapers are gentler on baby’s little buns because they don’t contain a gazillion chemicals to suppress smells and absorb liquids. This was something that was also confirmed to us after we switched to cloth diapers full-time. With the cloth diapers, baby rarely had any rashes.

So where do you start? You have heard about plenty of cloth diaper brands that have been around for the last 10-15 years with good/average reputation, but you don’t have the time to sift through Amazon reviews and commit? Despair no further! We have tried to do that job for you and answer some of the questions we had as we began this cloth diapering journey.

What brand(s) should I buy?

What are the pros and cons of each brand?

Is it affordable? What is this going to cost me?

Where can I buy cloth diapers?

Read More