3 Photography Backdrops under $3


IMG_5335 2
As an amateur photographer who has shot everything from engagements to family portraits, the switch to shooting flatlay scenes for our blog was a bit challenging because I had to create fun and engaging scenes in a tight space and on a small budget. The perfectionist in me believed that I needed fancy equipment and props to shoot beautiful pictures until I realized how expensive these items could get. Let’s just say things can add up real quick! I basically had to get creative fast, which isn’t hard to do when Home Depot and Michaels are your second home. I’ll never forget how excited I was when I came across these faux stone/marble laminate tiles at Home Depot. At the time we were shopping for our kitchen renovation and my husband was a bit concerned that I was purchasing laminate tile when we were in the process of getting rid of ours. But for the price, could you blame me? I had a similar epiphany at Michaels while browsing the paper aisle (yes I do this for fun) and realized I could get the rustic, wood-grain look that I love without breaking the bank.

img_9645

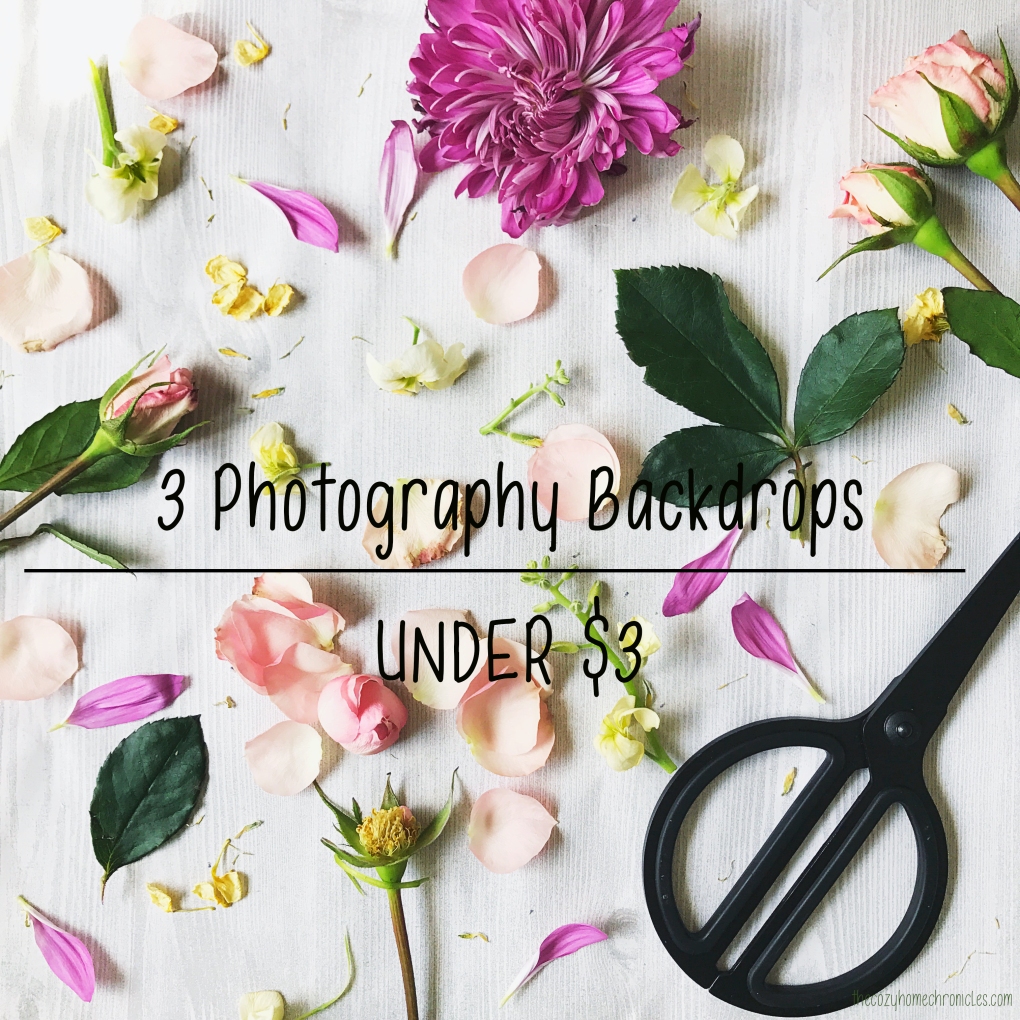
Why use backdrops might you ask? Well, if you’re someone who’s considering blogging or opening a business, one way you can grow your reach is by creating captivating photos to share your story or sell your product. We are by no means experts at this but we have certainly noticed more growth and engagement when we put more care into the images we created for our blogposts and social media accounts. Today, I’m sharing our favorite, inexpensive backdrops so that you too can make beautiful images for your blog or business. For your convenience, I’ve provided links to these backdrops below as well as examples of how I used them.

1. Woodgrain Scrapbook Paper: While not as durable as wood or stone, these papers offer a rustic, homey aura to the scene you are capturing. For only $.69 it’s totally worth getting a couple and experimenting with staging your products/recipes/art/etc…

IMG_3993 copy

IMG_2368 copy

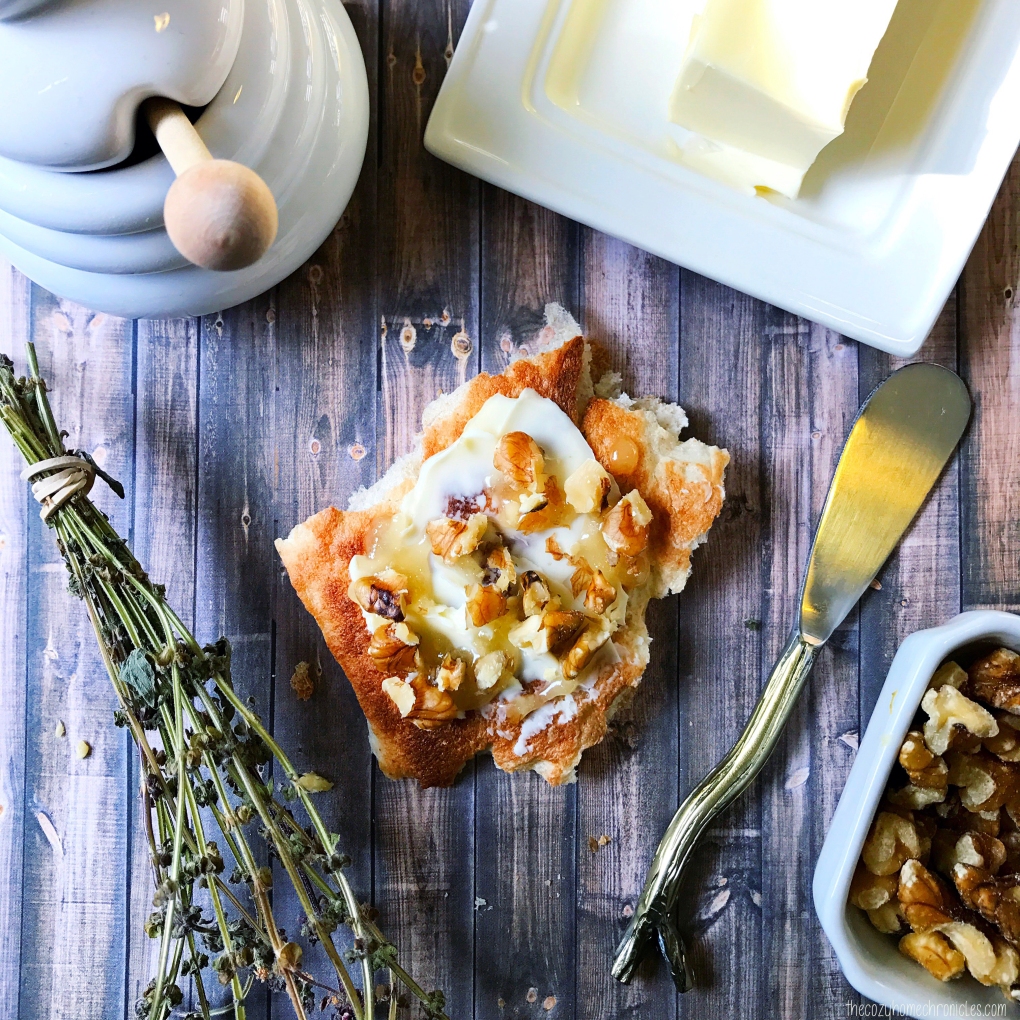
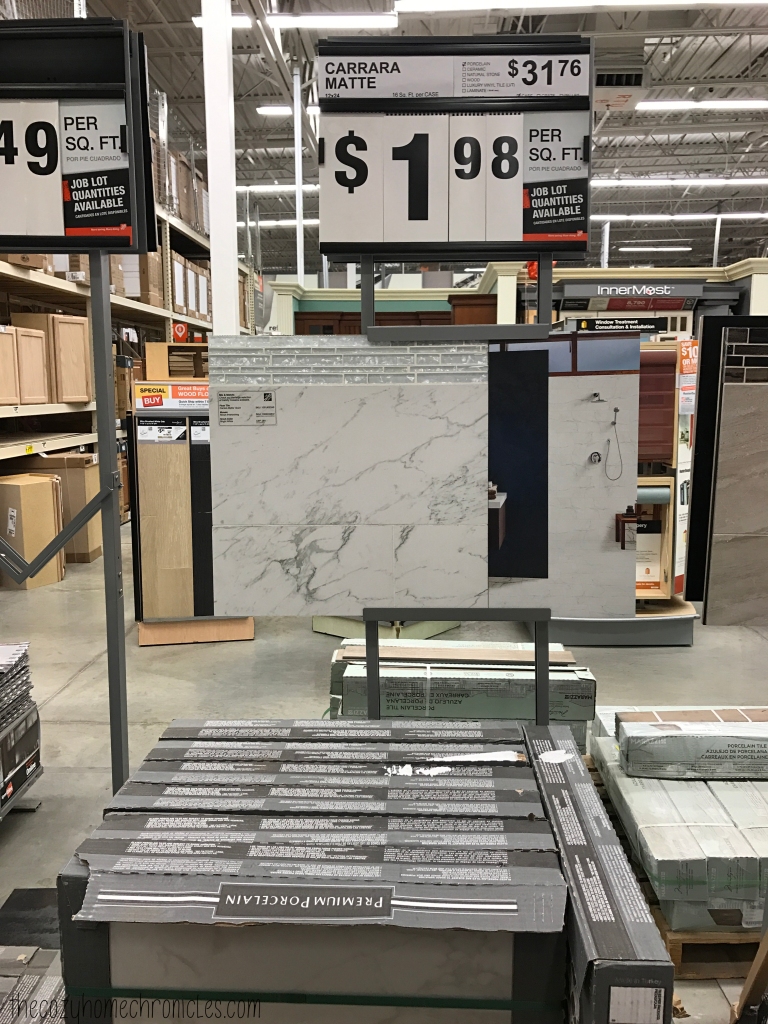
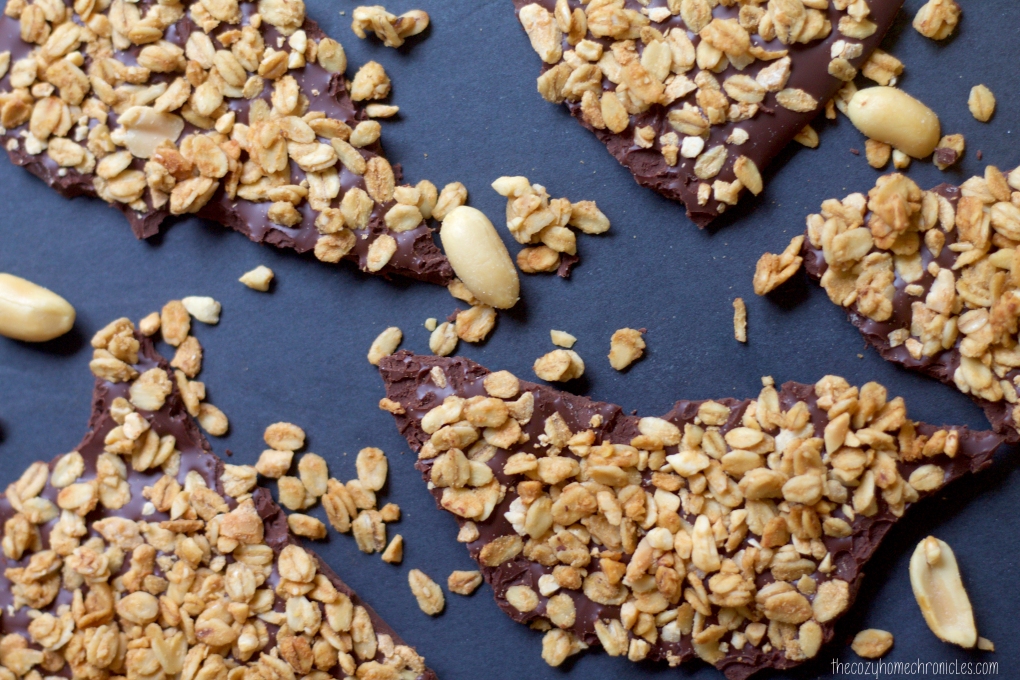
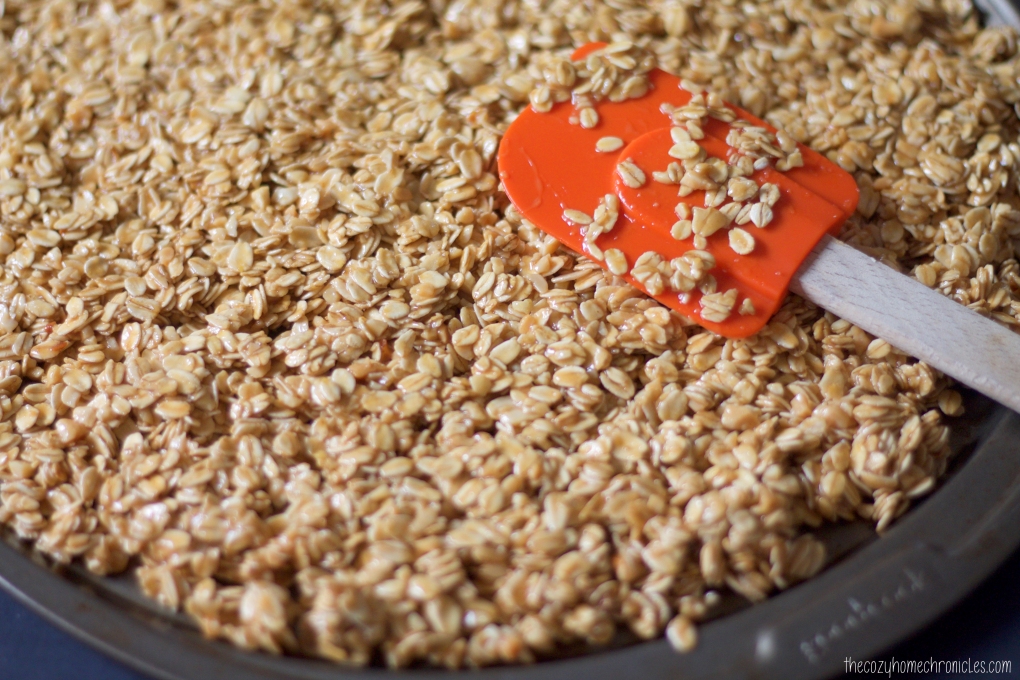
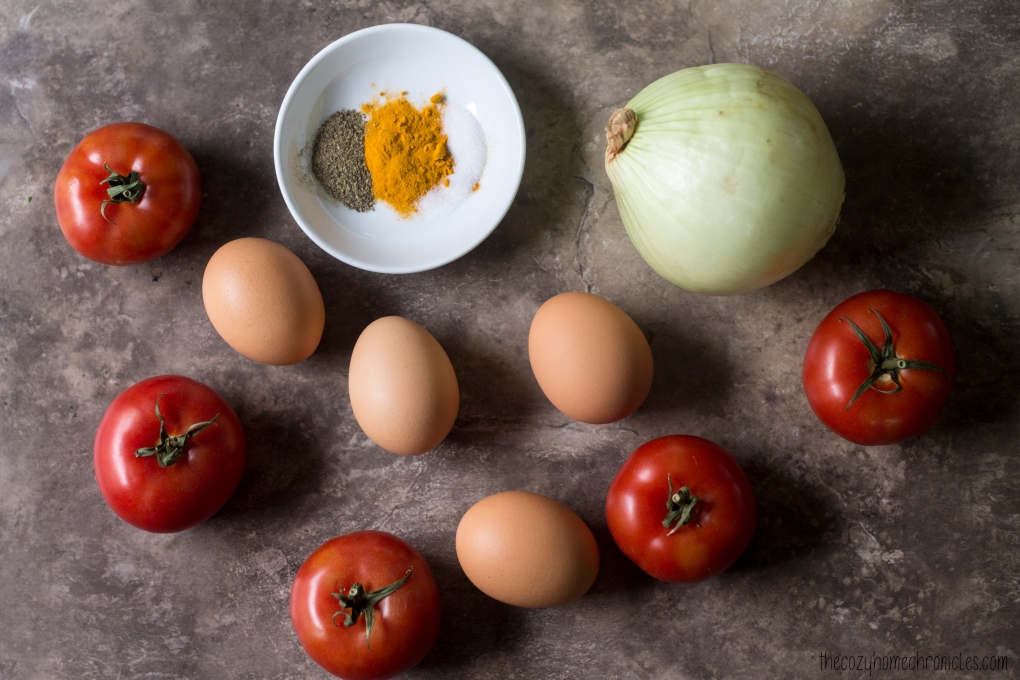
2. Faux Stone/ Marble Tile: I especially love these for shooting recipes because I get that authentic countertop look with minimal effort and without having to replace our countertop 😉 The best part is they can be easily cleaned and can be picked up if you are chasing a natural light source. They also come in a variety of colors and textures some ranging from $0.89 to $2.98.

IMG_0952

IMG_1666 copy

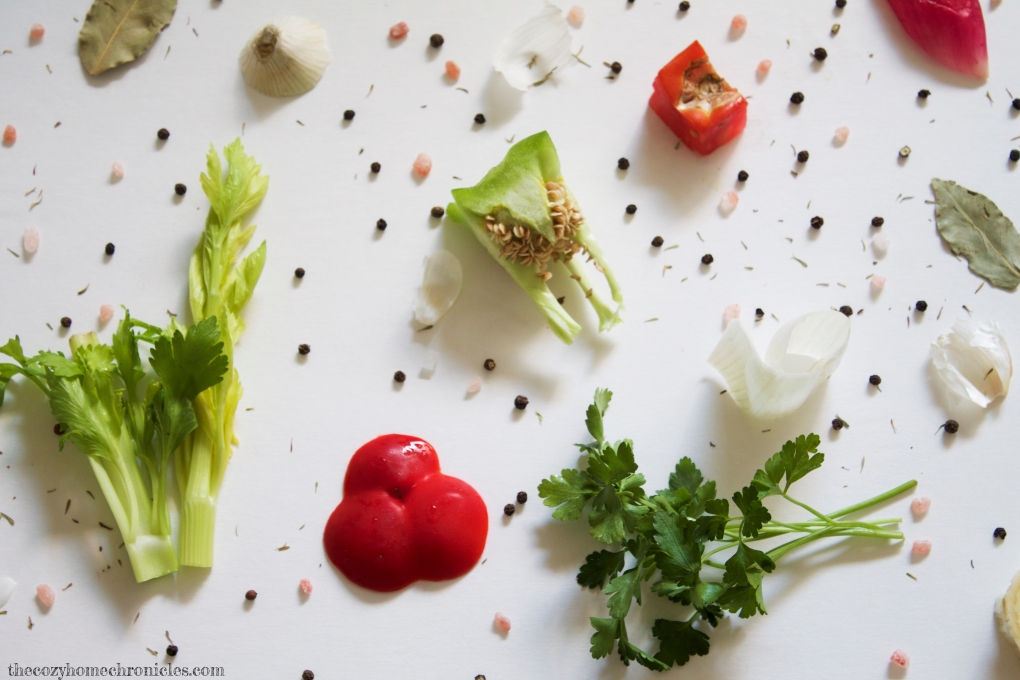
3. Foam Poster Boards: Foam boards are the largest of these three options so if you’re looking to capture a bigger scene then they are your best bet. Solid boards are perfect for making the objects you’re capturing pop and they’re also handy for reflecting and directing light. Oh and you can find them for $1 at Dollar Tree.

IMG_1285

IMG_1642 copy

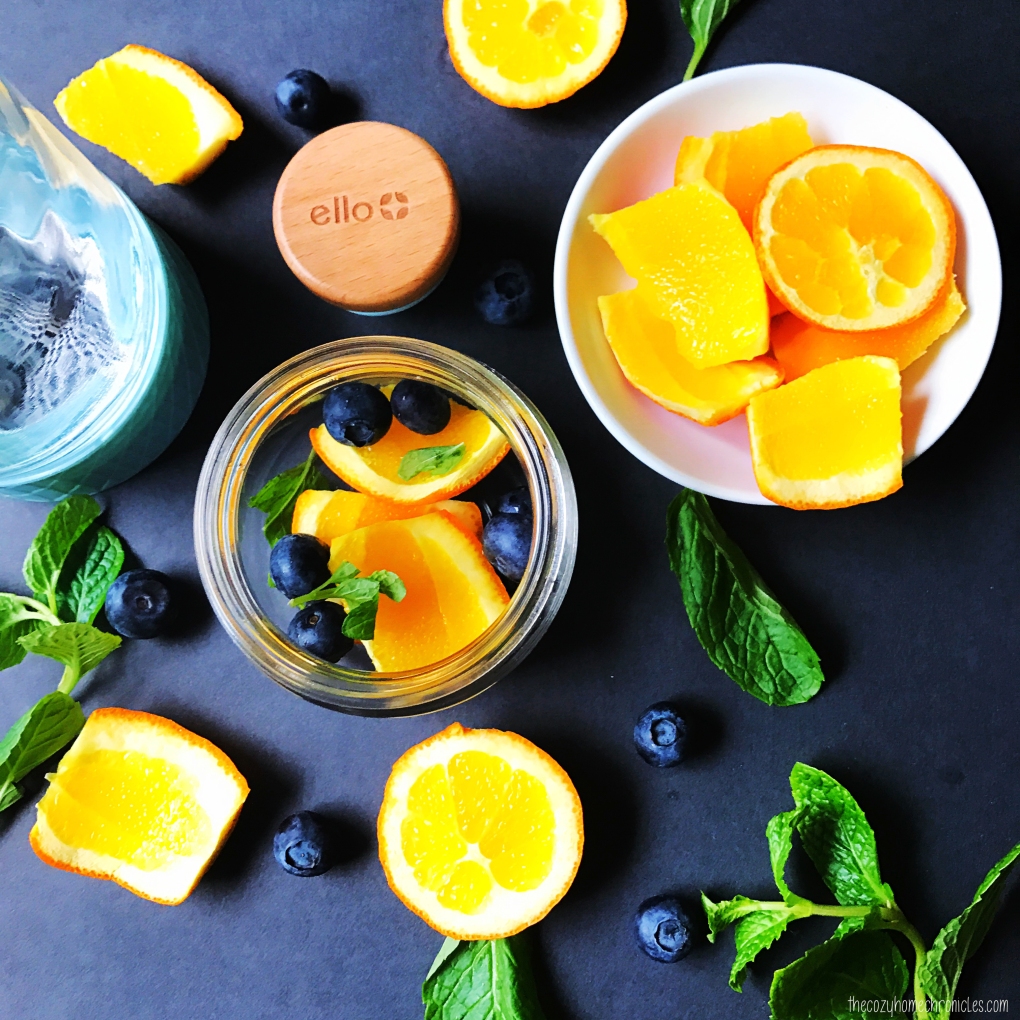
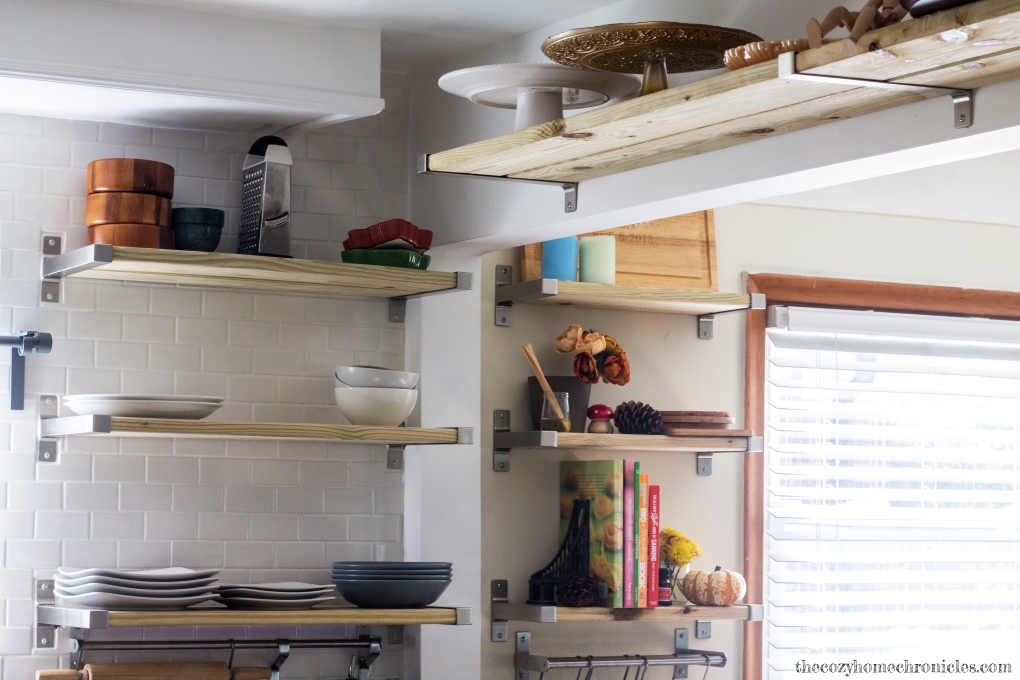
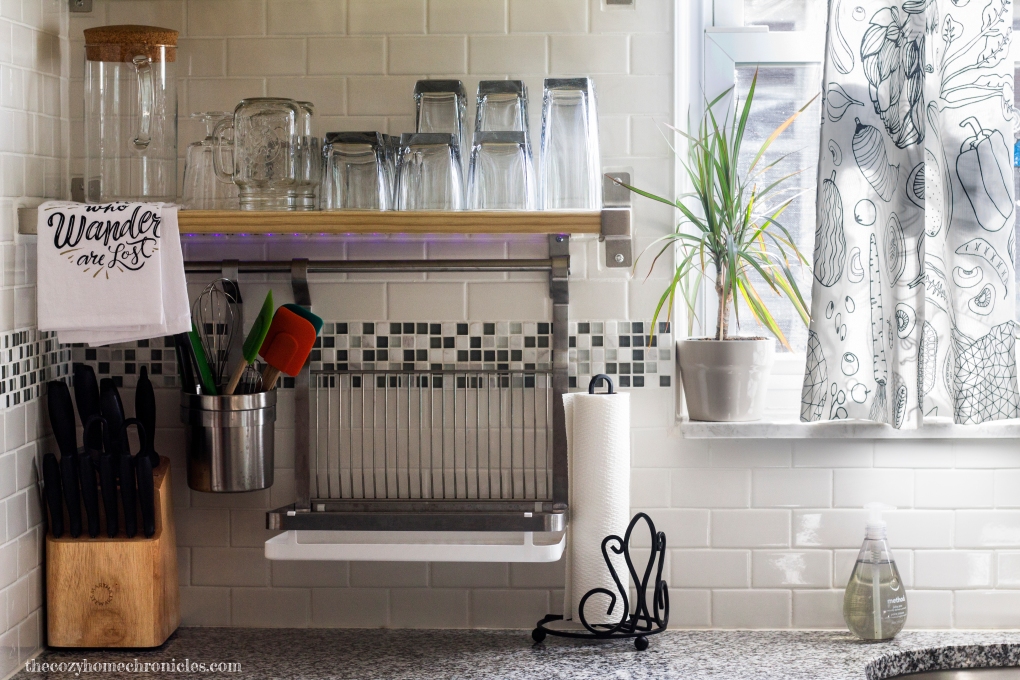
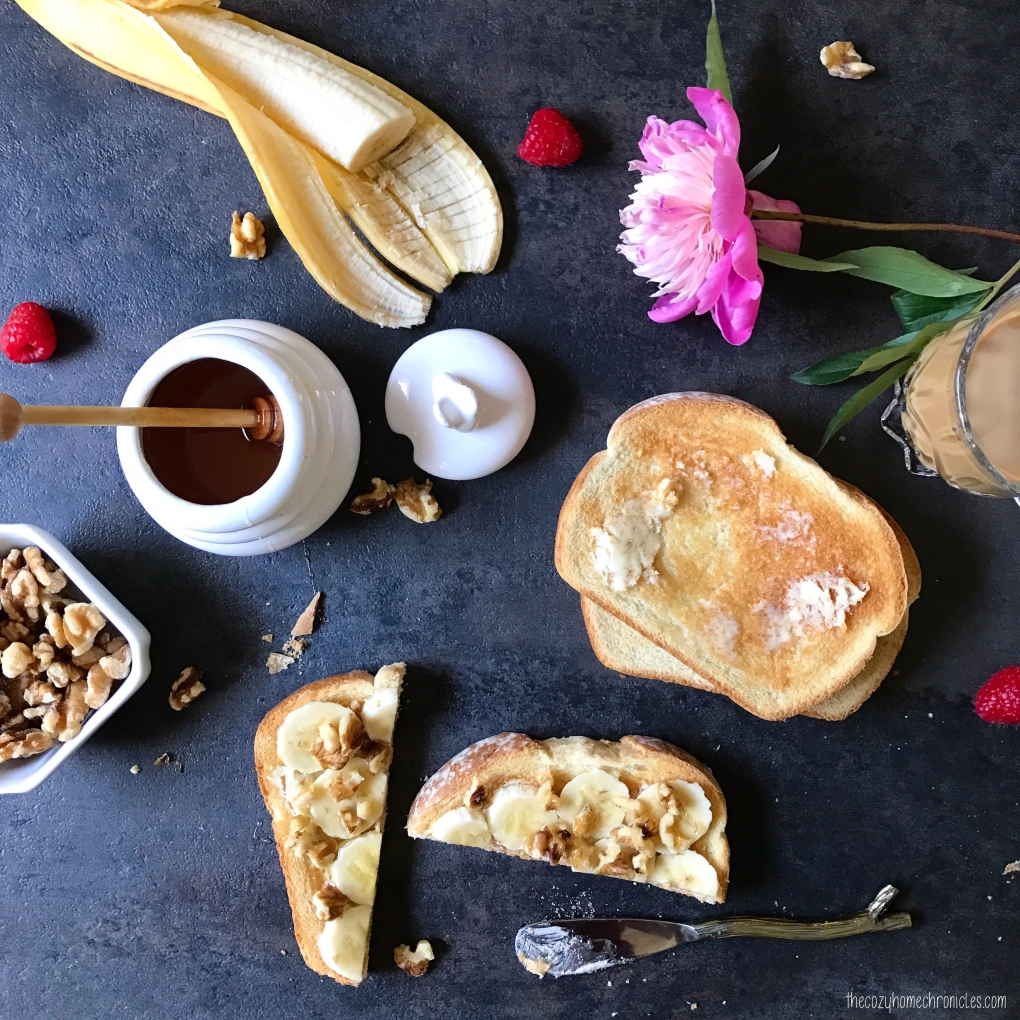
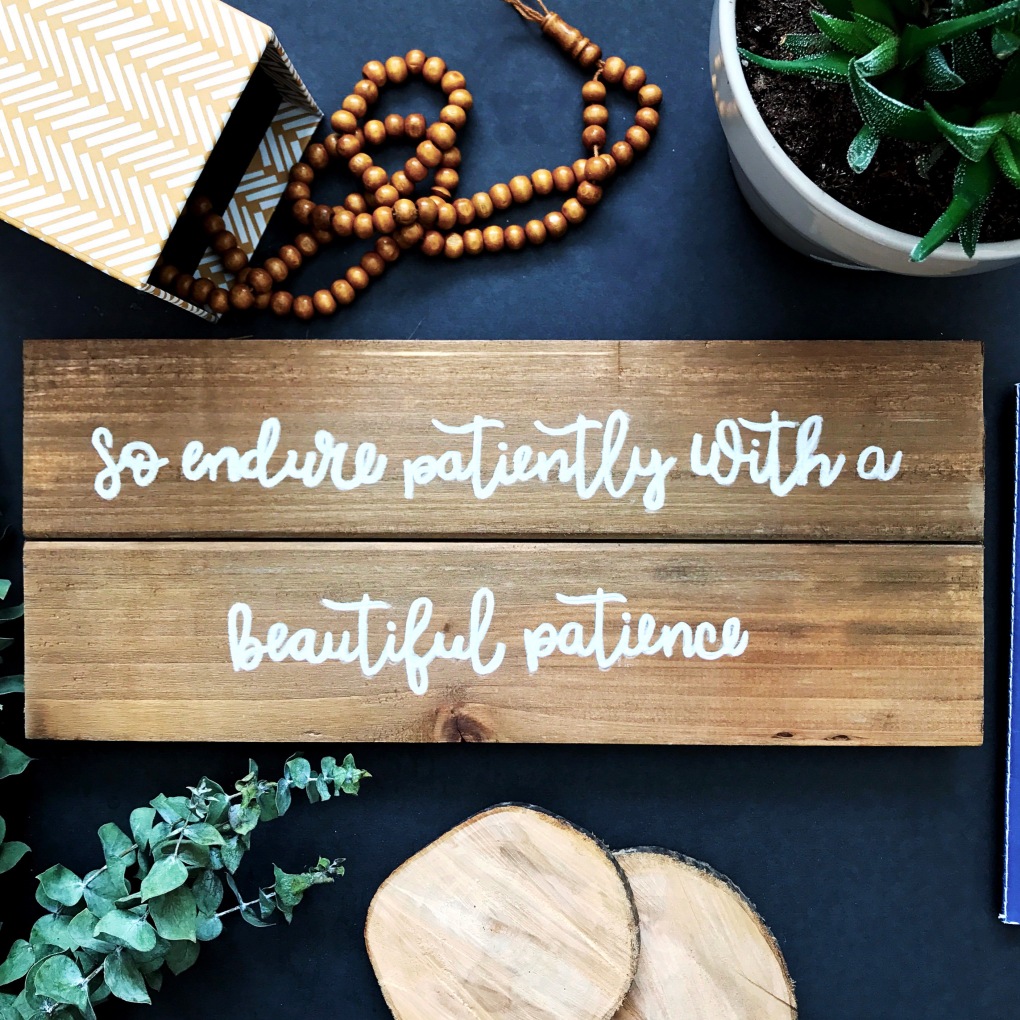
Of course you can also use these boards for more than just food photography. One thing I love to do is take everyday scenes that happen in our home and change up the backdrop. This allows me to share my vision and retell our story in a unique way. No fancy camera needed. Just your imagination, smart phone, and a backdrop for under $3.

IMG_3507

IMG_4283

If you found this post helpful, leave a comment and tell us how we did!

Please follow us and share!

Instagram


One Room Challenge: Week 6|Bathroom Renovation Reveal

Yesterday marked week 6 of Calling It Home’s One Room Challengeâ„¢ and that means it’s reveal time! We are so excited to share the results with you and see what other awesome bloggers have done. Seriously, after you’re done with this post go check out some of the other transformations. You will not be disappointed!

ORC
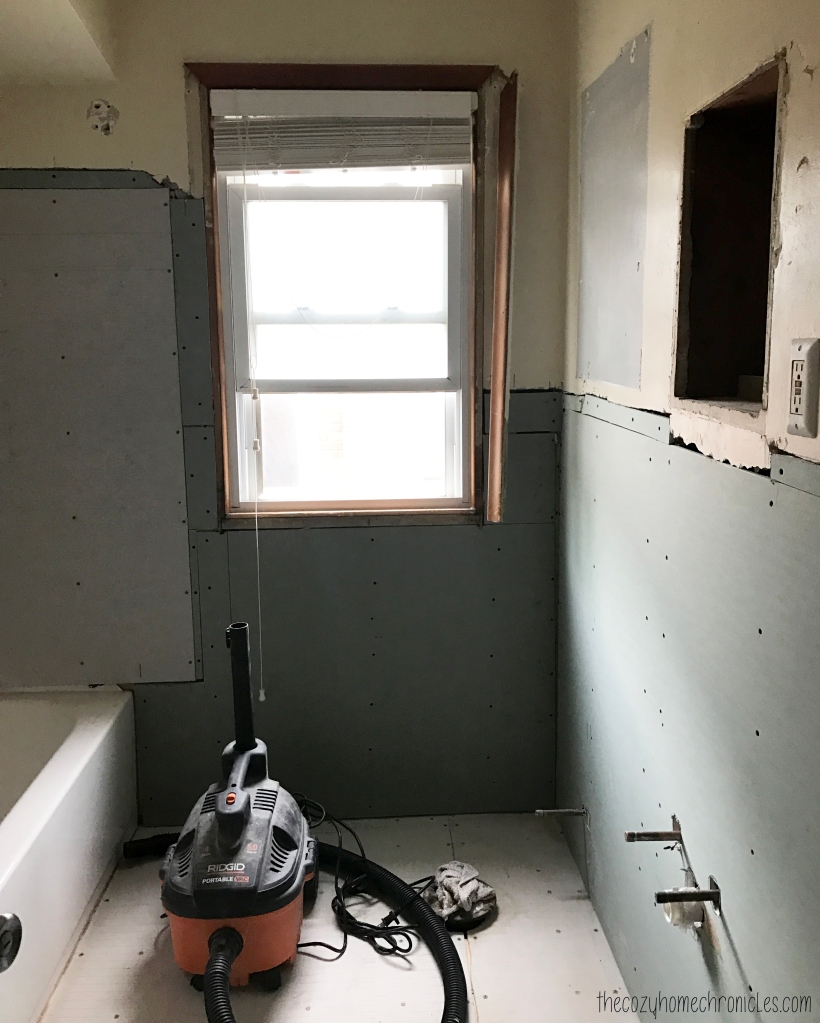
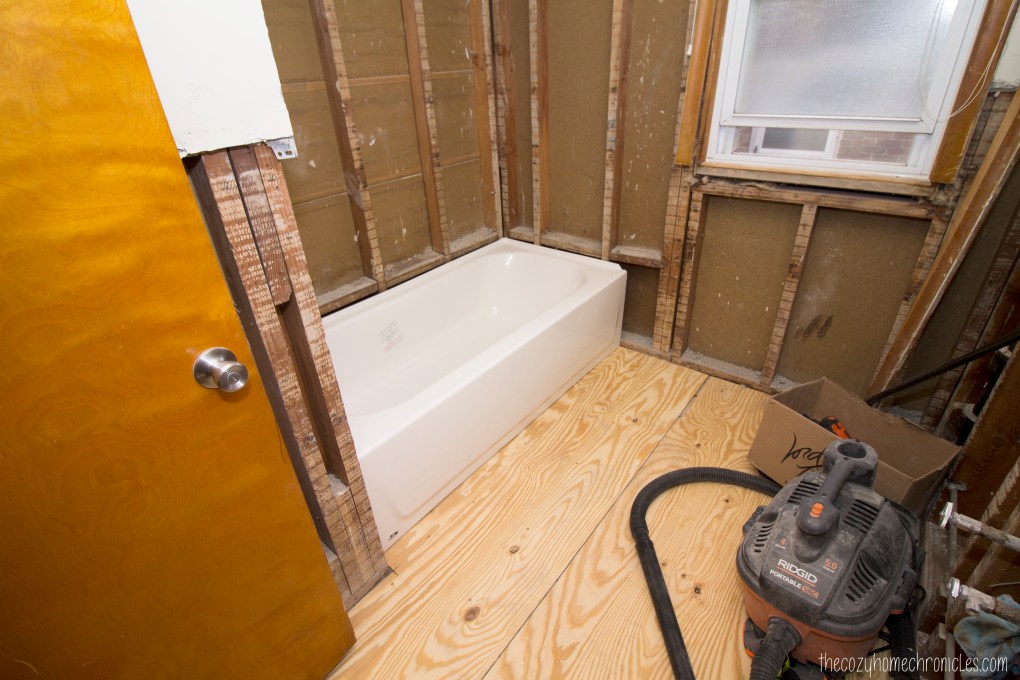
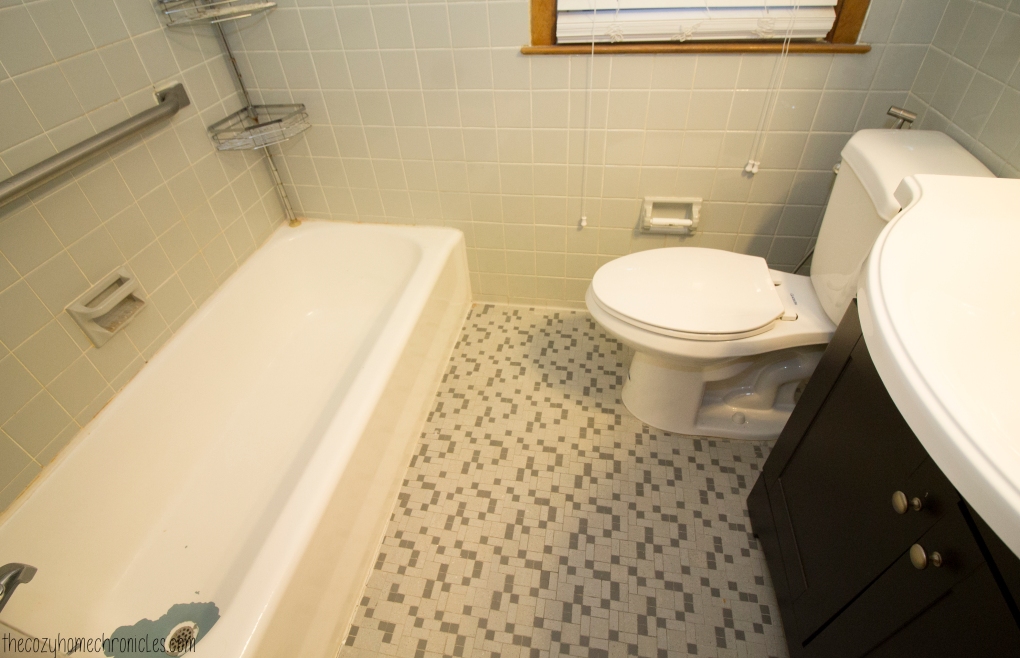
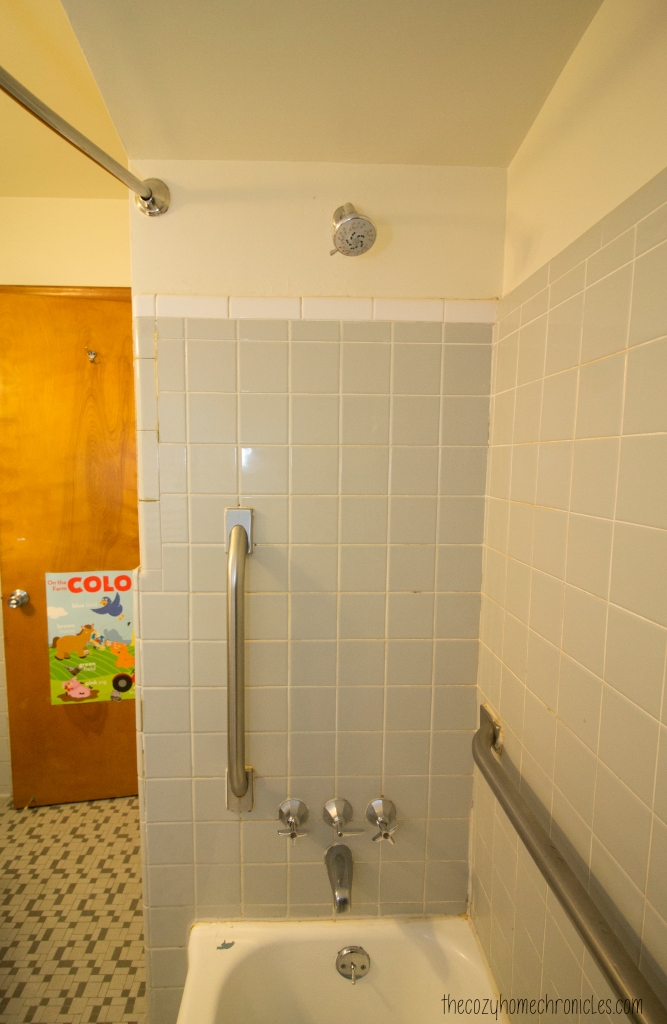
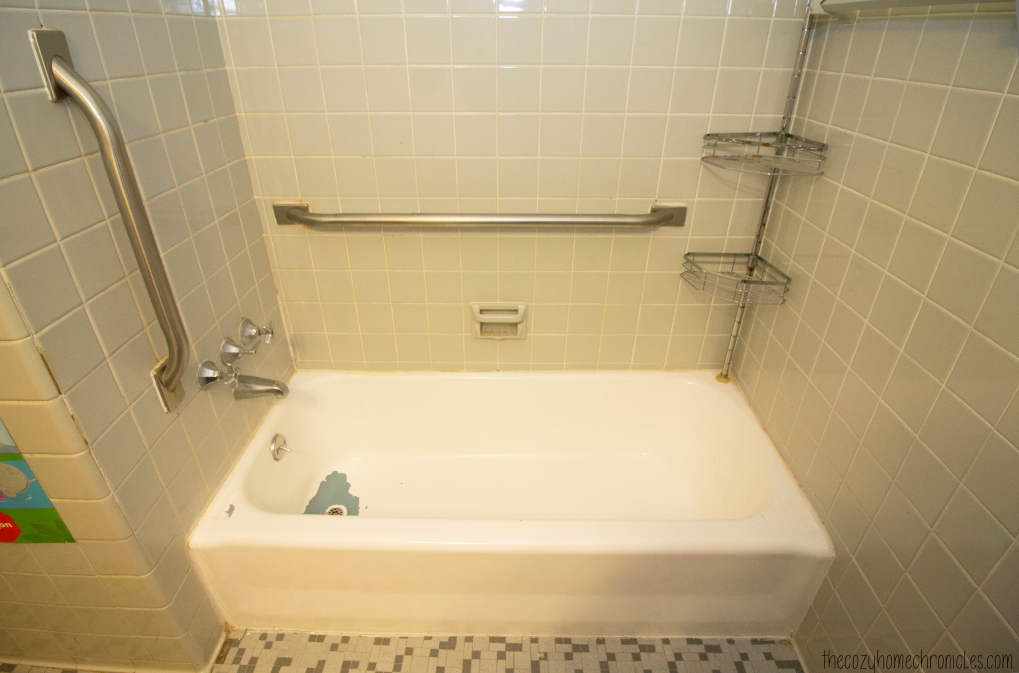
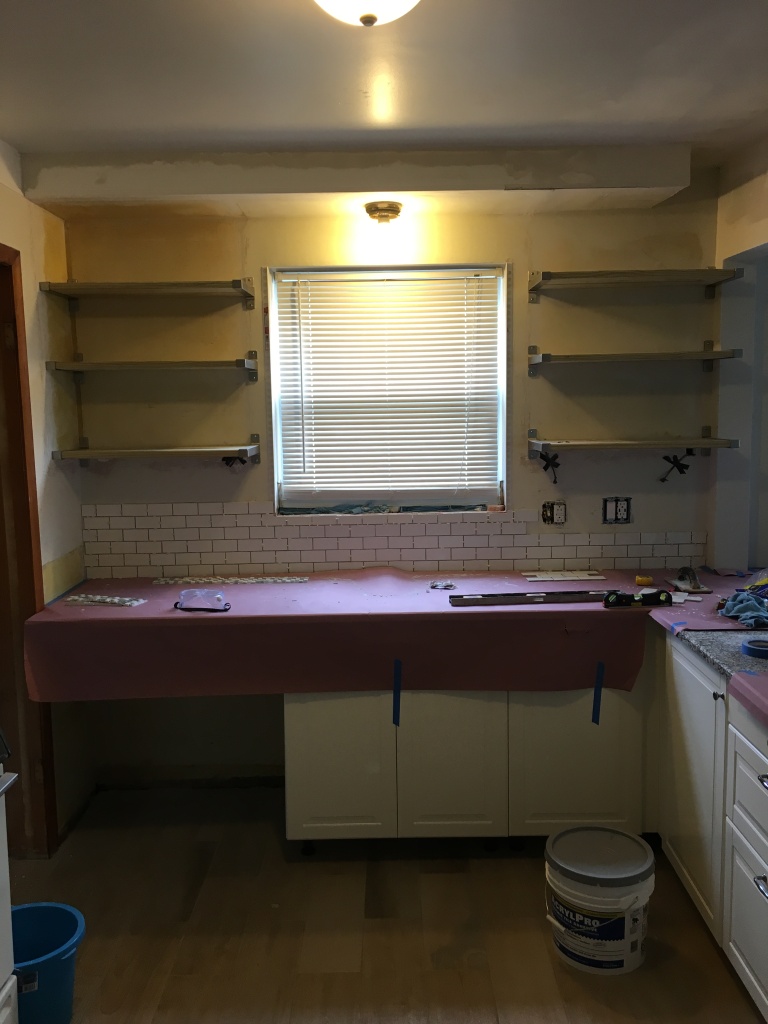
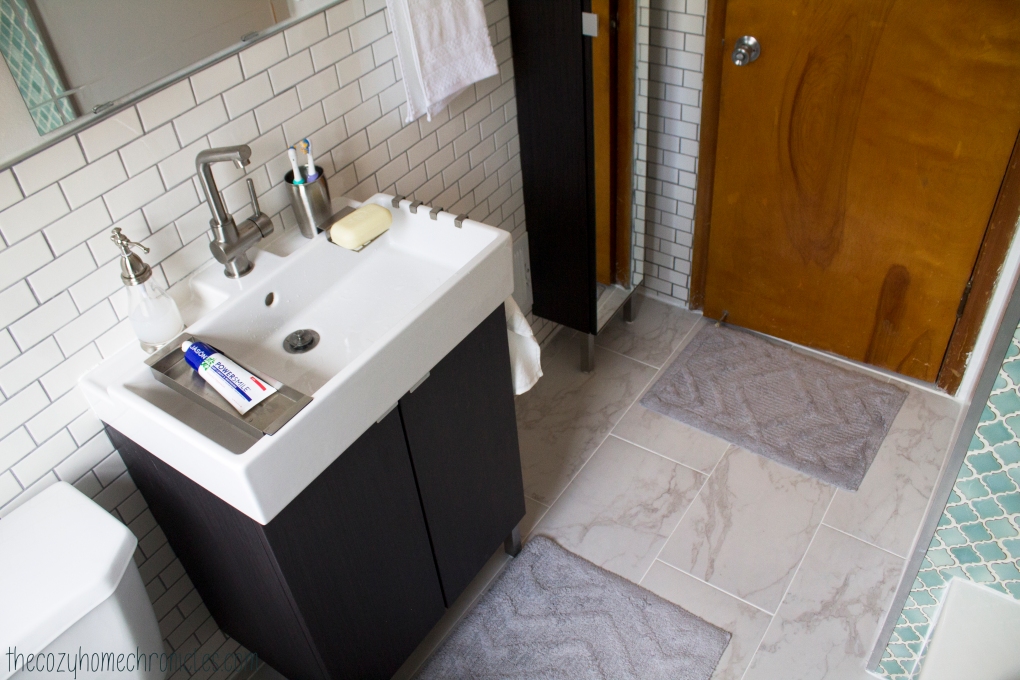
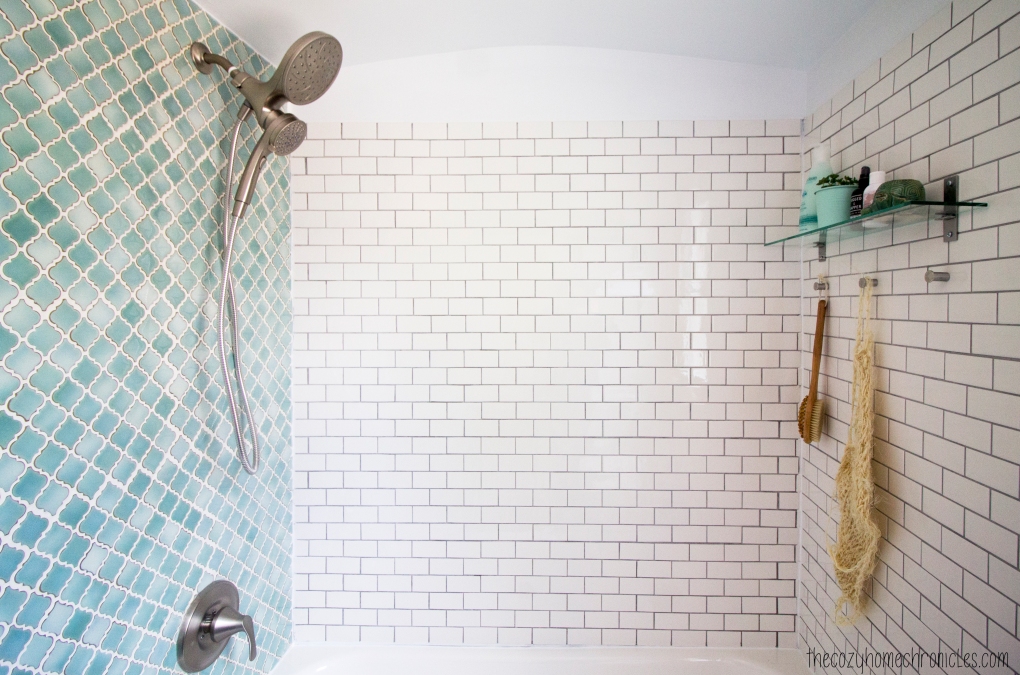
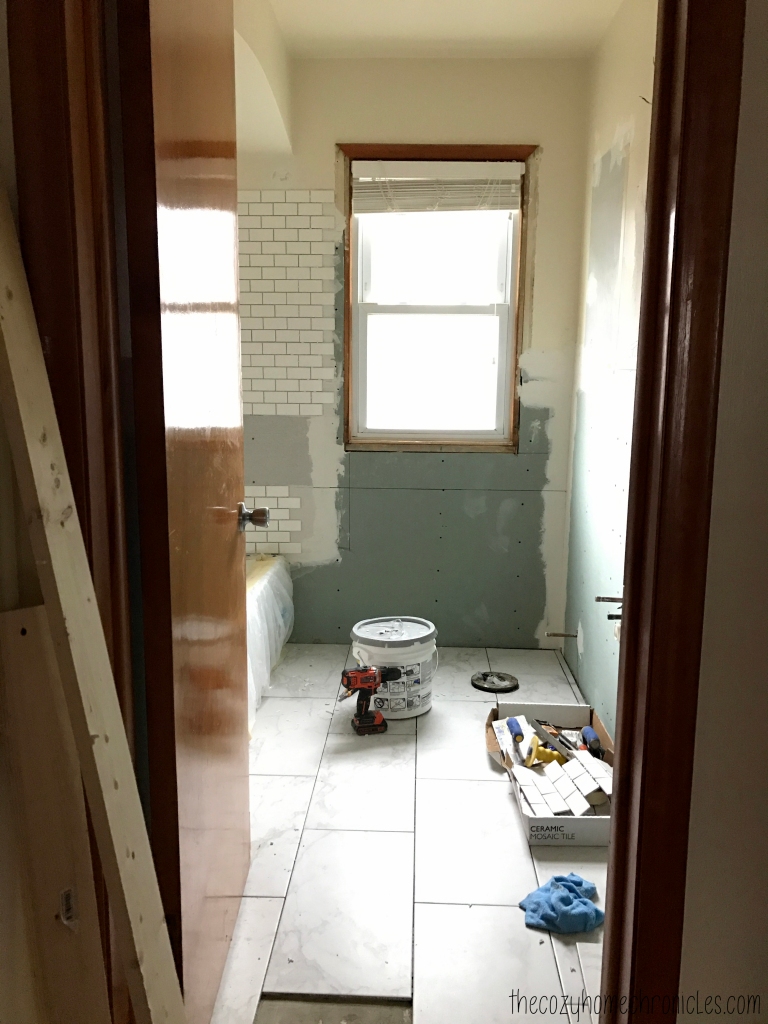
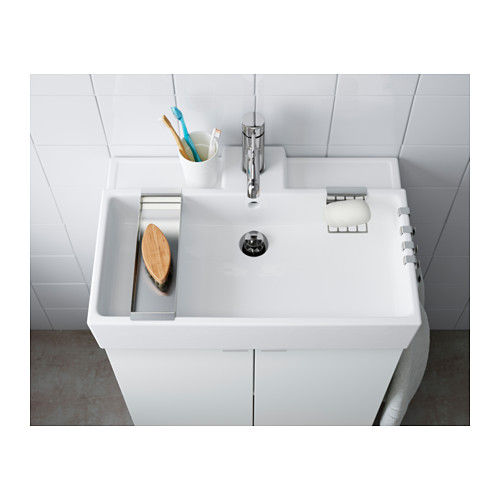
I wasn’t able to take pictures sooner because we were out of the house yesterday and we have guests staying with us but I finally got around to it this morning. We thought we would have a little more time to decorate but time is up! There are still a few things we will be finishing up this weekend including installing the glass shower door, putting in the toilet paper bar (which will be back in stock at IKEA on May 14th), and staining the new window sill moulding but the bathroom is fully functional and oh so awesome. We also realized that we had not been properly linking up our posts to the Calling It Home site and we were a little discouraged that we had done all this work for nothing. But this renovation isn’t for everyone else. It’s for us.  All the sweat and blood (literally) that went into this project was for our family’s comfort and so before we get to the reveal, we thought we would recap our six weeks of hard work.

IMG_1136

Week 1 | Bathroom Renovation Preparation

IMG_1590Week 2 | Bathroom Renovation Demolition

IMG_1597Week 3 | Laying the Foundation for Tile

IMG_6453Week 4 | Mudding and Tiling a Bathroom

IMG_6526Week 5 | Tiling and Decorating a Bathroom

If you’ve been following along, you’ll know that we ran into some issues that cost us precious time. Because of that, we literally spent every day this last week working well into the early morning hours in order to finish on time. In just one week, we grouted and sealed the entire bathroom, primed and painted the walls, assembled and installed the vanity and storage cabinet, installed shelving and lighting, cleaned and caulked everything, and had the plumber come and connect the plumbing. Was it worth it? Totally! Although some features were not our first choice, we are very happy with the results. As you will see soon, our bathroom is unrecognizable. The white subway and Carrara marble tile totally brightened up and opened up the space. It looks so much bigger! Our favorite part, however, is the accent wall in the shower. We cannot wait to bathe the babies and enjoy the beautiful view. Without further ado…

.

.

.

.

IMG_2123

IMG_2064

IMG_2034

IMG_2052

IMG_2037

IMG_2067

IMG_2058

IMG_2099

IMG_2093

What do you think of the transformation? We would love to hear from you in the comments below. You can also follow along on Instagram @thecozyhomechronicles for other fun DIYs and projects. Up next is our summer garden 🙂

If you liked this post please follow us and share!

Instagram


One Room Challenge: Week 5|Tiling and Decor Inspiration

Today marks week 5 of Calling It Home’s One Room Challengeâ„¢ and that means we are less than one week away from the final reveal. We thought we would have a little more finished this week but with a grant application deadline that my wife needed to submit for, things got pushed to the side. As of now, all the tile has been laid on the floor and walls and we are getting ready to grout tomorrow. We have had our fair share of cuts and bruises (not to mention fatigue) but we are finally nearing the finish line and are so excited to share with you.

All right! Here’s what we have left to do:

1. Grout and clean the haze

3. Prime and paint the non-tiled walls

4. Install vanity, toilet, storage cabinet, and other accessories

5. Decorate and style

ORC

Progress:
Einstein was really on to something when he came up with his theory of relativity. It’s seriously hard to believe that we have been working on this project for a month now! To recap: We demoed and gutted the bathroom, installed the new bathtub and had the pipes replaced, installed new cement boards and insulation, mudded and tiled everything. Tiling was not hard but it was tedious because of all the cuts I had to make. The good news is that grouting shouldn’t take more than a few hours (if we can actually settle on a grout color). After that the plan is to do minor touch-ups to the drywall and then prime and paint. If all goes according to schedule, we hope to install the vanity this weekend and get the bathroom ready for the final photoshoot.

IMG_6526

IMG_6537

IMG_6551

IMG_6608

IMG_6689

This past weekend we went and picked out our bathroom furniture from IKEA and it was a bit more difficult than we had anticipated. The vanity series that we really liked only came in two depths: 11″ and 19″. Both of these were on the extreme ends of what we wanted. Ideally, we were looking for something around 15-16″ to maximize storage efficiency and spaciousness. We found exactly that but in a color that we weren’t so sure about. In the end we had to make the sacrifice and go with this one in black-brown. The major upside to this was the vanity sink. Every single thing about the sink that comes with this vanity series is beautiful and perfect. Okay, I know I’m talking about a sink here but it truly is a thing to behold.

lillangen-sink-white__0381414_PE556140_S4
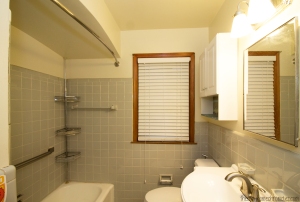
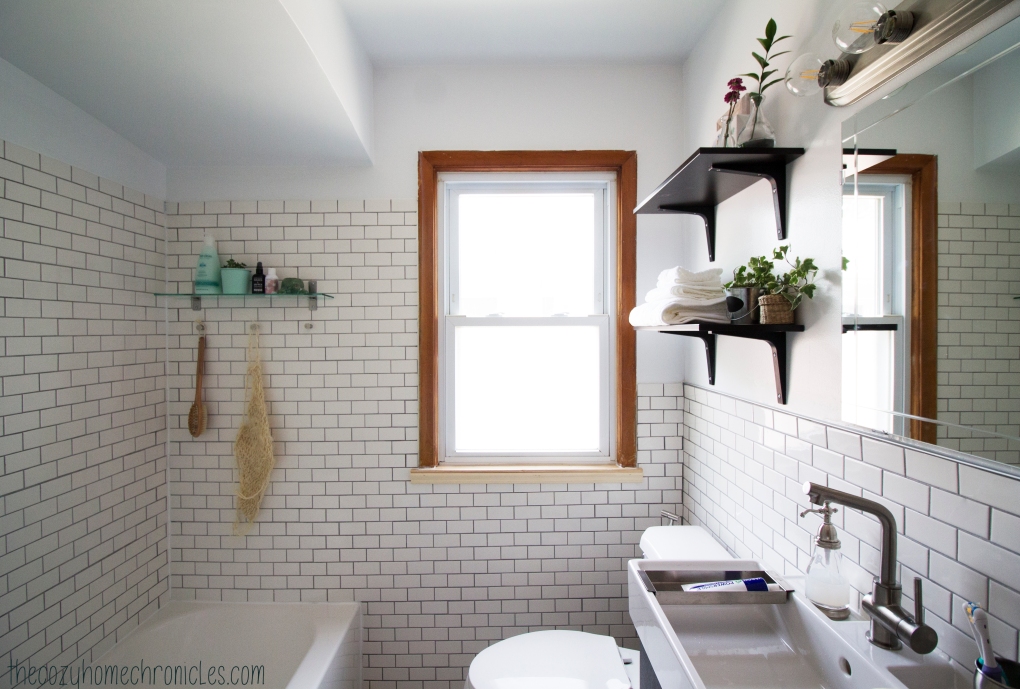
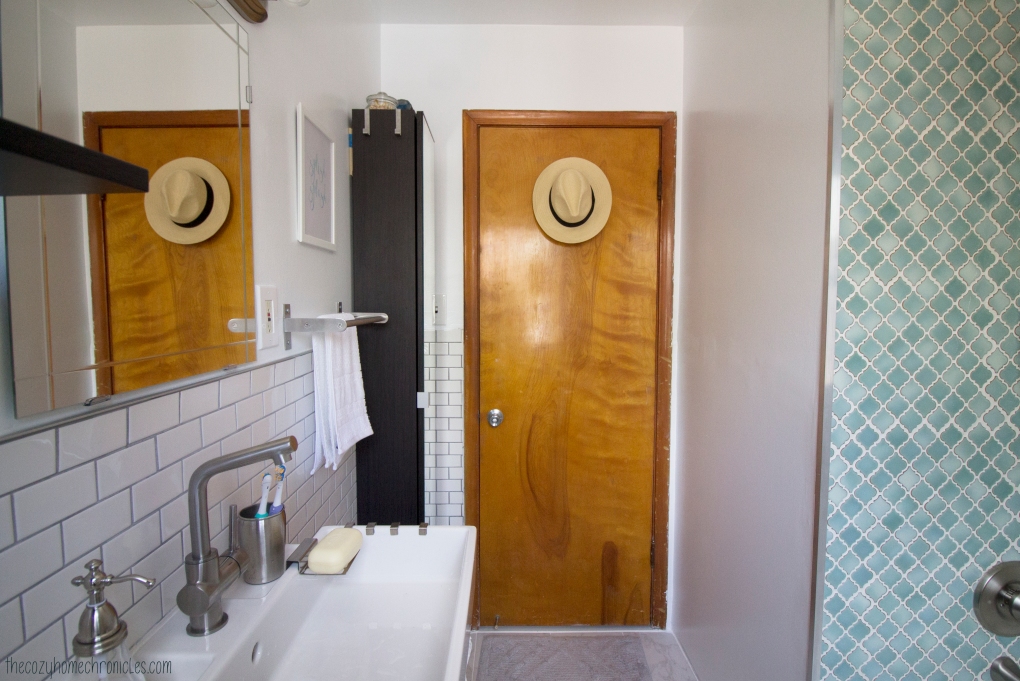
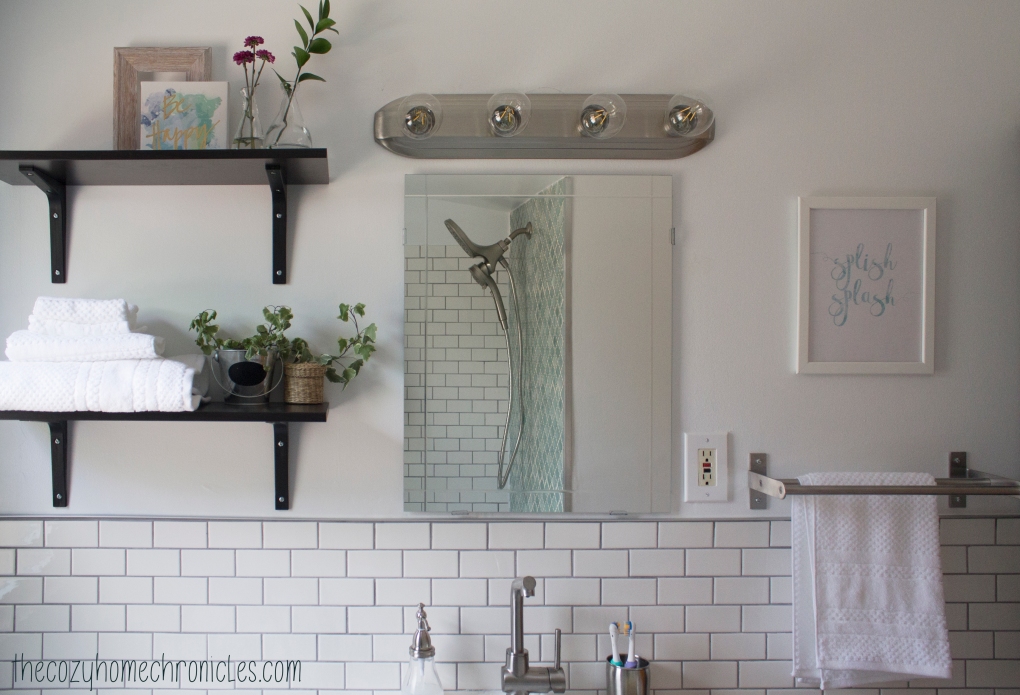
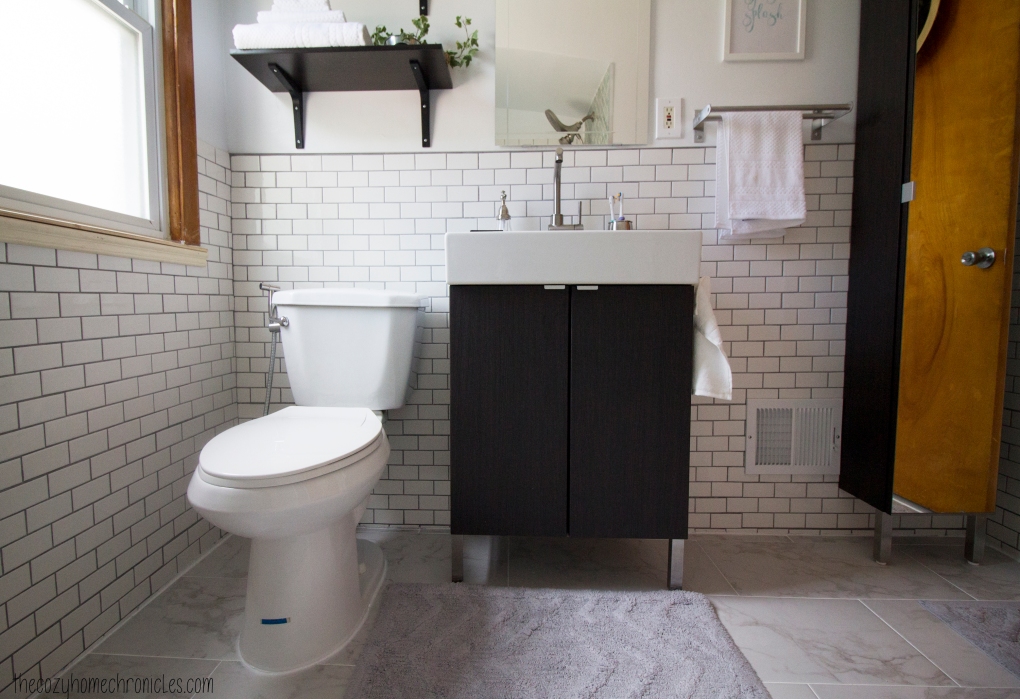
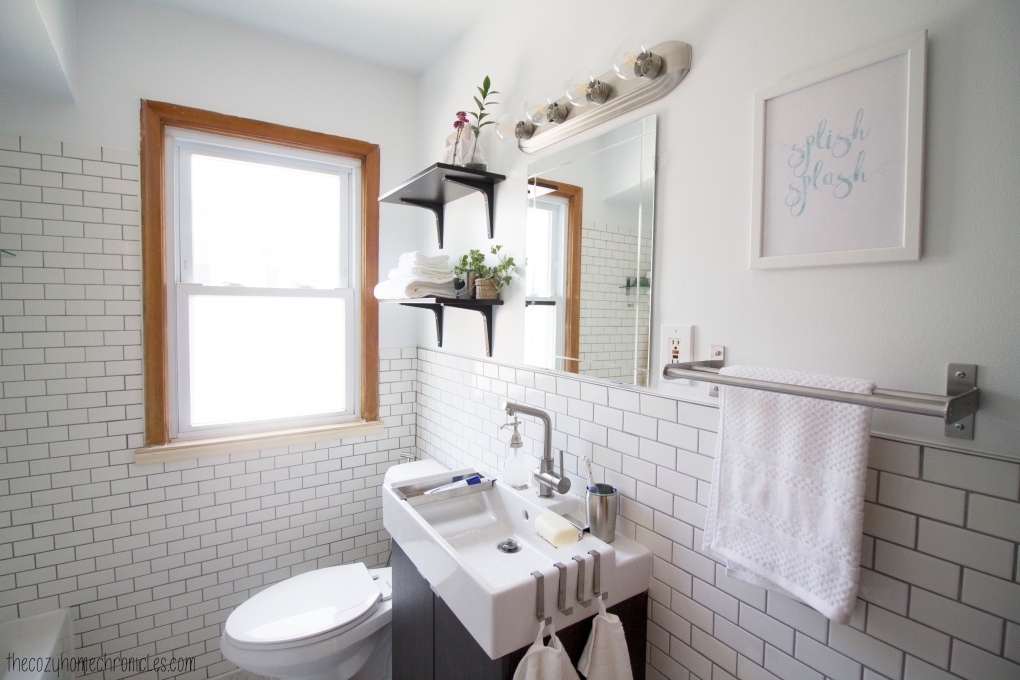
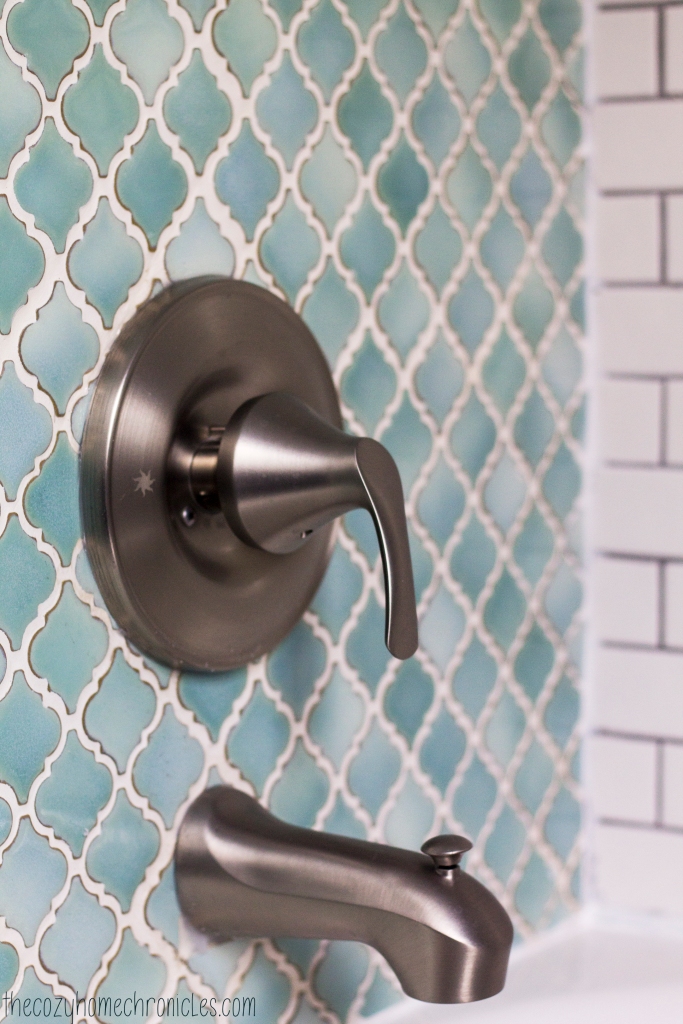
The light fixture was something else that we had to settle on this week and we went with an inexpensive bath bar light and these awesome filament globe bulbs. It might look simple but with the specific lightbulbs we chose,  it looks really cool.

Decor Inspiration:
We put together a mood board of inspiring decor items from IKEA, Target, Etsy, Urban Outfitters, and Anthropologie. We are not going to necessarily buy all of these things but creating this helped us decide on the look that we are going for: something earth-inspired, calming, and with a splash of color.

bathroom inspo

At the center of the mood board is a quote art that my wife made herself. It’s something our son always says when he’s splashing around in the bath and we thought it would make for a nice bathroom wall decor. We are also providing it to you as a free download printable. Think of it is a gift of appreciation for putting up with us and our crazy projects all this time 🙂

Printable Wall Art: splishsplash

Anyways, we could have shown you more progress shots but we will save that for next week. There’s nothing worse than a trailer that gives away a movie’s plot. The accent wall turned out more amazing than we could have thought so we will just let you revel in that thought until you can see it for yourself in next week’s final post.

Would you like to see our progress as it unfolds? You can also follow along on Instagram @thecozyhomechronicles for behind-the-scene videos!

If you liked this post please follow us and share!

Instagram


One Room Challenge: Week 4|Mudding and Tiling a Bathroom

We are hitting week 4 of  The One Room Challengeâ„¢ and that means we are less than two weeks away from the final reveal. Yikes! All the cement boards are completely up on the floors and walls and we are mudding as I speak (type). In other news, our accent wall tile arrived! And boy are we happy with the product. If you’ve been following along, you’ll know that we were torn about what color to go with for our planned accent wall in the shower. We had to order it online and we made the split decision to go with the mint green arabesque from Home Depot. It was a gamble to order online because pictures can be very deceiving but luckily these Merola tiles are more gorgeous than we could have imagined.

All right! Here’s what we have left to do:

1. Tile and grout
2. Install the vanity
3. Install the medicine cabinet
4. Connect the toilet and sink
5. Decorate

ORC

IMG_6449

Progress:
I know it’s been a slow first few weeks but we are feeling the fire now and desperately trying to finish on time. This past week was spent cutting and installing cement boards on the floors and walls. We also got rid of the debris from the demolition over the weekend. The city that we live in opens the dump to the public on the third Saturday of every month, which is awesome because you can dump all types of material except hazardous chemicals. It’s super convenient and the timing couldn’t have been more perfect. On the down side, I managed to get a nice scar on my jaw when a mesh wire from the cement boards caught my skin. Ouch!

Once the mud dries we will sand and then thoroughly remove all the dust so that we can begin tiling tomorrow. We will start with the floors first and then do the walls. Next week, we will be sharing a design board of some decor ideas and a fun little printable we have been putting together for wall art. Until next time 🙂

IMG_6453

IMG_6471

IMG_6469

Would you like to see our progress as it unfolds? You can also follow along on Instagram @thecozyhomechronicles for behind-the-scene videos!

If you liked this post please follow us and share!

Instagram


One Room Challenge: Week 3|Laying the Foundation for Tile

We are hitting week 3 of The One Room Challengeâ„¢ and boy has it been rough! We just finally finished the demolition this past weekend and up until an hour ago our bathroom was completely gutted. Right now we are seriously questioning if we can finish on time and that’s been a bit disheartening but we are pumped to make it happen. It’s called a challenge for a reason, right?! In this post we will be sharing why our progress has been slow as well as some mistakes that we made so that you can avoid them.

ORC

IMG_6067

Progress:
As you know from last week’s update, we had some hiccups with the walls because the tile wasn’t chipping away easily so we made the decision to take everything out all the way down to the studs. If you follow along on our Instagram stories, you might have seen how we completely demolished the walls and the floor in the bathroom. We also took out that hideous 300-pound blue tub (with help of course…that is why you have brother-in-laws!). With the walls and floors gone, we layed down the moisture barrier and plywood so that we can install the cement boards and tile. We have our plumber guy coming first thing tomorrow morning to replace some corroded pipes and get the bathtub and shower head/faucets all set up. Replacing plumbing wasn’t in our budget but now that we’ve gotten this far it doesn’t make sense to build something new on a faulty foundation. And those pipes were clearly nearing the end. Once the plumbing is all set, we can begin tiling!

IMG_5931

IMG_5960

Issues & Concerns:
The reason that our demolition took two weeks (besides that we are doing this in the evenings with two kids) is that the removal of the tile proved to be much more labor intensive and involved than we had anticipated. This was an issue we had little control over. There is one blunder that we made, however, that cost us unnecessary delays. The bathtub. You see, there’s not much you can do without your bathub in place. During the entire brainstorming and design stage of this project, we focused entirely on the tile, vanity, and lighting and we completely neglected the bathtub! We just assumed that we could walk into a local Home Depot and leave with a reasonably-priced, 5-star tub. Yeah, no. Once we started looking into reviews and the different types (cast-iron vs. steel) we became so overwhelmed. Many of the good ones were not available in-store and would have cost us another 1-2 weeks of time if we ordered online. In the end we settled on a tub that had decent reviews and was available in-store. The awesome thing about it is that it is 2 inches deeper than standard bathtubs. It is now sitting in the bathroom so that the plumber can set it up and we can finally begin putting this room back together again. The lesson in all of this? If you’re ever considering doing a bathroom renovation on a tight schedule then have a bathtub selected and a plumber arranged to come before you start.

IMG_1590

IMG_6156

IMG_1597

Would you like to see our progress as it unfolds? You can also follow along on Instagram @thecozyhomechronicles for behind-the-scene videos!

If you liked this post please follow us and share!

Instagram


One Room Challenge: Week 2|Bathroom Renovation Demolition

Good evening friends! Today is exactly one week since we started our bathroom renovation project in conjunction with The One Room Challengeâ„¢ and so far we are still in the demolition stage. In this post we will be sharing our progress and where we stand currently. To be honest, I thought we would be done with the demolition by now but we all got sick and needed to take it easy. I didn’t want to be a hero and push myself past my limit so I took off the last two days. Slow and steady wins the race.

ORCProgress:
If you follow along on our Instagram stories, you might have seen that we already removed the toilet and the vanity over the weekend. The last major piece we need to take out is our bright blue 1950’s tub. We managed to remove the majority of wall tile from the existing cement boards only to realize that the mortar isn’t coming off as we had imagined. Considering the age of the bathroom, I’m not all too surprised. The good news is that we are a little more settled on the tile we will be using. After a recent trip to Home Depot, we really fell in love with this Carrara Matte tile for our floors. With white subway tile for the walls, it’s going to look great!

IMG_5529

IMG_5554

Issues/Concerns:
Since I will not be sticking to the original plan of leaving the cement boards, I had to purchase a new blade for the angle grinder so we can cut through the cement boards and take them out piece by piece. Removing everything all the way to the studs is both a good thing and a bad thing. The good is that we will redo the bathroom with all new construction materials, we will be able to do a clean, solid job from beginning to end. The bad is that we will have to spend more $$$ on purchasing drywall and new cement backer boards. Considering that this bathroom is a small space, the additional expenses shouldn’t exceed $250 (and this is considering that I will also have to remove and replace the subfloor with new plywood & moisture barrier). We just really wanted to challenge ourselves to do this renovation on an extreme (but realistic) budget so we could inspire others who might not otherwise consider renovating because of the cost.

All this fun stuff with the walls and floor removal, which I had hoped I wouldn’t have to deal with, will add between 1-2 weeks to the job. As is the case with any renovation project, you have to be prepared for stumbling blocks and plan accordingly. Despite our setbacks, I think we will still make it out in 6 weeks. We sometimes get discouraged thinking it will take that long, so we have to keep reminding ourselves that we have day jobs and two little ones and that’s why we can’t just finish it as quickly as we would like. Until next week 🙂

IMG_2598

IMG_3028

IMG_5470

IMG_5467

You can also follow along on Instagram @thecozyhomechronicles for the latest behind-the-scenes and videos of our progress.

If you liked this post please follow us and share!

Instagram


One Room Challenge: Week 1|Bathroom Renovation Preparations

We are super excited to share that this year we will be participating in our first ever One Room Challenge! Hosted by Lisa of Calling It Home,  The One Room Challengeâ„¢, is a widely anticipated biannual event every April and October in which twenty design bloggers take the challenge of transforming a space in just six weeks. Every Wednesday, the designers document their process while sharing their sources and professional advice. On Thursdays, guest bloggers, like us, can play along and support other guest bloggers that are also tackling a room renovation. We have been wanting to participate for a while now but last year we started our kitchen renovation much later than anticipated and so we weren’t able to play along.  We really hope we can get this bathroom done in the six week period but with two kids under the age of two and graduate school on our plates that is a tall order. We are diving right in regardless.

ORCLast week, in anticipation of this event, we shared two design boards and some bathrooms for inspiration. You can check them out here. We spent the last two days completely emptying out our bathroom and relocating to the bathroom downstairs. With me gearing up to start dissertation fieldwork this summer and my husband starting his MBA soon, we decided this project could not wait any longer because life will just get busier. Besides getting it done in under six weeks, we also need to stick to a tight budget. Challenge accepted.

Alright! Here’s what our bathroom looks like now:

IMG_1136

IMG_1138

IMG_1141

IMG_1144

IMG_1147

Ugh.  So much YELLOW. As a photographer, the urge to edit these images was intense but I wanted to capture the space exactly as is so we can all enjoy the final transformation. The wall tiles are still in great condition but they make the space so dark. We really want a bright clean look that white subway tile will definitely give.

4548dc7e-0269-4621-829d-718bb55c38b1_1000

We started some of the demolition today by taking out the toilet, sink, and vanity. The tub will be next to go followed by the tile and then it’s all rebuilding from there. We still haven’t fully settled on the floor tile, accent wall tile, and vanity but we will be deciding in the next day or so. The feedback we have received from readers, family, and friends has overwhelmingly been in favor of Design Board #2 which is interesting because we are leaning toward white marble floors and black fixtures. I guess you will just have to tune in next week to see where we are in the process. You can also follow along on Instagram @thecozyhomechronicles for the latest behind-the-scenes and videos of our progress. Until next week 🙂

If you liked this post please follow us and share!

Instagram


Healthy Homemade Butterfingers

img_9645

My brother recently brought over a PB&J  Chobani Flip for me because he’s experimenting with “healthier” snacking and wanted me to try it out. Ignoring the fact that it had 18 grams of sugar, the crunchy peanut topping was quite good and reminded me instantly of the popular candy bar Butterfinger; something I haven’t had in a long time. Although we both love all things peanut butter and chocolate, we have chosen to stay away from processed foods especially made by Nestle. Of course I couldn’t leave my sweet tooth hanging so I sought to create a healthier, homemade version of the candy bar. And that is exactly what I did… in the form of a granola bark.

img_9198-1

Plain granola bark without the peanuts or chocolate drizzle on top.  

img_9633

Granola and roasted peanut cluster bark

I did look up how to make homemade Butterfinger but all the recipes I found either required a candy thermometer or even unhealthier store-bought candy corn. Ain’t nobody got time for that! All I did for this recipe was create a sweet, nutty, and crunchy granola as a substitute for the crispy textured inside of the candy bar and made it into a bark for easy assembly. At first, I tried making a batch of granola with regular peanut butter but I felt that I could not control the flavor as I desired so I used PB2 instead and experimented with different combinations of maple syrup, vanilla extract, and salt until I felt I achieved that distinctive Butterfinger taste and texture. You’ll be pleasantly surprised at how simple this recipe is and the best part is that it has real wholesome ingredients and none of the preservatives! Just know that this bark is addicting but it does store well in the fridge so try to save some for your friends and family. They’ll be happy you did 🙂

Healthy Homemade Butterfingers

  • Difficulty: Easy
  • Print

Ingredients

Granola
1 1/2  cups rolled oats
1/2 cup coarse crushed salt roasted peanuts
6 tablespoons PB2 powder
3-4 tablespoons water
1/2 teaspoon salt
1 teaspoon vanilla extract
1/4 cup pure maple syrup
2 tablespoons vegetable oil

Butterfinger bark
1/2 cup of quality milk chocolate, melted
1 1/2 cups of crunchy peanut granola
1/4 cup salt roasted peanuts (optional)

Directions
1. In a mixing bowl, combine PB2 and water. Stir in the salt, vanilla extract, maple syrup, and oil until smooth.
2. Add in rolled oats and crushed peanuts and combine until evenly coated.
3. Spread mixture on a thin baking sheet and bake at 250F for 30 minutes stirring every 5 minutes until evenly golden brown and crunchy.
4. In a double boiler or in the microwave, melt your milk chocolate and spread half of it thinly and evenly on a silicone baking sheet or parchment paper.
5. Immediately top with a generous amount of crunchy peanut butter granola and peanuts  (optional) then drizzle with remaining chocolate. Refrigerate until firm before peeling off the silicone or parchment paper and breaking the bark into pieces. If you have extra granola you can store in an airtight container for snacking at a later time 😉

img_9154

img_9161

img_9165

img_9648

Have you ever tried to make a copycat candy recipe? Do share in the comments below. And as always…

If you liked this post please follow us and share!

Instagram


Inspirational Wallpaper: December

letitsnow

Ahhh December…one of the busiest times of the year. Don’t worry, we will make this brief. We just wanted to wish all our readers a very blessed holiday season (no matter what you celebrate) and to those of you that are students, we wish you the very best of luck on your final exams (we know how you feel). We will have a few more posts to wrap up 2016 but we are looking forward to sharing another wonderful year with you (God willing). And believe it or not, we are actually hoping for some snow. Cheers!

For download and Printing: letitsnow

If you liked this post please follow us and share!

Instagram


DIY Rustic Wooden Shelving

img_7585

This post is a detailed DIY tutorial for building reasonably-priced, open shelving using a combination of components from IKEA and Home Depot like the one we had in our updated kitchen. Initially, we were going to purchase the IKEA EKBY shelf system but they only had black, white and aluminum options for the actual shelf. Since we wanted to have rustic, woody elements to break up the modern features of our kitchen, we opted to use the EKBY brackets (which you can buy separately) with wood that fit our style and design. If you are wondering why I chose these lumber pieces specifically it is also because they are the perfect width and fit for the EKBY brackets.

The cost of IKEA EKBY shelving varies based on sizing with the standard 31″ shelf costing $19.99 and the larger 46″ shelf costing $29.99. Because we needed a total of 6 standard shelves, that would have put us at around $200 for both the brackets and the shelves. Instead, I was able to purchase eight, 10ft pressure-treated lumbers and cut them to my specifications for a total of $60. With the 6 bracket sets that put us at under $130 for all of our shelves so we saved over $60 in the process. Not only are these versions cheaper to make but you can build and install these shelves in 5 easy steps and without sacrificing on wood preference. Let’s get started, shall we?

Supplies
IKEA Shelf – EKBY BJÄRNUM (two available sizes, 7.5″ at $7 and 11″ at $10)
Home Depot WeatherShield – Pressure Treated Lumber (5/4 x 6 – 10ft at $7.47)
Drywall Anchors & Screws (10 1/2″ – 70 Pack $11.98)

Tools
Saw
Drill
Screw Driver
Small Level
Drywall Anchors
Measure Tape

Directions

1. Measure your space to determine the desired length of your shelves taking into account that the brackets will add about 1/2 inch total to the length.

2. Cut your lumber accordingly and fit them into the brackets to complete the shelf unit. To build one shelf, you will need two pieces of lumber for each pair of brackets.

3. Have someone hold the completed shelf up to the wall while you mark the points where you will install the shelves corresponding to the holes in the EKBY brackets.
CAUTION: Before you mark the holes or drill through them, lay a level on the shelf to make sure it is straight.

4. Proceed to drill through the markings and place drywall anchors into these holes.

5. Have a helper hold up the shelf  again while you fasten it to the wall using screws and a screw driver or drill.

img_1116

img_0928

img_1117

img_0930

img_0931

img_1128

If you liked this post please follow us and share!

Instagram