National DIY Day Celebration

IMG_1096 NDD

Happy Monday Friends 🙂 Yesterday, April 2nd, we celebrated National DIY Day by gathering with a group of awesome volunteers to build raised garden beds for a local community garden. If you are unfamiliar with National DIY Day, it is a day founded by Craft Box Girls two years ago as a way to bring people together and celebrate creativity. Last year, people all over the world were celebrating April 2nd, some as far as Australia!

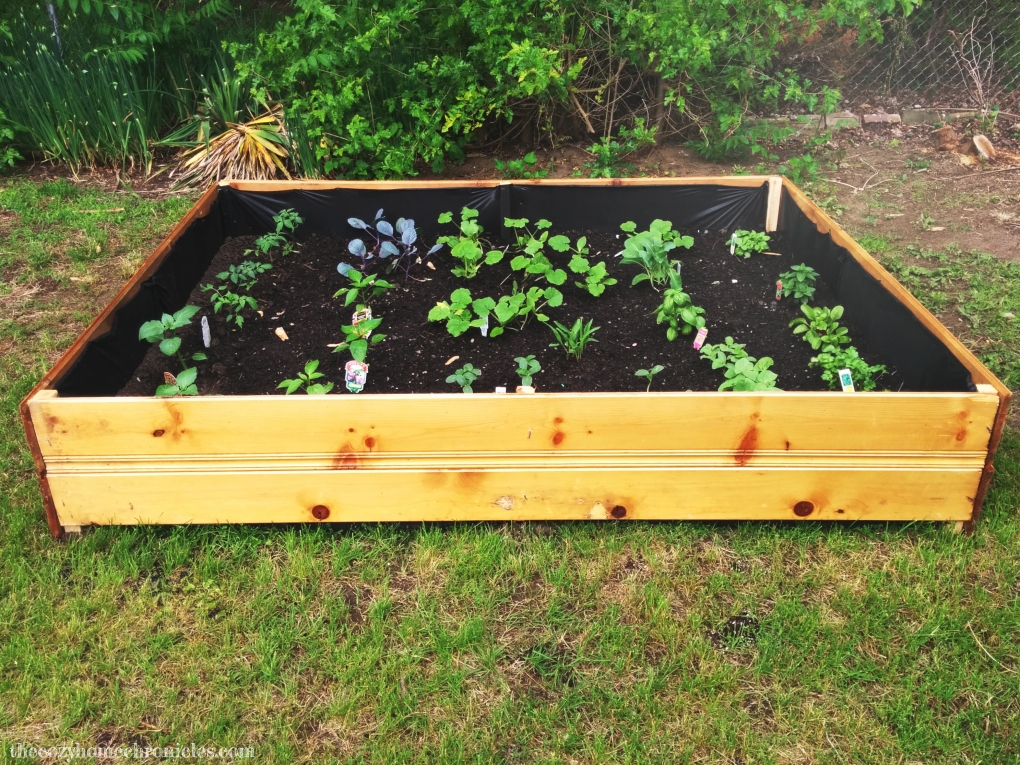
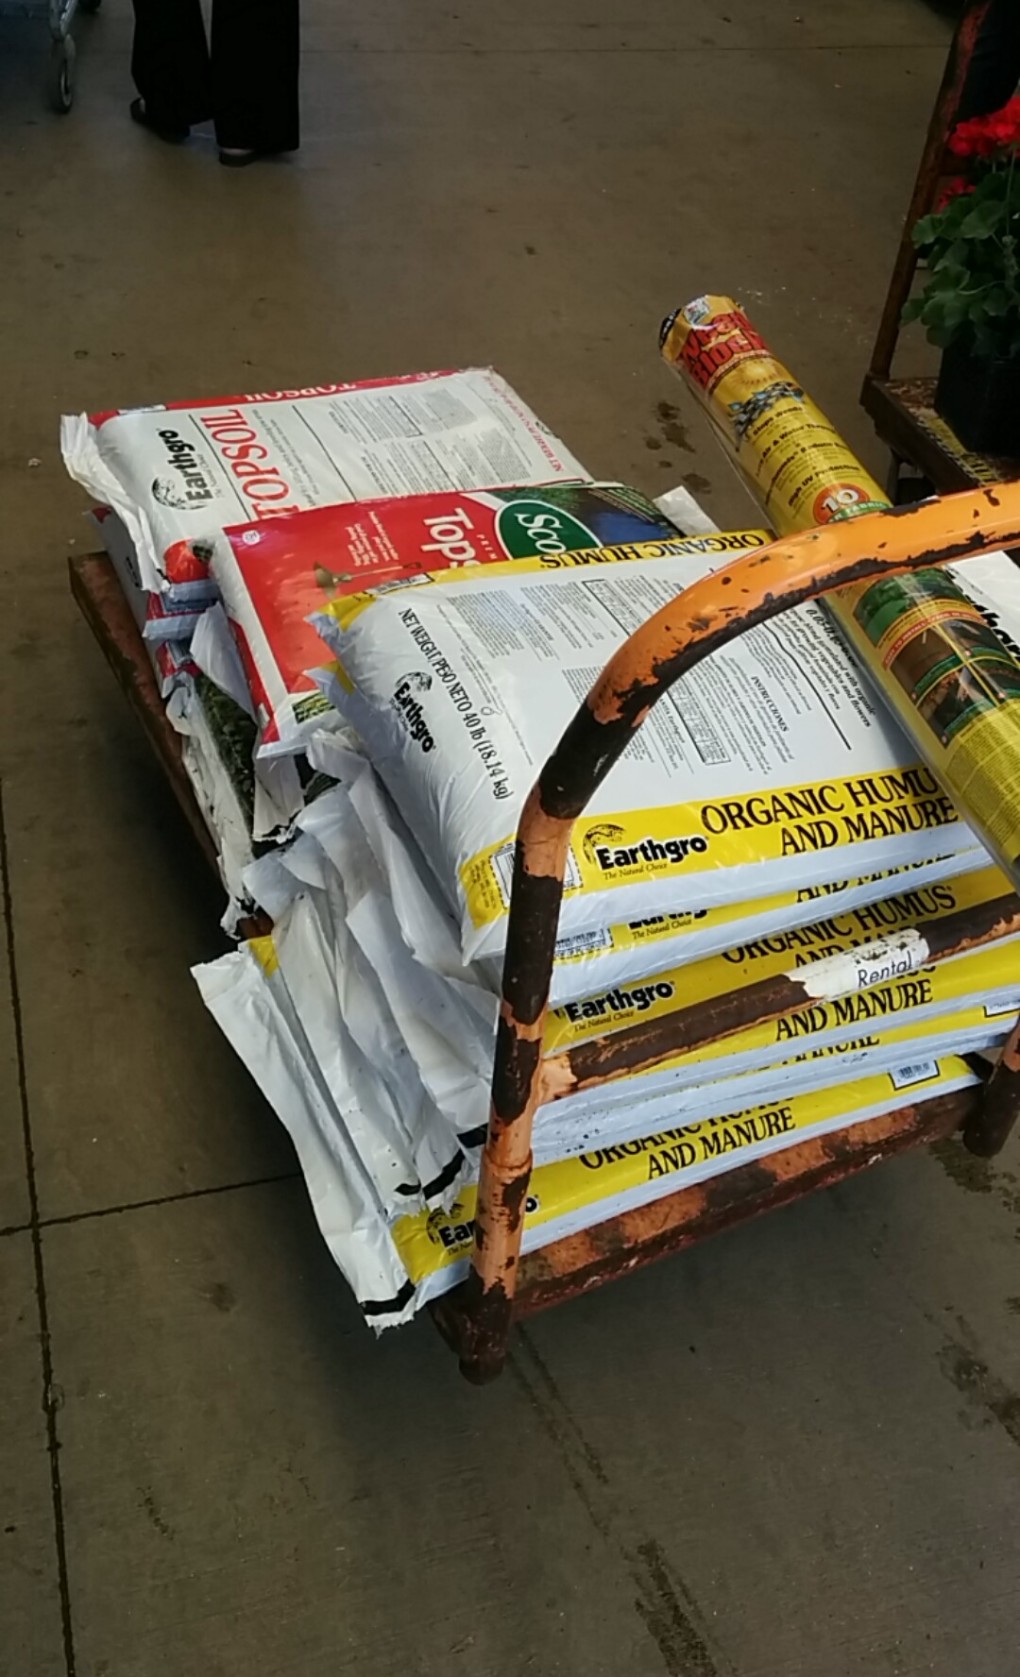
As DIY Day Ambassadors we wanted to use our DIY skills for a good cause and so we teamed up with Zaman International, a non-profit humanitarian organization committed to addressing the basic needs and empowerment of marginalized women and children locally and internationally, to host the event. Since their foundation, they have provided essential needs to more than 180,000 clients in Southeast Michigan. In April 2016, Zaman moved into a 40,500 square foot Hope for Humanity Center in Inkster, Michigan. Aside from launching a Food Pantry, Zaman was recently accepted into the Feeding Inkster Community Garden Program which provides seeds, plant starters, garden tools (as available), and technical assistance for the creation and harvesting of a community garden. They are expected to ensure low-income community residents receive harvested, fresh produce in a timely manner. With not much viable land near their warehouse, we stepped in to build and decorate raised beds that will allow them to grow their fruits, vegetables, and herbs. We will be returning early next month to fill the beds up with 2 inches of gravel, soil, and plants but until then we just wanted to share a little bit about our first successful event. There were a few minor hiccups and delays but overall we are very pleased with the end result.

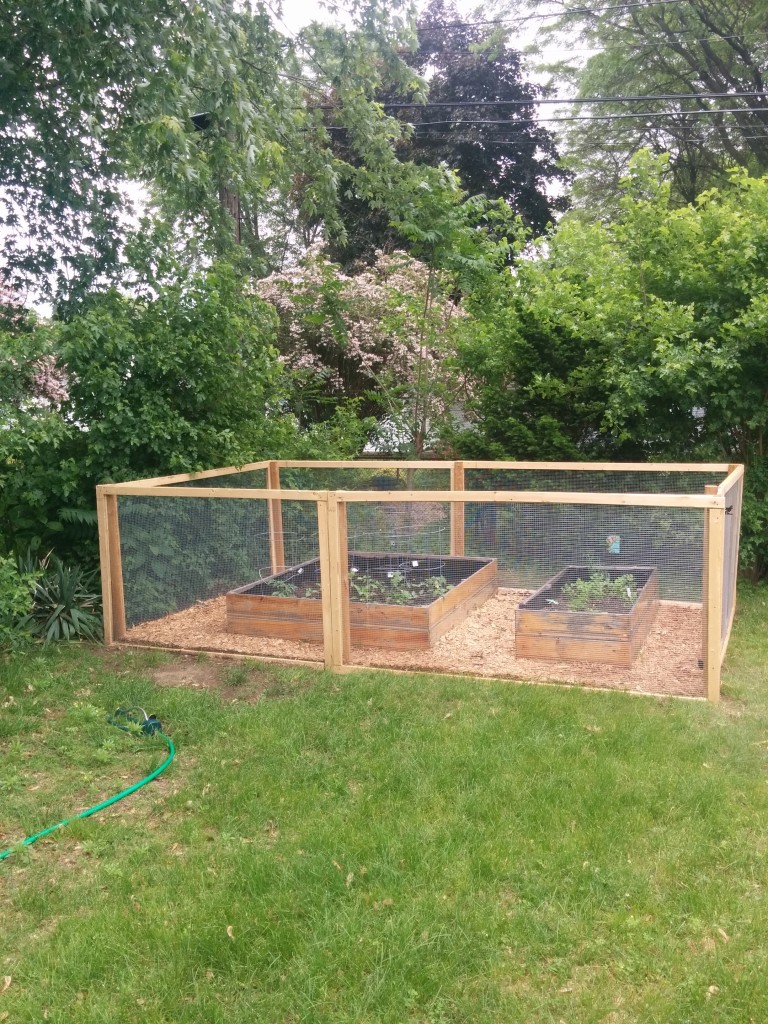
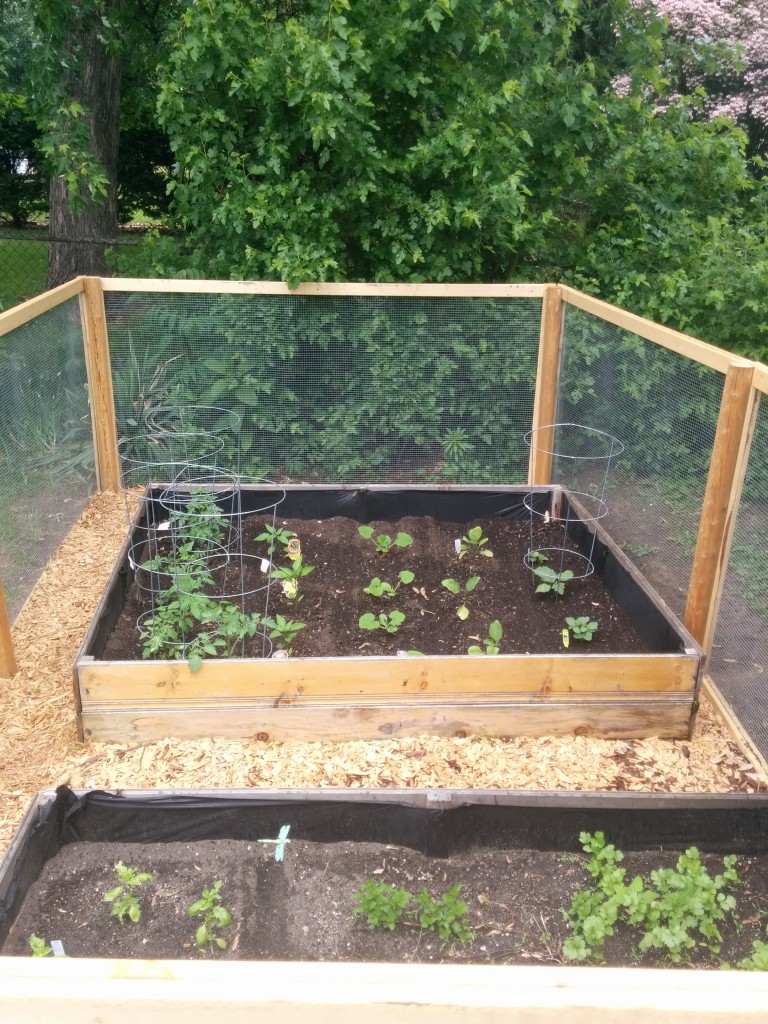
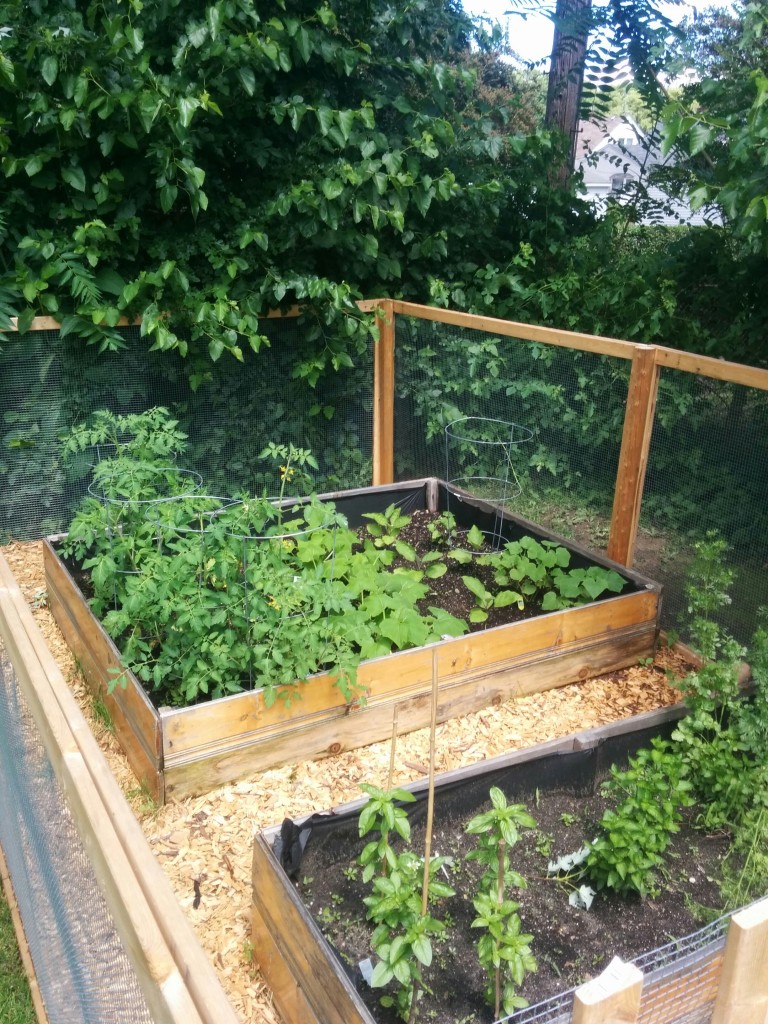
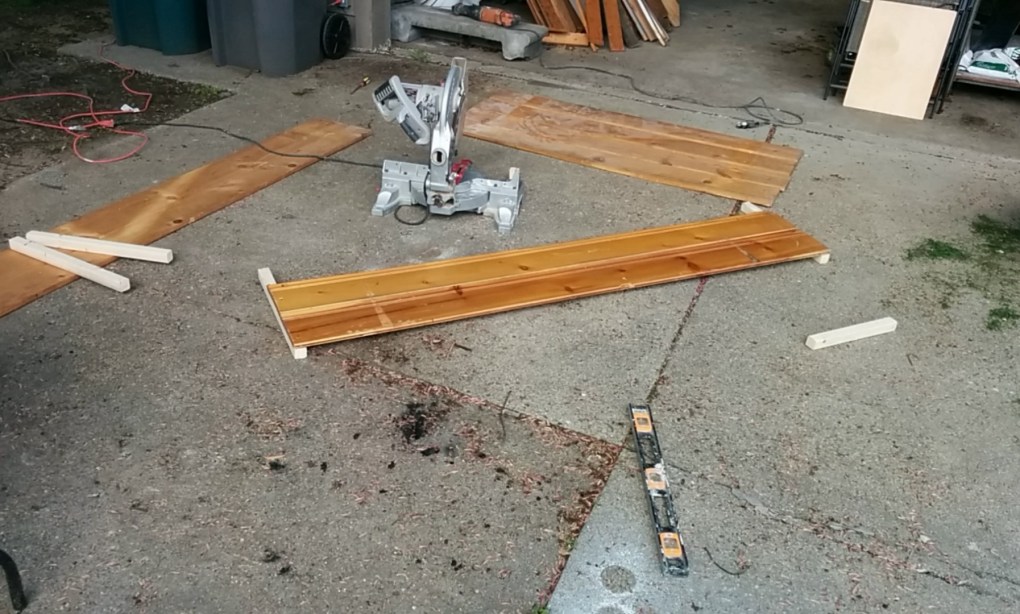
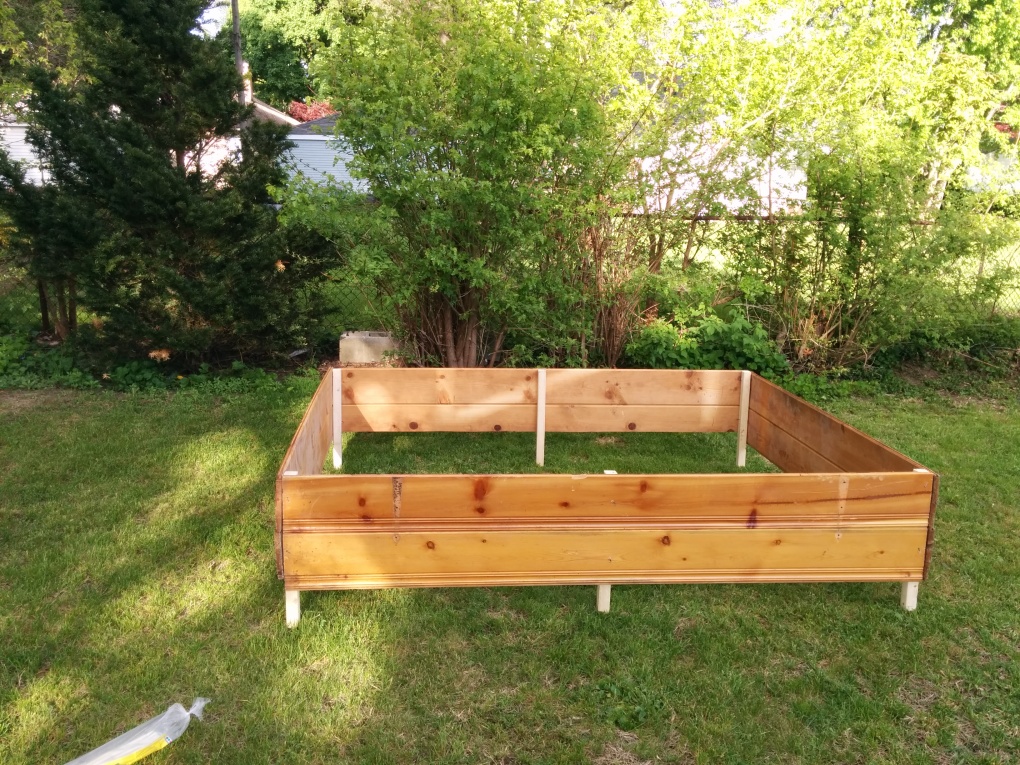
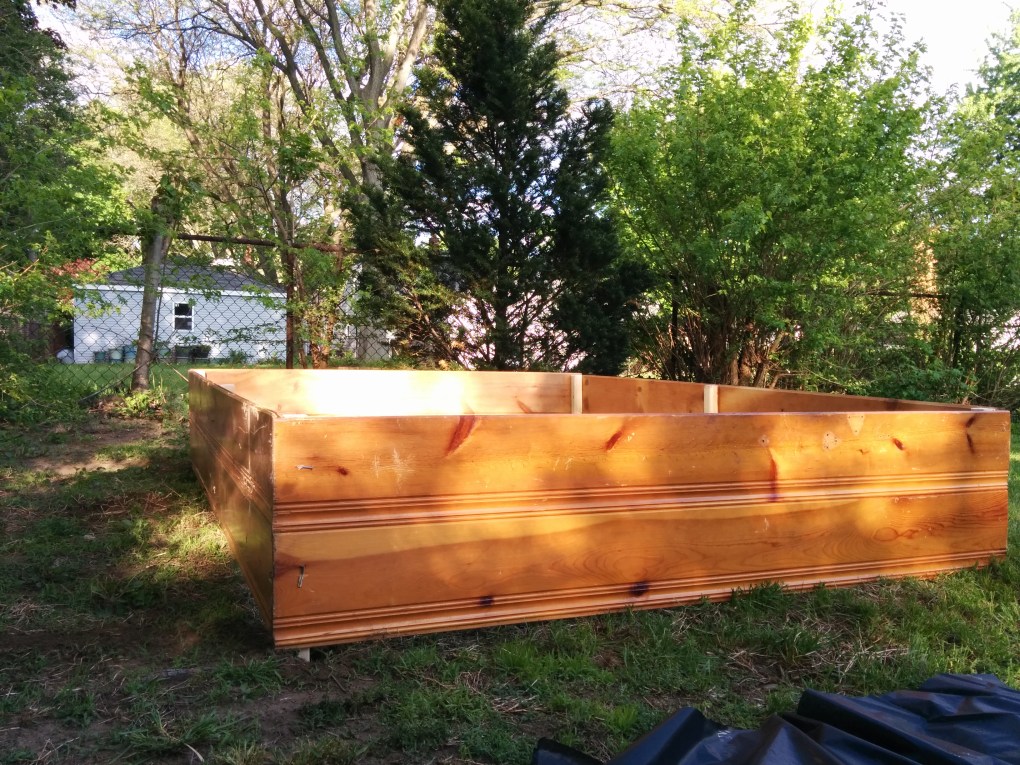
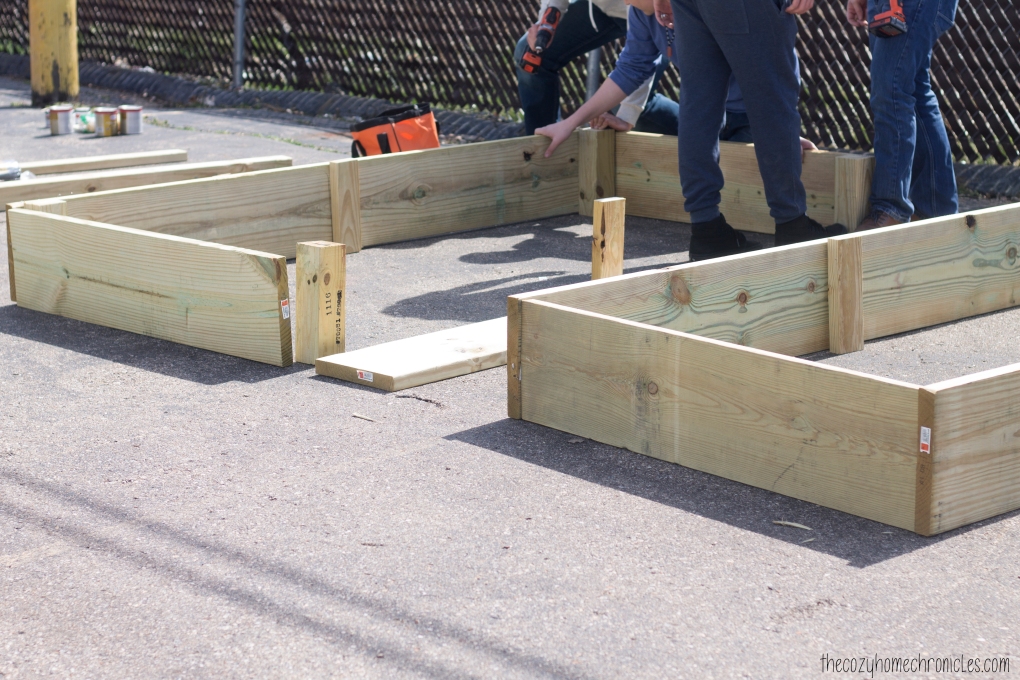
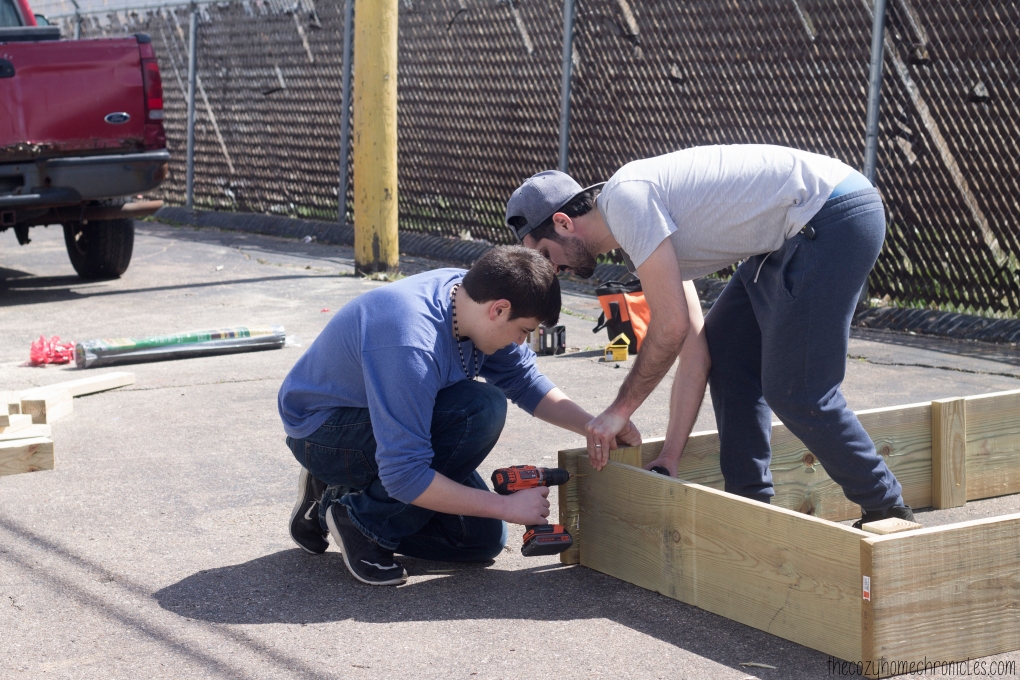
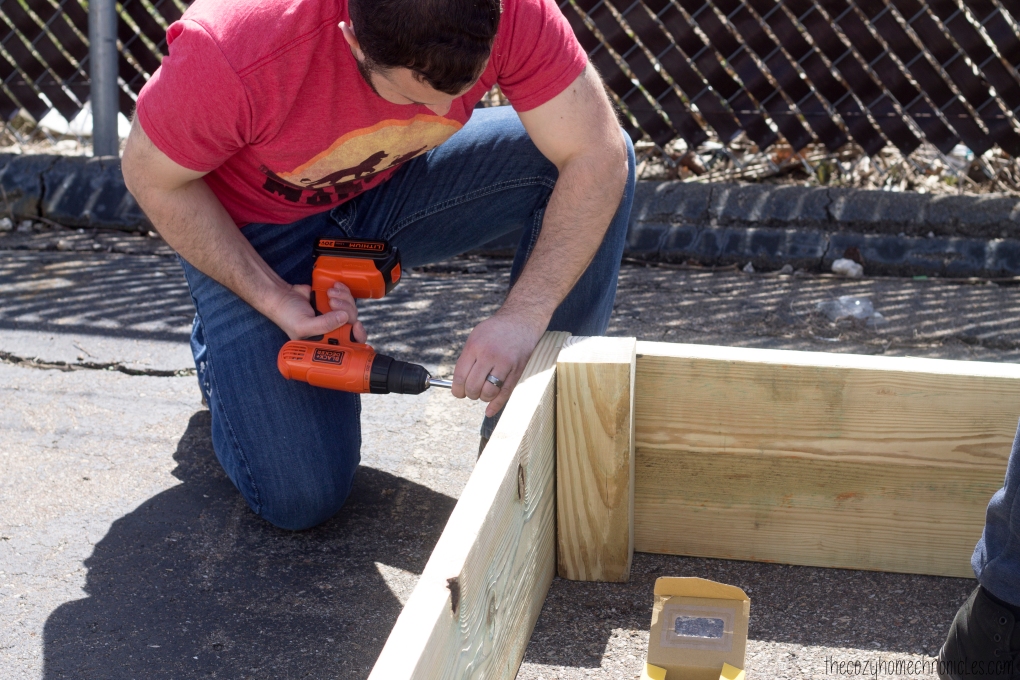
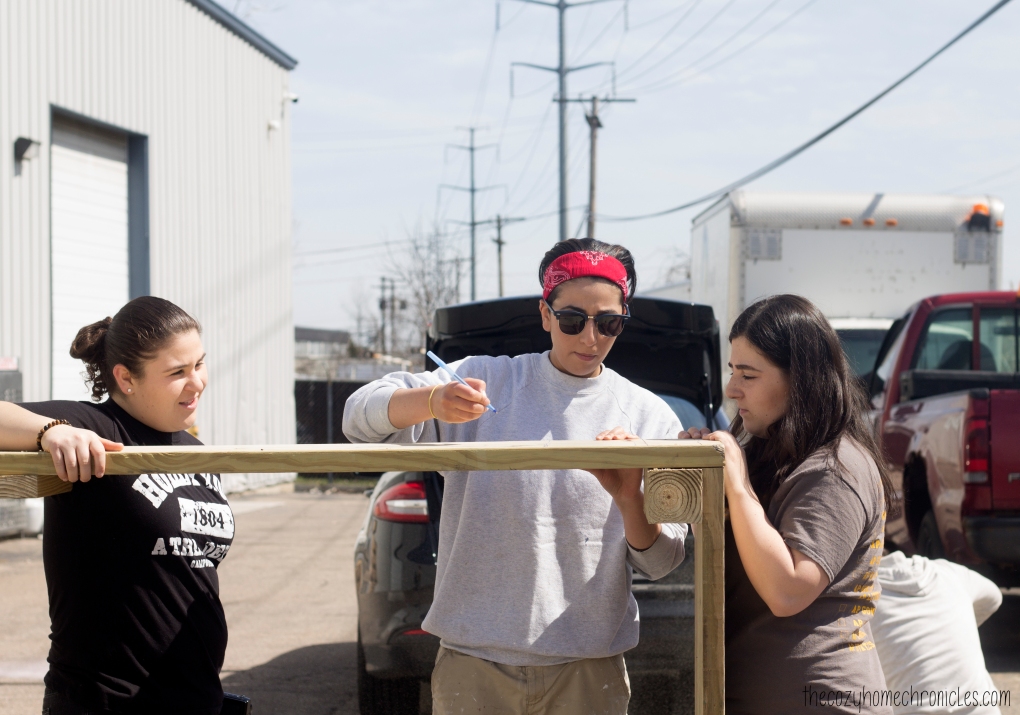
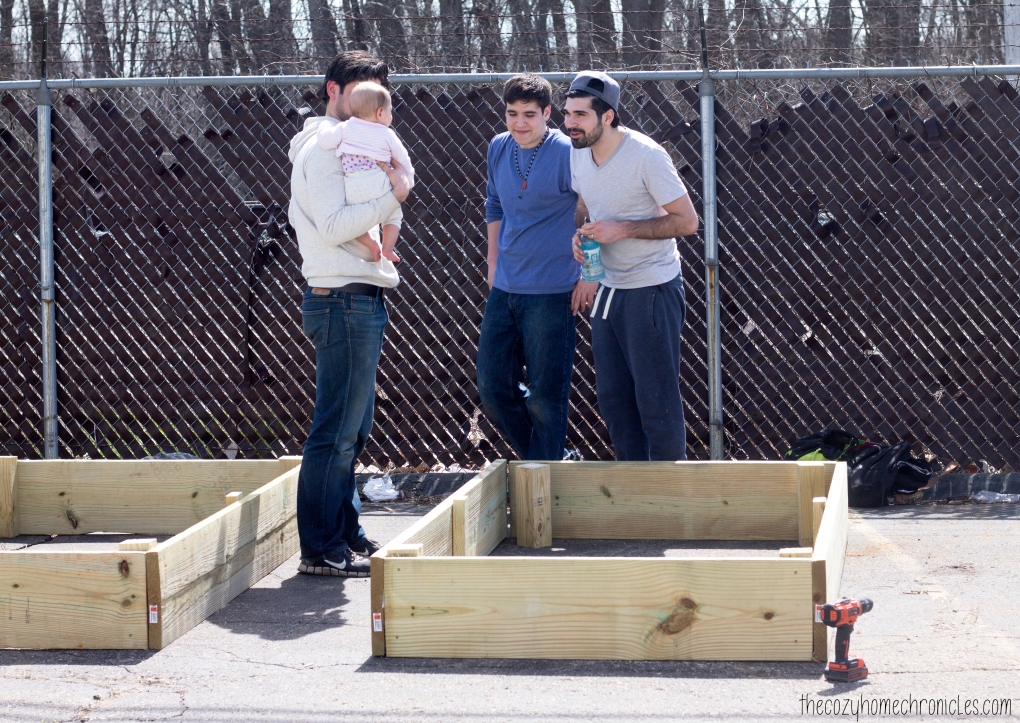
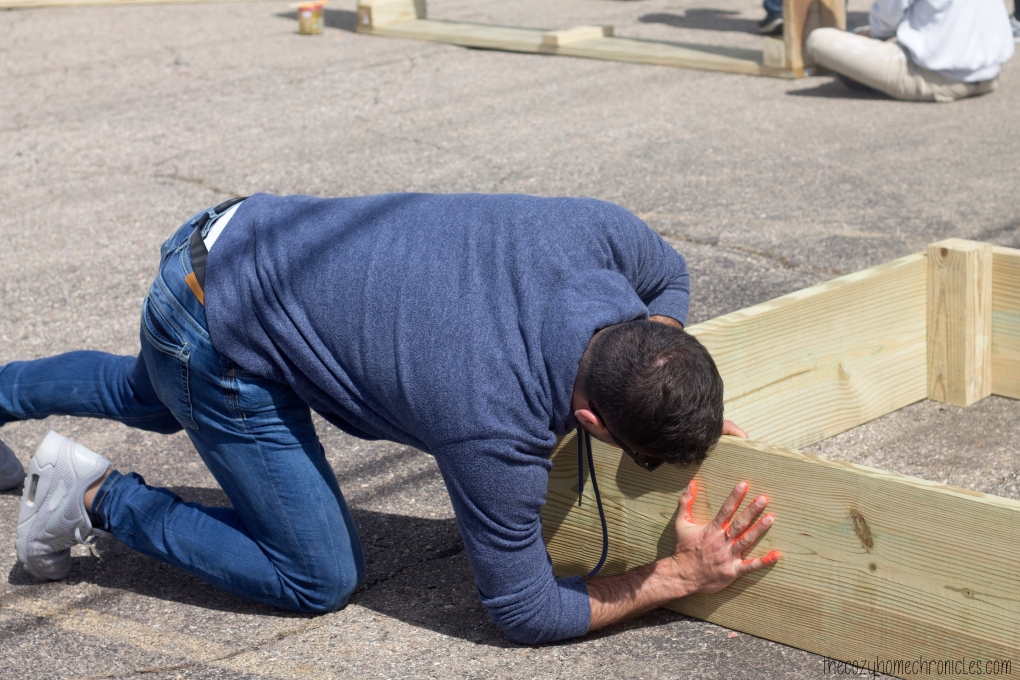
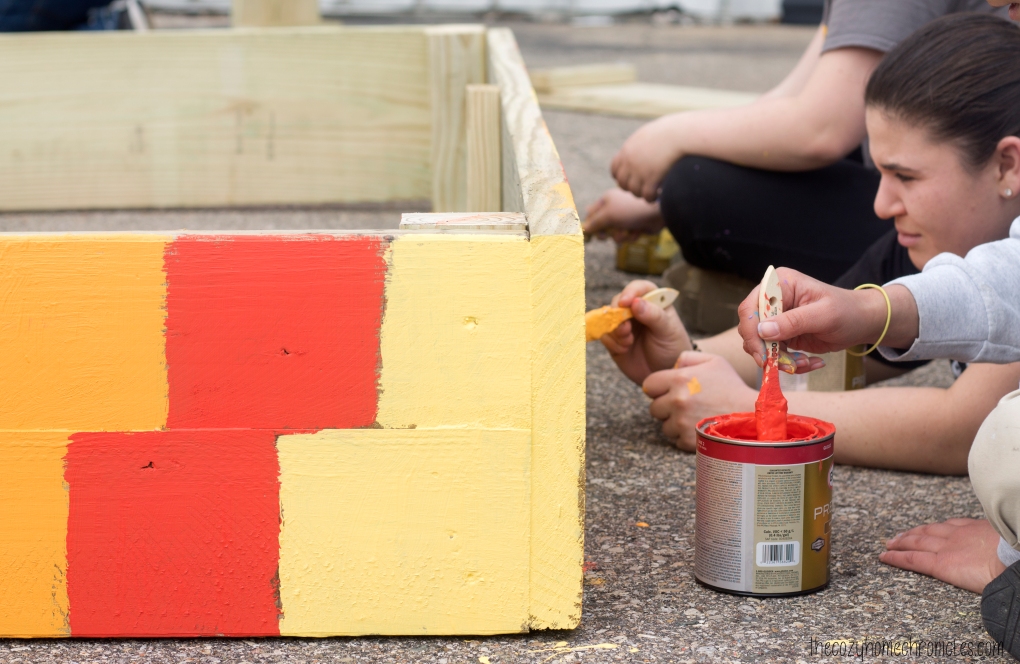
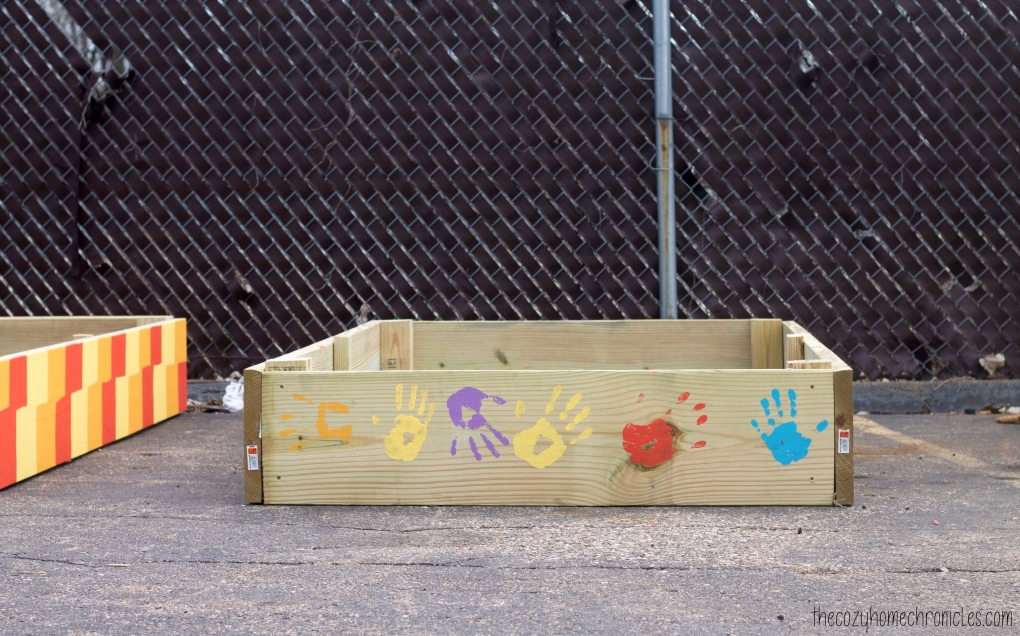
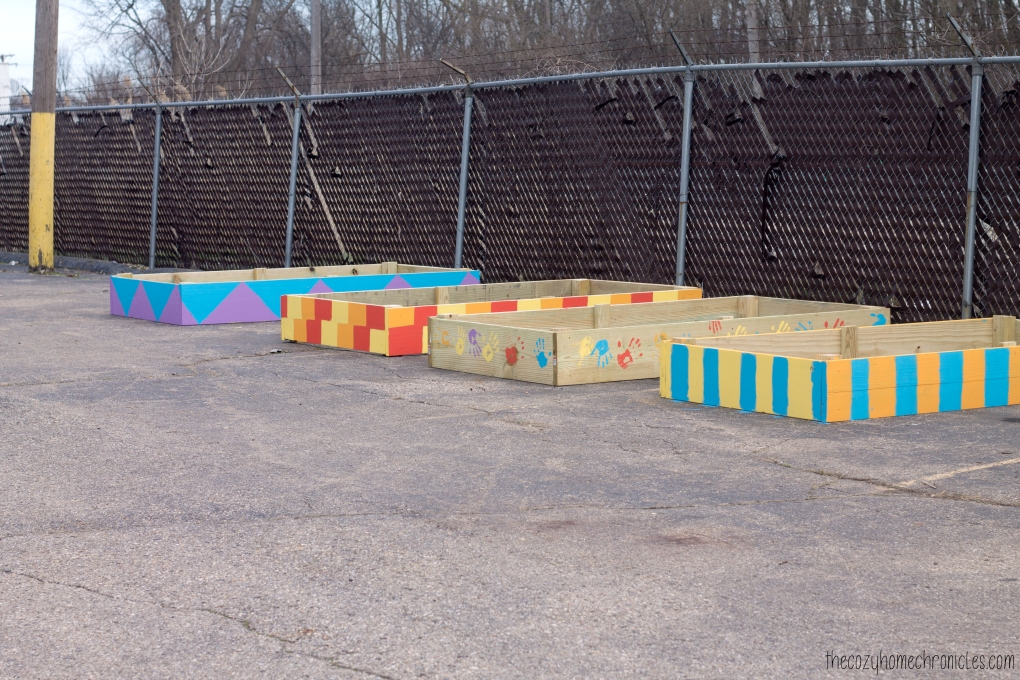
With a team of 10 volunteers were able to put together four 4ft x 8ft beds in just a few short hours. Two local Home Depots were generous enough to provide $25 vouchers to help with the cost of supplies like the screws, paint, and weed-blocker while the Craftbox Girls sponsored the cost of the wood to build the beds. A friend with a background in interior design and art, came up with a few cool designs that were easy to paint and added a fun splash of color to the garden beds. Scroll on down to see pictures from the event and be sure to check back in with us next month when we return to complete the project. If you’re feeling inspired and want to build your own raised bed for your dream summer garden, head on over to our very own post that covers just that. If there’s anything we hope people take away from National DIY Day, it’s this: The ability to create is part of what makes us human. We all have it in us and anyone can unlock that potential and  create anything, if only they set their mind to do it.

IMG_1018

IMG_1030

IMG_1029

IMG_1022

IMG_1044

IMG_1055

IMG_1089

IMG_1096

IMG_1095

If you liked this post please follow us and share!

Instagram


Build your Own Garden Fence

If you read our previous blog post on how to build a raised garden bed on a budget, then you might be wondering how we have kept our harvest safe from unwanted visitors. Initially we went with a cheap fence made of galvanized poultry netting but after many missing tomatoes and half-bitten squash we decided that the next year we would spend a bit more to have a quality fence. We wanted a roomy enclosed space with easy access for us to plant but sturdy and tall enough to keep the demon bunnies out. I soon sketched out a blueprint for my imagined firewall and got to work making it a reality. I will warn you that it is a bit on the pricier side but it’s a sound fence that’s practical and aesthetically pleasing. Shall we get to work?


IMG_20140720_201426

Our sorry excuse of a fence

Supplies for an 12ft x 8ft garden fence
8 2.5 x 2.5 x 8ft  ($27.79)
24 2 x 4 x 8ft ($80.88)
1 1/2 x 4ft x 25ft Hardware Cloth ($38.98)
1 box Wood Screws ($6.26)
1 Fence Door Hardware ($15.98)

Tools
Staple Gun
Post Hole Digger
Miter Saw or Hand Saw
Power Drill

Directions

  1. Design a template for your fence because this saves you on both time and money. The desired size of the enclosure will dictate how much wood you will need and in turn how much you will spend. I can’t stress enough how important the planning phase is for any successful project.
  2. Cut the 2.5 x 2.5 x 8ft timber to 7 ft. 5ft of the timber is for the fence sections since the hardware cloth is only 4ft tall and the remaining 2ft is going into the holes you will dig to secure the fence.
  3. Using the post digger, dig seven holes (3 on each side and an extra one for the door) about 2 ft deep. I did not use cement to secure the timber posts because I find it unnecessary but feel free to use cement if you like!
  4. Once you have dug your post holes, insert the timber poles leaving 5ft above the ground. Make sure the poles are level by laying a 2×4 or a longer piece of wood across the posts while placing a level on top of it.
  5. The next step is to assemble the sides of the fence by using the 24 pieces of 2x4in x 8ft pieces to make rectangular frames:
    • Cut a total of four 2 x 4 x 8ft to a height of 5 ft (current they are 8 ft). These will be the vertical sides of your frame. The hardware cloth is 4 ft and that is your height unless you want the hardware cloth to be shorter.
    • Cut a total of four 2 x 4 x 8ft to your desired width. I cut mine to 6 ft because I needed the width of the fence horizontally to be 12ft.
    • Now that you have four 4ft and four 6ft pieces lay them out according to the design in Figure 1.  You must follow that design if you want to keep the fence sturdily joined together. This also keeps the ends from bending.
    • Lay the hardware cloth flat on top of your bottom piece of your boards (see Figure 2 ) and fasten using your staple gun.
    • Proceed by laying the top pieces of your board over the hardware cloth/bottom frame and join the boards together using wood screws (see Figure 3).
    • Flip the completed fence frame gently and screw the other side as well (see Figure 4).
  6. Repeat Step 5 until you have enough sections to enclose your garden. I needed to repeat the  step six times. If you are unsure about your calculations try attaching your fence side to the post first and proceed by building then attaching rather than building all the sides and attaching them at the end.
  7. Now you can attach the completed fence sides to your 5ft timbers posts using a drill and wood screws.
  8. Create a basic door using the leftover 2 x 4 x 8ft by cutting them until you have two 2ft and four 5ft pieces. Align the four 5ft pieces on the ground vertically and make sure the space between them is even. Place the two 2ft pieces one closer to the top and one closer to the the bottom, using wood screws to secure them. Last but not least cut a piece of hardware cloth to the size of your door and install it on the backside of the door. I used basic fence door hardware for the hinges and lock. Installation manual is included in the packing and is very straightforward.
  9. For an overall cleaner look, use mulch, wood chips or small stones between the garden bed(s) and fence.
  10. Enjoy the fruits of your hard labor without bunny or deer bite marks.
    newfence

    Figure 1 – Bottom, Top & Hardware Cloth

    fencedesign2

    Figure 2 (Spacing for visualization)

    fencedesign3

    Figure 3 (w/o spacing)

    fencedesign4

    Figure 4 (w/o spacing)

IMG_20150529_125008IMG_20150529_125016IMG_20150529_125023IMG_20150623_132751

If you liked this post please follow us and share!

Instagram


Build Your Own Raised Garden Bed

Spring is finally in the air here in Michigan and we are getting closer and closer to planting season, one of our favorite times of the year. Gardening for us is just so fun and fulfilling because it connects us to the beauty of nurturing and growth. If this is the year you decided to try your hand at gardening then starting with a raised bed might be the way to go. A custom raised vegetable/fruit/herb garden is not only easy to make but it takes a lot of the hassle out of gardening in terms of weeding and messes. It also makes for a beautiful backyard feature and less back-bending and back-breaking work.

garden bed copy copy

You can go about this project a couple different ways but the instructions I have provided in this post are for store-bought wood from your local Home Depot or Lowe’s. For our garden beds, we upcyled wood panels that we had stored in our garage from our early basement renovation and we personally recommend this route if you have unused wood just lying around. There is something extra rewarding about repurposing items and reducing waste and what better time to do that than during the environmentally conscience activity of gardening. Of course you can always buy a raised garden bed but where’s the fun in that? Not to mention, a store-bought garden bed can run anywhere from $100-$250 depending on the size and material. If you buy the wood yourself, you can have a similar garden bed for half the price and if you go the upcycling route it will cost you nearly nothing.

Costco Garden Bed

Costco – $107.50 / one

Home Depot Garden Bed

Home Depot – $99.19 / one

Lowes Garden Bed

Lowe’s – $118.00 / one


Now that we have you convinced (hopefully) to build your own garden bed, here’s what you’ll need:

Supplies for an 8ft x 8ft garden bed
8 2in x 6in x 8ft ($60)
2 2in x 2in x 8ft ($7.50)
1 Weed Blocker ($9.97)
1 box Wood Screws ($6.58)
Patience ($0.00)
Green Thumb (Priceless)

Note: I did not include the amount and price of soil in the supply list because that will really depend on the size of your bed. If you are unsure, this soil calculator is super helpful!

Tools
Staple Gun
Post Hole Digger
Miter Saw or Hand Saw
Power Drill

Directions

  1. Design the layout of your raised garden bed based on the shape and dimensions you want. Our wood panels were 6 ft long so our garden bed ended up being 6ft x 6ft.
  2. If you chose a rectangular design and want to make cuts to the 2x6x8’s (or any other wood you are using), now would be the time to do so using a miter or hand saw. If you want a square 8ft x 8ft layout then just leave them as is. These pieces will be the side panels of your garden bed.
  3. Cut your 2x2x8s so that you end up with a total of six 2ft pieces (you’ll have some wood leftover). These will be the legs of your garden bed. You may notice that the garden legs are longer than the side panels and that is intended. The extra foot of leg is for planting the garden bed firmly in the ground.
  4. Next, you will attach the side panels of your garden bed to the legs.The first thing you want to do is lay out two 2x6x8 pieces horizontally and parallel to each other so that there are no gaps between them. At equal intervals, starting precisely from the corner, attach the garden bed legs (2x2x2) to the sides using your drill. You will need 6 screws to do this: 1 in each of the two panels for each of the three legs.
  5. Repeat step 4 using two more 2x6x8s and the remaining 3 legs.
  6. Now you can complete the garden bed by connecting the remaining panels perpendicular to the side panels with the legs to form your square or rectangle. Make sure that the legs are on the inside of the garden bed. Once you have put together all the boards, your garden bed should look like the final image in the 3D model below.
  7. Use the post hole digger and dig 6 holes for your legs, making sure you measure the distances accurately between the legs so you won’t have to struggle putting them into the ground.
  8. Now you can go ahead and place the garden bed legs into their corresponding holes.
  9. This is an optional step but one we found helped drastically reduce the weeds. Lay the weed blocker down at the bottom of the garden bed and use a staple gun to fasten it to the sides of the bed. Do the same thing across all sides of the garden bed making sure to cover the entire surface area.
  10. Fill your garden bed with the soil mixture of your choice and you are all set to plant whatever your heart desires 🙂

And for the visual learner…

garden bed 1
garden bed 2
garden bed 3
garden bed 4
garden bed 5
garden bed 6

Snapchat-20140523061353IMG_20140523_184812IMG_20140523_190343Snapchat-20140523012215garden bed copy copy

Now sit back and enjoy the harvest to come.

If you liked this post please follow us and share!

Instagram