One Room Challenge: Week 6|Bathroom Renovation Reveal

Yesterday marked week 6 of Calling It Home’s One Room Challenge™ and that means it’s reveal time! We are so excited to share the results with you and see what other awesome bloggers have done. Seriously, after you’re done with this post go check out some of the other transformations. You will not be disappointed!

ORCI wasn’t able to take pictures sooner because we were out of the house yesterday and we have guests staying with us but I finally got around to it this morning. We thought we would have a little more time to decorate but time is up! There are still a few things we will be finishing up this weekend including installing the glass shower door, putting in the toilet paper bar (which will be back in stock at IKEA on May 14th), and staining the new window sill moulding but the bathroom is fully functional and oh so awesome. We also realized that we had not been properly linking up our posts to the Calling It Home site and we were a little discouraged that we had done all this work for nothing. But this renovation isn’t for everyone else. It’s for us.  All the sweat and blood (literally) that went into this project was for our family’s comfort and so before we get to the reveal, we thought we would recap our six weeks of hard work.

IMG_1136

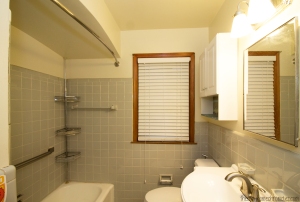
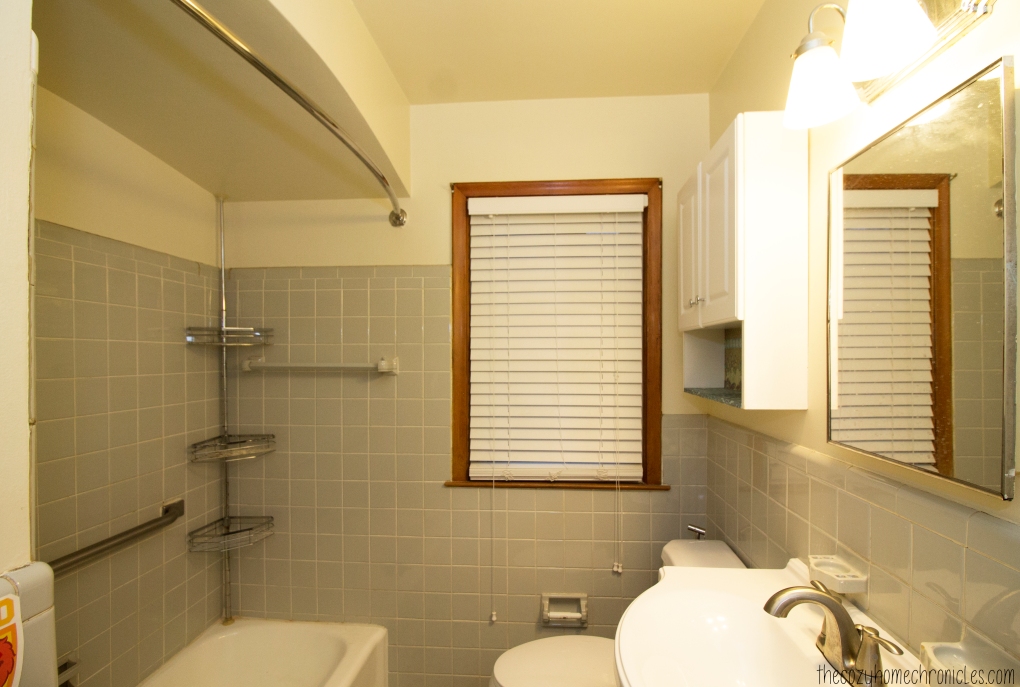
Week 1 | Bathroom Renovation Preparation

IMG_1590
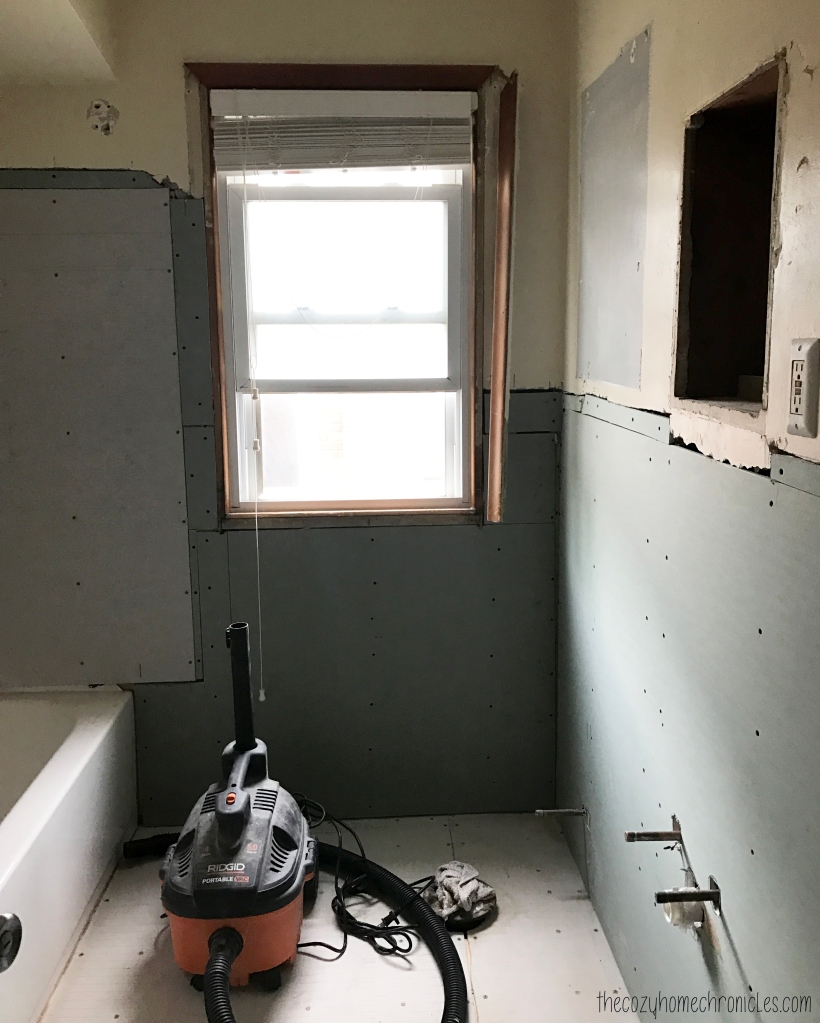
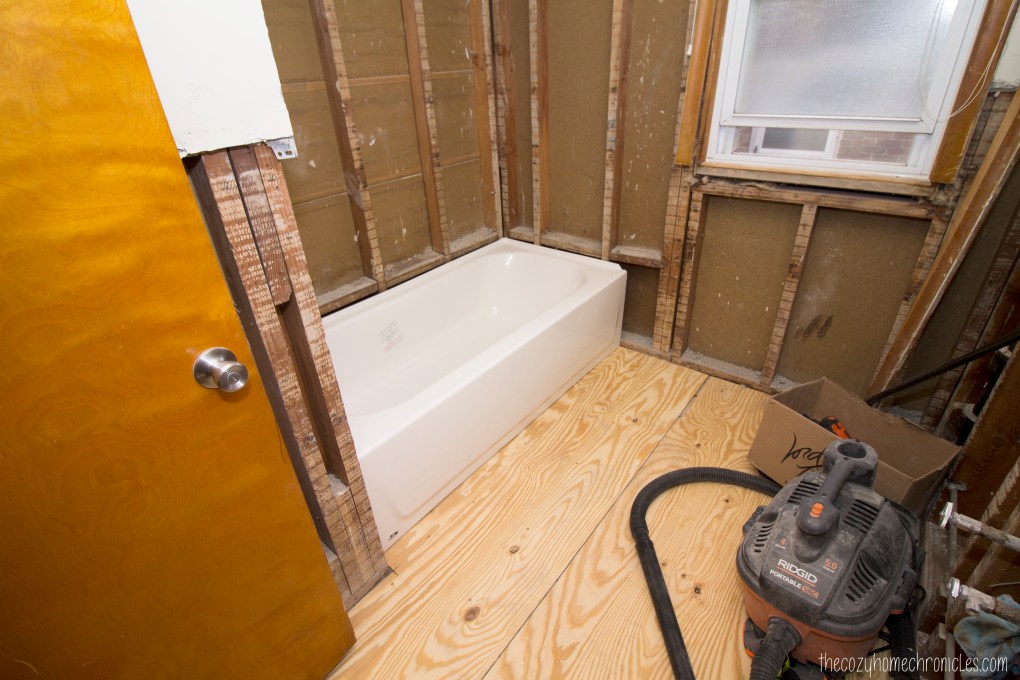
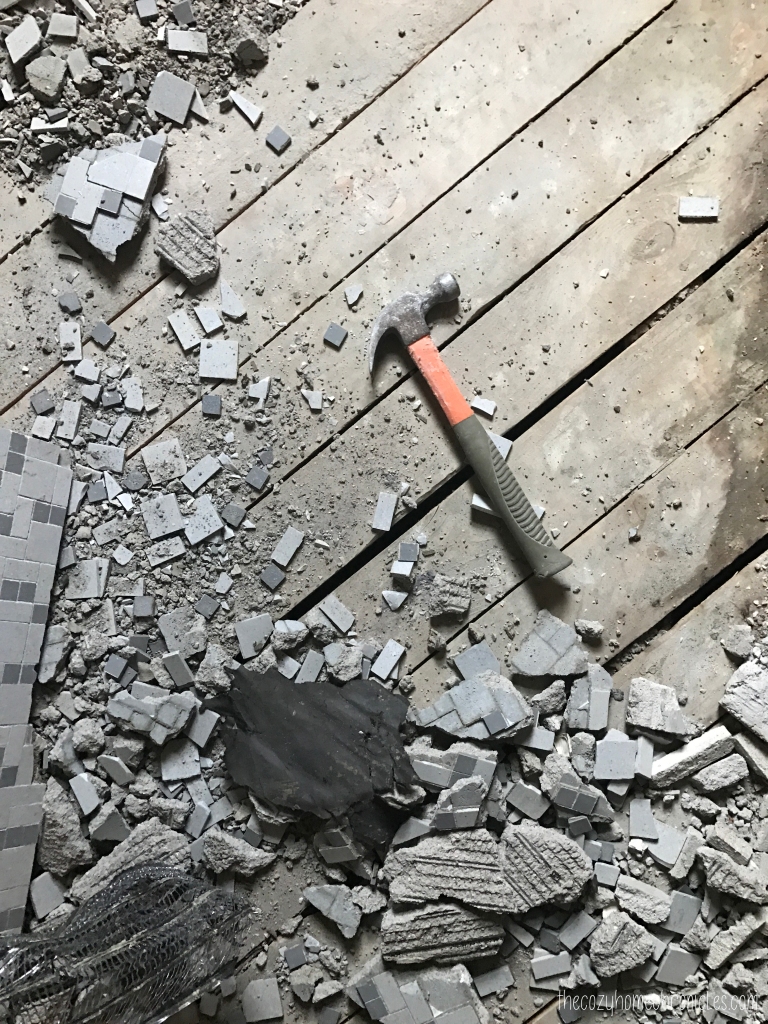
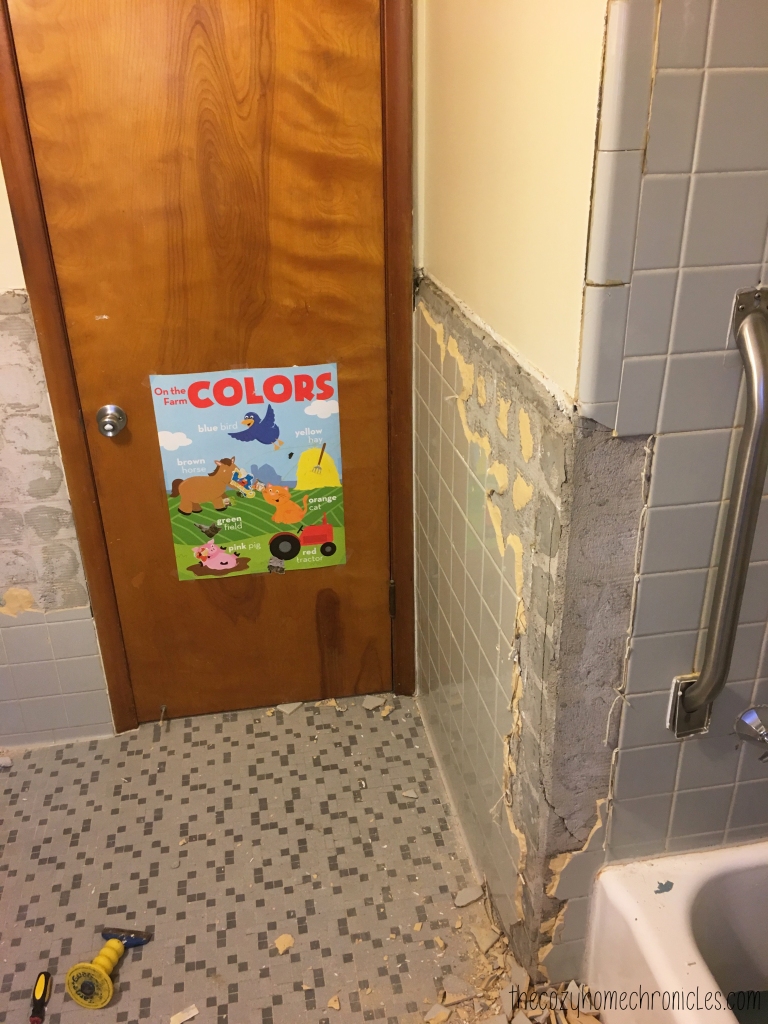
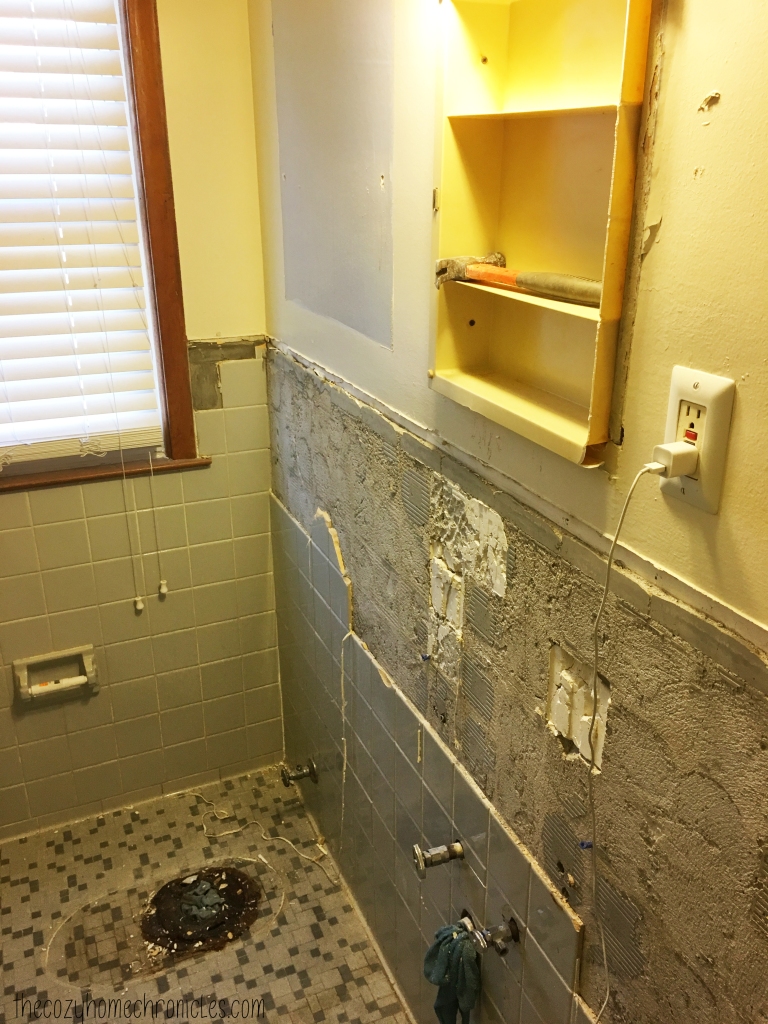
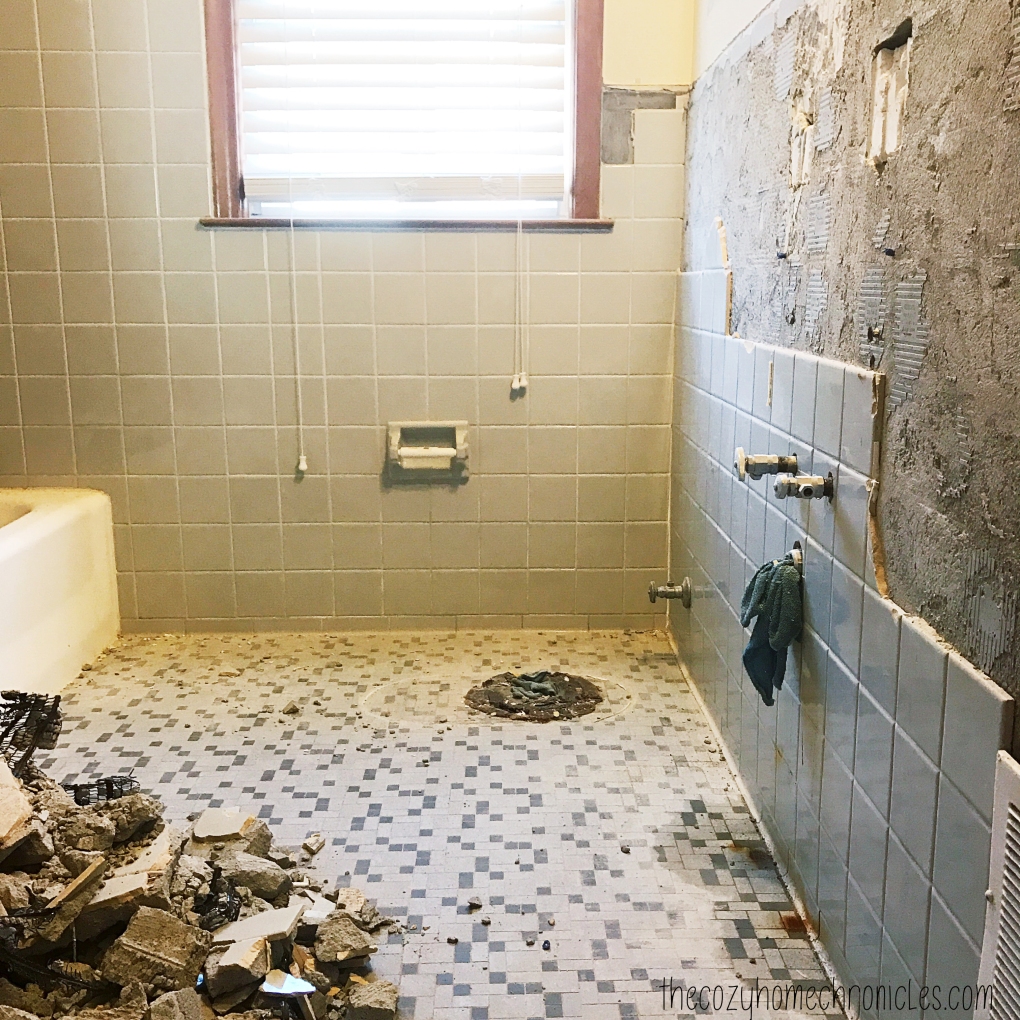
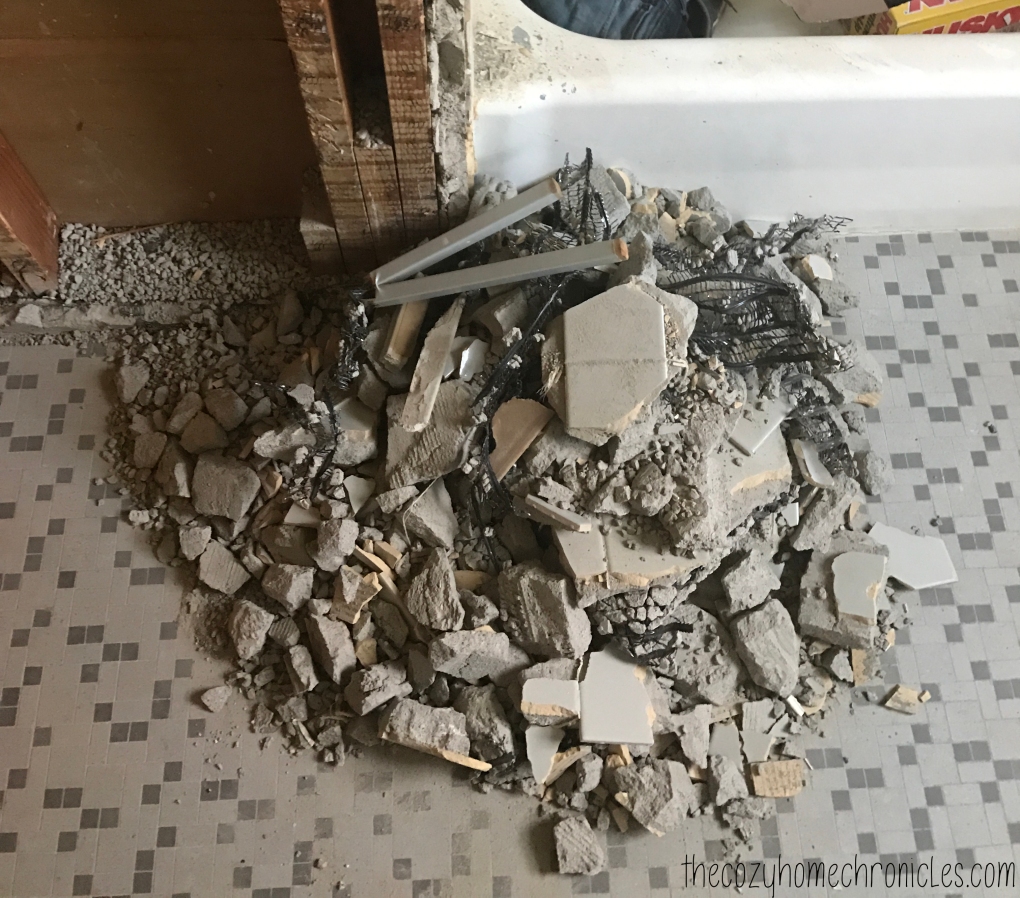
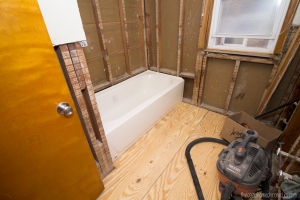
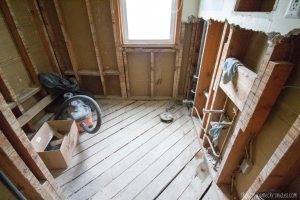
Week 2 | Bathroom Renovation Demolition

IMG_1597
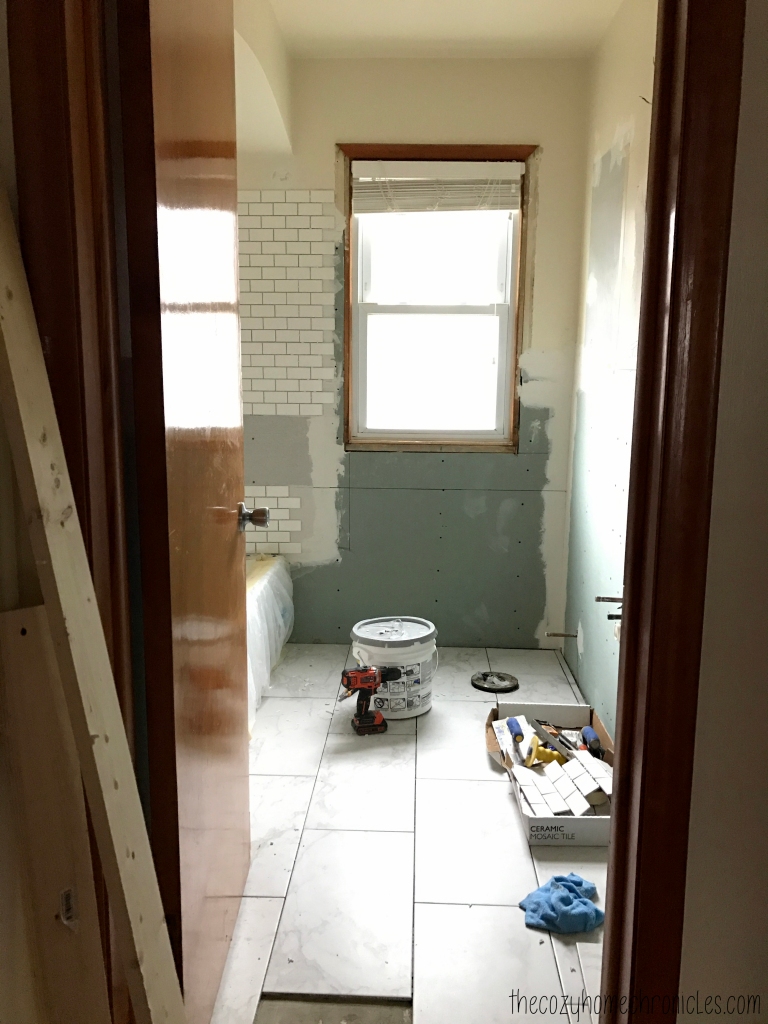
Week 3 | Laying the Foundation for Tile

IMG_6453
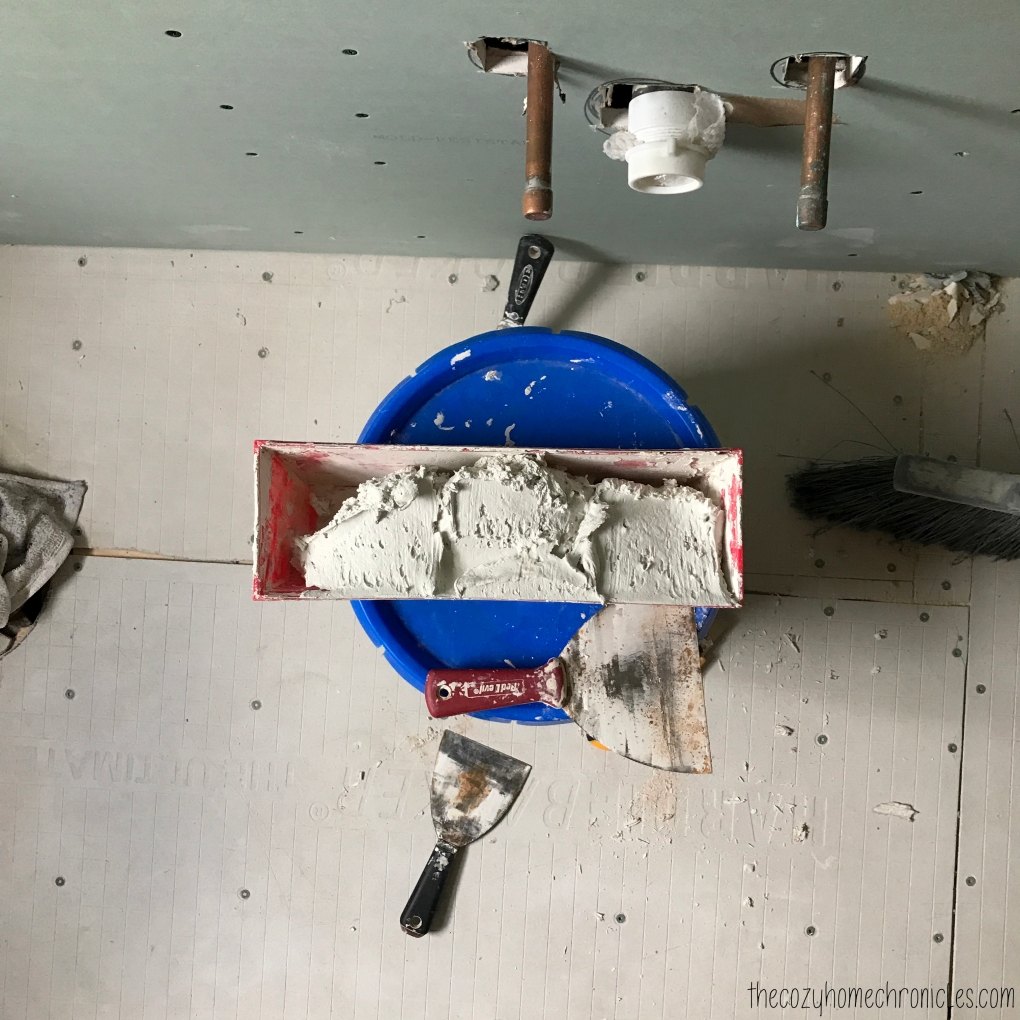
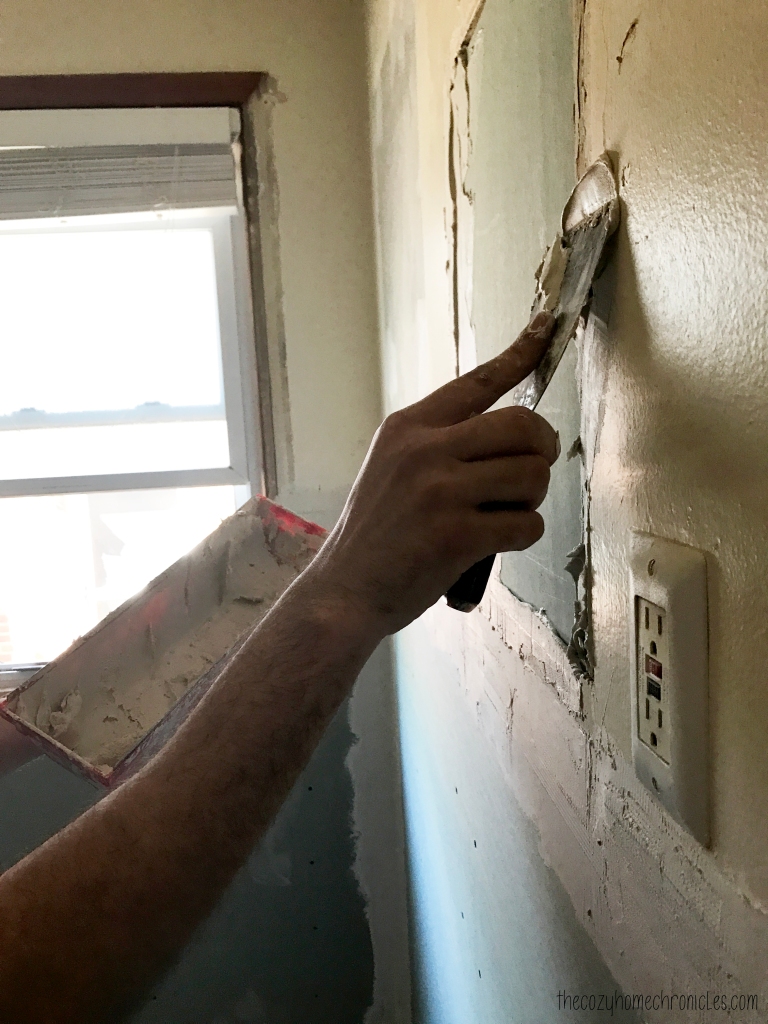
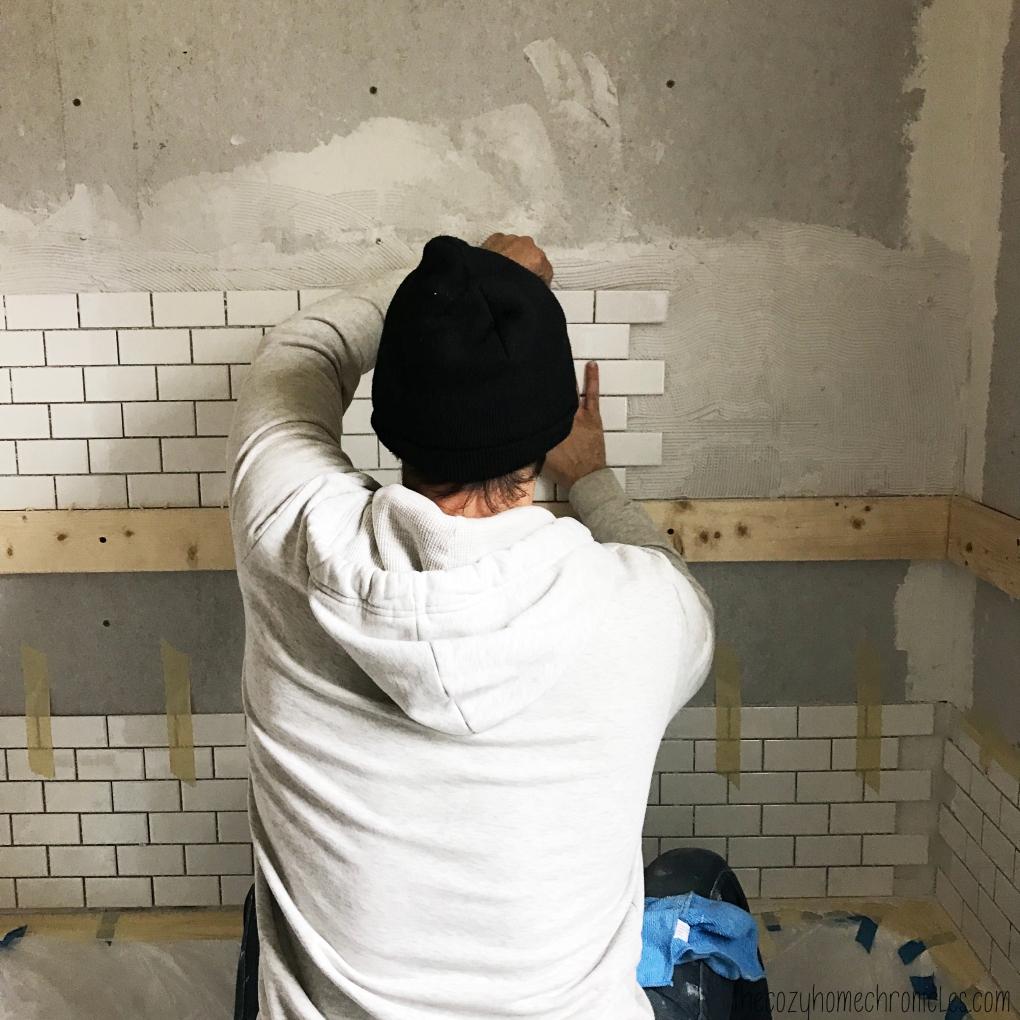
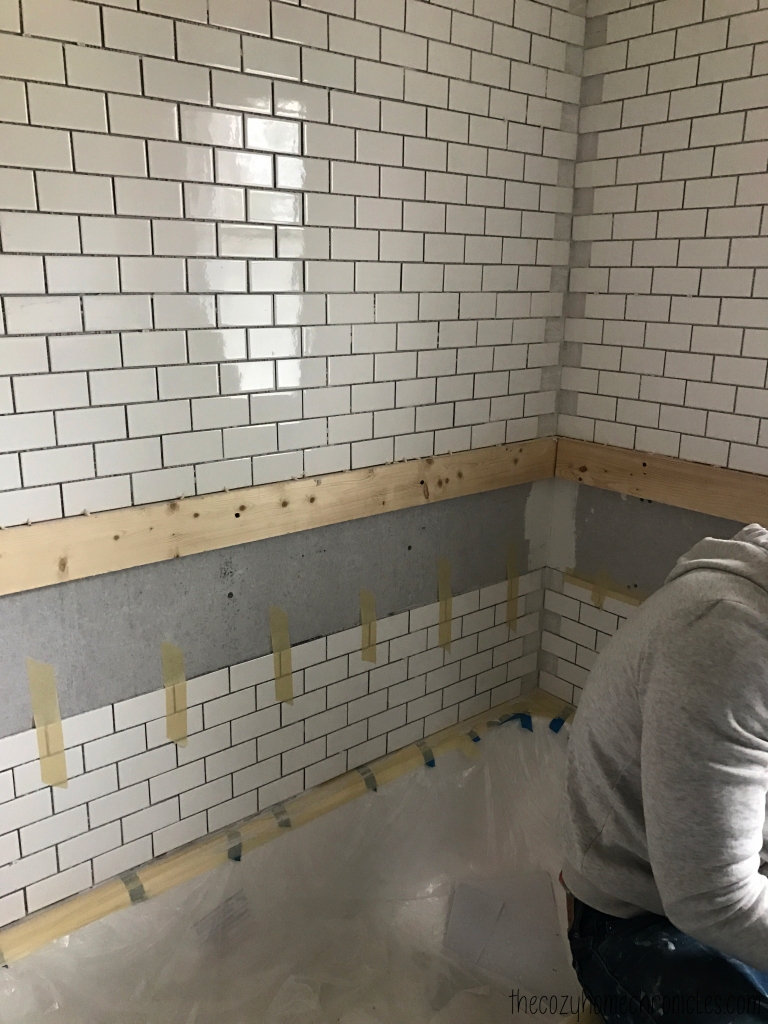
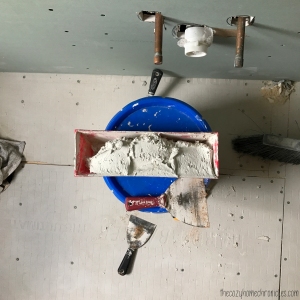
Week 4 | Mudding and Tiling a Bathroom

IMG_6526
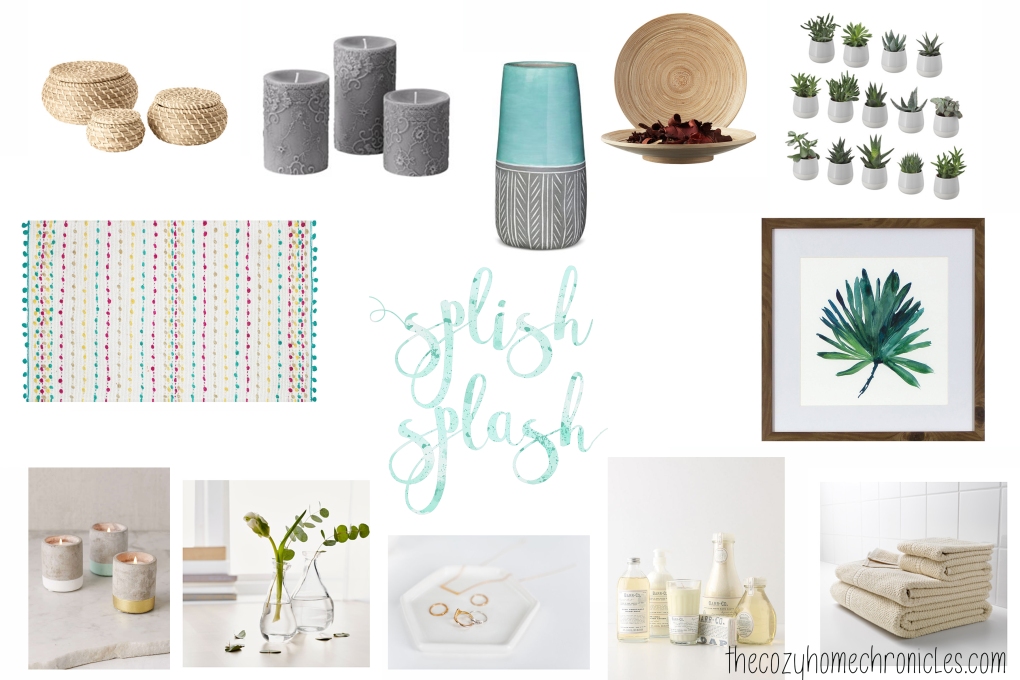
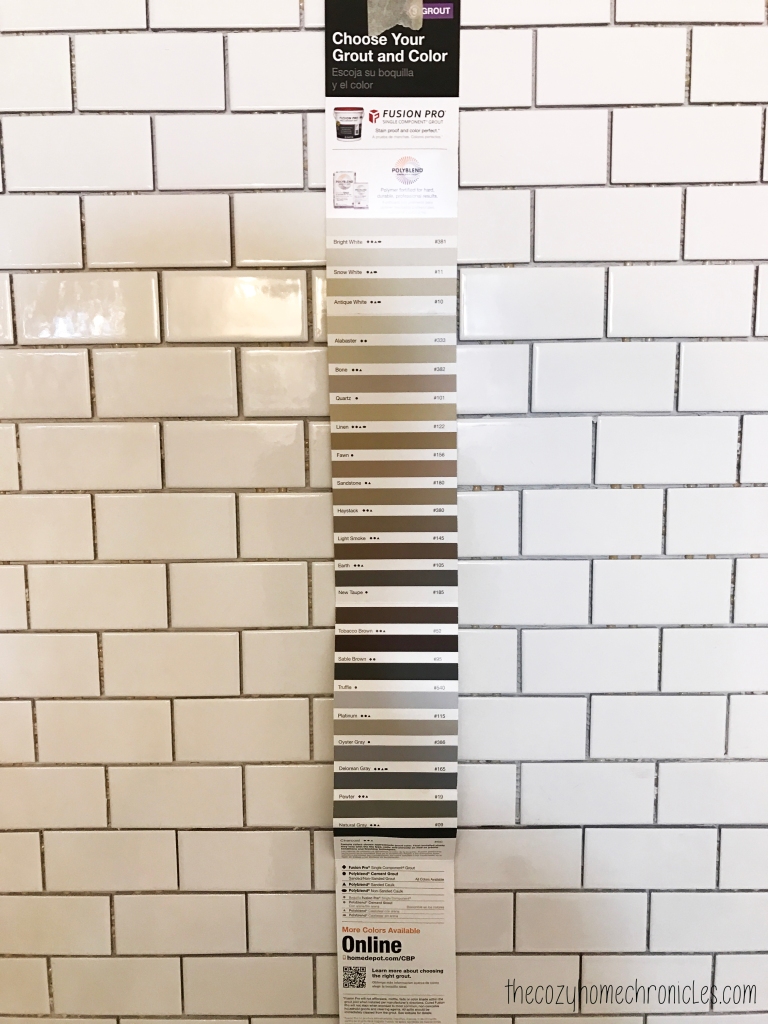
Week 5 | Tiling and Decorating a Bathroom

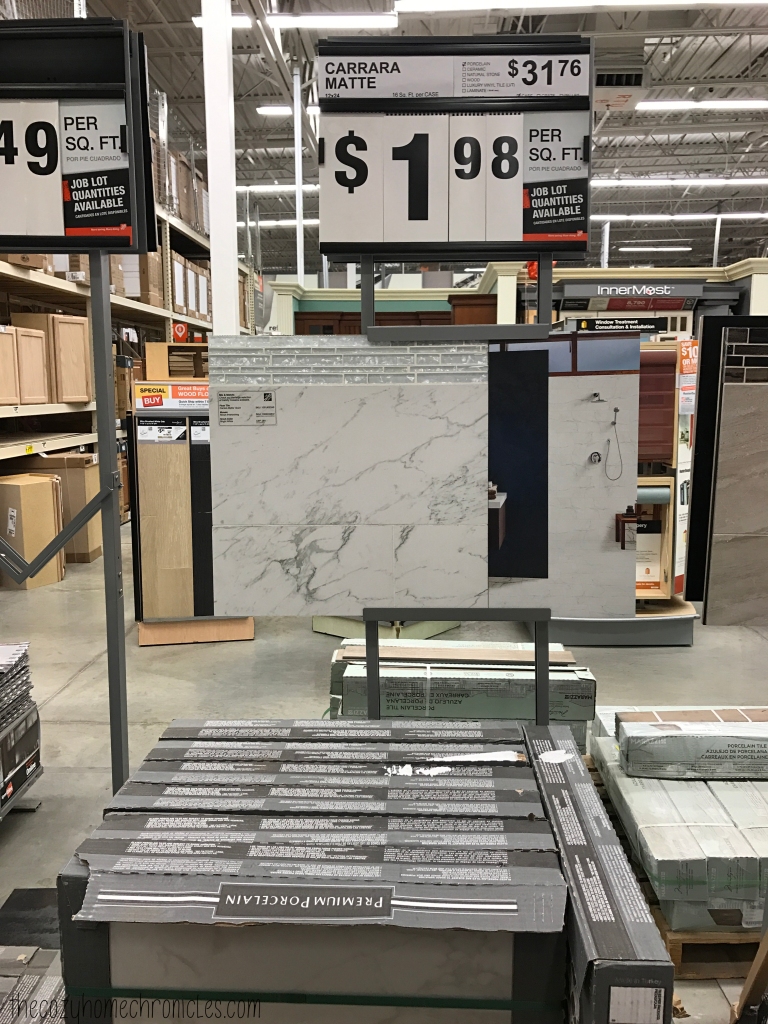
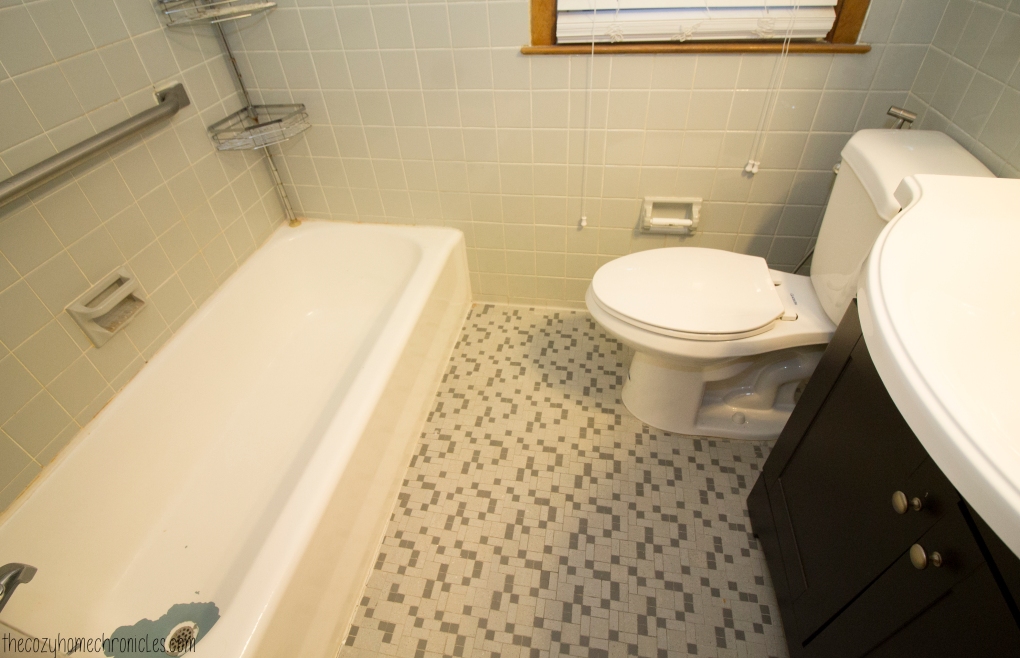
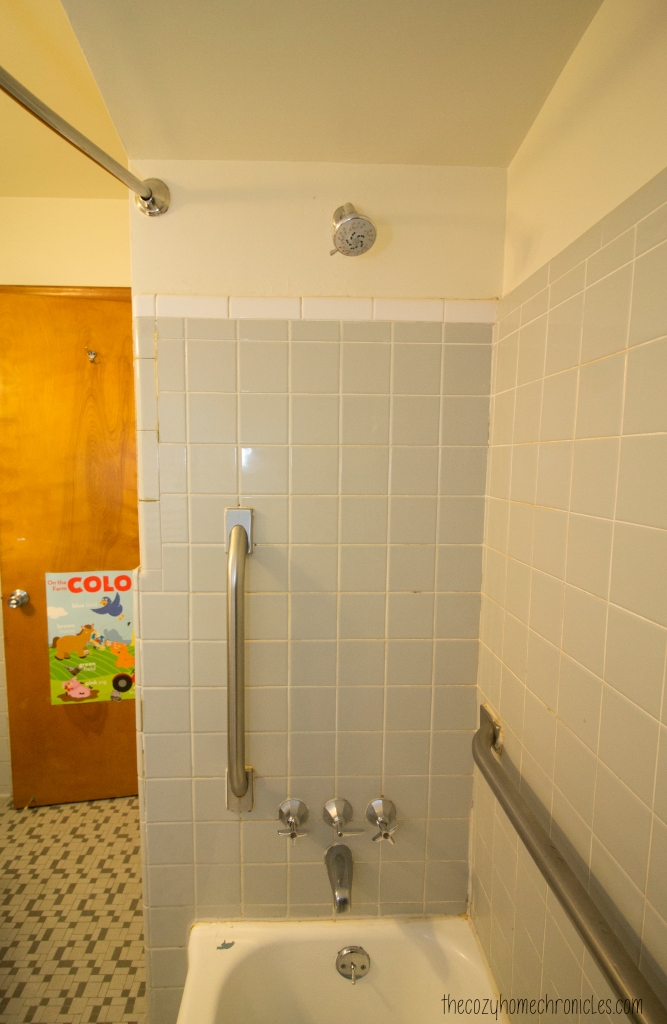
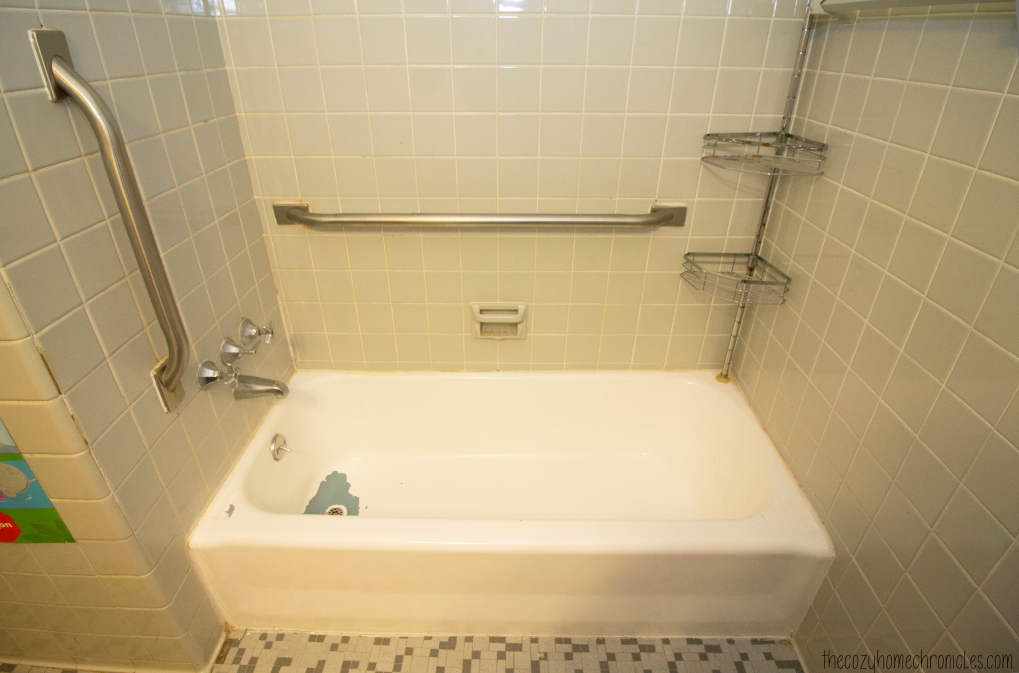
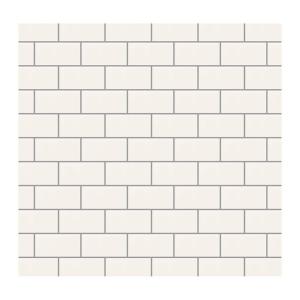
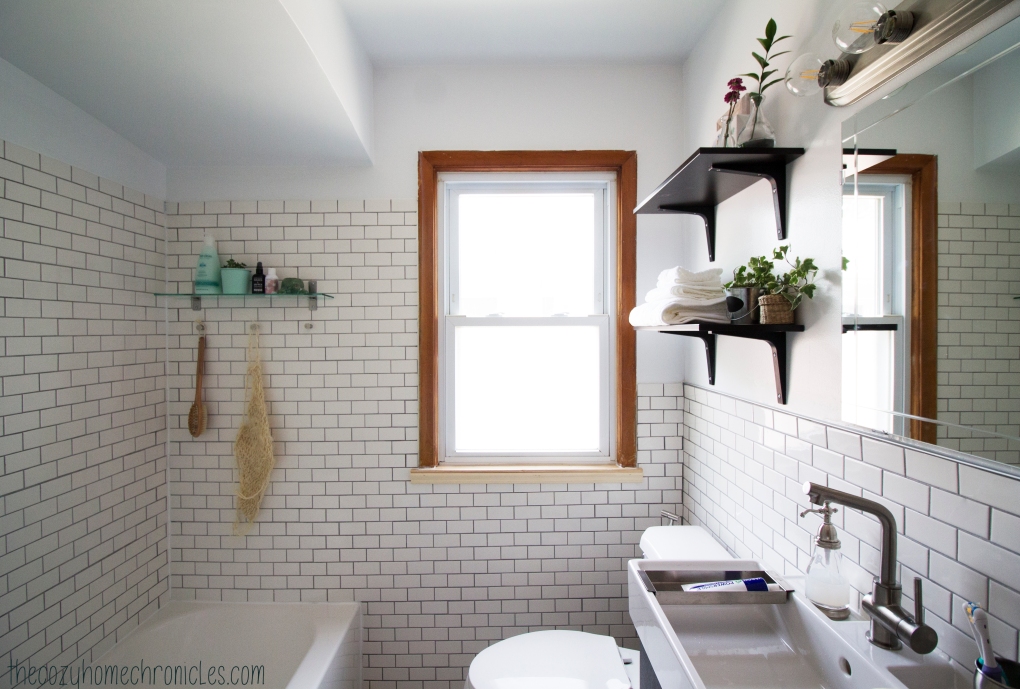
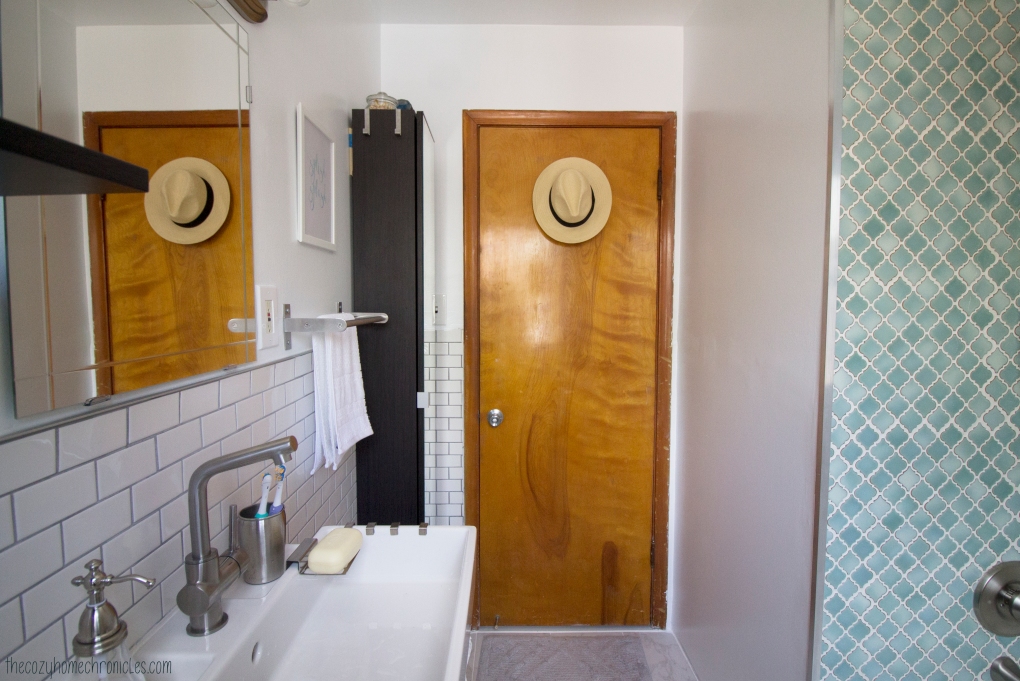
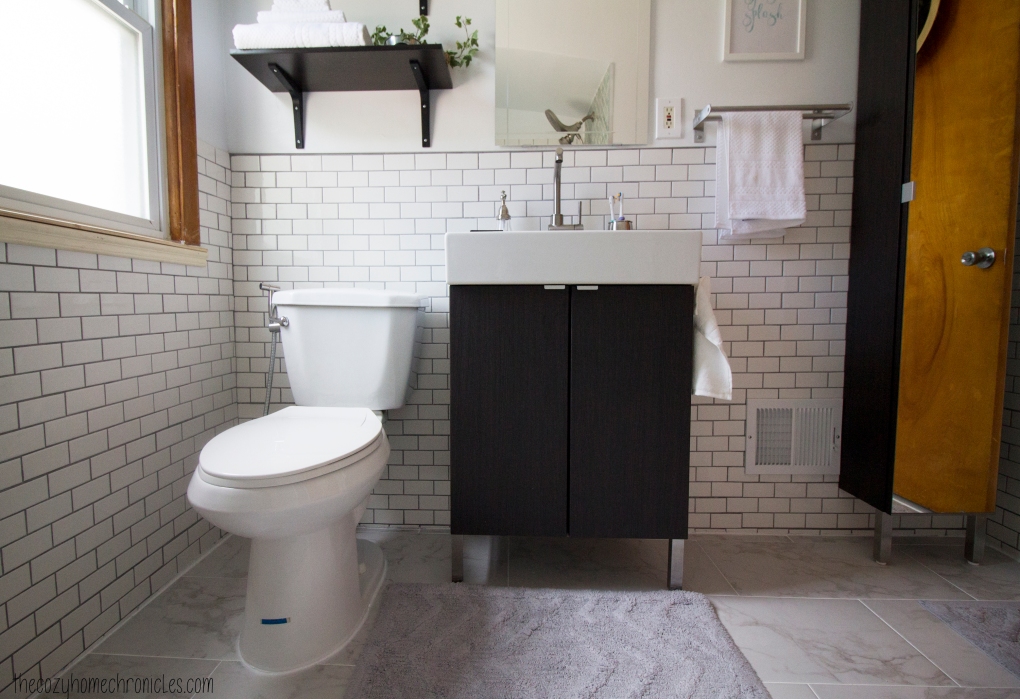
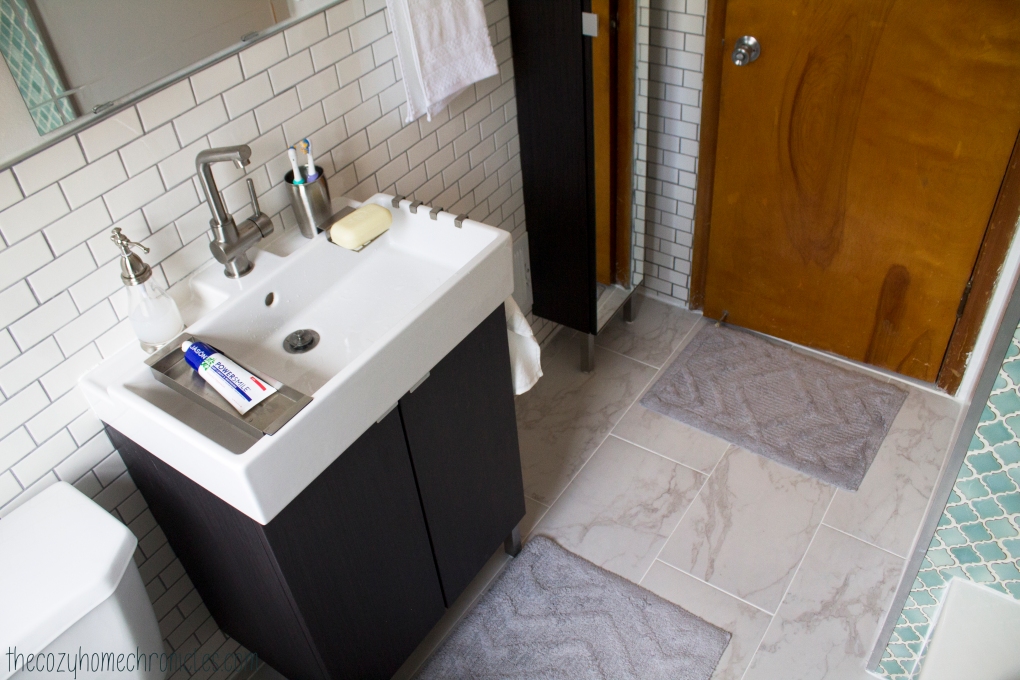
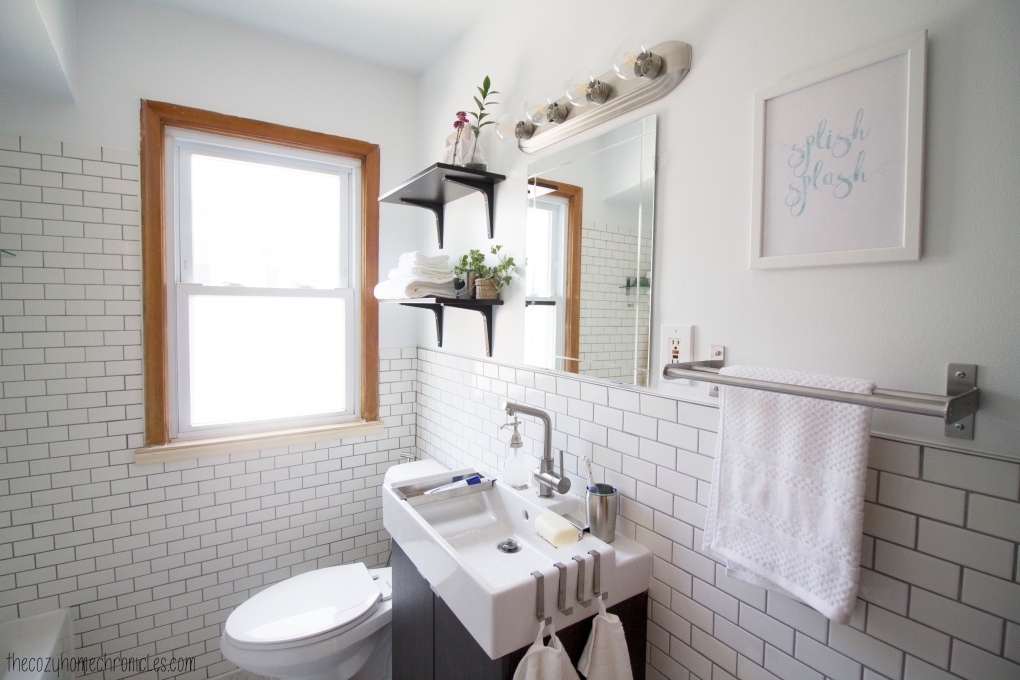
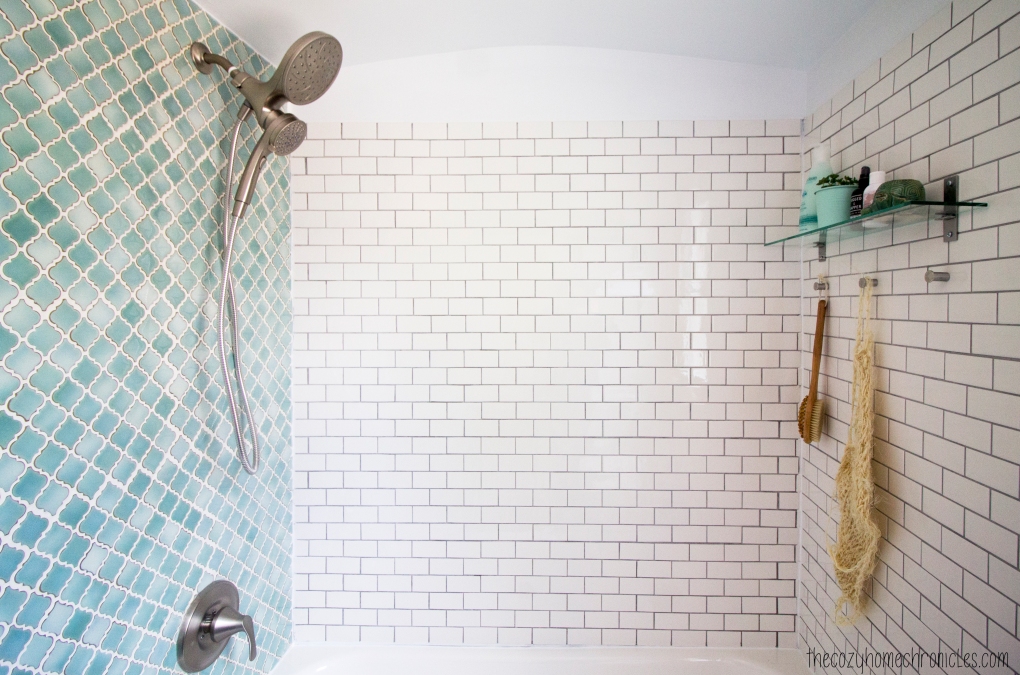
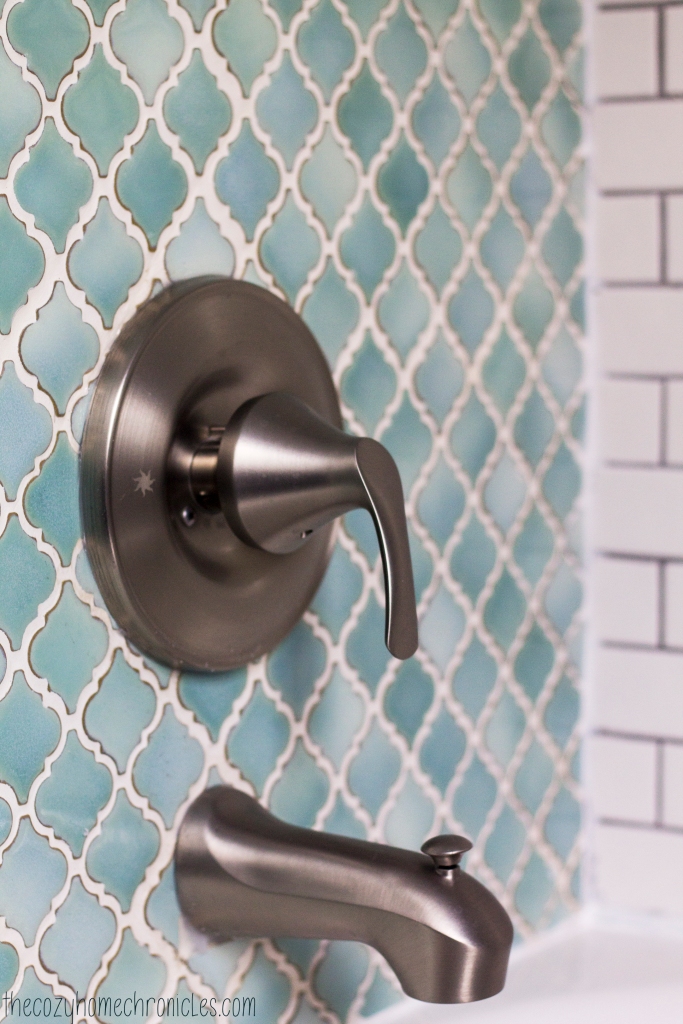
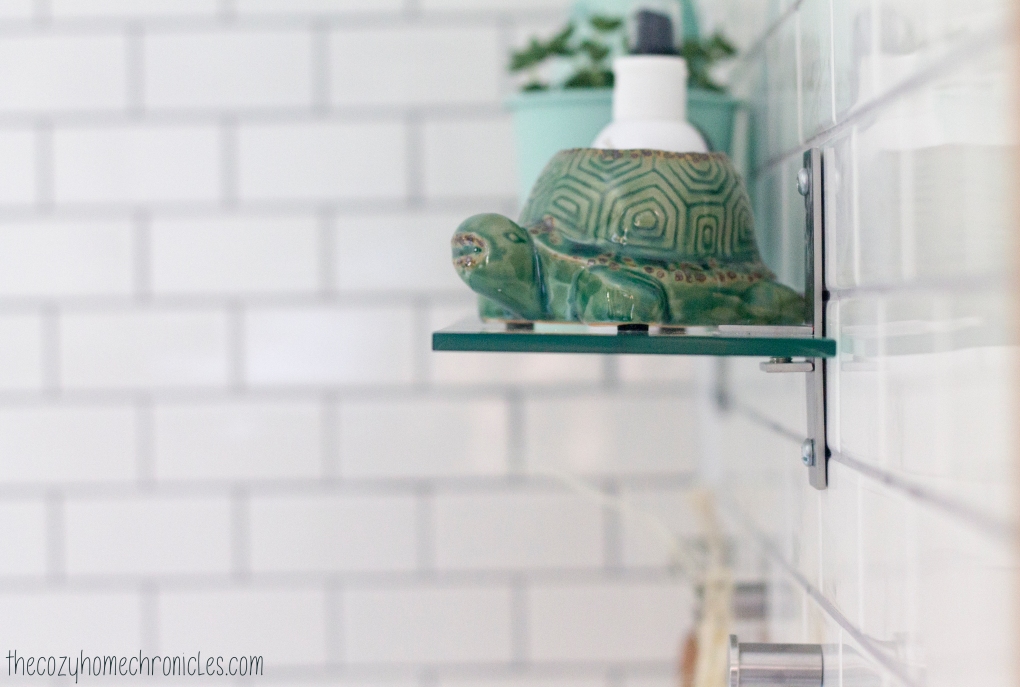
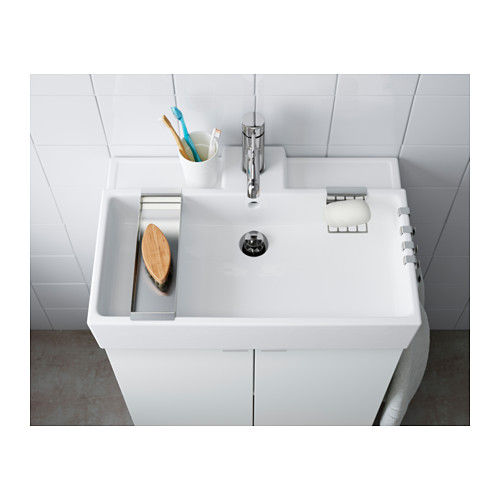
If you’ve been following along, you’ll know that we ran into some issues that cost us precious time. Because of that, we literally spent every day this last week working well into the early morning hours in order to finish on time. In just one week, we grouted and sealed the entire bathroom, primed and painted the walls, assembled and installed the vanity and storage cabinet, installed shelving and lighting, cleaned and caulked everything, and had the plumber come and connect the plumbing. Was it worth it? Totally! Although some features were not our first choice, we are very happy with the results. As you will see soon, our bathroom is unrecognizable. The white subway and Carrara marble tile totally brightened up and opened up the space. It looks so much bigger! Our favorite part, however, is the accent wall in the shower. We cannot wait to bathe the babies and enjoy the beautiful view. Without further ado…

.

.

.

.

IMG_2123

IMG_2064

IMG_2034

IMG_2052

IMG_2037

IMG_2067

IMG_2058

IMG_2099

IMG_2093

What do you think of the transformation? We would love to hear from you in the comments below. You can also follow along on Instagram @thecozyhomechronicles for other fun DIYs and projects. Up next is our summer garden 🙂

If you liked this post please follow us and share!

Instagram


One Room Challenge: Week 5|Tiling and Decor Inspiration

Today marks week 5 of Calling It Home’s One Room Challenge™ and that means we are less than one week away from the final reveal. We thought we would have a little more finished this week but with a grant application deadline that my wife needed to submit for, things got pushed to the side. As of now, all the tile has been laid on the floor and walls and we are getting ready to grout tomorrow. We have had our fair share of cuts and bruises (not to mention fatigue) but we are finally nearing the finish line and are so excited to share with you.

All right! Here’s what we have left to do:

1. Grout and clean the haze

3. Prime and paint the non-tiled walls

4. Install vanity, toilet, storage cabinet, and other accessories

5. Decorate and style

ORC

Progress:
Einstein was really on to something when he came up with his theory of relativity. It’s seriously hard to believe that we have been working on this project for a month now! To recap: We demoed and gutted the bathroom, installed the new bathtub and had the pipes replaced, installed new cement boards and insulation, mudded and tiled everything. Tiling was not hard but it was tedious because of all the cuts I had to make. The good news is that grouting shouldn’t take more than a few hours (if we can actually settle on a grout color). After that the plan is to do minor touch-ups to the drywall and then prime and paint. If all goes according to schedule, we hope to install the vanity this weekend and get the bathroom ready for the final photoshoot.

IMG_6526

IMG_6537

IMG_6551

IMG_6608

IMG_6689

This past weekend we went and picked out our bathroom furniture from IKEA and it was a bit more difficult than we had anticipated. The vanity series that we really liked only came in two depths: 11″ and 19″. Both of these were on the extreme ends of what we wanted. Ideally, we were looking for something around 15-16″ to maximize storage efficiency and spaciousness. We found exactly that but in a color that we weren’t so sure about. In the end we had to make the sacrifice and go with this one in black-brown. The major upside to this was the vanity sink. Every single thing about the sink that comes with this vanity series is beautiful and perfect. Okay, I know I’m talking about a sink here but it truly is a thing to behold.

lillangen-sink-white__0381414_PE556140_S4
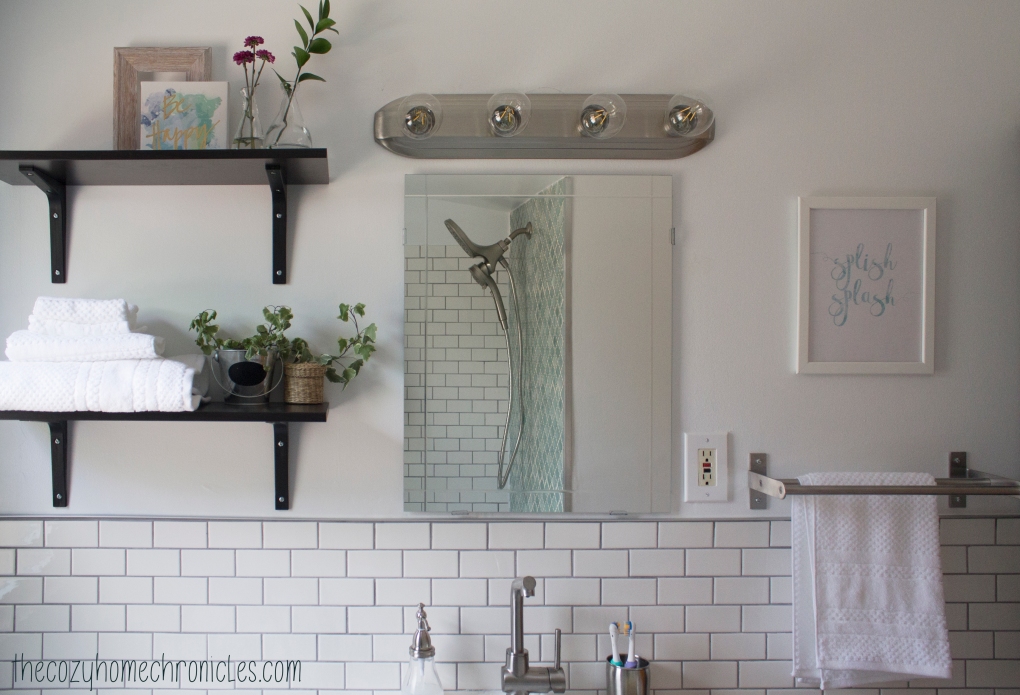
The light fixture was something else that we had to settle on this week and we went with an inexpensive bath bar light and these awesome filament globe bulbs. It might look simple but with the specific lightbulbs we chose,  it looks really cool.

Decor Inspiration:
We put together a mood board of inspiring decor items from IKEA, Target, Etsy, Urban Outfitters, and Anthropologie. We are not going to necessarily buy all of these things but creating this helped us decide on the look that we are going for: something earth-inspired, calming, and with a splash of color.

bathroom inspo

At the center of the mood board is a quote art that my wife made herself. It’s something our son always says when he’s splashing around in the bath and we thought it would make for a nice bathroom wall decor. We are also providing it to you as a free download printable. Think of it is a gift of appreciation for putting up with us and our crazy projects all this time 🙂

Printable Wall Art: splishsplash

Anyways, we could have shown you more progress shots but we will save that for next week. There’s nothing worse than a trailer that gives away a movie’s plot. The accent wall turned out more amazing than we could have thought so we will just let you revel in that thought until you can see it for yourself in next week’s final post.

Would you like to see our progress as it unfolds? You can also follow along on Instagram @thecozyhomechronicles for behind-the-scene videos!

If you liked this post please follow us and share!

Instagram


One Room Challenge: Week 4|Mudding and Tiling a Bathroom

We are hitting week 4 of  The One Room Challenge™ and that means we are less than two weeks away from the final reveal. Yikes! All the cement boards are completely up on the floors and walls and we are mudding as I speak (type). In other news, our accent wall tile arrived! And boy are we happy with the product. If you’ve been following along, you’ll know that we were torn about what color to go with for our planned accent wall in the shower. We had to order it online and we made the split decision to go with the mint green arabesque from Home Depot. It was a gamble to order online because pictures can be very deceiving but luckily these Merola tiles are more gorgeous than we could have imagined.

All right! Here’s what we have left to do:

1. Tile and grout
2. Install the vanity
3. Install the medicine cabinet
4. Connect the toilet and sink
5. Decorate

ORC

IMG_6449

Progress:
I know it’s been a slow first few weeks but we are feeling the fire now and desperately trying to finish on time. This past week was spent cutting and installing cement boards on the floors and walls. We also got rid of the debris from the demolition over the weekend. The city that we live in opens the dump to the public on the third Saturday of every month, which is awesome because you can dump all types of material except hazardous chemicals. It’s super convenient and the timing couldn’t have been more perfect. On the down side, I managed to get a nice scar on my jaw when a mesh wire from the cement boards caught my skin. Ouch!

Once the mud dries we will sand and then thoroughly remove all the dust so that we can begin tiling tomorrow. We will start with the floors first and then do the walls. Next week, we will be sharing a design board of some decor ideas and a fun little printable we have been putting together for wall art. Until next time 🙂

IMG_6453

IMG_6471

IMG_6469

Would you like to see our progress as it unfolds? You can also follow along on Instagram @thecozyhomechronicles for behind-the-scene videos!

If you liked this post please follow us and share!

Instagram


One Room Challenge: Week 3|Laying the Foundation for Tile

We are hitting week 3 of The One Room Challenge™ and boy has it been rough! We just finally finished the demolition this past weekend and up until an hour ago our bathroom was completely gutted. Right now we are seriously questioning if we can finish on time and that’s been a bit disheartening but we are pumped to make it happen. It’s called a challenge for a reason, right?! In this post we will be sharing why our progress has been slow as well as some mistakes that we made so that you can avoid them.

ORC

IMG_6067

Progress:
As you know from last week’s update, we had some hiccups with the walls because the tile wasn’t chipping away easily so we made the decision to take everything out all the way down to the studs. If you follow along on our Instagram stories, you might have seen how we completely demolished the walls and the floor in the bathroom. We also took out that hideous 300-pound blue tub (with help of course…that is why you have brother-in-laws!). With the walls and floors gone, we layed down the moisture barrier and plywood so that we can install the cement boards and tile. We have our plumber guy coming first thing tomorrow morning to replace some corroded pipes and get the bathtub and shower head/faucets all set up. Replacing plumbing wasn’t in our budget but now that we’ve gotten this far it doesn’t make sense to build something new on a faulty foundation. And those pipes were clearly nearing the end. Once the plumbing is all set, we can begin tiling!

IMG_5931

IMG_5960

Issues & Concerns:
The reason that our demolition took two weeks (besides that we are doing this in the evenings with two kids) is that the removal of the tile proved to be much more labor intensive and involved than we had anticipated. This was an issue we had little control over. There is one blunder that we made, however, that cost us unnecessary delays. The bathtub. You see, there’s not much you can do without your bathub in place. During the entire brainstorming and design stage of this project, we focused entirely on the tile, vanity, and lighting and we completely neglected the bathtub! We just assumed that we could walk into a local Home Depot and leave with a reasonably-priced, 5-star tub. Yeah, no. Once we started looking into reviews and the different types (cast-iron vs. steel) we became so overwhelmed. Many of the good ones were not available in-store and would have cost us another 1-2 weeks of time if we ordered online. In the end we settled on a tub that had decent reviews and was available in-store. The awesome thing about it is that it is 2 inches deeper than standard bathtubs. It is now sitting in the bathroom so that the plumber can set it up and we can finally begin putting this room back together again. The lesson in all of this? If you’re ever considering doing a bathroom renovation on a tight schedule then have a bathtub selected and a plumber arranged to come before you start.

IMG_1590

IMG_6156

IMG_1597

Would you like to see our progress as it unfolds? You can also follow along on Instagram @thecozyhomechronicles for behind-the-scene videos!

If you liked this post please follow us and share!

Instagram


One Room Challenge: Week 2|Bathroom Renovation Demolition

Good evening friends! Today is exactly one week since we started our bathroom renovation project in conjunction with The One Room Challenge™ and so far we are still in the demolition stage. In this post we will be sharing our progress and where we stand currently. To be honest, I thought we would be done with the demolition by now but we all got sick and needed to take it easy. I didn’t want to be a hero and push myself past my limit so I took off the last two days. Slow and steady wins the race.

ORCProgress:
If you follow along on our Instagram stories, you might have seen that we already removed the toilet and the vanity over the weekend. The last major piece we need to take out is our bright blue 1950’s tub. We managed to remove the majority of wall tile from the existing cement boards only to realize that the mortar isn’t coming off as we had imagined. Considering the age of the bathroom, I’m not all too surprised. The good news is that we are a little more settled on the tile we will be using. After a recent trip to Home Depot, we really fell in love with this Carrara Matte tile for our floors. With white subway tile for the walls, it’s going to look great!

IMG_5529

IMG_5554

Issues/Concerns:
Since I will not be sticking to the original plan of leaving the cement boards, I had to purchase a new blade for the angle grinder so we can cut through the cement boards and take them out piece by piece. Removing everything all the way to the studs is both a good thing and a bad thing. The good is that we will redo the bathroom with all new construction materials, we will be able to do a clean, solid job from beginning to end. The bad is that we will have to spend more $$$ on purchasing drywall and new cement backer boards. Considering that this bathroom is a small space, the additional expenses shouldn’t exceed $250 (and this is considering that I will also have to remove and replace the subfloor with new plywood & moisture barrier). We just really wanted to challenge ourselves to do this renovation on an extreme (but realistic) budget so we could inspire others who might not otherwise consider renovating because of the cost.

All this fun stuff with the walls and floor removal, which I had hoped I wouldn’t have to deal with, will add between 1-2 weeks to the job. As is the case with any renovation project, you have to be prepared for stumbling blocks and plan accordingly. Despite our setbacks, I think we will still make it out in 6 weeks. We sometimes get discouraged thinking it will take that long, so we have to keep reminding ourselves that we have day jobs and two little ones and that’s why we can’t just finish it as quickly as we would like. Until next week 🙂

IMG_2598

IMG_3028

IMG_5470

IMG_5467

You can also follow along on Instagram @thecozyhomechronicles for the latest behind-the-scenes and videos of our progress.

If you liked this post please follow us and share!

Instagram


One Room Challenge: Week 1|Bathroom Renovation Preparations

We are super excited to share that this year we will be participating in our first ever One Room Challenge! Hosted by Lisa of Calling It HomeThe One Room Challenge™, is a widely anticipated biannual event every April and October in which twenty design bloggers take the challenge of transforming a space in just six weeks. Every Wednesday, the designers document their process while sharing their sources and professional advice. On Thursdays, guest bloggers, like us, can play along and support other guest bloggers that are also tackling a room renovation. We have been wanting to participate for a while now but last year we started our kitchen renovation much later than anticipated and so we weren’t able to play along.  We really hope we can get this bathroom done in the six week period but with two kids under the age of two and graduate school on our plates that is a tall order. We are diving right in regardless.

ORCLast week, in anticipation of this event, we shared two design boards and some bathrooms for inspiration. You can check them out here. We spent the last two days completely emptying out our bathroom and relocating to the bathroom downstairs. With me gearing up to start dissertation fieldwork this summer and my husband starting his MBA soon, we decided this project could not wait any longer because life will just get busier. Besides getting it done in under six weeks, we also need to stick to a tight budget. Challenge accepted.

Alright! Here’s what our bathroom looks like now:

IMG_1136

IMG_1138

IMG_1141

IMG_1144

IMG_1147

Ugh.  So much YELLOW. As a photographer, the urge to edit these images was intense but I wanted to capture the space exactly as is so we can all enjoy the final transformation. The wall tiles are still in great condition but they make the space so dark. We really want a bright clean look that white subway tile will definitely give.

4548dc7e-0269-4621-829d-718bb55c38b1_1000

We started some of the demolition today by taking out the toilet, sink, and vanity. The tub will be next to go followed by the tile and then it’s all rebuilding from there. We still haven’t fully settled on the floor tile, accent wall tile, and vanity but we will be deciding in the next day or so. The feedback we have received from readers, family, and friends has overwhelmingly been in favor of Design Board #2 which is interesting because we are leaning toward white marble floors and black fixtures. I guess you will just have to tune in next week to see where we are in the process. You can also follow along on Instagram @thecozyhomechronicles for the latest behind-the-scenes and videos of our progress. Until next week 🙂

If you liked this post please follow us and share!

Instagram


Don’t Fear the Tile

IMG_20140427_130054
I know we have been MIA but for good reason. We recently started remodeling our kitchen and we are doing pretty much everything ourselves from demolition to tiling to cabinet installation (which means some fun new posts coming soon). This means writing has been on hold for the most part as we juggle chasing after our kinetic 10-month old in between piles of schoolwork and construction. This is a post we have been wanting to do for a while but we just weren’t sure how we felt about encouraging you to tile on your own. Maybe our first tiling success was a fluke, we thought. Considering how many people furrowed their brows over the thought of us tiling, you can’t blame us for being cautious. But having tiled our entire basement in 2014 and now our kitchen in 2016, we are confident enough to encourage you to skip the contractor and try tiling for yourself. So if you’re getting ready to start a major renovation and are thinking about picking up your phone to dial a contractor, stop for a moment and listen to what we have to say. It’s normal to be skeptical about your handy skills and worry that an attempted DIY would end badly for you. You know? That worst case scenario that pops in your head telling you your work will be so bad you’ll have to pay twice as much because you will need to hire someone to fix it up. While that might be true for some things, it is not the case for tiling. Yeah, yeah, we know what you’re thinking. We had plenty of people tell us we were crazy for wanting to tile the basement ourselves. “It will be so uneven,” they said. Not so. We are nowhere near professionals and prior to renovating our basement we had not installed a single tile in our lives. Not only were we able to tile a 1,000 square feet on our own but we did a dang fine job too. With the both of us (plus my father-in-law and brother-in-law helping on occasion) putting in a couple hours of labor after work hours, we were able to complete the project in 5 days. With our kitchen remodel, I was able to tile and grout a 10×11 kitchen in just 2 days working after work hours. Still not convinced? Keep reading to see just how easy it is. And if budget is important, get ready for some major savings!

Supplies
Tiles
Mortar
Grout
Tile Spacers

Tools
Power Drill
Mixing Paddle
Big Trowel
Small Trowel
Rubber Grout Float
Level
Cleaning Sponges
Grout Sealer
Empty Buckets
Clean towels or rags

Below is a more detailed explanation and cost-breakdown of the supplies we picked out:

Because we were tiling our basement, we wanted tiles that were both durable and inexpensive. After a bit of research, we settled on TrafficMaster from Home Depot for $0.57 a square foot.  For the 1,000 square feet area we tiled, we ended up buying 68 cases of tile, which put us at $582. Always buy an extra case of tiles to have as backup in case some break or you need to replace some in the future.

tiles

For the mortar, we settled on VersaBond Gray 50 lb. Fortified Thin-Set Mortar which cost us $14.47 a bag. Since each bag covers 100 square feet, we purchased 11 bags (to be on the safe side) for a total cost of $160. Below are the pictures from Home Depot’s website for this product.

The trickiest part about selecting grout (that stuff that goes between the tiles) is making sure that the color matches with the tile. After some back and forth, I settled on the Polyblend #380 Haystack 25 lb. Sanded Grout from Home Depot. Each bag ($14.49) covers around 680 square feet so I bought 2 of them for a total of $29.

Last but not least, I went with the 3/16 inch Job-Tough Tombstone Style Tile Spaces (500- Pack) from Home Depot for the cute little tile spacers. They go for $6 a pack and can be enough unless you plan on finishing the tiles in 1 day, then we recommend you buy 2 packs for a total of $12.

Labor: By putting in the elbow grease yourself, you can save anywhere from $2-3 a square foot. Just to give you an idea-for a 1,000 square foot space that amounts to $2000-$3000 in savings. For a smaller space like a kitchen, the savings can be anywhere from $200-$300. Hey, every penny counts when you’re dropping 10K on a kitchen right?

Note: If you need to cut any tiles you will need a small manual or electric tile cutter (ex. QEP Rip Ceramic Tile Cutter @ $30).

Directions

Read More