Inspirational Wallpaper: September

With labor day weekend behind us and work and a new school year ahead, let us remember to be kind and empathetic to everyone we encounter. It’s difficult to imagine sending my baby off to school, but if today was that day I think I would share these wise words:

“To be yourself in a world that is constantly trying to make you something else is the greatest accomplishment.” -Ralph Waldo Emerson

Life is difficult enough as it is so let’s embrace our uniqueness and allow others to do the same. Happy September! We wish everyone a wonderful, fresh start to autumn 🙂

img_4700

September Wallpaper


DIY Eid Stocking Stuffers

Untitled-2

Eid Al-Adha is less than two weeks away and I’ve been scrambling to get the house ready so that we can feel those celebratory vibes as summer comes to an end. I came up with the idea to make these Eid-themed stocking stuffers as both a way to fill with small gifts and eidiya (money)as well as decorate the home while marking the end of pilgrimage or haj that has come to pass. Despite brainstorming this project in advance, I am only now getting around to making them a reality. Now all that’s left for me to do is fill them up with some gift cards, sweet treats, and inspirational trinkets. If only there were more hours in a day! Thankfully these take only minutes to make so if you don’t feel like wrapping gifts, this is the perfect little project to make and the kids (and adults) will love having their own Kaaba filled with fun goodies. Let’s get started shall we!

Supplies
(6) 9in x  12in Basic Felt (black)
(1) 9in x  12in Basic Felt (white)
(1) 7/8in x 5yd gold sparkly ribbon
(1) 1/8in x 7yd ribbon (sub string)
Monogram letter stickers (gold)
Hot glue gun
Scissors
Hole puncher
Needle and thread (optional)

*Makes 3 stocking stuffers. To make 1 you only need 2 pieces of black felt. All of these materials can be purchased from Michaels or a local craft store.

Directions

  1. Begin by cutting one of your black felt pieces down from 12in to 9in so that you have a 9×9 square.
  2. Line up both black felt pieces and glue them together (carefully) using your hot glue gun. Start with the bottom and move on to the sides but leave the top open (this is where the awesome stuffing happens). You can also sew the felt together with needle and thread but hot glue works just as well and takes less time. Let dry for 5 minutes.
  3. Cut out a piece of gold sparkly ribbon 9 inches long and glue along the top of your 9×9 felt piece.
  4. Cut out a piece of white felt 2inches thick (2×9) and glue about 2 inches from the bottom of your 9×9 piece.
  5. Place your monogram sticker centrally between the white felt and gold ribbon strip.
  6. At the top of the 9×12 black felt piece, punch two holes approximately  3.5in from the ends.
  7. Thread any thin ribbon or string through the holes, stuff them with some fun trinkets and gift cards, and hang them up for the family to enjoy.

IMG_4490

IMG_4492

IMG_4500

Let us know in the comments below if you made these and what you stuffed them with. We are always looking for new, creative ideas 🙂 And as always, if you liked this post please follow us and share!

Instagram


Simple Kafta Pita Pizzas

IMG_3639 copy

I’ve never been a picky eater and I enjoy many many foods but there will always be a special place in my heart for kafta pizza. For me, it conjures up memories of busy weeknights in high school filled with homework deadlines, violin lessons, and soccer practice. It was for those days, mom or dad would pick up fresh kafta from the local butcher and spread it on pita so that we could have dinner ready in no time. I’d roll mine up with a side salad of onions and tomatoes and savor every single bite. Mmmmmm.

Now that summer is ending and school is just around the corner it means plenty of busy days ahead. If you’re like me and looking to start the meal planning process now to get ahead of the game then this is the perfect midweek recipe to write in. With just a few ingredients you can have a delicious and filling meal for the whole family in a short amount of time. It’s also something different and variety is always nice to have in your meal plan 🙂

Simple Kafta Pizza Pita

  • Difficulty: Easy
  • Print

Ingredients

Kafta Pizza
Fresh pita bread
1 lb kafta (makes about 5 pizzas)

Side Salad
4 ripe roma tomatoes, cut into small wedges
1 medium sweet onion, thinly sliced
1 bunch fresh Thyme (sub parsley)
1 teaspoon sumac
1/2 lemon juiced
Extra Virgin Olive Oil
Salt and Pepper to taste

Sides
Homemade french fries
Lebanese yogurt
Lebanese pickles

Directions

  1. Turn your oven on the broiler setting and begin preparing any sides like frying your french fries (if you have some already cut up) or whipping your yogurt with a bit of salt.
  2. Make your side salad by gently tossing the tomatoes, onions, thyme, sumac, lemon juice, and olive oil. Finish off with salt and pepper to your liking.
  3. Open your pita bread at the seam so you have two evenly-sized thin pita circles.
  4. Using the back of a soup spoon, spread a tablespoon or two of kafta evenly across the inside part of your pita bread. If you put too much meat, it won’t fully cook and the bread will become soggy in the middle and burn on the edges.
  5. Place your kafta pizzas on a baking sheet and place under the broiler for about 5 minutes or until the meat is cooked and the bread is a nice golden brown.
  6. Enjoy!

IMG_3621 copy

IMG_3615 (1)

IMG_3630

If you liked this post please follow us and share!

Instagram


Bed-share, don’t care

IMG_3871 (1)

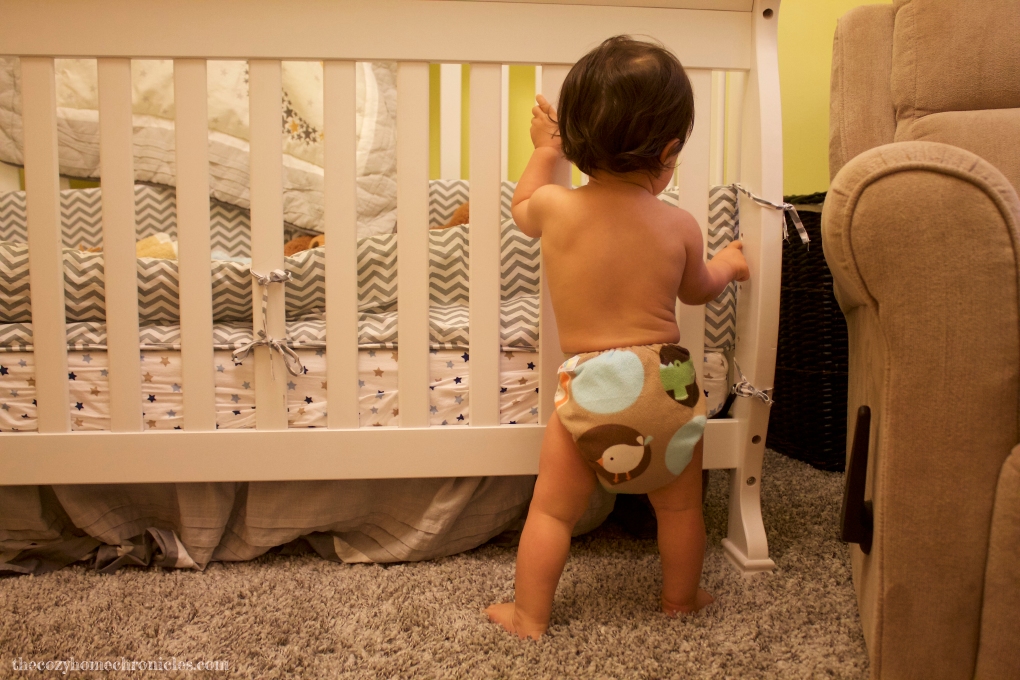
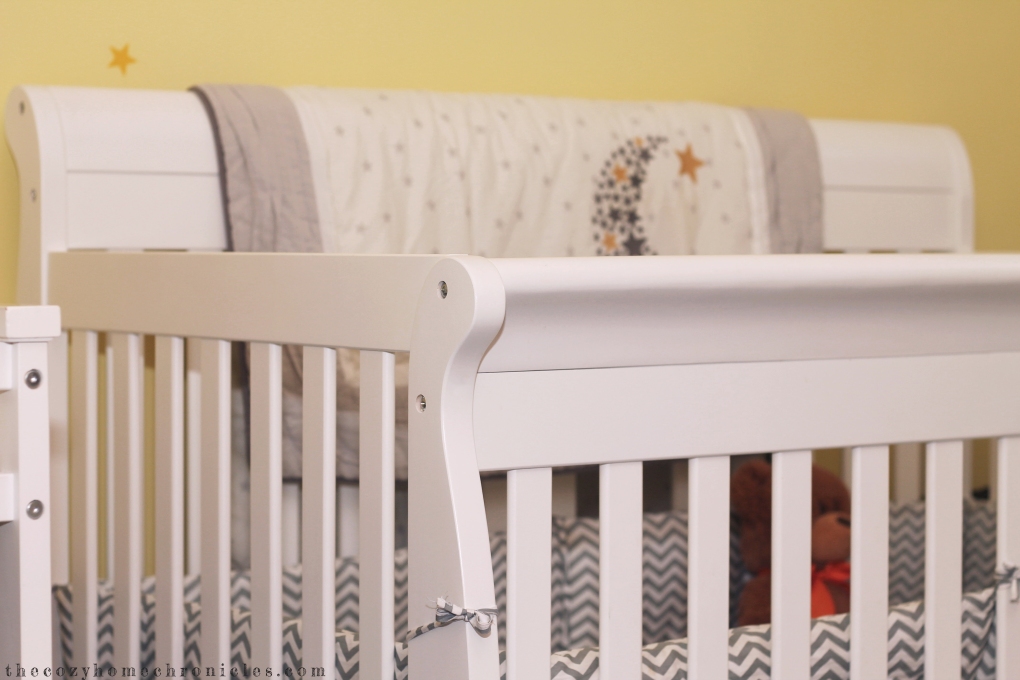
Our useless, empty crib.

Bed-sharing. It’s one of those things that elicits strong reactions of admonition from family members, co-workers, and total strangers alike. “You let him sleep in your bed?! You need to fix that!” I can’t tell you the number of times I have heard this and while it’s natural to feel doubt about parenting choices, I am here to unapologetically say that we have absolutely no regrets with our choice to bed-share. I am no scientist or doctor and while I am aware of the research on both sides of the debate regarding the benefits and risks of bed-sharing, the anthropologist in me continues to question the status-quo cultural presumptions (particularly American) that treat bed-sharing as an unfortunate lapse in judgement at best and potential child abuse at worst. Says who babies need their own rooms and beds to grow into independent, self-sufficient adults? And what kind of “independence” are we talking about? If that means being able to play on their own and let you leave the house without batting an eyelash then my son is as independent as they get.

I, however, did not write this as an argument for or against bed-sharing because I really believe only a parent can know what’s best for their  family and lifestyle. I am writing this brief reflection to add my voice to a conversation on bed-sharing that has been particularly negative, a conversation that is built on fear and shame (as if new parents don’t have enough stress to deal with). I’ll never forget, as a new mom, feeling guilt whenever I had to reveal to people that our son slept with us. I would internally grimace in anticipation of the response, almost acknowledging that it was a problem we were putting off fixing. That is until I found comfort in friends (mostly anthropologists-surprise, surprise) who understood and had either bed-shared or knew someone who did. But I could never shake the thought of why I felt that sense of embarrassment and why it mattered to so many people where my baby slept. So here’s to all the guilt-ridden mommas and daddas out there that need a little reminder of something they know to be true deep down inside: bed-sharing is absolutely magical. And just in case you forgot, here are three reasons why you know you would do it all over again.

bed-share

1) Welcome to parenthood where the work is plenty and the sleep is little. If you have ever had to wake up to feed an infant, you know that it happens several times a night. Interrupted sleep is the norm. So you can either make things harder on yourself by getting out of your warm, comfy bed and walk down a dark hallway to attend to your little one OR you can have your baby right next to you able to help him or herself and doze right back off so that you can too.

2) Babies make the best wake up calls. Dings and beeps on your phone or alarm clock are just dreadful reminders that it’s time to be an adult again. Babies, on the other hand, are the perfect reminders of all things beautiful in life: wondrous curiosity, a hunger for exploration, carefree joy. There is nothing more wonderful than waking up to the sound of silly babbles in your ear, soft little fingers playing with your face, and slobbery drool dripping down your cheeks. Nothing.

3) Baby cuddles. Enough said. My son is a keep-your-hands-off-me explorer by day and a snuggly, cuddle-bug by night. I can’t get enough of the smell of his hair and the way he kicks me at night to make sure I’m still there. I know this might sound super morbid but the average life expectancy of an American adult is 76 or 81 depending on your sex so if you do the math you’ll realize they’re only cute and small enough to snuggle in bed with for less than 5% of their life. Now if that doesn’t make your heart melt and want to hold them tighter, I don’t know what will.

If you liked this post please follow us and share!

Instagram


Summer Spring Rolls


IMG_3731

I don’t know about the rest of you but we have been having a HOT summer here in Michigan. It’s already unbearable with 90% humidity some days but add pregnancy to the equation and it’s a totally different ballgame. As a family we love having fresh, homemade food at the ready but when it’s that hot outside the thought of cooking can be a bit daunting. For those kinds of summer days, we have an easy solution and one of our favorite go-to meals: fresh spring rolls. Not only is there little to no stove-top cooking involved (which means no extra heat in the house) but the flavors are just so refreshing and energizing they will leave you feeling light yet fully satisfied.

And if it’s that time of the week where you’re ready to clear out your fridge or you’ve just harvested some delicious veggies and herbs from your garden then this is the perfect recipe to reduce food waste or showcase those beautiful summer flavors. You can replace the shrimp with tofu or skip the protein all together to create a scrumptious vegetable medley. The possibilities are endless and we hope that you do give them a try. If you do, be sure to let us know 🙂

Summer Spring Rolls

  • Difficulty: Easy
  • Print

Ingredients

Spring Rolls
1 lb of shrimp, deveined and cooked
10 spring roll rice papers
1 English cucumber
2 medium carrots
2-4 large red radishes (sub 1 daikon)
1 small cabbage (red or green)
1 bunch green onions
1 bunch basil
1 lime
1 minced garlic clove
1/2 teaspoon freshly grated ginger
Soy sauce
Sriracha or chili garlic paste

Dipping Sauce
2 tbsp Brown sugar
1/4 cup rice vinegar
1 teaspoon sesame oil
Sriracha or chili garlic paste to taste
Green onions and red pepper flakes for garnish

Directions

  1. If you don’t have shrimp that is already deveined and cooked then begin by peeling, deveining, and cooking your shrimp (do not overcook). Let the shrimp marinate in a bit of garlic, ginger, lime juice, and soy sauce for flavor while you ready the rest of the fillings.
  2. Prepare your vegetables by julienning or thinly slicing the carrots, cucumber, radishes, and green onions. Thinly shred the cabbage. You can also chiffonade your basil but I prefer to keep them whole.
  3. Bring 4 cups of water to a boil and pour into a bowl for dipping the rice paper. You want the water to be hot but not so hot that you burn your fingers.
  4. Optional: Use 1 cup of the hot water to shock and wilt the cabbage for a few minutes. Rinse with cold water and drain. Toss with soy sauce and Sriracha for an added kick.
  5. Prepare a damp working station such as a cutting board for stuffing and rolling the spring rolls.
  6.  Dip your rice paper in the water bowl until pliable and lay on your work surface.
  7. Place 3-4 pieces of shrimp in the middle followed by the shredded cabbage, carrots, cucumbers, radishes, green onions, and basil.
  8. Fold one end of the rice paper over, tuck in both edges, and roll over until sealed.
  9. Repeat steps 6-8 until you have filled all of your rice papers.
  10. Place the rolls on a serving platter and serve with a simple dipping sauce.

IMG_3649 copy

IMG_3691

IMG_3695

IMG_3745

If you liked this post please follow us and share!

Instagram


Inspirational Wallpaper: August

As summer slowly winds down, we are making sure to relish those sun-filled moments of peace and carefree joy. It might be a busy time with school starting around the corner but take a pause to delight in the warmth, sounds, and smells of August. Your heart will thank you for it.

Be Still

Be Still


Potato Kibbeh (faux Lebanese steak tartare/kibbeh nayeh)

IMG_2396
Oh pregnancy cravings. You always have a way of being exactly what I’m not supposed to have. While we don’t eat a lot of red meat in our diet, I repeatedly craved kibbeh nayeh (a Lebanese dish made of fresh raw meat, bulgur, and spices) during my first pregnancy and now find myself craving it with my second. For obvious reasons, raw meat is a no-no but I was determined to see my craving satisfied by creating a stellar vegetarian substitute. When I first attempted to make faux kibbeh during my first pregnancy, I happened to only have yellow potatoes on hand and this turned out to be the biggest blessing in disguise. I have since tried this recipe using your average Idaho potatoes and let me tell you it simply isn’t the same! The waxiness of the yellow potato gives you that authentic meat-like texture and flavor that other potatoes don’t. Just take my word for it and you won’t be disappointed.

We didn’t eat kibbeh nayeh much growing up but when we did it was an absolute treat. For many Lebanese, the highlight is the meat but for my dad the thought of devouring mouthfuls of raw meat was just unappetizing. We ate this meal a particular way: a light amount of meat thinly spread, heavily topped with crunchy bulgur, walnuts, and aromatic spices, drenched in olive oil so rich you could drink it, garnished with fragrant herbs like basil and mint, and served alongside fresh sweet onions, radishes, and other crunchy veggies and treats. This is what I have sought to recreate in this recipe; not just faux meat but an entire medley of exquisite flavors that make for a simple, nutritious, and delicious vegan lunch or dinner. This recipe makes quite a bit because we enjoy it so much that we have it for lunch for a few days. So if you’re looking for a recipe that makes weekly meal planning a bit easier, this is definitely a keeper!

Potato Kibbeh (faux Lebanese steak tartare/kibbeh nayeh)

  • Difficulty: Easy
  • Print

Ingredients

Faux meat base:
3lbs yellow waxy potatoes
1/3 cup fine bulgur
2 tablespoons tomato paste
1 to 2 cups of kammouneh*
Salt and pepper to taste
1 tablespoon high quality extra virgin olive oil

*Kammouneh:
3 cups fine bulgur rinsed and thoroughly drained and dried
1/2 tablespoon salt
1 teaspoon ground black pepper
1 tablespoon cumin
1 tablespoon ground allspice
2 tablespoons paprika
1 tablespoon dried ground basil
1 teaspoon dried marjoram
1 teaspoon ground coriander
1/2 tablespoon crushed red pepper flakes (more or less depending on how much heat you can handle)

**You can also get kammouneh for kibbeh nayeh from your local Lebanese butcher if you live in the Dearborn area. I have some stored in my freezer which I use to make this recipe.

For serving and garnishment:
Scallions
Basil
Mint
Jalapeno peppers
Sweet onions
Radishes
Walnuts
Lebanese pickles and olives
Pita Bread
High quality extra virgin olive oil

Directions

  1. In a small bowl, combine 1/3 fine bulgur and warm water. Set aside for 30 minutes until soft.
  2. Meanwhile, peel and boil your potatoes in a large pot until cooked and tender.
  3. While your potatoes are boiling, make the kammouneh in the food processor by mixing the 3 cups of thoroughly drained bulgur (remove any excess moisture) with the kibbeh spices. The bulgur will stay slightly crunchy and will take on a reddish hue.
  4. Once your potatoes are thoroughly cooked, drain and rinse with cool water.
  5. This step can either be done with a potato masher or handheld mixer in a large bowl or in the food processor. You will want to whip your potatoes while warm and incorporate the 1/3 cup of soft bulgur, tomato paste, kammouneh, olive oil, and salt and pepper until perfectly seasoned. The amount of kammouneh that you add is flexible-start with 1 cup and if you feel it needs a bit more flavor and texture then add a bit more.
  6. Spread the faux meat base on a plate, making grooves with the fork.
  7. Top your base in the following order: 1) kammouneh 2) walnuts 3) scallions and herbs
  8. Drizzle a generous amount of olive oil and serve alongside pita bread and fresh herbs and vegetables.

IMG_2366

IMG_2423

IMG_2370

IMG_2376

IMG_2398

If you liked this post please follow us and share!

Instagram


Inspirational Wallpaper: July

No explanation is really needed for this dreamy summer wallpaper but Rumi’s words are always spot on. Have a lovely and blessed July!

IMG_6961-2

Out beyond ideas of wrongdoing
and rightdoing there is a field.
I’ll meet you there.
When the soul lies down in that grass
the world is too full to talk about.

Rumi

July 2016 Wallpaper


Reflections on a year of cloth-diapering

Our little hobbit turned one yesterday (where did the time go?!) and we have been reflecting all week on the year that has passed. It certainly wasn’t easy. There were so many things we had to learn and many more sleepless nights but we loved every minute of our first year as parents. One of our proud parent highlights of the year was our very positive experience with cloth-diapering. After one year of successful cloth-diapering we highly recommend it to anyone and everyone considering it. However, that doesn’t mean we didn’t learn a thing or two along the way so here we present to you 5 things we wish we knew or did from the beginning to make our cloth-diaper journey a bit smoother and less stressful.

CD3

 1. Print a schedule and keep track of laundry days

When you have a million other things to juggle it’s quite easy to forget the last time you did the diaper laundry. Trust us, it’s not so fun when you realize you’re out of diapers as you are preparing baby for bedtime. Keeping a schedule helps you keep the load of remembering off your shoulders and clean diapers on hand when you need them most.

2. A little bit of bleach goes a long way

Over time cloth diapers eventually start to smell even if you wash them consistently. Whether it’s ammonia or bacteria build-up, the smell can be extremely unpleasant and linger after several washes. Don’t worry, it’s not  necessarily something you are doing wrong. You just need to switch things up and find something that gets the smell out. We started adding a small amount of bleach to our cycles just once or twice a month and it was like hitting the reset button. The diapers not only smelled great but looked bright and clean too! Be careful not to overdo it with the bleach though. After all, it is a harmful chemical and should only be used sparingly.

3. Diaper liners will be your friend when baby starts solids

Remember when we wrote a post about how diaper liners sucked because they ruined our plumbing? While we still don’t recommend them for flushing, they definitely come in handy when your little one starts pooping solids. After several weeks of rinsing smeared poo off the inside of diapers, we decided to bring back the liners and we haven’t looked back since. Just toss the liner with the poo in the pail and you are good to go. No extra whiffing or rinsing required.

4. Some diaper rash creams leave stains

This one just bothers us because we had kept our diapers in such great condition for so long. If you’re like us and you care about keeping your diapers looking clean then know that certain diaper rash creams (non-water soluble like Desitin) don’t wash away. At least we haven’t yet discovered a way to get rid of them. We are definitely going to be using these diapers again for a baby #2 but if you are planning on selling them once you are done (we know many do) then this is something you might want to watch out for.

5. It’s okay to cheat once in a while

If you’re going on vacation or out longer than a few hours and you don’t have access to a diaper pail or laundry machine just go with disposables. That is unless you’re taking an extra luggage to haul back some reeking souvenirs. My brother got married recently and rather than lugging around a bag for dirty diapers to makeup, pictures, and the reception, we opted to use disposable diapers that day for the convenience. I’ll admit I did feel guilty but I eventually got over it. Look, you will have circumstances where it will be near impossible to cloth diaper and that’s completely okay. Don’t be too hard on yourself, cloth-diapering was never meant to make your life difficult.

CD2

If you already cloth diaper these will just have made you nod your head in agreement (we hope) but if you are just starting out then we really hope you find these tips helpful. And if you have any questions or comments we would love to hear from you 🙂 Until next time.

If you liked this post please follow us and share!

Instagram


Inspirational Wallpaper: June

When we think of June we think of bright sunny days and life in full bloom, which is precisely what we were looking for in this choosing this month’s wallpaper. We hope it gives you nothing but warm summer vibes like it does for us. We wish everyone a happy, fun-filled June.

IMG_1737

Tree in Bloom

If you liked this post please follow us and share!

Instagram