
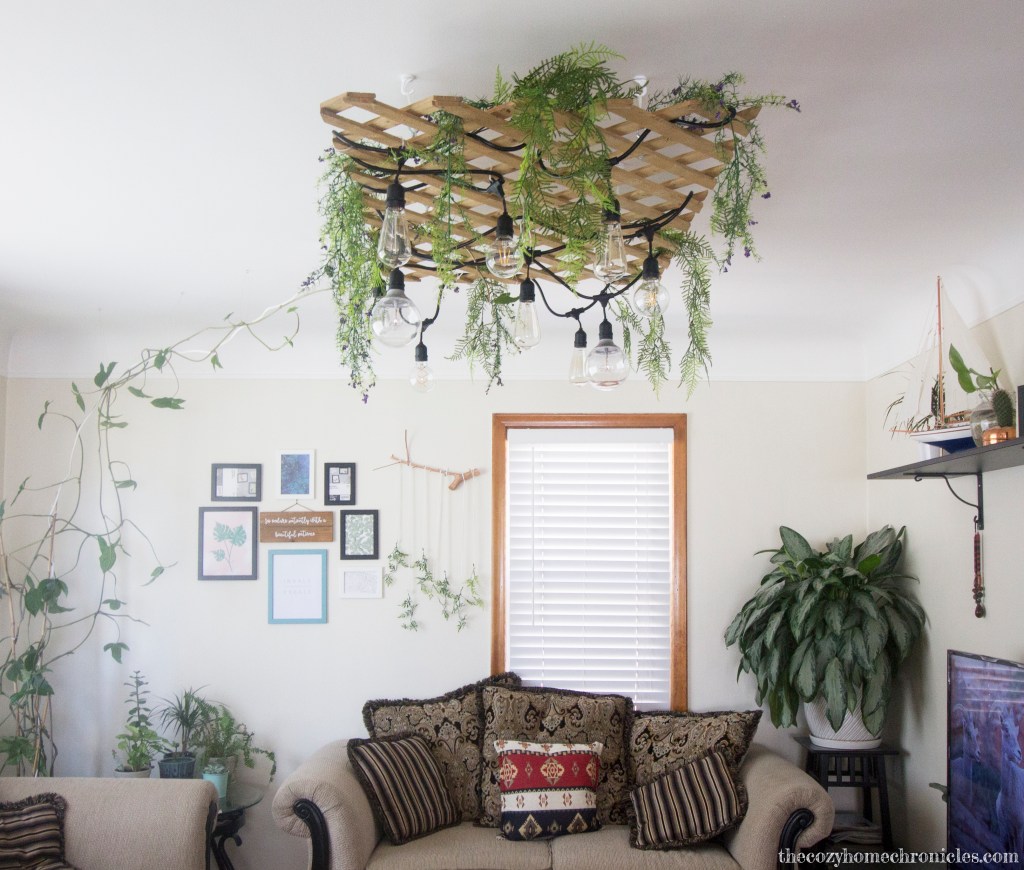
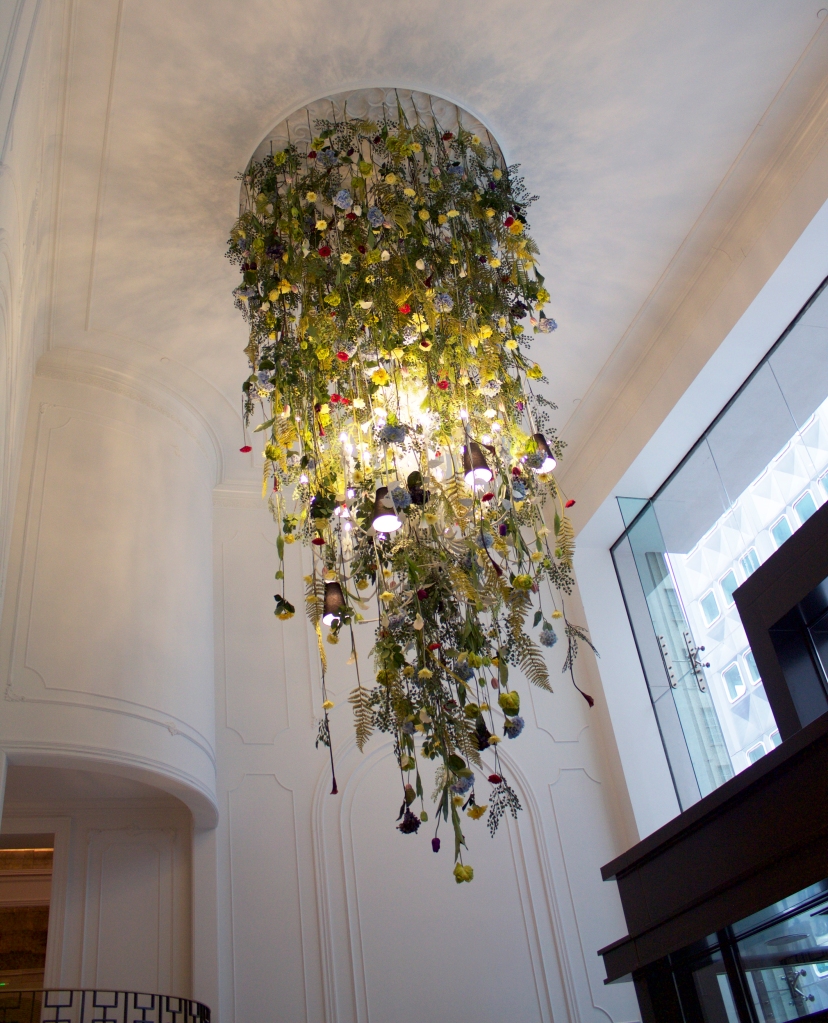
After finishing our crazy and exhausting 6-week bathroom renovation challenge in May, you would think we would wait just a littttle bit longer before DIYing again. But, nope. We just can’t help ourselves. It seems there is never a shortage of problems that need creative solutions and for us one of those problems has been the lack of adequate lighting in the living room. For the last four years we have made do with two lamps on our end tables and let’s just say, the amount of light they offered left much to be desired. Making our own light fixture has been a goal of ours and so we have been mulling ideas over for quite some time. All we knew was that we definitely wanted something that gave off rustic, jungalow, boho vibes. When I thought of inspiration that embodied these elements, my mind always went back to the same place: The lobby of a hotel in Philadelphia where I stayed for an anthropology conference.
We also wanted something inexpensive; something we could make out of upcycled and thrifted materials. It didn’t take long for us to settle on the garden lattice sitting abandoned at the back of our garage. Not only did it give us the look we were going for but it also helped us solve another design problem: what to do with the overgrown arrowhead vine taking over the living room. And then, almost in what could only be described as divine intervention, something possessed my husband to stop at a garage sale where he found this set of 5 really cool Edison bulbs for $5 (normally they would go for around $7 a bulb). A few Home Depot trips later and we had settled on how to hang our new fixture. The funnest part of this whole process was seeing our random ideas become a reality. We are just so happy with the finished product and we love that it feels like a rustic garden in our living room. We like it so much, we just may consider putting another one up above the dining table 😉 Alrightie, here’s what you’ll need to make this fixture:
Supplies
Pressure Treated Lattice
(6) Ceiling Hooks – VersaHook
(10) Heavy Duty Cable Ties or Loop Wire and clamps*
(6) Metal Bolt – Everbilt 3/8 in. Eye Bolt with Nut
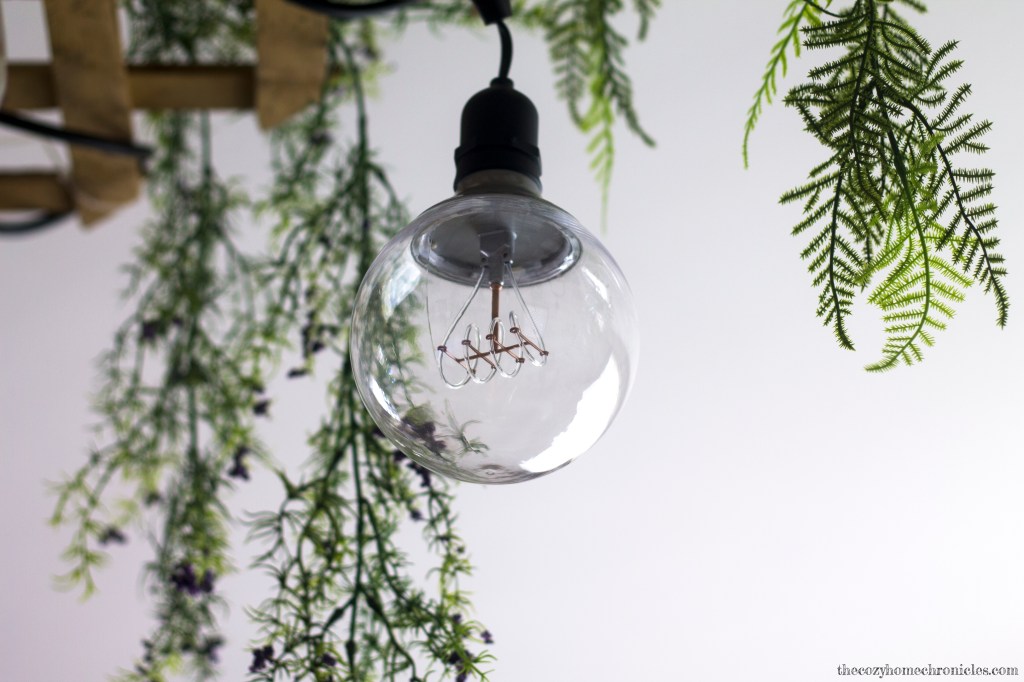
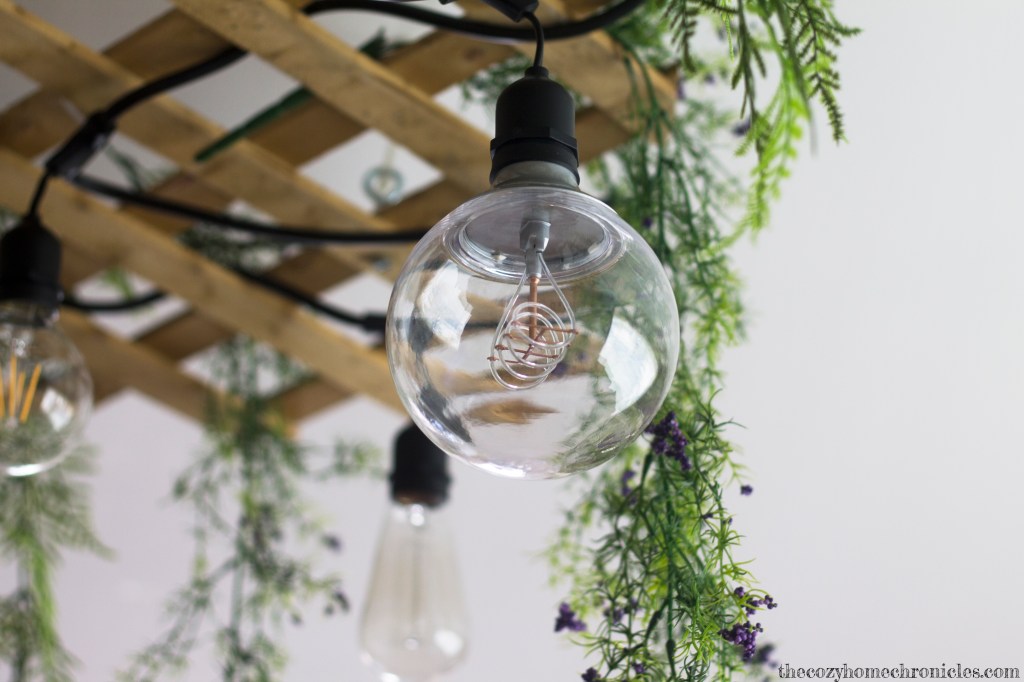
10 Vintage or LED Edison light bulbs
10 String Light socket
Faux Foliage
*Important: For safety purposes, make sure to use commercial cable ties with a tensile strength of at least 40 pounds or you risk the fixture falling down.
Directions:
- Cut the lattice to the desired size (we did 3ft wide by 5ft long) with a hand saw.
- On the lattice, choose 6 symmetrical points for hanging support and drill a hole for each. Secure the 3/8in eye bolts in each of the six holes.
- String the cable ties through the eye bolts and loop until completely secure. This is very important. You must not be able to open the loop or slide the tie back through the head.
- Measuring according to the location of the eye bolts on the lattice, drill 6 corresponding holes into the ceiling.
- Insert drywall anchors into the ceiling holes and secure the ceiling hooks by twisting.
- Just for a test run, install your fixture base by hanging the cable tie loops on the ceiling hooks. If everything looks good and sturdy then take it down and proceed with the next steps.
- Now for the fun part! Weave your string light sockets through the lattice and secure the wire in place with the remaining cable ties (you can use more if you like).
- Decorate your light fixture by arranging your faux foliage around the lattice either by weaving the stems through the lattice or using glue or a staple gun for a more permanent fix. Make sure to place the foliage a good distance away from the light bulbs or they can burn.
- Install your completed fixture by hanging the cable tie loops on the ceiling hooks.
- Finally, screw in your Edison bulbs, plug in the light, and enjoy the beautiful view!


With the lattice and the Edison bulbs as the base, you can customize this fixture for any home decor style with just a coat of paint and greenery of your choice. You can hang flower stems, eucalyptus, lavender, air plants, etc… The creative possibilities are endless. If you do attempt to make this, be sure to share and tag us so we can see 🙂
If you liked this post please follow us and share!
![]()


Leave a comment