Low Waste Eid Gift Guide

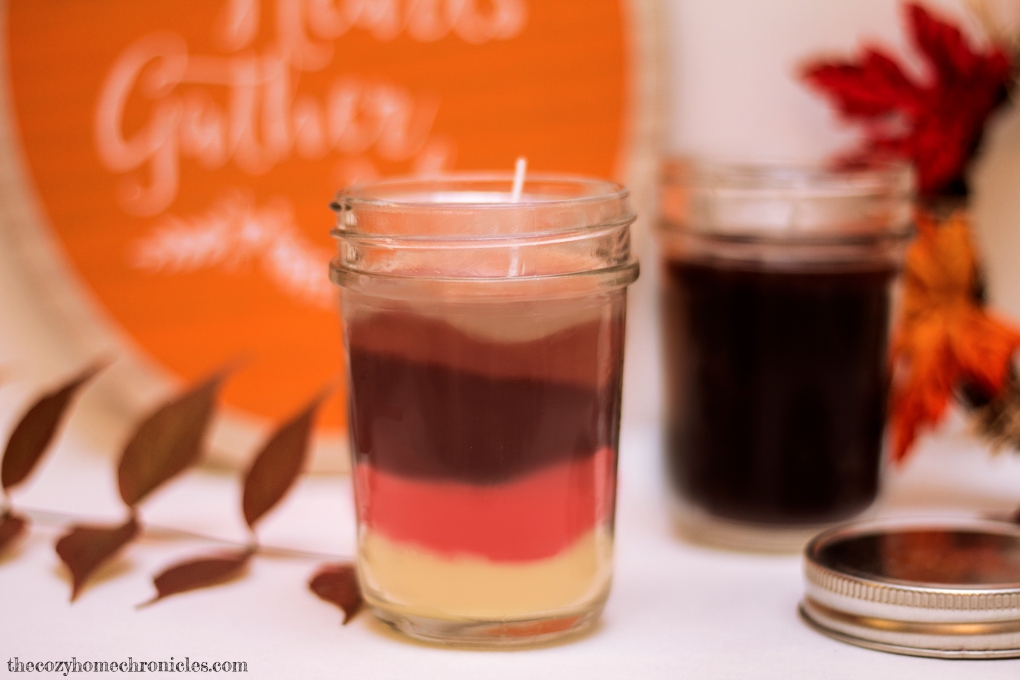
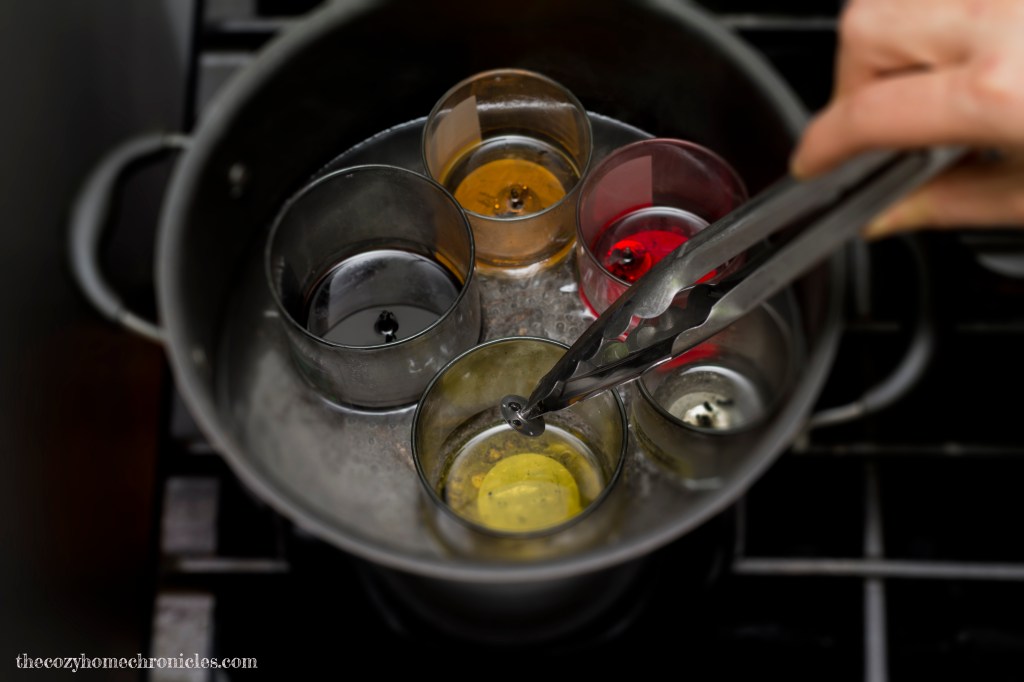
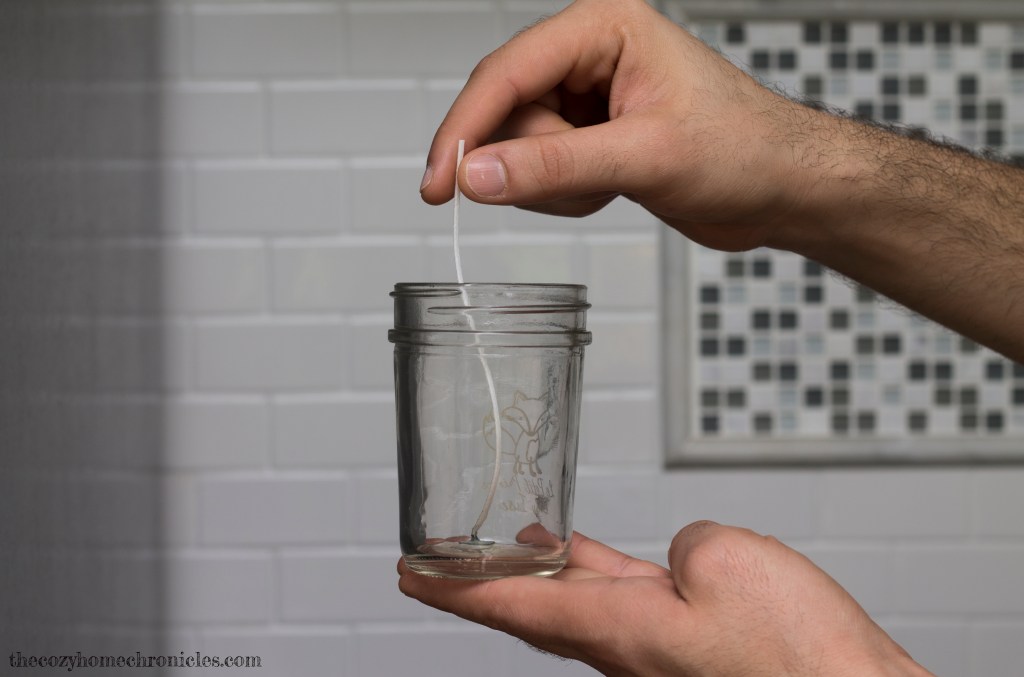
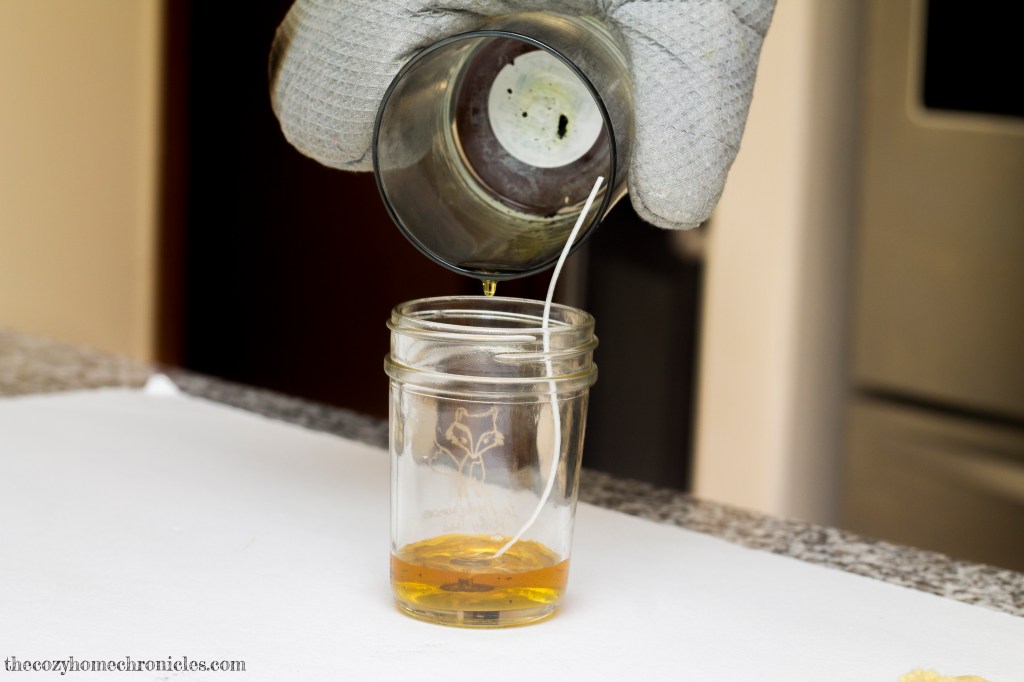
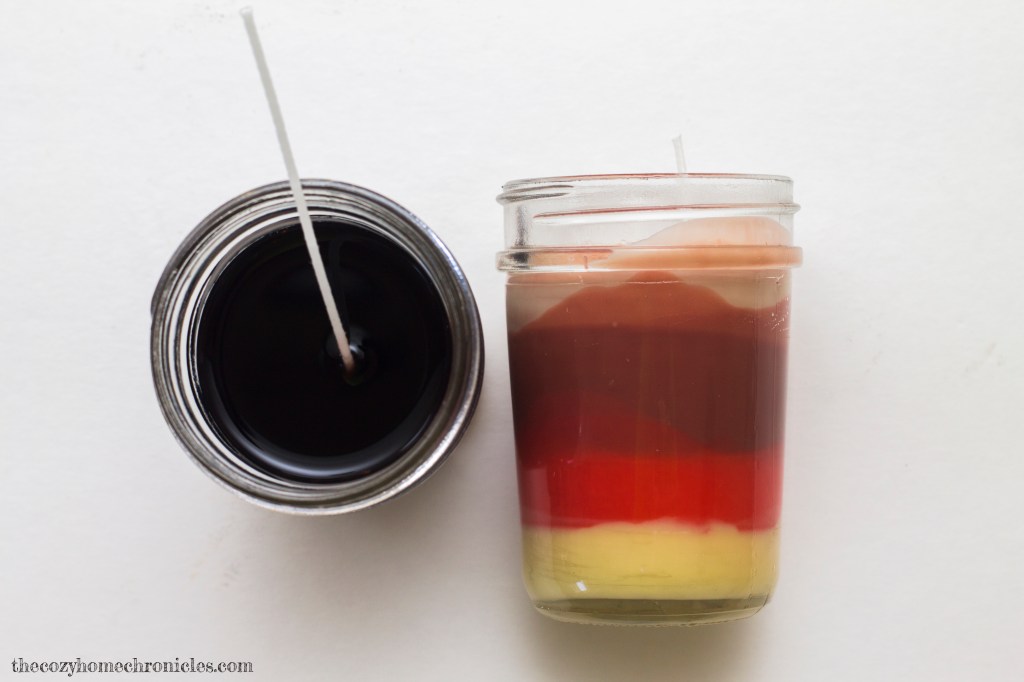
Hello friends! It’s been a minute since I’ve written a post on this blog. I’ll spare you all the boring details but since last Ramadan, we’ve added a third baby to our family, Sufi graduated with his MBA, and we flipped another house. I’m still trying to finish my dissertation while juggling life with three kids during a pandemic. As you can see we have our hands full! But as many of you know, blogging is my creative outlet and absolutely necessary for my mental health so I’ve made some time to do something I enjoy while creating a resource for you to help you make Eid 2020 special as sustainably as possible.

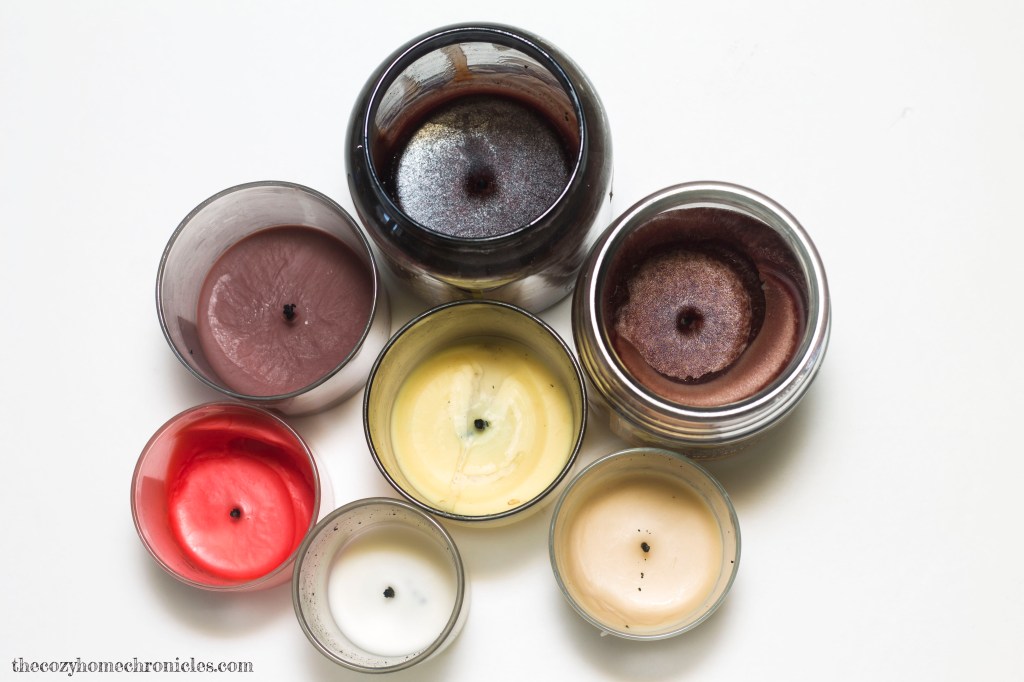
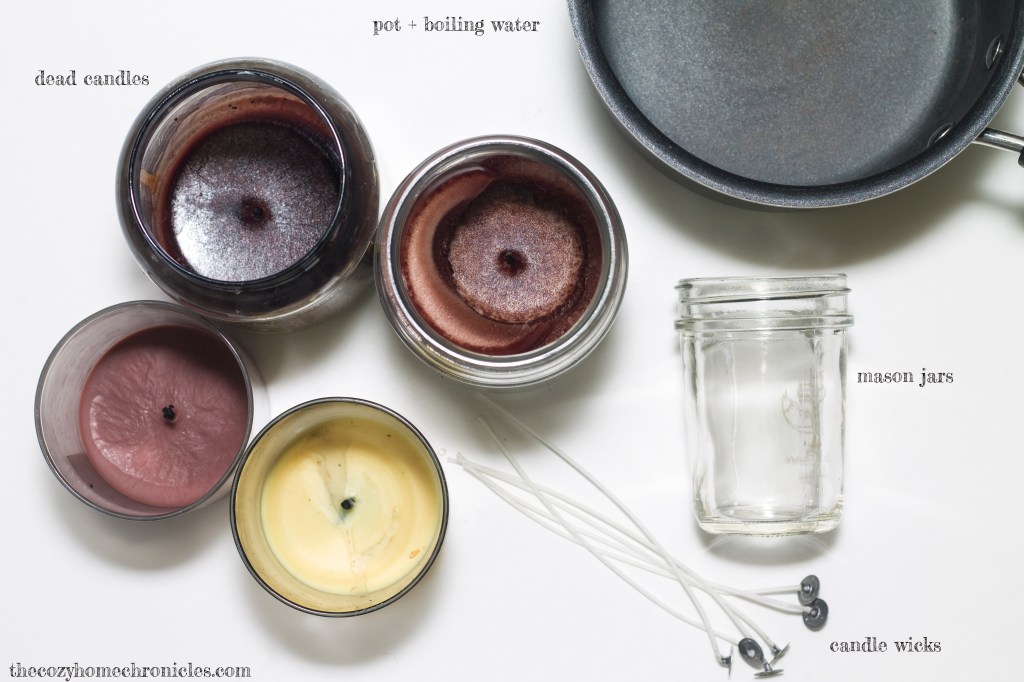
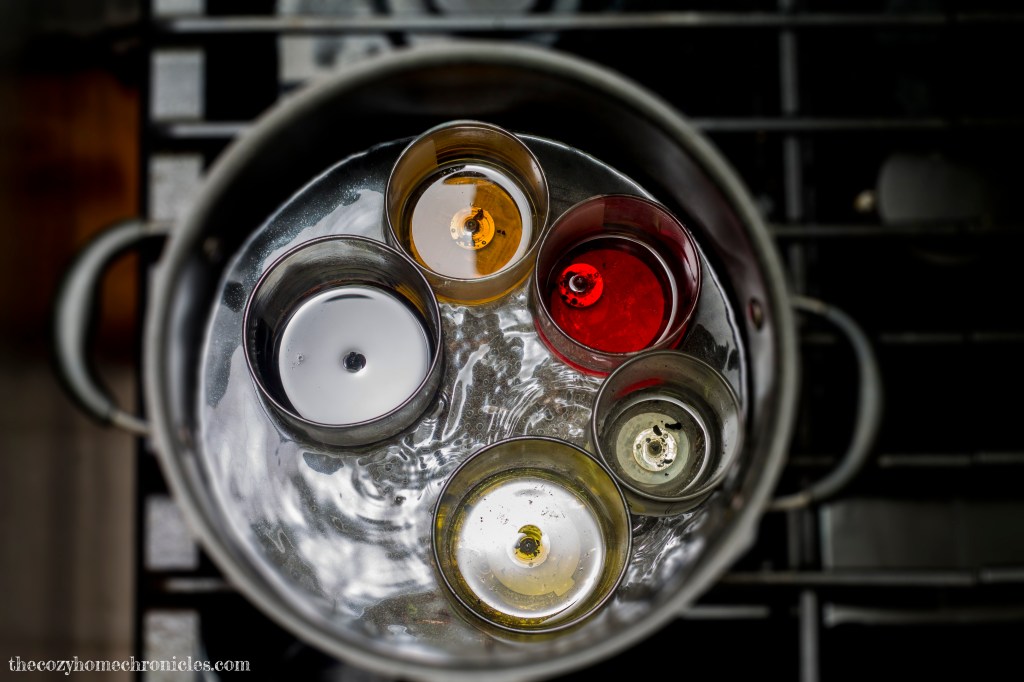
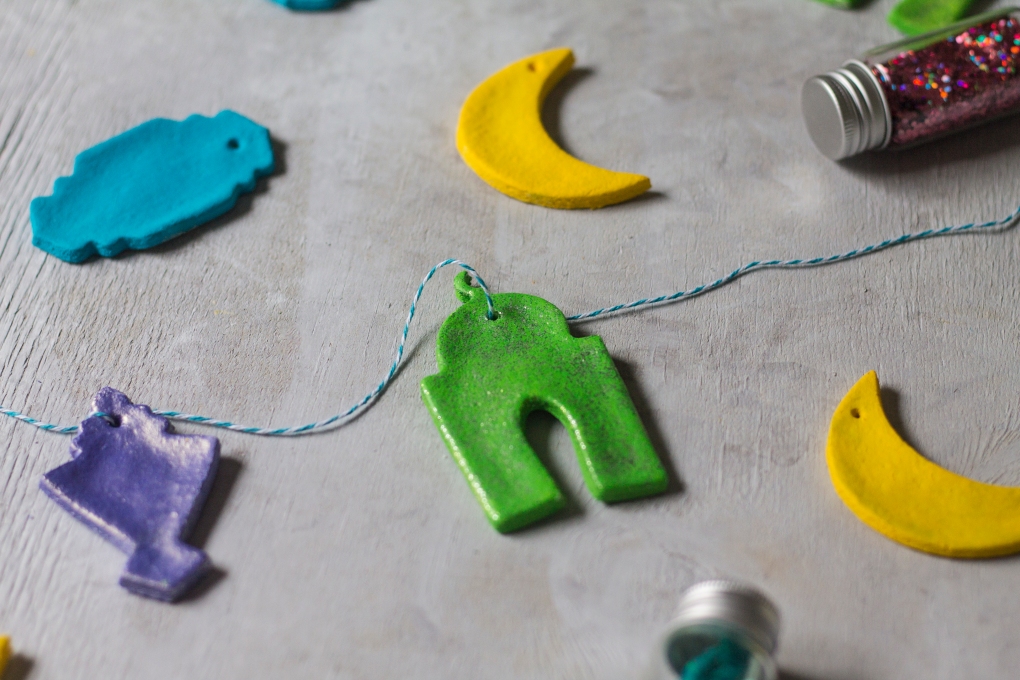
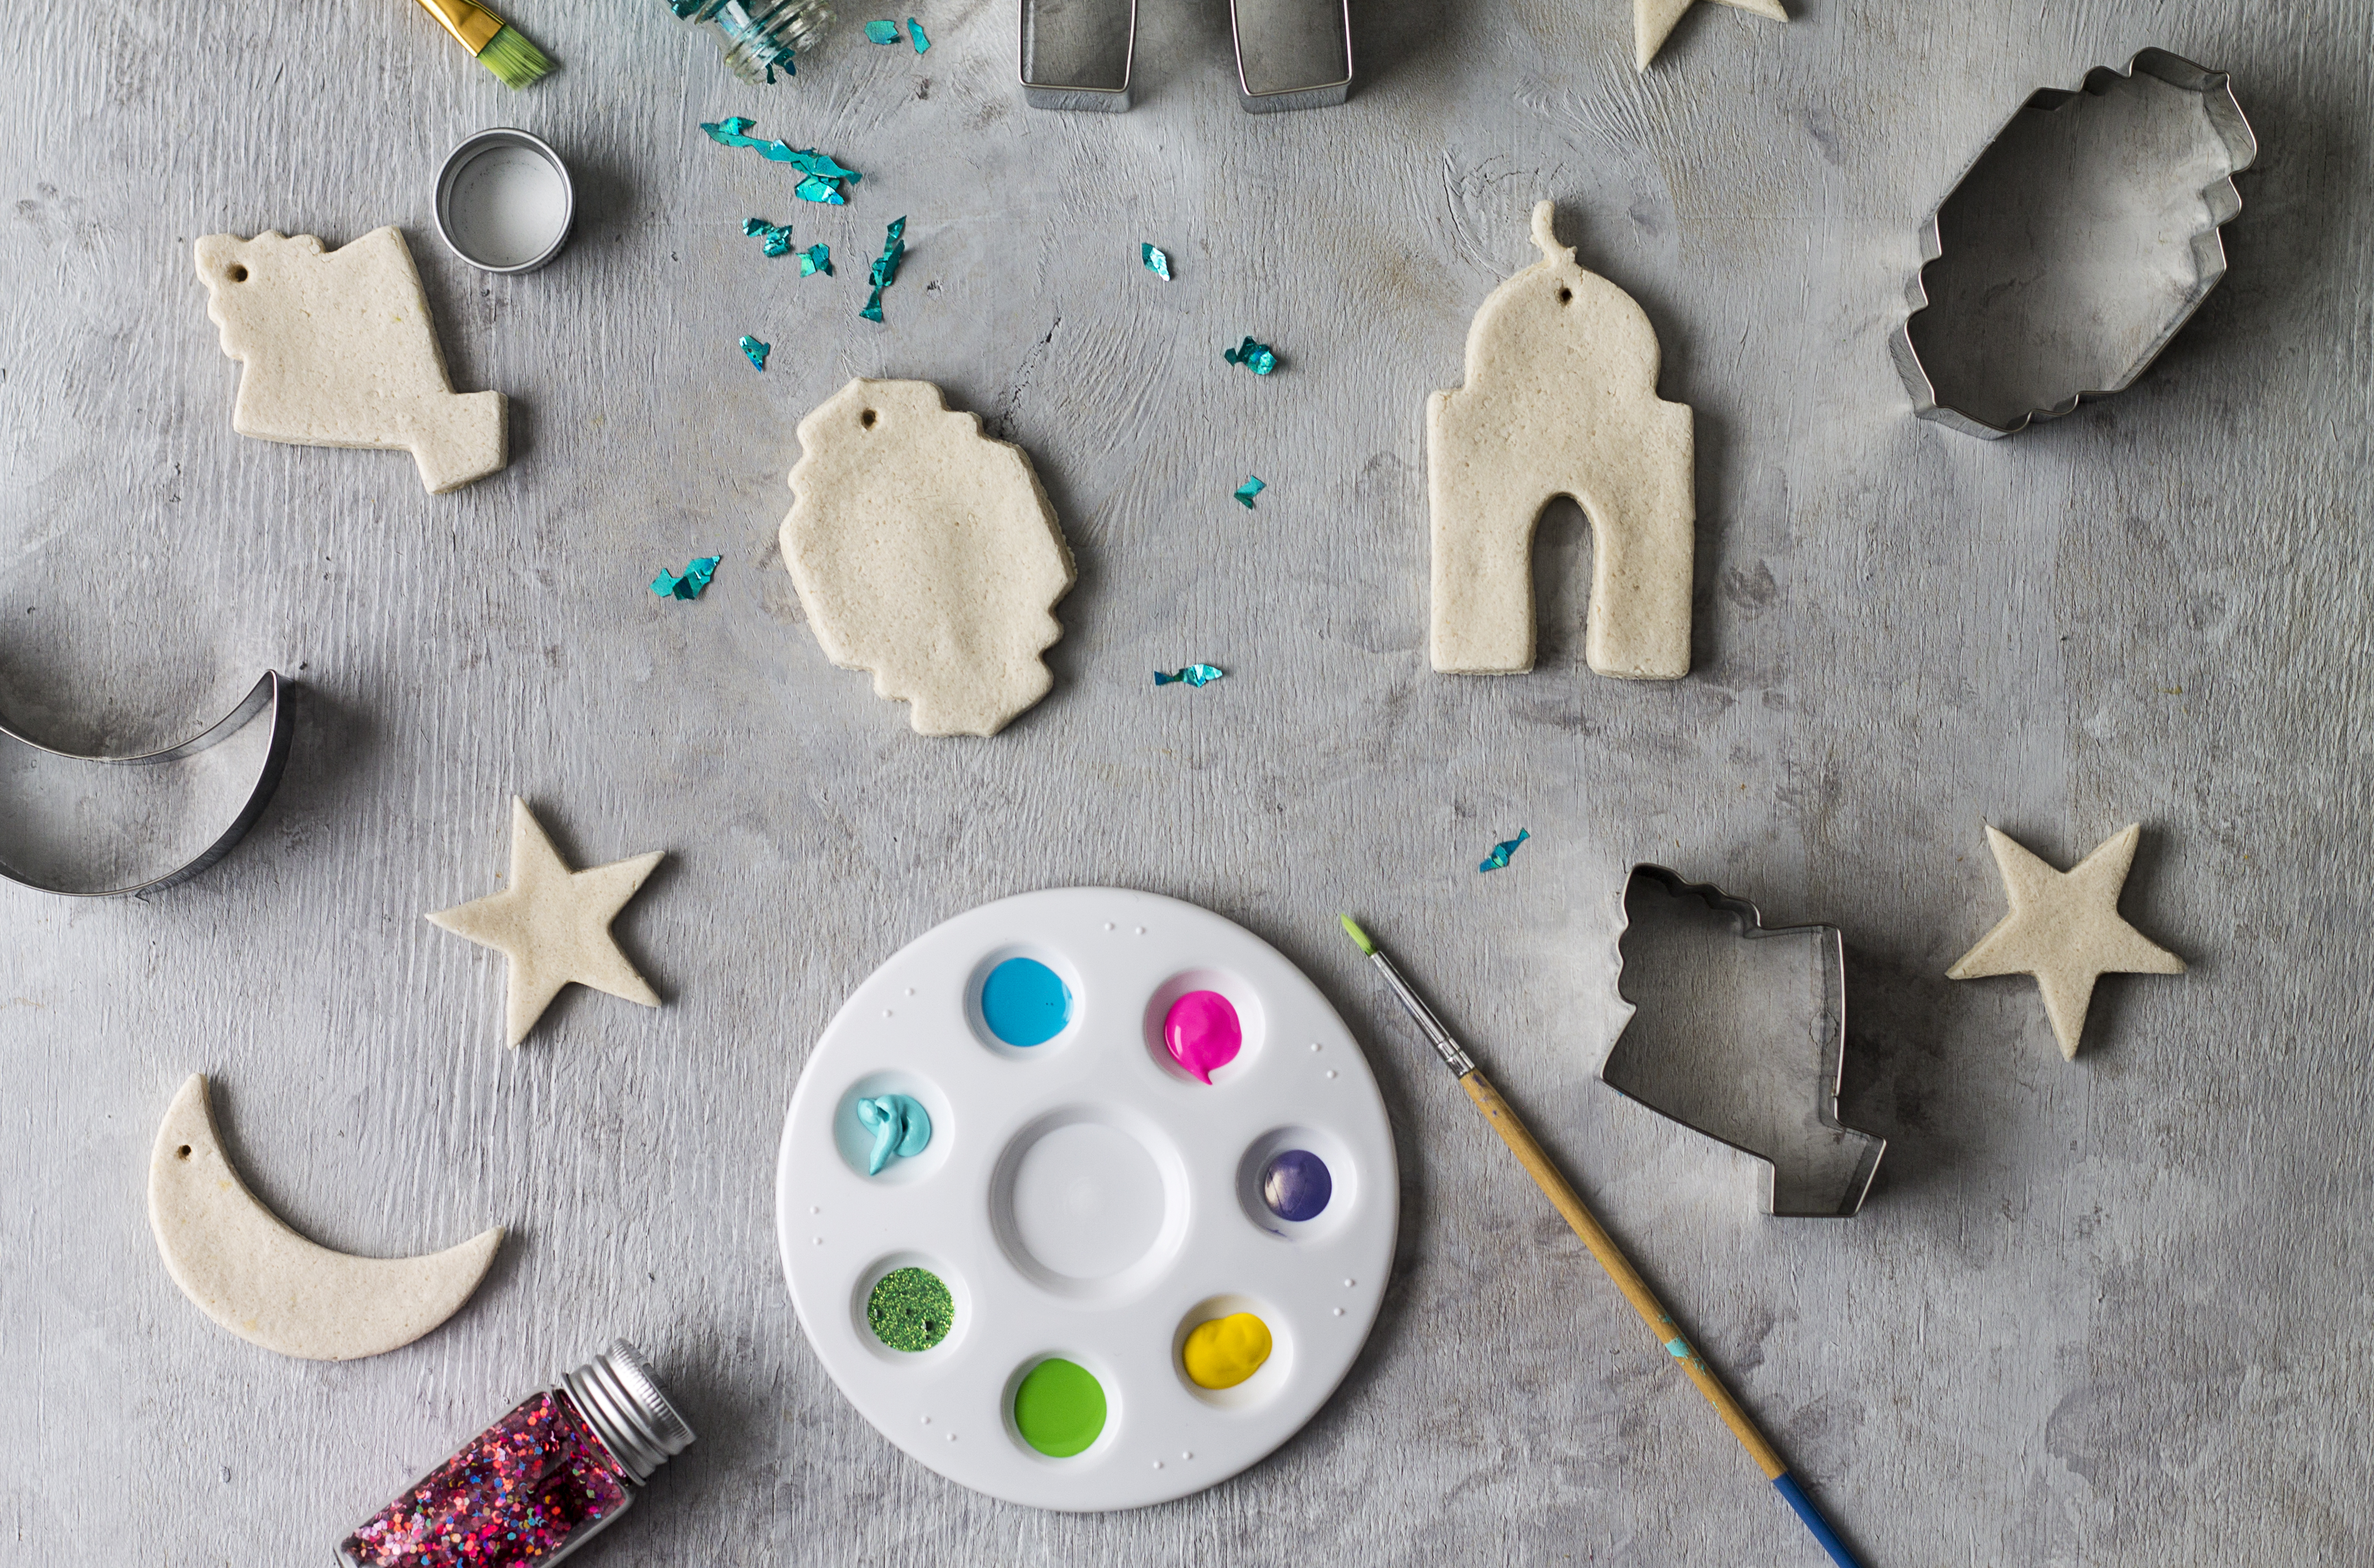
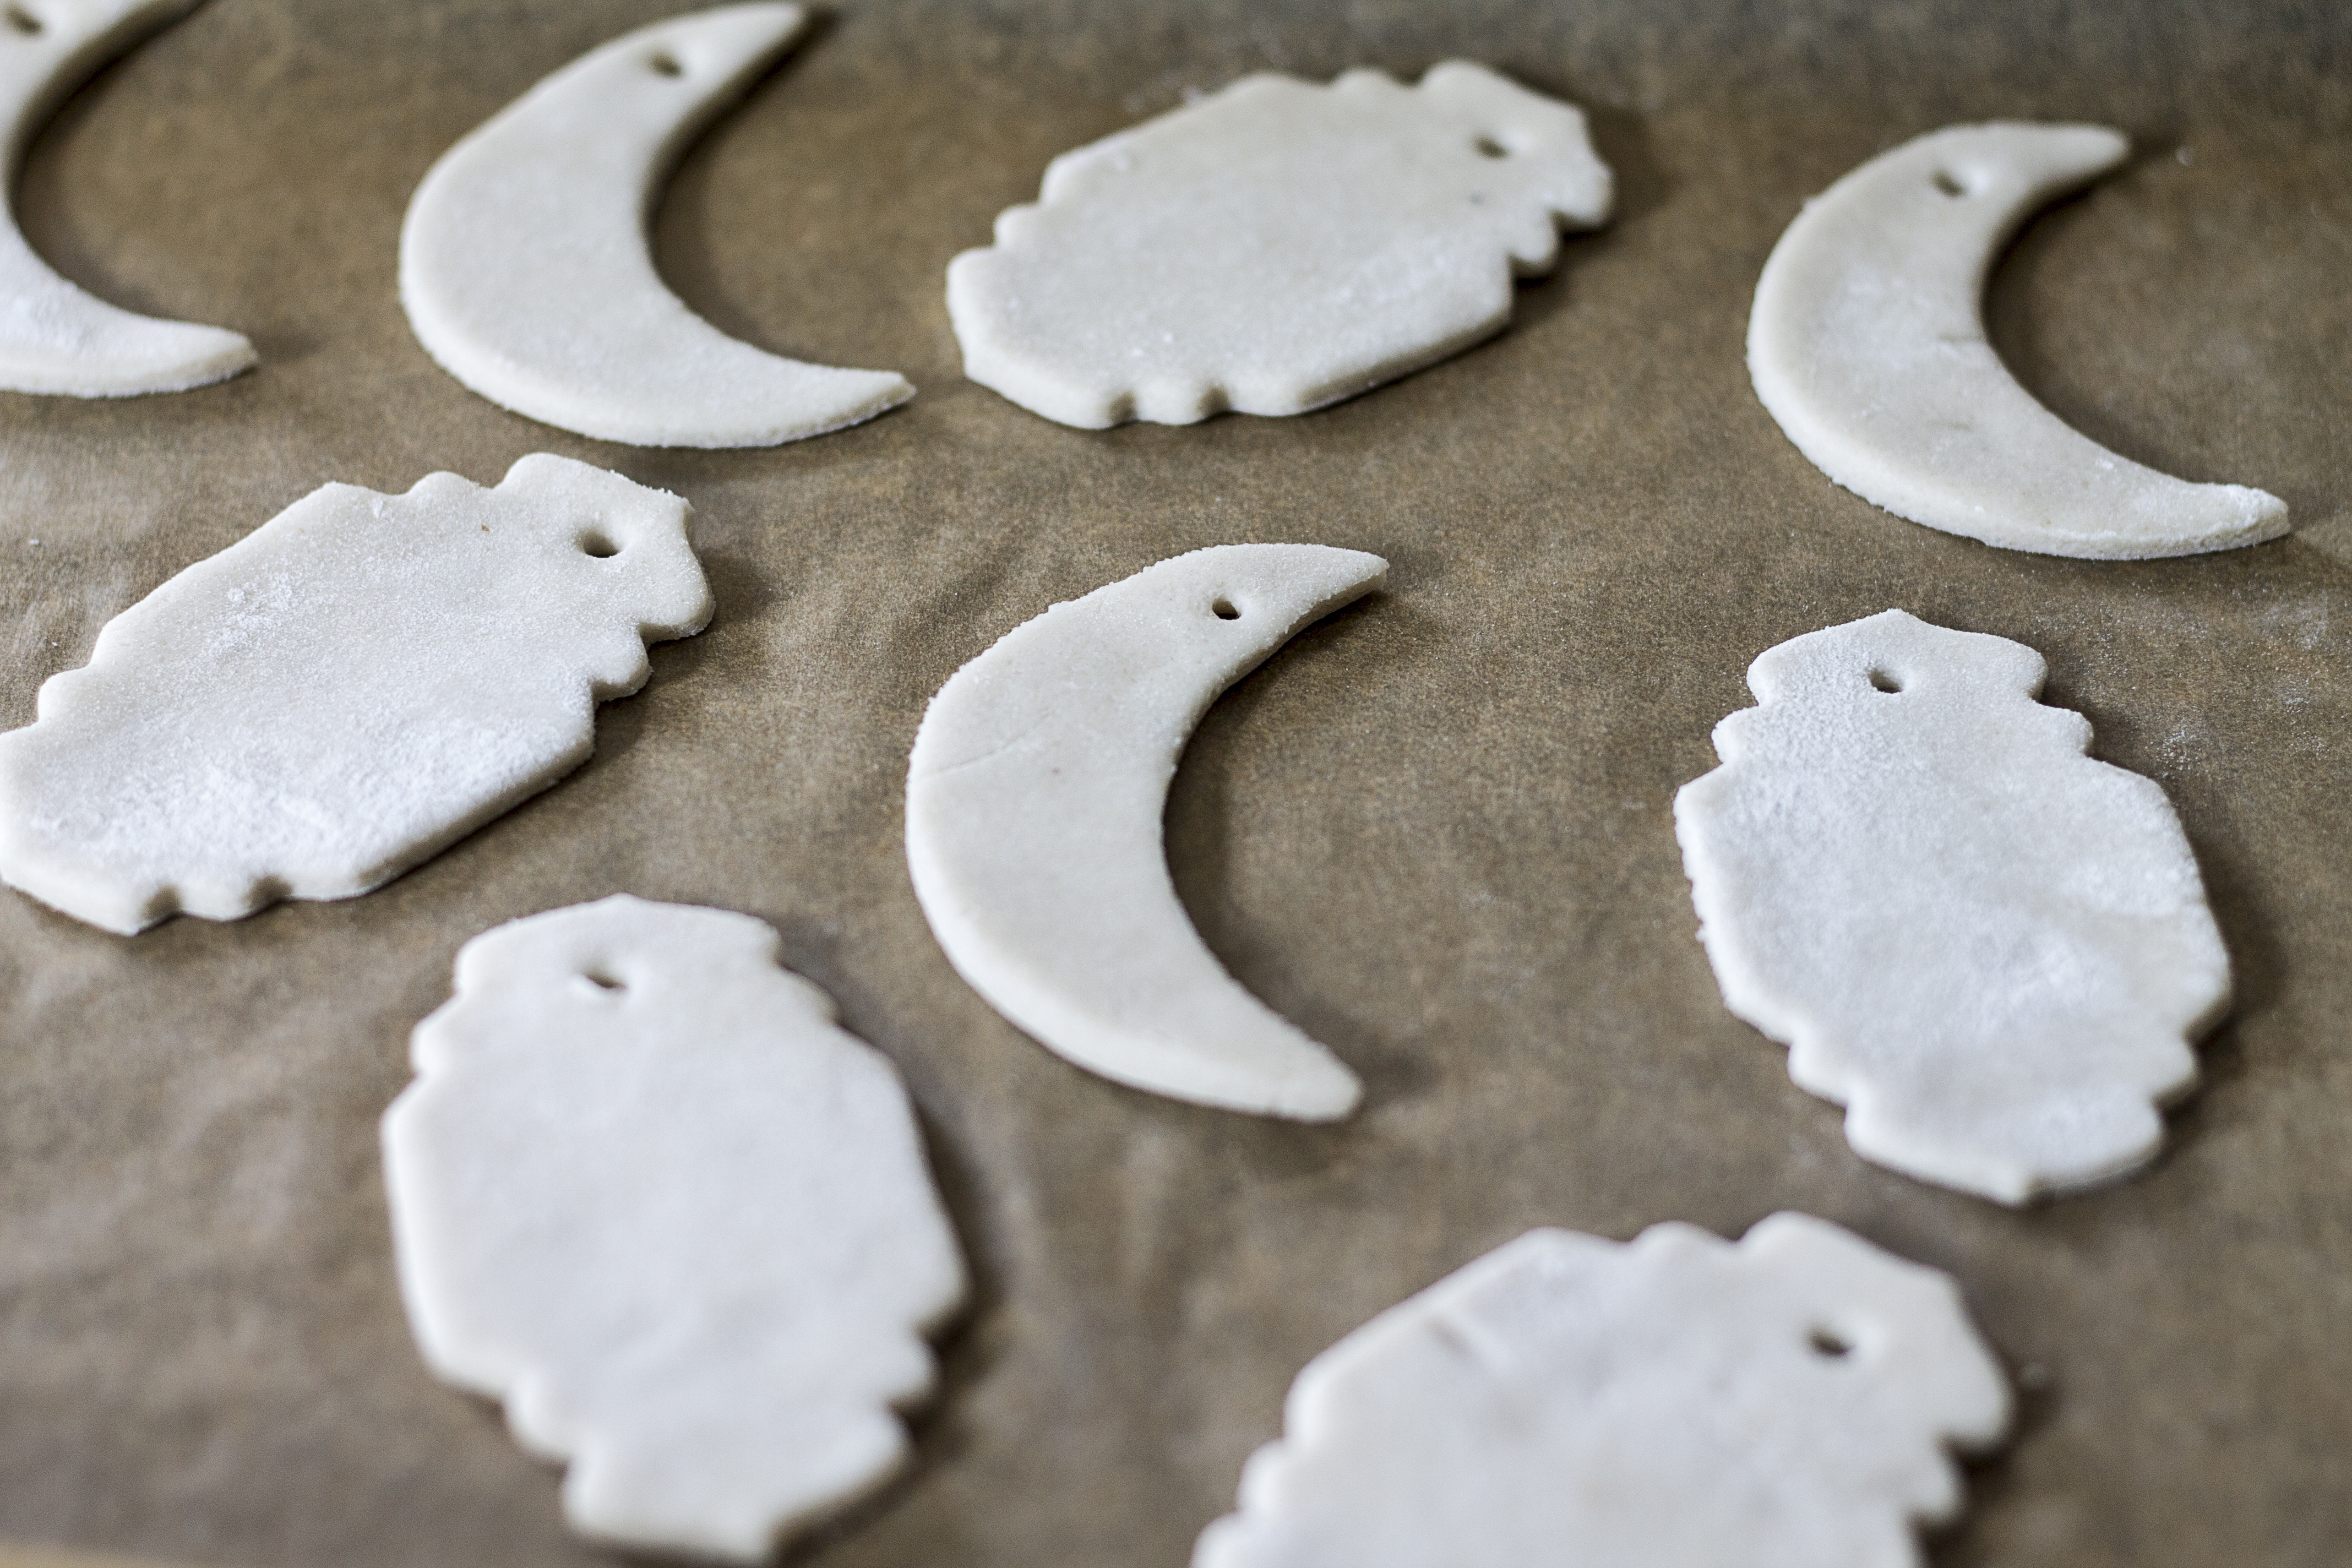
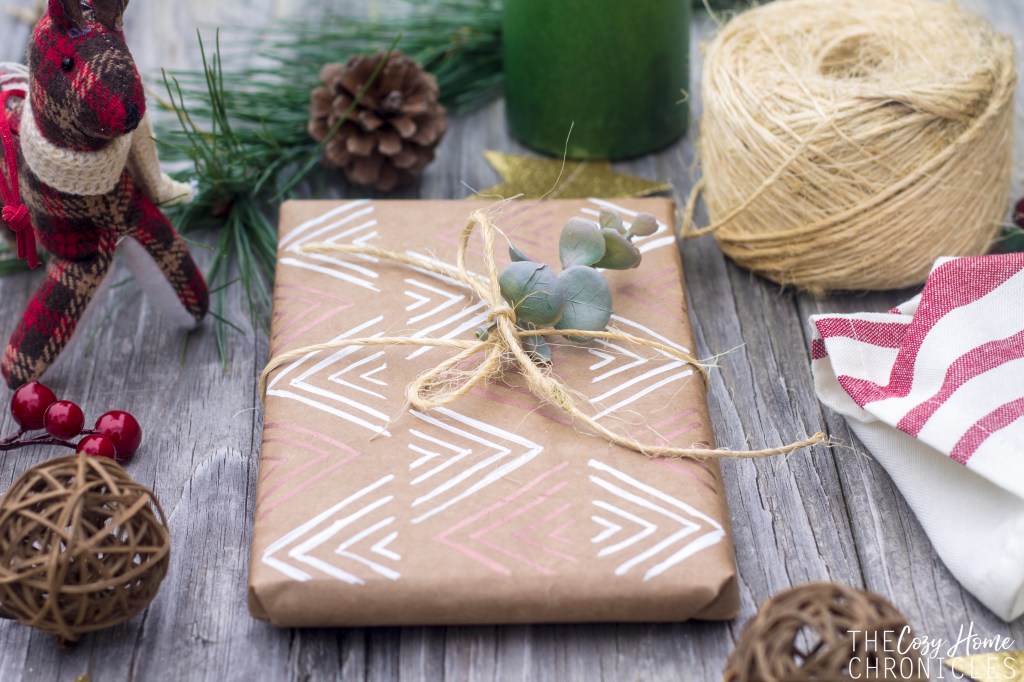
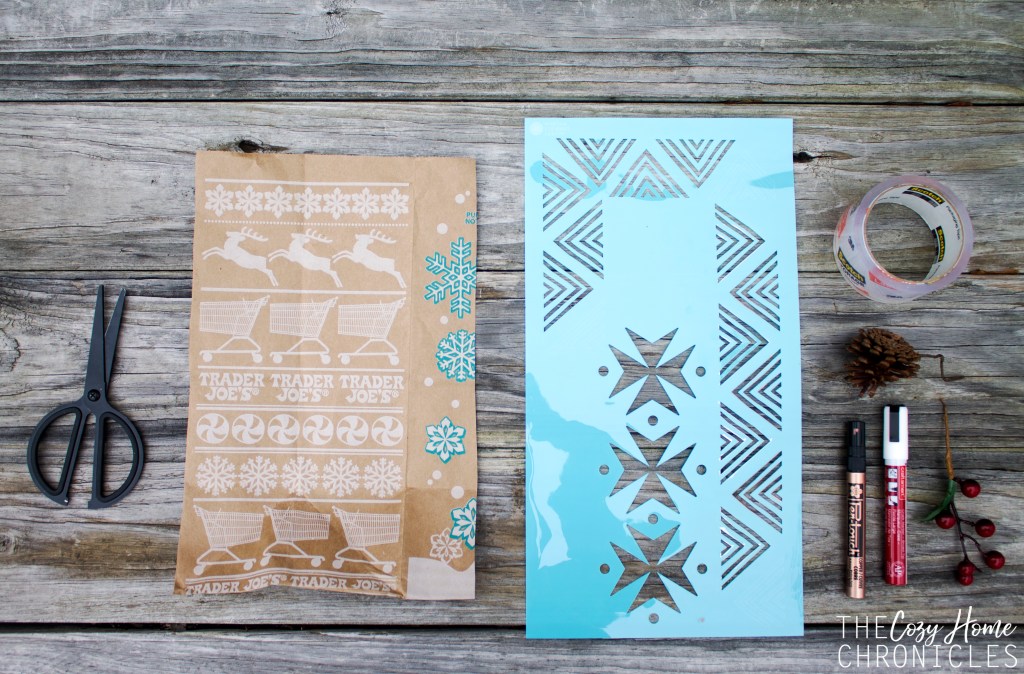
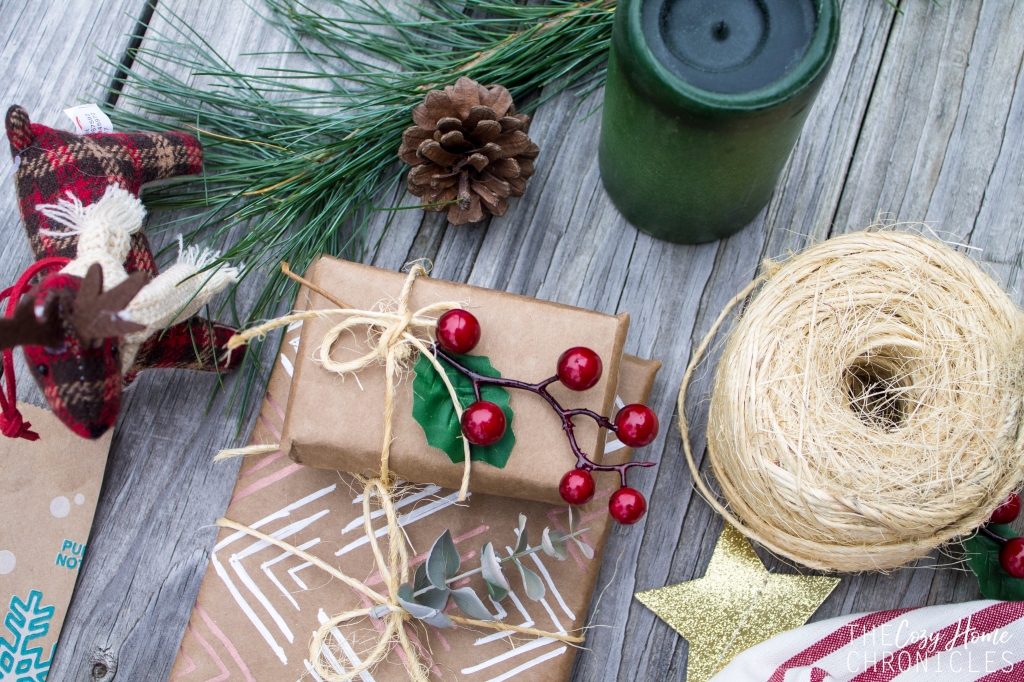
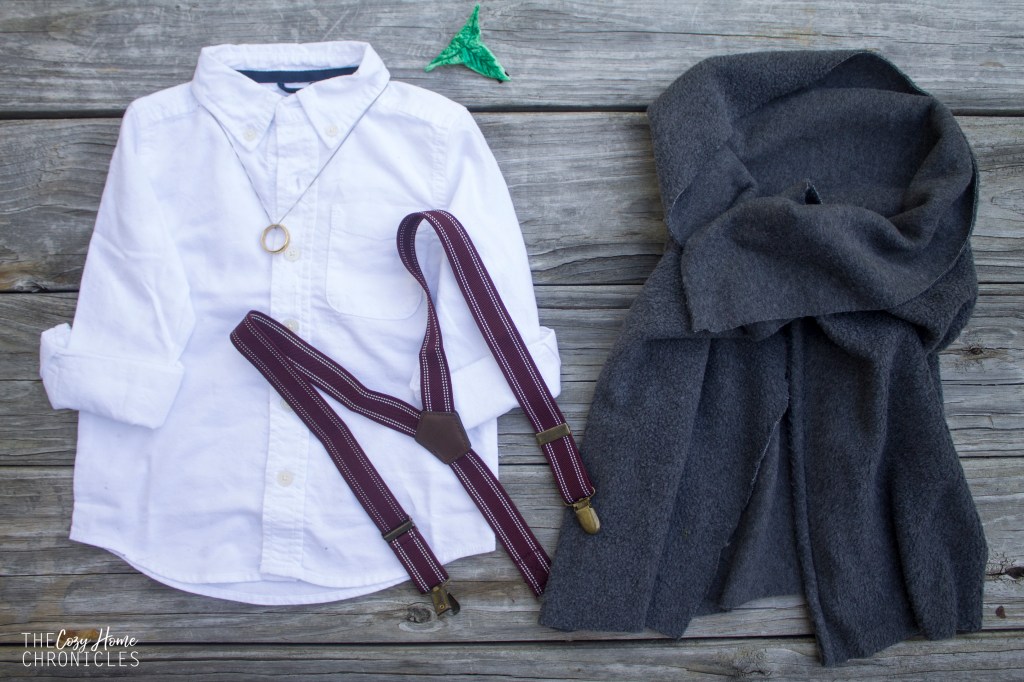
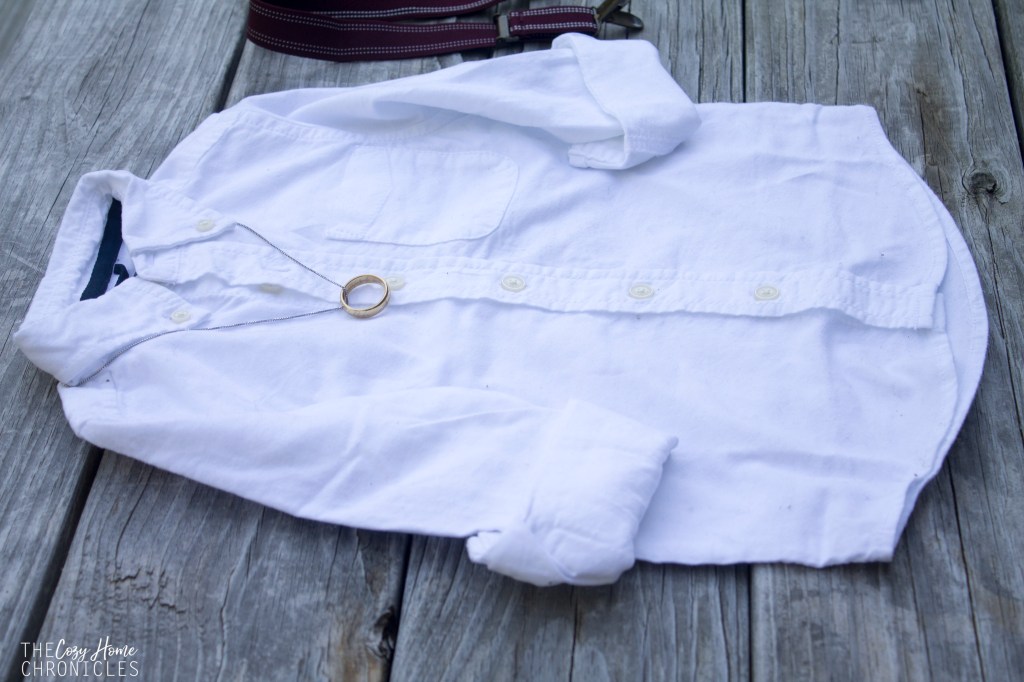
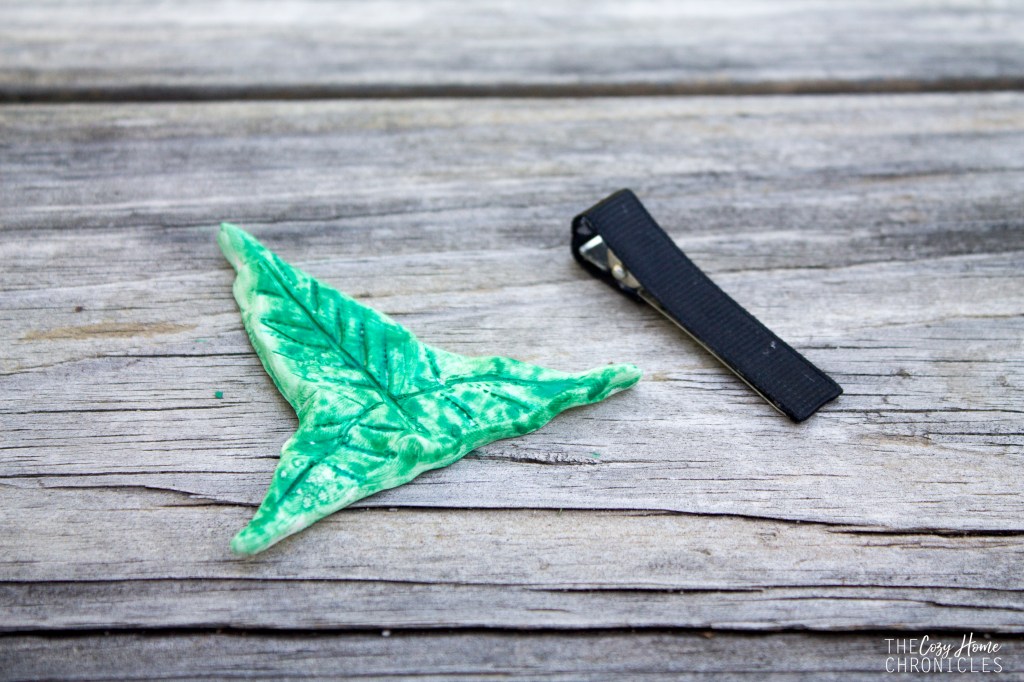
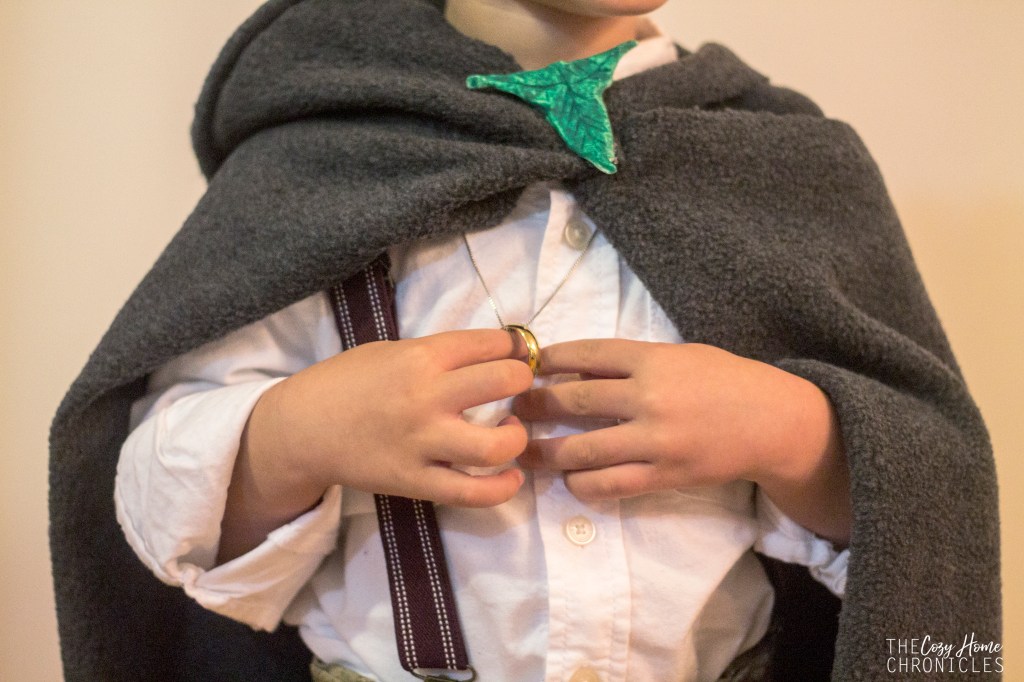
Low Waste Eid is a compilation of beautiful and thoughtful gifts from a diverse group of talented Muslim bloggers. The emphasis is on minimizing waste and getting creative by using what you have around your home. These days, it’s easy to get caught up in the consumerist impulse even when it comes to Muslim holidays but given the devastating effects materialism has on the environment, human rights, and our spiritual health (among many other things) it’s time we rethink how we consume.  Even if you purchase the majority of your gifts, I hope you’ll attempt to make one of these low-waste gifts from our guide. Every journey begins with one step and there’s never a better time than now to take a step towards living more sustainably.

If you enjoyed this ebook, please share it with your family and friends and please show these wonderful contributors your support by following them on instagram and engaging with their content.

Aisha
Amanie
Areeba
Bea
Farhana
Hana
Nida
Tayyaba


DIY Ramadan Salt Dough Ornaments

The month of Ramadan is just around the corner and this year is a busy time for us as we are expecting baby #3 in July. As you may already know, decorating the home for Ramadan is something we do every year and this year is no exception. We are, however, trying to be more conscious of our waste so I’m really focusing on using what we have and making what we don’t. That’s why I’m super excited to share this DIY Ramadan craft project featuring With a Spin’s cookie cutters. This project makes use of everyday ingredients in your pantry, can be customized to your style, and the finished product can be used year after year. Now that’s what I call a win-win-win. While, I love neutral minimalist tones, the kids wanted vibrant colors so that’s what we went with. The decorating possibilities are truly endless. Let’s make some salt dough ornaments!

Ingredients
2 cups all-purpose flour
1 cup salt
1 cup warm water

Tools
Lantern cookie cutter set
Islamic shape cookie cutter set
Rolling pin
Baking sheet

Directions

  1. Mix warm water into flour and salt mixture to form a dough. Knead for 10 minutes until smooth.
  2. Roll out dough about 1/4-1/2 inch thick and cut out desired shapes. Use a toothpick or skewer to punch a hole near the top of the shape for the string.
  3. Place shapes on a baking sheet and bake for 5 hours at 200 F.
  4. Let cool overnight and paint with acrylic or craft paint.
  5. Thread with string to make individual ornaments for hanging or string several together to make a festive garland.

That’s it! This is such a simple and fun craft to make with the kids and a wonderful way to get them involved in the Ramadan spirit. If you liked this craft and found it inspiring, we would love if you shared it. If you make this DIY, be sure to share a picture of your creation and tag us on Instagram @thecozyhomechronicles.

For more related content, you can find us on Instagram where we share more of our day-to-day and Pinterest where we share our ideas and inspiration. If you have any thoughts or suggestions about this DIY project, feel free to leave a comment below. And as always…


DIY Upcycled Tea Tin Planter


February is coming to an end and we are a tad bit in disbelief. I know, this seems like a reoccurring theme over here but during this busy season of our life it’s difficult to fully grasp how quickly the time is flying. We did take some time off for a family vacation (there’s a post in the works) in January and it was just what we needed to reset for this new year but when we came back we dove head first into our semesters and it took some time to get back on our feet. We are now back in the groove of things and excited to share what we have been working on. Last month I was lucky to be a part of Salvage Dior’s January Creative Team on Instagram where each week I, along with my four teammates, were responsible for creating something new for our homes that fit within the following themes: 1) Upcycle, 2) On the Wall, 3) Child’s Play, 4) Coffee Table Decor. In this post I’ll be sharing the project I completed for the first week, an upcycled tea tin turned planter.

IMG_8994

Loose leaf tea is something we drink quite a bit of in our home and I’m always left wondering what to do with the tins once they’re through. In the past I’ve used them as storage for spices and knick knacks but this time I wanted something a bit more creative. At the time we were also revamping our plant corner so I thought it would be nice to make some new planters for the Pothos and Sedum I was growing hydroponically. I was inspired by the recent trend in natural fiber textiles and wanted to create that woven look to contrast with the industrial shelving we chose for the plant’s display. If I wanted to buy what I was looking for, I could have easily spent anywhere from $6-25 a pot depending on the size. Instead, I was able to make this tea tin planter and some tin can planters for $0 because I had everything already on hand. The only thing that you would probably need to buy if you’re not DIY nerds like us is the bundling twine but that itself is very inexpensive ($3.98 for 525 feet). Alright, let’s make a planter!


If you are an avid DIYer, you most likely have a glue gun in your arsenal of crafting tools.

eb_loose_2

DIY Upcycled Tea Tin Planter

  • Difficulty: Easy
  • Print

Materials
Tea tins or tin cans, washed and dried
Bundling twine
Hot glue-sticks
Milk Paint (optional)

Tools
Glue Gun
Scissors
Drill (or a hammer and nail)

Directions

  1. Heat your glue gun and in the meantime use your drill to place drainage holes in the bottom of your tin. You can also use a hammer and a nail to do this or you can skip this step and just make sure to include a layer of small rocks beneath your soil for water drainage.
  2.  Glue the end of the bundling twine to the side of your tin at the very bottom and begin wrapping the twine around, making sure to glue the first 3 coils to the tin and to each other. As you wrap the twine, be sure to push the coils down tightly to close any gaps and give your planter a neat, elegant look.
  3. Continue wrapping the twine around, stopping midway to glue the coils down. Wind the twine around the tin until you reach the top and then cut the twine to length.
  4. Uncoil the twine a couple turns, then rewind it tightly against the tin using hot glue to secure the top two coils to the tin and to the adjoining coils.
  5. Take your scissors and trim off any noticeable twine hairs sticking out (see the time-lapse video below). At this point you can paint the planter and let it dry or go straight to planting and styling it!

IMG_8984

IMG_8998

If you liked this post and found it inspiring, we would love if you shared it. For more related content, you can find us on Instagram where we share more of our day-to-day and Pinterest where we share our ideas and inspiration. If you have any thoughts or suggestions about this DIY project, feel free to leave a comment below. And as always…

signature3


DIY Upcycled Brown Paper Bag Gift Wrap

It’s finally the holiday weekend and that means we are inching ever closer to the start of 2018. We recently hit our 2 year blogging anniversary earlier this month and we thought it would be nice to celebrate with a short reflection and a makeover of the first post that ever went up on this blog. Why? Because sometimes, in the nitty gritty of blogging we can find ourselves questioning it all and in our tunnel vision of self-pity and negativity, we forget how far we have come. Comparison isn’t so bad when you’re looking at yourself and everyone loves a good before and after so here is ours.

IMG_8421

IMG_7538

As you can see clearly, our styling and photography has drastically improved in the last two years. Our first post was written in 2015 just a week before Christmas and right before I was about to dive into a week of hell taking my PhD qualifying examinations (a 7 day, 40+ page writing endeavor). Since that first post, we have connected with some wonderful bloggers, participated in two One Room Challenges, built a small but amazing community, and even wrote our first sponsored blog post.  There have been many times this year when we would feel frustrated with our engagement or turn-around time and even question what kind of blog we were aiming to be but looking back to our first post, I think the answer has always been there. DIYing is obviously something we are very passionate about as well as striving to live as simply and sustainably as possible and that’s exactly the commitment that our first post embodies. In this post, we will be sharing our revamped post with a little twist; using stencils to create beautiful gift wrap designs. For those of you who waited until last minute to wrap your gifts, you’ll want to hold off on that last minute Target run because this is such a simple way to add a personal touch to your gift wrapping and for next to no cost at all (depending on what your craft supply stash looks like). The wonderful thing about this gift-wrap is that it’s not just for Christmas; you can customize it to fit any holiday or occasion year round.

IMG_7551

Supplies
Brown paper bag
Scissors
Stencils
Metallic Paint Marker, paint pens, or sharpies
Twine
Embellishments such as eucalyptus, flowers, pine cones, etc..

IMG_7527

Directions

  1. Flatten your brown paper bag and cut down to the size you need.
  2. With a metallic paint pen, stencil in the blank side of the bag using the pattern of your choosing.
  3. Place your thoughtful gift inside and wrap nicely.
  4. Embellish with rustic twine, eucalyptus, pine cones, or holly.

IMG_7536

As you can see, I was going for a minimalist/bohemian look (surprise, surprise) with the copper and white pattern, twine, and eucalyptus accent. It’s almost too pretty to open!

IMG_7546

So what does 2018 hold for us? It’s been really hard to answer this question because life is pretty busy with two kids and graduate school on our plates. We do know that we love what we do and we love sharing it with you. We hope that we can continue growing; growing ourselves, our skills, and our blog and hopefully inspiring you all along the way. We can say for certain that we will definitely be sharing more DIY projects, simple family recipes, our simple living journey, and parenting adventures but whether we can keep up with our 50 blog posts/year productivity will remain to be seen. If there are topics you would like to see more of here on The Cozy Home Chronicles, please feel free to leave your suggestions in the comments below. And for those of you new bloggers, those considering starting blogs, or even veteran bloggers wondering “what’s the point?”, keep on dreaming and working towards those dreams with your eyes on the journey and not solely on the destination.

“Tell your heart that the fear of suffering is worse than the suffering itself. And that no heart has ever suffered when it goes in search of its dreams, because every second of the search is a second’s encounter with God and with eternity.”-Paulo Coehlo, The Alchemist

signature3


There and Back Again: A last-minute DIY Halloween Hobbit Costume

 Halloween is just a day away so if you’re scrambling for a last minute costume idea, we have just the thing for you! Now do you want to take a wild guess what my son and daughter will be dressed up as? Hobbitses!!! Yes, Hobbits! Frodo Baggins and his side kick Samwise Gamjee to be exact. We don’t really celebrate Halloween per say (our kids don’t even eat candy) but every year my good friend hosts a “babyween” as a place for the kids to get together, dress up for fun, and enjoy healthy snacks and fun games. This year she will also be adding a giving component to the party so we will be taking canned goods that she will be donating to a local food pantry. As I’m sure you already know, we are huge fans (understatement) of J.R.R. Tolkien’s work. The way I see it, we all have role models that we admire and kids grow up looking for those role models. J.R.R. Tolkein’s mythology offers plenty of worthy role models; compassionate, brave, and principled characters that fight to defeat the greatest evil of their time. And what’s not to love about that?

IMG_5898

This costume is super easy to put together and most things (clothing items) you will probably already have at home. The only things you’ll need to get are a piece of fabric for the cloak and clay and a hair clip to make the elven brooch. The fabric doesn’t even need to be sewn because it looks more authentic with uneven and rustic ends. For the elven brooch, I just pulled up an image of the real one as I shaped the clay. It’s not perfect but it looks pretty good. After that, all that’s left is to get dressed in your fancy hobbit attire, pop on a chain with a ring on it, and clip your cloak on. Just remember,

“It’s a dangerous business, Frodo, going out your door. You step onto the road, and if you don’t keep your feet, there’s no knowing where you might be swept off to.”

What you’ll need:
White/Gray button down shirt
Suspenders
Dress pants like corduroy, khaki, or twill (preferably short or you can roll them up)
Necklace chain with a ring
Fleece fabric square
Elven Brooch

Note: Some of these components may be a choking hazard for young children so be very careful.

IMG_5897

DIY Elven Brooch:

  1. Shape white modeling clay into a leaf and bake for 20 minutes at 250F or according to instructions as it varies by brand.
  2. Once hardened and cool, paint the leaf with green acrylic paint. Let dry.
  3. Glue the clay leaf to a hair clip using hot glue or heavy duty glue. Let dry and you’re all done!

IMG_5881

IMG_6276

I’ll be sharing more of the final look on Instagram tomorrow so be sure to come see 🙂 And as always, if you liked this post please follow us and share!

Instagram

signature3


Watercolor Painting with Beetroot

I am constantly looking for ways to reduce waste and simplify our life at home. Maybe I’m a little too determined. If I had things my way, we would probably be living knee-high in a collection of recyclable materials. Unfortunately there are not enough hours in the day to see all my ideas through and thankfully my husband is there to ensure that we do not become hoarders. Of course that doesn’t mean I don’t try to be resourceful within reason.

IMG_3754

Beets are something we eat quite a bit of in our home. We love snacking on boiled beets with a splash of vinegar and salt or incorporating them in a meal like this side-dish of Swedish Beetroot Salad I posted some time ago. One of my favorite things about beets is their deep magenta hue. I imagine there was a time, before synthetic dyes, when beets were used to naturally color everyday items and it makes me feel guilty to throw away such a beautiful by-product. I have experimented painting with beetroot juice many times but this was my first time sharing this experience with my son who has finally learned to wield a brush (as good as any toddler will). The last time I boiled beets, I stored some of the juice in a mason jar in the fridge and saved it for a rainy day.  My favorite part about this activity is the fact that this paint is completely natural. My son can snack on beets and even take a lick of his “paint” and I would have no qualms about it. This activity is perfect for a rainy indoor day but you can also take it outdoors if you want to spare yourself preparing for the messy aftermath. All this is to say: If you boil beets, don’t throw out the juice. For this activity here’s what you’ll need:

  • paper, preferably watercolor paper
  • small paint brushes
  • beetroot juice ( to make it concentrated, simply microwave in a small container to evaporate the water)
  • glass of clean water
  • fine salt and course salt
  • old newspaper or something to protect your work surface

IMG_3745

IMG_3766
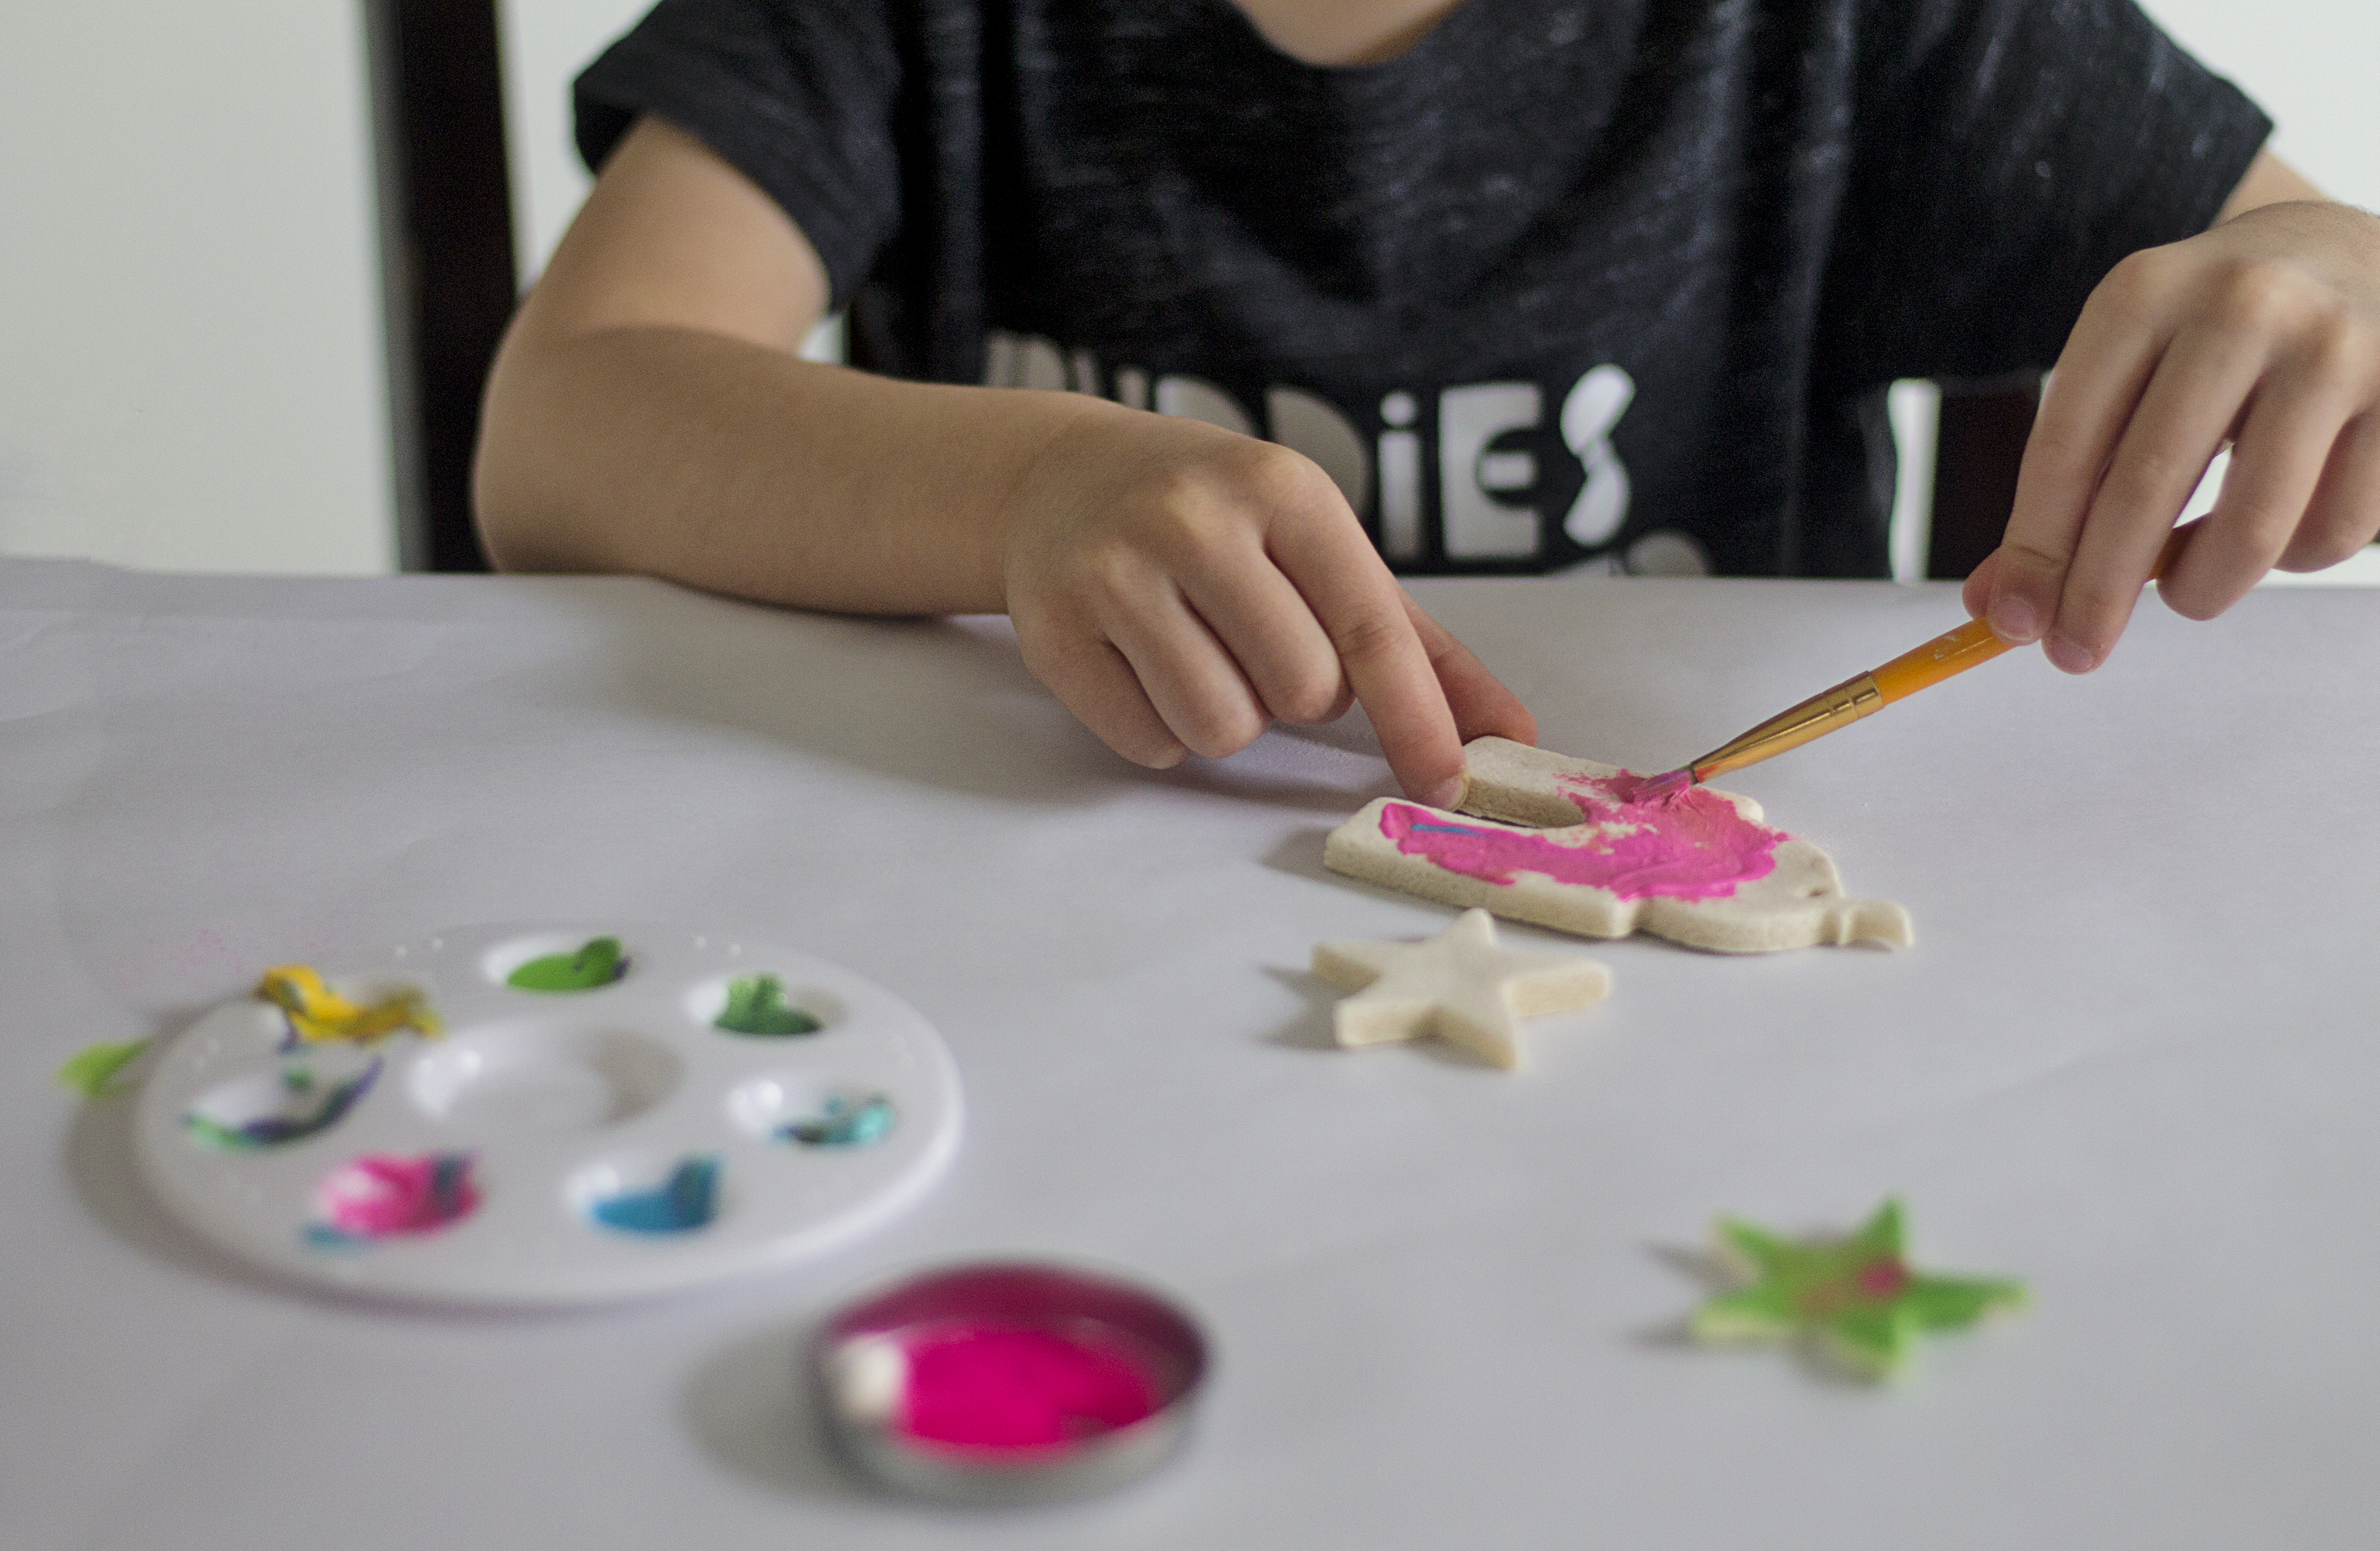
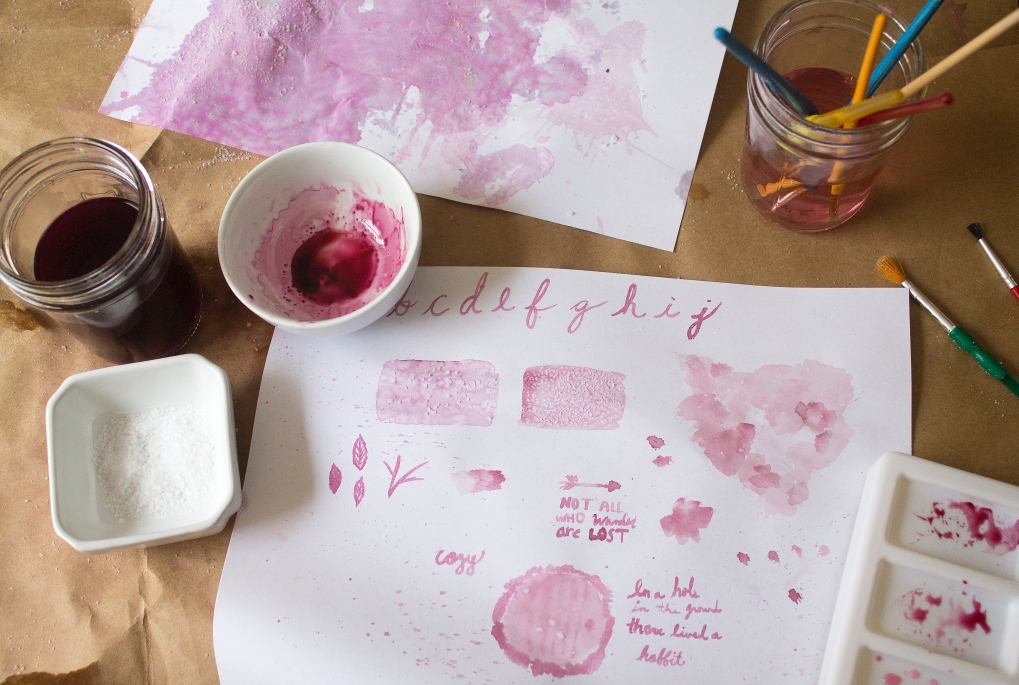
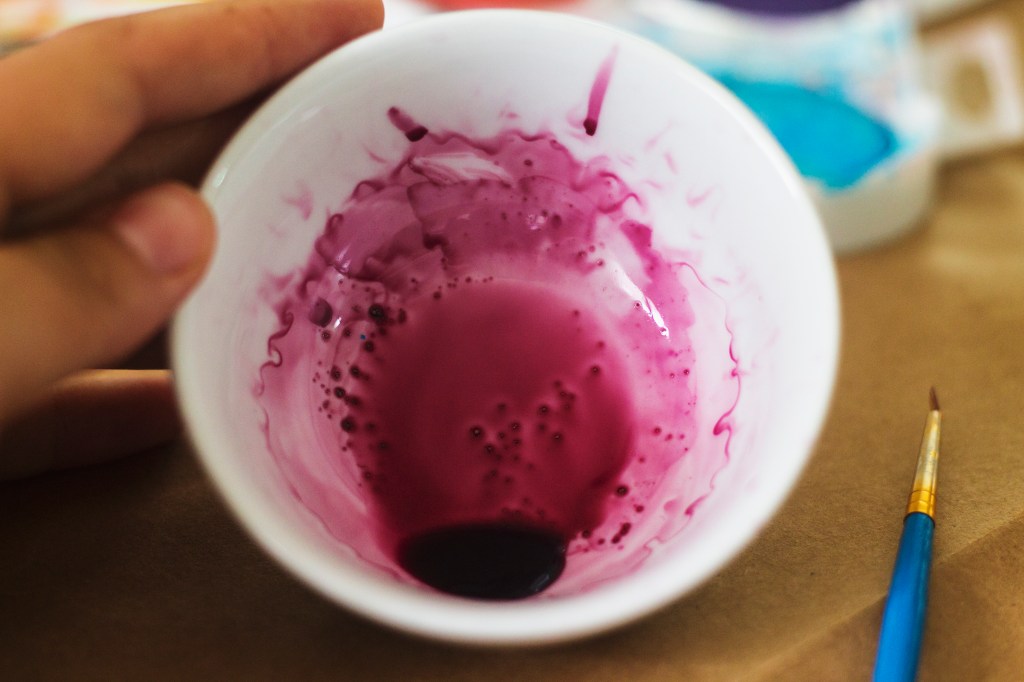
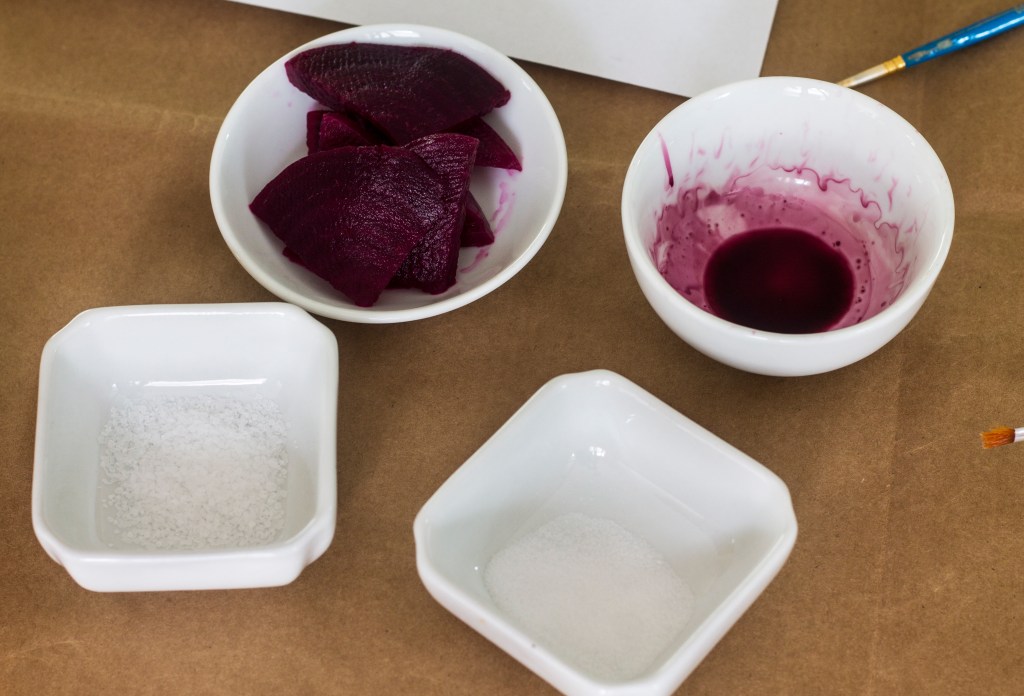
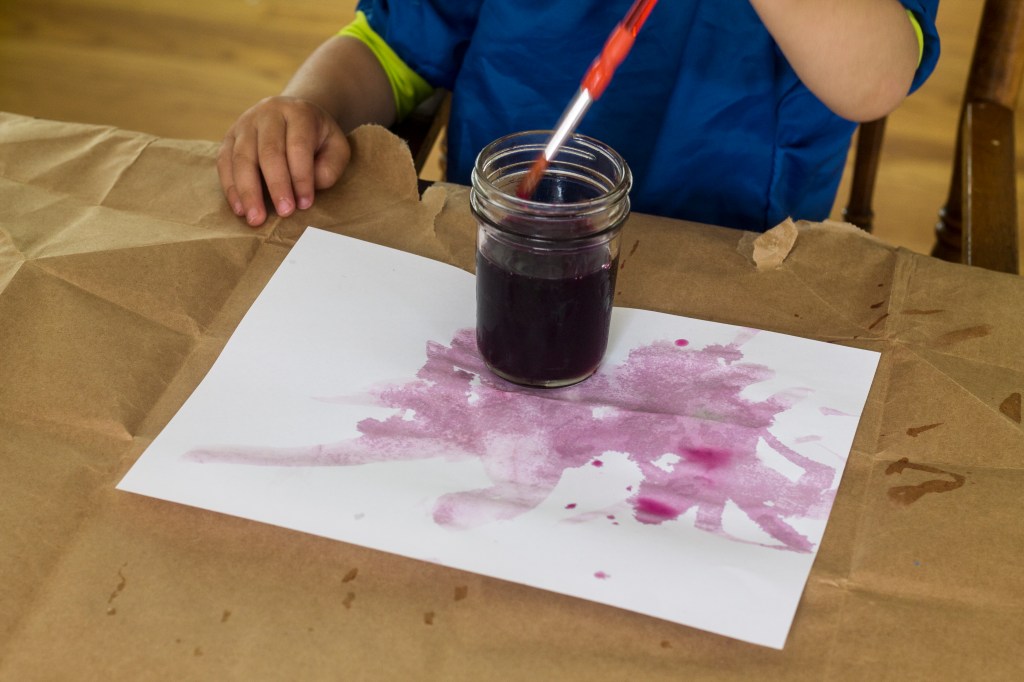
My son was ecstatic about pouring salt all over his painting (consider that he’s been attempting to dump salt out since he turned 18 months) but what he doesn’t know is that we were actually practicing a legit water color technique that I learned from Inkstruck Studio. As you can see this activity not only kept my toddler entertained but was a good learning exercise for me too. If you enjoy watercolor painting or hand lettering, you definitely could get something out of this activity if you plan ahead. Here’s a really good video tutorial that introduces basic watercolor and hand lettering techniques if you are interested. If you do try this activity be sure to share on Instagram and tag us @thecozyhomechronicles 🙂

IMG_3773

If you found this post helpful, leave a comment and tell us how we did!

Please follow us and share!

Instagram


DIY Spring Succulent Wreath

img_0143
Can you believe it’s March already?! I mean just last year we were gearing up to begin our kitchen renovation and now here we are off on new adventures and projects. Spring is certainly in the air here in Michigan as we have had several days of 55 degree weather in the last few weeks. We are now preparing to usher spring into our home and what better way than to spruce up our entrance. I was recently at Jo-Ann Fabrics getting ideas for some upcoming projects and I came across several pretty spring wreaths covered in moss, crawling vines, foliage, and succulents. These wreaths screamed Lord of the Rings (big fans here if you hadn’t figured that out already) but the price…they ranged from $30-$60! I knew I could make one for much less and that’s exactly what I did (with a lot more succulents too). This is such an easy and fun project and it really made the door stand out with a pop of earthy green. This wreath is also the perfect project to make with children and can even be turned into a learning activity. Our son, who is almost two years old, had so much fun picking up the succulents and moving them around as I tried to settle on the final design.

In other news, we are super excited to share that were chosen to be ambassadors for National DIY Day which is coming up on April 2nd. Aside from this post, we will have some more fun DIYs coming your way in the spirit of celebrating creativity and crafting. We will also be hosting a local event in the Metro Detroit area, building raised garden beds for a community garden (stay tuned for more info). And speaking of DIYing for a good cause… As National DIY DAY ambassadors we are proud to support AdoptAClassroom.org and their mission to give teachers a hand by providing much-needed classroom materials so that their students can learn and succeed. National DIY DAY and The Cozy Home Chronicles are committed to supporting classrooms and providing tools for students and teachers to enhance the creative learning experience.

You can support AdoptAClassroom.org by Texting a Donation Today! Text the word “Give” to (678) 582-8594 and you will be prompted through a secure system to make a donation of your choice!

Alrightie, let’s make that wreath!

Supplies
18′ Grapevine Wreath ($4.99)
Succulent Mat ($4.99)
Moss rocks ($3.49)
Greenery of your choice ($4.99-$9.99)
Hot glue gun & glue sticks

Total Cost: $23.45 + tax

I purchased my supplies from Michaels over the course of a few weeks and used my coupons to put my wreath at well under $20. From the greenery I purchased, I had enough leftover to make another wreath if I just purchase more succulents and a grapevine wreath. So for the price of a store-bought wreath, you can basically make two or even three wreaths.

img_0132

img_0151

Directions:

  1. Collect your succulents, moss rocks, and greenery and start placing them on your grapevine wreath until you are happy with the arrangement. You might have to move things around several times to get the desired look.
  2. Once you have settled on your design, you will need to glue each piece in place using a generous amount of hot glue, embedding the stem deep into the vine, and holding down for 20-25 seconds until firmly in place.
  3. Once all the pieces have been glued down and any excess strands of glue have been removed, you can hang your wreath on a hook or door wreath hanger.

IMG_3495

IMG_0160

IMG_0166

Share your spring stories with us below and If you liked this post please follow us and share!

Instagram


IKEA Hack: DIY Rustic Bread Tin Box

img_9537

We eat A LOT of bread… possibly too much of it but we are hobbits so that’s probably not going to change anytime soon. Although we finished renovating our kitchen this past May, there is still some work to be done in terms of organizing and decorating. One of the things that needed to get checked off of our to-do list was finding a way to preserve and store our leftover bread. When we searched for bread storage online, we immediately fell in love with the charm of those rustic farmhouse bread tins. Of course it would have been easy to click purchase and have one delivered straight to our doorstep for $45 but where’s the fun in that? Instead we took our time getting ideas until we came up with an easy DIY bread tin. Not only is it way cheaper than any bread tin you’ll find in store but it’s super easy to make and customizable too. IKEA has two different tin options that you can use for this project and both are under $15. 

The Beromlig that we settled on came with two sizes for $8.99 and we used the larger one to make the bread tin box (we will probably turn the smaller one into a cookie tin). That’s a steal considering simple tins like the one pictured below on wayfair.com are going for $26.99 at sale price. Besides the choice of tin, you also have the option to pick any font you want. We went for a classic look with “Old School Alphabet” stencils that we found at a local Michaels. Lastly, you’ll need to settle on an ink color from the many pretty shades that are out there. Why permanent marker you ask? Well we did try acrylic paint and it peeled off too easily. Although permanent marker can come off with rubbing alcohol (we checked!), it does not come off with a gentle wiping using a wet cloth. I suppose you can use spray paint or some other fancy medium but for a simple and inexpensive home decor item,a  good old Sharpie will do the trick. Alright, let’s get started!custom_imageMaterials
Beromlig Storage Tin
 or Hemsmak
Letter stencils
Permanent marker
Washi or painter’s tape

img_9524-copy

Directions

1. Wipe the inside and outside of the tin clean with a damp cloth and dry thoroughly.
2. Arrange and level your letters on the tin and tape them in place using washi or painter’s tape.
3. Fill in the letters with any color permanent ink you choose.
4. Let dry for 10 minutes before removing the stencils.
5. Find a happy place for your bread box and fill with delicious breads 🙂

img_9485

img_9497-copy

img_9527

img_9515-1

What projects and adventures are you working on right now? Please join the conversation below in our comment section, we would love to hear from you!

If you liked this post please follow us and share!

Instagram


Dress your plants: DIY Washi Tape Planter Art

ujb

This month, the wonderful Igor and Judith at Urban Jungle Bloggers are on the lookout for creative, inspiring and unusual planters for dressing up plants. We took this as a challenge to transform our neutral, minimalist IKEA pots into something a bit more bright and cheery for our eclectic space. Plus with the holidays around the corner, we thought it would be nice to offer a simple DIY gift idea for that special plant-lover in your life.

We’ve seen many cool Washi Tape projects before but had never attempted one until now. Not only is Washi Tape super versatile but the variety of colors, patterns, and textures it comes in makes for endless crafting possibilities. Aside from the planters, tape, and scissors, all you really need for this project is your imagination. To get your creative juices flowing, we are sharing the simple designs we came up with when we put our scissors to the tape. Although it was tedious, we found it much easier to work with smaller pieces of tape with regards to the curvature of the pot (hence the mosaic look!). Despite the time it took, we really enjoyed watching the abstract design emerge as we added piece by piece. 

Supplies
Planters
Washi Tape
Scissors
Mod Podge

IMG_8264.jpg

Directions
1. Design your planters. There’s no limit to what you can think up and create.
2. Cut and stick your Washi Tape pieces on the planter according to your design.
3. Seal your design with Mod Podge.

img_8281

img_8280-1

img_8286


img_8283

img_8269
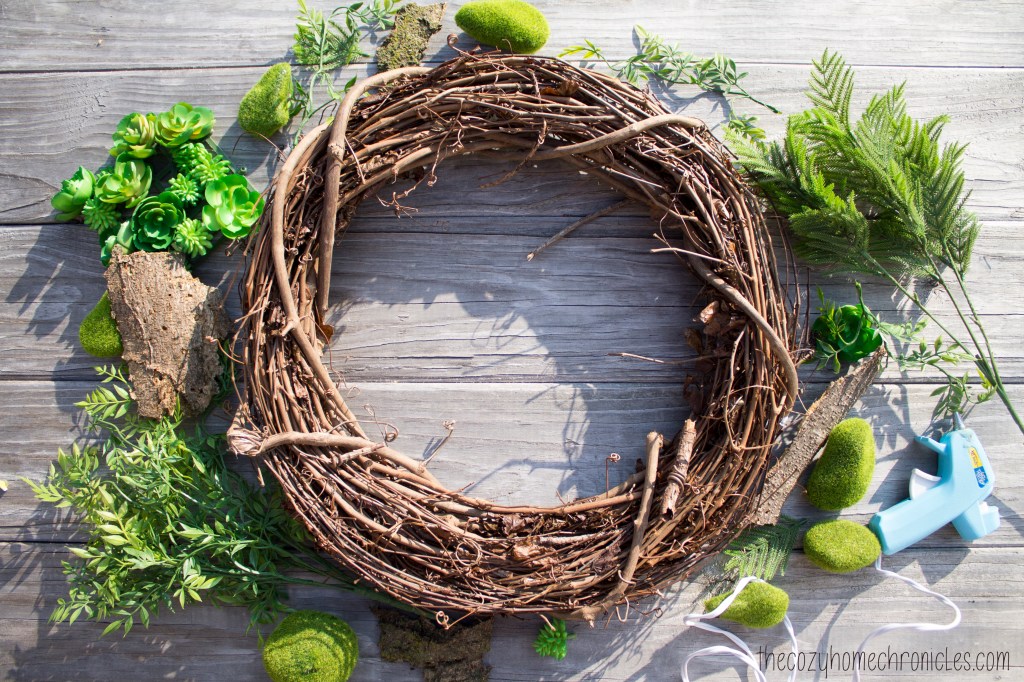
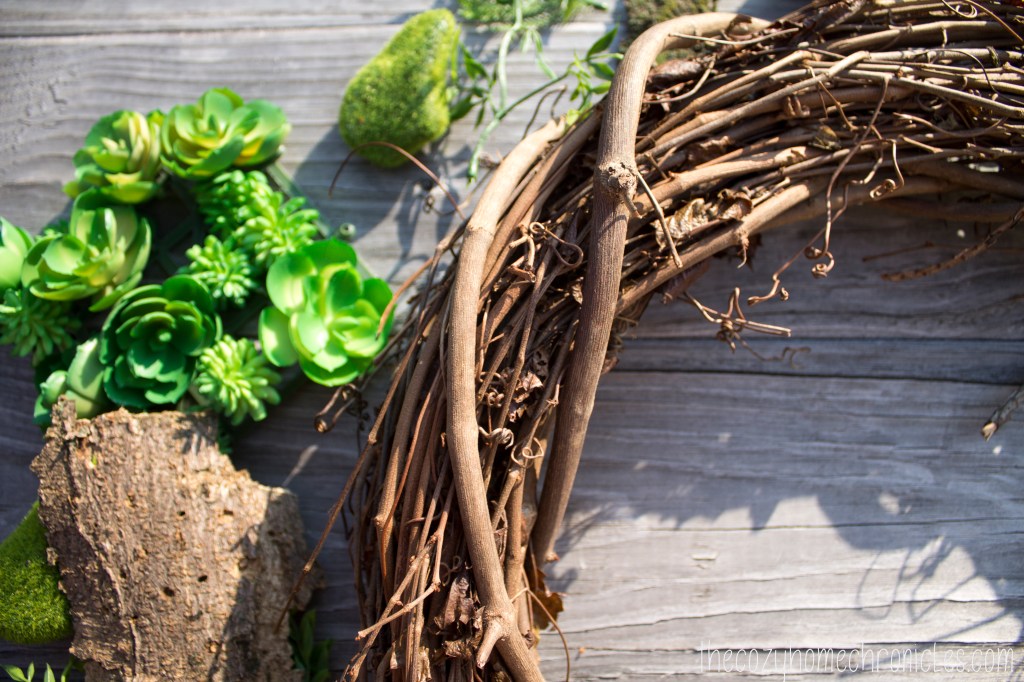
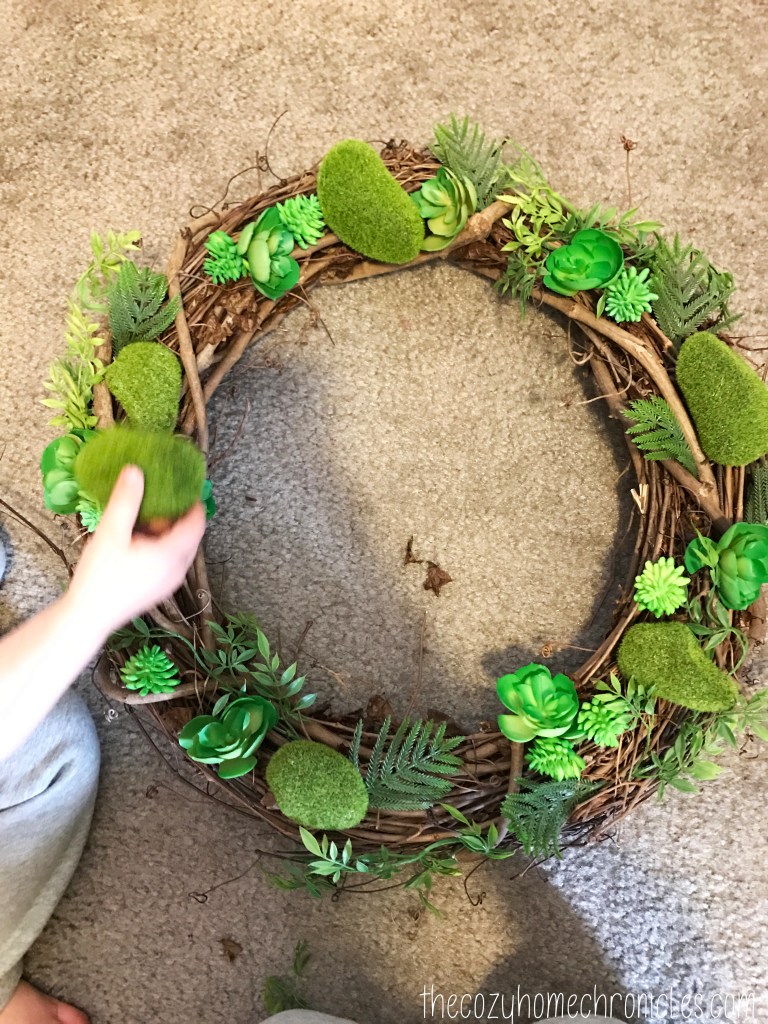
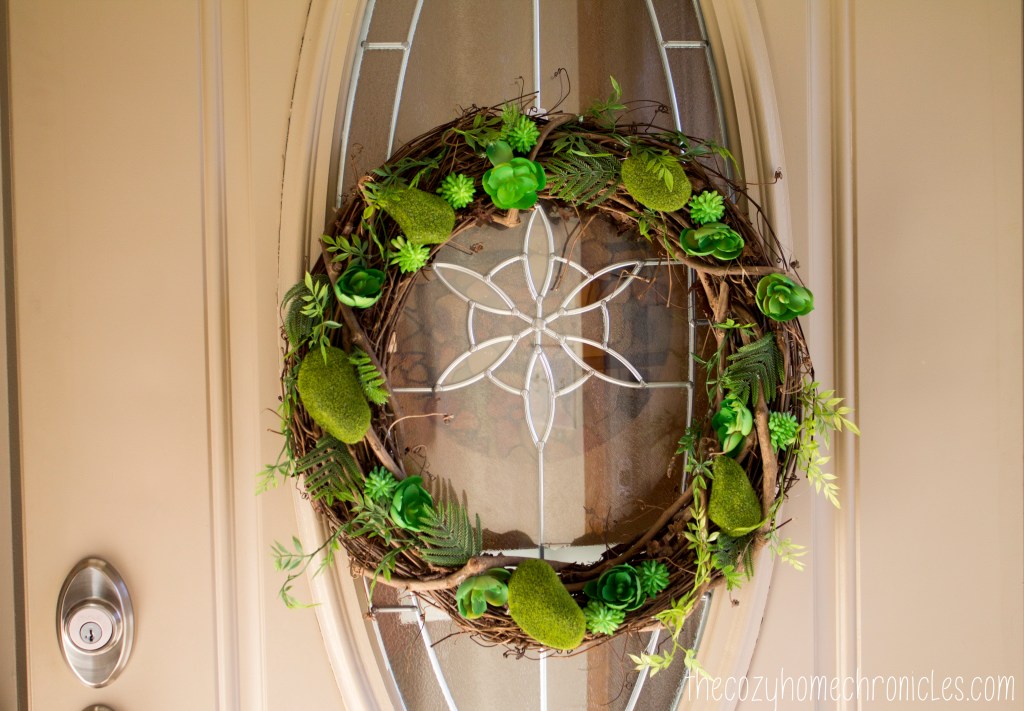
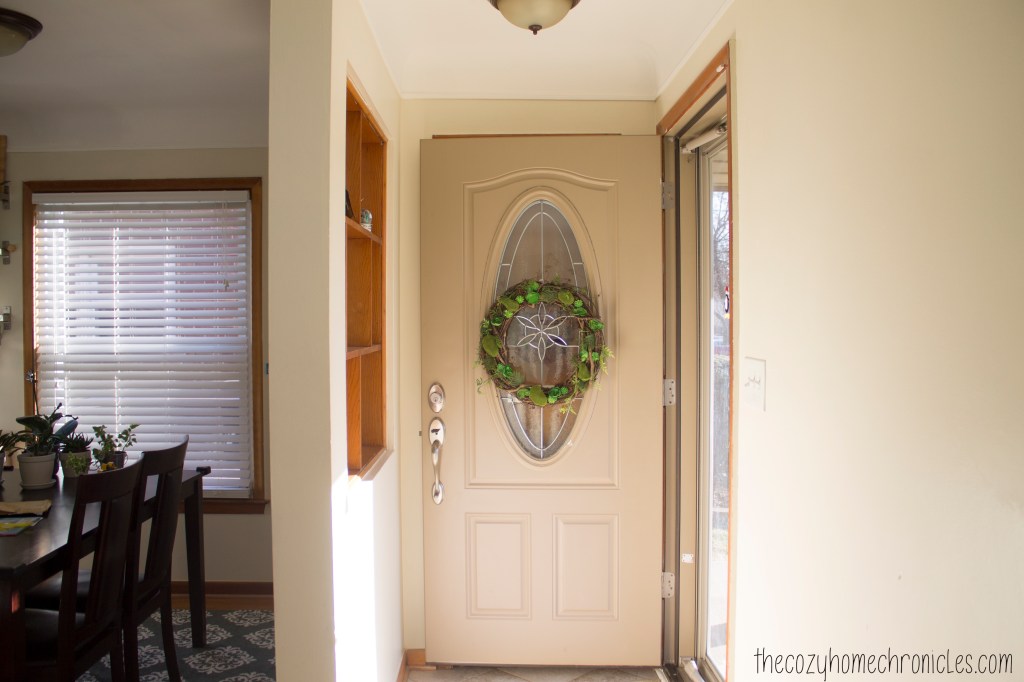
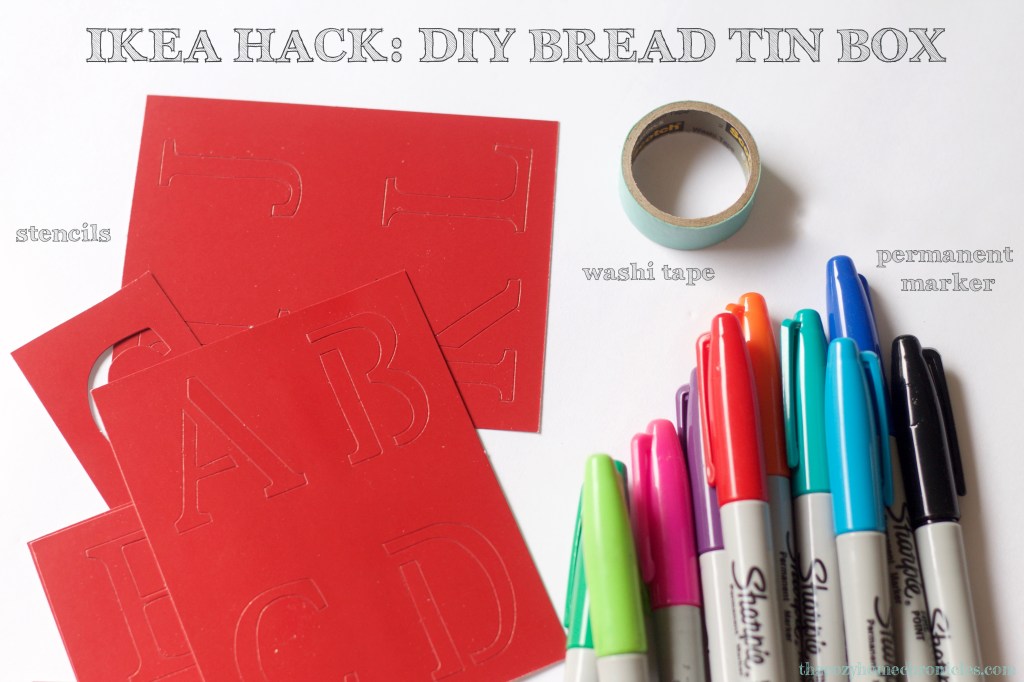
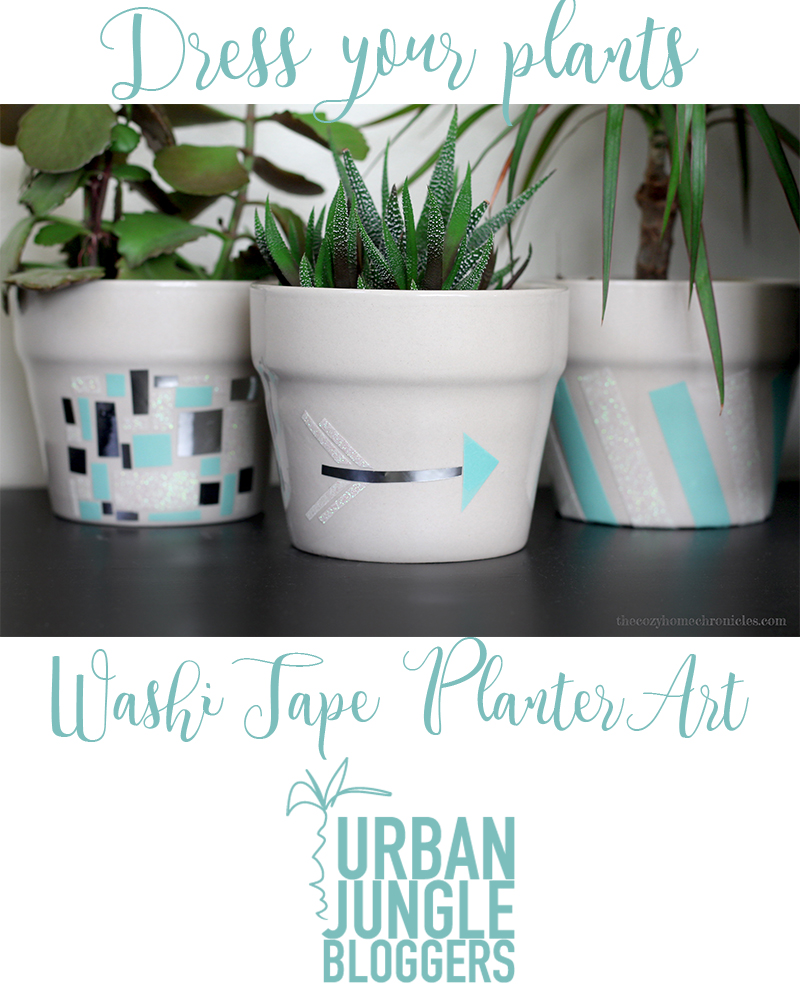
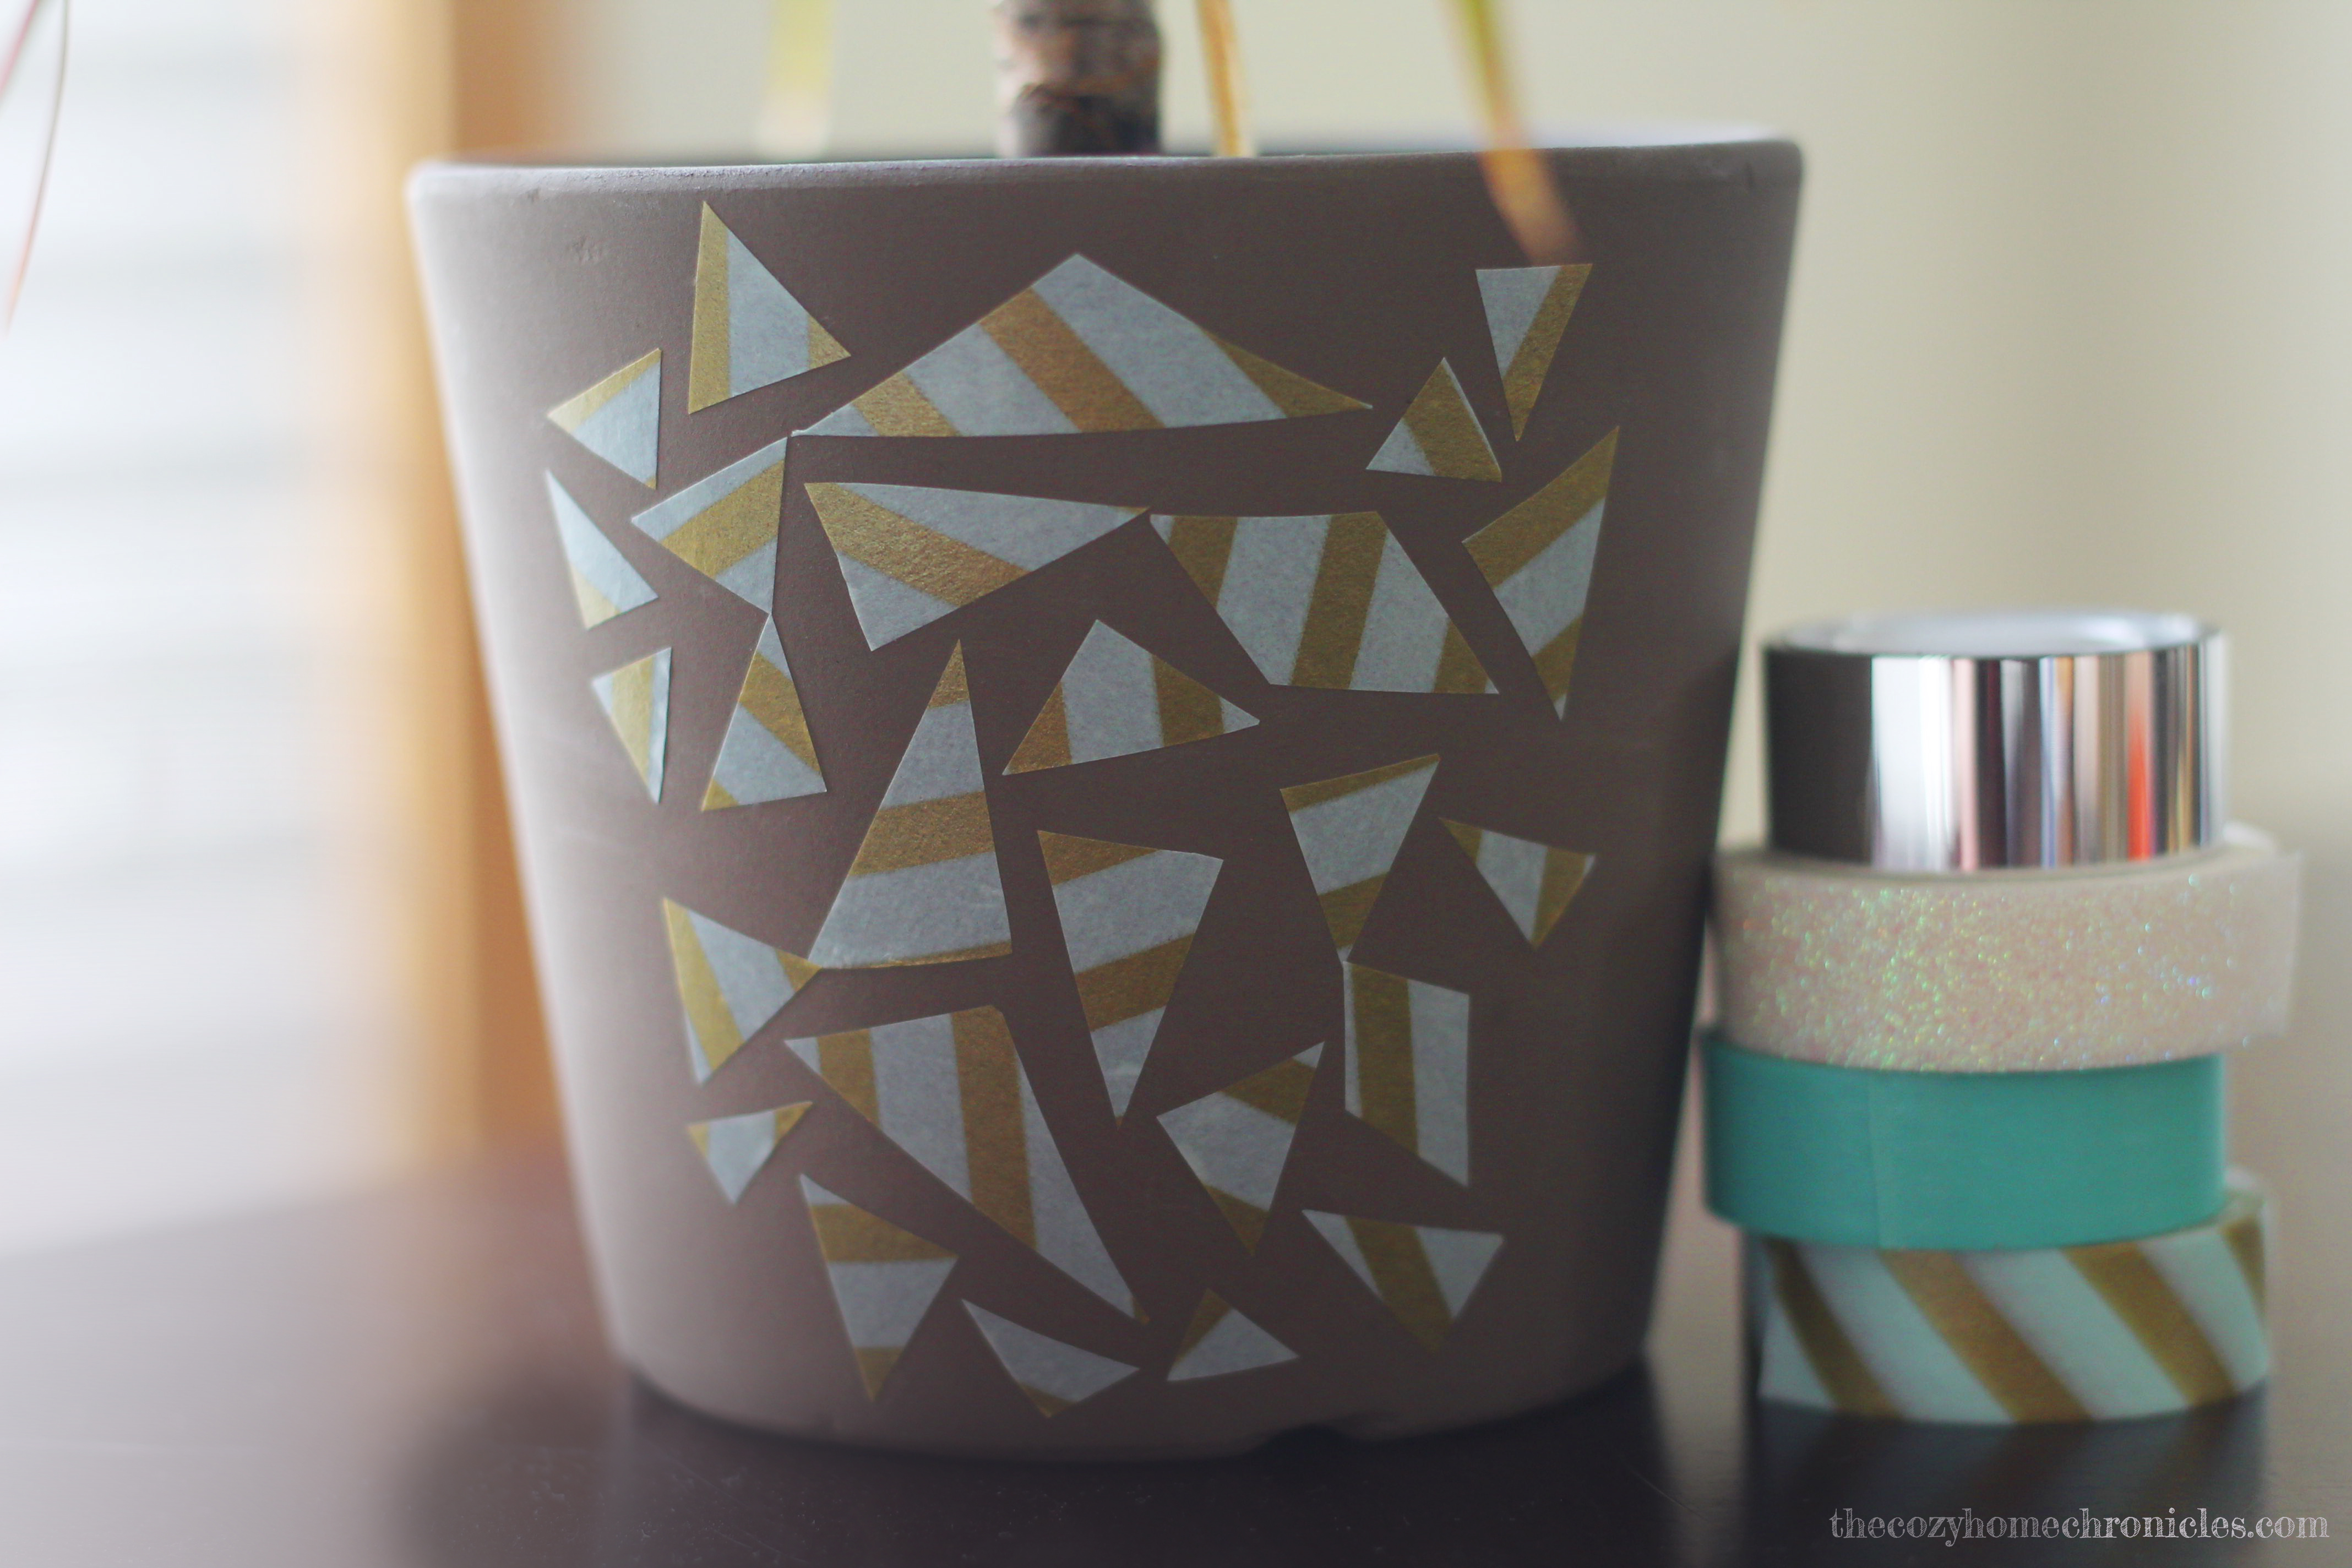
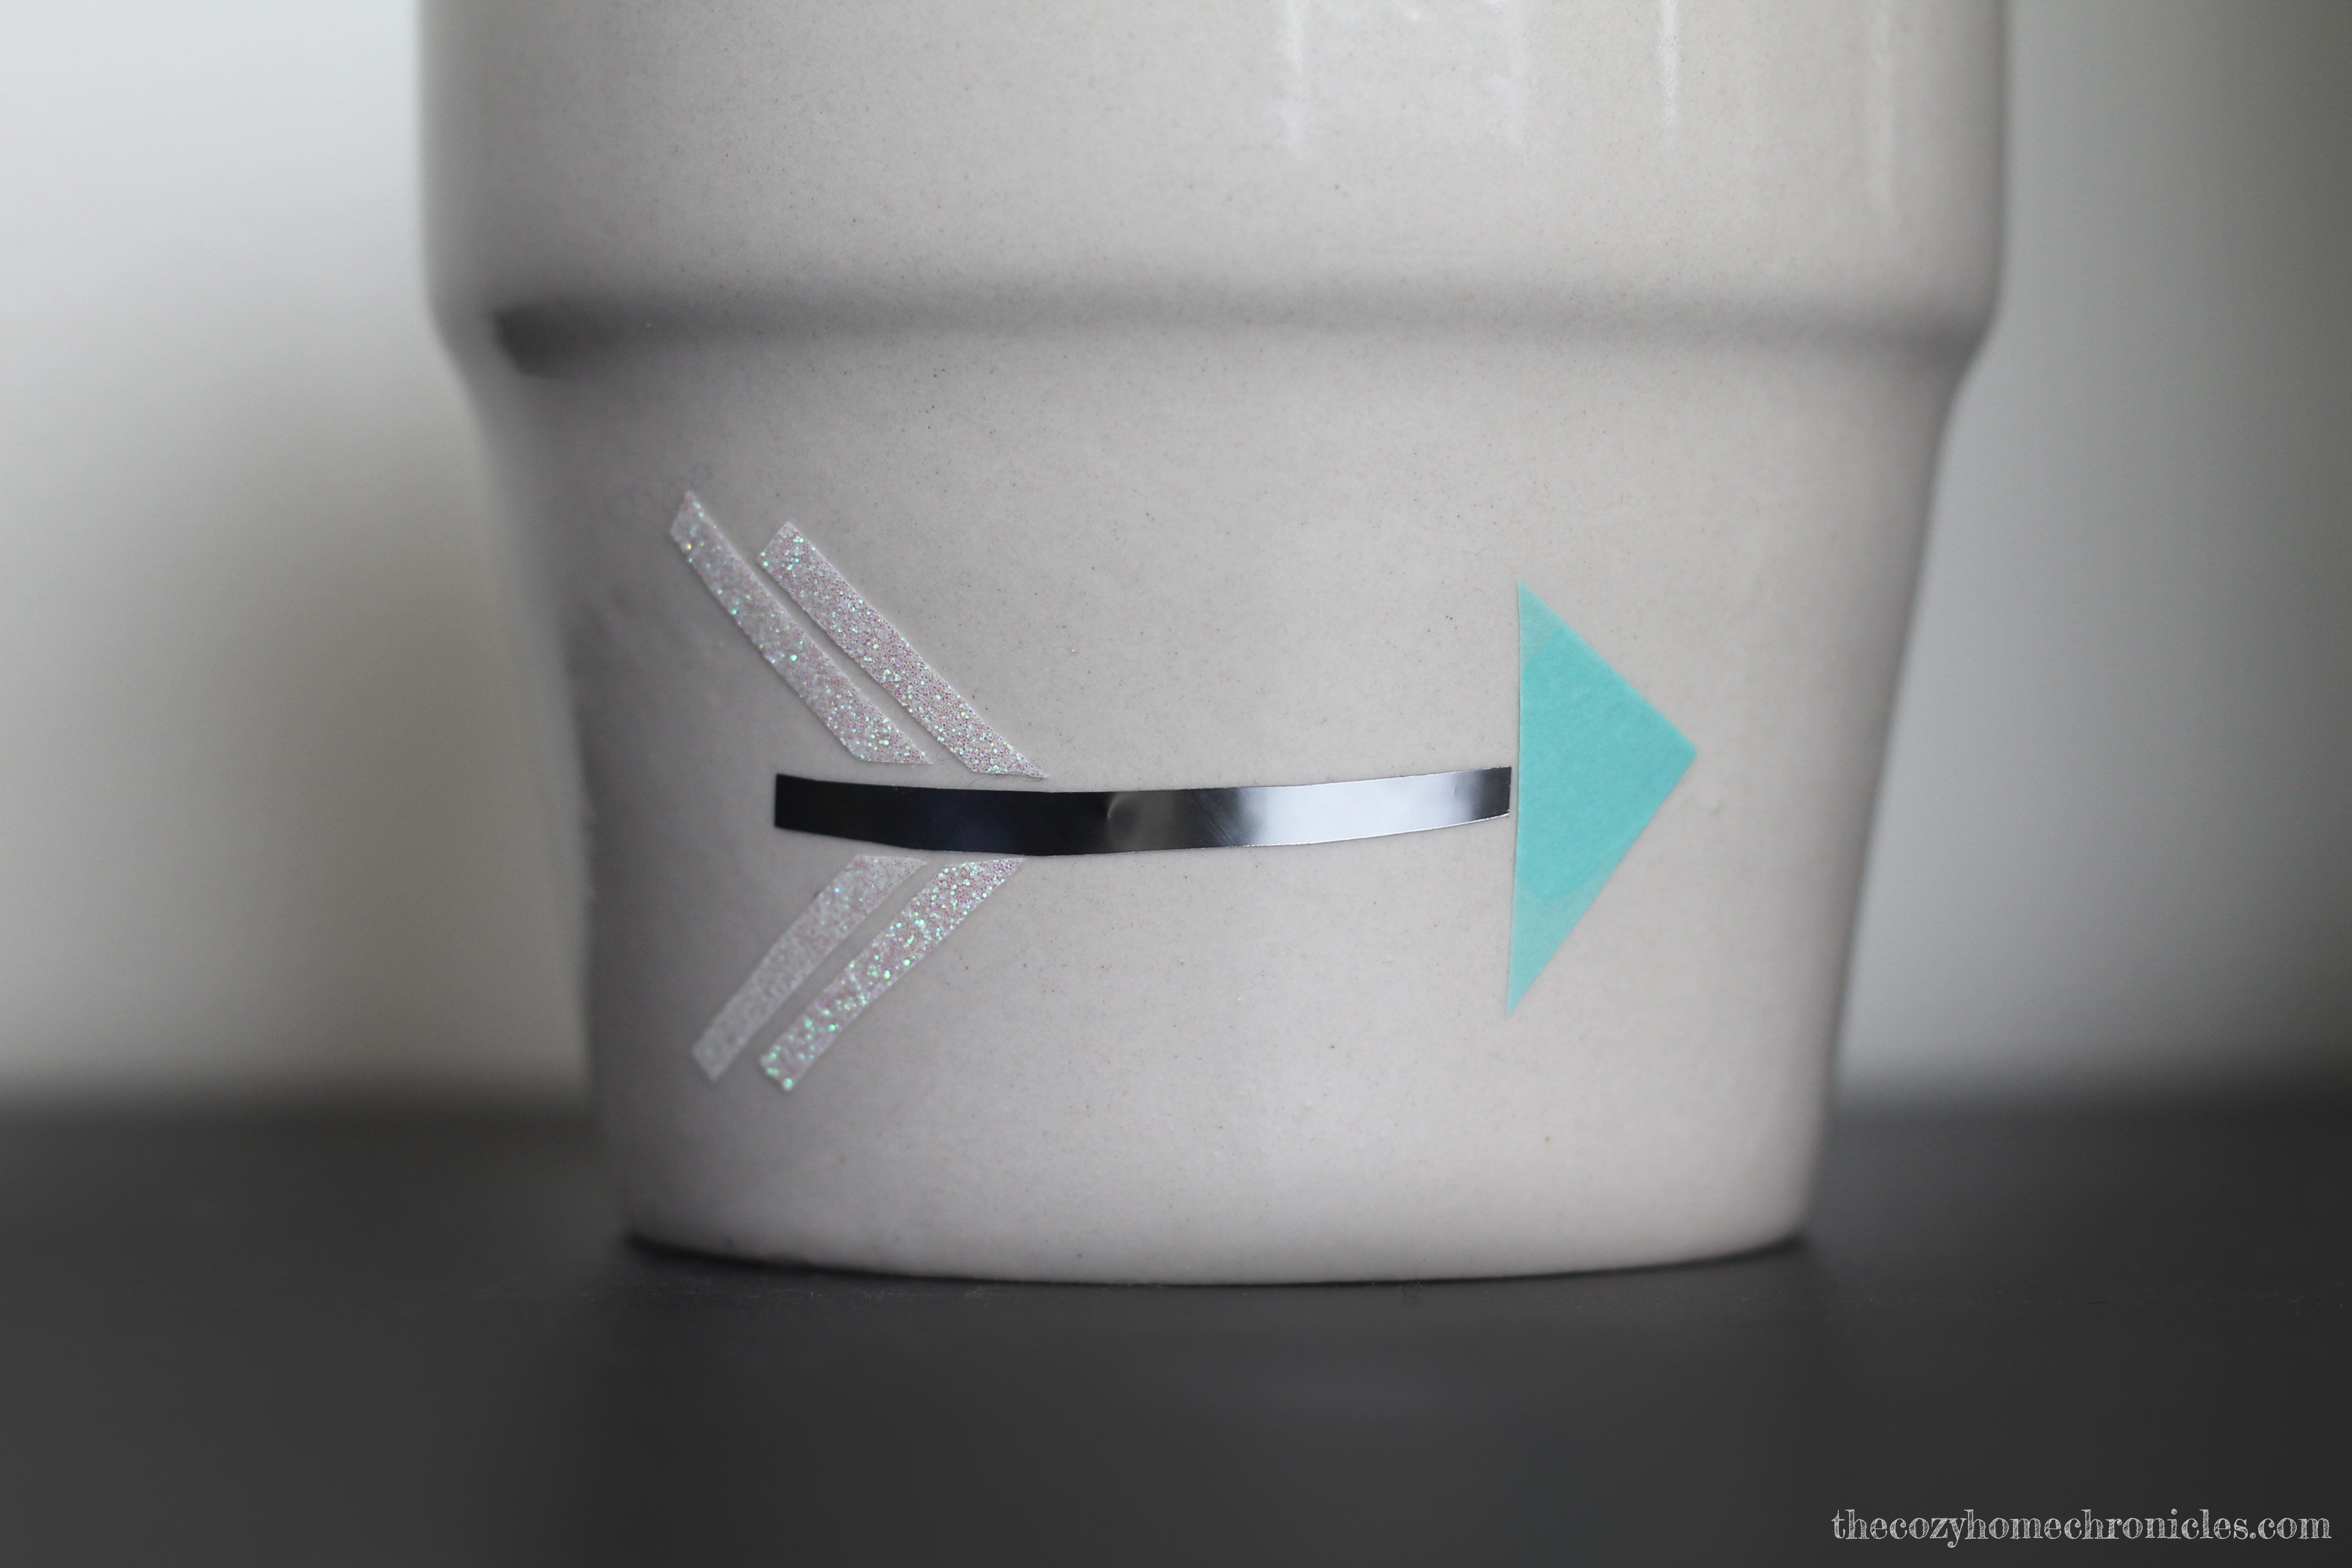
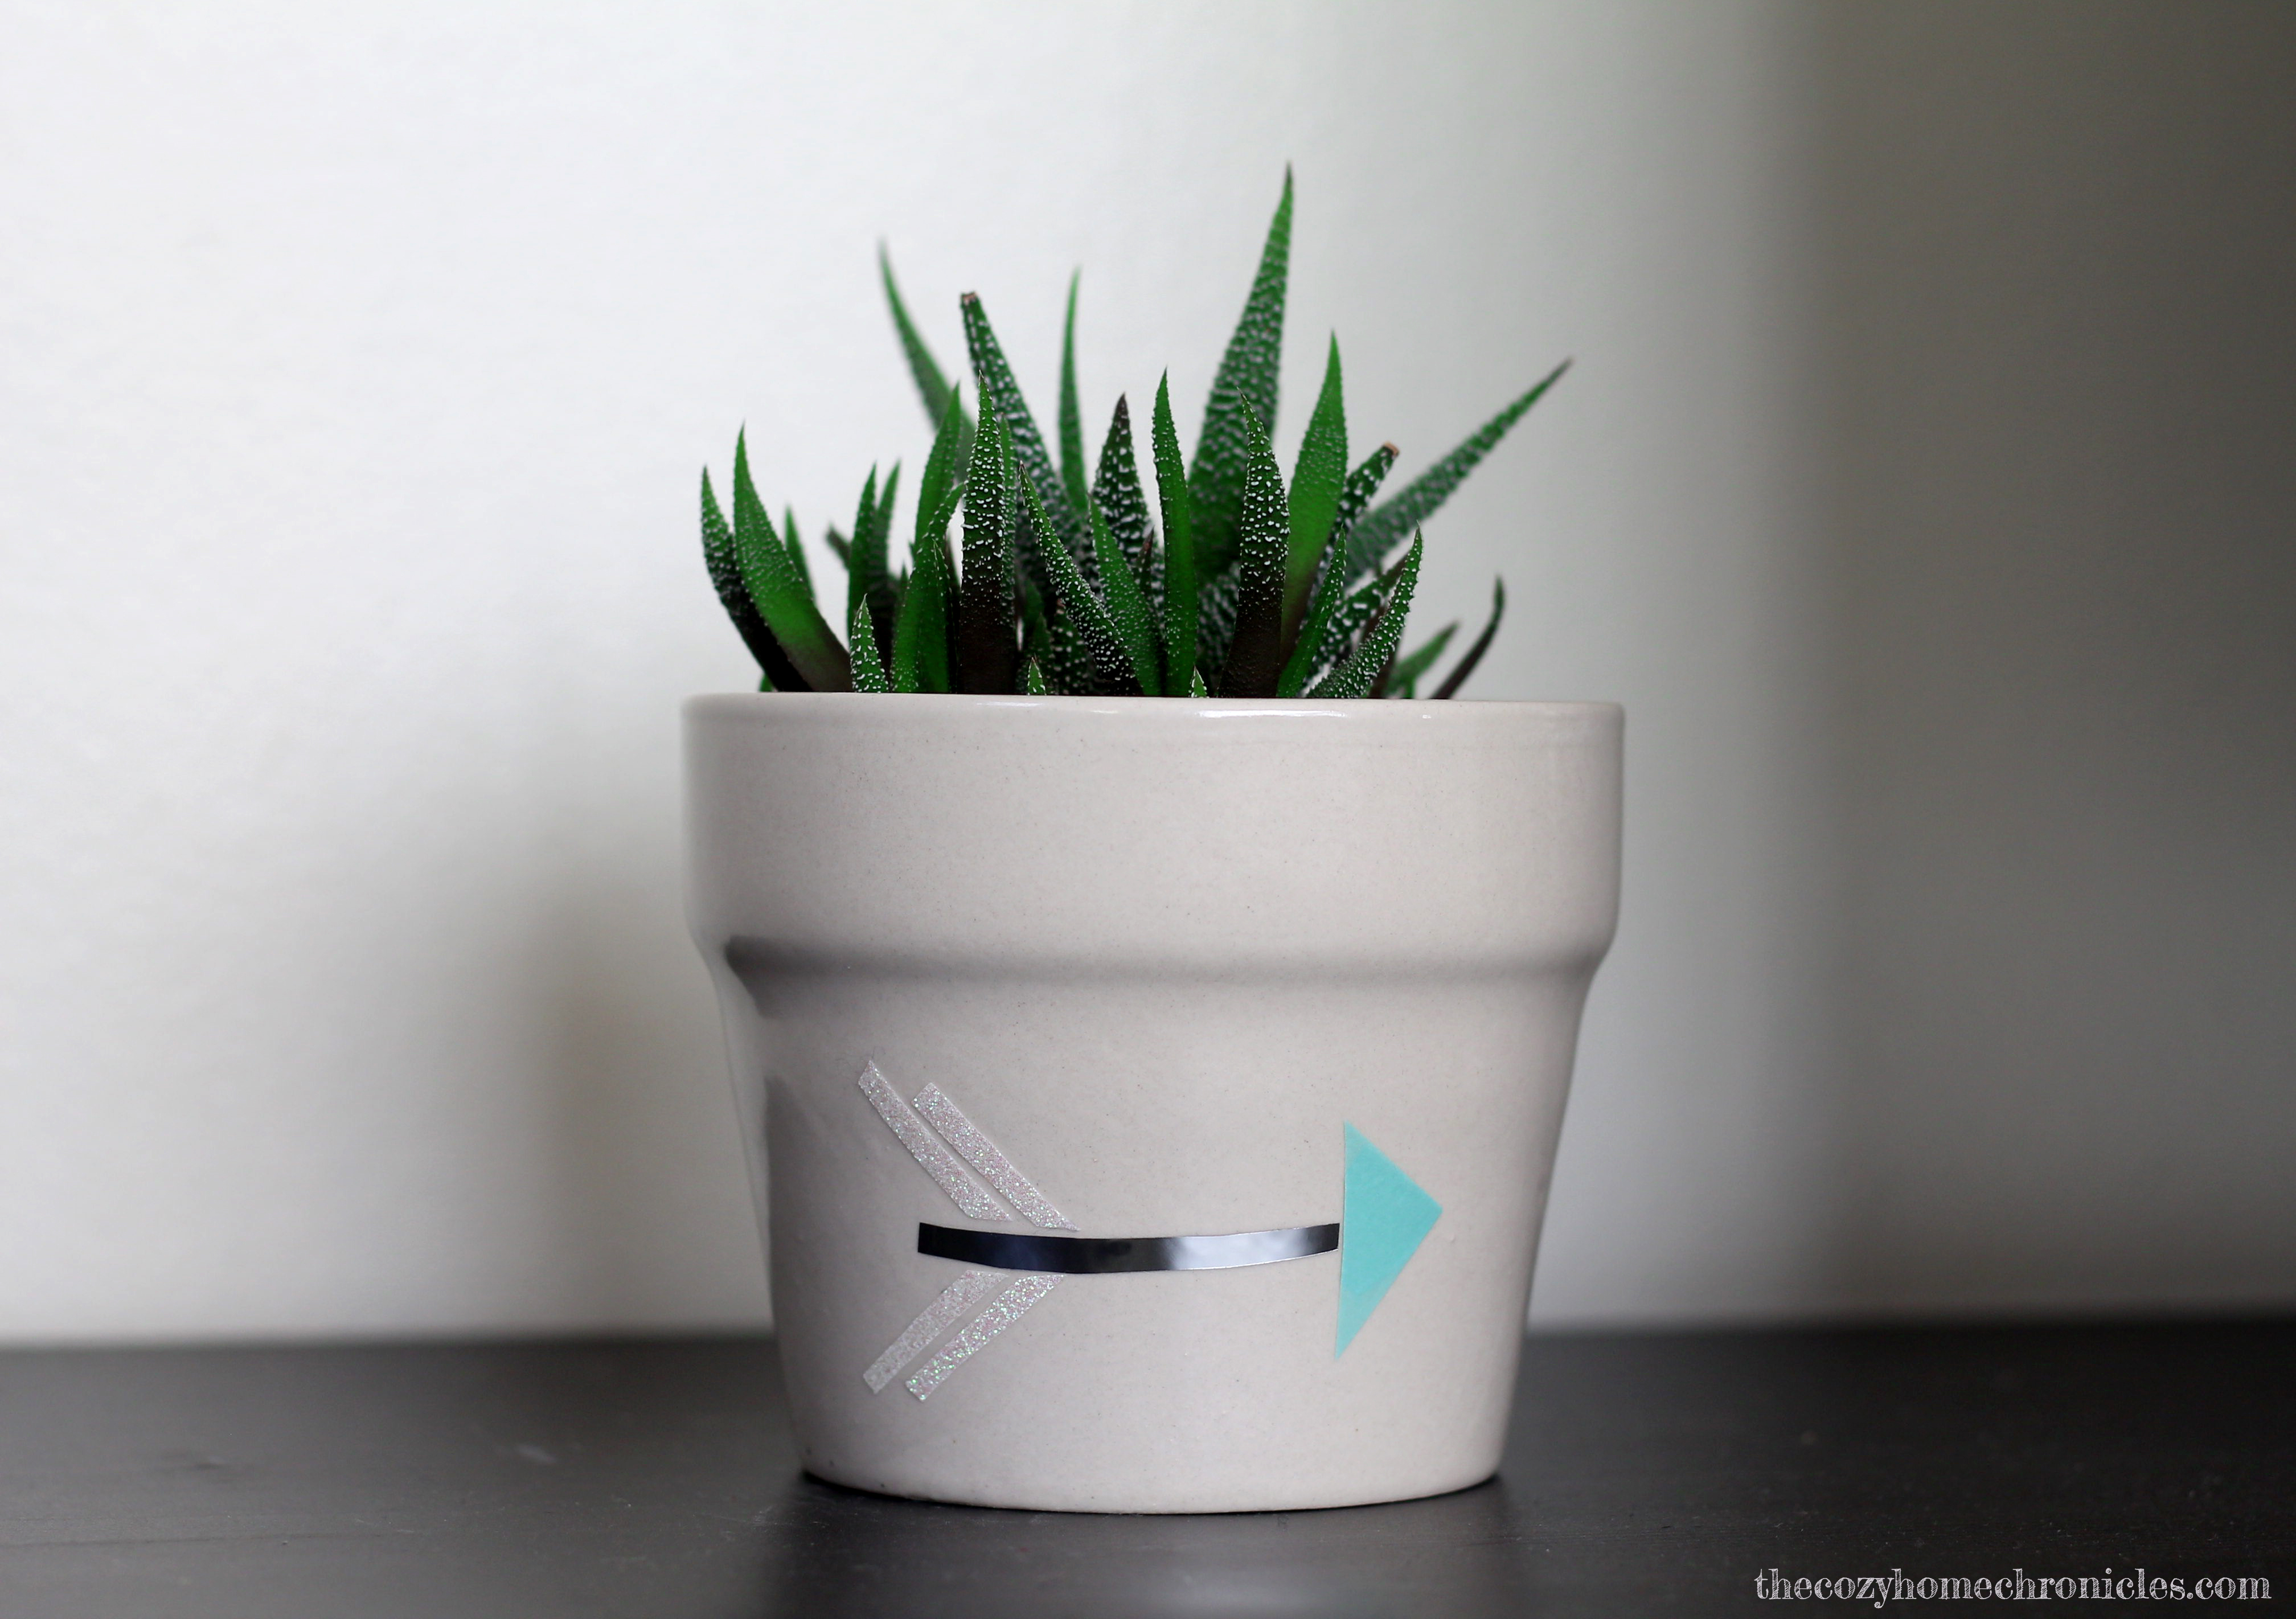
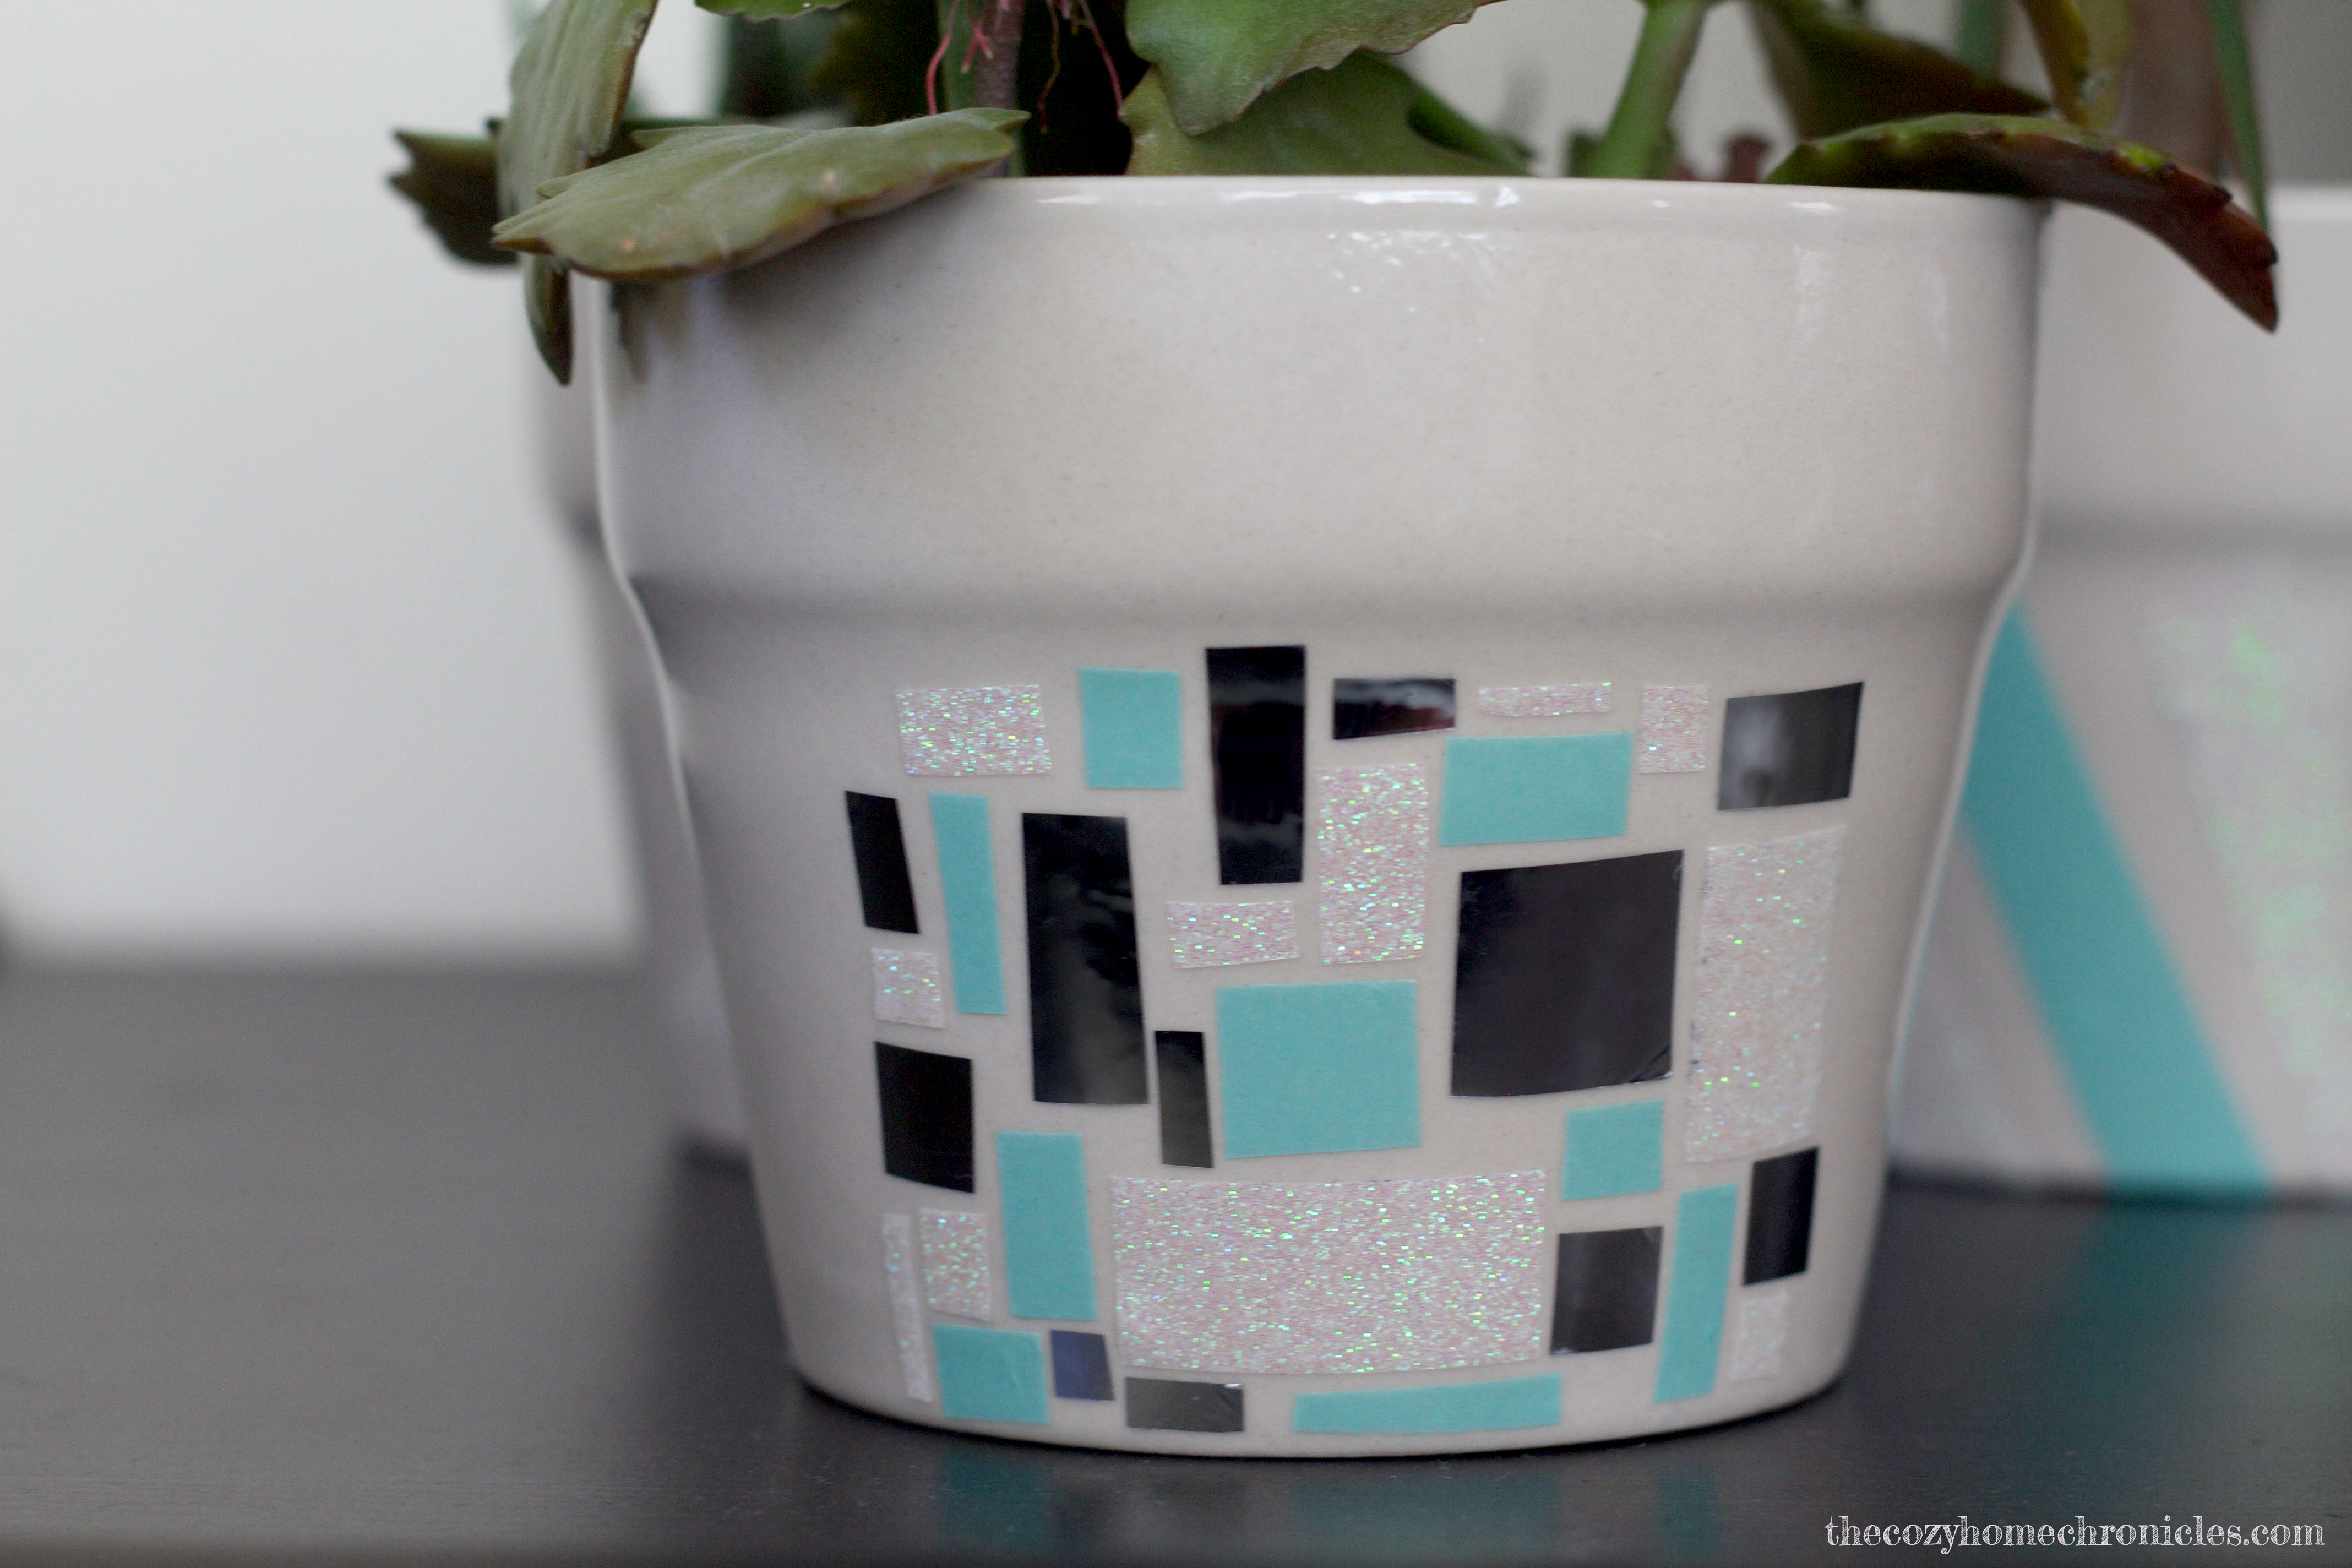
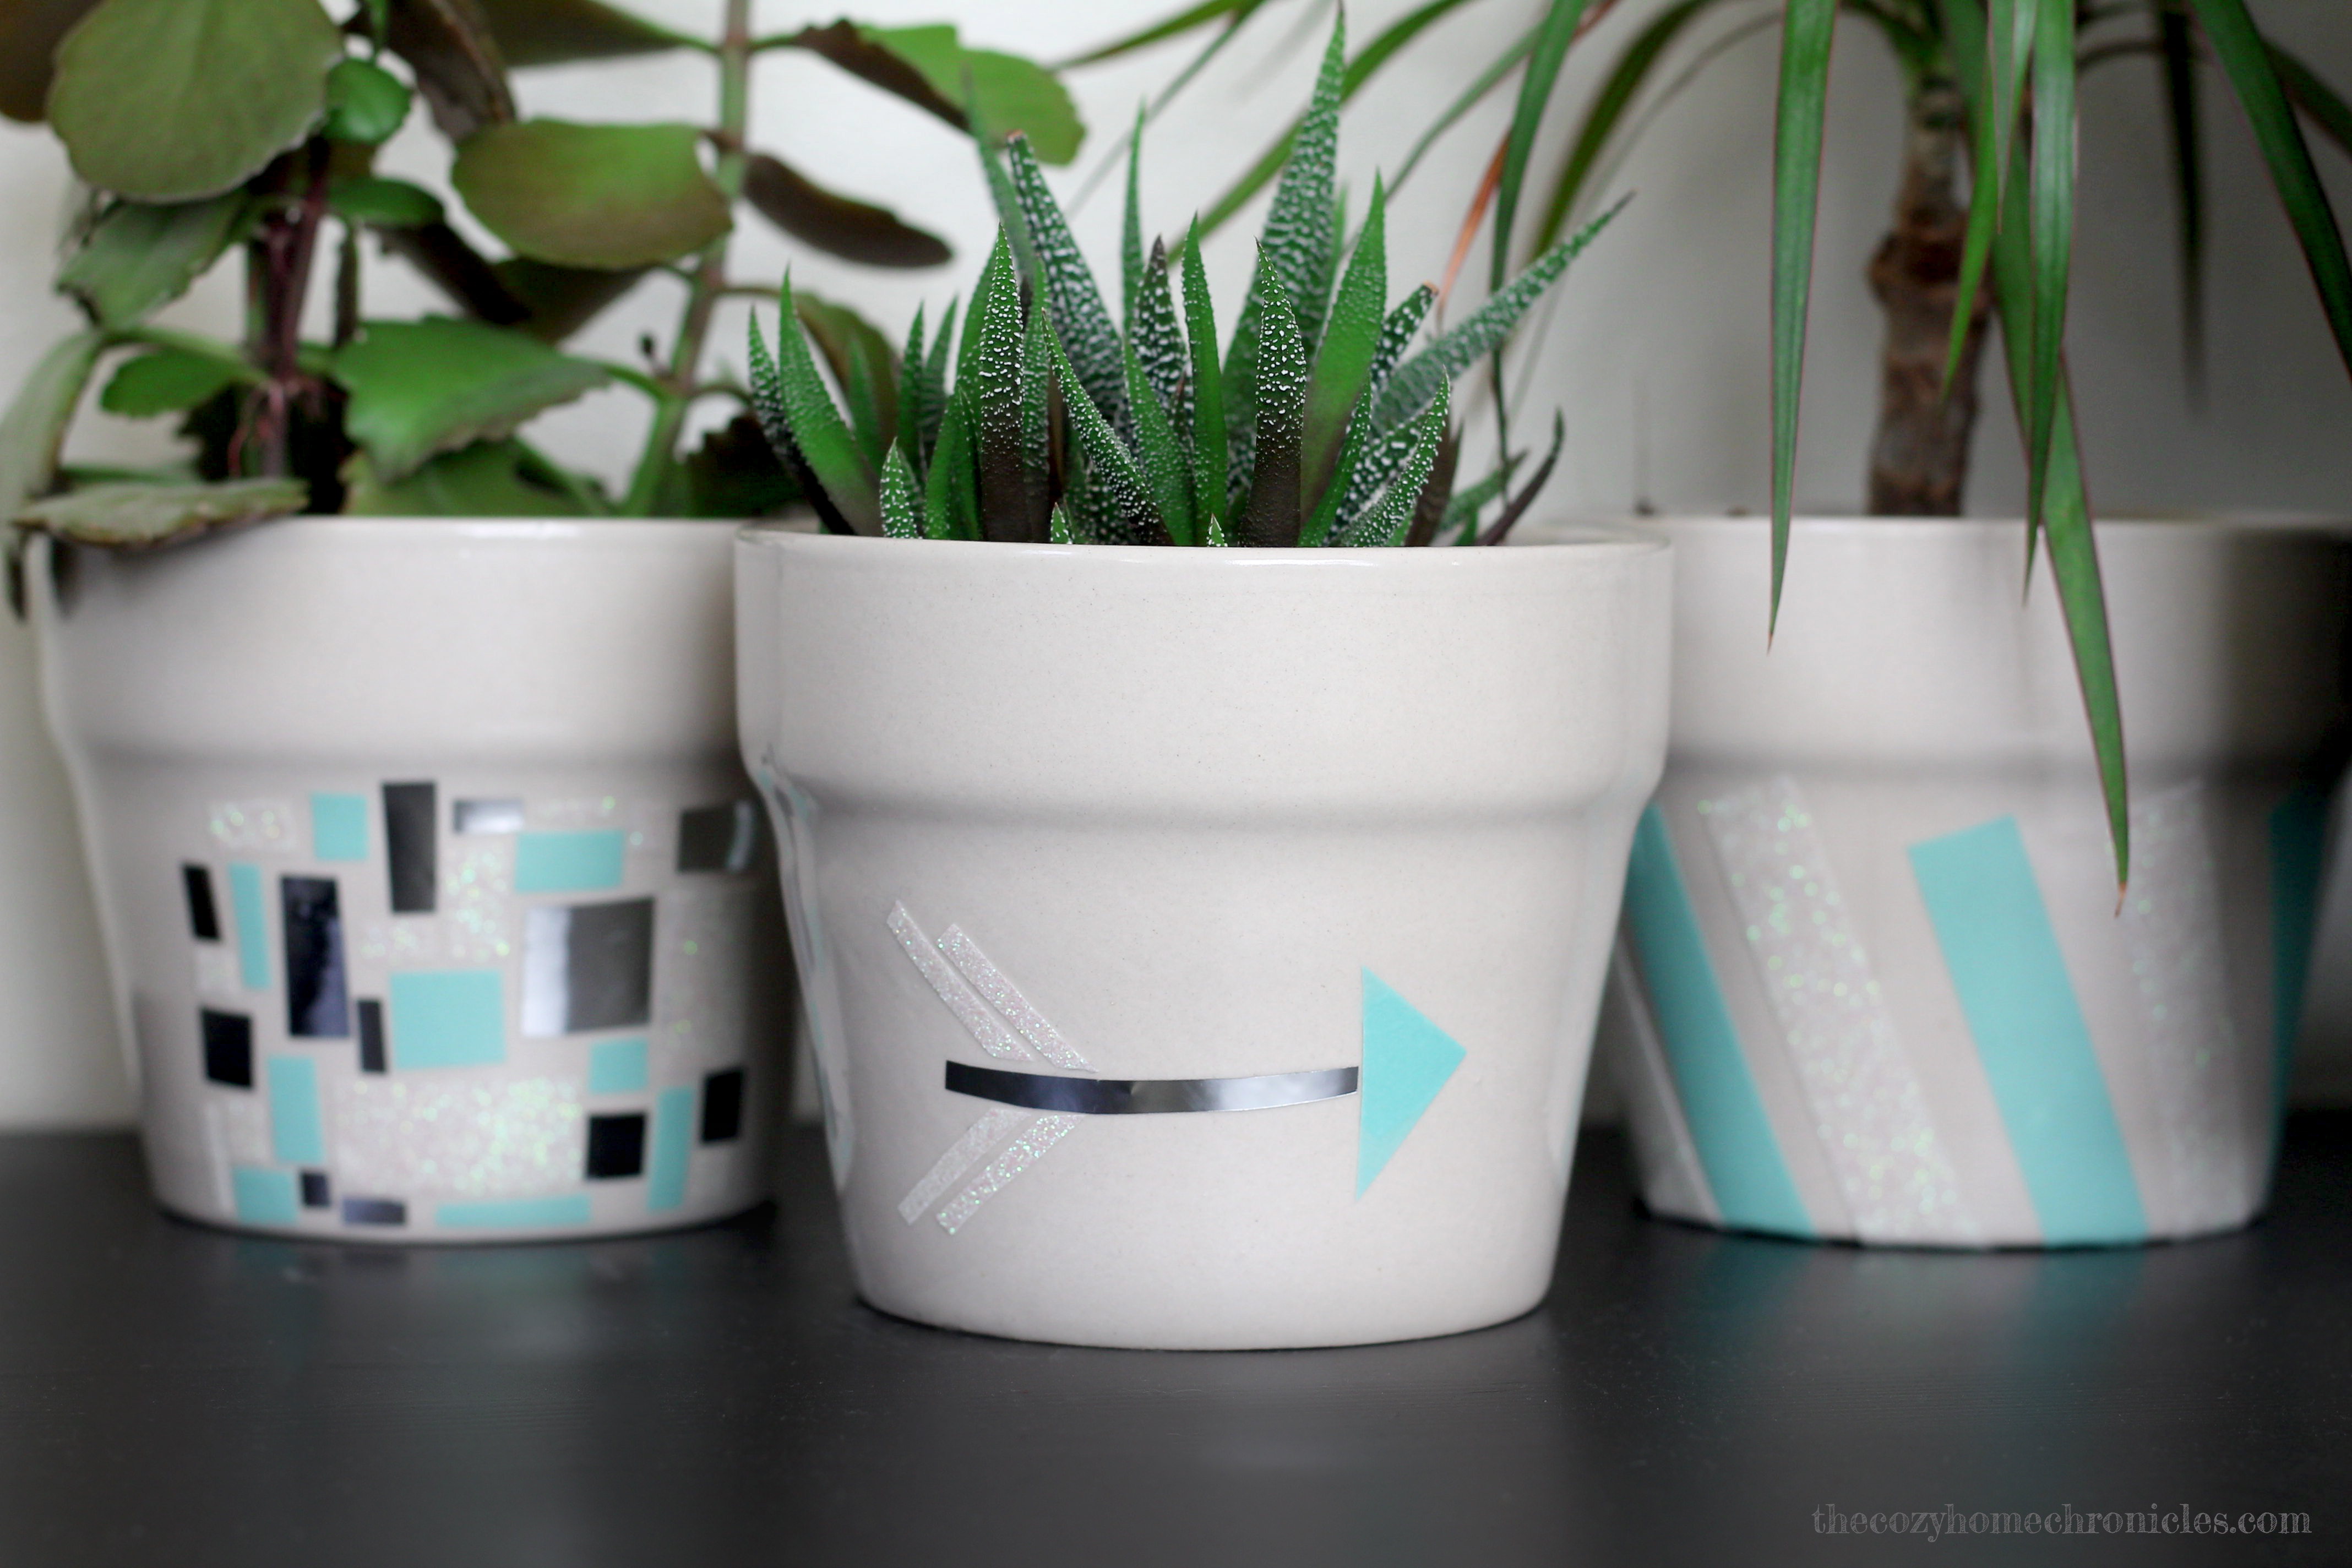
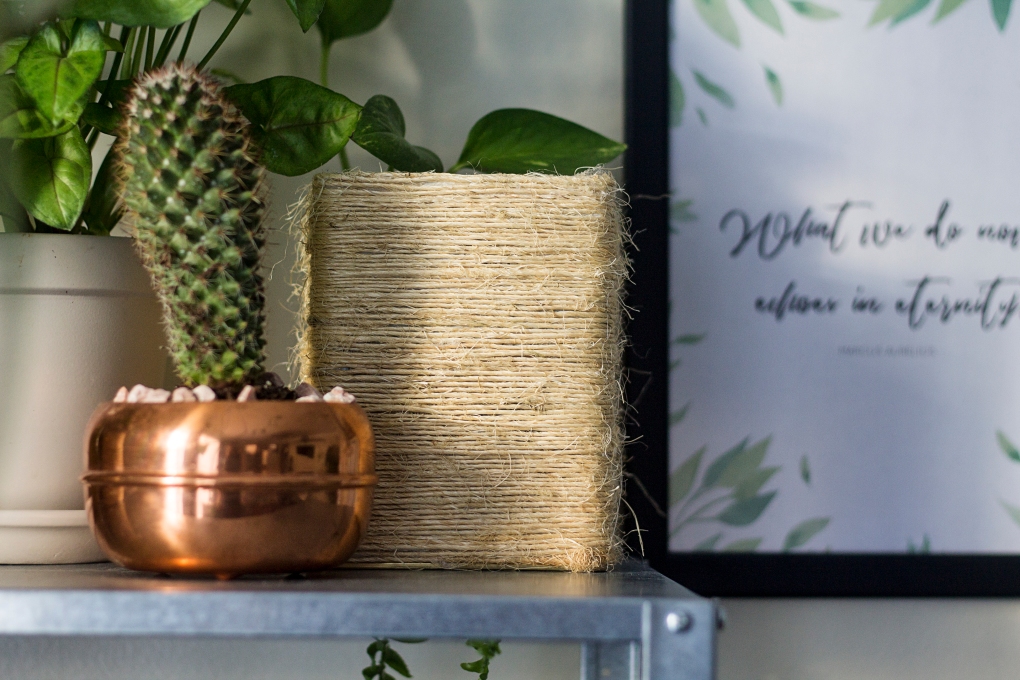
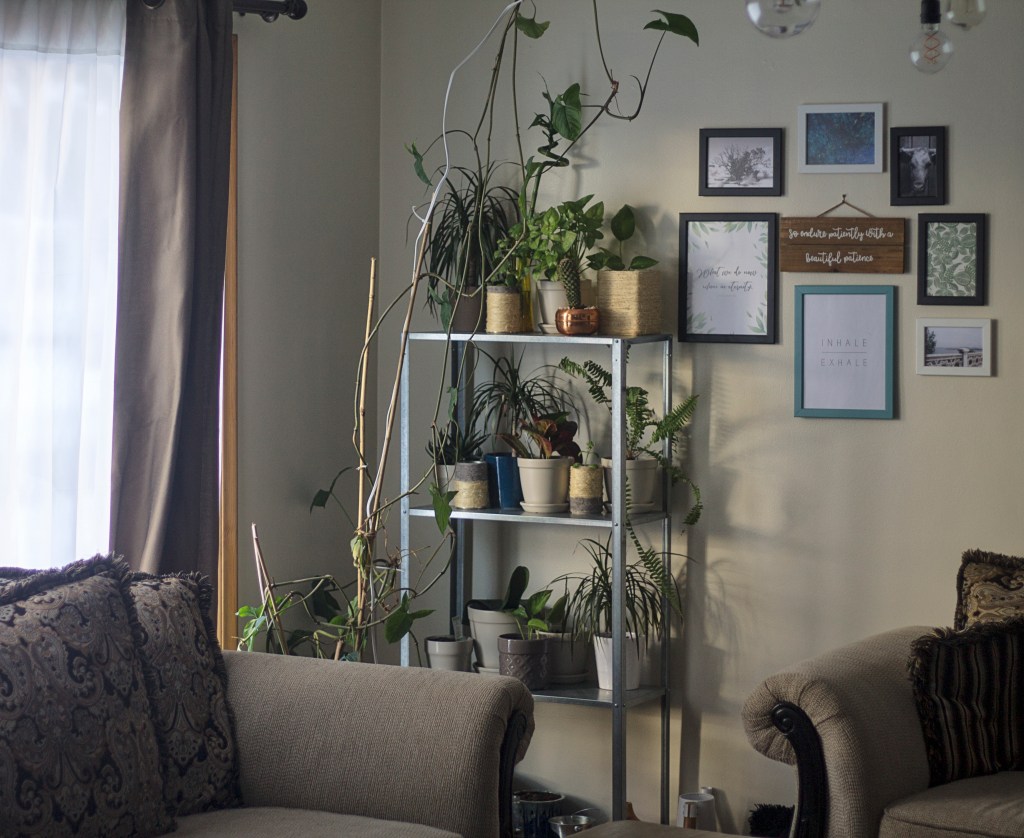
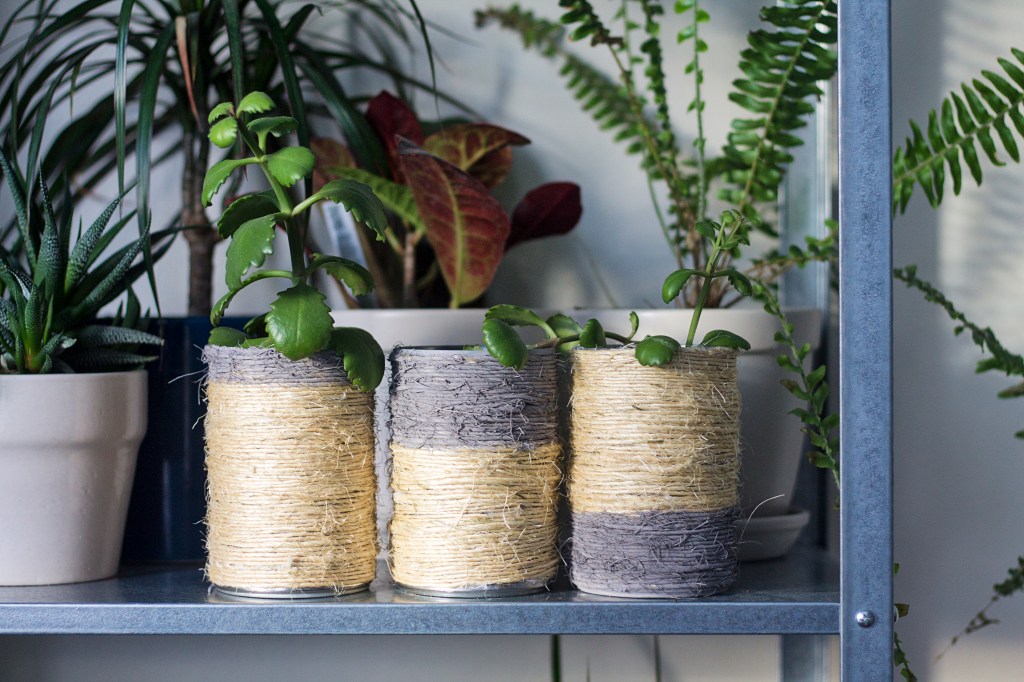
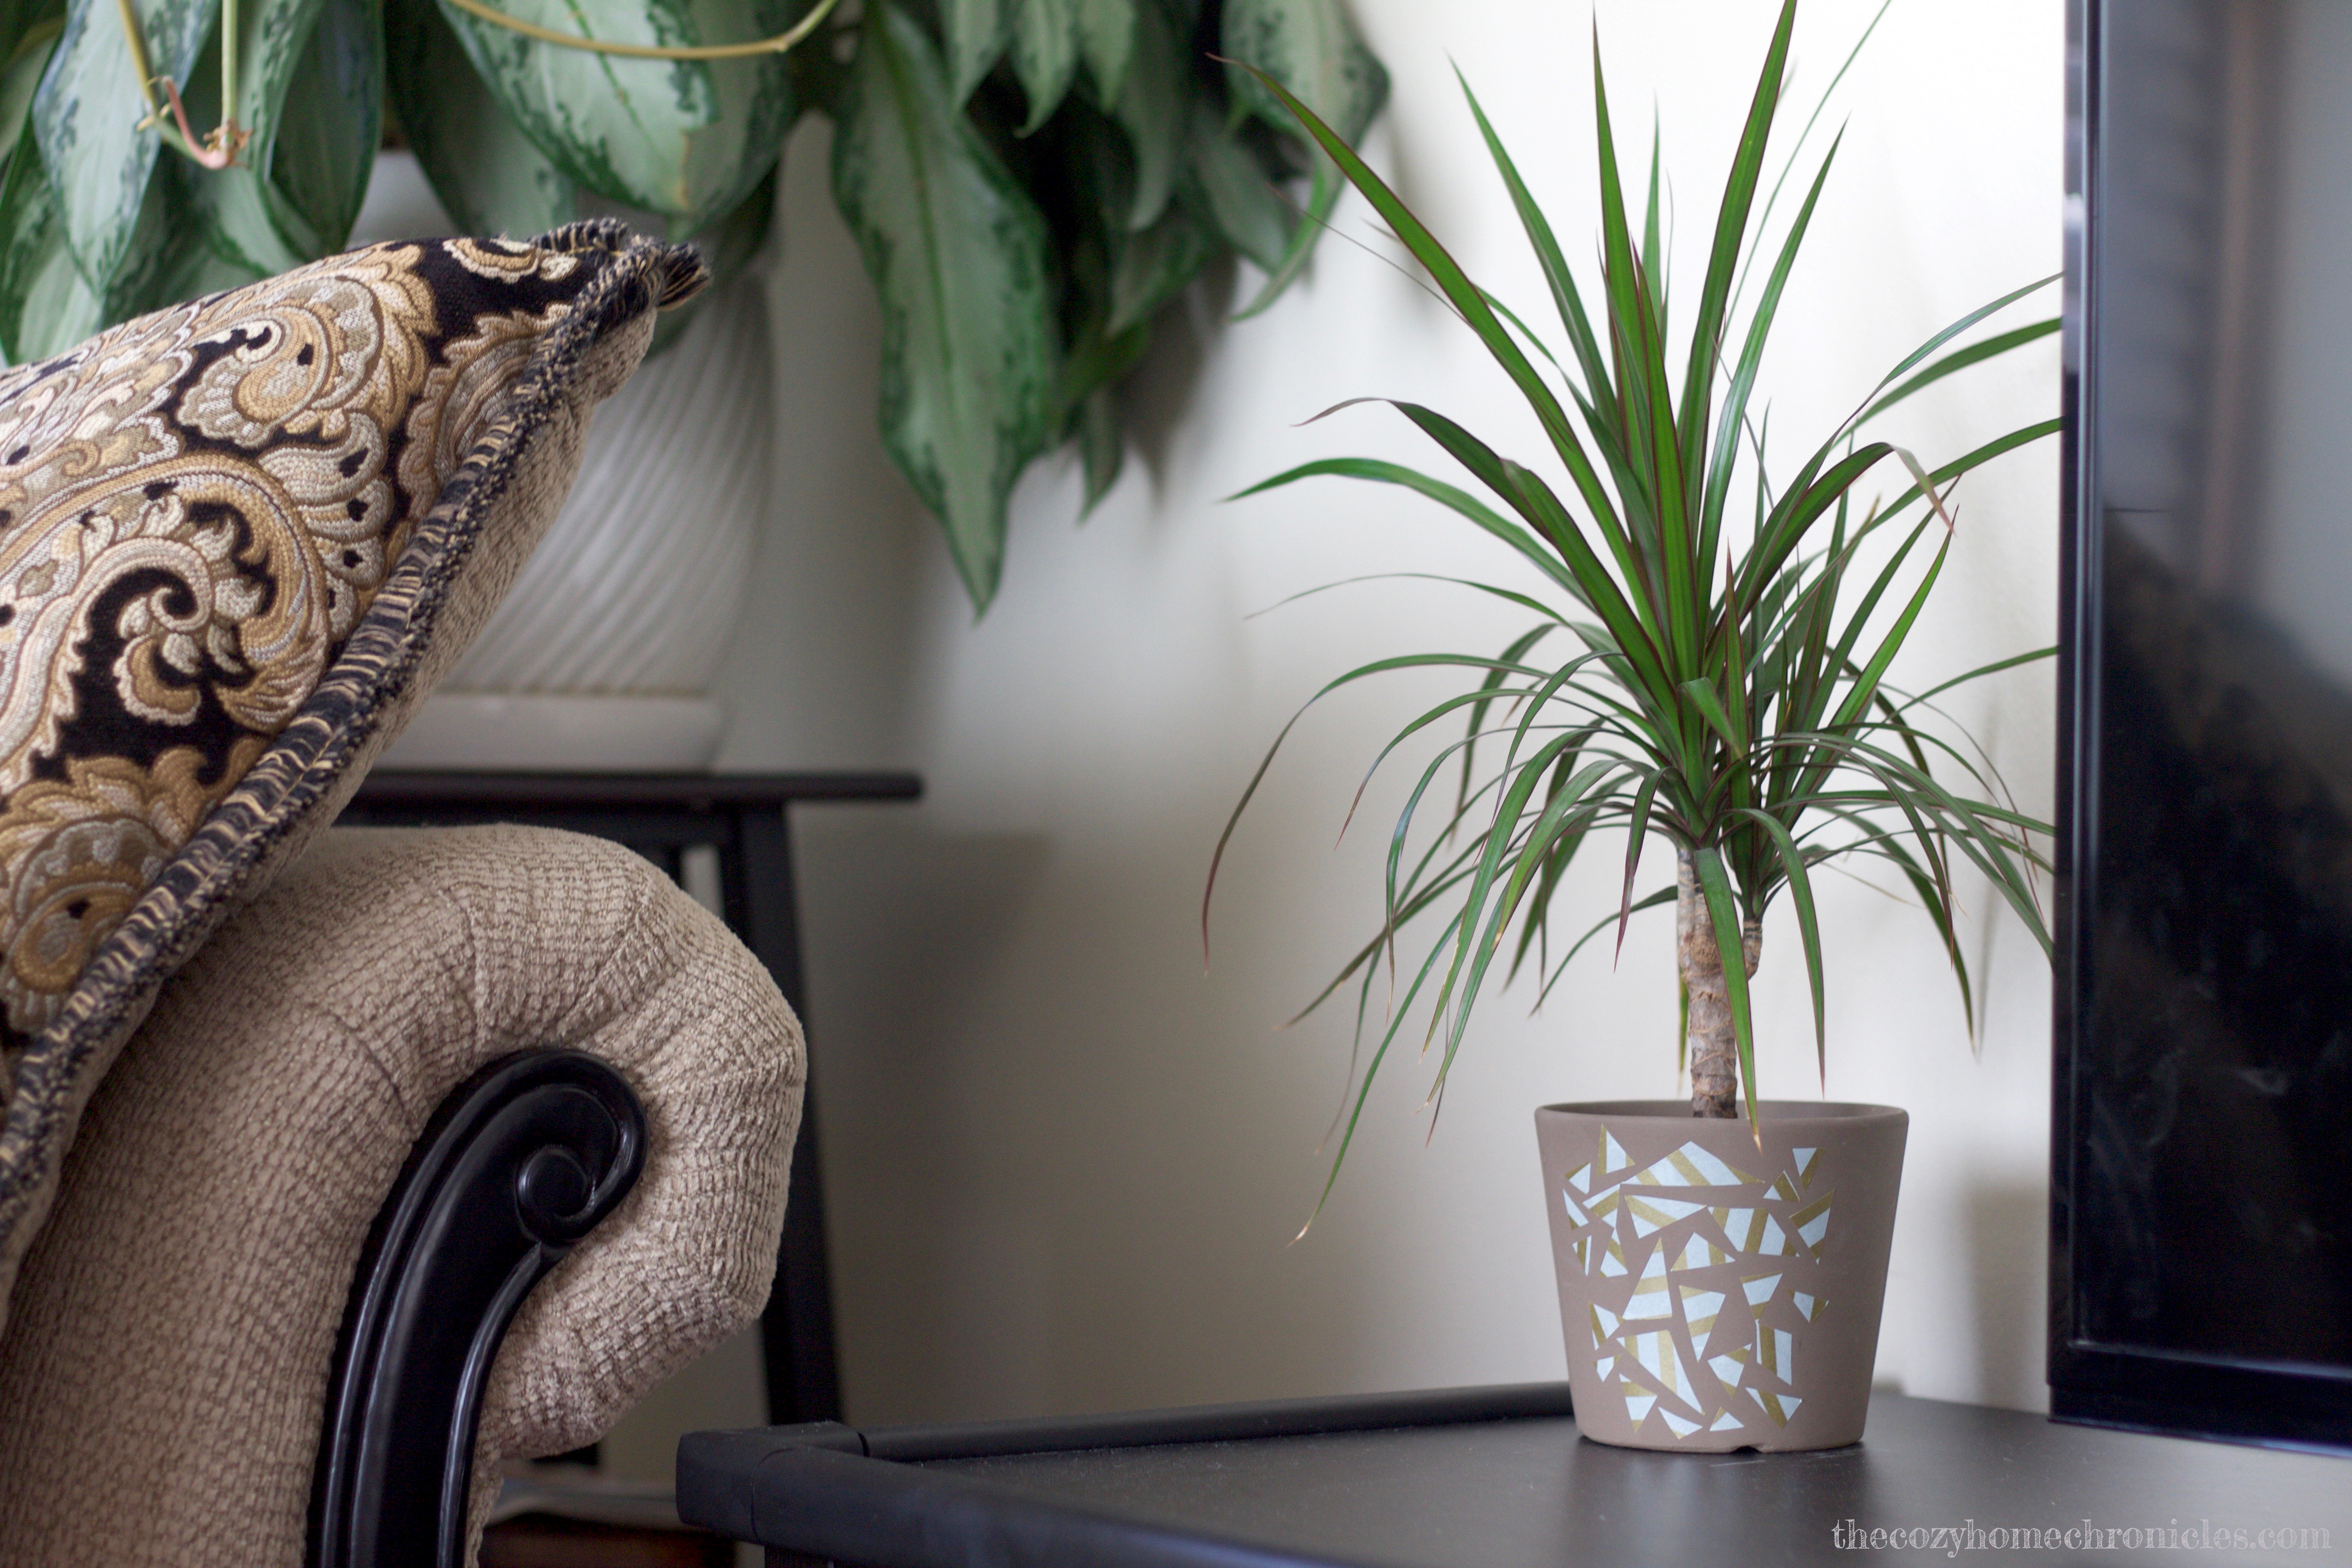
What are some ideas you have for decorating planters in your home? If you attempt this project please do share the finished product with us on instagram under #chcdiy 🙂

If you liked this post please follow us and share!

Instagram


DIY Upcycled Candles

img_7917

It’s that chilly, cozy time of year and you’re reaching to light up those festive candle scents; earthy pine, spicy cinnamon apple, warm vanilla cookie. That is, until you realize your candles are nearly dead from last season’s use. You can barely fit your hand in to light the wick at the bottom of the jar and even if you can, the wick is completely burnt out. We recently found ourselves in a similar situation with a significant collection of useless but oh-so-amazing-smelling candles that still had plenty of wax in them. Rather than being wasteful and tossing them out, we assessed our inventory and devised a plan to revive them. Using small mason jars leftover from our baby shower last year, we made new candles out of the old ones, layering some our favorite scents for a colorful look. With new wicks, pretty glass jars, and some TLC, you too can have your favorite candle(s) brought back to life!

Supplies
Dead candles
Glass mason jars (or any cool glass container of your choice-here’s your chance to get creative!)
Large pot with boiling water
Candle wicks


img_7922


Directions
1. Fill a large pot with just enough water to submerge the candle jar(s) halfway, place on the stove, and bring to a boil.
2. Turn the fire on low and carefully place your candle jars in the pot until the wax is completely melted.

img_7933

3. Using tongs, remove the old wicks from the melted candle jars and dispose of them.

img_7938

4. Dip a new wick in the melted wax and place it at the bottom of your new jar/container.

img_7945

5. Let it cool and solidify.
6. Secure the wick in place so that it is standing straight up when you pour the melted wax in the jar.
7. Using an oven mitten or kitchen towel for protection, remove the melted candle jars from the pot and pour the hot wax into your newly prepared jar/container.

img_7950

8. Lay the candle on a flat surface to set and harden. If you want this process to happen more quickly then put your candle on a tray and pop it in the fridge.
9. Once your first layer has solidified, pour the next layer.

img_7957

10. Repeat steps 7-9 until you’ve filled your jar.
11. Trim the wick.

img_8096

It’s seriously that easy! We made these for our home but with a pretty container these can make beautiful gifts for friends or loved ones. I mean, who doesn’t love candles?

What do you do with your old, dying candles? We would love to hear from you! And as always…

If you liked this post please follow us and share!

Instagram