Low Waste Eid Volume 3

Hello friends! I know I haven’t been very active on this blog and there is a good reason for that. Between my daughter’s food allergy treatment program which has us flying to California every 3 months and me still writing my dissertation, it’s hard to find time to write here. One thing that I do make time for is trying to live more sustainably which I share on my instagram page. That journey has led me down many paths and projects and I’m excited to be sharing this one with you. I started Low Waste Eid three years ago as a way to showcase and encourage a slower, more conscientious approach to celebrating Eid; an approach that is part of the ethos of our faith. Each year I am awed by the creativity and thoughtfulness of the contributors and this year is no exception.  As you will come to see, it is perfectly possible to decorate and gift in a socially responsible way. All you need is a bit of imagination and resourcefulness. I am looking forward to writing more consistently about my low waste journey when life gets a little less chaotic but in the meantime, you can download the ebook guide full of low waste gift ideas and decor below.

If you enjoyed this guide, please share it with your family and friends and please show these wonderful contributors your support by following them on instagram and engaging with their content.


Amanie
Anaam
Ayesha
Farhana
Hadeel
Hana
Malika
Momina
Nada
Nida
Sadia


LOW WASTE EID GUIDE 2021

Eid is just around the corner and we are back with another volume of Low Waste Eid. This is something I really enjoy putting together because I truly believe it’s important to rethink our holiday traditions in light of the climate crisis. Foil balloons, wrapping paper, and shiny toys for Eid are all nice on the surface but what happens when we are done with these things. Where do they go? Out of sight, out of mind is not an ethically justifiable position. Change takes time and while perfection is not possible, we must start somewhere. I hope this guide will be a source of inspiration to take that step. I hope you’ll see that Eid can be just as festive and special when we lessen our impact by making or upcycling gifts and decor. If you decide to make something from the guide or are inspired to create something from what you have on hand, please share and use the hashtag #lowwasteeid. I’ll be sharing your creations on my instagram as we get closer to Eid.

If you enjoyed this guide, please share it with your family and friends and please show these wonderful contributors your support by following them on instagram and engaging with their content.


Amanie
Areeba
Azima and Shazia
Bea
Farhana
Filsan
Hana
Hana S.
Momina
Nada
Nida
Tayyaba


Low Waste Eid Gift Guide

Hello friends! It’s been a minute since I’ve written a post on this blog. I’ll spare you all the boring details but since last Ramadan, we’ve added a third baby to our family, Sufi graduated with his MBA, and we flipped another house. I’m still trying to finish my dissertation while juggling life with three kids during a pandemic. As you can see we have our hands full! But as many of you know, blogging is my creative outlet and absolutely necessary for my mental health so I’ve made some time to do something I enjoy while creating a resource for you to help you make Eid 2020 special as sustainably as possible.

Low Waste Eid is a compilation of beautiful and thoughtful gifts from a diverse group of talented Muslim bloggers. The emphasis is on minimizing waste and getting creative by using what you have around your home. These days, it’s easy to get caught up in the consumerist impulse even when it comes to Muslim holidays but given the devastating effects materialism has on the environment, human rights, and our spiritual health (among many other things) it’s time we rethink how we consume.  Even if you purchase the majority of your gifts, I hope you’ll attempt to make one of these low-waste gifts from our guide. Every journey begins with one step and there’s never a better time than now to take a step towards living more sustainably.

If you enjoyed this ebook, please share it with your family and friends and please show these wonderful contributors your support by following them on instagram and engaging with their content.

Aisha
Amanie
Areeba
Bea
Farhana
Hana
Nida
Tayyaba


Mindful Eid Gift Guide For Kids

Ramadan is more than halfway over and like us, many of you are probably thinking ahead to Eid (early Eid Mubarak!). While many people traditionally give Eid money to children, it seems more and more people are opting for physical gifts. Often these gifts can be a source of stress for parents as the accumulation of toys is daunting to deal with (speaking from experience here). On top of that, many toys are made cheaply to satisfy short term interests and end up being wasteful in the long run. What to do? That’s where this gift guide comes in!

The list and links you will find in this guide are for toys that are either eco-friendly (made from wood or recycled plastics), sustainably and ethically made, or for long term educational use. These are toys we have either purchased for Eid previously or are considering for Eid this year. I’ve tried to include diverse options and price points so I hope you’ll find something for you. After the list of toys, you will find sources for some fun DIY gift options as well as printable Eid envelopes if you’re going to go the cash route. I am also including a list of ideas for fun experiences you can do with your family on Eid. It should go without saying that Eid is not about gifting but rather a time of celebration with family so please don’t let this post make you feel overwhelmed. Lastly, I would like to point out that buying second-hand is the more sustainable option for our environment but I understand that it’s frowned upon in certain cultures as “cheap.” These toys are for those looking to purchase new toys but want more mindful, socially responsible options; they are definitely not the latest and greatest toy trends of 2019.

  1. Books are one of my favorite gift options for children because they open up a whole new world and encourage parent-child bonding time. Gifting books is extra special when you know the child’s interests and nothing is better than seeing a child’s face light up as they flip through a good book. Here are some wonderful book options:

2. Opinel Le Petit Chef– This knife and peeler equipment set for children aged 7-11 is an excellent gift for your favorite kitchen helper and offers the perfect opportunity to bond over meal prep as well as teach cooking safety early on.

3. Kiddie Woods Doctor Kit-This doctor’s kit is beautifully made and perfect for imaginative play. We bought this for our kids for Eid last year and they still love role playing doctor together. Needless to say it was a huge hit!

4. Kid’s Beginner Microscope– If you have a curious, budding scientist on your hands, this microscope is perfect for introducing STEM and encouraging exploration and learning.

5. PlanToys Assorted Fruits and Vegetables– These are the perfect addition to a play kitchen set or for a child that enjoys playing chef. I love this company because of their focus on sustainability and using reclaimed rubber woods. They have a large and wonderful selection of wooden toys for babies and toddlers and you can browse them all here.

6. Tegu Magnetic Blocks-Magnetic blocks are a great toy for encouraging creative play and supporting cognitive development. I love that Tegu blocks are made from durable solid wood and that the company cares about social impact by prioritizing “long term employee growth and development.”

7. ALEX Pretend Tin Tea Set-What child doesn’t love a good tea party? The set pictured is made of tin and I included it because it’s durable and withstands the clumsiness of toddlers but if you’re gifting an older, more responsible child then this porcelain set is a gorgeous and affordable option.

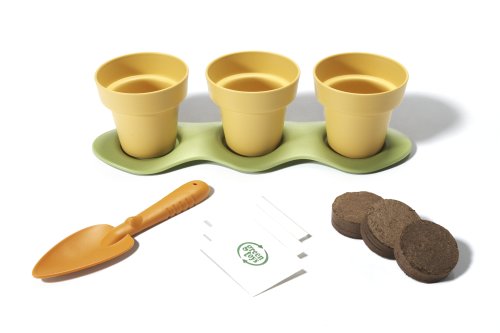
8. Green Toys Indoor Gardening Set– These planters with seeds make an excellent gift for the nature-loving child in your life. I love Green Toys because they are made from recycled plastics and they also have a huge selection of toys for children of all ages. You can browse them here.

9. Wishbone Design Studio 3-in-1 Bike-This is the priciest gift on this list but if you’ve been on the lookout for a toddler bike then this is a wonderful option. It’s made from sustainably-harvested wood, converts from a baby walker to a balance bike, and won Best Green Toy in 2011.

10. Cuddle + Kind Handknit Dolls– You can’t go wrong with a classic doll especially when it’s handmade from 100% cotton using sustainable, fair trade practices. My favorite part about this company is that it’s family-owned and the purchase of each doll provides 10 meals to children in need.

11. National Geographic Fossil Dig Kit– Another great STEM gift that is the perfect balance of learning and fun. I’m probably getting this for my son because he LOVES to “dig” for dinosaur bones in the yard and I love the hands-on learning it will offer. Not a dinosaur enthusiast? No worries! National Geographic has plenty of other hands-on learning kits here.

12. Sarah’s Play Silks– These play silks are not only beautiful but perfect for all sorts of open-ended play. I love this company because it’s family-owned, specializes in Waldorf inspired toys, and uses natural materials such as wood and silk.

13. HABA Bonita Garden– This beautifully painted stacking peg toy is perfect for younger toddlers and fosters creativity, fine motor skills, and hand-eye coordination. I love HABA because their wooden toys are made to last and are colored with non-toxic, water-based stains. The German company also has a diverse selection of other wooden toys and puzzles that you can browse through here.

Do-It-Yourself Gift Ideas

These are some simple, fun DIY gifts you can make together with your kids. I am considering making one of these to have on hand for young Eid visitors or to send as Eid favors for my children’s classes.

Printable Eid Money Envelopes

Giving the traditional Eid money is easier because it takes the stress out of gift giving and gives the parents the option to spend or invest as they see fit (college fund, much needed summer clothes, etc.) . If you go that route, we have you covered with some free and purchasable Eid envelope options.

Fun Eid Experiences

While we do usually get one simple gift for the kids, we believe the best gift (and most sustainable gift) is spending quality time together so we’re taking the guesswork out of your Eid planning by sharing some fun things you can do during these special days.

  • A trip to the zoo
  • A movie outing
  • A picnic, BBQ, or kite flying at the park
  • Strawberry picking (or whatever fruit is in season)
  • Mini-golf
  • Bowling
  • A family bike ride
  • A visit to a local museum
  • Go Paddle-boating or canoeing
  • Go out for ice cream
  • Take family pictures

We hope you’ve found this comprehensive gift guide helpful. If you do, we would greatly appreciate you sharing this post with family and friends across your favorite social media channels. If you have any questions or suggestions, feel free to leave them in the comments below and as always….


30 Mindful Ramadan Deeds: Printable List and Calendar Cards

The month of Ramadan begins in just a few days and aside from decorating which I’ve written about in the past (see here and here), I’ve been trying to find ways to get the kids more involved in the spirit of Ramadan. Both of our children are at an age where they understand certain concepts such as “helping” and “being nice” so I wanted to take this month as an opportunity to practice mindfulness of their actions and reflect on the impact those actions can have on themselves (feeling good), on others ( the social impact of a helping hand), and on the environment (consequences of consumption and the destruction of nature). I’ve come across similar good deed countdowns for Christmas and Ramadan but found that many of them were geared towards older children so I tried making a list that was appropriate for children aged 2+. Obviously they won’t be able to do all of these on their own but that’s kind of the point; it’s a family activity.

Feel free to switch up the order of the cards and even alter the activity to fit your lifestyle and/or child’s level of understanding. I think you’ll get the most mileage out of these activities when you use them to spark conversation on why we do what we do (making beds=the importance of cleanliness, visiting a sick family member=caring for others in need, planting flowers=the earth as a trust we should care for, etc.) You get the point. If you do have a Ramadan advent calendar or are considering making one, just know that the document I’ve included can be adjusted during the printing process to fit the size of your calendar. Simply click on “layout” and select how many pages you’d like to print on a page. For my calendar with 3×3 inch pockets, I printed 16 pages on 1 page so that I could cut them out as cards about 2.5 x 2.5 inches in size. The only thing I would suggest is that you print them on sturdy card stock so that you can use them year after year.

30 Days of Mindful Deeds| Free PDF Downloads

I think that about covers everything. If you found this post and the printables helpful, we would love it if you would share with your friends and/or provide feedback in the comments below. And if you do participate in our 30 days of Mindful Deeds, we would love it if you would share on your instagram stories or feed and tag us @thecozyhomechronicles. We will also be sharing in the hopes of inspiring others to try these activities because it really does take a village and together we can hopefully raise a kinder, more mindful generation.


DIY Ramadan Salt Dough Ornaments

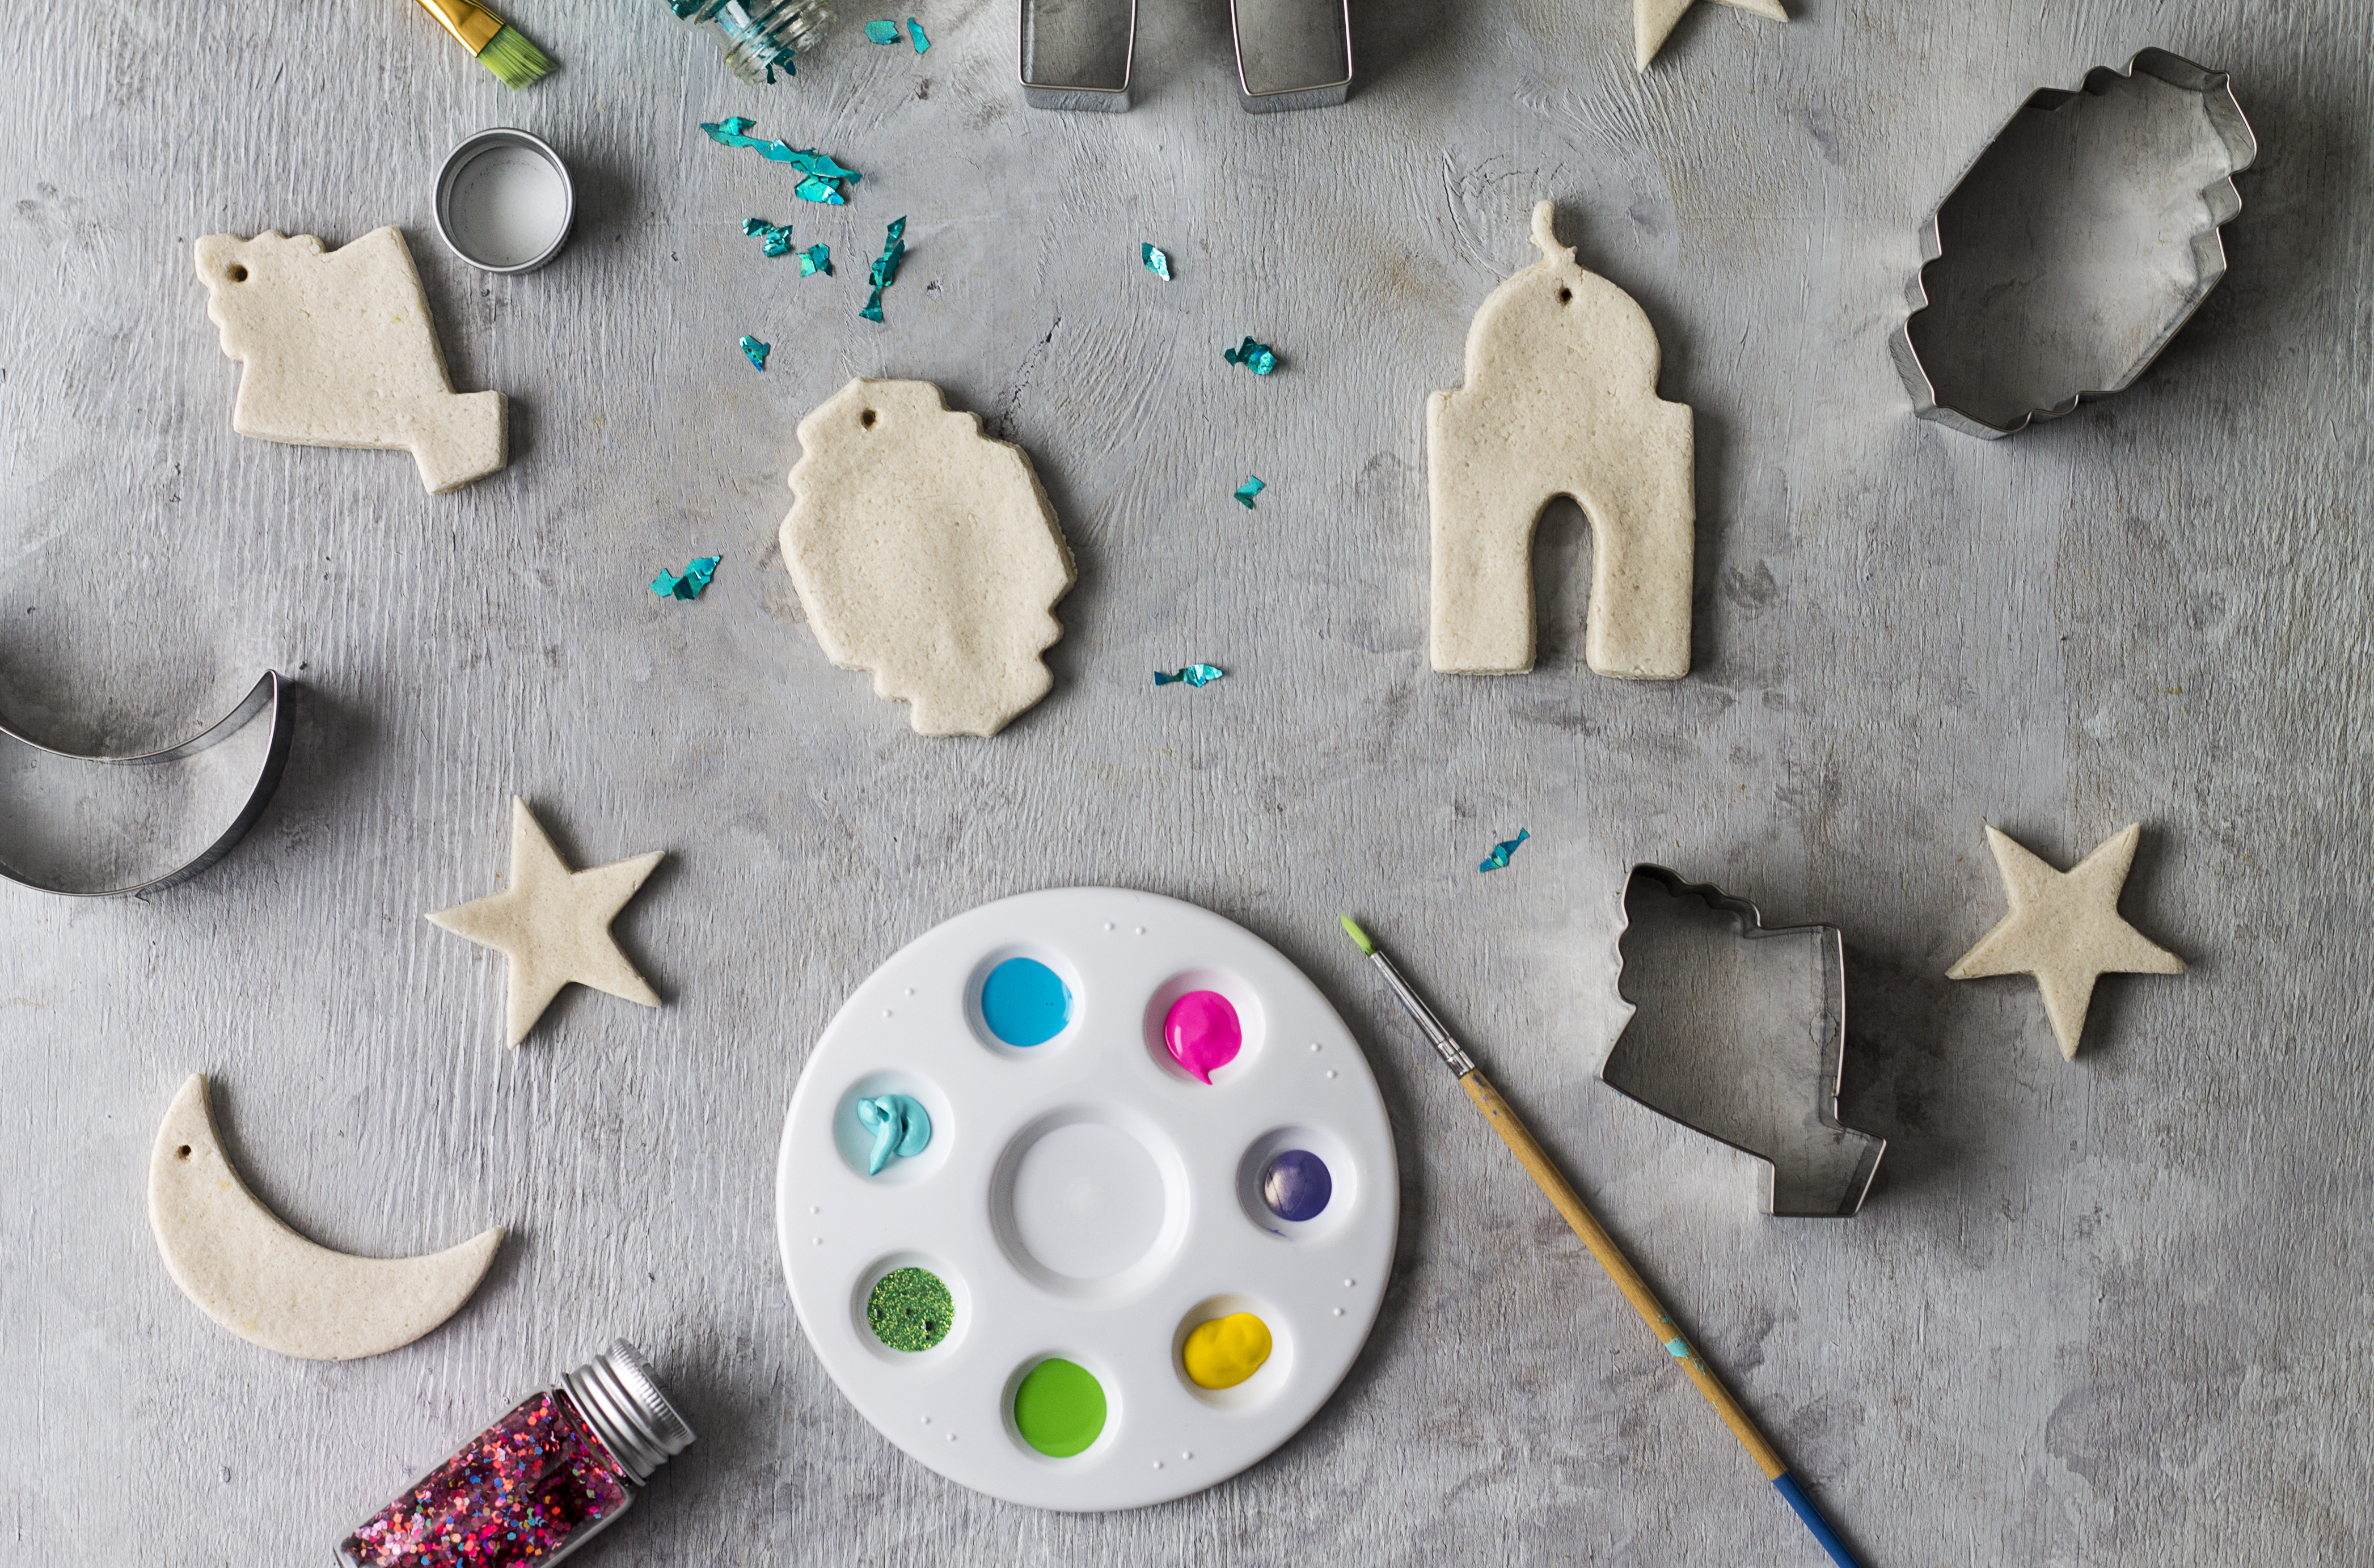
The month of Ramadan is just around the corner and this year is a busy time for us as we are expecting baby #3 in July. As you may already know, decorating the home for Ramadan is something we do every year and this year is no exception. We are, however, trying to be more conscious of our waste so I’m really focusing on using what we have and making what we don’t. That’s why I’m super excited to share this DIY Ramadan craft project featuring With a Spin’s cookie cutters. This project makes use of everyday ingredients in your pantry, can be customized to your style, and the finished product can be used year after year. Now that’s what I call a win-win-win. While, I love neutral minimalist tones, the kids wanted vibrant colors so that’s what we went with. The decorating possibilities are truly endless. Let’s make some salt dough ornaments!

Ingredients
2 cups all-purpose flour
1 cup salt
1 cup warm water

Tools
Lantern cookie cutter set
Islamic shape cookie cutter set
Rolling pin
Baking sheet

Directions

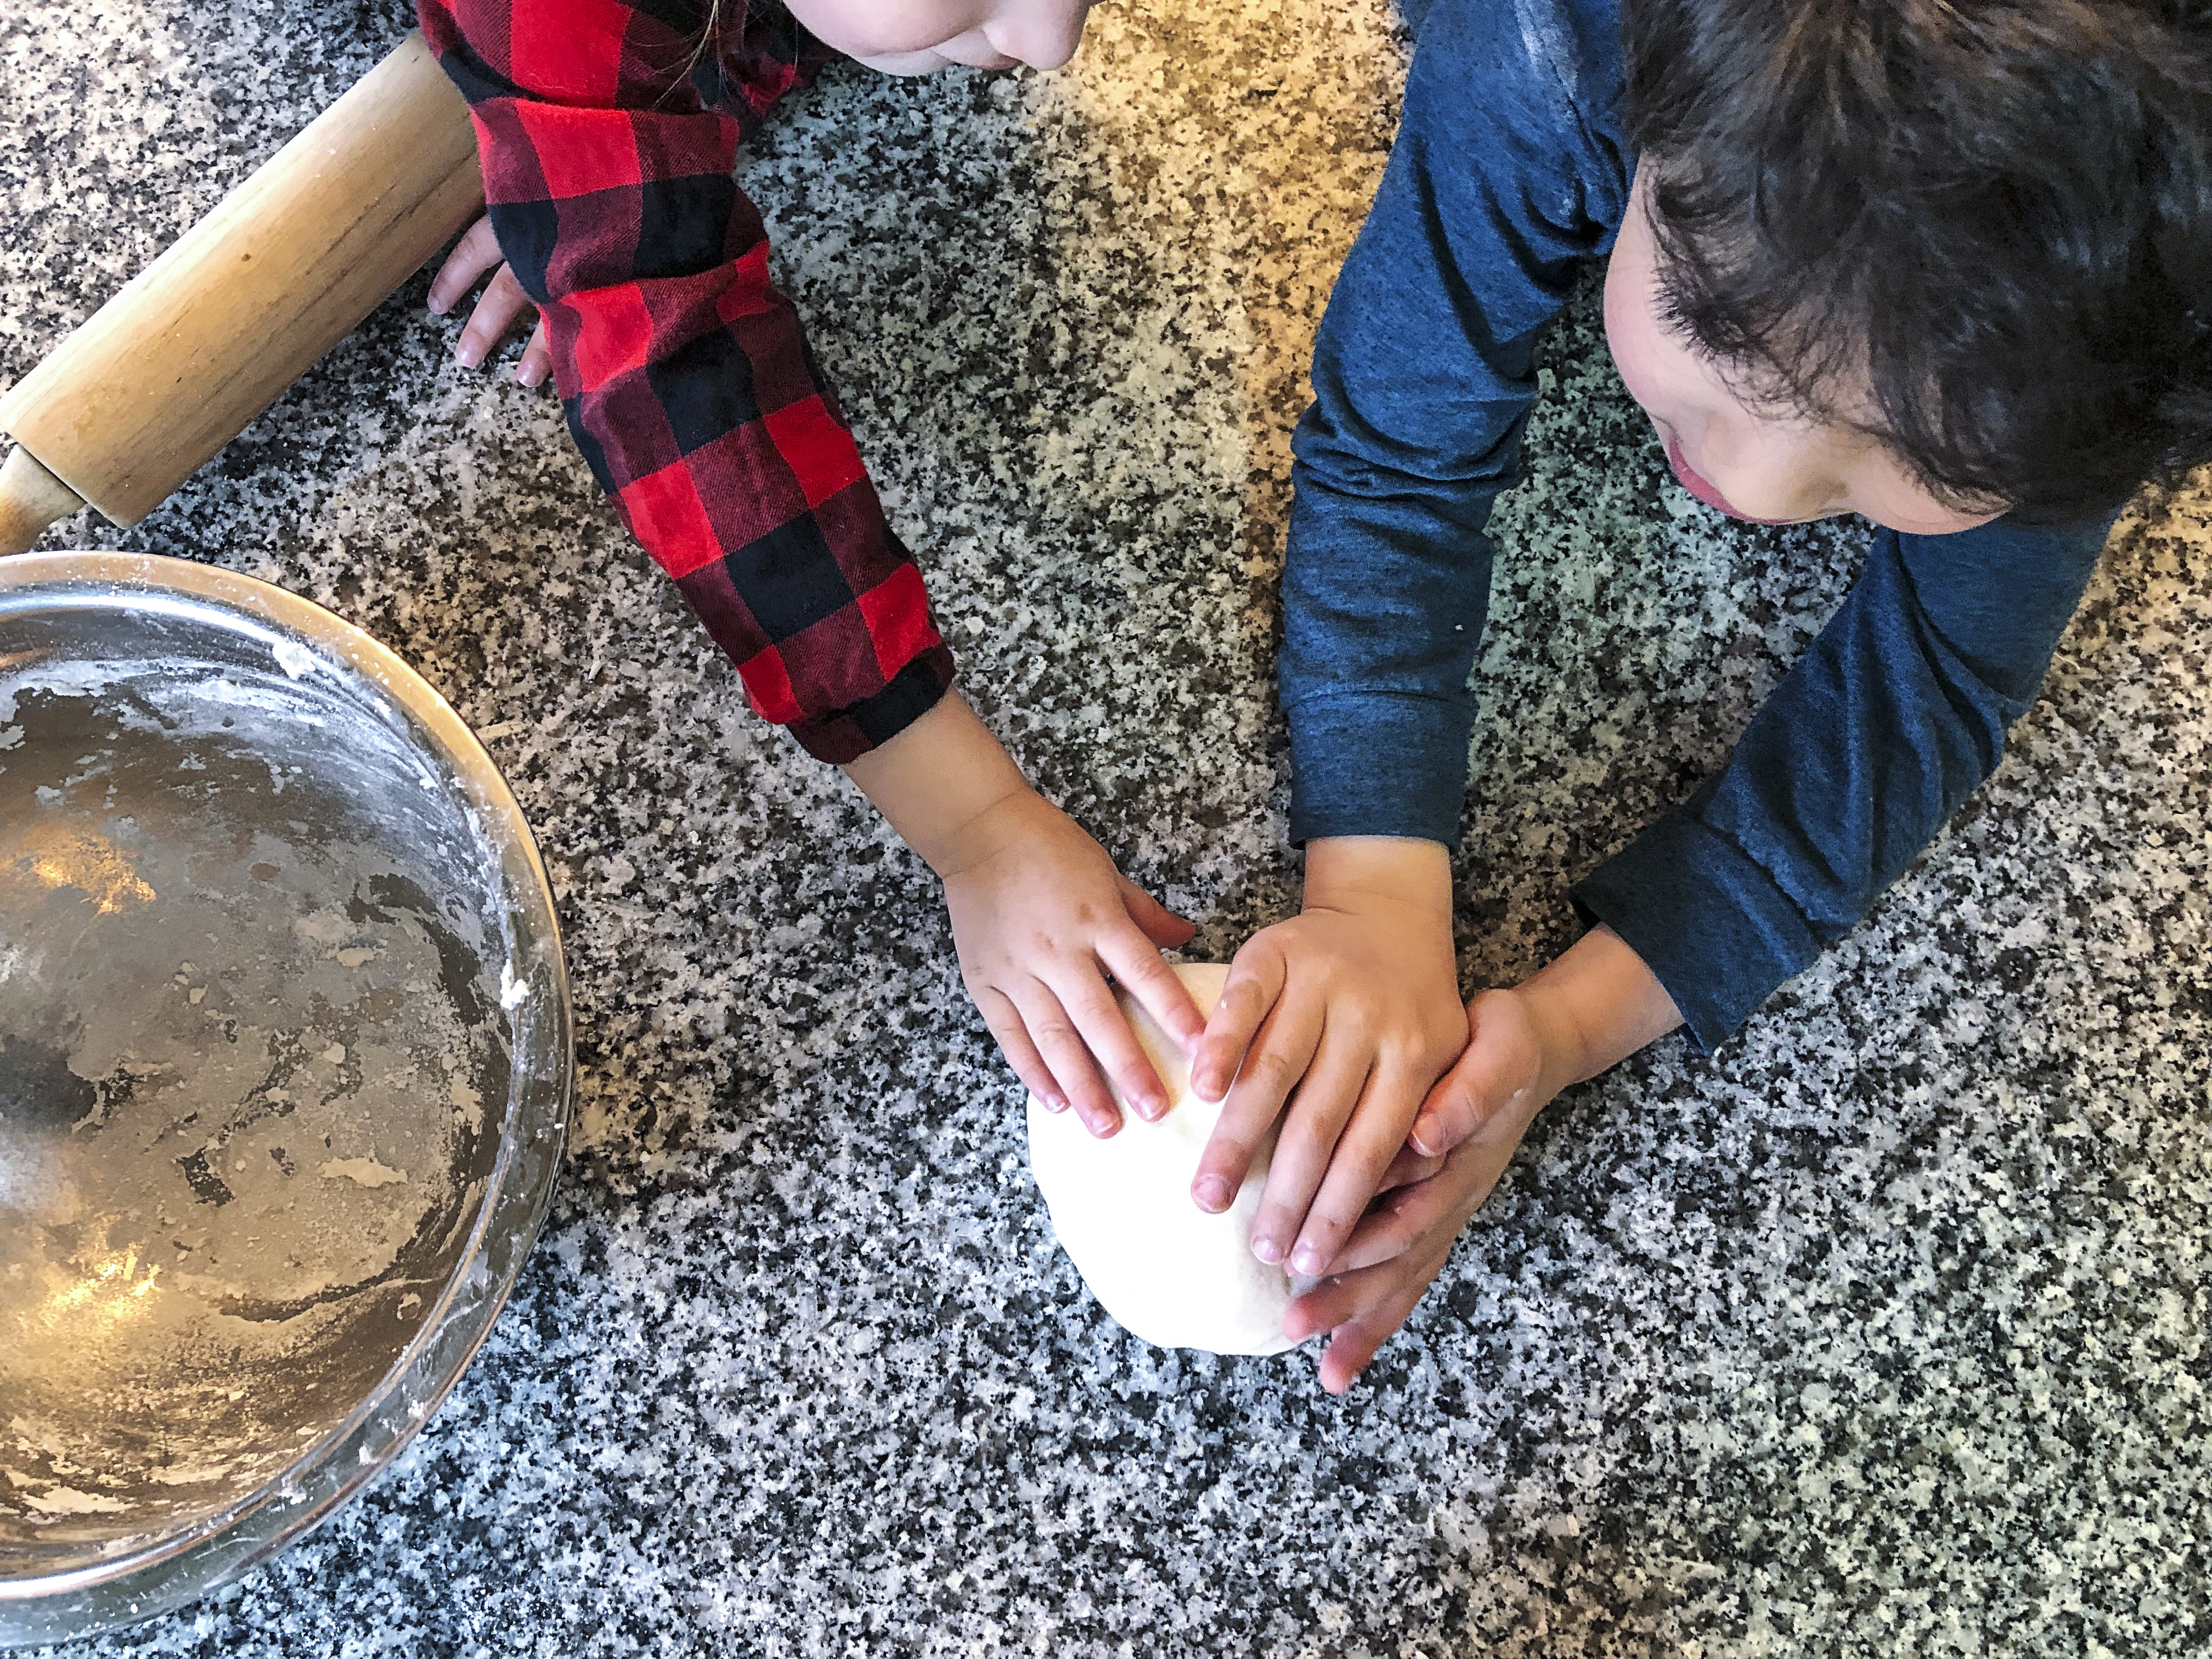
  1. Mix warm water into flour and salt mixture to form a dough. Knead for 10 minutes until smooth.
  2. Roll out dough about 1/4-1/2 inch thick and cut out desired shapes. Use a toothpick or skewer to punch a hole near the top of the shape for the string.
  3. Place shapes on a baking sheet and bake for 5 hours at 200 F.
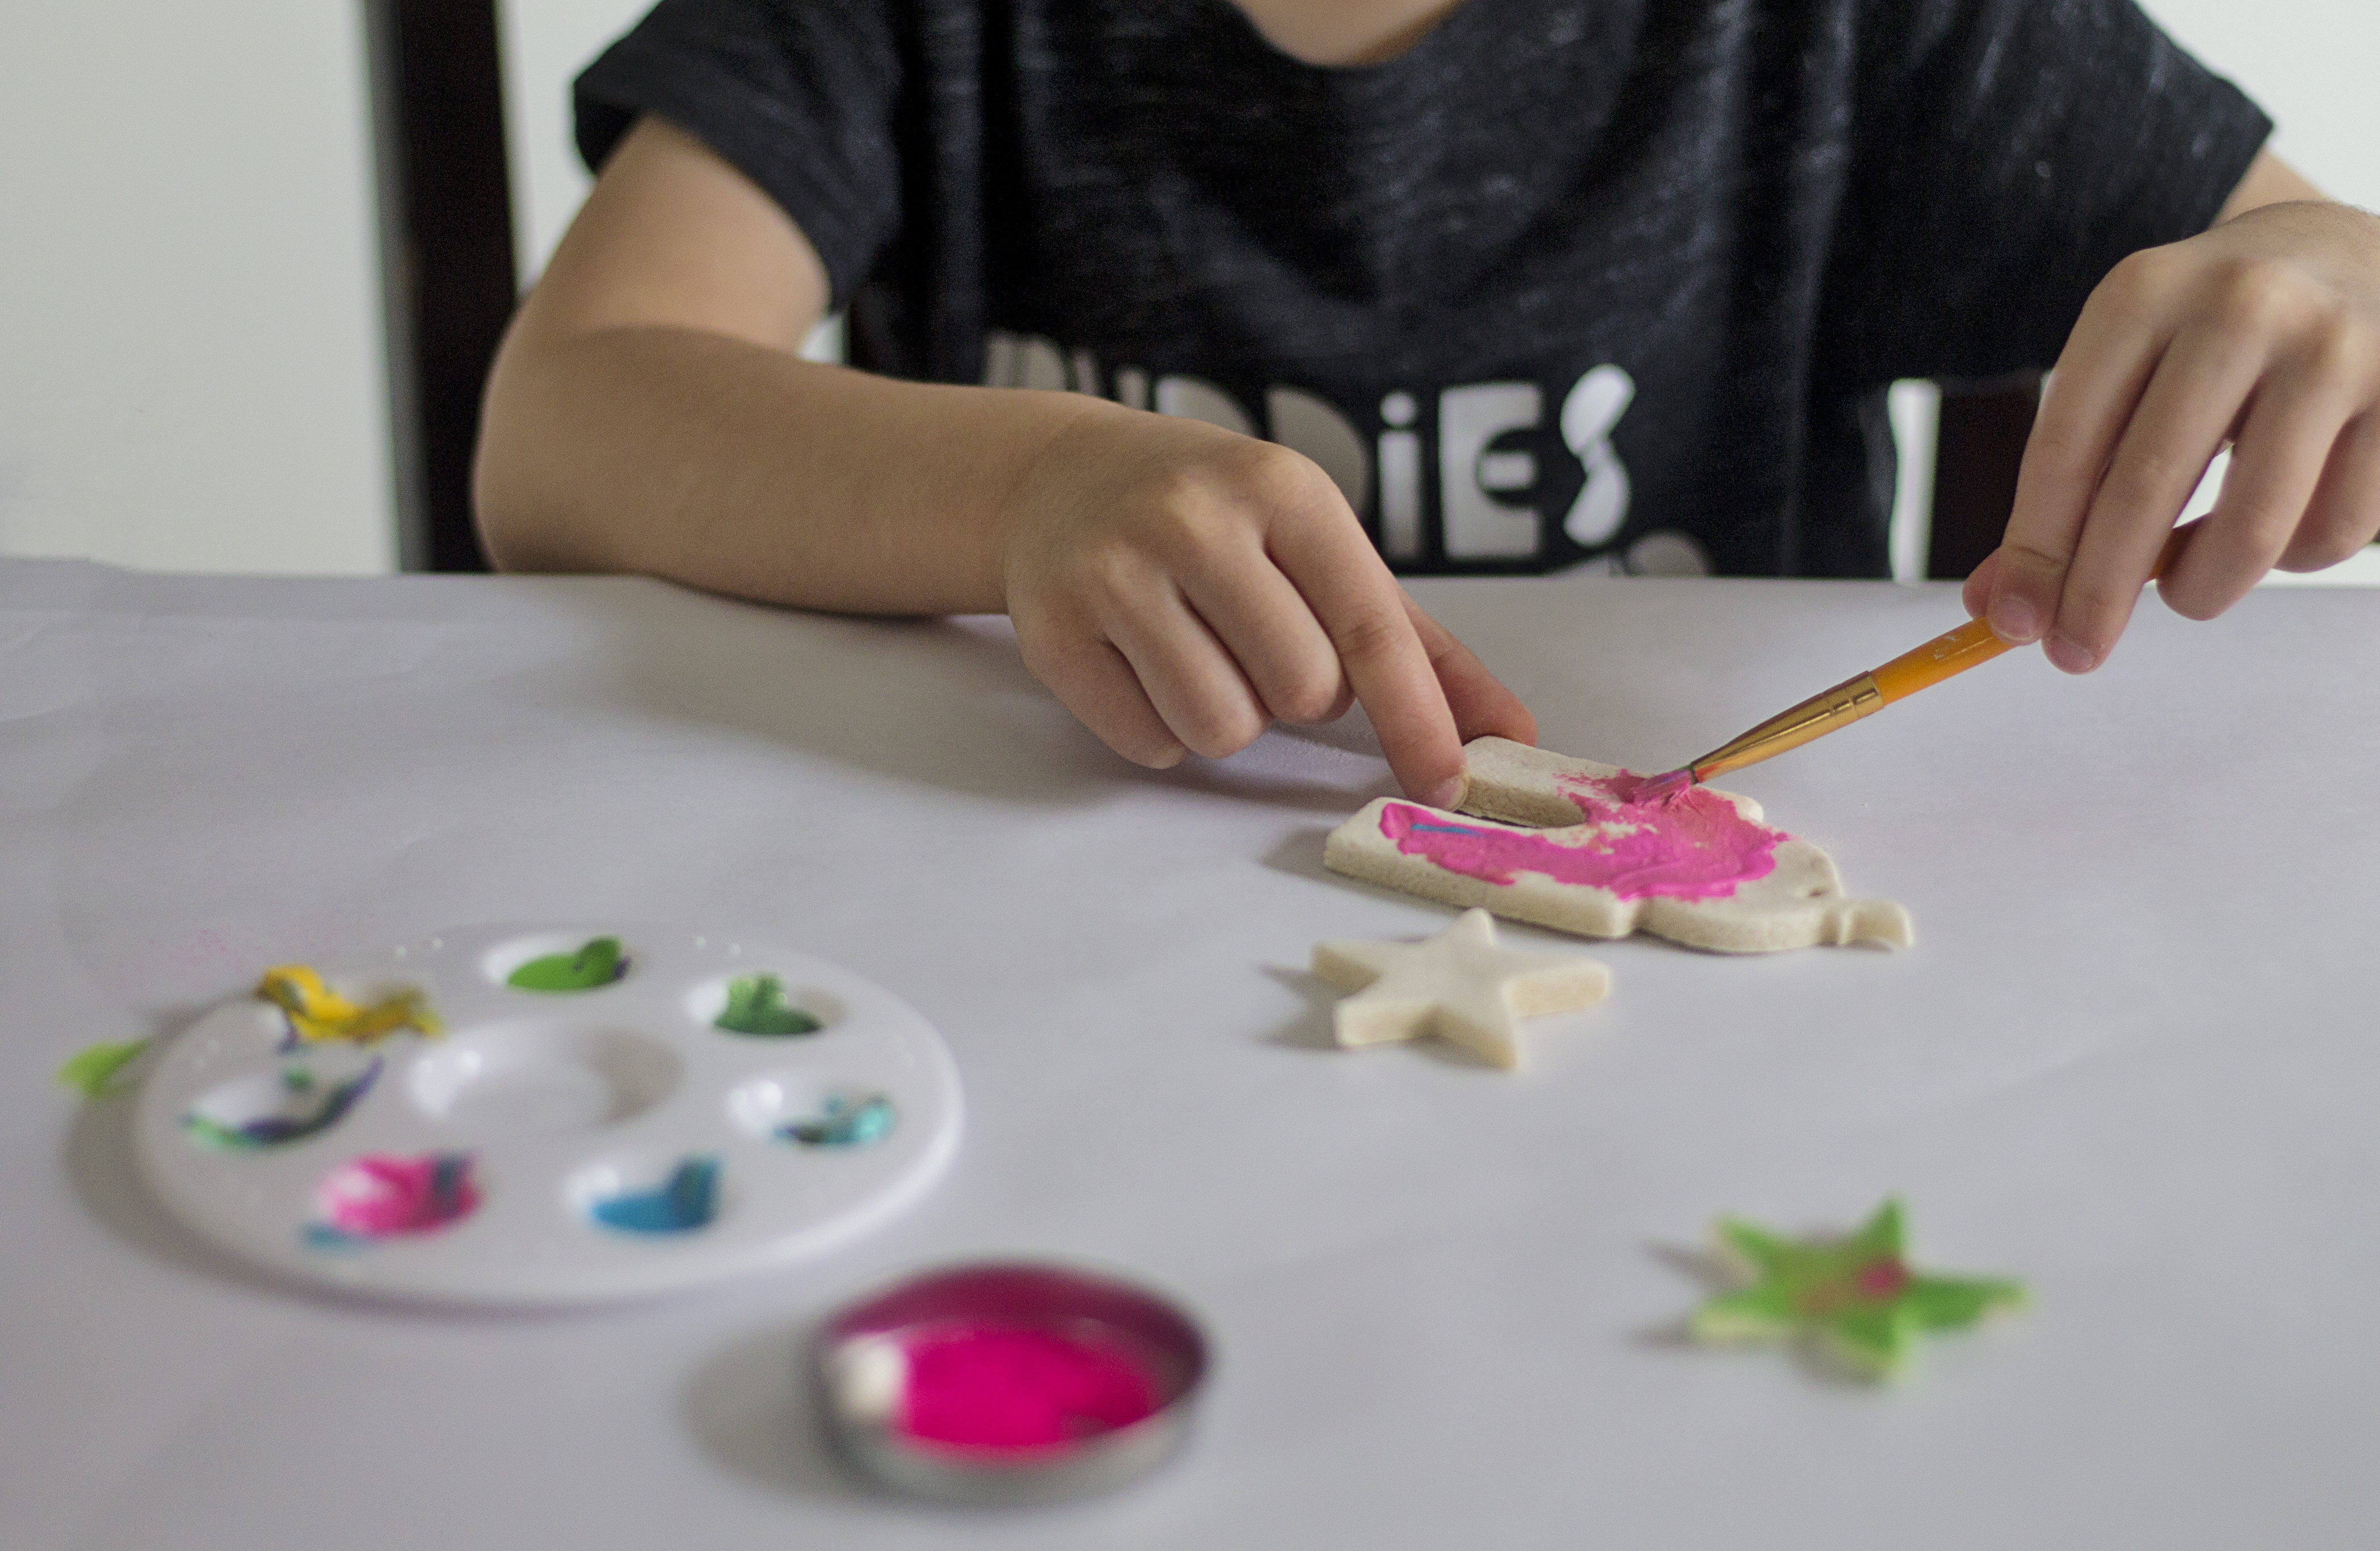
  4. Let cool overnight and paint with acrylic or craft paint.
  5. Thread with string to make individual ornaments for hanging or string several together to make a festive garland.

That’s it! This is such a simple and fun craft to make with the kids and a wonderful way to get them involved in the Ramadan spirit. If you liked this craft and found it inspiring, we would love if you shared it. If you make this DIY, be sure to share a picture of your creation and tag us on Instagram @thecozyhomechronicles.

For more related content, you can find us on Instagram where we share more of our day-to-day and Pinterest where we share our ideas and inspiration. If you have any thoughts or suggestions about this DIY project, feel free to leave a comment below. And as always…


The UpSkill Project Community Workshop

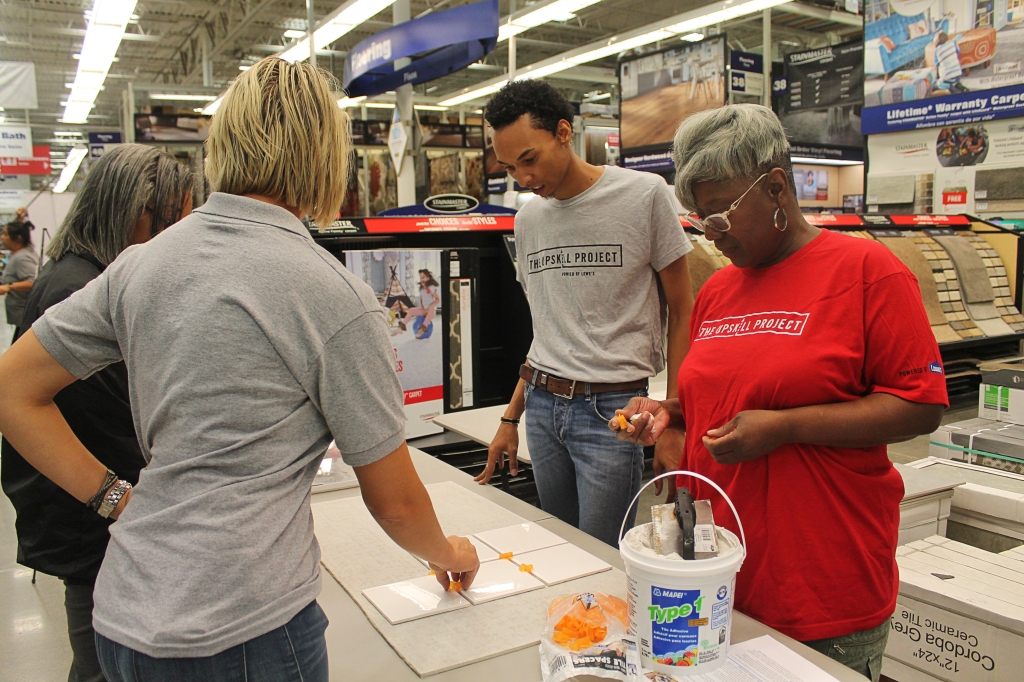
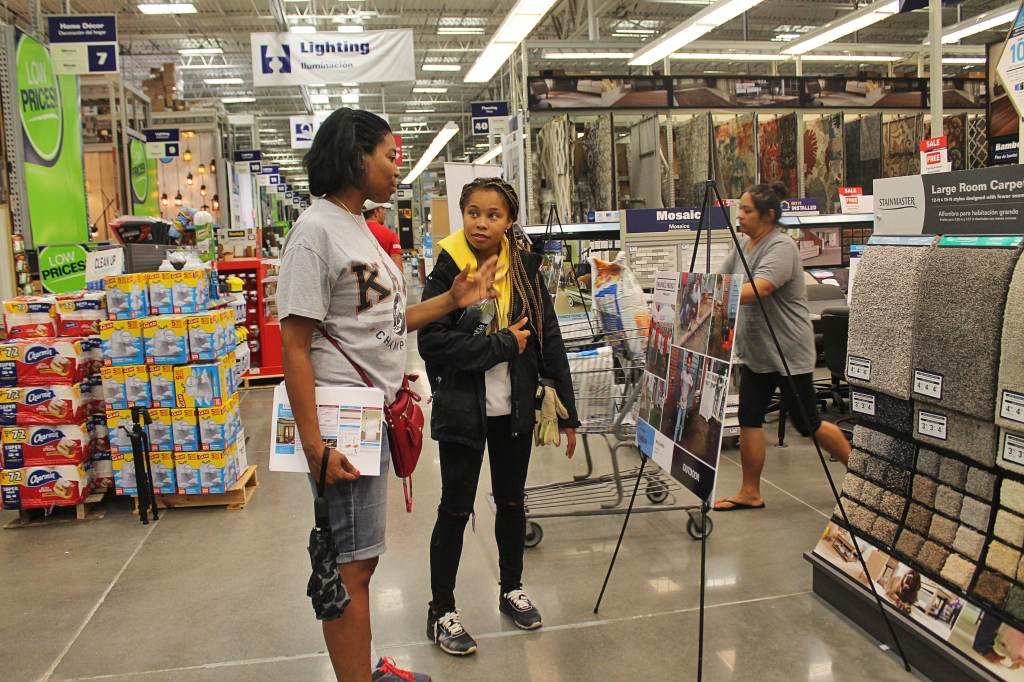
Three weekends ago, I had the privilege of attending and documenting The UpSkill Project Community Workshop which was held at the Warren, Michigan Lowe’s on a stormy Saturday. It was my 30th birthday weekend and I could think of no better way to celebrate than to be doing what I love…DIYing of course!

IMG_7574

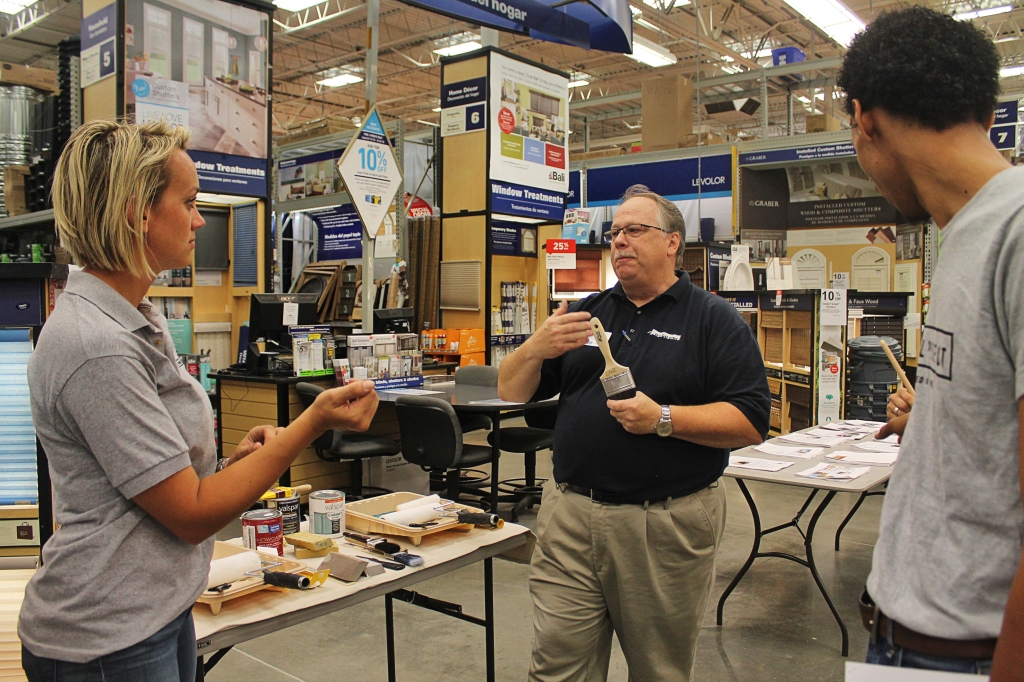
The workshop was set up to be a hands on learning experience for homeowners wishing to pick up basic home improvement skills and I can’t express enough what an amazing opportunity this was. I love that Lowe’s is inspiring and educating homeowners through this platform! I learned so much from the Lowe’s experts that day and I’m so excited to share some of that with you in this post. Shall we dive right in?

IMG_7569

Drywall

Drywall dings and dents are a common household issue with a very simple solution. Lowe’s has this nifty drywall repair kit that comes complete with spackling, a putty knife, and a sander. All you need to do is gently spread the spackle over the hole until it’s covered. This particular spackle is made to go on pink and turn white when it’s dry so you know when it’s time to sand. For larger holes, you will need to place the self-adhesive mesh patch over the hole before covering with the spackle. Once you’ve sanded the surface until it’s smooth, you can go ahead and paint over the patch up. It’s that easy!

IMG_7581
Painting

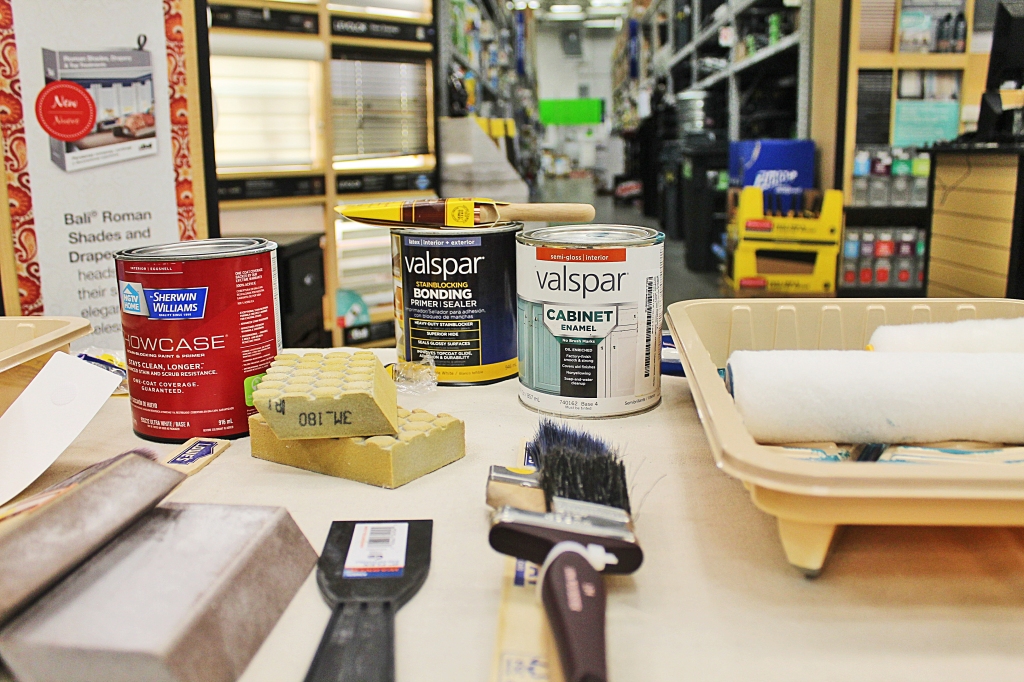
Painting is something we’ve done quite a bit of for our home renovation projects but it wasn’t until this workshop that I realized I was doing it all wrong. Prior to this workshop, I would paint the wall with a roller first and then use a brush to finish the corners and edges. I learned from Ray that it should be the other way around: paint your corners and edges first then go over with the roller. Oops. I definitely see this method resulting in a much more professional-looking paint job. It looks like I might have to revisit some of my old paint jobs!

IMG_7567

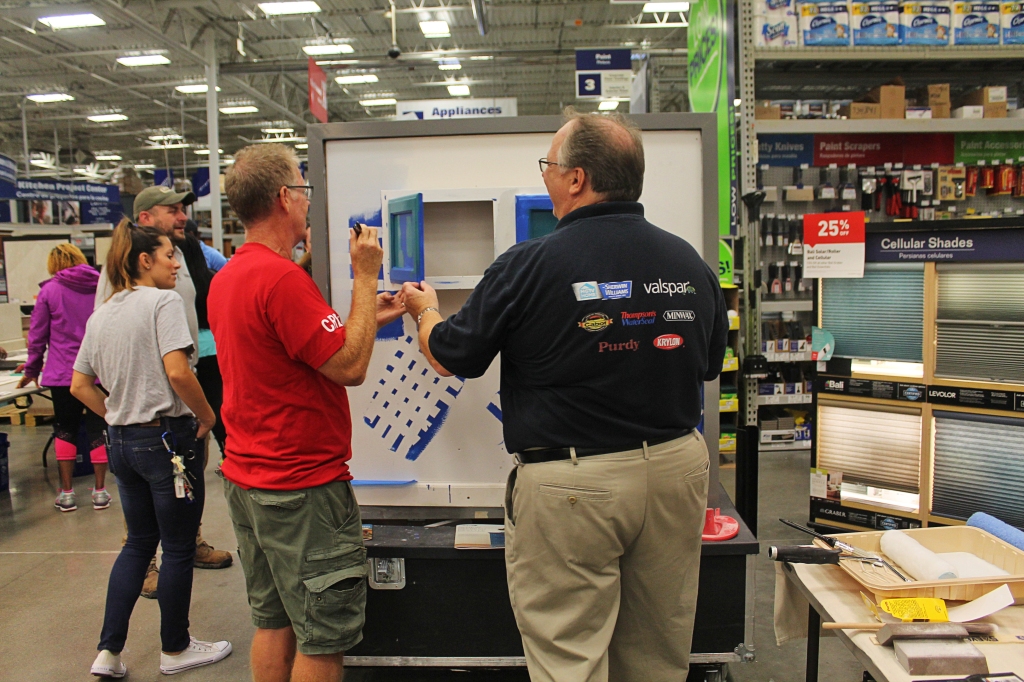
The other important thing I learned is that the quality of the brush really matters! Ray, who is a passionate paint manufacturer, said he would actually advise sacrificing the quality of paint over the quality of the brush. He went on to show us the difference between the two brush’s bristles and let participants see for themselves as they got to paint a kitchen cabinet.

IMG_7566

Let me tell you, the Purdy brush we got to test out was amazing! All those times I was frustrated with my paint job and I thought it was just me. Now I know it was the cheap brush I was using and I can’t wait to implement these simple tips for my next paint job!

IMG_7565


Tiling

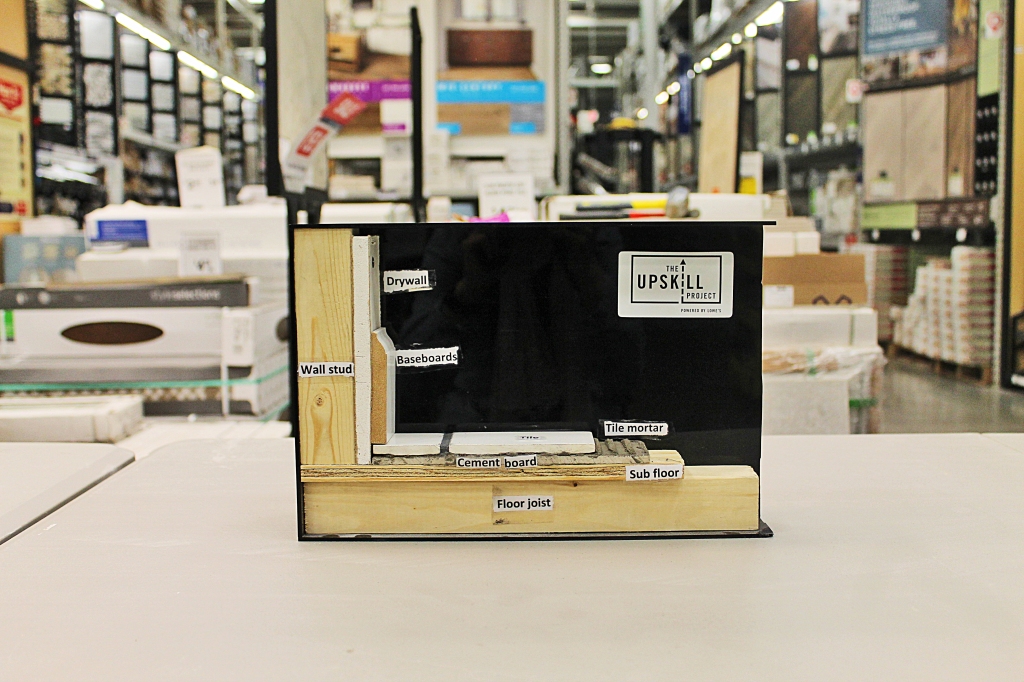
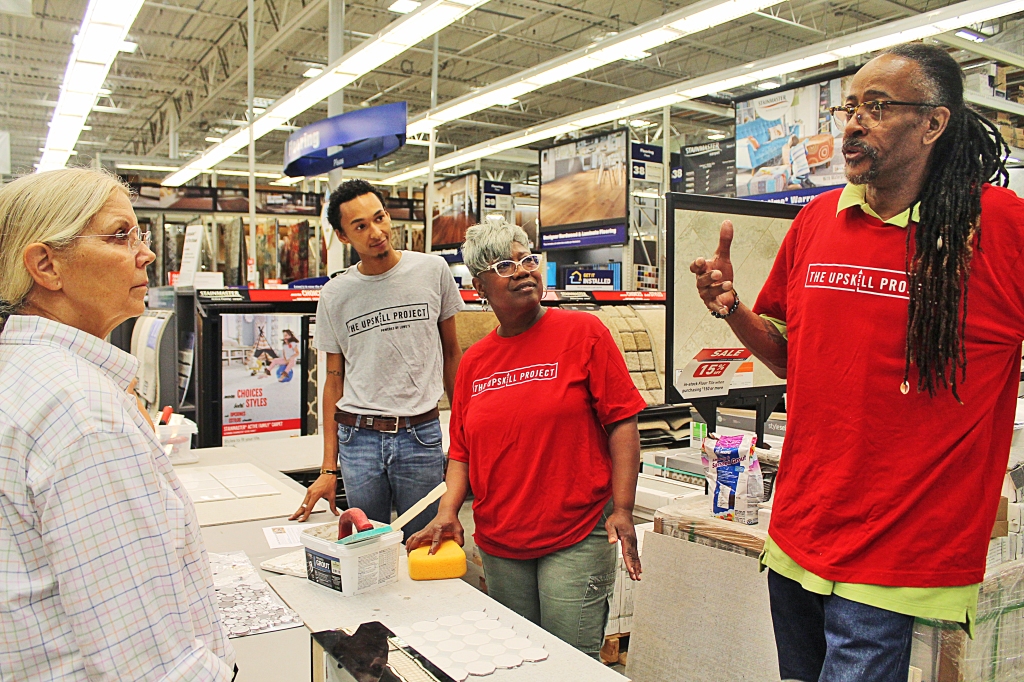
Tiling is another skill we are familiar with as we have renovated our basement, kitchen, and bathroom in the past. Of course, that doesn’t mean we did everything perfectly so I’m sharing some of the useful reminders I learned. One of the cool resources Lowe’s had on display was this cross-section of the wall and tile. Many of the participants didn’t know that you couldn’t just tile over existing tile so Andrew, one of The UpSkill Project teachers, explained what subflooring was and the importance of the cement board under the tile. I learned about something called self-leveling concrete which you can pour to create a smooth, even surface for tiling. I wish I had known about this when we were tiling our basement!

IMG_7557

Participants were able to practice laying tile spacers, backsplash tile, tile adhesive, and grout. 

IMG_7572

The Lowe’s experts recommended a pre-mixed grout for an even finish and stressed the importance of wiping the tiles consistently with a grouting sponge to prevent a hazy film from forming. The pre-mixed grout is something I wish I had used in our bathroom because of the variability in grout color that can result from small changes in water content.

IMG_7561

Plumbing

Plumbing was probably one of the more intimidating skills for participants, me included. I’ve always let my husband handle that part of our renovation projects. After this, however, I think I’m pretty confident I can swap out a vanity and sink. You’ll just have to remember to disconnect the water supply lines prior to starting and to keep a bucket under the sink during the P-trap removal. If you don’t, let’s just say you’ll find yourself in a very messy situation.

IMG_7584
Aside from learning these four skills, Lowe’s had a table set up with lots of useful pamphlets covering everything from tool buying guides to DIY laminate floor installation. You better believe I walked out of that workshop with a stack of pamphlets. I also really enjoyed meeting the other UpSkillers and watching them bond over sharing their DIY projects with each other.

IMG_7575
To be honest, I had been in a creative slump up to this point but after this workshop I was so inspired to find a new DIY project to tackle! What about you guys? If you’re getting ready to take on a new home project, we would love to hear about it in the comments below. If you have specific questions about any of the skills I discussed, you can also leave them in the comments below and we will point you in the right direction. You can always go into your neighborhood Lowe’s and ask a Red Vest associate for help as well. As always, if you loved this post and found it helpful, we would appreciate it if you would like it and share it.

signature3


This post is sponsored by Lowes. The thoughts and opinions are my own.


How to Build a Paved Patio with The Upskill Project

Back in May, I wrote about The UpSkill Project Contest where homeowners could submit a short video describing a DIY project they needed help with. Five local residents would receive $2000 in Lowe’s credit to purchase supplies along with a team of experts to help get the project done in just two days!

UpSkill_Horzntl_endorsed_k

This summer, I got to partner with Lowe’s to document one of the resident’s project transformations. And not just any project…a paved brick patio! You all know how much we love gardening and the outdoors so being able to learn how to do build a patio from the ground up and share it with you was a dream come true.

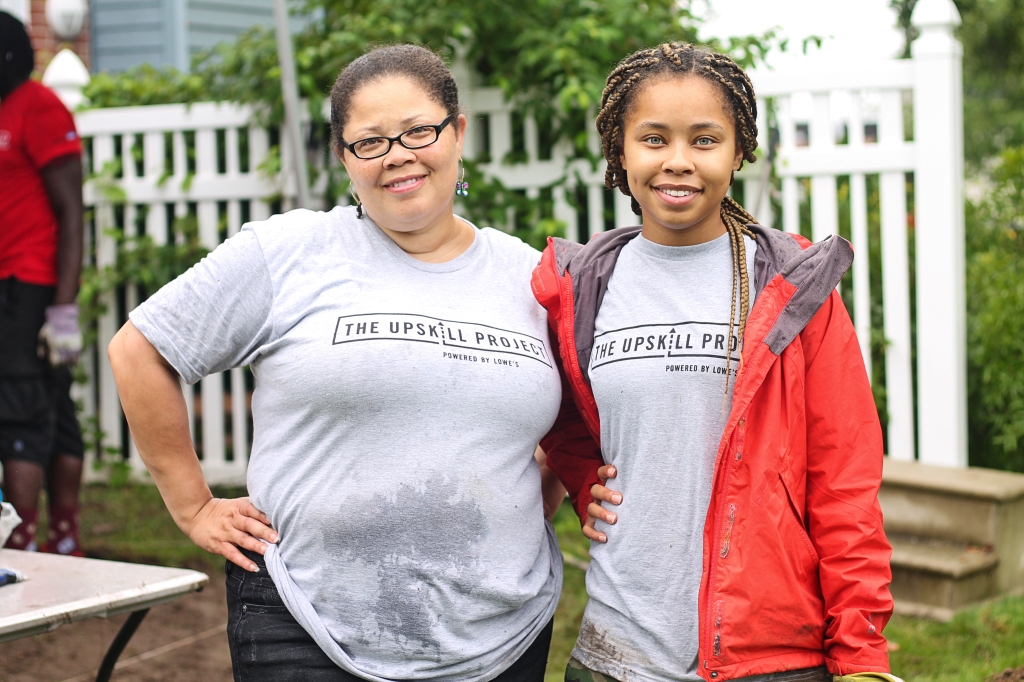
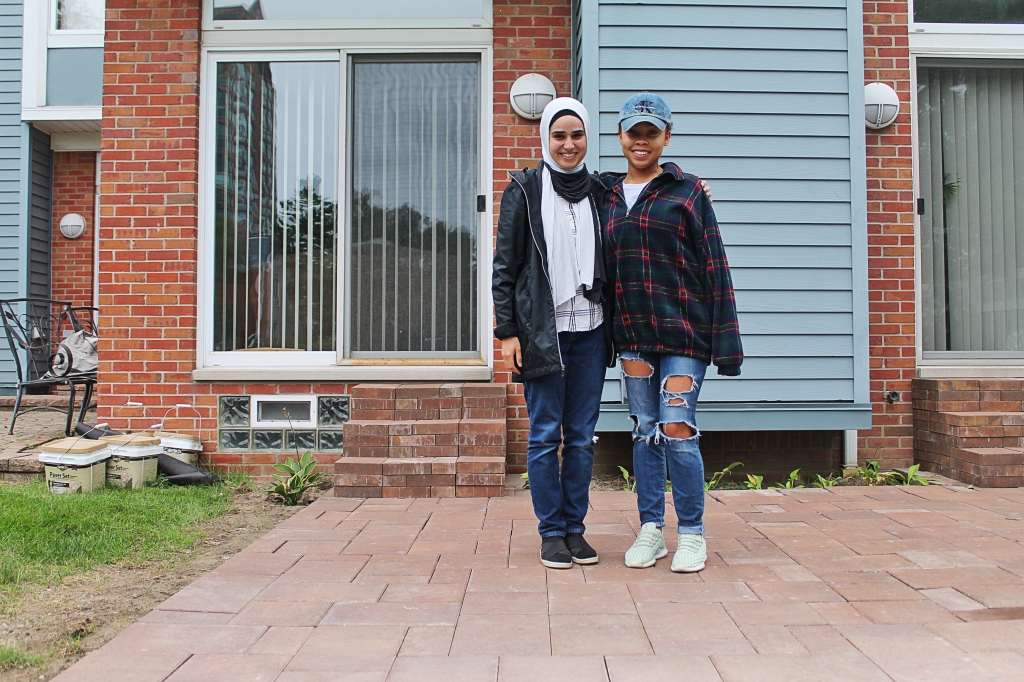
Meet Hattie and her mother, Dr. Tyra.
IMG_7383

Hattie was actually called to help her aunt record her UpSkill Project Contest entry when her aunt convinced her to submit one herself at the last minute. Knowing that her mother had been wanting a patio for the last two years, but would never justify spending on herself when she could help others, Hattie felt her mother deserved a space to entertain and have friends and family over. You can imagine just how excited her mother was when she found out she was finally going to get that patio. Dr. Tyra LOVES cooking and entertaining; so much so that she cooked the team a dream breakfast on the second morning of the project.

IMG_7500

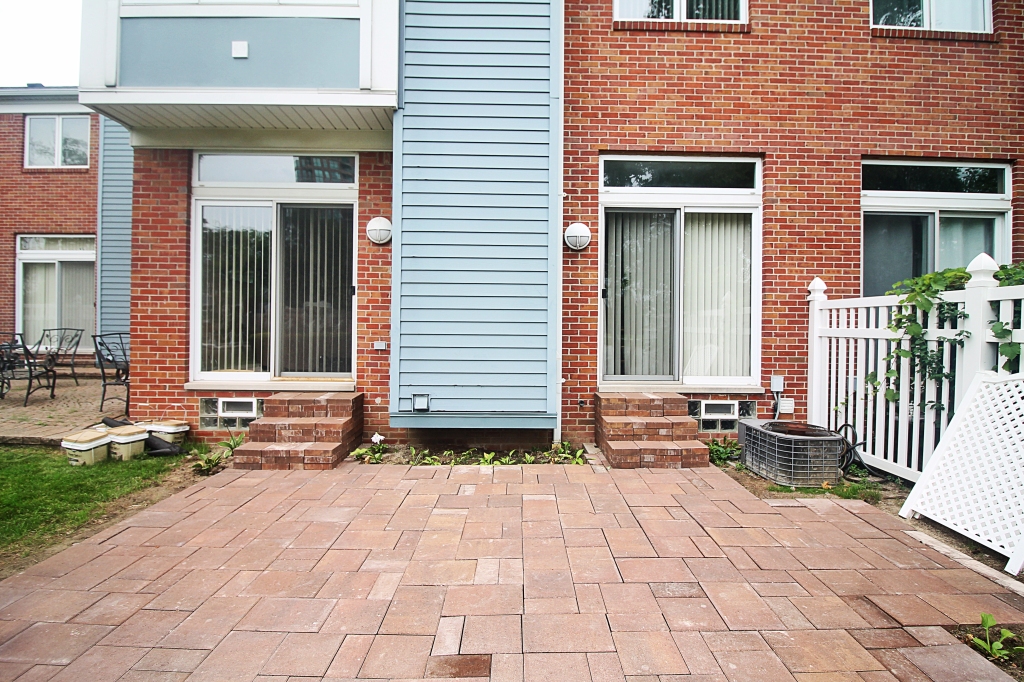
We all love a good before and after, so here’s what the space looked like prior to the start of any work. Nothing fancy, just an empty patch of grass.
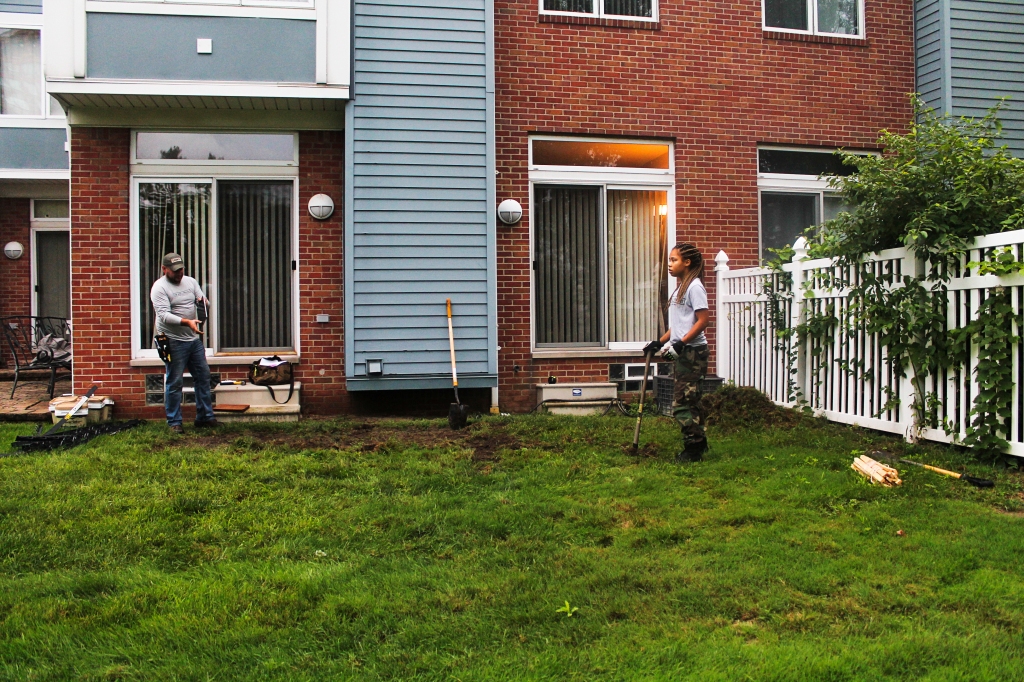
IMG_7336

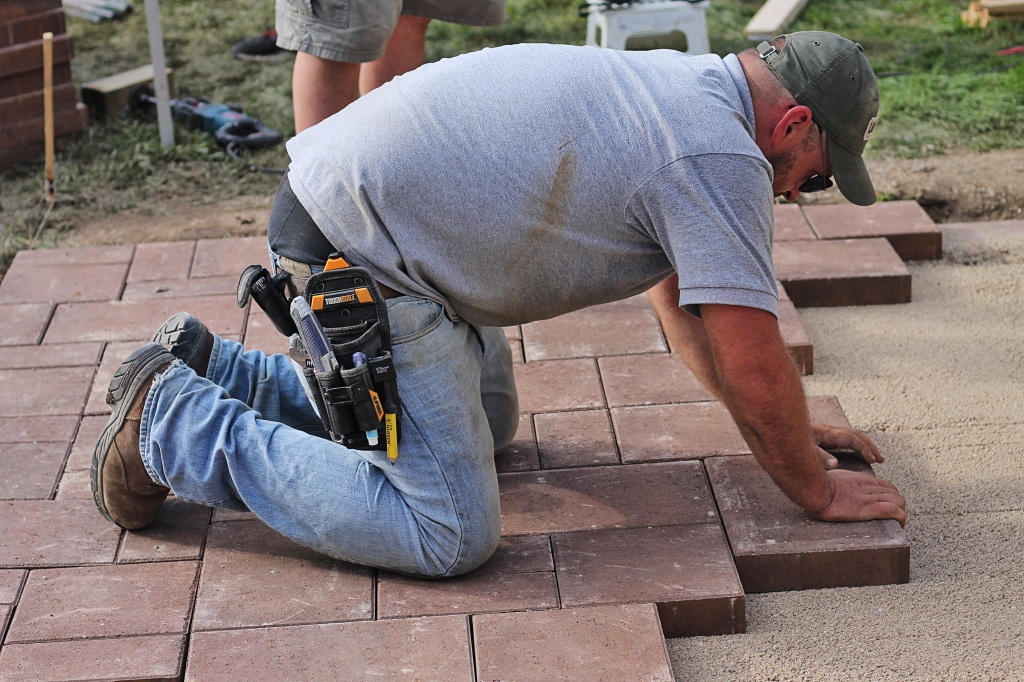
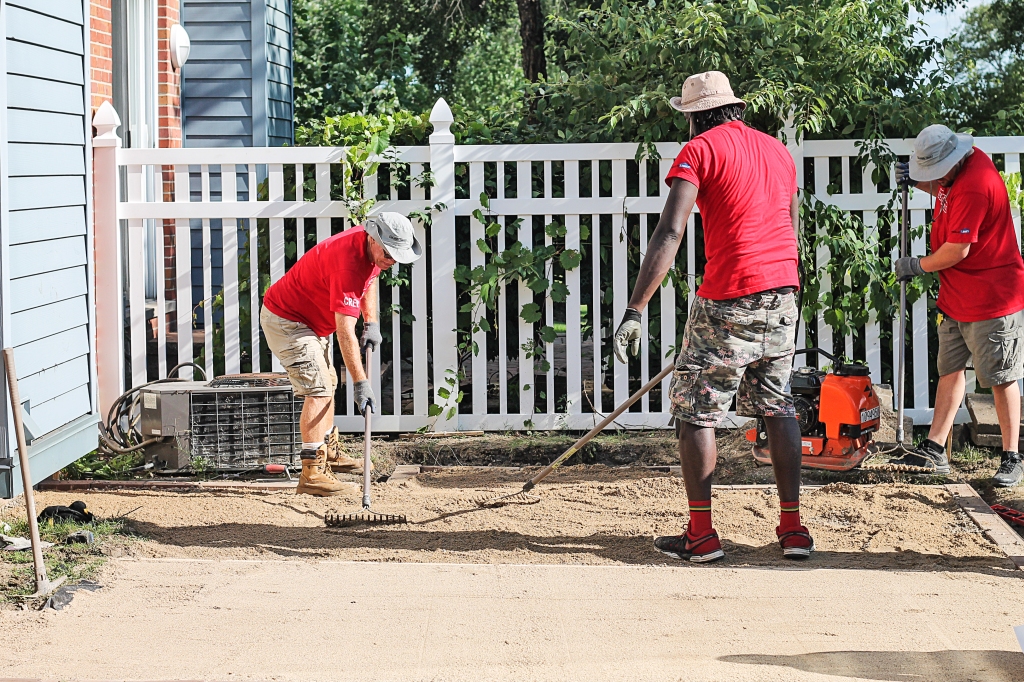
Leading the team through the patio building was Andrew who is a carpenter by trade and has his Bachelor of Fine Arts in Sculpture. How cool is that?! The Red Vests Eric, John, and Zach were from a local Lowe’s in the Gardening and Outdoor Department. Everyone worked so well together and by the end of the project I felt like I was in the company of friends.
IMG_7547

IMG_7520

Of course it wasn’t all fun and games so today I’m sharing some of the important things I learned about building a paved patio:

You can’t just wing it!

The first and most important step when it comes to building a patio is design and planning. Settling on a design (how large the area should be, what shape, what kind of pavers, etc.) will dictate how much materials you’ll need which in turn will determine your cost. The materials are quite heavy so you’ll want to have everything calculated in advance to prevent any running back and forth to the store picking up heavy materials.

IMG_7343
Touch things once.

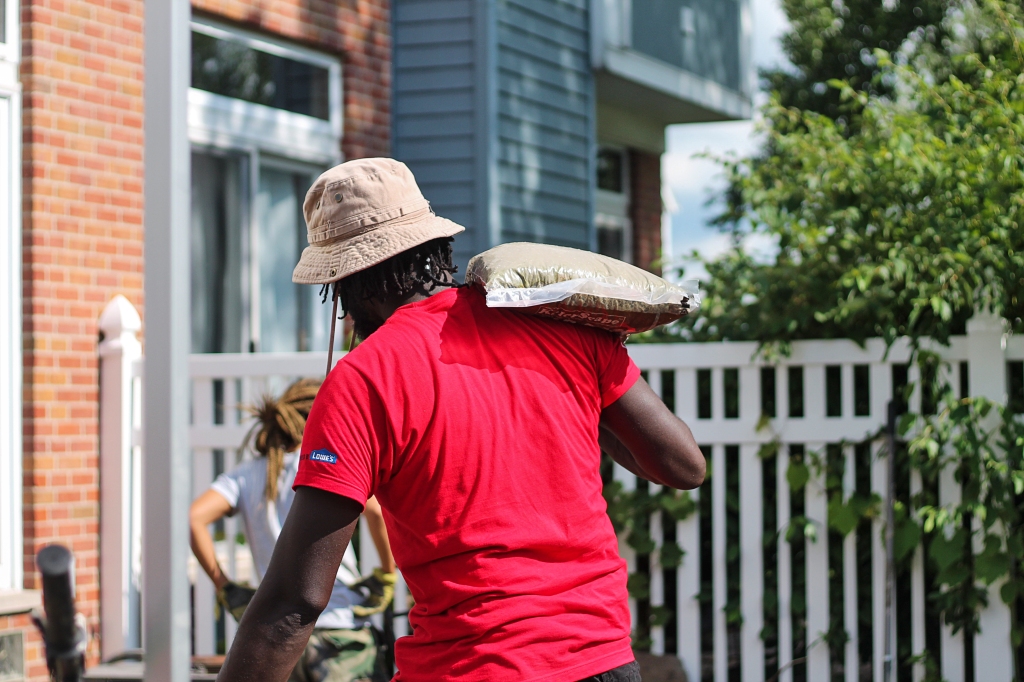
This very valuable advice was given to me by one of the Red Vests, Eric, when he saw that the materials were delivered to the front of the garage instead of to the backyard. To save yourself time and energy, have your patio materials close to your work site so you’re not having to haul things more than you need to. This also includes clean up. It’s important to have your tools for removal and your method of disposal arranged prior to starting your project so the process runs smoothly and you don’t have to move debris twice.
IMG_7413

If you see rain in the forecast, abort the mission.

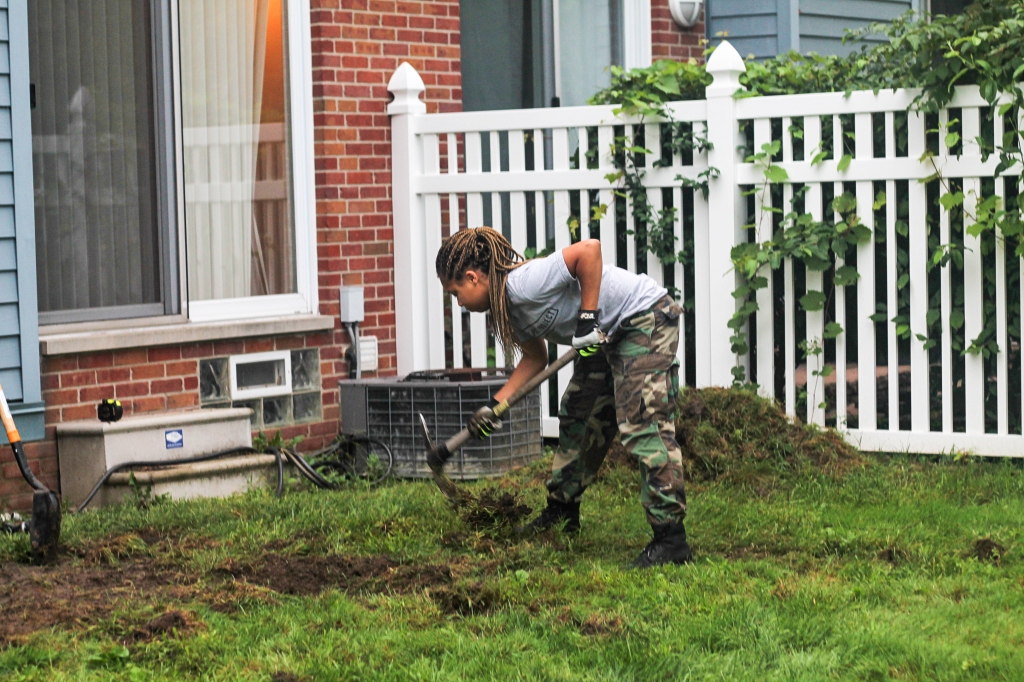
Or simply wait until the weather clears up. A wet ground can really interfere with the compacting process which is super important for a level and solid patio. The rain on the first day of this  project threw us a serious curveball and delayed the completion of the patio. There is a silver lining to the rain, however, if you’re not in a hurry to finish your project. A wet ground makes it much easier to pull out the grass so if it’s raining you can still begin the sod removal phase of your project. Just be sure to let the ground dry sufficiently before moving on.
IMG_7338
Assemble a team.

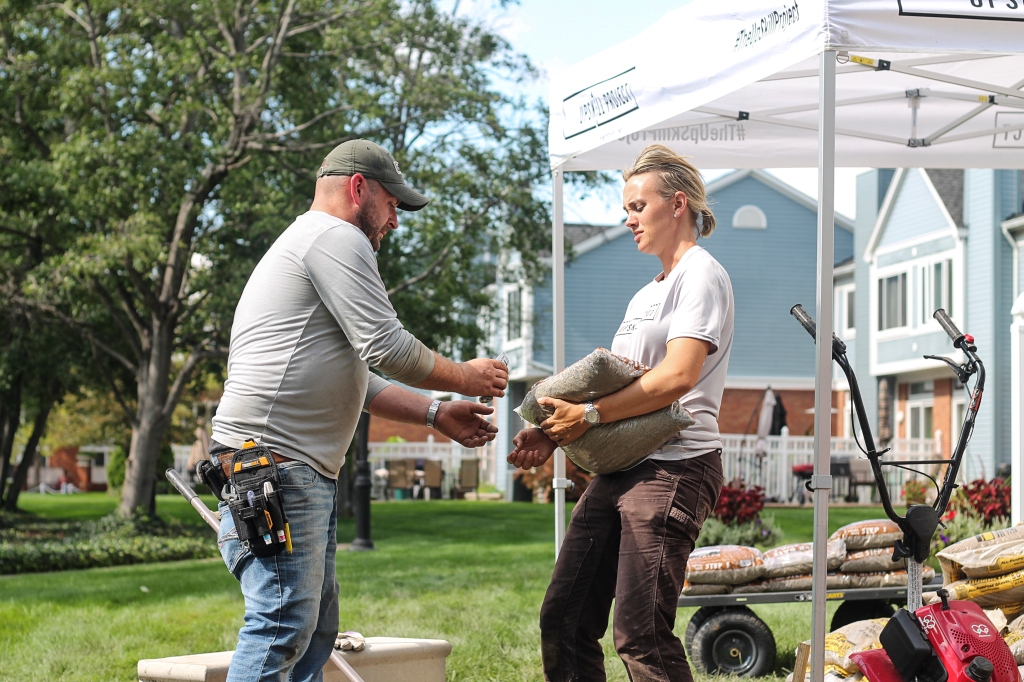
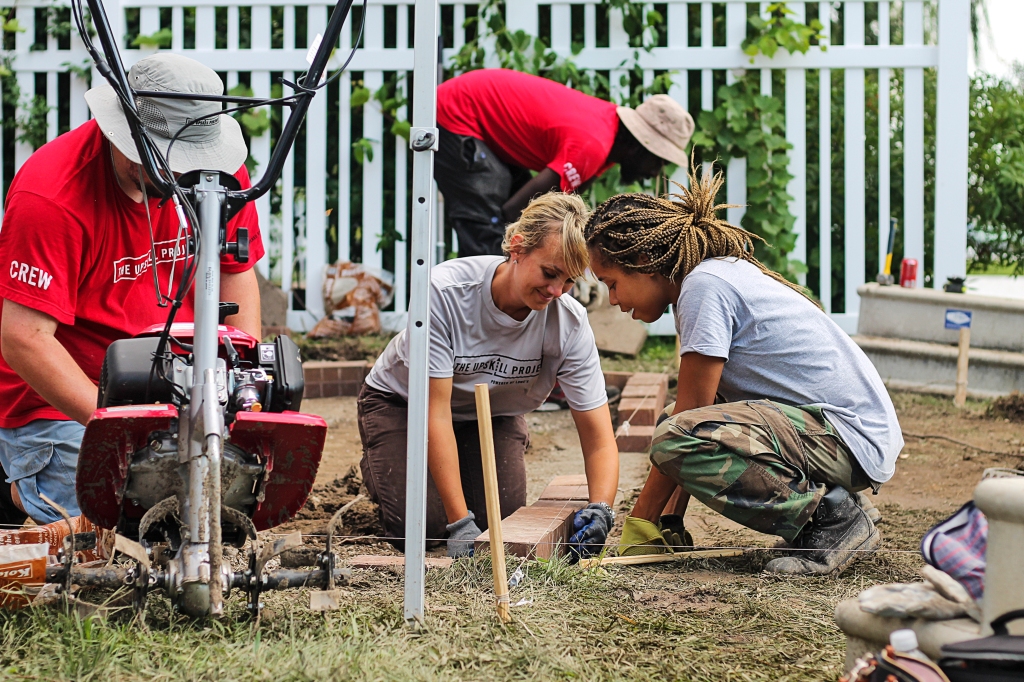
There’s nothing overly technical about building a paved patio but you should know that it is very labor intensive. From stripping the sod to pouring and compacting gravel to laying the pavers, each step requires quite a bit of upper body strength. If you want to build a patio in the shortest amount of time without burning out quickly, you’ll definitely want a team of 3-5 members to help spread out the workload.
IMG_7408

IMG_7445

Compact, Compact, Compact.

I can’t stress enough how important it is to begin with a sturdy and level foundation. To achieve this, you will need to compact several times at each of the following stages:

  1. After you’ve dug out the grass for your patio
  2. After you’ve poured Paver Base Step 1
  3. After you’ve poured Paver Base Step 2

IMG_7426

Start by building a retaining wall

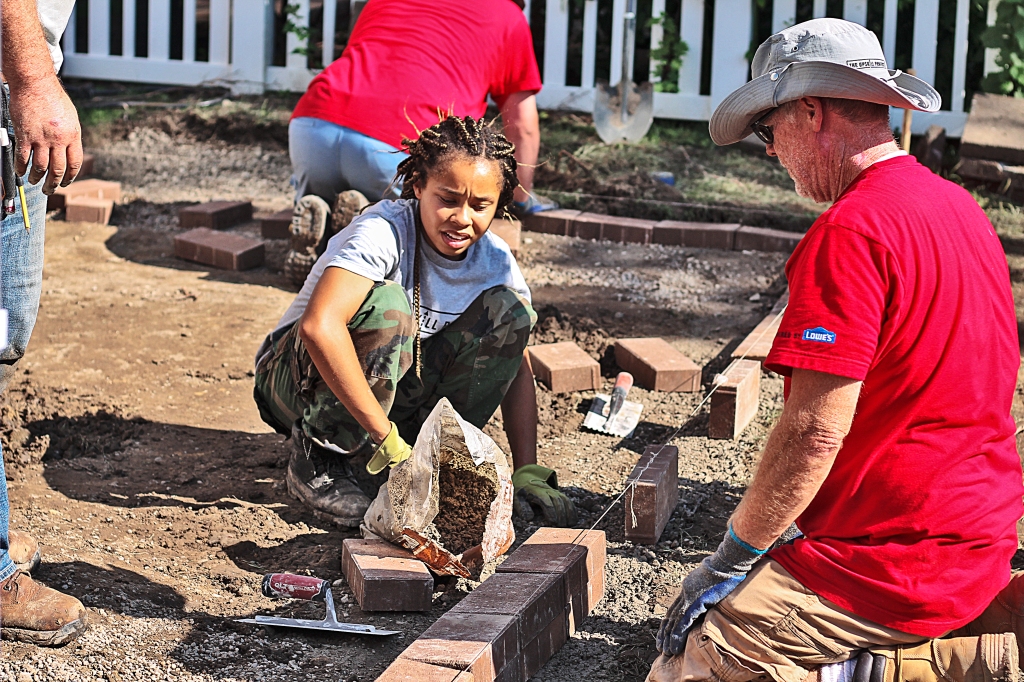
The first pavers you’ll want to lay are the outside ones along the perimeter. More importantly, you’ll want to secure the wall with glue and recess framing to prevent the bricks from extending outward as you continue to compact the gravel and sand. The retaining wall is two brick pavers high and must take into account sloping to prevent water from collecting in your patio. Once the wall is built, you can begin setting the pavers down working toward the middle of the patio area from one end to the other. 
IMG_7454

Don’t forget the landscape fabric.

This is pretty self explanatory. If you don’t want weeds bursting through your patio then this is a crucial step that you’ll want to do once the earth is level just before you begin to pour paver base step 1.

IMG_7505

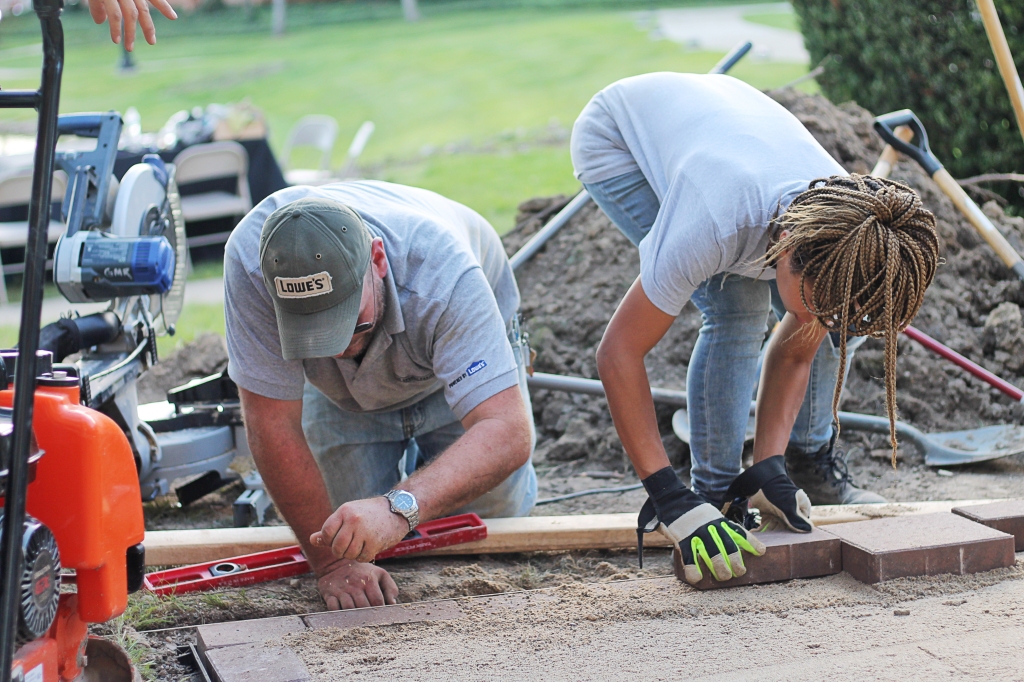
Once you begin to install the pavers, it’s pretty much smooth sailing from there. All you have to do is make sure to tap the pavers with a rubber mallet and periodically check to make sure they are all level. You also want to leave a space about 1/4 of an inch wide between the pavers for the polymeric sand to be poured. Once you’ve filled all the cracks with polymeric sand, you’ll mist the patio to harden the sand and join the pavers together. Once it’s dry, you can finally furnish and enjoy your patio!
IMG_7542

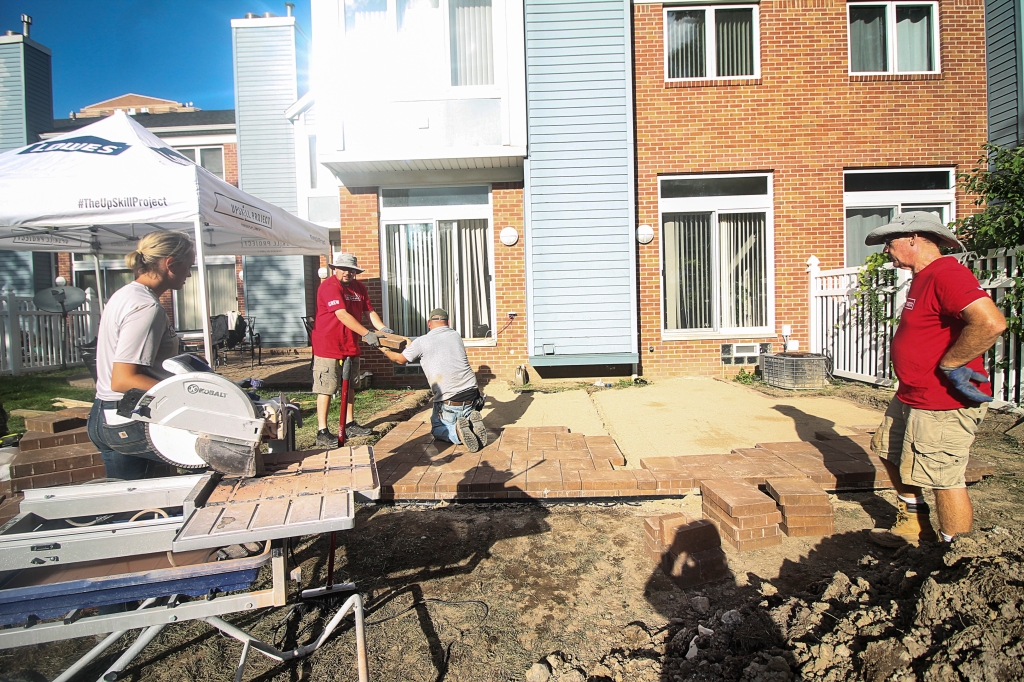
Now that doesn’t sound so bad, does it?! If you’re thinking of doing a paved patio yourself, here are the materials and tools you’ll need to get the job done.
IMG_7551

Materials

Paver Base Step 1
Paver Sand Step 2
Paver Set
Brick Paver

Tools

Tamper
Box Beam Level
Knee Pads
Steel Pick Mattock
Kobalt Long Handle Shovel
Smooth Rubber Mallet
Landscape Fabric
Kobalt Tabletop Saw
IMG_7871

IMG_7878
If you want to see behind the scene footage from the project Do Days, you can check out our Instagram story in the highlights entitled “DIY Patio.” If you loved reading about how to build a patio then you’ll definitely want to check back for our upcoming post on the UpSkill Workshop where I’ll share lots of helpful home DIY skills that I learned. And if you found this post helpful, we’d appreciate it if you would like it and share.

signature3

This post is sponsored by Lowes. The thoughts and opinions are my own.


How We Flipped and Sold a Home in Less than Two Months

We never planned on flipping a home, it kind of just happened. The short story is that we helped a family member buy a home that they ended up realizing was not right for them. We know, that can be quite a costly mistake. Luckily, the home was in excellent condition and the housing market was doing great so we sat down with our realtor who suggested we fix 5 simple things to get the home sold as soon as possible. And it worked! It really worked! Within a month, we had the home listed and shortly after had secured a buyer. So today we are sharing the simple things we did to get the ball rolling and how much it cost us. It’s probably important we note that we are not realtors or contractors, just a couple of avid DIYers with a tad bit of crazy in us 🙂

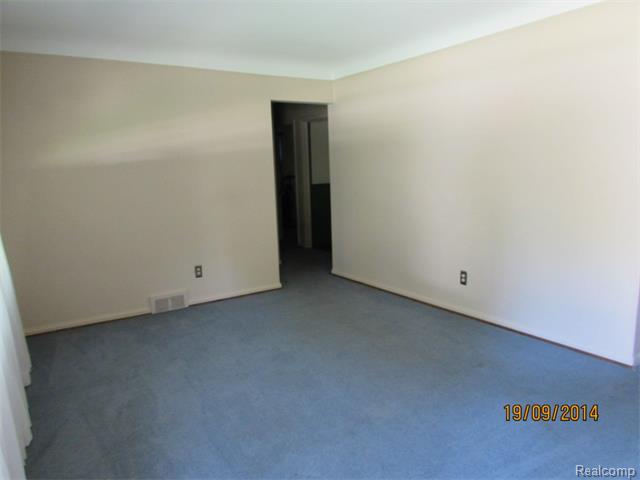
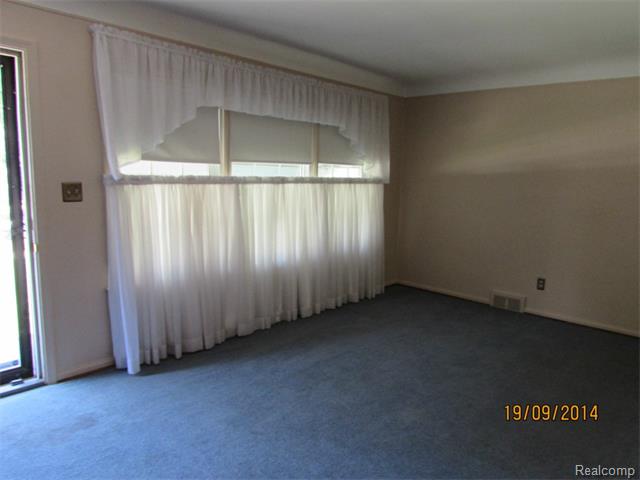
Here are the pictures of the home from the original listing prior to us doing anything:

215063318_2_0
215063318_3_0
215063318_5_0
215063318_9_0
215063318_11_0

These are the five things that were recommended we change:

  1. Remove carpet and wallpaper
  2. Add a fresh coat of paint
  3. Finish hardwood floors
  4. Landscaping
  5. Professional cleaning

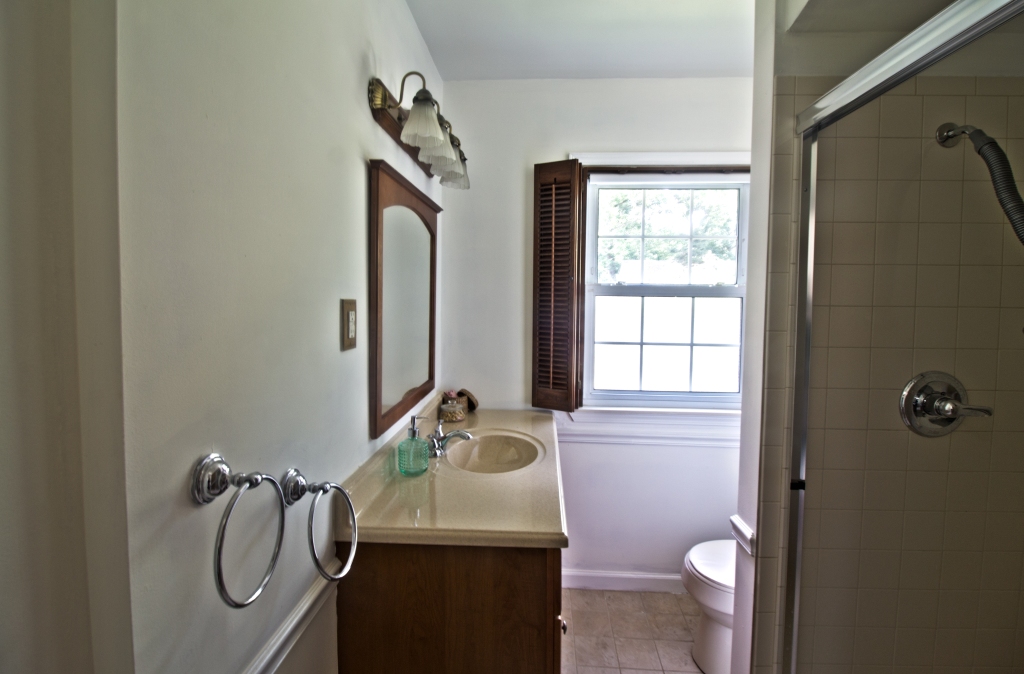
We also went a little above and beyond by adding a few items for styling purposes. These included a kitchen towel and plant in the kitchen, a welcome mat outside the front door, and a towel, soap dispenser, and some decorative items in the bathroom.

We didn’t do much DIYing here because of time constraints with our school so instead we hired people to take care of most of the labor. Below is a breakdown of each job and the cost associated with it:

  • City Inspection: $300 – The city inspection consists of all matters related to city code and regulation. They come in and make sure everything is up to standard and request that you update what is not so you can get a COO (Certificate of Occupancy) which you need if you are selling the house.
  • Painter: $1800 – We requested a handful of quotes and went with the mid-range contractor that had between 5-10 years of experience. Most of the cost was for removing the old wallpaper from the entire main floor. The patching up and painting wasn’t as bad as we initially thought.
  • Flooring Company: $ 1700 – This cost was a deal compared to the other quotes we got. The flooring contractor removed the old carpet and refinished the hardwood floors in approximately a week’s time. Be aware that the cost could be higher if you have flooring problems or need wooden trim and/or shoehorn installed.
  • Electrician: $250 – We needed an electrician to remove and replace all the 3-prong outlets to 2-prong because they were not grounded. Another minor thing he did was make sure that all of our wiring was up to code in the garage and outside the house.
  • Professional Cleaning: $150 – To sell the house and truly bring out the beauty of the space we hired a local cleaning company to polish up the home just before it hit the market for showings.
  • TLC: $100 – After we got all of the above done we decided to caulk to make sure corners, windows and all doors were sealed and correctly adjusted to their frames.
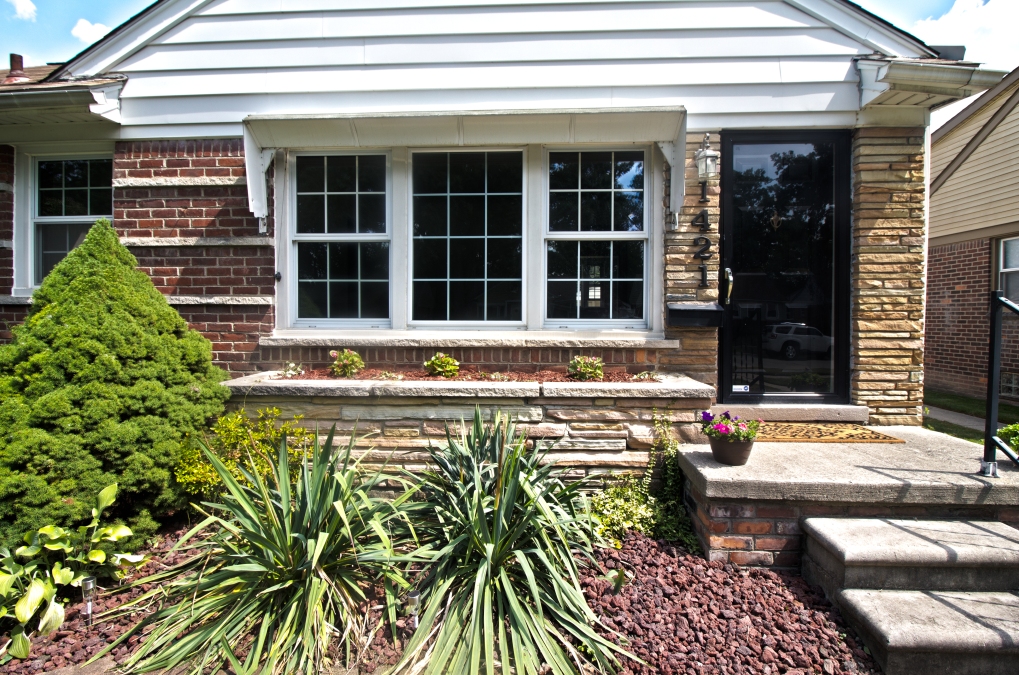
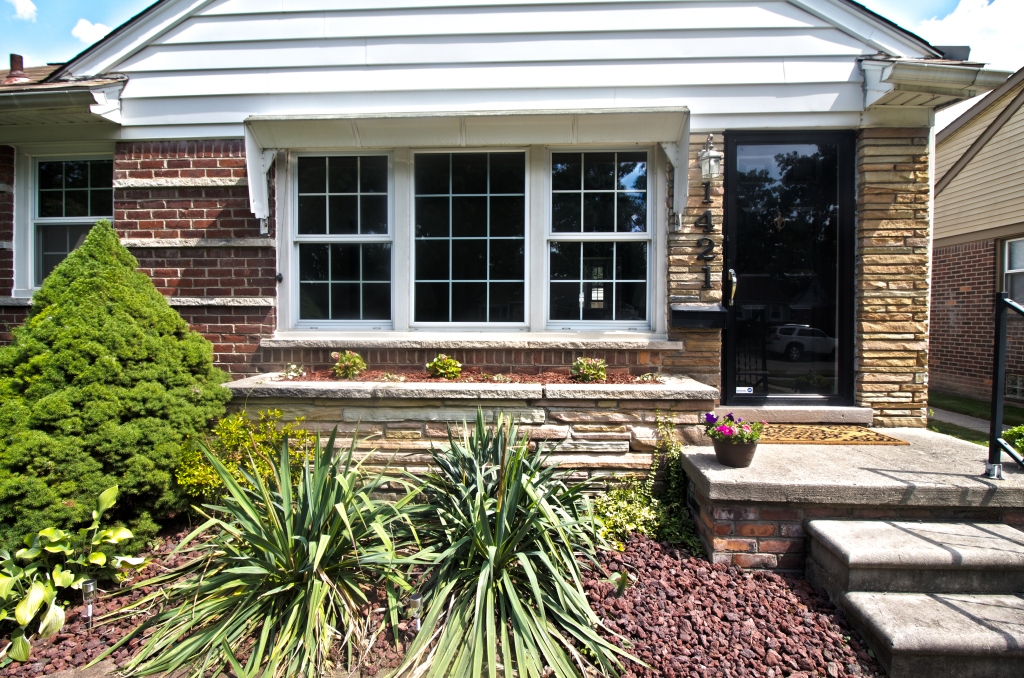
  • Landscaping and Decor: $150 –  You can’t go wrong with mulch, flowers and lava stones to make the landscape pop. We also purchased a nice outdoor welcome mat and indoor mat for potential buyers to feel a sense of home.

TOTAL: $4,450

We really wish we had the time to do these updates ourselves, but it would have been too overwhelming and would have taken us much longer. If we did do some of the things ourselves such as the painting and cleaning then we would have saved quite a bit of money, although we did recoup the costs with the sale of the home. The important thing to note is that it doesn’t take much to get a home move-in ready even if there’s a kitchen or bathroom that could use some updating.  If you have a similar project you’re diving into or are considering becoming a house flipper, now you know what it takes to get a home with good bones flipped and sold in no time at all. Now for the part you’ve all been waiting for…….the reveal:

FrontDoor

Kitchen2

BTHRM

Living Room

Bedroom1A2

Landscaping

Have you ever flipped a home or considered flipping a home? Let us know in the comments below. We can’t wait to share our next exciting project with you so if you don’t want to miss out be sure to follow us here and on instagram for the latest and greatest. signature3


Our DIY Home Journey + The Upskill Project

This probably should have been the first post on our blog but I figured it’s never too late to share our rather interesting DIY home backstory. You see, the idea of renovating our home ourselves never even crossed our mind. I mean don’t get me wrong, we are pretty handy and creative (heck, we DIYed our wedding) but we just assumed that home repairs were way out of our league. So like every clueless new homeowner, we called contractors to help us with the very basics and then some. Things went pretty smoothly until one day the contractor working on our basement announced that he had a family emergency overseas that he needed to attend to. I think he saw the panic in our eyes because he calmly responded, “Look, I first learned this trade by watching others in a very short amount of time. You don’t have to be a genius to do this line of work, anyone can do this.” He then spent the next few days before his departure demonstrating and explaining how to put up studs, mud drywall, and lay tile. He even left us with his tools! Those simple words of encouragement and instruction were enough to spark something within us. Although, it took us some time to finish our basement, the internal transformation happened immediately.

That’s how we got a taste for home DIYing. Every year since, we have tackled a major home project and we even started this blog as a way to share our home journey because we are passionate about DIYing and home life. When we experienced the joy of confidently working together on our home, we wanted to share that with YOU because we truly believe that ANYONE can do these things. We are living proof. Just take a look at the pictures of our home from our first showing compared to what it is today. Doesn’t it make your DIY senses tingle?

That’s why we are super excited to share that we are partnering with Lowe’s for The Upskill Project contest running in Detroit from May 7th-21st. So if you have a home project that you’ve been wanting to undertake but are reluctant because of the costs or because your skills leave much to be desired, then this contest is for you! Lowe’s is offering up to five lucky people the chance to win a $2,000 Lowe’s gift card for their project along with expert help to guide and teach the skills needed to complete your project. We know from experience just how crucial a little bit of guidance is and that is why this movement resonates with us so much. It’s all about empowering homeowners and giving them the skills, confidence, and inspiration they need to tackle any home project.

UpSkill_Horzntl_endorsed_k

To enter, all you need to do is submit a video answering the following questions:

  1. What is your project?
  2. What skills do you need to complete your project?
  3. What would having those skills mean to you?

Simple enough, right?! We’ll be there to help and document one winner’s project progress along the way.  And if you’re not a lucky winner, you’ll still have the opportunity to learn the skills you need at a free workshop hosted at a local Lowe’s on August 25th. This workshop is an invaluable opportunity to learn important homeowner skills such as painting, tiling, plumbing, and general tool use. Did I mention we will also be there too? So mark your calendars and get ready for a date with your new DIY BFFs.

IMG_6067If you’re not in the Detroit area and want to enter the contest, don’t fret because The UpSkill Project is coming to a number of cities across the country throughout the year. You can click here and scroll down for a full list.

All right, what are you waiting for?! Want to enter this contest? Start brainstorming and share this contest with your friends! We want to see what cool projects you have envisioned for your home! Maybe you want to build a rain garden? Or renovate your peach 1950’s bathroom? Whatever it is, may the odds be ever in your favor.

signature3

Disclaimer: NO PURCH NECESSARY.  Homeowners and renters (with property owner’s permission) in eligible ZIPs only.  Rules/Entry details here: http://bit.ly/2Gvud8k. Ends 5/21/18. 

This post is sponsored by Lowes. The thoughts and opinions are my own.