Our DIY Ramadan: Ramadan Banner & Tablescape Inspiration

Hello lovely readers! If you are coming here from Mint Candy Designs, hello and welcome to our blog. It’s always wonderful to have new faces around here 🙂 With Ramadan just around the corner, we are excited to share with you some simple ways to decorate your home and make the spirit of Ramadan manifest in your heart and home. Last year, we shared different ways to add festive and colorful touches to the dining table, where you gather to break bread after a long day of fasting. This year, we teamed up with some talented home bloggers to bring you creative DIYs that you can do to welcome this beautiful month into your home.

“There’s hidden sweetness in the stomach’s emptiness.”-Rumi

IMG_3035
The feature of this post is a minimalist Ramadan banner and backdrop that I created near the front entrance of our home. I think it’s a beautiful welcoming statement for family and iftar guests and it makes the perfect backdrop for any family photos. It’s also super easy to make!

IMG_3238 wwm

For the Ramadan banner, here’s what you’ll need:
galvanized letters
natural cord
scissors
measuring tape

You can actually use any type of materials for the letters. I chose galvanized tin because they were on clearance at Jo-Anns and I wanted something more sustainable and long-lasting. I was tempted to spray paint the letters gold but in the end decided I liked the rustic, industrial look. To make the sign, all you need to do is arrange your letters spelling RAMADAN MUBARAK. Measure equal spaces between each letter (I did 5 inches) and secure each letter to the cord with a double knot. When you’re finished, create a loop at each end of the cord so you can hang the banner easily on a hook.

IMG_3105

To complete the backdrop simply cut out stars from glittered card stock and stick them to the wall using washi tape. You can also tie ribbon or yarn to cover up the command hooks and add a touch of green with any stems of your choice (eucalyptus, myrtle, grevillea, huckleberry).

IMG_3160

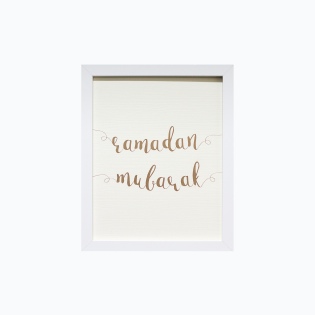
I also spruced up the dining area by hanging up garland and faux greenery. On our open shelving I created a simple display with a lantern and a gold foil Ramadan Mubarak print.

IMG_3054

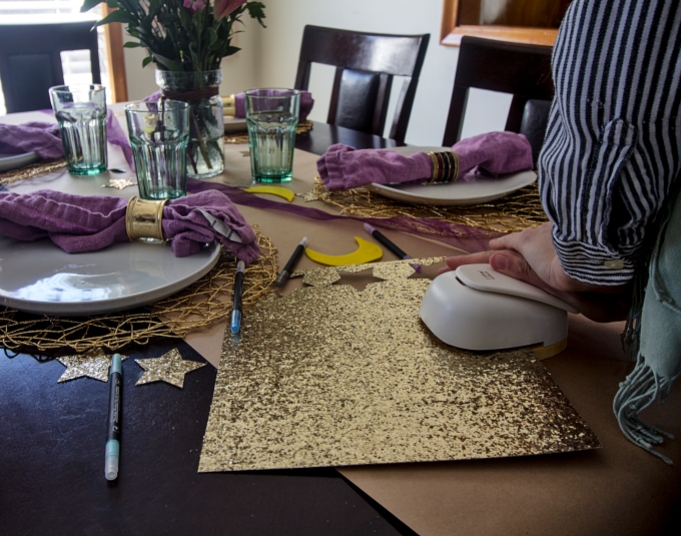
I hung up our Ramadan advent calendar from Handmade Beginnings  where I’ll put something fun for the kiddos throughout the month. For the table I pulled out the turquoise glasses and purple linens I purchased from IKEA on clearance last year. Unfortunately they no longer offer those specific products (or if they do the colors are different) so I’ll link what alternatives they have below. For the napkins, my source link takes you to a conscious minimalist cotton napkin from H&M.

IMG_3033

 The only new things I purchased for this look were the gold placemats, the craft paper for the table-runner, and the glitter card stock to make the stars for the embellishments. I got the idea for the craft paper table runner from a Pinterest tablescape for Thanksgiving. I think it’s a nice screen-free way to keep children occupied with coloring and you can even write down your own reflections throughout the month. For an extra pop of color, never underestimate the power of fresh flowers. If you’re blessed with a beautiful flower garden then make it a family tradition and go flower picking right before iftar. If not, a local market or a Trader Joe’s would be a good option for gorgeous and reasonably-priced florals.


Sources:

Gold Placemat $1.99 | Craft Roll  $4.79 |Glitter Cardstock  $1.99| Ramadan Print $5.00 | Kitchen Towel $8.00 | Cotton Napkins $3.99 | Turquoise Glass $0.99 | Lantern $3.99

You can also find my sources of inspiration for these looks here on our Pinterest boards:

What did you think of the final result? Would you make this Ramadan banner? If you’re looking for more Ramadan decor inspiration then you’ll definitely want to head on over to my friend at Nimistyle and see her DIY Doily Table Runner and Gratitude Wall. Also don’t forget to check out the rest of the lovely DIYs in the Blog Hop linked below!

IMG_3677

Nimi Style | Amna B Interiors | Simply in Control | Mint Candy Designs | Zair Zabr Play

Last but not least, my friend Amanda and I put together our first Ramadan Ebook. It’s an idea that we’ve been sitting on for a while but this year we took a leap and tried to make it a reality. It’s nothing fancy but it’s a helpful resource filled with meal ideas and recipe links, decor tips, a checklist to help get you organized and even a few simple, mindful challenges for you to try. The best part is it’s available for free download right here:

Ramadan Ready Ebook

Amanda's Plate & The Cozy Home Chronicles

As always if you loved this post, please follow us and share. And for those who celebrate,  Ramadan Mubarak!

signature3


DIY Anthropologie-Inspired Fringe Wall Art

Earlier last month, I shared a DIY upcycling project that I created for a four week creative challenge that I participated in back in January. In this post, I’ll be showing you how to make my decor for week two’s challenge “On the Wall.” First let me start by saying that while I love my own creative process, one thing I really enjoy is the challenge of recreating products that already exist for much cheaper. Seriously, if you’ve ever wanted something that was way out of your price range but thought maybe you could make it at home then I’m your person! Like, if there was a career path or job title for Expert Home Decor Replicator, I’d be the first in line but until such a day here I am making copycat Anthropologie wall art for my own home and blog.

39685805_004_b1

Image via Anthropologie

Do you want to take a guess how much these Solar System Wall Art pieces are going for? Do you even want to know? Try $78-$198. Yep, you read that correctly. How about making one for less than $20? If that’s a yes and you want to know just how, keep on reading for the full scoop. Here’s what you’ll need:

Materials
Gold Floral Hoops or Macrame Rings
Natural cord
Wooden or stone beads
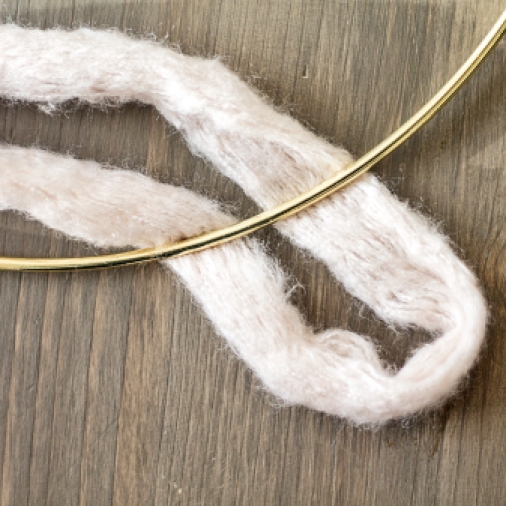
Premier Jazz Yarn


Note: For this specific design, I used 2 floral hoops: a 6in and an 8in. I also used the jazzy yarn in the color “mushroom.” You can use any color or even a variety of colors to create a custom piece for your space. 

Directions

  1. Hold the two gold rings parallel so they’re touching (small ring inside the large) and tie them together using the natural cord. Wind the cord around the rings until the rings are secure and then double knot the cord leaving at least 7 inches for the beads and loop. For extra security, you can add a dab of hot glue to the knot.
  2. String the wood beads on the cord, secure with a knot, and create a small loop for hanging.
  3. Cut out 6-10 strands of the premier jazz yarn, keeping in mind that you want each strand to be twice as long as the final fringe since you’ll be folding it over. I wanted a staggered look so I cut out different sizes ranging from 20-35 inches (actually between 10-17inches).
  4. On the bottom end of the larger ring, secure the yarn by folding the strands in half and pulling the strands of the yarn over the ring and through the loop (see images below).
  5. Pull to tighten and trim the strands to your liking. Now hang and enjoy the view 🙂


anthropologiewallart

This was such a simple DIY wall decor and it really added a nice touch to our eclectic space. Would you make something like this for your home? Let us know in the comments below and as always, if you found this inspiring we would love it if you shared.

IMG_9856

signature3


DIY Upcycled Tea Tin Planter


February is coming to an end and we are a tad bit in disbelief. I know, this seems like a reoccurring theme over here but during this busy season of our life it’s difficult to fully grasp how quickly the time is flying. We did take some time off for a family vacation (there’s a post in the works) in January and it was just what we needed to reset for this new year but when we came back we dove head first into our semesters and it took some time to get back on our feet. We are now back in the groove of things and excited to share what we have been working on. Last month I was lucky to be a part of Salvage Dior’s January Creative Team on Instagram where each week I, along with my four teammates, were responsible for creating something new for our homes that fit within the following themes: 1) Upcycle, 2) On the Wall, 3) Child’s Play, 4) Coffee Table Decor. In this post I’ll be sharing the project I completed for the first week, an upcycled tea tin turned planter.

IMG_8994

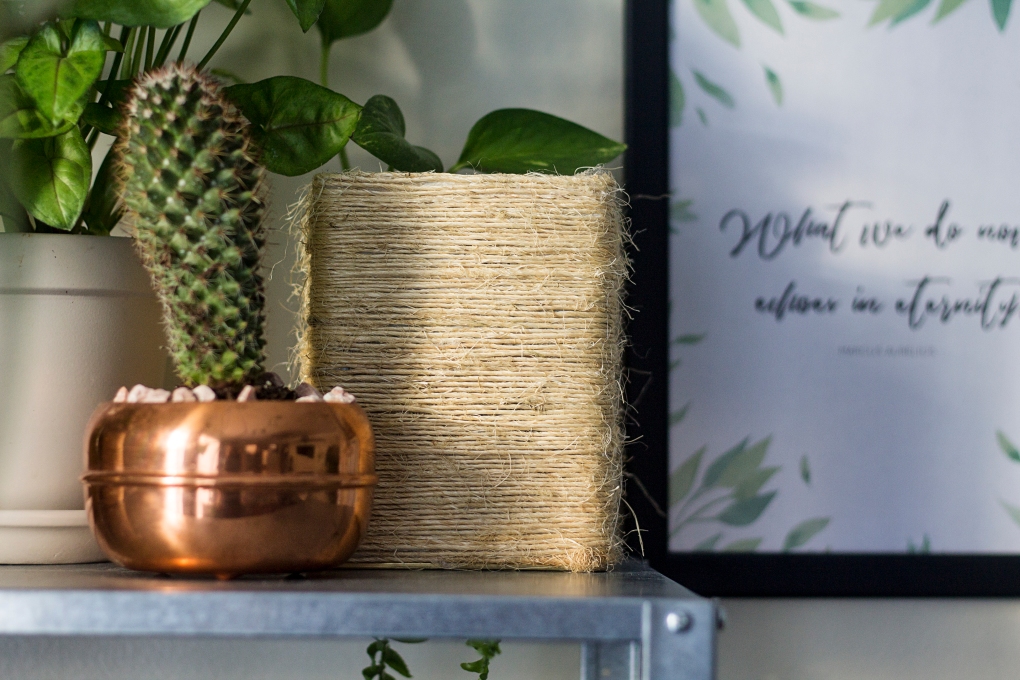
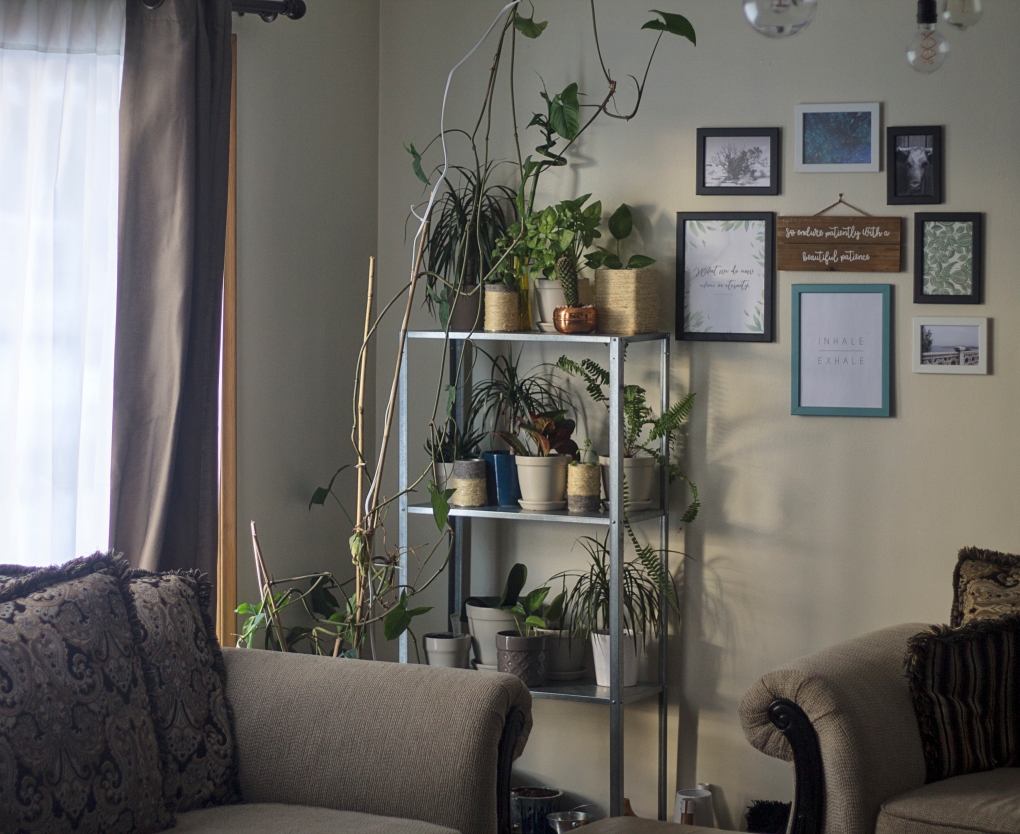
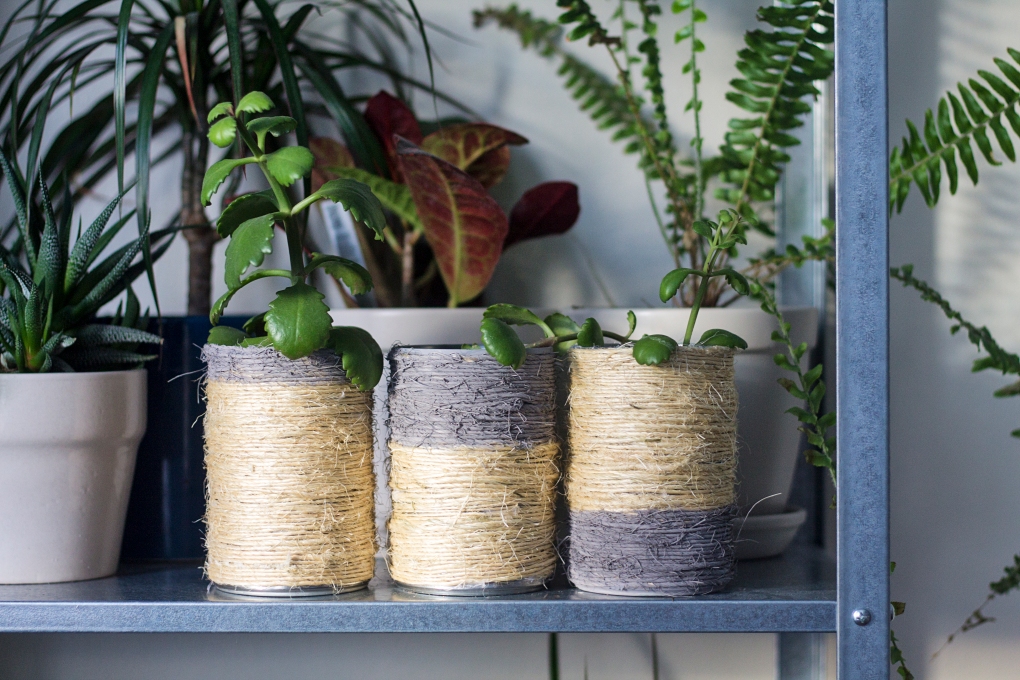
Loose leaf tea is something we drink quite a bit of in our home and I’m always left wondering what to do with the tins once they’re through. In the past I’ve used them as storage for spices and knick knacks but this time I wanted something a bit more creative. At the time we were also revamping our plant corner so I thought it would be nice to make some new planters for the Pothos and Sedum I was growing hydroponically. I was inspired by the recent trend in natural fiber textiles and wanted to create that woven look to contrast with the industrial shelving we chose for the plant’s display. If I wanted to buy what I was looking for, I could have easily spent anywhere from $6-25 a pot depending on the size. Instead, I was able to make this tea tin planter and some tin can planters for $0 because I had everything already on hand. The only thing that you would probably need to buy if you’re not DIY nerds like us is the bundling twine but that itself is very inexpensive ($3.98 for 525 feet). Alright, let’s make a planter!


If you are an avid DIYer, you most likely have a glue gun in your arsenal of crafting tools.

eb_loose_2

DIY Upcycled Tea Tin Planter

  • Difficulty: Easy
  • Print

Materials
Tea tins or tin cans, washed and dried
Bundling twine
Hot glue-sticks
Milk Paint (optional)

Tools
Glue Gun
Scissors
Drill (or a hammer and nail)

Directions

  1. Heat your glue gun and in the meantime use your drill to place drainage holes in the bottom of your tin. You can also use a hammer and a nail to do this or you can skip this step and just make sure to include a layer of small rocks beneath your soil for water drainage.
  2.  Glue the end of the bundling twine to the side of your tin at the very bottom and begin wrapping the twine around, making sure to glue the first 3 coils to the tin and to each other. As you wrap the twine, be sure to push the coils down tightly to close any gaps and give your planter a neat, elegant look.
  3. Continue wrapping the twine around, stopping midway to glue the coils down. Wind the twine around the tin until you reach the top and then cut the twine to length.
  4. Uncoil the twine a couple turns, then rewind it tightly against the tin using hot glue to secure the top two coils to the tin and to the adjoining coils.
  5. Take your scissors and trim off any noticeable twine hairs sticking out (see the time-lapse video below). At this point you can paint the planter and let it dry or go straight to planting and styling it!

IMG_8984

IMG_8998

If you liked this post and found it inspiring, we would love if you shared it. For more related content, you can find us on Instagram where we share more of our day-to-day and Pinterest where we share our ideas and inspiration. If you have any thoughts or suggestions about this DIY project, feel free to leave a comment below. And as always…

signature3


DIY Upcycled Brown Paper Bag Gift Wrap

It’s finally the holiday weekend and that means we are inching ever closer to the start of 2018. We recently hit our 2 year blogging anniversary earlier this month and we thought it would be nice to celebrate with a short reflection and a makeover of the first post that ever went up on this blog. Why? Because sometimes, in the nitty gritty of blogging we can find ourselves questioning it all and in our tunnel vision of self-pity and negativity, we forget how far we have come. Comparison isn’t so bad when you’re looking at yourself and everyone loves a good before and after so here is ours.

IMG_8421

IMG_7538

As you can see clearly, our styling and photography has drastically improved in the last two years. Our first post was written in 2015 just a week before Christmas and right before I was about to dive into a week of hell taking my PhD qualifying examinations (a 7 day, 40+ page writing endeavor). Since that first post, we have connected with some wonderful bloggers, participated in two One Room Challenges, built a small but amazing community, and even wrote our first sponsored blog post.  There have been many times this year when we would feel frustrated with our engagement or turn-around time and even question what kind of blog we were aiming to be but looking back to our first post, I think the answer has always been there. DIYing is obviously something we are very passionate about as well as striving to live as simply and sustainably as possible and that’s exactly the commitment that our first post embodies. In this post, we will be sharing our revamped post with a little twist; using stencils to create beautiful gift wrap designs. For those of you who waited until last minute to wrap your gifts, you’ll want to hold off on that last minute Target run because this is such a simple way to add a personal touch to your gift wrapping and for next to no cost at all (depending on what your craft supply stash looks like). The wonderful thing about this gift-wrap is that it’s not just for Christmas; you can customize it to fit any holiday or occasion year round.

IMG_7551

Supplies
Brown paper bag
Scissors
Stencils
Metallic Paint Marker, paint pens, or sharpies
Twine
Embellishments such as eucalyptus, flowers, pine cones, etc..

IMG_7527

Directions

  1. Flatten your brown paper bag and cut down to the size you need.
  2. With a metallic paint pen, stencil in the blank side of the bag using the pattern of your choosing.
  3. Place your thoughtful gift inside and wrap nicely.
  4. Embellish with rustic twine, eucalyptus, pine cones, or holly.

IMG_7536

As you can see, I was going for a minimalist/bohemian look (surprise, surprise) with the copper and white pattern, twine, and eucalyptus accent. It’s almost too pretty to open!

IMG_7546

So what does 2018 hold for us? It’s been really hard to answer this question because life is pretty busy with two kids and graduate school on our plates. We do know that we love what we do and we love sharing it with you. We hope that we can continue growing; growing ourselves, our skills, and our blog and hopefully inspiring you all along the way. We can say for certain that we will definitely be sharing more DIY projects, simple family recipes, our simple living journey, and parenting adventures but whether we can keep up with our 50 blog posts/year productivity will remain to be seen. If there are topics you would like to see more of here on The Cozy Home Chronicles, please feel free to leave your suggestions in the comments below. And for those of you new bloggers, those considering starting blogs, or even veteran bloggers wondering “what’s the point?”, keep on dreaming and working towards those dreams with your eyes on the journey and not solely on the destination.

“Tell your heart that the fear of suffering is worse than the suffering itself. And that no heart has ever suffered when it goes in search of its dreams, because every second of the search is a second’s encounter with God and with eternity.”-Paulo Coehlo, The Alchemist

signature3


Organizing for Your Lifestyle: Strategies for Developing Sustainable Organizing Solutions

Let’s be real. Maintaining a clean house most days is a challenge in itself. Now add two young children and school and we are looking at nearly impossible. But we manage somehow. Believe it or not, the hardest part is not having to pick up after our little ones but rather picking up in a timely manner. In order to do that, one needs to be…dun..dun..dun.. yep, you guessed it. ORGANIZED! Since both my husband and I are in school this semester, we figured it was high time we got our house sustainably organized once and for all. Of course, it doesn’t hurt to get a little bit of help.

IMG_5906

In her book Organizing for your Lifestyle, Jane Stoller offers inspiration and practical advice for tackling any organization project from the smallest closet to the biggest room. The first chapter is a general overview of organization philosophy covering the very basics including the health and cost benefits of organizing as well as organization approaches such as minimalism. After that expect to dive straight in. My favorite part of the book is the way in which it is organized; each chapter serves as a guide to a different space. As someone who suffers from indecisivism (is that a thing?) I can tell you that knowing where to start is the most stressful part so following a list definitely helped eliminate that stress. Here’s how the book is split up:

  1. Closet
  2. Bathroom
  3. Kitchen
  4. Travel
  5. Books
  6. Storage Room

Suddenly, a good pre-New Year’s purging doesn’t sound too bad now does it?! Today I’m sharing five of my favorite practical tips from the book and how I’m applying them as we tackle our organizational woes.

1. Have a date with your closet every year. Jane recommends evaluating and reorganizing your closet twice annually as “this will help you to stay fully in control of what you have, and knowledgeable about what you need, while ensuring that no excess clothing outstays its welcome.” We recently tackled the kid’s closet and ended up donating a TON of stuff they had outgrown that was taking up valuable space. After seeing how much space this opened up, I added reminders to my calendar to do this on a quarterly basis.

IMG_5909

2. Think in terms of frequency of use. Mentally sorting out your belongings into daily use/weekly use/sparse use really puts things into perspective and allows you to tailor your organization system to your practical needs so that you have what you need when you need it. This has been really helpful in our bathroom as I have tried to make sure that we have easy access to the things we use every day like toothpaste and shampoo whereas medications that are used infrequently are tucked away out of sight.

3. “Organize so your mother (or father) can cook in your kitchen.” This one really stood out to me because the kitchen is the heart of our home. If you don’t have easy access to basic tools and ingredients while cooking then you’re wasting valuable time during meal prep. Imagining someone else using your kitchen is a great exercise for thinking about the efficiency of your space. I used the opportunity to remove some unwanted gadgets, dinnerware, and Tupperware out of circulation to make room for things that I actually use and need.

IMG_5743

4. Find a balance between function and aesthetics. What works for one person or family doesn’t work for everyone and that’s okay. It’s up to you to find a solution that is both functional and visually appealing for your needs (sometimes function will trump aesthetics and that’s also okay). This issue came up for me while I sifted through my scarf collection. Although I can see how the variety of colors and patterns hanging together on a wall can be visually unappealing, this strategy has proven to be the most practical for my lifestyle because it offers easy open access to all my scarves.

IMG_5969

5. Make organizing a lifestyle. This is by far the most important advice because it requires you to think in the long term. With this philosophy, organizing is no longer about buying storage containers or fancy systems but rather about asking yourself, “how can I stay organized?” The answer, I think, will lie in a happy medium between a designated system, daily practices, monthly maintenance, and a quarterly assessment of successes and failures. To help us along through this process, I’ve created a diagram to envision what this would look like.

Organizing Chart

We are by no means completely organized because we haven’t had the time to tackle all of these spaces in one sitting but we have been thinking through these tips as we slowly organize our home corner by corner. These strategies have certainly helped me be more intentional about finding sustainable organization solutions and I look forward to sharing more as we work on making our home better organized. If you want more organizing inspiration as well as tips and tricks on the specifics of storage, folding, and labeling, you can find Jane’s book here.

If you enjoyed this read, please share and follow!

Instagram

signature3


One Room Challenge: Week 7 |Simple Office Makeover Reveal

Today is the big day friends! Although we weren’t able to keep up with the weekly progress posts for our One Room Challenge, we still managed to finish the room on time (hooray!). If you’re just tuning in here for the very first time and don’t know what The One Room Challenge™ is, it’s a widely anticipated biannual event every April and October, hosted by Lisa of Calling It Home, in which twenty design bloggers take the challenge of transforming a space in just six weeks. Every Wednesday, the designers document their process while sharing their sources and professional advice. On Thursdays, guest bloggers, like us, can play along and support other guest bloggers that are also tackling a room renovation. As you may already know, we were working on an office makeover for my brother and sister-in-law because although we love DIYing, we couldn’t handle the stress of doing our own home renovation while both of us are in school.

ORC GPDon’t worry I’m not going to chit chat too much. The whole point of this post is to see a satisfying transformation and we will get to that in just a minute. Of course we also want this post to be inspirational and informative so following the before and afters we will give an overview of the changes this project entailed, the cost, and our sources. If you don’t even remember how this project began you can refer to weeks one, two, and three for a quick reminder.
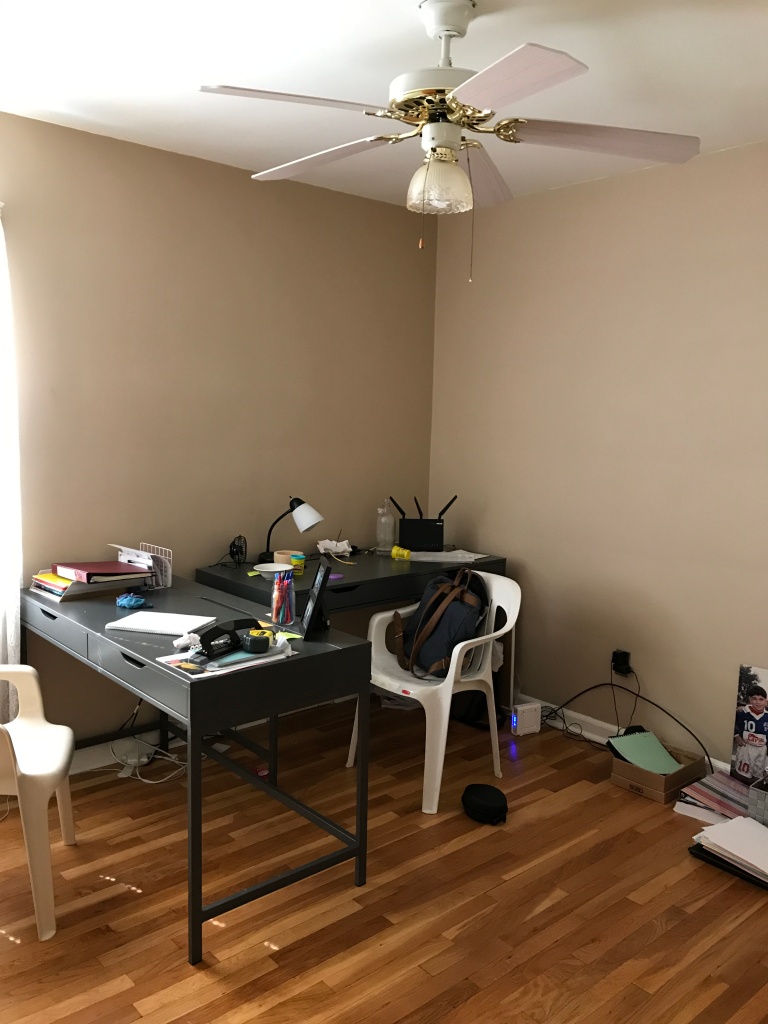
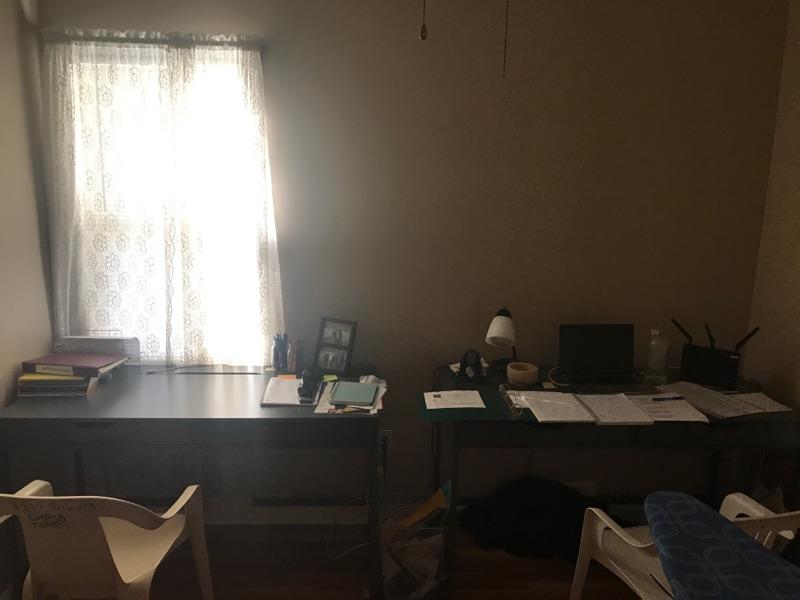
BEFORE: A DARK & SAD ROOM

IMG_5608

IMG_5607

AFTER: WORK SPACE GOALS

IMG_7365

IMG_7355


IMG_7361

IMG_7377

IMG_7121

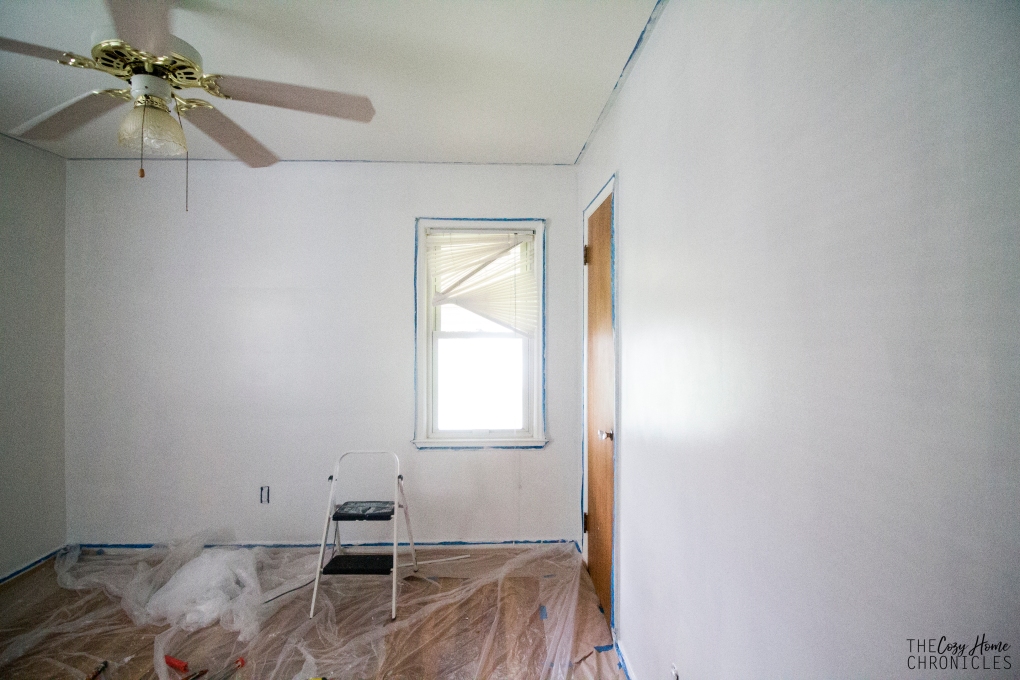
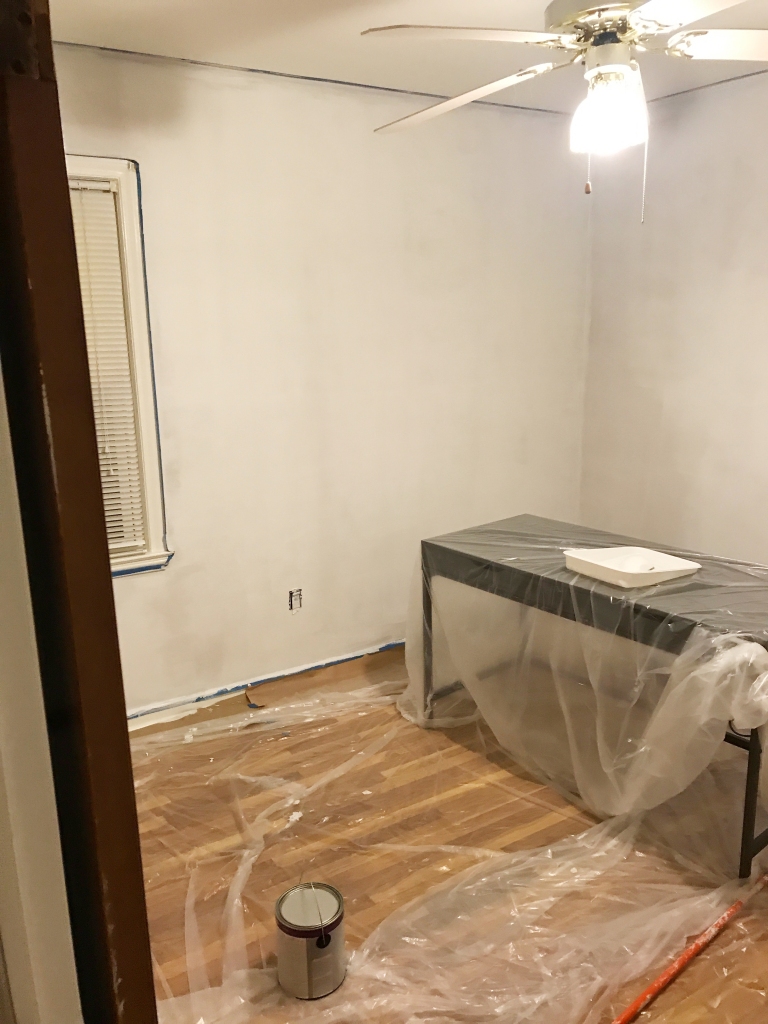
So how did we get from A to Z? Never underestimate the power of a fresh coat of paint. In our opinion it is the cheapest, easiest, and most impactful way to transform a space. My sister-in-law wanted a bright and modern space so we went with Behr in Ultra White for a fresh clean look. Another impactful thing we did was to take down the vintage lace curtains and replace them with brand new blinds that I purchased from IKEA for $2 each (yes you read that correctly). Let’s just say it pays to lurk in the last chance section!

IMG_7371

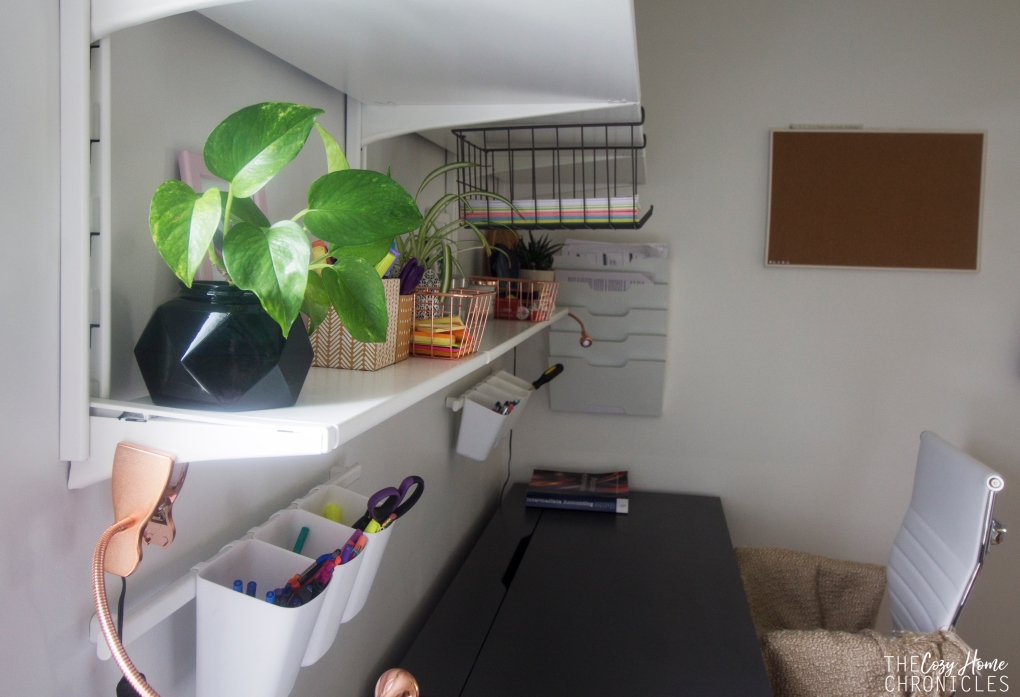
Replacing the fan light with a modern ceiling light from IKEA for $30 also dramatically changed the look of the office. The black fixture really complemented the gray desks and the hardwood floors and brought in much needed light. Of course one of the most expensive purchases was the Algot system which we added for shelf space above the desks. While we did toy around with the idea of building custom shelving, we decided in the end that spending a little more on a system that could be adjustable to changing needs would be the smartest choice. For $85, it was well worth the investment and provided the perfect amount of space for organizing books, supplies, and for styling decor. The best part about this transformation was that nothing was difficult to do; painting, installing shelving, replacing the light fixture, all of these required no super special tools or skill sets (which means you could do it too!). 

IMG_7385

We could not be happier with how this room turned out. Considering our crazy schedules and all the stress in our lives, I think we did a pretty good job of bringing  our simple vision to life. We wanted a fresh, inspiring space with bohemian elements (patterned rug, copper accents, plants) and I think we definitely pulled that off. While we are very happy with the final look of the room, there are still some areas of improvement that we will probably return to. One of them is wire control. We definitely want to find a way to conceal and minimize the tangling of the printer, desk lamp, and laptop cords. We also want to add a little more color and character to the rest of the walls. I think this is something that will naturally come as my brother and sister-in-law live in the space and identify what speaks to their style. In that sense, I don’t mind the empty walls as much because I think of it as their decor journey has only just begun. I also thought it would be nice to have a fun little reading corner complete with fancy shmancy floor pillows but it looks like that will have to wait.


Sources


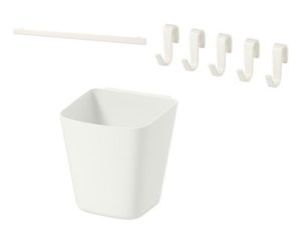
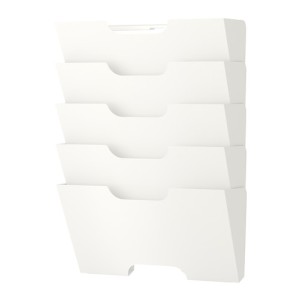
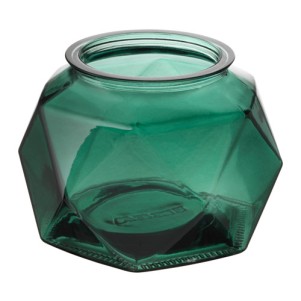
Ceiling Light $29.99 | Office Chair  $84.99 |Shelving  $85| Rug $69.99| Desk Lamp $12.99 Magazine Rack $14.99 |Vase $2.99 | Plants $2.99| Hanging Storage $4.36| Frames $.99

As you can see, many of the items we purchased are both accessible and reasonably priced for the average home DIYer. We took advantage of many deals to save big including using a 10% off coupon from Wayfair and thrifting to keep our makeover well under $500. The rug was my sister’s belated birthday gift to my brother for the renovation so all we really had to purchase was the shelving, chairs, lighting and accessories. This came out to about $350. For the decorating I was a little savvier as I relied on some thrifty finds like a set of 4 wall baskets for $1.99 and free printable wall art (tropical palm leaf and keep pushing on).

IMG_7199


All in all, it’s been another successful One Room Challenge and we can’t wait for the next one 🙂

Any questions? Thoughts? We would love to hear from you in the comments below. Don’t forget to check out everyone else’s final reveal posts and as always, if you liked this post please follow us and share!

Instagram

signature3


There and Back Again: A last-minute DIY Halloween Hobbit Costume

 Halloween is just a day away so if you’re scrambling for a last minute costume idea, we have just the thing for you! Now do you want to take a wild guess what my son and daughter will be dressed up as? Hobbitses!!! Yes, Hobbits! Frodo Baggins and his side kick Samwise Gamjee to be exact. We don’t really celebrate Halloween per say (our kids don’t even eat candy) but every year my good friend hosts a “babyween” as a place for the kids to get together, dress up for fun, and enjoy healthy snacks and fun games. This year she will also be adding a giving component to the party so we will be taking canned goods that she will be donating to a local food pantry. As I’m sure you already know, we are huge fans (understatement) of J.R.R. Tolkien’s work. The way I see it, we all have role models that we admire and kids grow up looking for those role models. J.R.R. Tolkein’s mythology offers plenty of worthy role models; compassionate, brave, and principled characters that fight to defeat the greatest evil of their time. And what’s not to love about that?

IMG_5898

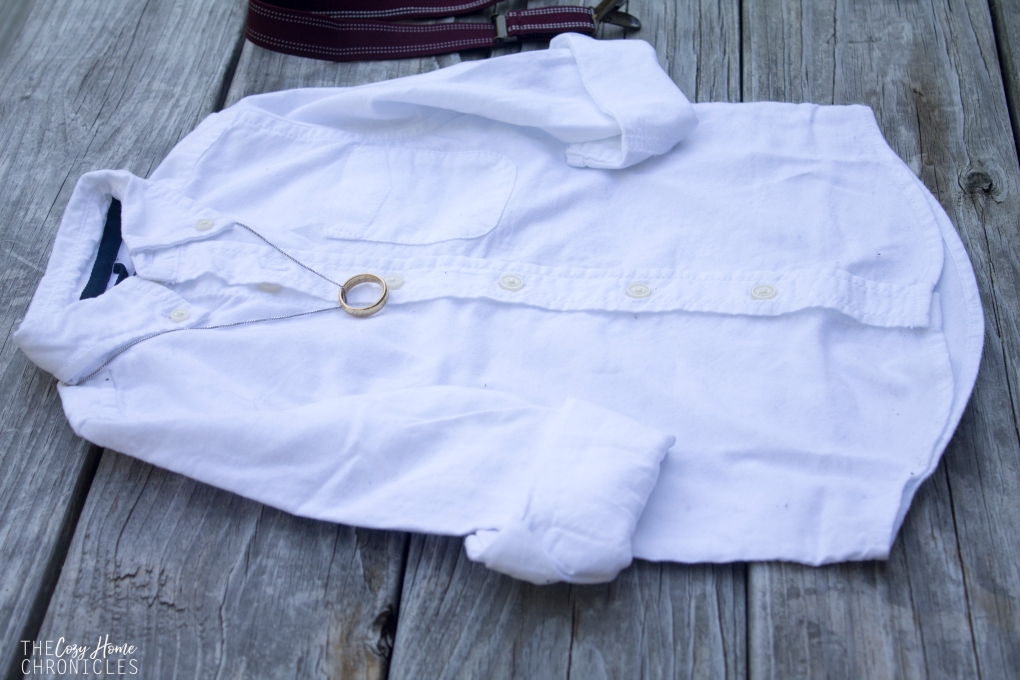
This costume is super easy to put together and most things (clothing items) you will probably already have at home. The only things you’ll need to get are a piece of fabric for the cloak and clay and a hair clip to make the elven brooch. The fabric doesn’t even need to be sewn because it looks more authentic with uneven and rustic ends. For the elven brooch, I just pulled up an image of the real one as I shaped the clay. It’s not perfect but it looks pretty good. After that, all that’s left is to get dressed in your fancy hobbit attire, pop on a chain with a ring on it, and clip your cloak on. Just remember,

“It’s a dangerous business, Frodo, going out your door. You step onto the road, and if you don’t keep your feet, there’s no knowing where you might be swept off to.”

What you’ll need:
White/Gray button down shirt
Suspenders
Dress pants like corduroy, khaki, or twill (preferably short or you can roll them up)
Necklace chain with a ring
Fleece fabric square
Elven Brooch

Note: Some of these components may be a choking hazard for young children so be very careful.

IMG_5897

DIY Elven Brooch:

  1. Shape white modeling clay into a leaf and bake for 20 minutes at 250F or according to instructions as it varies by brand.
  2. Once hardened and cool, paint the leaf with green acrylic paint. Let dry.
  3. Glue the clay leaf to a hair clip using hot glue or heavy duty glue. Let dry and you’re all done!

IMG_5881

IMG_6276

I’ll be sharing more of the final look on Instagram tomorrow so be sure to come see 🙂 And as always, if you liked this post please follow us and share!

Instagram

signature3


One Room Challenge: Week 3 | Choosing Office Furniture

Hello friends and welcome to week 3 of our One Room Challenge Office Makeover. Hosted by Lisa of Calling It Home,  The One Room Challenge™, is a widely anticipated biannual event every April and October in which twenty design bloggers take the challenge of transforming a space in just six weeks. Every Wednesday, the designers document their progress while sharing their sources and professional advice. On Thursdays, guest bloggers, like us, can play along and support other guest bloggers that are also tackling a room renovation.

ORC GP

If you’ve been following along since the beginning, you’ll know that we are running a bit behind schedule. As of now, we are officially done with painting the room and we are getting ready to furnish it! Although we haven’t made any big changes yet, we did make some pretty big decisions recently including settling on a rug, blinds, and shelving system. Today is a big day because we are actually going to IKEA to finally purchase many of those things including the Algot system, which we will be installing on the wall where the desks will be located. I’ll be taking my brother and sister-in-law along  with me so they can test out office chairs to determine what is comfortable and stylish for them. Ideally, it would have been nice to thrift and reupholster some office chairs but for longevity and comfort purposes we opted to buy them new instead.  Here are just some of the things we will be picking up today:

ORCWeek3

We really wanted to build custom wood shelving but there is simply not enough time in our schedules. At the end of the day, we think the Algot system is the best choice because: 1) it’s easy to install, 2) reasonably priced, 3) modern and clean, and 4) customizable to fit any organizing needs. We will share a post in the future detailing exactly how to purchase and install the Algot for your office space. In the meantime, here are some pictures of the painted room and the itinerary for the last three weeks.

IMG_5697

IMG_5689

WEEK 1: Empty office, tape around the walls and windows, and paint

WEEK 2: Finish painting walls

WEEK 3: Finalize and purchase office furniture

WEEK 4: Install shelving, lighting, and window treatments

WEEK 5: Organizing, styling, and decorating

WEEK 6: Cleaning and Final Reveal

Be sure to check back next week for more updates on this fun office project! And as always, if you liked this post please follow us and share!

Instagram

signature3


One Room Challenge: Week 2 | Primed to Paint

Hello Friends and welcome to Week 2 of our One Room Challenge Office Makeover. It’s been a busy and rough week (our son got sick with some kind of stomach bug and we are running in the Detroit Free Press Marathon on Sunday) so we are a bit behind schedule. Because of the relatively small scale of work needed for this room, we are not really worried about finishing on time.

ORC GPHosted by Lisa of Calling It Home,  The One Room Challenge™, is a widely anticipated biannual event every April and October in which twenty design bloggers take the challenge of transforming a space in just six weeks. Every Wednesday, the designers document their progress while sharing their sources and professional advice. On Thursdays, guest bloggers, like us, can play along and support other guest bloggers that are also tackling a room renovation.

IMG_6165

IMG_6169

IMG_6170

IMG_1306

IMG_6076

As far as this week’s progress goes, we did manage to have the room emptied and primed (thanks little bro). Although it’s hard to tell in the pictures above, the primed walls give a small glimpse of how light paint will transform the feel of the room. And speaking of paint colors, after much deliberation at our local Home Depot, my sister in-law and I decided to go with Behr’s Ultra-Pure White. I think it will offer the blank canvas we need to build a space that is inviting and inspiring to work in. To get an idea of what this might look like in a room, you can read here about this once “color of the month.” All rightie, here’s what the rest of the schedule looks like now:

WEEK 1: Empty office, tape around the walls and windows, and paint

WEEK 2: Paint walls, install shelving and organization systems

WEEK 3: Change light fixture

WEEK 4: Install window treatments

WEEK 5: Organizing, styling, and decorating

WEEK 6: Cleaning and Final Reveal

Be sure to check back next week for more updates on this fun office project! And as always, if you liked this post please follow us and share!

Instagram


signature3


One Room Challenge: Week 1 | Simple Office Makeover Mood Board

Happy Friday friends! After getting a taste of our first One Room Challenge back in April when we renovated our bathroom, we are back for another round! Hosted by Lisa of Calling It Home,  The One Room Challenge™, is a widely anticipated biannual event every April and October in which twenty design bloggers take the challenge of transforming a space in just six weeks. Every Wednesday, the designers document their process while sharing their sources and professional advice. On Thursdays, guest bloggers, like us, can play along and support other guest bloggers that are also tackling a room renovation.

ORC GPThis year is a little interesting for us because we are now both in graduate school and so are VERY short on time (can’t stress that enough). While we would love to turn a room upside down for a makeover, we simply do not have the luxury of doing so. Instead we will be working with my brother and sister-in-law to help them design and makeover their home office. Both my brother and sister-in-law are in their last year of undergraduate school and they are newlyweds so they want a space that is budget friendly and one that is comfortable and organized as they continue to pursue their dreams. We are hoping to deliver on all fronts!

BEFORE

IMG_5607
IMG_5614
IMG_5608
IMG_5609

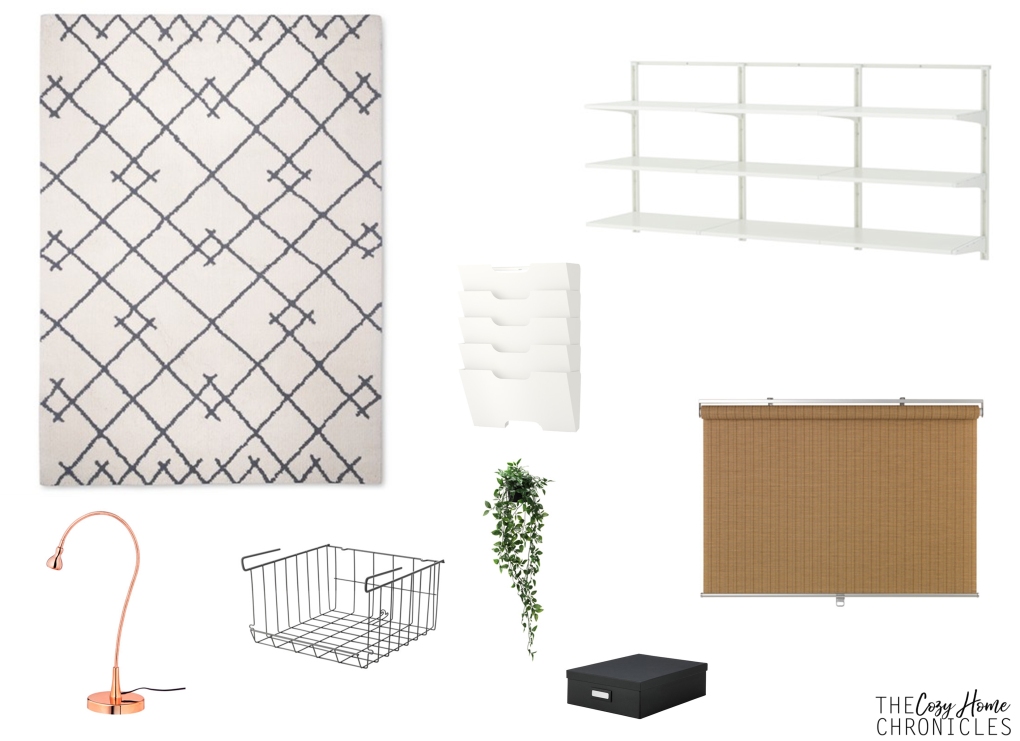
IMG_5990In this post, I’ll be sharing a mood board that I created as an inspirational blueprint. Before I put it together, I created a pinterest board and had my sister-in-law pin some of her favorite office spaces. Then as we boarded a plane for Kansas City, we went over her choices and why she liked them. Of course we didn’t leave out my brother in the decision-making, although he was a little less interested in the particulars. Based on their style interests this is the board I came up with:
ORC OFFICE

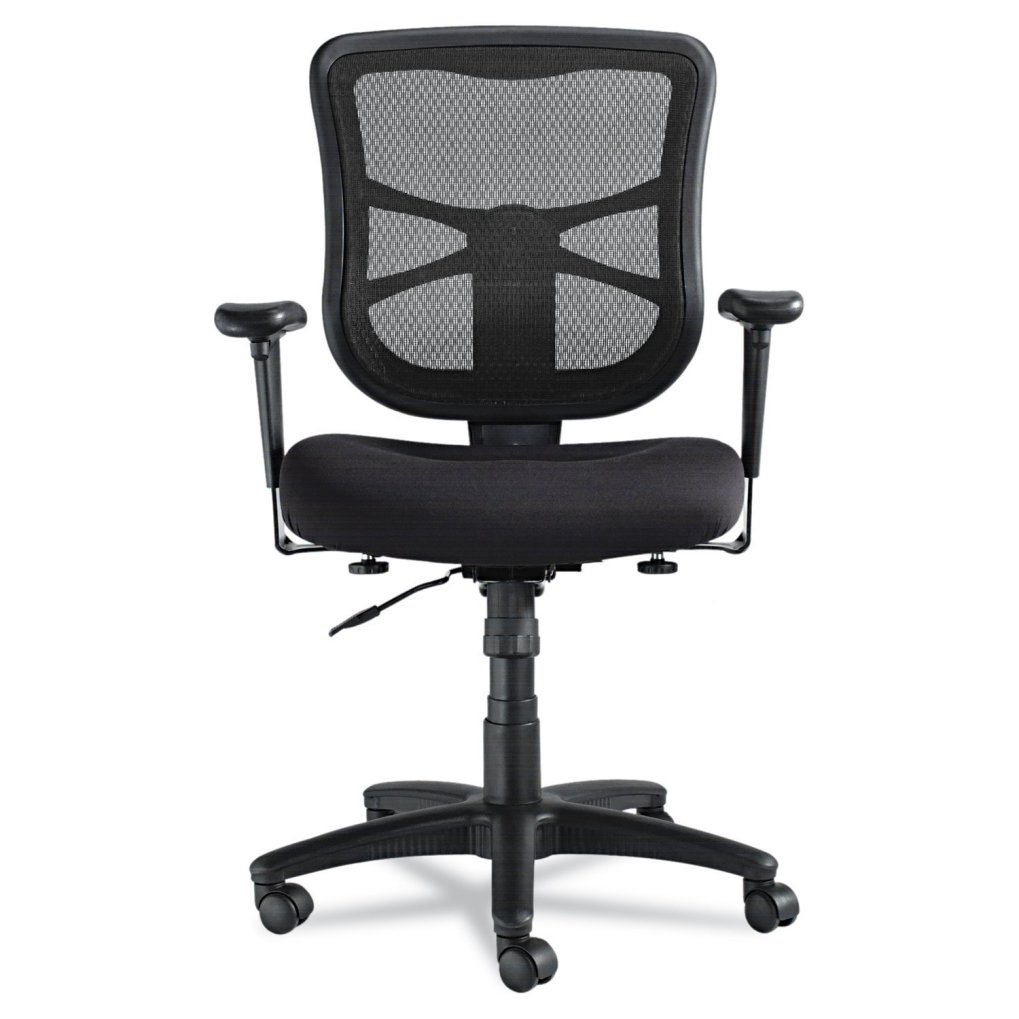
Obviously many of the elements will change as we proceed with the makeover but there are some things that we will stick with: neutrals and black with subtle pops of color, copper accents, and plants. To cut on costs, I will make use of free printables for the wall decor and I will also hit thrift stores and garage sales for much of the small storage furniture and decorative accessories. What I imagine we will spend the most on are office chairs and a rug. Unless by some miracle we hit the thrifting jackpot. The biggest challenges will face are keeping the cost low and balancing between function and aesthetics. My brother really wants a super comfy, ergonomic executive chair and unfortunately those are not the most visually appealing.

71xQWAfmXqL._SL1500_In terms of timeline here are where things stand. My brother is currently cleaning out the office {if you’re reading this bro, you better get on it ;)} to get it ready for painting. As you can see the walls are really dark so we will be picking out a fresh white to brighten up the space and get it primed to be ONE inspirational work space.

WEEK 1: Empty office, tape around the walls and windows, and paint

WEEK 2: Install shelving and organization systems

WEEK 3: Change light fixture

WEEK 4: Install window treatments

WEEK 5: Organizing, styling, and decorating

WEEK 6: Cleaning and Final Reveal

Anyone else working on a makeover for One Room Challenge? Feel free to share in the comments below, we would love to hear what you have planned! Until next week 🙂

If you liked this post please follow us and share!

Instagram