One Room Challenge: Week 1 | Simple Office Makeover Mood Board

Happy Friday friends! After getting a taste of our first One Room Challenge back in April when we renovated our bathroom, we are back for another round! Hosted by Lisa of Calling It Home,  The One Room Challenge™, is a widely anticipated biannual event every April and October in which twenty design bloggers take the challenge of transforming a space in just six weeks. Every Wednesday, the designers document their process while sharing their sources and professional advice. On Thursdays, guest bloggers, like us, can play along and support other guest bloggers that are also tackling a room renovation.

ORC GPThis year is a little interesting for us because we are now both in graduate school and so are VERY short on time (can’t stress that enough). While we would love to turn a room upside down for a makeover, we simply do not have the luxury of doing so. Instead we will be working with my brother and sister-in-law to help them design and makeover their home office. Both my brother and sister-in-law are in their last year of undergraduate school and they are newlyweds so they want a space that is budget friendly and one that is comfortable and organized as they continue to pursue their dreams. We are hoping to deliver on all fronts!
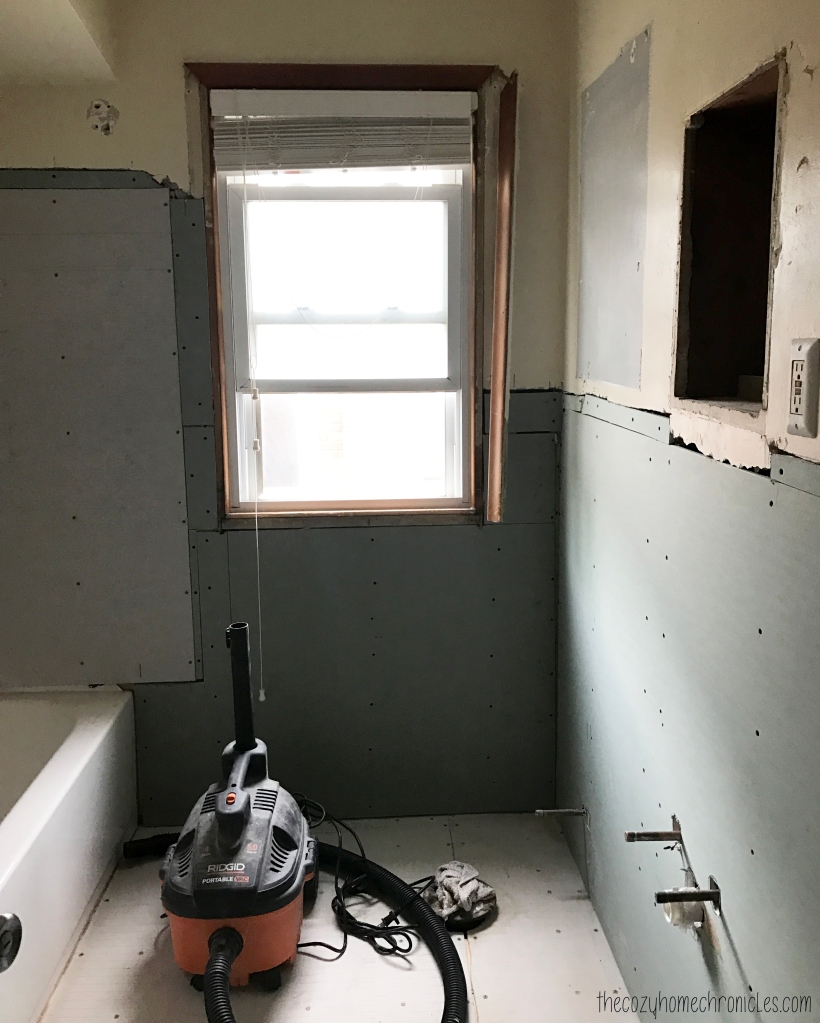
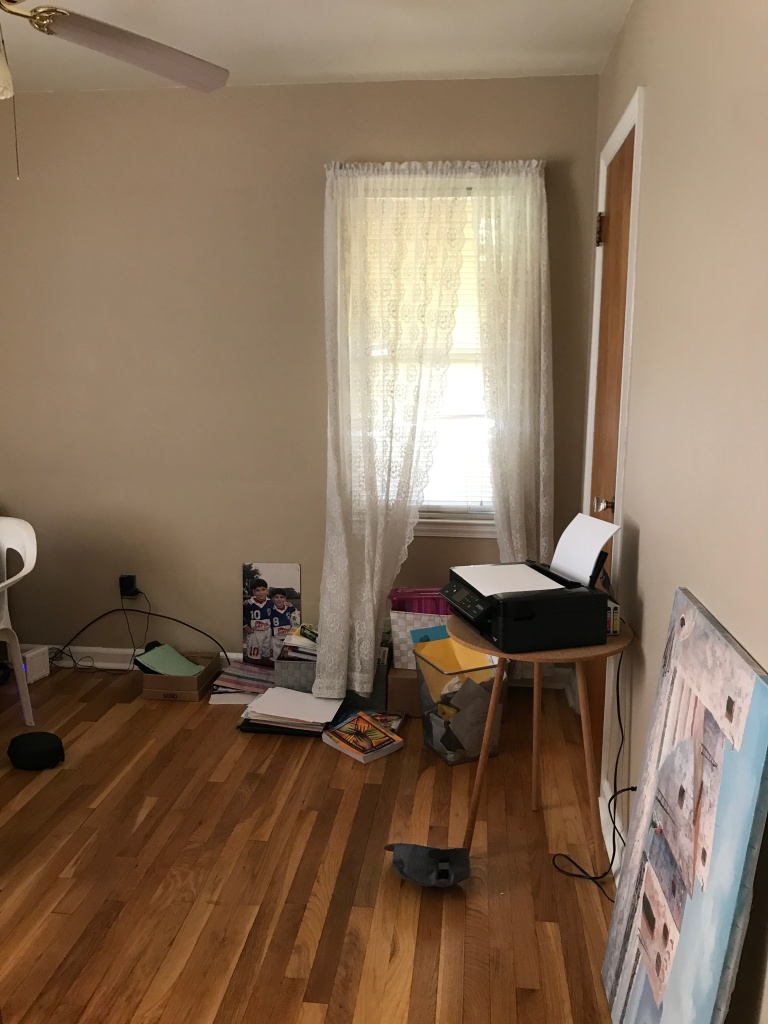
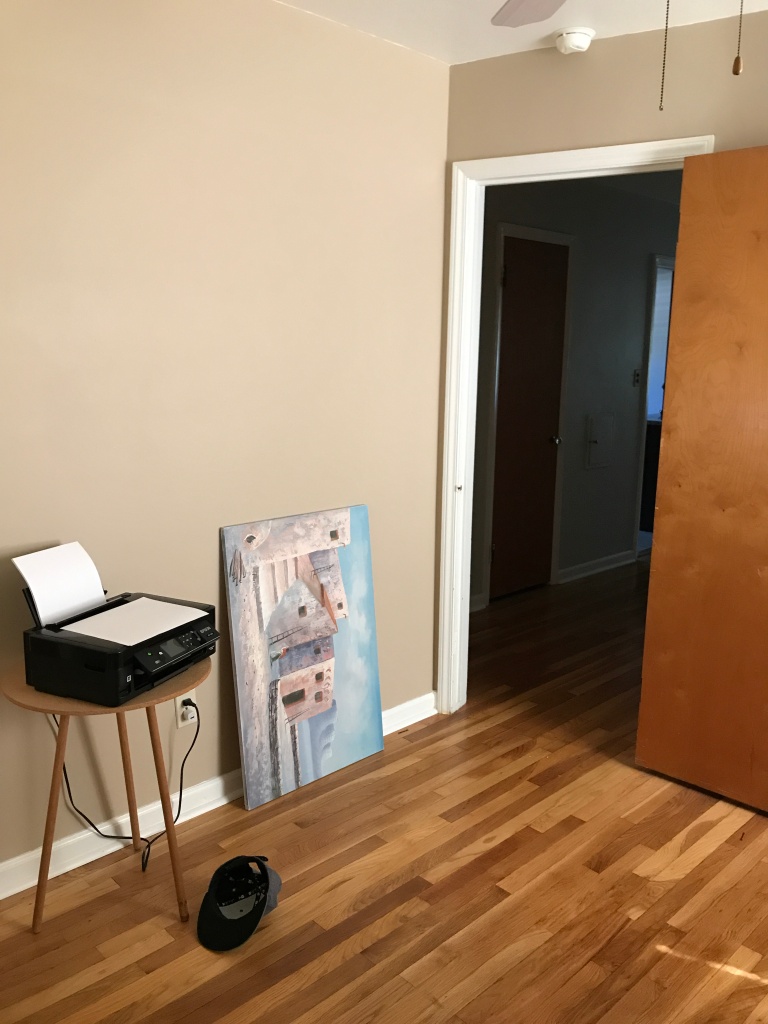
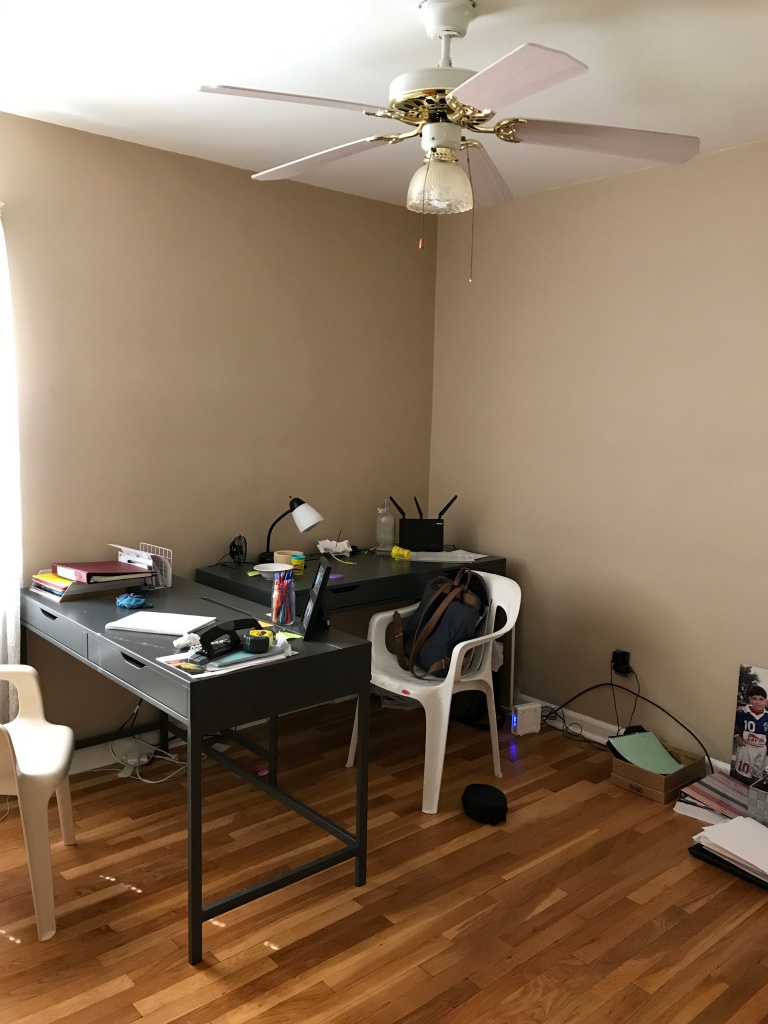
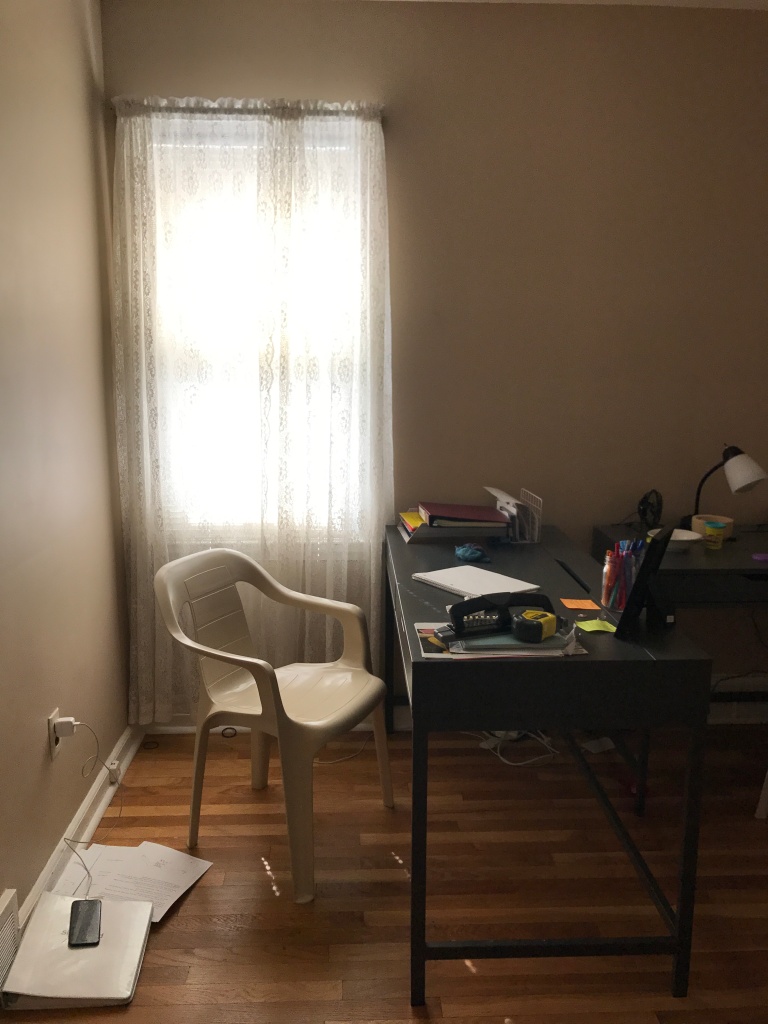
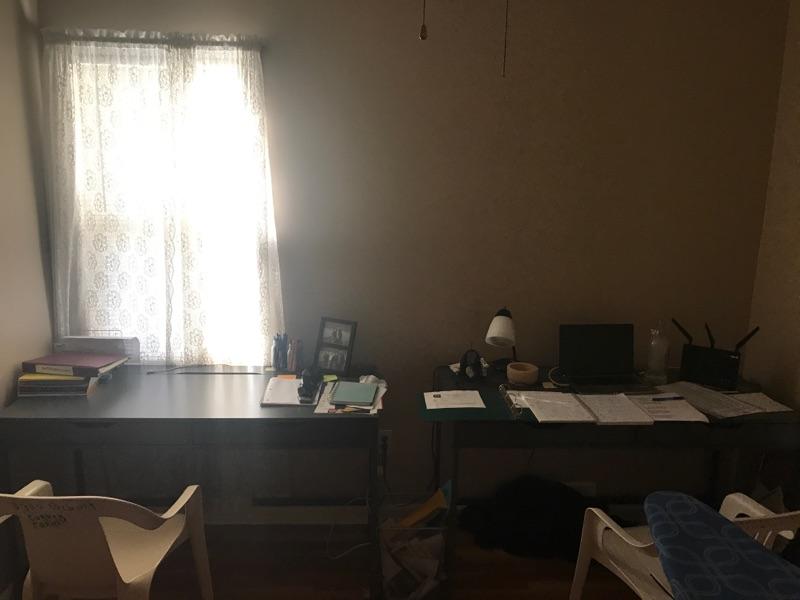
BEFORE

IMG_5607
IMG_5614
IMG_5608
IMG_5609

IMG_5990
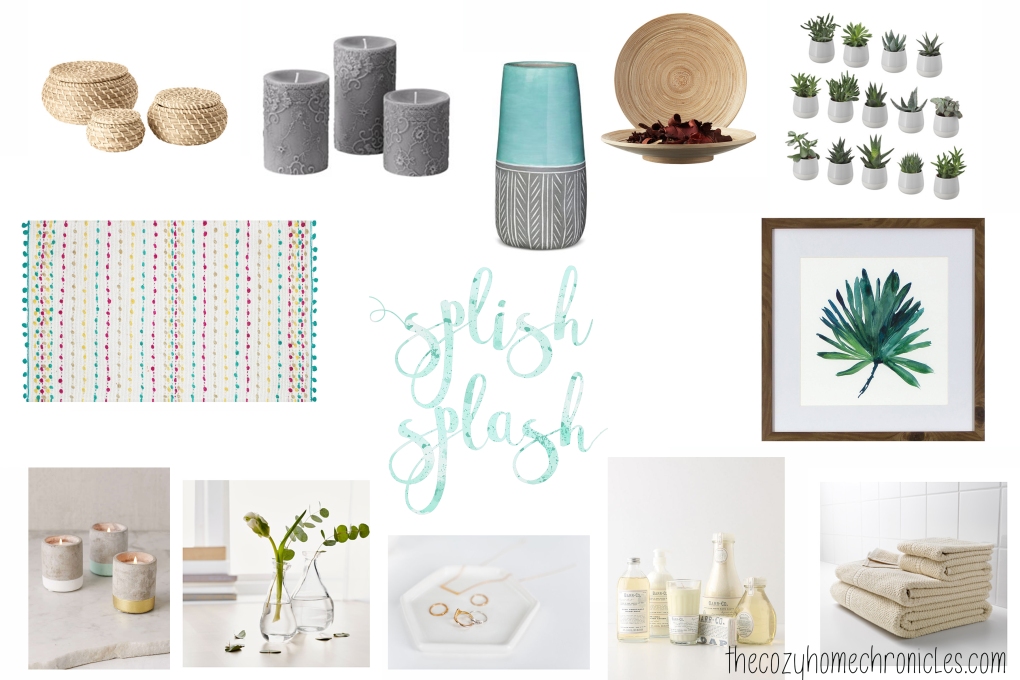
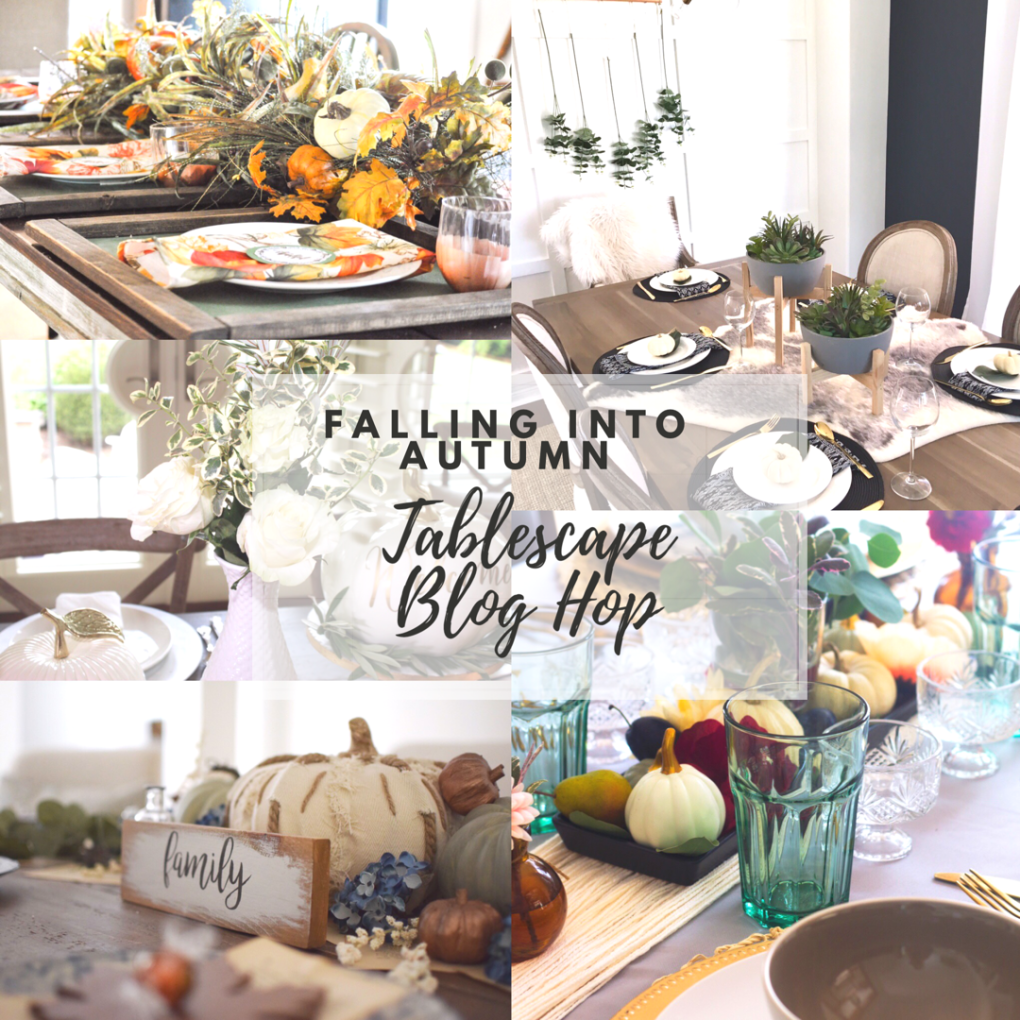
In this post, I’ll be sharing a mood board that I created as an inspirational blueprint. Before I put it together, I created a pinterest board and had my sister-in-law pin some of her favorite office spaces. Then as we boarded a plane for Kansas City, we went over her choices and why she liked them. Of course we didn’t leave out my brother in the decision-making, although he was a little less interested in the particulars. Based on their style interests this is the board I came up with:

ORC OFFICE

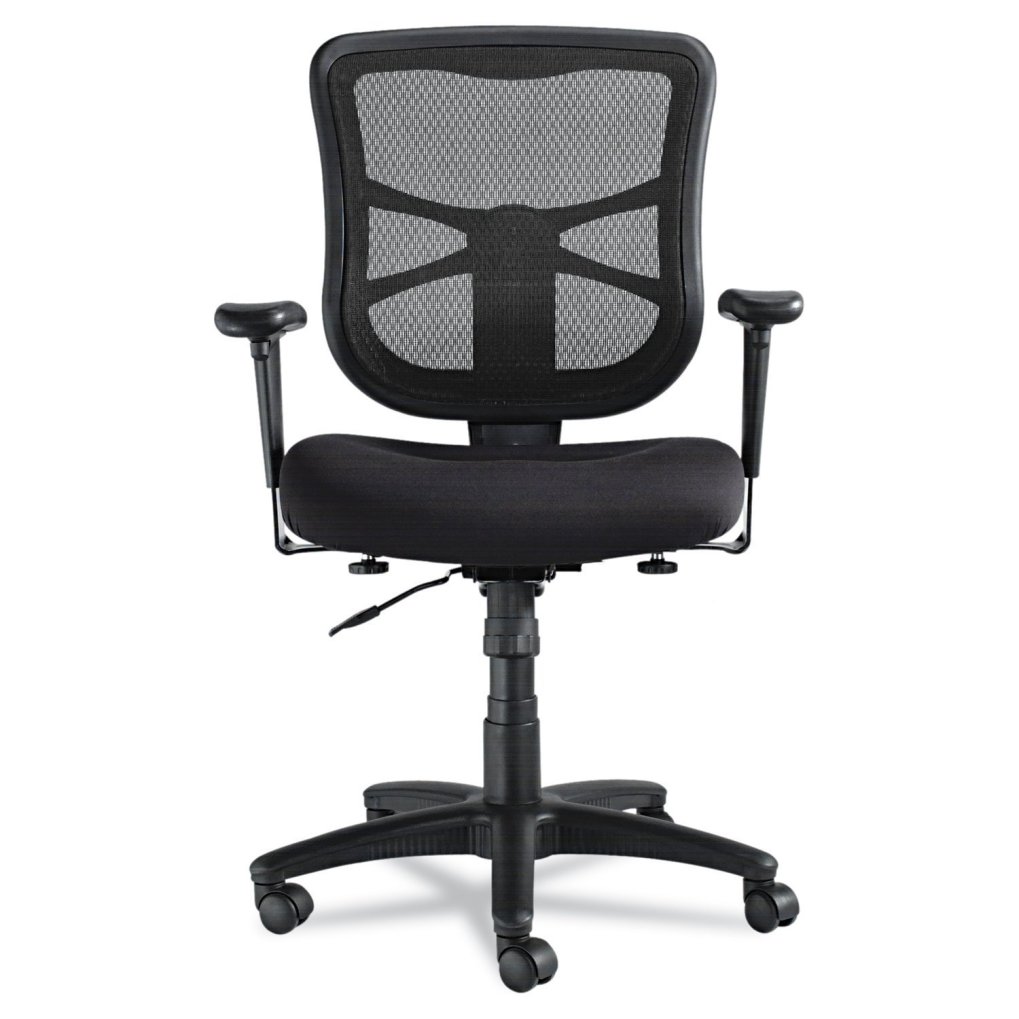
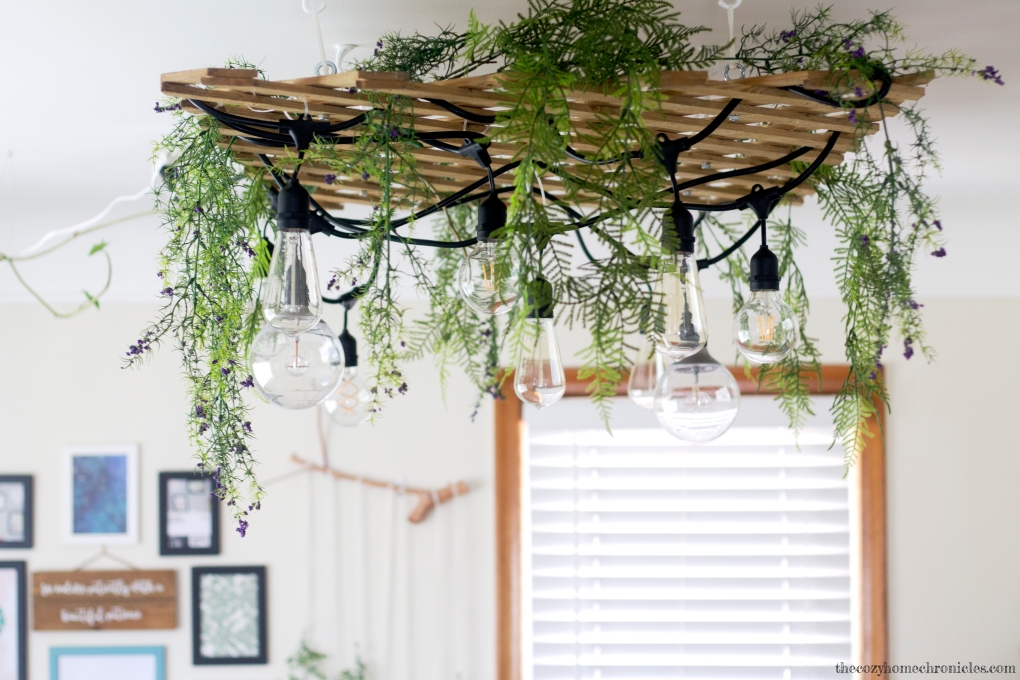
Obviously many of the elements will change as we proceed with the makeover but there are some things that we will stick with: neutrals and black with subtle pops of color, copper accents, and plants. To cut on costs, I will make use of free printables for the wall decor and I will also hit thrift stores and garage sales for much of the small storage furniture and decorative accessories. What I imagine we will spend the most on are office chairs and a rug. Unless by some miracle we hit the thrifting jackpot. The biggest challenges will face are keeping the cost low and balancing between function and aesthetics. My brother really wants a super comfy, ergonomic executive chair and unfortunately those are not the most visually appealing.

71xQWAfmXqL._SL1500_
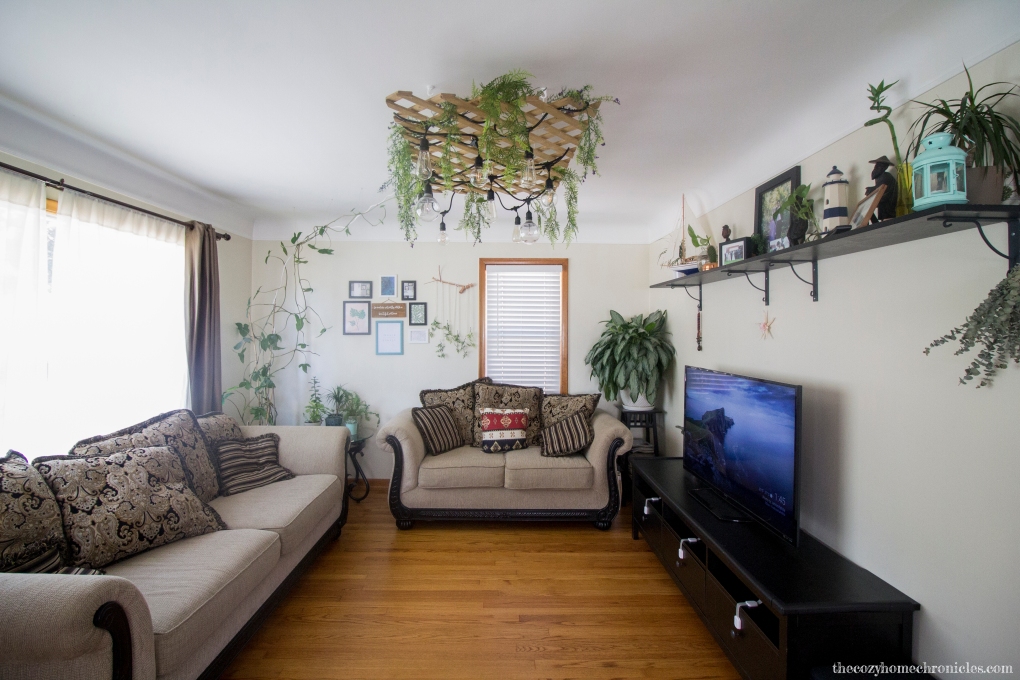
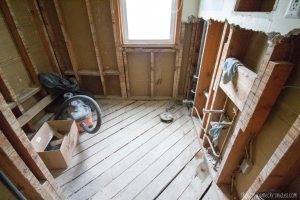
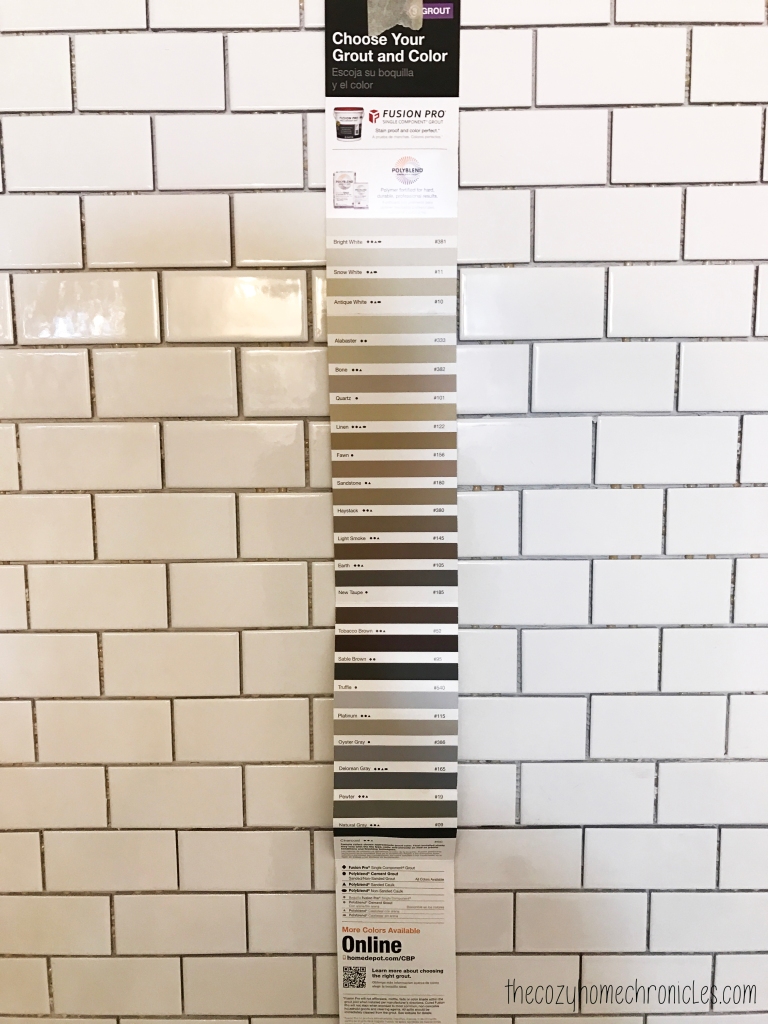
In terms of timeline here are where things stand. My brother is currently cleaning out the office {if you’re reading this bro, you better get on it ;)} to get it ready for painting. As you can see the walls are really dark so we will be picking out a fresh white to brighten up the space and get it primed to be ONE inspirational work space.

WEEK 1: Empty office, tape around the walls and windows, and paint

WEEK 2: Install shelving and organization systems

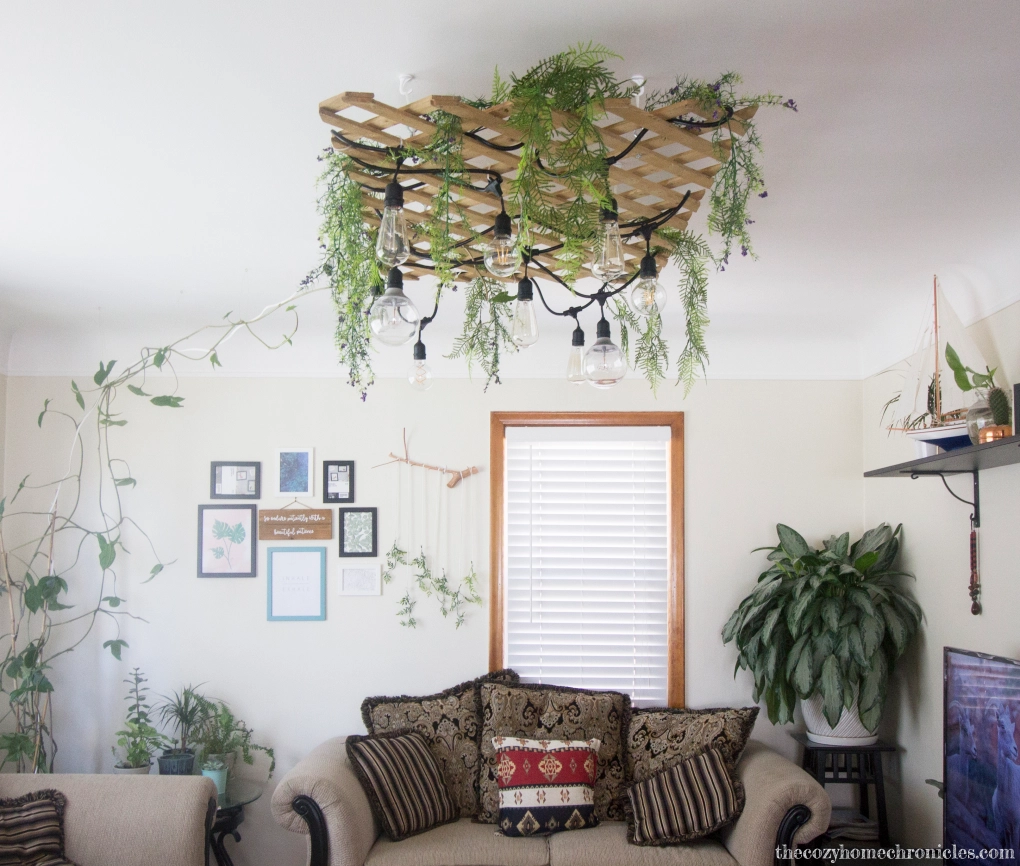
WEEK 3: Change light fixture

WEEK 4: Install window treatments

WEEK 5: Organizing, styling, and decorating

WEEK 6: Cleaning and Final Reveal

Anyone else working on a makeover for One Room Challenge? Feel free to share in the comments below, we would love to hear what you have planned! Until next week 🙂

If you liked this post please follow us and share!

Instagram


DIY Fall Harvest Wreath

IMG_5649

How is it already October?! In less than one month our daughter (aka Hobbit #2) will be turning one years old and we are feeling all the feels 😦 It doesn’t help that our days are filled with schoolwork and housework, with little time for much else. However, that doesn’t mean we can’t find a way to usher in one of our favorite seasons. As you’ve probably gleaned from our autumn tablescape post, we are really digging the more muted and subtle fall colors (think burgundy, peaches, grayish greens) and I really wanted to celebrate those colors in the form of a welcoming wreath. Between Michaels, Target, and Dollar Tree, I found all the elements that perfectly captured the look I was going for. I dare even say, “I nailed it.” My sister-in-law found it hard to believe that something so pretty could be made from Dollar Tree florals but it can and for well under $10 and 30 minutes too. So if you’re looking for ways to make a beautiful autumn statement but are tight on time and money then this is the perfect project for you 🙂 If you want to see how it’s made then you’re in luck because tomorrow I’ll be collaborating with the CraftBox Girls to bring you a live tutorial at 12 pm EST.  Be sure to tune in, say hello, and get some crafting inspiration 🙂

Supplies
18′ Grapevine Wreath ($3)
Faux Florals ($5)
Faux Pears ($5)
Eucalyptus ($3)
Hot glue gun & glue sticks

Total Cost: $16 + tax

IMG_5627

Pro tip: Don’t forget to use the Michaels app for coupons. I always use my coupon to save 40% off any regular priced item. With the supplies that I purchased, I was able to make 2 wreathes for the price of 1 putting the total cost per wreath at under $10.

IMG_5609

Directions:

  1. Collect your florals, eucalyptus, and faux fruit and start placing them around your grapevine wreath until you are happy with the arrangement. You might have to move things around several times to get the desired look.
  2. Once you have settled on your design, you will need to glue each piece in place using a generous amount of hot glue, embedding the stem deep into the vine, and holding down for 20-25 seconds until firmly in place.
  3. Once all the pieces have been glued down and any excess strands of glue have been removed, you can hang your wreath on a hook or door wreath hanger.

IMG_5681

IMG_5669

IMG_5674

IMG_5672

Share your autumn stories with us below and if you liked this post please follow us and share!

Instagram


Falling into Autumn

Photo 2017-09-12, 4 12 12 PM

If you are coming here from Happy Haute Home, hello and welcome to our blog. It’s always wonderful to have new faces around here 🙂 Today we are excited to share with you our autumn tablescape which includes a fun and simple DIY table runner. Autumn is such a lovely time of year and I really wanted to create a space that celebrates the beautiful colors of the season while inspiring quiet introspection. Each season offers plenty to reflect on but there is nothing quite like reflecting on your harvest (physically and spiritually) and thinking about what can be improved upon for the next cycle when you begin anew.

“Every tree, every growing thing as it grows, says this truth, you harvest what you sow.”-Rumi

IMG_4417

If you haven’t guessed already from our latest home decor posts and Instagram feed, we are a tad into the bohemian look. Taken to it’s extreme, however, the boho theme can tend toward maximalism and appear a bit cluttered for our taste so I sought to create a clean design based on some of our favorite bohemian colors and elements: greenery, gold, yarn, textured glass, palm leaf, and patterned fabric.

IMG_4363

IMG_4367

IMG_4415

To pull this look together, I relied mostly on what I had lying around our home. For each place setting, I simply layered palm leaf placemats with gold chargers, white plates, and checkered napkins atop. For the centerpiece, I placed a small glass cup filled with eucalyptus and sage in the middle of a black candle dish and arranged white pumpkins, faux florals and pears, and real plums all around. For colorful touches, I included teal glassware, textured crystal, and gold flatware. I used my old amber essential oil diffuser bottles to showcase the dahlias and sage from our garden. The only thing I purposefully purchased for this tablescape (other than pumpkins) were the napkins. I really liked the flannel pattern and the farmhouse vibes they exuded, not to mention they were fairly inexpensive. For your convenience, I’ve included a list of the main sources down below for the all items I knew off the top of my head.


IMG_4397

Of course my favorite part of this whole tablescape is the table runner that I made. I am happy to report that the finished product turned out exactly as I had pictured: an oversized tassel. All you will need to make this table runner is wool yarn and scissors. Simply unspool the yarn and cut into strips longer than the length of the table. The hardest part is making sure not to tangle the yarn as you lay the pieces side by side. When you’re happy with the width of your table runner (I used three rolls of yarn) then tie each of the ends together and voila!

IMG_4386

IMG_4428

Sources:
Checkered napkins: Target |$3
Faux Pears: Target|$5
Palm Leaf Placemat: IKEA|$3
Gold Charger: Dollar Store| $1
Eucalyptus: Trader Joes| $3
White Pumpkins: Farmers Market| $2

What do you think of the final result? I know it doesn’t include the fiery red, yellow, and orange hues normally associated with fall but we actually find it quite refreshing. I’ll be using this very same color palette to make an autumn wreath early next month so stay tuned for that. If you’re looking for more autumn decor inspiration that’s subtle and beautiful then you’ll definitely want to head on over to my friend at Harlow and Thistle and see her creative display. Also don’t forget to check out the rest of the stunning tablescapes in the Falling into Autumn Blog Hop linked below!


Happy Haute Home | Harlow and Thistle | Mint Candy Designs | Live Laugh and Craft | The Cozy Home Chronicles


DIY Garden Lattice Light Fixture

IMG_3179

After finishing our crazy and exhausting 6-week bathroom renovation challenge in May, you would think we would wait just a littttle bit longer before DIYing again. But, nope. We just can’t help ourselves. It seems there is never a shortage of problems that need creative solutions and for us one of those problems has been the lack of adequate lighting in the living room. For the last four years we have made do with two lamps on our end tables and let’s just say, the amount of light they offered left much to be desired. Making our own light fixture has been a goal of ours and so we have been mulling ideas over for quite some time. All we knew was that we definitely wanted something that gave off rustic, jungalow, boho vibes. When I thought of inspiration that embodied these elements, my mind always went back to the same place: The lobby of a hotel in Philadelphia where I stayed for an anthropology conference.

IMG_6043

We also wanted something inexpensive; something we could make out of upcycled and thrifted materials. It didn’t take long for us to settle on the garden lattice sitting abandoned at the back of our garage. Not only did it give us the look we were going for but it also helped us solve another design problem: what to do with the overgrown arrowhead vine taking over the living room. And then, almost in what could only be described as divine intervention, something possessed my husband to stop at a garage sale where he found this set of 5 really cool Edison bulbs for $5 (normally they would go for around $7 a bulb). A few Home Depot trips later and we had settled on how to hang our new fixture. The funnest part of this whole process was seeing our random ideas become a reality. We are just so happy with the finished product and we love that it feels like a rustic garden in our living room. We like it so much, we just may consider putting another one up above the dining table 😉 Alrightie, here’s what you’ll need to make this fixture:

Supplies
Pressure Treated Lattice
(6) Ceiling Hooks – VersaHook
(10) Heavy Duty Cable Ties or Loop Wire and clamps*
(6) Metal Bolt – Everbilt 3/8 in. Eye Bolt with Nut
10 Vintage or LED Edison light bulbs
10 String Light socket
Faux Foliage

*Important: For safety purposes, make sure to use commercial cable ties with a tensile strength of at least 40 pounds or you risk the fixture falling down.

IMG_3170

Directions: 

  1. Cut the lattice to the desired size (we did 3ft wide by 5ft long) with a hand saw.
  2. On the lattice, choose 6 symmetrical points for hanging support and drill a hole for each. Secure the 3/8in eye bolts in each of the six holes.
  3. String the cable ties through the eye bolts and loop until completely secure. This is very important. You must not be able to open the loop or slide the tie back through the head.
  4. Measuring according to the location of the eye bolts on the lattice, drill 6 corresponding holes into the ceiling.
  5. Insert drywall anchors into the ceiling holes and secure the ceiling hooks by twisting.
  6. Just for a test run, install your fixture base by hanging the cable tie loops on the ceiling hooks. If everything looks good and sturdy then take it down and proceed with the next steps.
  7. Now for the fun part! Weave your string light sockets through the lattice and secure the wire in place with the remaining cable ties (you can use more if you like).
  8. Decorate your light fixture by arranging your faux foliage around the lattice either by weaving the stems through the lattice or using glue or a staple gun for a more permanent fix. Make sure to place the foliage a good distance away from the light bulbs or they can burn.
  9. Install your completed fixture by hanging the cable tie loops on the ceiling hooks.
  10. Finally, screw in your Edison bulbs, plug in the light, and enjoy the beautiful view!


IMG_3164

IMG_3171

With the lattice and the Edison bulbs as the base, you can customize this fixture for any home decor style with just a coat of paint and greenery of your choice. You can hang flower stems, eucalyptus, lavender, air plants, etc… The creative possibilities are endless. If you do attempt to make this, be sure to share and tag us so we can see 🙂

If you liked this post please follow us and share!

Instagram


Taking the Necessary Steps in Becoming a DIY Home Gardener

To accomplish anything in life, you have to start somewhere. While the commitment to dive right in is necessary, knowing where to begin is arguably the most important part. Whether it’s deciding to tackle your own home renovation or even a simple endeavor such as gardening at home, you have to learn some basics if you want to taste success. Starting a vegetable garden at home is simple; all budding horticulturists need is a decent amount of space and the right materials to start laying the foundations. Before setting up your garden, here are a few things you should know.

IMG_2203
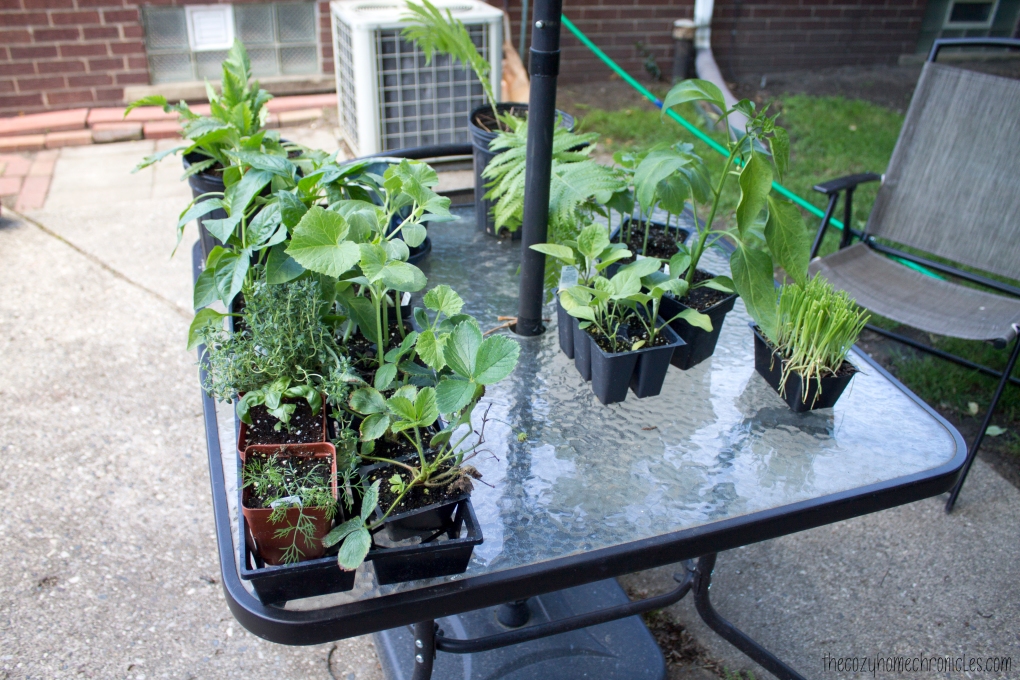
It’s vital to give plants the sunniest spot as possible in your yard. If you live in a place with unpredictable weather then investing in a greenhouse, regardless of the size, may be beneficial. As a benchmark, experts recommend using smaller framed models that feature clip-in glazing systems, as this type of greenhouse can fit in almost any corner of the garden. The wonderful thing about greenhouses is that you’re no longer limited by the weather but instead can grow all year long. If a greenhouse proves to be too tedious, do-it-yourself gardeners can get inspiration from home bloggers on how to build a raised garden bed from scratch. Raised garden beds may not offer protection from bad weather but they do keep away some pests, including weeds.

IMG_2166

Once you have chosen the location and the material foundation of your garden, you can begin the fun process of planting. Not sure what to grow? The experts over at Thompson and Morgan have a list of the easiest vegetables to grow in your backyard. Of course planting is the easiest part. In order to ensure that you have a successful harvest, you will need to maintain your garden through watering and weeding. By not regularly cleaning your garden, you run the risk of entanglement or, worse, a gradual takeover of your plants. In terms of what to use when trying to get rid of weeds altogether, it’s better to approach this in a non-chemical sort of way by pulling out the roots using a shovel or trowel. On the other hand, if there are persistent wild plants with spreading wiry or deep roots, then there are some natural-based herbicides that can do the trick.

IMG_2195

It’s also best to cut the grass around the garden as this will keep your garden looking aesthetically appealing. Tending to long grass and dense flower borders, also reduces any viable areas where pests, such as slugs and snails, can hide and destroy your plants. This upkeep can be easily accomplished using your average lawnmower. By perusing through the extensive list of lawnmowers on Screwfix it’s evident how manufacturers have started to produce lightweight models ideal for the modern day gardener. These cordless mowers are ideal for getting into tight spaces and are easy to maneuver unlike the heavy duty mowers of the past. There are also plenty of eco-friendly electric options for those who want to reduce their carbon footprint.

IMG_2162

If you want to eliminate that kind of maintenance all together, you can opt to put a pathway made of pavers or woodchips in between your garden beds as suggested by Toby Buckland, a well-known English gardener, TV presenter, and author. For more gardening advice, including ideas about what to plant, check out his beginner’s guide in The Telegraph. The more you know, the easier it will be to dig right in. Happy Gardening!

IMG_2137

If you liked this post please follow us and share!

Instagram


Getting the heart and home ready for Ramadan

IMG_1964

It’s been a busy year for us and we are very grateful for all the fun projects and renovations we were able to do. However, with Ramadan just around the corner, we want to wind down a bit and focus on family and spirituality. It’s hard to believe that our babies are growing so fast (our son is turning two in just a month and our daughter will be turning 7 months) but now that they’re more attentive and communicative, we want to make the month extra special so they can grow up with fond and happy memories of our Ramadans together. For us, Ramadan is a month for reflection and growth. We enter this month as warriors, much like Paulo Coehlo’s Warriors of Light:

“Warriors of light are not perfect.Their beauty lies in accepting this fact and still desiring to grow and to learn.”

I wanted to capture this free-spirited approach in decorating our home and this sort of transformed into a colorful bohemian style tablescape since the dinning area is really where the family comes together to break bread and unwind after a long day of fasting. In this post I’ll be sharing some decor inspiration from our Ramadan preparations, including a family-friendly DIY project and a free printable you can frame to either hang up or place on your dinning table.

IMG_1898

This tablescape looks a lot fancier than it is. At the heart of it is a DIY Table Runner which is super easy to put together. I even had my son help out with the painting and he had a blast! All you’ll need is an inexpensive white table runner, a mandala or doily stencil, acrylic paint for fabric, and stencil brushes. The rest is self-explanatory. I probably could have done a much better job but I was painting with a toddler so we got a little carried away with dipping the brush in paint.

IMG_6103

Besides the table runner, all you’ll need to achieve this look are a variety of colorful vases (and/or ornate lanterns) filled with fresh summer flowers. The vases you see in the images are ones that I thrifted from a local Goodwill for $3 total. The spirit of Ramadan is also about humility so I didn’t want to create a space that was too extravagant or wasteful. I arranged the vases along the table, intertwined with crawling vine garland ( I bought on clearance) and in between these pretty palm leaf placemats. I also created a framed quote art out of one of our favorite supplications that we listen to just before iftar time. I wanted it to be a reminder on the table that aside from all the delicious food we get to eat, Ramadan is so much more than that. It is about reconnecting with God and softening our hearts so that we can be better, more empathetic human beings.

IMG_1969

IMG_1925

IMG_1900

In the home, I hung up lanterns and garland from the ceiling that I had purchased in a hanging decor kit from Michaels. The colors matched up very nicely with the bohemian color palette I had saved on Pinterest. Decorating with family is such a wonderful way to build memories and traditions. My son was very excited about standing on the table with me to hang these up and it put the biggest smile on my face seeing him gush with joy as he pulled out the tape from the dispenser in an effort to “help me.”

IMG_2024

On the wall behind the dinning table, I hung up a Ramadan advent calendar that I purchased from Handmade Beginnings. Not only is it beautiful but it’s perfect for making each day interactive and for making the countdown to Eid fun and exciting for little ones. Since my children are still young, I am choosing an activity that is simple and age appropriate. I found these free Ramadan coloring pages on Crayola’s website so what I plan to do is get a 30+ count marker or crayon set and put a different color in each  of the calendar’s pouches. Each day we will pull out a new color and work on our Ramadan page and hopefully by the end of the month (and just in time for Eid) we will have a pretty piece of art to hang up 🙂

IMG_1985

IMG_1994

There you have it. An expensive and simple way to add a colorful touch to your table and home for Ramadan. I really wanted a space that was special, vibrant, and cozy for our family and our dinner guests and I’m really happy with how it turned out.

IMG_2002

What do you think? What are your favorite ways to make Ramadan special for your family?

Free Download:  Ramadan Printable_Color |Ramadan Printable_Black


If you liked this post please follow us and share!

Instagram


One Room Challenge: Week 6|Bathroom Renovation Reveal

Yesterday marked week 6 of Calling It Home’s One Room Challenge™ and that means it’s reveal time! We are so excited to share the results with you and see what other awesome bloggers have done. Seriously, after you’re done with this post go check out some of the other transformations. You will not be disappointed!

ORC
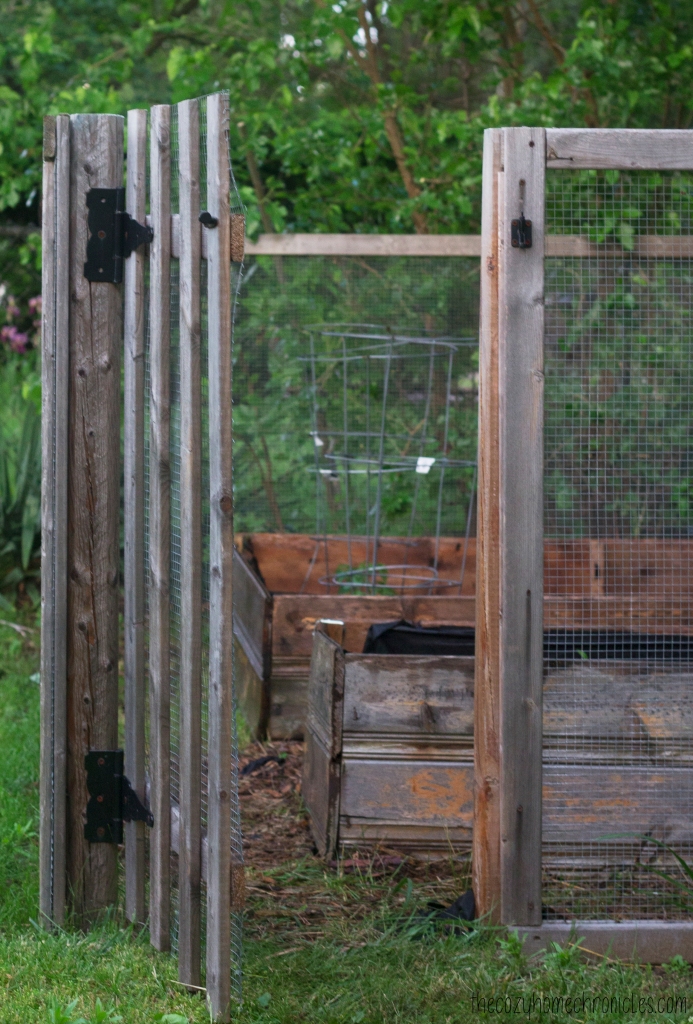
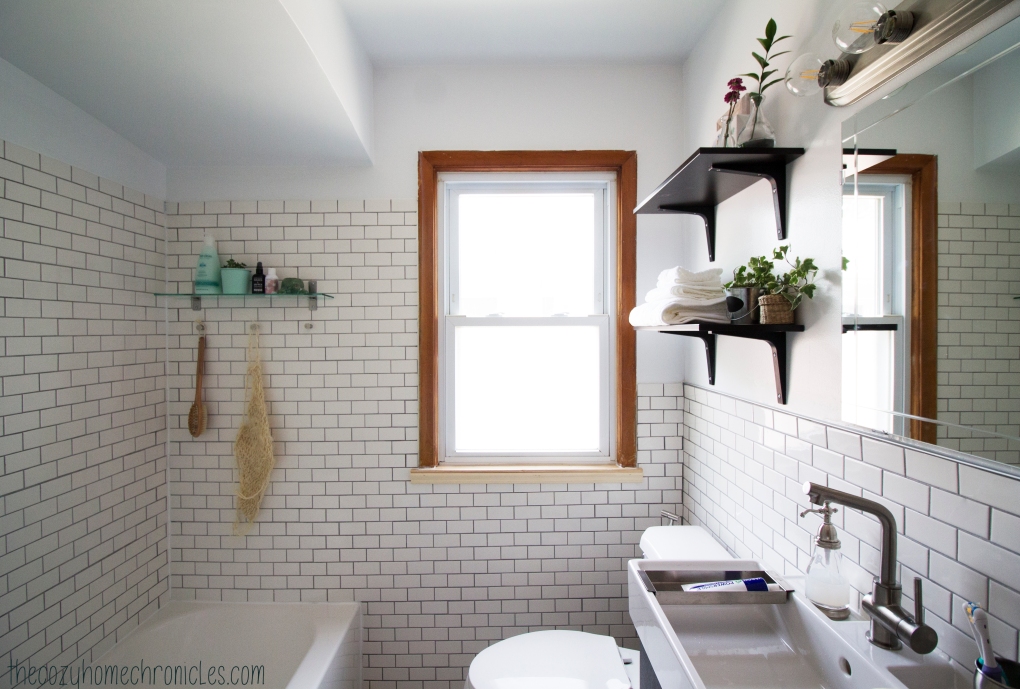
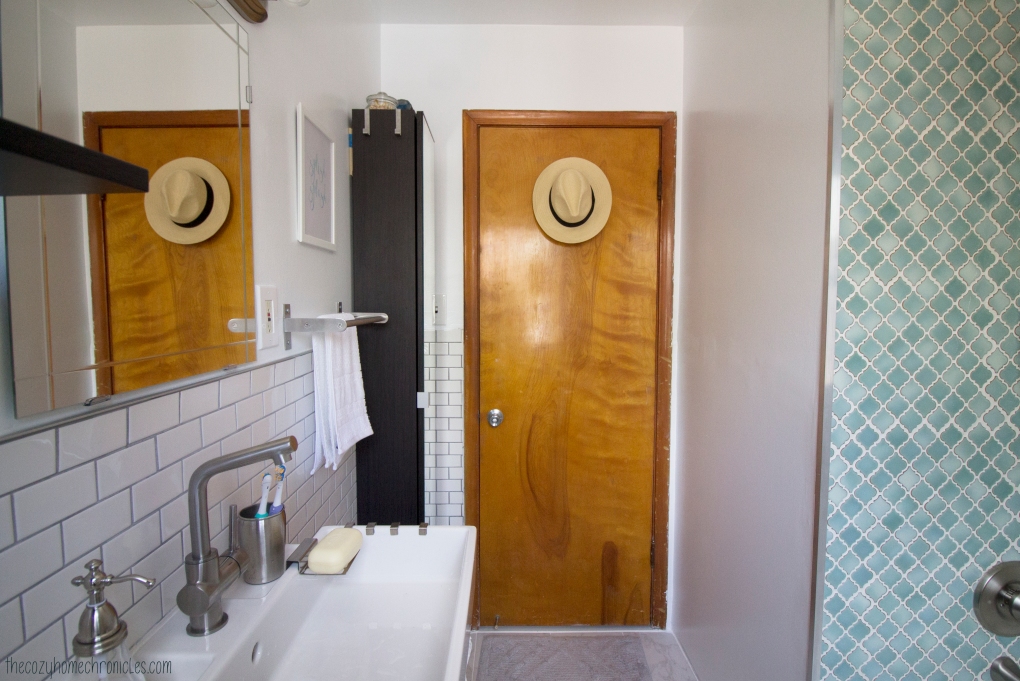
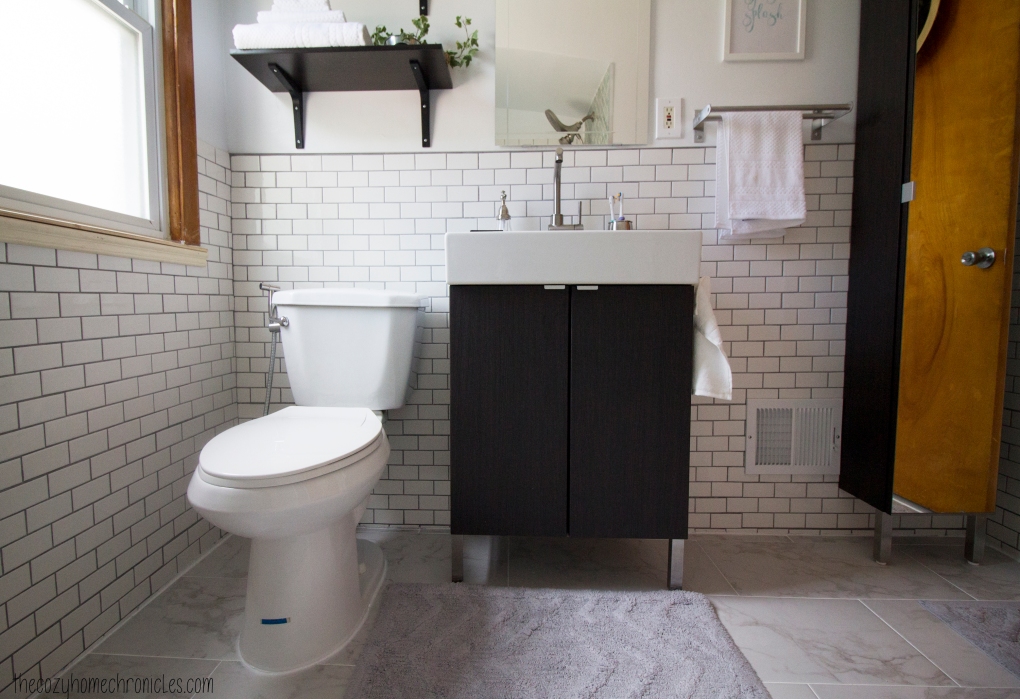
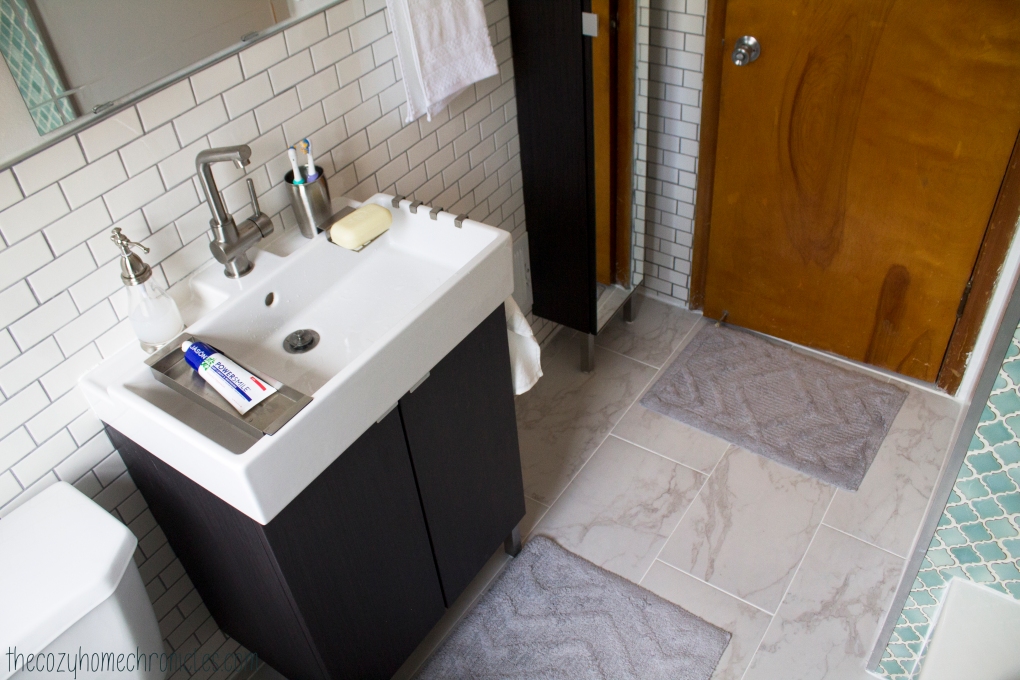
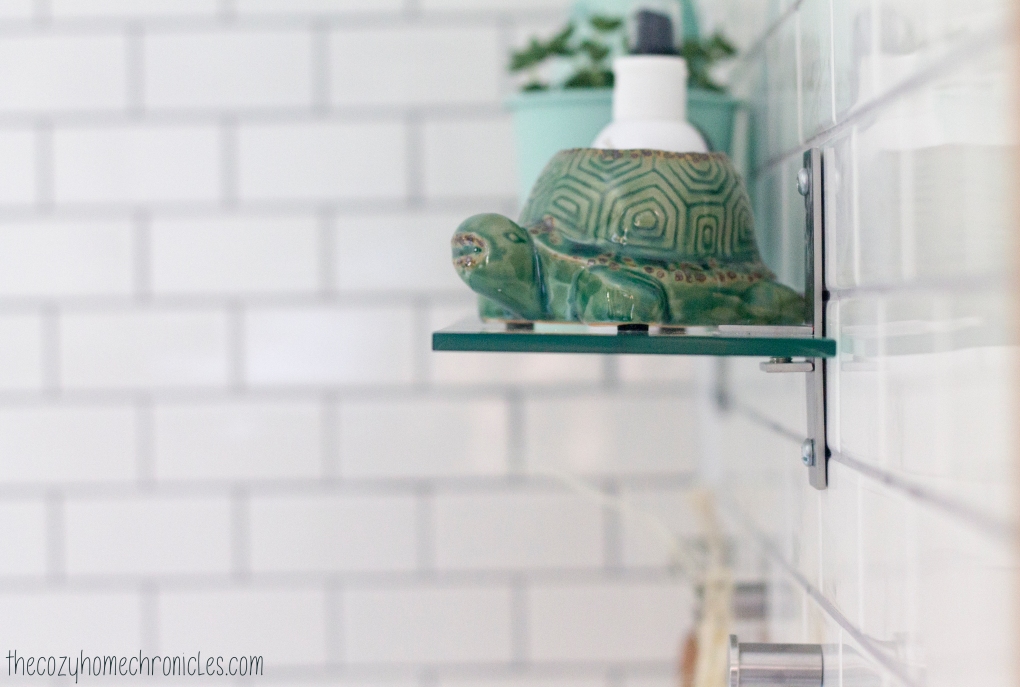
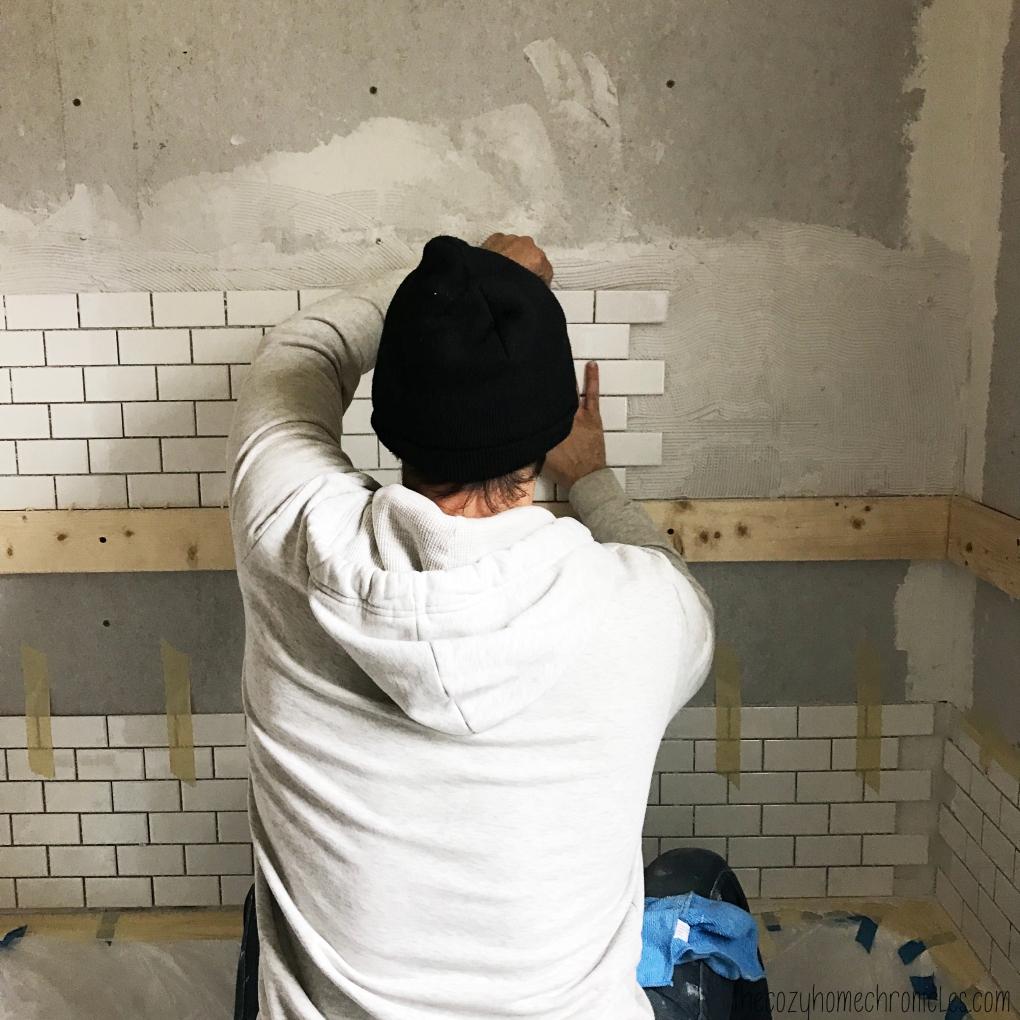
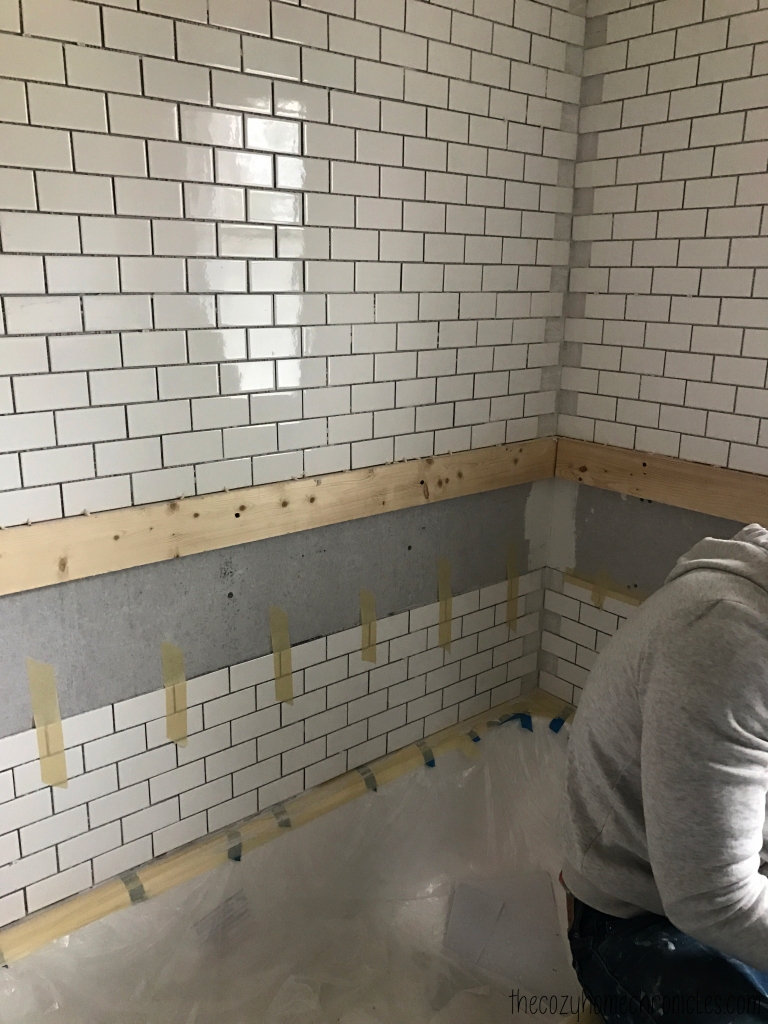
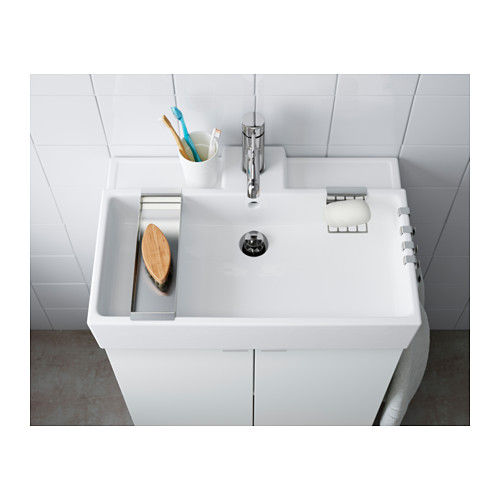
I wasn’t able to take pictures sooner because we were out of the house yesterday and we have guests staying with us but I finally got around to it this morning. We thought we would have a little more time to decorate but time is up! There are still a few things we will be finishing up this weekend including installing the glass shower door, putting in the toilet paper bar (which will be back in stock at IKEA on May 14th), and staining the new window sill moulding but the bathroom is fully functional and oh so awesome. We also realized that we had not been properly linking up our posts to the Calling It Home site and we were a little discouraged that we had done all this work for nothing. But this renovation isn’t for everyone else. It’s for us.  All the sweat and blood (literally) that went into this project was for our family’s comfort and so before we get to the reveal, we thought we would recap our six weeks of hard work.

IMG_1136

Week 1 | Bathroom Renovation Preparation

IMG_1590Week 2 | Bathroom Renovation Demolition

IMG_1597Week 3 | Laying the Foundation for Tile

IMG_6453Week 4 | Mudding and Tiling a Bathroom

IMG_6526Week 5 | Tiling and Decorating a Bathroom

If you’ve been following along, you’ll know that we ran into some issues that cost us precious time. Because of that, we literally spent every day this last week working well into the early morning hours in order to finish on time. In just one week, we grouted and sealed the entire bathroom, primed and painted the walls, assembled and installed the vanity and storage cabinet, installed shelving and lighting, cleaned and caulked everything, and had the plumber come and connect the plumbing. Was it worth it? Totally! Although some features were not our first choice, we are very happy with the results. As you will see soon, our bathroom is unrecognizable. The white subway and Carrara marble tile totally brightened up and opened up the space. It looks so much bigger! Our favorite part, however, is the accent wall in the shower. We cannot wait to bathe the babies and enjoy the beautiful view. Without further ado…

.

.

.

.

IMG_2123

IMG_2064

IMG_2034

IMG_2052

IMG_2037

IMG_2067

IMG_2058

IMG_2099

IMG_2093

What do you think of the transformation? We would love to hear from you in the comments below. You can also follow along on Instagram @thecozyhomechronicles for other fun DIYs and projects. Up next is our summer garden 🙂

If you liked this post please follow us and share!

Instagram


One Room Challenge: Week 5|Tiling and Decor Inspiration

Today marks week 5 of Calling It Home’s One Room Challenge™ and that means we are less than one week away from the final reveal. We thought we would have a little more finished this week but with a grant application deadline that my wife needed to submit for, things got pushed to the side. As of now, all the tile has been laid on the floor and walls and we are getting ready to grout tomorrow. We have had our fair share of cuts and bruises (not to mention fatigue) but we are finally nearing the finish line and are so excited to share with you.

All right! Here’s what we have left to do:

1. Grout and clean the haze

3. Prime and paint the non-tiled walls

4. Install vanity, toilet, storage cabinet, and other accessories

5. Decorate and style

ORC

Progress:
Einstein was really on to something when he came up with his theory of relativity. It’s seriously hard to believe that we have been working on this project for a month now! To recap: We demoed and gutted the bathroom, installed the new bathtub and had the pipes replaced, installed new cement boards and insulation, mudded and tiled everything. Tiling was not hard but it was tedious because of all the cuts I had to make. The good news is that grouting shouldn’t take more than a few hours (if we can actually settle on a grout color). After that the plan is to do minor touch-ups to the drywall and then prime and paint. If all goes according to schedule, we hope to install the vanity this weekend and get the bathroom ready for the final photoshoot.

IMG_6526

IMG_6537

IMG_6551

IMG_6608

IMG_6689

This past weekend we went and picked out our bathroom furniture from IKEA and it was a bit more difficult than we had anticipated. The vanity series that we really liked only came in two depths: 11″ and 19″. Both of these were on the extreme ends of what we wanted. Ideally, we were looking for something around 15-16″ to maximize storage efficiency and spaciousness. We found exactly that but in a color that we weren’t so sure about. In the end we had to make the sacrifice and go with this one in black-brown. The major upside to this was the vanity sink. Every single thing about the sink that comes with this vanity series is beautiful and perfect. Okay, I know I’m talking about a sink here but it truly is a thing to behold.

lillangen-sink-white__0381414_PE556140_S4
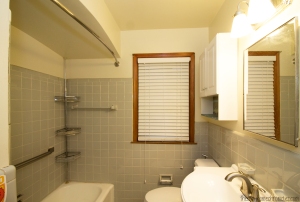
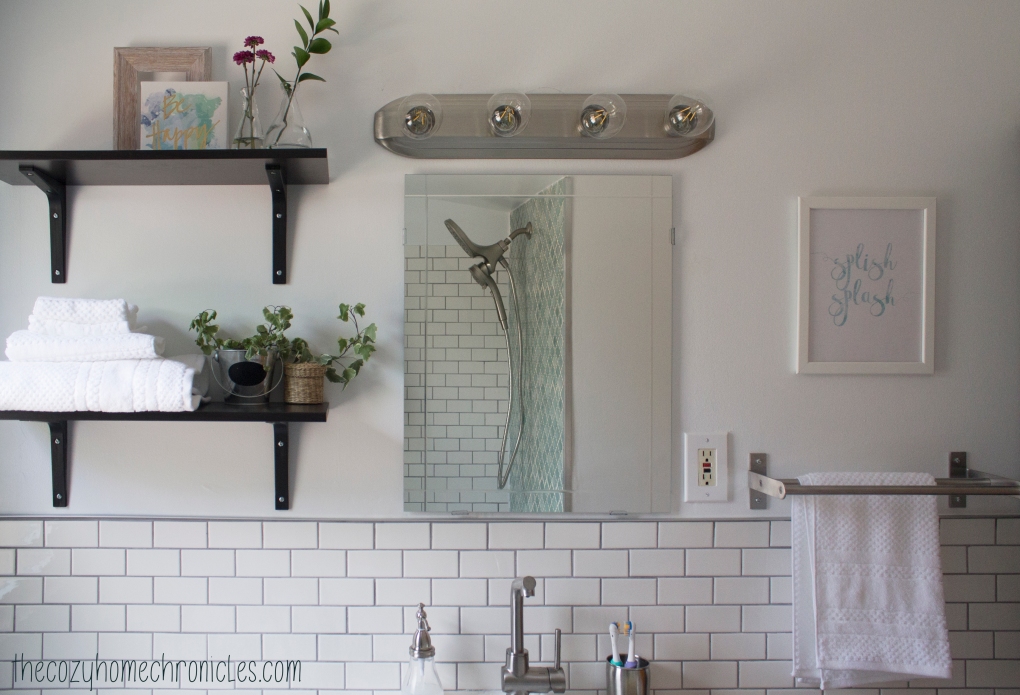
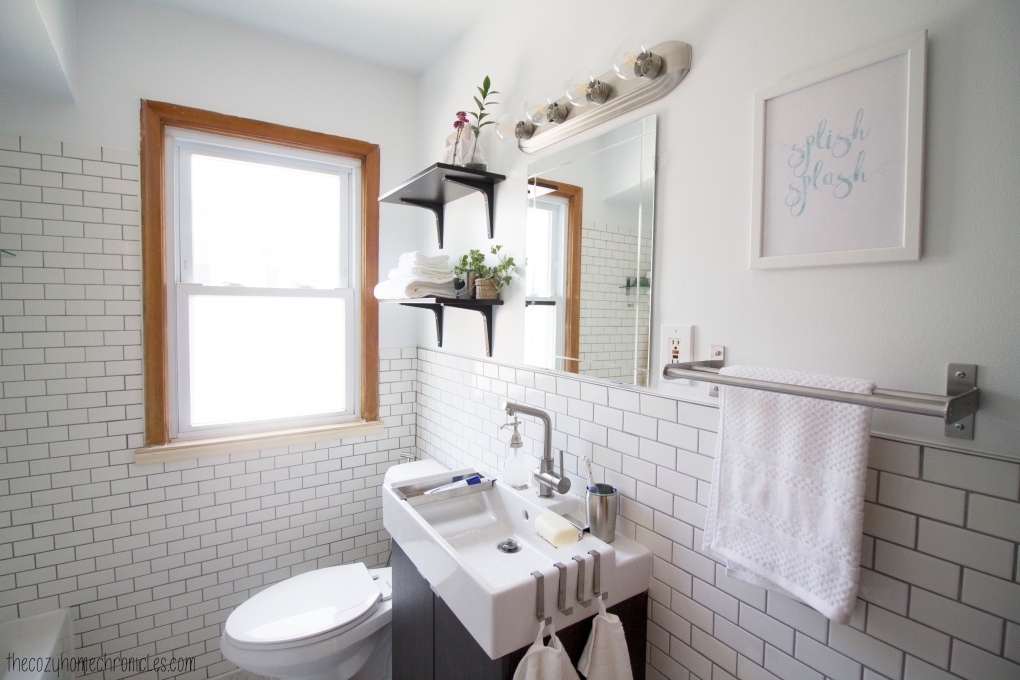
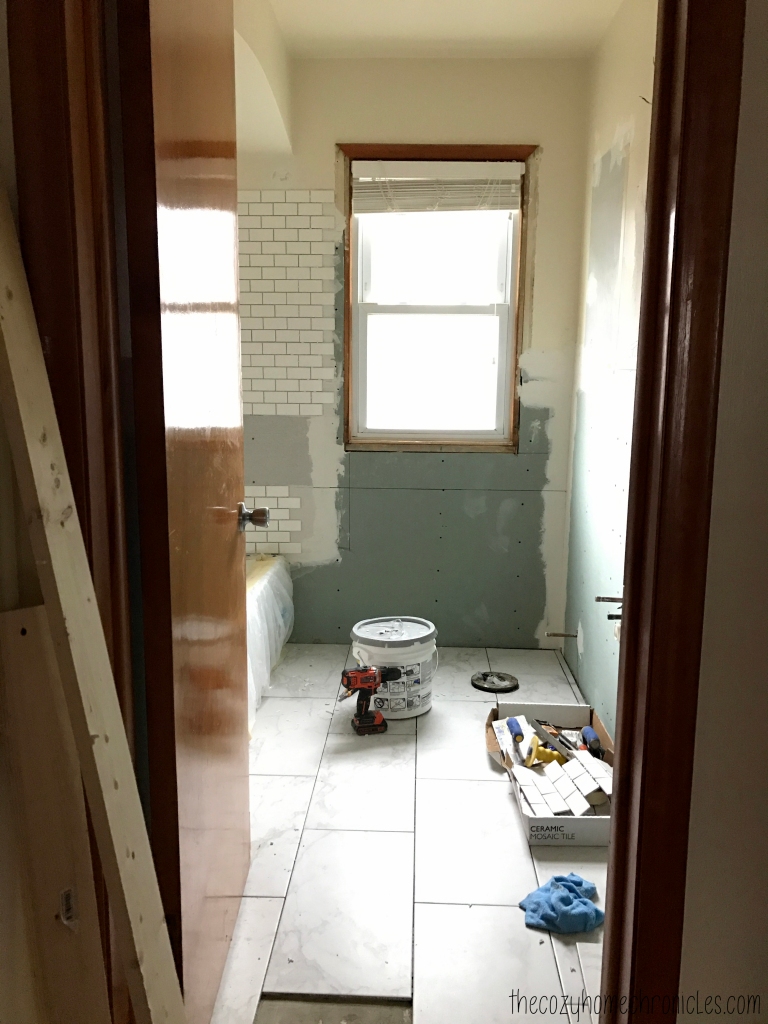
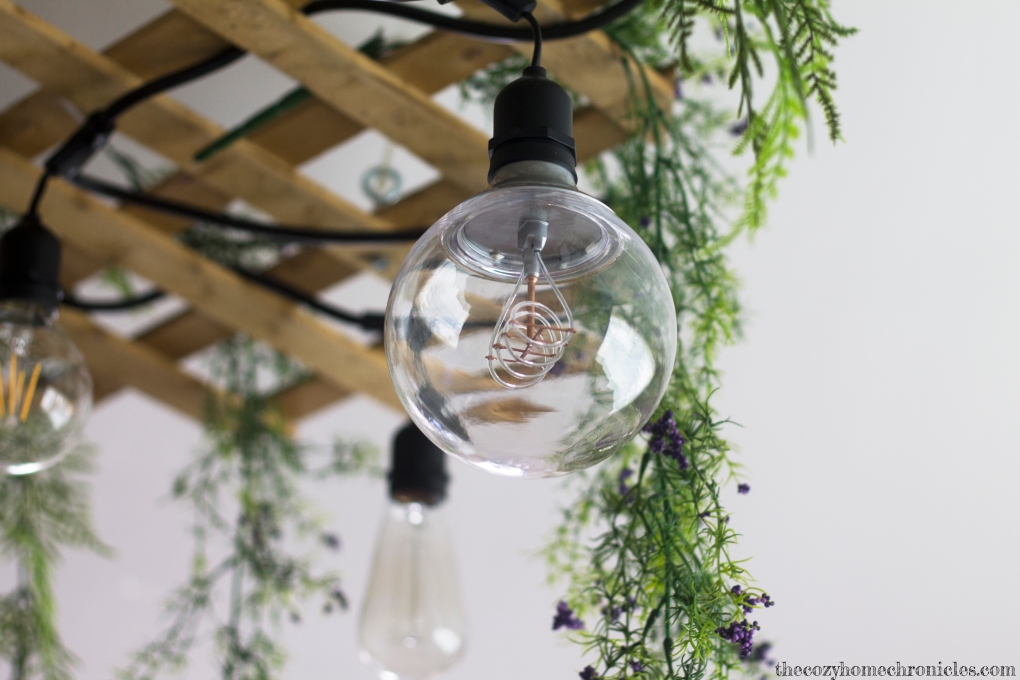
The light fixture was something else that we had to settle on this week and we went with an inexpensive bath bar light and these awesome filament globe bulbs. It might look simple but with the specific lightbulbs we chose,  it looks really cool.

Decor Inspiration:
We put together a mood board of inspiring decor items from IKEA, Target, Etsy, Urban Outfitters, and Anthropologie. We are not going to necessarily buy all of these things but creating this helped us decide on the look that we are going for: something earth-inspired, calming, and with a splash of color.

bathroom inspo

At the center of the mood board is a quote art that my wife made herself. It’s something our son always says when he’s splashing around in the bath and we thought it would make for a nice bathroom wall decor. We are also providing it to you as a free download printable. Think of it is a gift of appreciation for putting up with us and our crazy projects all this time 🙂

Printable Wall Art: splishsplash

Anyways, we could have shown you more progress shots but we will save that for next week. There’s nothing worse than a trailer that gives away a movie’s plot. The accent wall turned out more amazing than we could have thought so we will just let you revel in that thought until you can see it for yourself in next week’s final post.

Would you like to see our progress as it unfolds? You can also follow along on Instagram @thecozyhomechronicles for behind-the-scene videos!

If you liked this post please follow us and share!

Instagram


One Room Challenge: Week 4|Mudding and Tiling a Bathroom

We are hitting week 4 of  The One Room Challenge™ and that means we are less than two weeks away from the final reveal. Yikes! All the cement boards are completely up on the floors and walls and we are mudding as I speak (type). In other news, our accent wall tile arrived! And boy are we happy with the product. If you’ve been following along, you’ll know that we were torn about what color to go with for our planned accent wall in the shower. We had to order it online and we made the split decision to go with the mint green arabesque from Home Depot. It was a gamble to order online because pictures can be very deceiving but luckily these Merola tiles are more gorgeous than we could have imagined.

All right! Here’s what we have left to do:

1. Tile and grout
2. Install the vanity
3. Install the medicine cabinet
4. Connect the toilet and sink
5. Decorate

ORC

IMG_6449

Progress:
I know it’s been a slow first few weeks but we are feeling the fire now and desperately trying to finish on time. This past week was spent cutting and installing cement boards on the floors and walls. We also got rid of the debris from the demolition over the weekend. The city that we live in opens the dump to the public on the third Saturday of every month, which is awesome because you can dump all types of material except hazardous chemicals. It’s super convenient and the timing couldn’t have been more perfect. On the down side, I managed to get a nice scar on my jaw when a mesh wire from the cement boards caught my skin. Ouch!

Once the mud dries we will sand and then thoroughly remove all the dust so that we can begin tiling tomorrow. We will start with the floors first and then do the walls. Next week, we will be sharing a design board of some decor ideas and a fun little printable we have been putting together for wall art. Until next time 🙂

IMG_6453

IMG_6471

IMG_6469

Would you like to see our progress as it unfolds? You can also follow along on Instagram @thecozyhomechronicles for behind-the-scene videos!

If you liked this post please follow us and share!

Instagram


Spring and New Beginnings

Happy Thursday friends 🙂 Guess what? Urban Jungle Bloggers, hosted by the inspiring Igor and Judith, is back with another season and this month is all about celebrating the circle of life. As if right on cue, many of our indoor plants have begun to show signs of new life. Our windowsill basil flowered beautifully bringing with it the sweet aroma of summer pesto.

IMG_0737

Our fern and white elephant leaves are unfurling gracefully and it is such a joy to watch. Now that we are parents, we find ourselves more attuned to the growth surrounding us in our home. It is a bittersweet reminder that our little humans will continue to grow up but also inspiring to know that the world progresses through incremental changes. How can we allow ourselves to mentally and spiritually stagnate, when our physical body and surroundings are on a continuous path of growth?

IMG_0739

IMG_0729

We are especially happy with our rooting pothos. We now have two living separately in clear glass vases and they have successfully stayed alive in water for over a year now. Not only do they look beautiful but they require very little maintenance. If you’re thinking of bringing plants into your home but think you have a black thumb then this is definitely a plant you should consider starting out with.

IMG_9587 copy

Meanwhile outside, our backyard is blossoming with life. A variety of birds including woodpeckers, cardinals, and blue jays have returned to our feeder. We are really excited to finish our bathroom renovation and turn our attention to our garden and landscaping. We have a garden inspiration board on Pinterest that we have been adding to and we can’t wait to make our imagination a reality. Anyone have any grand garden/landscaping plans? We would love to hear from you in the comments below.

IMG_0919


IMG_0926

IMG_0936

 If you liked this post please follow us and share!

Instagram