One Room Challenge: Week 3|Laying the Foundation for Tile

We are hitting week 3 of The One Room Challenge™ and boy has it been rough! We just finally finished the demolition this past weekend and up until an hour ago our bathroom was completely gutted. Right now we are seriously questioning if we can finish on time and that’s been a bit disheartening but we are pumped to make it happen. It’s called a challenge for a reason, right?! In this post we will be sharing why our progress has been slow as well as some mistakes that we made so that you can avoid them.

ORC

IMG_6067

Progress:
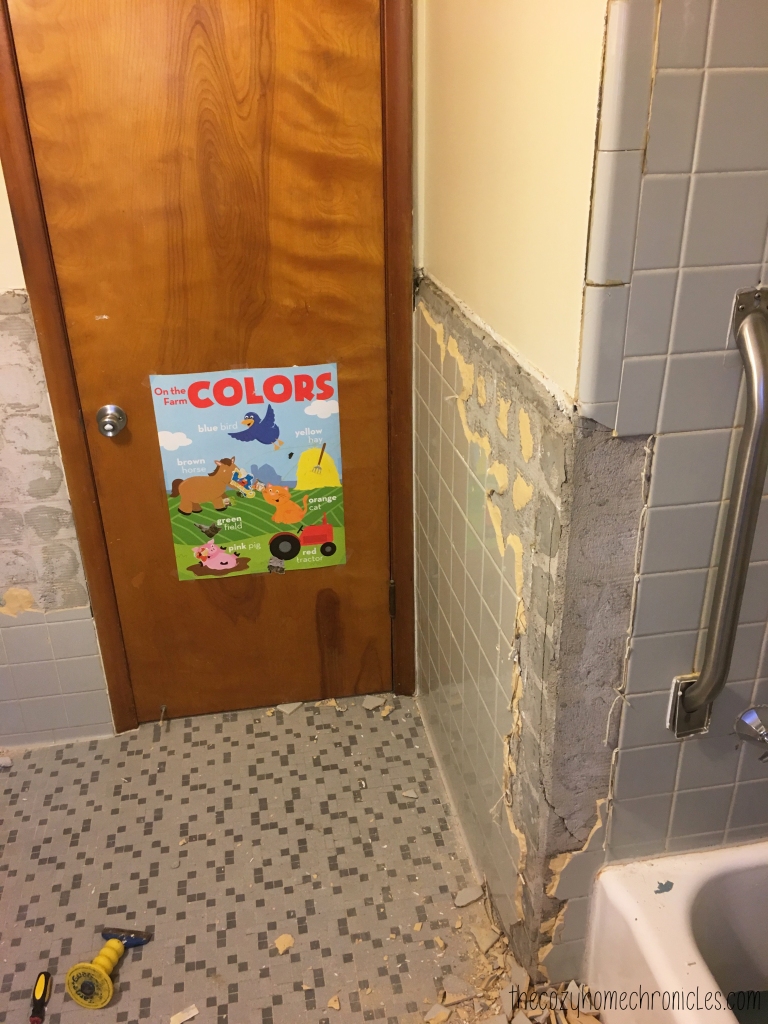
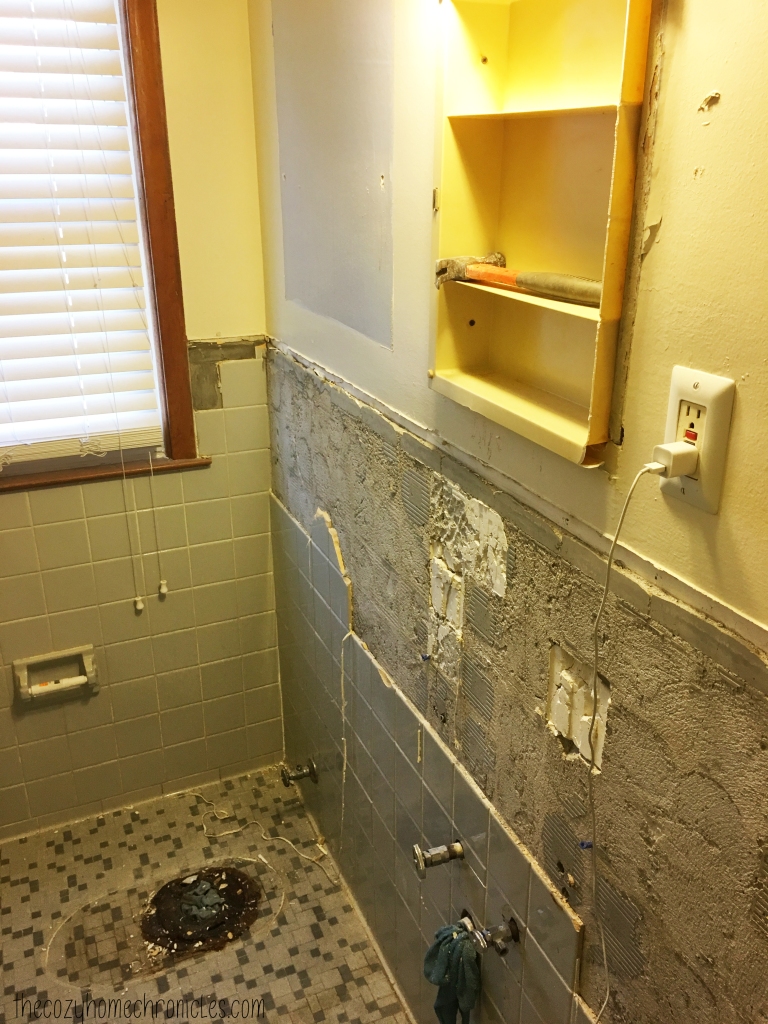
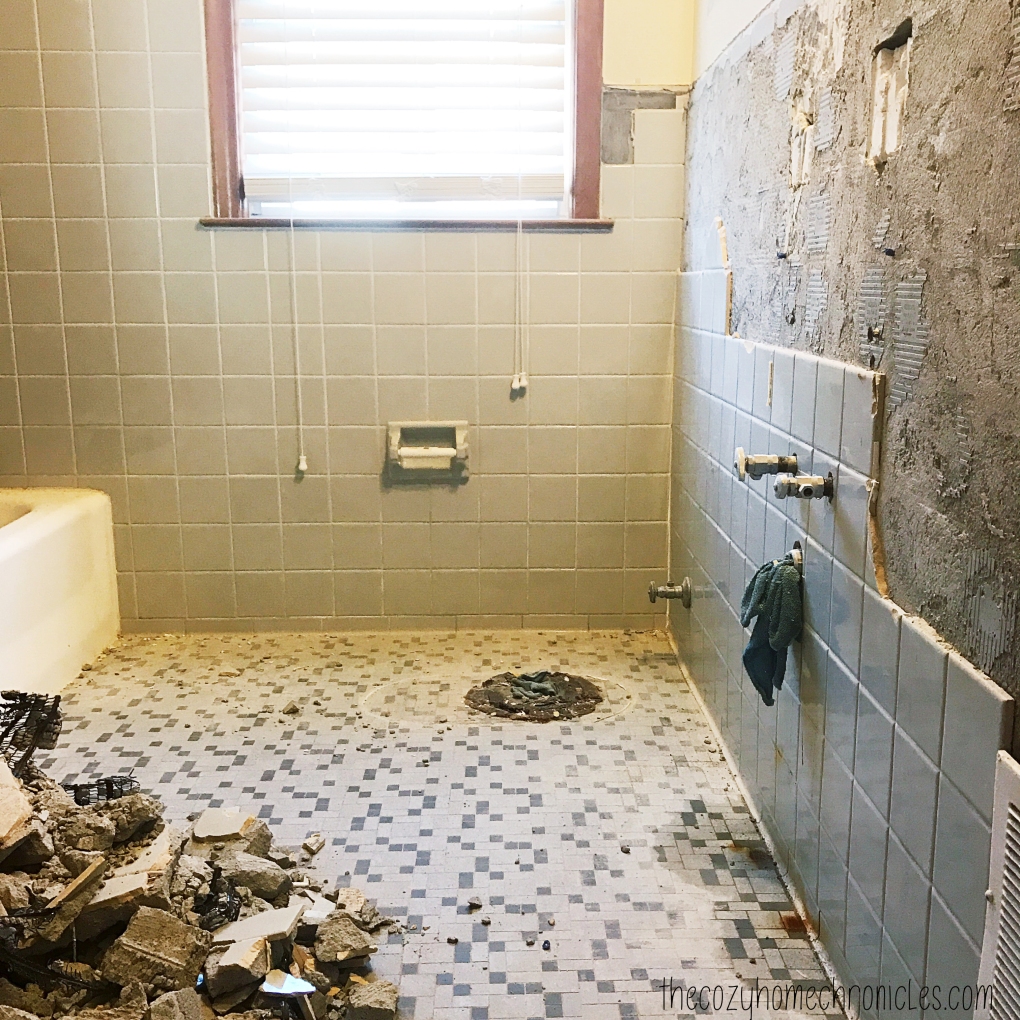
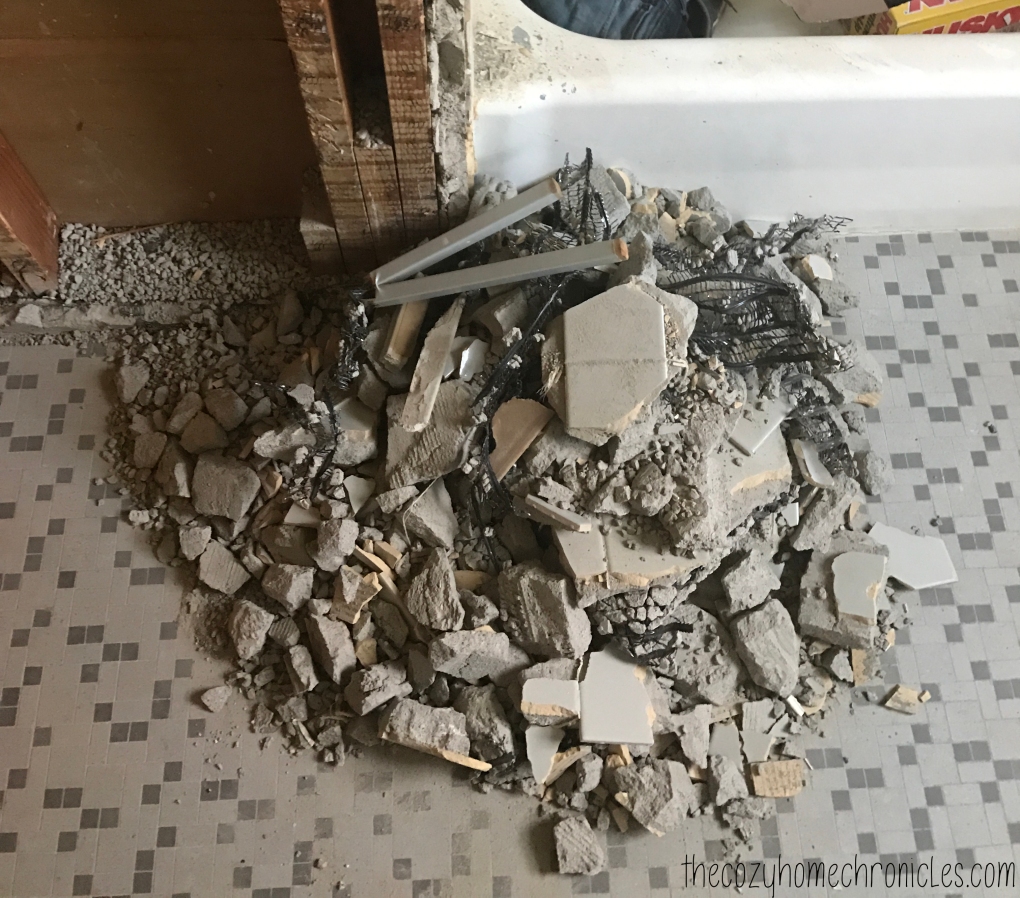
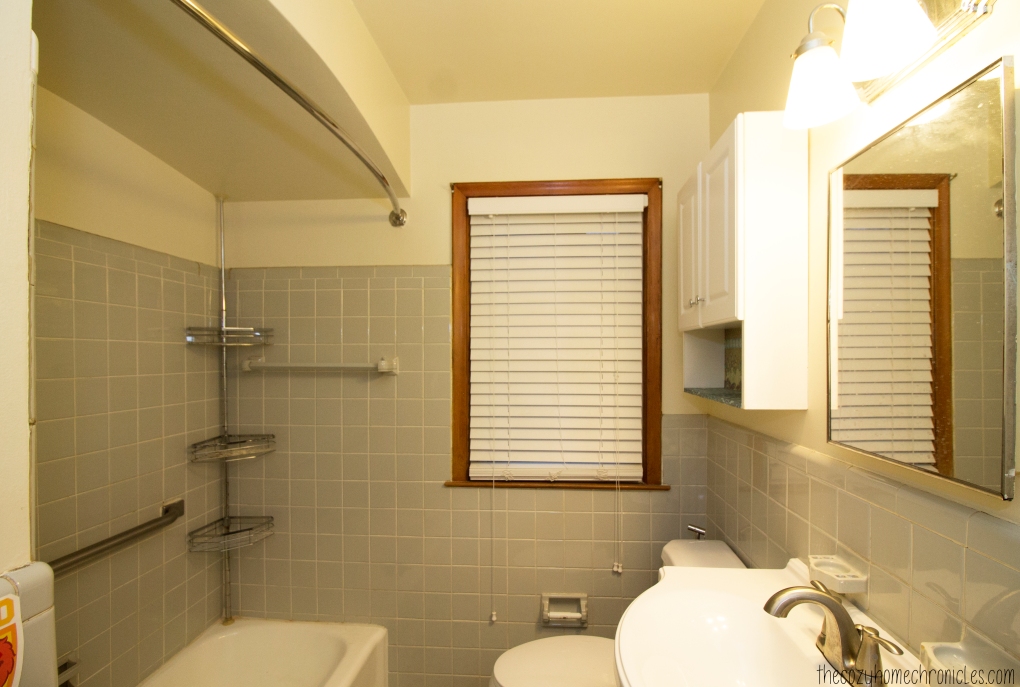
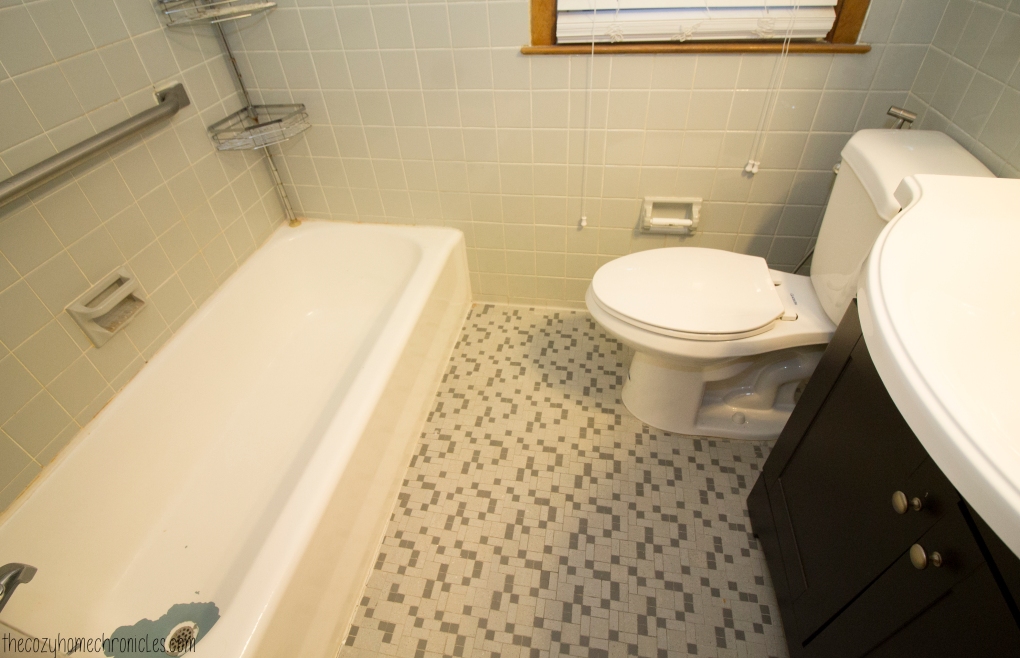
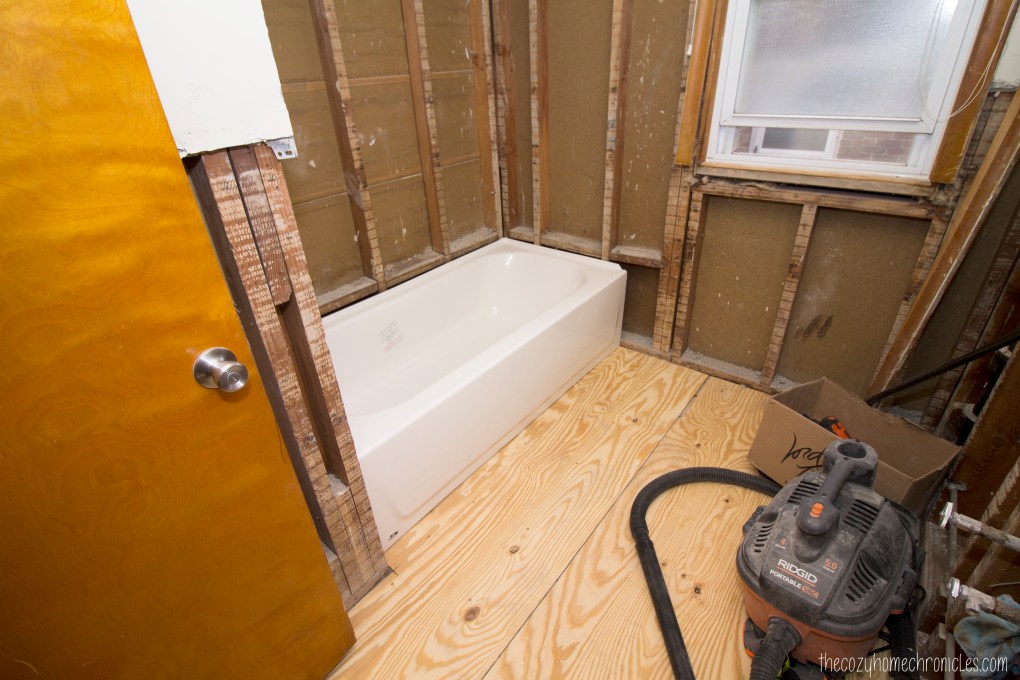
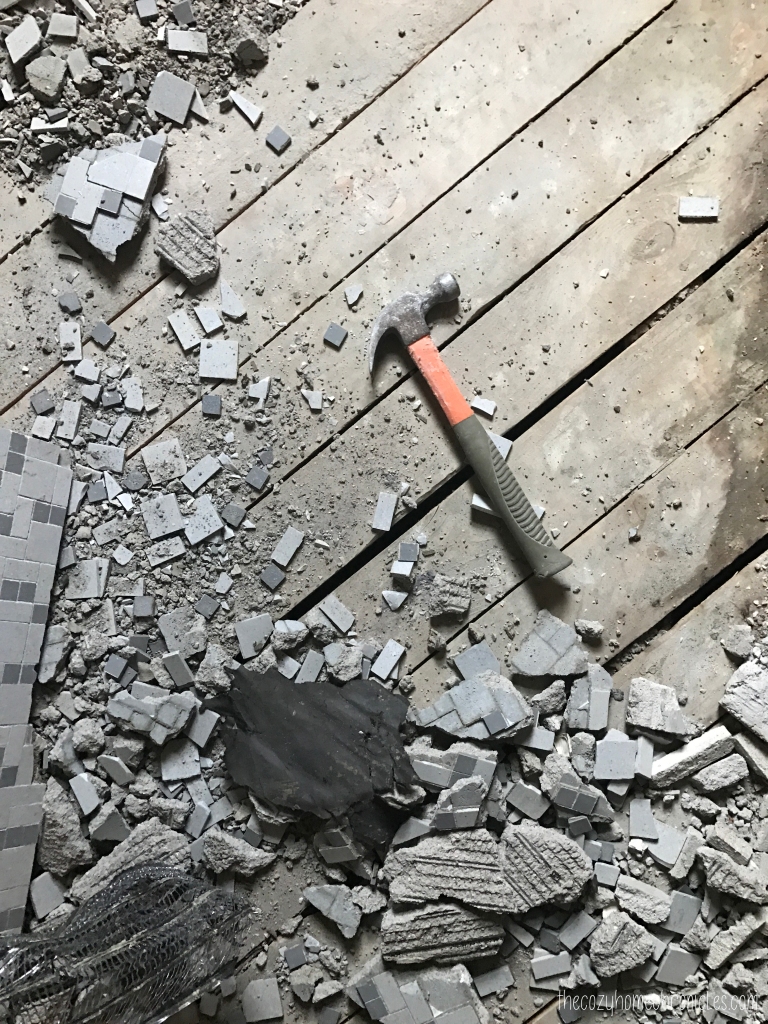
As you know from last week’s update, we had some hiccups with the walls because the tile wasn’t chipping away easily so we made the decision to take everything out all the way down to the studs. If you follow along on our Instagram stories, you might have seen how we completely demolished the walls and the floor in the bathroom. We also took out that hideous 300-pound blue tub (with help of course…that is why you have brother-in-laws!). With the walls and floors gone, we layed down the moisture barrier and plywood so that we can install the cement boards and tile. We have our plumber guy coming first thing tomorrow morning to replace some corroded pipes and get the bathtub and shower head/faucets all set up. Replacing plumbing wasn’t in our budget but now that we’ve gotten this far it doesn’t make sense to build something new on a faulty foundation. And those pipes were clearly nearing the end. Once the plumbing is all set, we can begin tiling!

IMG_5931

IMG_5960

Issues & Concerns:
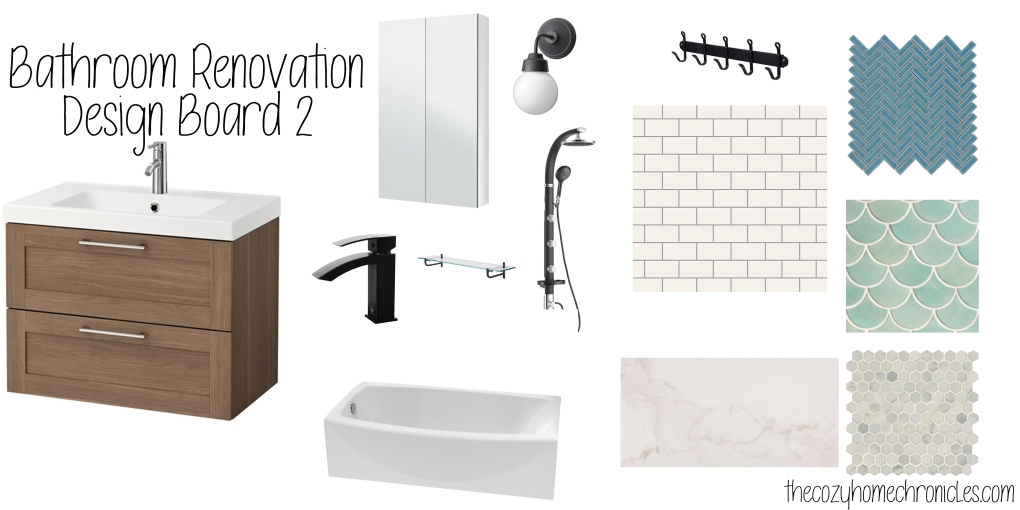
The reason that our demolition took two weeks (besides that we are doing this in the evenings with two kids) is that the removal of the tile proved to be much more labor intensive and involved than we had anticipated. This was an issue we had little control over. There is one blunder that we made, however, that cost us unnecessary delays. The bathtub. You see, there’s not much you can do without your bathub in place. During the entire brainstorming and design stage of this project, we focused entirely on the tile, vanity, and lighting and we completely neglected the bathtub! We just assumed that we could walk into a local Home Depot and leave with a reasonably-priced, 5-star tub. Yeah, no. Once we started looking into reviews and the different types (cast-iron vs. steel) we became so overwhelmed. Many of the good ones were not available in-store and would have cost us another 1-2 weeks of time if we ordered online. In the end we settled on a tub that had decent reviews and was available in-store. The awesome thing about it is that it is 2 inches deeper than standard bathtubs. It is now sitting in the bathroom so that the plumber can set it up and we can finally begin putting this room back together again. The lesson in all of this? If you’re ever considering doing a bathroom renovation on a tight schedule then have a bathtub selected and a plumber arranged to come before you start.

IMG_1590

IMG_6156

IMG_1597

Would you like to see our progress as it unfolds? You can also follow along on Instagram @thecozyhomechronicles for behind-the-scene videos!

If you liked this post please follow us and share!

Instagram


Laundry Room Remodel with IKEA’s Algot System

As you may be well aware of, maintaining a home requires not only constant work but some level of organization in order to cultivate a sense of peace and stability. Sometimes organization can be found through specific practices such as meal planning or journaling, other times it can be found in the design of a space that maximizes storage and efficiency. In our home we try to maintain a happy balance between both practice and design. Before having children, doing laundry was manageable because we could fold and put our clothes away in our bedroom without any interruptions. Now with two little ones, we can’t afford to bring the laundry up to fold unless we want our clothes scattered all over the main floor. We found that even though we had scheduled days for doing specific loads, our laundry room was just not equipped to deal with us sorting, folding, hanging, and ironing our clothing in one space. There was no counter-space to fold and no shelving to store laundry baskets and cleaning supplies. Something had to be done!

Here’s what our laundry room looked like before:

IMG_9673

IMG_9682

IMG_9680

IMG_9678

When we first bought our house, there was virtually no laundry room. There was just an old washer and dryer sitting in a dark and dusty, cement-walled basement. When we finished our basement in 2014, we made sure to include a space for laundry although we never put much more than a shelf and a sink cabinet. Fast forward to three years later and the realization that our laundry room was wasting valuable space. After much research and number crunching we decided that IKEA’s Algot system provided us with all of the features we were looking for at a very reasonable price. The Algot has a variety of options that accommodate any need from hanging rods to pull out drawers to drying racks. We are very familiar with the system because we had used it to replace our master bedroom and nursery closets but had never considered using it on an open wall. Until now.

In total, we spent $177 for the design we chose and we are very happy with the outcome. The system gave us the shelf space, hanging space, and counter space we desperately needed to deal effectively with laundry all in one space. If you are considering this system but are hesitant about what it will cost you, you can get 100% accurate pricing by designing your space through the Algot planner.

Here’s what our laundry room looks like after:

IMG_1006

IMG_1293

IMG_1355

IMG_1338

IMG_1344

Of course a remodel wouldn’t be complete without some fresh new decor. Not only did we want a space that is efficient but we also wanted one that is cozy and pleasant to work in. Below we are sharing some of our favorite, simple decor ideas.

IMG_1349

  1. Laundry Wall Decal: We had such a hard time settling on one from MyDandelionDecal’s impressive 5-star rated shop but in the end chose a piece that was classic and inviting. The lovely shop owner has set up a 20% off code exclusively for our readers so if you’re interested in supporting a small business while decorating your home, the code is COZYCHRONICLE20
  2. DIY Wool Dryer Ball Basket:  Since we do not use dryer sheets, we needed something to keep our dryer balls from rolling all over the place. Armed with a paint pen, a clearance-priced metal plaque, and a white crate, I was able to put together this adorable storage box for under $10.
  3. IKEA Ljusnan Seagrass Baskets: These baskets add such a rustic touch and are perfect for storing clothes pins and essential oils.
  4. DIY Framed Wall Print: IKEA’s $0.99 Fiskbo Frame meets Michael’s $0.69 scrapbook paper for an inexpensive pop of color and pattern.
  5. Cotton Stem Bouquet: Who else thinks fresh cotton when they think of laundry? This inexpensive mint green jar is the perfect pair to Kirkland’s cotton stem.

IMG_3532

IMG_1004

IMG_0997

As with all things in our home, this laundry room is still a work in progress. One thing that we still have yet to do is designate and design a corner for our cleaning tools. In due time! At this stage in our busy lives, however, this update gives us all the things we needed. It just goes to show you, a space doesn’t have to be fancy to get the job done.

If you liked this post please follow us and share!

Instagram


One Room Challenge: Week 2|Bathroom Renovation Demolition

Good evening friends! Today is exactly one week since we started our bathroom renovation project in conjunction with The One Room Challenge™ and so far we are still in the demolition stage. In this post we will be sharing our progress and where we stand currently. To be honest, I thought we would be done with the demolition by now but we all got sick and needed to take it easy. I didn’t want to be a hero and push myself past my limit so I took off the last two days. Slow and steady wins the race.

ORCProgress:
If you follow along on our Instagram stories, you might have seen that we already removed the toilet and the vanity over the weekend. The last major piece we need to take out is our bright blue 1950’s tub. We managed to remove the majority of wall tile from the existing cement boards only to realize that the mortar isn’t coming off as we had imagined. Considering the age of the bathroom, I’m not all too surprised. The good news is that we are a little more settled on the tile we will be using. After a recent trip to Home Depot, we really fell in love with this Carrara Matte tile for our floors. With white subway tile for the walls, it’s going to look great!

IMG_5529

IMG_5554

Issues/Concerns:
Since I will not be sticking to the original plan of leaving the cement boards, I had to purchase a new blade for the angle grinder so we can cut through the cement boards and take them out piece by piece. Removing everything all the way to the studs is both a good thing and a bad thing. The good is that we will redo the bathroom with all new construction materials, we will be able to do a clean, solid job from beginning to end. The bad is that we will have to spend more $$$ on purchasing drywall and new cement backer boards. Considering that this bathroom is a small space, the additional expenses shouldn’t exceed $250 (and this is considering that I will also have to remove and replace the subfloor with new plywood & moisture barrier). We just really wanted to challenge ourselves to do this renovation on an extreme (but realistic) budget so we could inspire others who might not otherwise consider renovating because of the cost.

All this fun stuff with the walls and floor removal, which I had hoped I wouldn’t have to deal with, will add between 1-2 weeks to the job. As is the case with any renovation project, you have to be prepared for stumbling blocks and plan accordingly. Despite our setbacks, I think we will still make it out in 6 weeks. We sometimes get discouraged thinking it will take that long, so we have to keep reminding ourselves that we have day jobs and two little ones and that’s why we can’t just finish it as quickly as we would like. Until next week 🙂

IMG_2598

IMG_3028

IMG_5470

IMG_5467

You can also follow along on Instagram @thecozyhomechronicles for the latest behind-the-scenes and videos of our progress.

If you liked this post please follow us and share!

Instagram


One Room Challenge: Week 1|Bathroom Renovation Preparations

We are super excited to share that this year we will be participating in our first ever One Room Challenge! Hosted by Lisa of Calling It HomeThe One Room Challenge™, is a widely anticipated biannual event every April and October in which twenty design bloggers take the challenge of transforming a space in just six weeks. Every Wednesday, the designers document their process while sharing their sources and professional advice. On Thursdays, guest bloggers, like us, can play along and support other guest bloggers that are also tackling a room renovation. We have been wanting to participate for a while now but last year we started our kitchen renovation much later than anticipated and so we weren’t able to play along.  We really hope we can get this bathroom done in the six week period but with two kids under the age of two and graduate school on our plates that is a tall order. We are diving right in regardless.

ORCLast week, in anticipation of this event, we shared two design boards and some bathrooms for inspiration. You can check them out here. We spent the last two days completely emptying out our bathroom and relocating to the bathroom downstairs. With me gearing up to start dissertation fieldwork this summer and my husband starting his MBA soon, we decided this project could not wait any longer because life will just get busier. Besides getting it done in under six weeks, we also need to stick to a tight budget. Challenge accepted.

Alright! Here’s what our bathroom looks like now:

IMG_1136

IMG_1138

IMG_1141

IMG_1144

IMG_1147

Ugh.  So much YELLOW. As a photographer, the urge to edit these images was intense but I wanted to capture the space exactly as is so we can all enjoy the final transformation. The wall tiles are still in great condition but they make the space so dark. We really want a bright clean look that white subway tile will definitely give.

4548dc7e-0269-4621-829d-718bb55c38b1_1000

We started some of the demolition today by taking out the toilet, sink, and vanity. The tub will be next to go followed by the tile and then it’s all rebuilding from there. We still haven’t fully settled on the floor tile, accent wall tile, and vanity but we will be deciding in the next day or so. The feedback we have received from readers, family, and friends has overwhelmingly been in favor of Design Board #2 which is interesting because we are leaning toward white marble floors and black fixtures. I guess you will just have to tune in next week to see where we are in the process. You can also follow along on Instagram @thecozyhomechronicles for the latest behind-the-scenes and videos of our progress. Until next week 🙂

If you liked this post please follow us and share!

Instagram


Bathroom Renovation: Design Inspiration

Happy Tuesday friends 😊  Today we are sharing two design boards and some inspiration for an exciting renovation we have planned…our main floor bathroom. This is a project we have wanted to do for quite some time but it was pretty low on our priorities because of time and budget. Now that we have finished our basement and renovated our kitchen, we figured it was a good year to do it (our painted tub is also starting to chip away). We also wanted our renovation to coincide with The One Room Challenge although right now we are not so sure because we can’t really start our project unless we have settled on a design. And that has been quite hard to do!

Here are just some of our dilemmas:

  1. Black, steel, or chrome faucet fixtures?
  2. Floating shelves or cabinets?
  3. Colorful or white/gray mosaic tile?

We know what you’re thinking! That may seem like everything but we promise there are some things we do know for certain that we want.

  1. White subway tile.
  2. A narrow vanity.
  3. An accent wall in the shower.

With that in mind, here are two design boards that we came up with based on what we like. They do look very similar but there are some major differences with regards to floor tile, vanity color, fixtures, and mosaic tile choices. The reason there are three tile choices because even with two boards we couldn’t narrow things down. Heck, we even have a Pinterest board dedicated to all the mosaic tiles we like. If there was no such thing as a budget then we would hands down go with Moroccan fish tile. Unfortunately what we were quoted for a small area was almost more than our entire bathroom renovation budget (boo). The real question now for us is whether we should go with a white/gray stone tile or a bright pop of color like emerald or mint green. We are leaning toward a splash of color even though white herringbone and hexagon patterns are beautiful. Home Depot carries gorgeous arabesque tile that are very reasonably priced (decisions, decisions).

Before we get to our boards, here are some bathrooms that we saved in our bathroom inspiration Pinterest board that have really stood out and helped us realize what features and looks we like. Now only if we can settle on something.

A Pop of Color or Pattern in the Shower

Black, White, and Wood All Over

tumblr_mw5rdhP7pS1qkgnf7o1_500

Source: Little Lulu

Small and White, Clean and Bright

20142_coba20a_01_PE379441

Source: IKEA

20172_coba09a_01_PH138884

Source: IKEA

Simple and Rustic

b0754fc708c8e4f9e4e44000dd8b8166.jpg

Source: Housley

All right. Without further ado here are our boards.

Bathroom Renovation D1

Bathroom Renovation D2

Our finished bathroom will probably pull features and inspiration from both boards and some of our favorite bathrooms but until we can be decisive and settle on a final look, there won’t be a finished bathroom. What do you guys think? Which board was your favorite? We would love to hear your thoughts and opinions in the comments below.

If you liked this post please follow us and share!

Instagram


DIY Framed Chalkboard Wall

Our son is getting to the age where he can almost color without trying to eat his markers and crayons (the keyword there is almost), however, he still attempts to scribble on the wall any chance he gets. Despite getting him a small IKEA table for all of his creative pursuits, he seems not to want to be confined to paper so we figured if coloring on the walls is what he wants then coloring on the walls he shall get. We have always been admirers of chalkboards…the rustic kind that you see in old schoolhouses in black and white movies. We figured a chalkboard would not only be nice for doodling and writing the dinner menu on but also as a fun educational medium to teach letters, words, and concepts.

IMG_9985

We did toy around with the idea of painting an entire wall, which has become popular these days, but in the end we decided a 6ft x 3ft area was plenty of space for all of us to use. Plus since we chose to put it in the hallway, adjacent to the kitchen, we wanted to preserve some wall space just in case we wanted to add wall art or organizers for a command center in the future. The awesome thing about making your own chalkboard wall is that for $10 of chalkboard paint, you can get a little over 100 sq. ft of coverage. That’s a steal when you consider that chalkboards the size of small picture frames are going for that and much more. The other really nice thing is that you can frame the painted area to achieve that authentic chalkboard look and you can do so using any type of wood you like in any stain you want. We went with an inexpensive white moulding from Home Depot that we nailed directly to the wall. We’ve come across DIY framed chalkboards that involve painting another medium and then hanging it up. Not only is a large chalkboard heavy and impractical to hang but it would be dangerous if you have little ones in your life. Just something to think about if you are not sure how you feel about painting a wall with chalkboard paint.

The only thing you need to be mindful of is if you have kids in the house then you will want to time your painting after their bedtime so the paint can dry without handprints all over it. Other than that, this chalkboard wall is super easy to put together and loads of fun. Our son loves scribbling on it, I love practicing my handlettering, and of course baba loves leaving silly doodles for us to wake up to. Yes, we are not ashamed to admit it… this chalkboard was as much for us as it was for our son.

Supplies
Chalkboard Paint ($9.67)
Wood Moulding
Trim Nails

Tools
Paint Roller
Paint Tray
Paint Tray Liner
Blue Painters Tape
Hammer

Chalk options
Chalkboard Wall Safe Markers ($12.95)
Regular Chalk from IKEA  ($0.99)

Note: If you end up taking on this project using similar dimensions to our chalkboard then know that you will have leftover paint. Don’t you fret though, we will probably come up with another DIY project to make use of it.

IMG_9973.jpg

Directions
1. Measure the area you want to paint and outline the area with pencil.
2. Apply the painter’s tape over your outline, pressing down firmly as you go so you don’t have any air pockets where the paint can seep through.
3. Mix the paint using a paint stick and pour 1/4 of the paint in the paint tray.
4. Gently dip your paint roller in and start painting your designated area in a “W” pattern. Make sure you don’t use too much paint on your roller as it will start dripping and take away from the smooth surface of the board.
5. Let dry for 4 hours before applying a second coat.
6. After the final coat is painted, let it set for 3 days (per instructions on the paint container) before writing on it.
7. Test your new board with the writing medium of your choice: old-fashioned chalk or chalkboard marker.

IMG_2460

IMG_2465

IMG_3138

IMG_9929

IMG_9954

IMG_9988 copy


Have you been wanting to put up a chalkboard wall? If so, what’s been stopping you?

If you liked this post please follow us and share!

Instagram


DIY Spring Succulent Wreath

img_0143
Can you believe it’s March already?! I mean just last year we were gearing up to begin our kitchen renovation and now here we are off on new adventures and projects. Spring is certainly in the air here in Michigan as we have had several days of 55 degree weather in the last few weeks. We are now preparing to usher spring into our home and what better way than to spruce up our entrance. I was recently at Jo-Ann Fabrics getting ideas for some upcoming projects and I came across several pretty spring wreaths covered in moss, crawling vines, foliage, and succulents. These wreaths screamed Lord of the Rings (big fans here if you hadn’t figured that out already) but the price…they ranged from $30-$60! I knew I could make one for much less and that’s exactly what I did (with a lot more succulents too). This is such an easy and fun project and it really made the door stand out with a pop of earthy green. This wreath is also the perfect project to make with children and can even be turned into a learning activity. Our son, who is almost two years old, had so much fun picking up the succulents and moving them around as I tried to settle on the final design.

In other news, we are super excited to share that were chosen to be ambassadors for National DIY Day which is coming up on April 2nd. Aside from this post, we will have some more fun DIYs coming your way in the spirit of celebrating creativity and crafting. We will also be hosting a local event in the Metro Detroit area, building raised garden beds for a community garden (stay tuned for more info). And speaking of DIYing for a good cause… As National DIY DAY ambassadors we are proud to support AdoptAClassroom.org and their mission to give teachers a hand by providing much-needed classroom materials so that their students can learn and succeed. National DIY DAY and The Cozy Home Chronicles are committed to supporting classrooms and providing tools for students and teachers to enhance the creative learning experience.

You can support AdoptAClassroom.org by Texting a Donation Today! Text the word “Give” to (678) 582-8594 and you will be prompted through a secure system to make a donation of your choice!

Alrightie, let’s make that wreath!

Supplies
18′ Grapevine Wreath ($4.99)
Succulent Mat ($4.99)
Moss rocks ($3.49)
Greenery of your choice ($4.99-$9.99)
Hot glue gun & glue sticks

Total Cost: $23.45 + tax

I purchased my supplies from Michaels over the course of a few weeks and used my coupons to put my wreath at well under $20. From the greenery I purchased, I had enough leftover to make another wreath if I just purchase more succulents and a grapevine wreath. So for the price of a store-bought wreath, you can basically make two or even three wreaths.

img_0132

img_0151

Directions:

  1. Collect your succulents, moss rocks, and greenery and start placing them on your grapevine wreath until you are happy with the arrangement. You might have to move things around several times to get the desired look.
  2. Once you have settled on your design, you will need to glue each piece in place using a generous amount of hot glue, embedding the stem deep into the vine, and holding down for 20-25 seconds until firmly in place.
  3. Once all the pieces have been glued down and any excess strands of glue have been removed, you can hang your wreath on a hook or door wreath hanger.

IMG_3495

IMG_0160

IMG_0166

Share your spring stories with us below and If you liked this post please follow us and share!

Instagram


Celestial Themed Nursery

Today we are doing something new while throwing it back to a project we completed before we started blogging: the nursery. When we first found out we were having a baby, we knew instantly that we wanted to create a celestial-themed nursery. My husband and I have always been astronomy nerds; we own a telescope, we’ve dabbled with astrophotography at the Headlands International Dark Sky Park, and we just love the sense of peace and mystery that the cosmos invoke (insert Interstellar Soundtrack here). The theme for the room really started coming together when we started thinking about words to describe the space we wanted to create: whimsical, colorful, adventurous. If those words were a color scheme, it would kind of look like this:

colorblast

We thought of children’s books that could fit in our theme and exemplified these adjectives. The one that stuck out was Le Petit Prince (The Little Prince) by Antoine de Saint-Exupery. Although we both didn’t read the book until we were adults, it really left a deep impression on us. We loved the profound wisdom and simplicity of the story but it was the childlike innocence and way of looking at the world that we found most beautiful. We wanted the nursery to inspire the inner-child in all of us.

img_2552

Naturally, I turned to Etsy for Little Prince inspiration and I found it in the form of a watercolor print based on a scene from the book. The colors in print were just so pretty so I contacted the shop owner and had a custom order made that included one of our favorite quotes from the book.

il_570xn-760340885_4psi

Everything else in the room was pretty much designed around this print’s color scheme. We ended up painting an accent wall with Behr’s Rise and Shine and putting up silver and deep yellow star and moon decals. We went with white furniture, a plush silver rug, and celestial-themed bedding from Babies R Us. While many people use design boards to collect inspiration for designing a space, we’ve put together a design board based on the space we created for those who are interested in designing a whimsical, celestial-inspired nursery. This board was created in part by things we do have in our own nursery (which is basically a playroom now) but it also includes things that we don’t have but find inspiring and beautiful. It’s fascinating to think that all of this was sparked by a piece of artwork based off of a children’s book but it just goes to show you how amazing the human imagination is.

nursery-recovered


Sources
1. Petite Tresor Nuit Bedding Set
2. Rocket Shelf
3. Silver Shag Rug
4. Delta Bennington Bell Crib
5. Pallra Light Blue Box Set
6. Star Pillow
7. Cape Cod Rocking Chair
8. Believe Wall Decor
9. Le Petit Prince Watercolor Print
10. Star Wall Decals
11. Skojig Ceiling Lamp
12. Dream Ring Moon & Stars Mobile
13. Not All Those Who Wander Are Lost Watercolor Print
14. Colorful Watercolor Pillows
15. Moon Night Light

We will eventually get around to doing a house tour but until then this design board will do. Not only was it super fun to make but it is great practice for when we start to brainstorm and think about the bathroom that we will be remodeling later this year. Have you ever put a design board together? Share your experience in the comments below and…

If you liked this post please follow us and share!

Instagram


Kitchen Undershelf LED Lighting

led-lighting

In the three wonderful years we’ve lived in our starter home, we’ve done many DIY projects, with our kitchen renovation being the biggest. So it should come as no surprise that we have a TON to write about. I’ve written about many of the more involved aspects of our DIY kitchen project in other posts but one feature I have not talked about is the LED lighting I installed under our open shelving. This was one of the more exciting parts of the whole project for me because I think LED lighting looks cool in kitchens (let’s be real…it does) and I liked the idea of having some light around when navigating the kitchen for a late night snack. Not to mention, LED lighting is such a simple and inexpensive addition that can really brighten up a space. Researching online and reading through DIY forums gave me an idea of what I needed to do and helped me to settle on the perfect product. There are many brands of LED lights out there but I purchased the Tingkam Waterproof 5m 5050 SMD RGB LED Strips which had great reviews on Amazon and some really cool features including a range of colors and lighting options. The installation was fairly straightforward and despite costing only $20, the lighting and adhesive were high quality. We are 6 months out from our renovation and have not had a single problem, thankfully.

img_0465

If you are considering installing LED lighting under open shelving, there are a few things you will need to consider. 1) Is there an accessible power outlet where you can plug-in the connected LEDs nearby? 2) Are there large spaces between the shelves where you will be installing the LEDS under? If there is a significant space between shelves, you will need to cut and splice wires using the LED connectors and extension cable. You will also need to think about aesthetics. 3) Where will you hide the extension cable(s)? Because I planned to incorporate LED lighting during the design stage of our kitchen renovation, I was able to do the electrical work and run the cable through the wall before I got to drywalling and tiling the backsplash over it. Once you’ve settled these minor issues, you’re all set to install the lights. Here’s what you’ll need:

Supplies
Lights $20.39
LED Connectors $9.49
LED Extension Cable
 $7.99
Butt Splice Connectors $6.55

71tval3m8ll-_sl1500_

Image via Amazon

Directions

  1.  Measure your shelf and cut the LED strips according to the length of your shelf. For the specific LED lights I purchased, you can cut the strip along every 3 LEDs where there is a scissor line (figure 1).
  2. Connect your LED strips using the LED connectors (figure 2). If your shelves have a wall or other obstacle between them and you can’t just run them continuously you will need the extension cable listed under the supply section. Make sure to measure the space between the shelves before you connect the LED strips together so you know what length to cut your extension cable. To connect your lights to the extension cable you need to splice the wires (see figure 2).
  3. Splicing: 1) Peel back the LED strip to reveal the copper stripes and connect them to the waterproof clasp of the LED connectors. 2) Cut the connector wire in half and separate the black, red, blue, and green wires so that you can align them with the corresponding colored wires on the extension cable (figure 3). 3) You can either crimp the wires together using the butt splice connectors or twist and tape them with electrical wire (figure 4).
  4. Once you are done splicing the LEDs, you can secure the lights to the bottom of the shelves using the self-adhesive backing. To get the best results, make sure your surface is completely dry and clean. If you are planning on hiding the wires then disconnect the LED lighting strips before you adhere them to the shelf and run the wires through the walls as needed (see figures 5-6).
  5. Now you can plug the LED lights in and enjoy experimenting with all the colors and settings (figures 7-8).
img_0985

figure 1

img_0991

figure 2

img_0984

figure 3

img_1141

figure 4

img_1012

figure 5

led

figure 6

img_8899

figure 7

img_8894

figure 8

Have you incorporated or considered incorporating LED lighting into any of your home renovation projects? Let us know in the comments below!

If you liked this post please follow us and share!

Instagram


DIY Upcycled Candles

img_7917

It’s that chilly, cozy time of year and you’re reaching to light up those festive candle scents; earthy pine, spicy cinnamon apple, warm vanilla cookie. That is, until you realize your candles are nearly dead from last season’s use. You can barely fit your hand in to light the wick at the bottom of the jar and even if you can, the wick is completely burnt out. We recently found ourselves in a similar situation with a significant collection of useless but oh-so-amazing-smelling candles that still had plenty of wax in them. Rather than being wasteful and tossing them out, we assessed our inventory and devised a plan to revive them. Using small mason jars leftover from our baby shower last year, we made new candles out of the old ones, layering some our favorite scents for a colorful look. With new wicks, pretty glass jars, and some TLC, you too can have your favorite candle(s) brought back to life!

Supplies
Dead candles
Glass mason jars (or any cool glass container of your choice-here’s your chance to get creative!)
Large pot with boiling water
Candle wicks


img_7922


Directions
1. Fill a large pot with just enough water to submerge the candle jar(s) halfway, place on the stove, and bring to a boil.
2. Turn the fire on low and carefully place your candle jars in the pot until the wax is completely melted.

img_7933

3. Using tongs, remove the old wicks from the melted candle jars and dispose of them.

img_7938

4. Dip a new wick in the melted wax and place it at the bottom of your new jar/container.

img_7945

5. Let it cool and solidify.
6. Secure the wick in place so that it is standing straight up when you pour the melted wax in the jar.
7. Using an oven mitten or kitchen towel for protection, remove the melted candle jars from the pot and pour the hot wax into your newly prepared jar/container.

img_7950

8. Lay the candle on a flat surface to set and harden. If you want this process to happen more quickly then put your candle on a tray and pop it in the fridge.
9. Once your first layer has solidified, pour the next layer.

img_7957

10. Repeat steps 7-9 until you’ve filled your jar.
11. Trim the wick.

img_8096

It’s seriously that easy! We made these for our home but with a pretty container these can make beautiful gifts for friends or loved ones. I mean, who doesn’t love candles?

What do you do with your old, dying candles? We would love to hear from you! And as always…

If you liked this post please follow us and share!

Instagram