DIY Rustic Wooden Shelving

img_7585

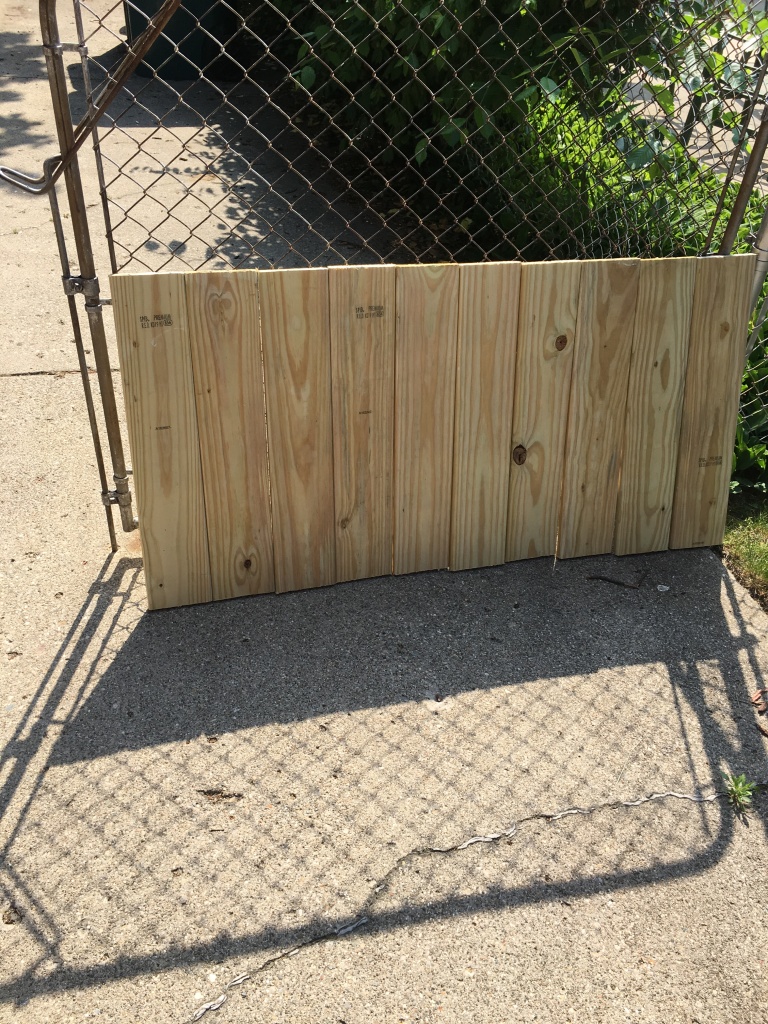
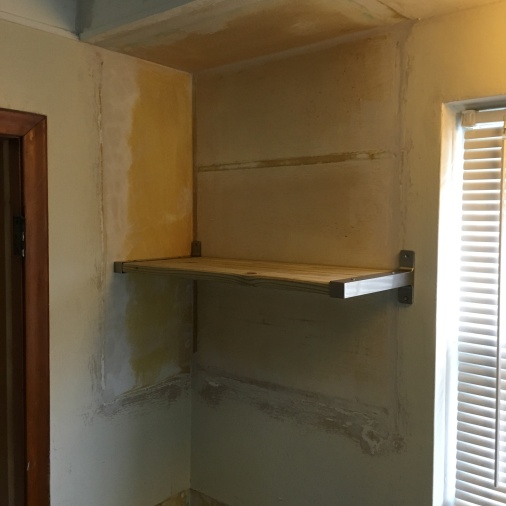
This post is a detailed DIY tutorial for building reasonably-priced, open shelving using a combination of components from IKEA and Home Depot like the one we had in our updated kitchen. Initially, we were going to purchase the IKEA EKBY shelf system but they only had black, white and aluminum options for the actual shelf. Since we wanted to have rustic, woody elements to break up the modern features of our kitchen, we opted to use the EKBY brackets (which you can buy separately) with wood that fit our style and design. If you are wondering why I chose these lumber pieces specifically it is also because they are the perfect width and fit for the EKBY brackets.

The cost of IKEA EKBY shelving varies based on sizing with the standard 31″ shelf costing $19.99 and the larger 46″ shelf costing $29.99. Because we needed a total of 6 standard shelves, that would have put us at around $200 for both the brackets and the shelves. Instead, I was able to purchase eight, 10ft pressure-treated lumbers and cut them to my specifications for a total of $60. With the 6 bracket sets that put us at under $130 for all of our shelves so we saved over $60 in the process. Not only are these versions cheaper to make but you can build and install these shelves in 5 easy steps and without sacrificing on wood preference. Let’s get started, shall we?

Supplies
IKEA Shelf – EKBY BJÄRNUM (two available sizes, 7.5″ at $7 and 11″ at $10)
Home Depot WeatherShield – Pressure Treated Lumber (5/4 x 6 – 10ft at $7.47)
Drywall Anchors & Screws (10 1/2″ – 70 Pack $11.98)

Tools
Saw
Drill
Screw Driver
Small Level
Drywall Anchors
Measure Tape

Directions

1. Measure your space to determine the desired length of your shelves taking into account that the brackets will add about 1/2 inch total to the length.

2. Cut your lumber accordingly and fit them into the brackets to complete the shelf unit. To build one shelf, you will need two pieces of lumber for each pair of brackets.

3. Have someone hold the completed shelf up to the wall while you mark the points where you will install the shelves corresponding to the holes in the EKBY brackets.
CAUTION: Before you mark the holes or drill through them, lay a level on the shelf to make sure it is straight.

4. Proceed to drill through the markings and place drywall anchors into these holes.

5. Have a helper hold up the shelf  again while you fasten it to the wall using screws and a screw driver or drill.

img_1116

img_0928

img_1117

img_0930

img_0931

img_1128

If you liked this post please follow us and share!

Instagram


Fall Harvest Herb Bouquets

img_7208

It’s nearing the end of October and the weather here is finally taking a chilly turn. With all the things that need to get done, including preparing for baby #2’s arrival in a few short weeks, tending to our garden has been one of those things low on our priority list. We really wanted to maximize our harvest this year and preserve what has managed to stay alive but we are just so short on time that we have to be realistic. All those green tomatoes and jalapeños may not be jellied or pickled this year but we at least wanted to dry some herbs for use through the winter. When I found myself bringing basil in but not having the time to clean and dry them, I placed them in a vase on the kitchen counter until I could find the time to tend to them. To my delight, not only did they thrive in their new home but they gave off the loveliest aroma. As you can see, I got a bit carried away and started making more herb arrangements to put around the house. I guess some good can come out of procrastination 😉

If you need to bring your herbs in before they completely die out but can’t preserve them immediately, consider making small bouquets out of them. With regular water changes, they should last up to a week or longer. And the best part? They make such beautiful decor! The pop of vibrant green has really brought life to our home. You can use vases, teacups, jars; any pretty glass you have on hand. I made simple, single herb arrangements but the possibilities are endless.  So hold off on lighting those pumpkin spice candles just a bit longer and consider bringing the fresh scents of basil, thyme, lavender, or whatever else you grow into your home. Nothing beats the clean, natural fragrance they give off!

img_7662-copy

img_7674-copy

 If you liked this post please follow us and share!

Instagram


Cozy Kitchen Series Part 3: Installation

Welcome to the third and final post (kind of) of our kitchen renovation series. For those who followed us through Cozy Kitchen Series Part 1: Planning and Cozy Kitchen Series Part 2: Demolition, we are excited to share a visual diary of how we installed the flooring, cabinetry, drywall, and backsplash before the final cleanup and reveal. We hope that our journey has inspired you to hold off on calling a contractor (for some things) and tap into your inner-handyman/woman and your inner-interior designer 🙂

Flooring
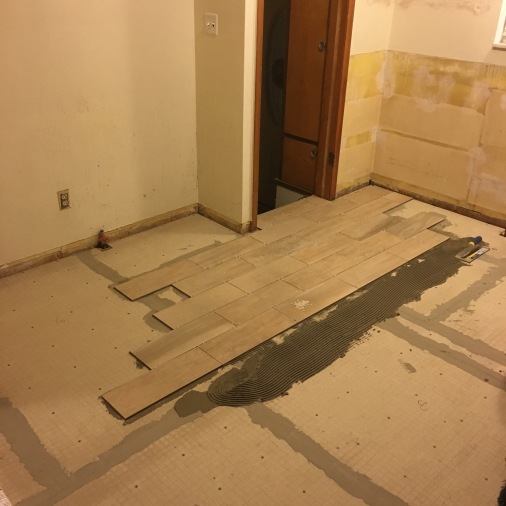
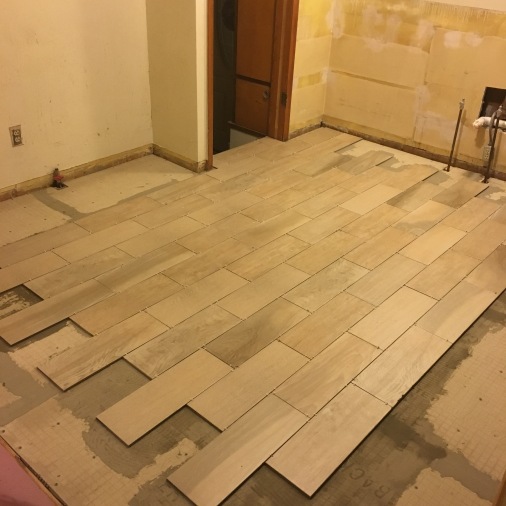
When starting a home renovation project, you want to make sure that the base of the space (aka the floor) is completely flat and level. If it is not, everything installed on top of it will be crooked, which will distort the look of the space. On top of that, you will create more work for yourself because your cabinets will need extra shimming and so on. For a more detailed how-to on tiling please refer to my basement tile post  Don’t Fear the Tile to help you with this step.

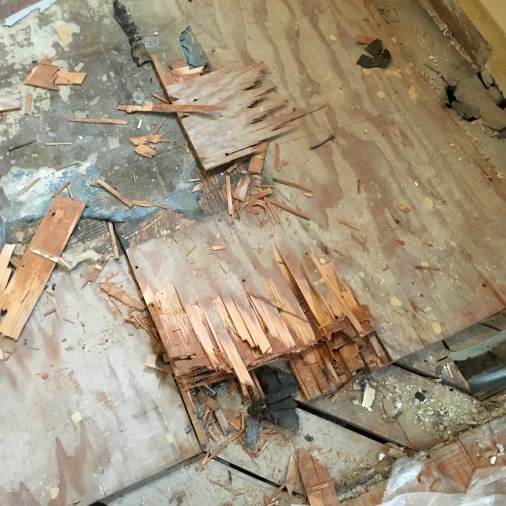
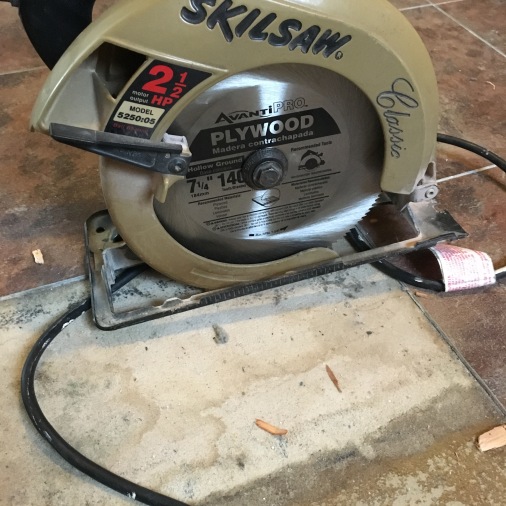
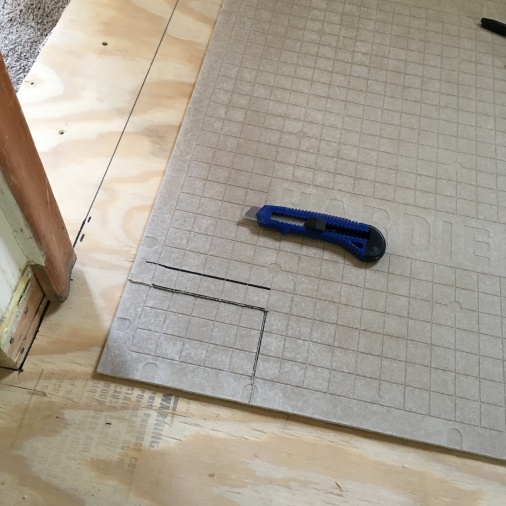
Although I had tiled before, I had never dealt with the removal of laminate tile. I’m not sure if it was the way it was installed but it was a pain! So much so that I had to remove the entire plywood subfloor beneath it. At first, I thought I could remove the laminate and salvage the plywood subfloor so that I could install the cement boards and tile on top of it. Things, however, didn’t go according to plan. The subfloor was so damaged that I had to purchase a circular saw in order to cut out the laminate and plywood subfloor to replace it completely. It was a messy and time-consuming task that I was not prepared for. This is why I think it’s very important that you are aware of and flexible enough to deal with the unexpected.

Cabinetry
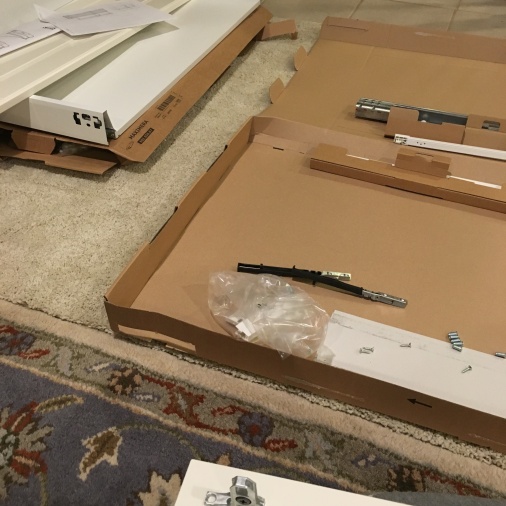
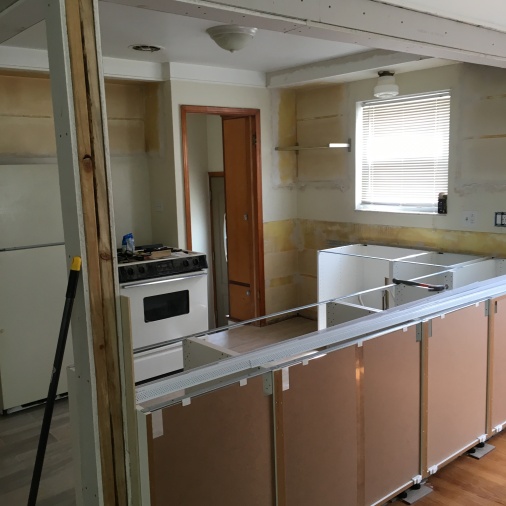
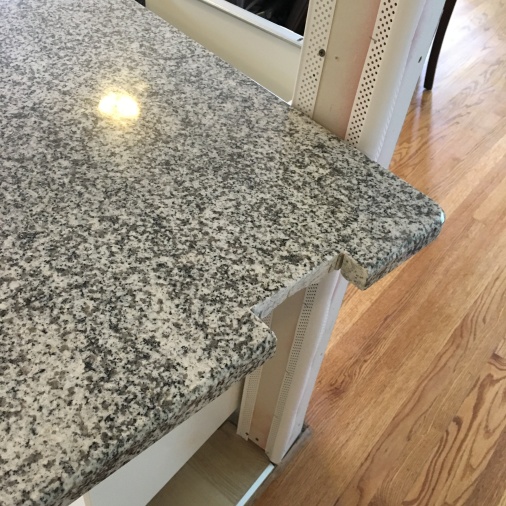
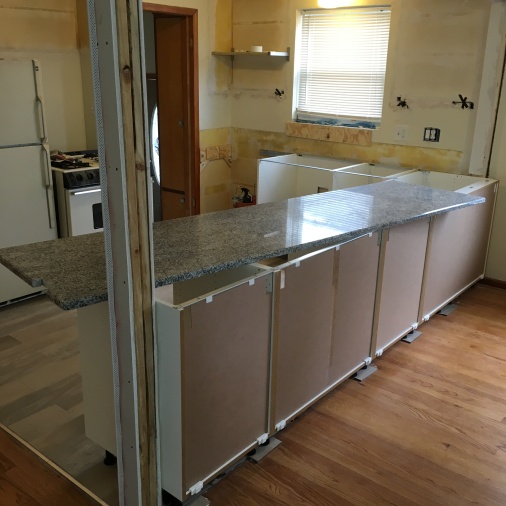
Because we purchased our cabinets from IKEA, assembly was a big part of this project. You do have the option of choosing an IKEA-approved contractor to handle the installation if you don’t have the time to do it yourself, but the instructions are pretty self-explanatory and the cabinets aren’t difficult to assemble at all. It took me between 3-4 hours to assemble all 7 of the cabinets and once I had assembled one, the rest were a breeze. One thing to note here is that if you are not installing them right away, you will need sufficient space to assemble and store them until you are ready. Lucky for us we had the basement to do this in, which helped us keep the kitchen clutter free. If you have a clean attached garage that would work great too. After I assembled the cabinets and installed them in the correct order on our freshly tiled floors, the countertop people from Home Depot came out to measure for the countertop and later installed it when it was cut and ready (it was a two week wait in case you’re wondering). Some things you just leave to the professionals!

Drywall
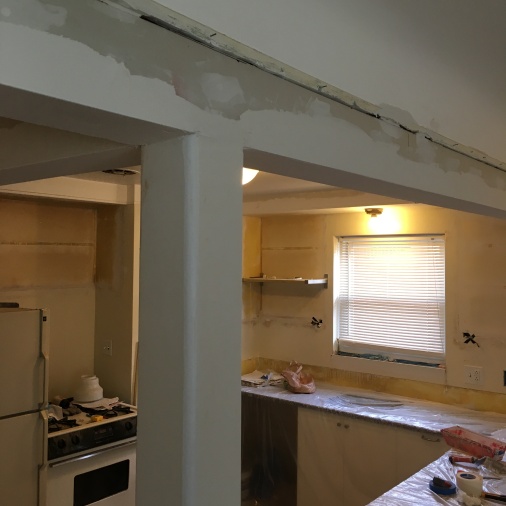
I didn’t have too much to drywall for this kitchen except for some patches behind the sink, the hideous hole in the ceiling “vent” that needed covering, and around the supporting beams and walls that were torn down. Drywalling is quick and easy until you get to the mudding and sanding part. The awesome thing is you can pretty much drywall an entire room in a few hours and be done with it. The rough part of drywalling is needing to apply mud to the seams and sanding them 3 times until all the separate pieces look like one big seamless wall. Other than the fact that you need some strong arms to get you through the sanding, there isn’t much required of you to be able to put up drywall. But if you don’t feel confident and you have no experience drywalling then YouTube can be your best friend 😉

Below is a graphic that sums up the steps of drywalling courtesy of This Old House.

finishing-drywall-overlg

Backsplash
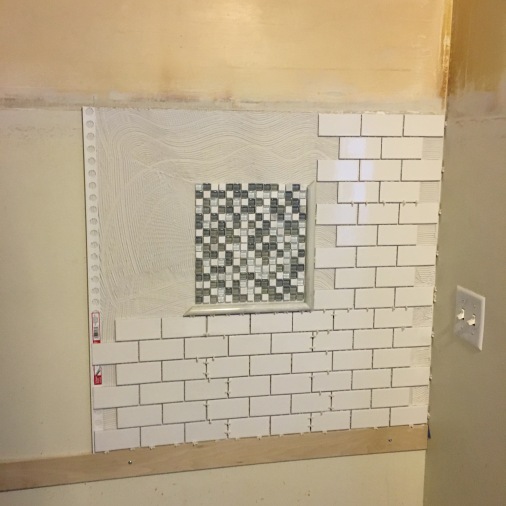
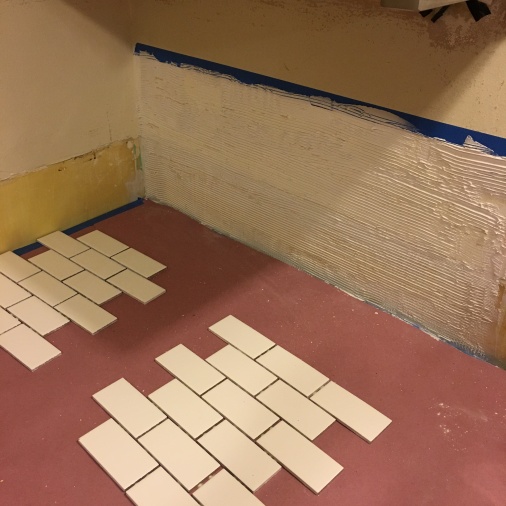
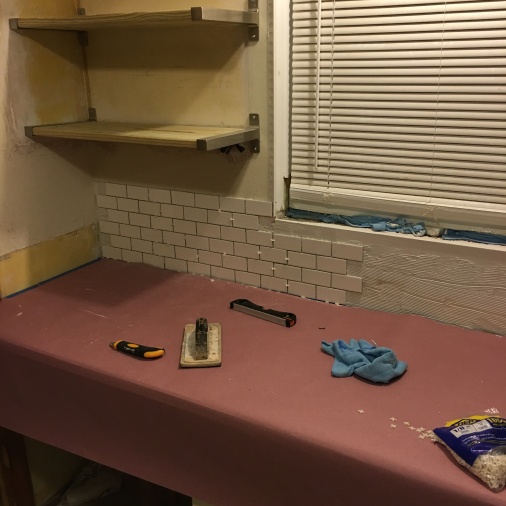
This would have been my favorite step if it wasn’t for the self-imposed due date. I worked around the clock for 2 weekends to finish this part of the project. Again, you can refer to our tile post Don’t Fear the Tile if you aren’t familiar with tiling. The only difference when tiling a kitchen backsplash wall is that you need to be careful with your application of tile adhesive/mastic. Because gravity will be working against you, you will have to score the surface with a blade before applying a light amount of adhesive and laying down the tiles. For me the hardest part of backsplash tiling was our indecisiveness. Yes, indecisiveness. We seriously went back and forth for weeks trying to settle on a backsplash tile. There were just too many beautiful ones to choose from! After considering our countertop design and the look we were going for, we finally settled on white subway tile for under $3/sq. ft with a strip of bluish/grayish accent tile. We didn’t originally plan to tile an entire wall but as we got closer to installing the backsplash, we realized it would look really nice to have a feature wall where our window and open shelving would be.

Well, there you have it! A detailed overview of our kitchen renovation and all the planning and work that went into it. Of course, as a homeowner, there is no such thing as being completely done with work around the house. We are still figuring out some things like how to organize all our stuff and what to replace our main light fixture with but we are so happy with the results and we really mean it when we say, you can totally do something like this if you wanted to. I know we promised a full kitchen reveal but I decided to put that in a separate post so that you aren’t overloaded with images. Check back tomorrow for the final reveal and in the meantime, feel free to ask for clarification, support, budgeting advice; basically anything kitchen-renovation related and we will be happy to answer you to the best of our ability.

If you liked this post please follow us and share!

Instagram


Cozy Kitchen Series Part 2: Demolition

For those of you who read the first entry in our Cozy Kitchen Series, Cozy Kitchen Series Part 1: Planning, things will take an exciting turn in the next posts because we will be putting all that meticulous planning into action. Depending on the type of kitchen renovation you’re envisioning, having a checklist or order of operations will really help you stay organized and on task. Based on our kitchen plans, my checklist looked something like this:

  1. Remove walls
  2. Remove flooring and subflooring below the laminate tiles
  3. Re-wire and/or re-direct electrical wires
  4. Tile installation, grouting,  and sealing
  5. Drywall
  6. Cabinet Installation
  7. Have a countertop template be made
  8. Countertop installation
  9. Drywall mudding and sanding
  10. Priming and painting
  11. Appliance installation
  12. Clean up
  13. Kitchen organization

In this part of the series, I will cover only the demolition portion of our renovation; specifically what it entailed and why I made the choice to hire a contractor. As I mentioned in the last post, it was a no-brainer for us that we needed to tear down a wall or two to achieve the desired kitchen layout. Taking down walls is a great way to achieve an open-concept look and dramatically change the organization and feel of a room. Which might explain why HGTV is always so demolition-happy. “Let’s take down this wall and that wall.” While it’s not hard to complete, it is certainly more involved than these shows let on, which is why I want to lay it all out for you so there are no surprises. Before I get into the details of the demolition, I want to explain why I decided to hire a contractor to oversee this portion of the renovation.

As someone who thoroughly enjoys DIY construction projects and all that they entail, it was definitely hard to give up control of this part of the renovation. But when it comes to the structural integrity of the house and safety, those take priority over anything else and after much research, I realized it was against city ordinance and just not worth the risk. However, that didn’t mean there wasn’t a way to have some hands on experience and save a bit of money. I decided that I would be able to do the demoing myself as long as I did my homework and prepared accordingly. When I called around for quotes, I made sure to say that I would be removing the drywall and cleaning up all the debris so that they were just responsible for removing the beams and reinforcing the structure of the house where needed. Because of this, I saved around $700-1,000 just by doing my own demolition and clean up.

So here’s what you’ll need to do leading up to the demolition:

  1. Hire a reputable contractor
  2. File a city permit to do the construction (every city is different so check online or call and ask)
  3. You either can work with the city engineer for inspection and approval or have your contractor handle all of that and keep you out of it

I got lucky and hired a contractor who did steps 2 and 3 for me. After everything was approved by the city and we paid the appropriate fees, we set a date for the removal of the wall. All I had to do was make sure that the drywall was removed and the electricity was rewired in the adjacent wall before they arrived as well as keep my hands off everything structural when I directed my rage at the walls. My only advice is that if you are uncomfortable or unsure about working with electricity then hire someone. It is very dangerous if you don’t know what you’re doing and don’t follow your city’s code. As an electrician once told me, “you don’t learn wiring after the firetrucks have left.” You have been warned!

Demolition

Now for the fun part! This section is an overview of the tools you will need, the preparation, and the basics of how to knock down a wall. Some say the demolition is the easiest step of remodeling but I beg to differ. It’s not all aimless fun hammering down walls like you see on TV. You have to be cautious and really watch out for electrical, gas, and plumbing which is not difficult but is certainly tedious.

Tools
Ridgid Multi-Tool $79.97
Ridgid Wet-Dry Vac $79.97
Heavy Duty Mask  $39.97
Hammer $29.97
Stud Finder $19.97
Heavy Duty Bags $17.48
Broom $15.98
Plastic Cover $12.98
Retractable Knife $12.97
Pry Bar  $8.87
Heavy Duty Gloves $4.46
Goggles $3.98

Preparation
Before you start removing anything, make sure to prepare the area for the messy aftermath. If you are able to remove furniture or anything in the immediate vicinity to a different room and keep it closed, that would be ideal. If you are not able to do that you can always cover everything to the best of your ability with plastic sheeting commonly used by painters. Cover all air vents and shut off your furnace/AC because it will move the dust around the house and you do not want that. Ideally the demolition should take you a day or two depending on the workload so don’t fret about the chaos.

  1.  Remove furniture/tables to the side
  2. Cover all vents & misc. furniture with plastic or cloth to protect from debris/dust
  3. Rent a dumpster or arrange a way to get rid of the debris & garbage.

Taking down the walls
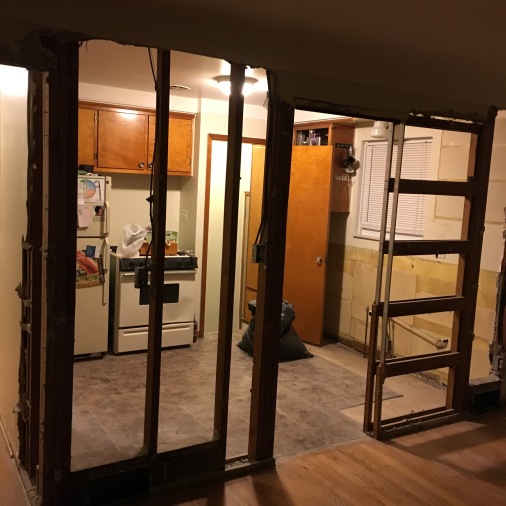
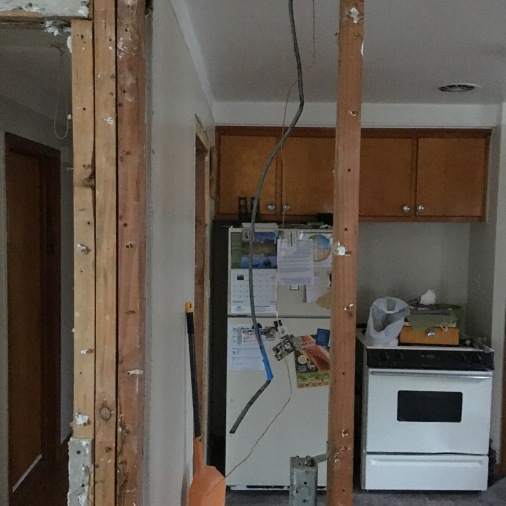
After you have prepared the space, you can  proceed with the demoing. Make sure you wear a dust mask, goggles, and appropriate clothing/gloves for the work at hand. Start by using a stud finder to find and mark their location on the wall. If you know the walls are hollow and there are no plumbing or gas  lines then go ahead and use the hammer to your heart’s content! I used the pry bar to break bigger pieces of drywall off along with a retractable knife to cut along the corner edges of the walls so I wouldn’t damage what I needed to keep intact. Just be careful not to hurt yourself. I made sure to minimize dust by trying to break larger pieces of drywall at one time. It may seem tedious and time-consuming at first but it will minimize the amount of work later cleaning and transporting debris. My recommendation is to use a combination of the hammer and multi-tool to create holes in which you can then insert the pry bar and break big pieces of the wall off. Clean up the debris regularly by using a broom and dust-pan or if you have a wet-dry Vac, vacuum every 30 minutes and empty it into a heavy duty bag so you don’t have to do it all at once. Once the drywall and debris are removed, your contractor(s) can begin restructuring the space.

All of the above may sound like a gross simplification but essentially that is the work that needs to be done if you’re looking to tear down a wall or two. To summarize, it’s not something you can do completely on your own but you can play a significant part and save yourself some money in the process. My next post will cover the rest of the order of operations and the struggles I faced along the way so don’t forget to check back in.  If you found this post helpful or have any questions, share your thoughts in the comments below and as always, if you liked this post please follow us and share!

Sneak peek of the next post….


Cozy Kitchen Series Part 1: Planning

This is the first post in a series we will be doing covering our DIY kitchen renovation project that took us around 3 months to complete (working the weekends and some evenings). In this post we will discuss everything planning-related from brainstorming and design to calculating the cost of the finished project. We will also cover the timeline we envisioned for the duration of this renovation and how to realistically plan.

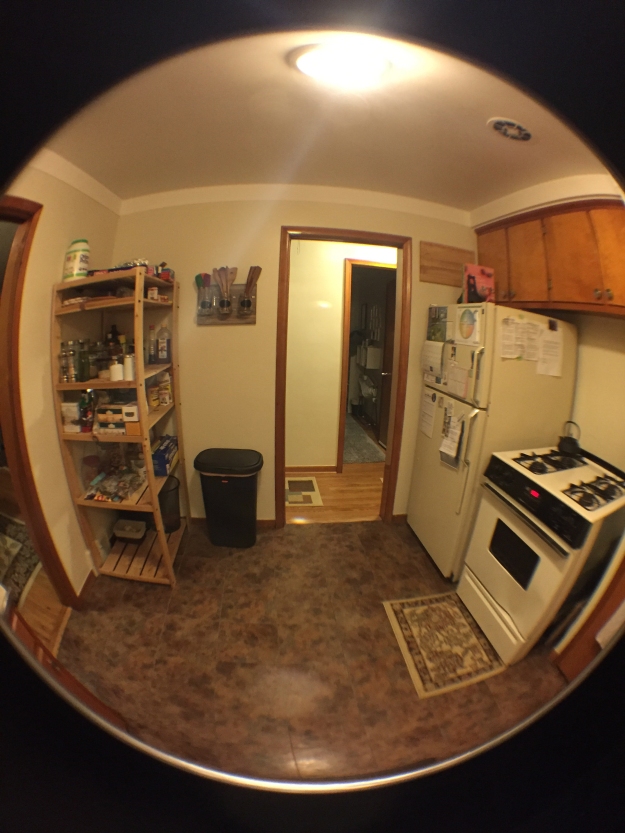
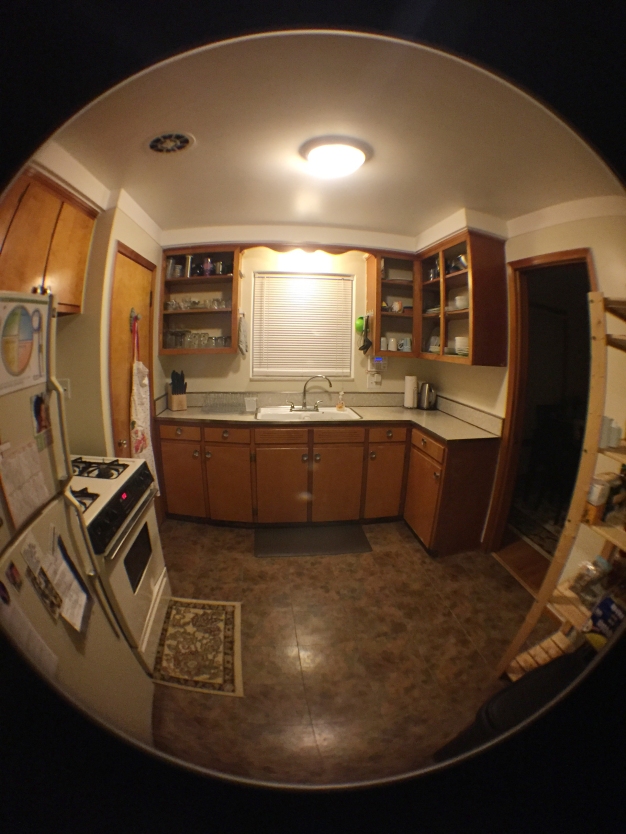
Just to give you an idea of the disaster we were working with, I’ve included some pictures below. My wife had taken some with her DSLR but can’t seem to find them so these fisheye view iPhone photos will have to do.
IMG_8984

IMG_8997

IMG_8996

IMG_8991

As you can see, there is not a lot of counter-space or any space for storage/keeping the kitchen organized. We also did not have a dishwasher which was fine until we had a baby and time became a luxury. The “hood” for the stove (if you can even call it that) was this disgusting hole in the ceiling that looked awful and was completely useless in circulating air. Aside from all that, it was just dimly lit, cramped, and uninspiring. But that was soon to change…

Brainstorming

This step is one I’m sure many of you are familiar with.  If you’ve ever walked through IKEA thinking to yourself, “this would look great in my house!” then you have partaken in the process of brainstorming. This is pretty much what we did for about six months before we began the serious design stage. We looked everywhere for style and layout inspiration including Houzz, Home Depot, Lowes, Pinterest, Instagram, IKEA, etc… The key is to save your ideas somewhere so that when you begin the designing process you have a better idea of what you want and don’t want. Throughout this process, we made sure to pay attention to four things: aesthetics, organization, functionality, and layout. As  I mentioned earlier we had barely any counter-space or storage space. For us, this was a major priority so we knew right away that to achieve the results we wanted, we would need to tear down the wall between the kitchen and dinning room.

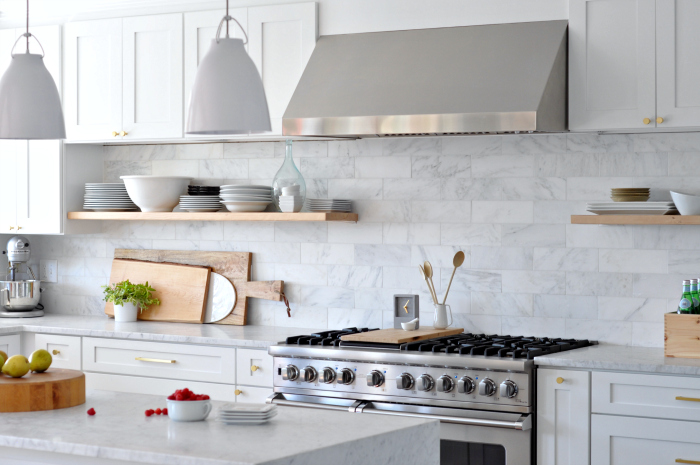
Aside from that, we looked to other kitchens and blogs and dissected every minute detail. Here are some kitchens that we shared with each other throughout the brainstorming process. We made sure to tell each other what we liked about each kitchen so that we could begin to narrow things down.
open-white-kitchen

Open shelving was something that kept coming up over and over again in all the kitchens we shared with each other.  We just really loved how it opened up a space and made for easy access to everyday kitchenware. Image credit: House updated
20153_cosk09a_01_PH123795

ikea-traditional-looks-meet-modern-versatility__1364299411904-s4

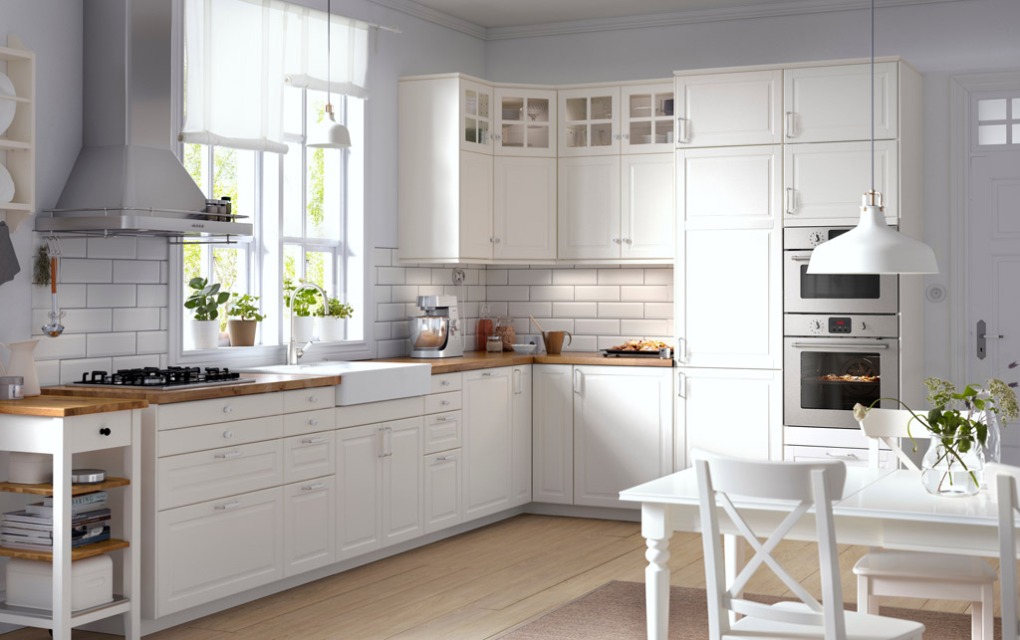
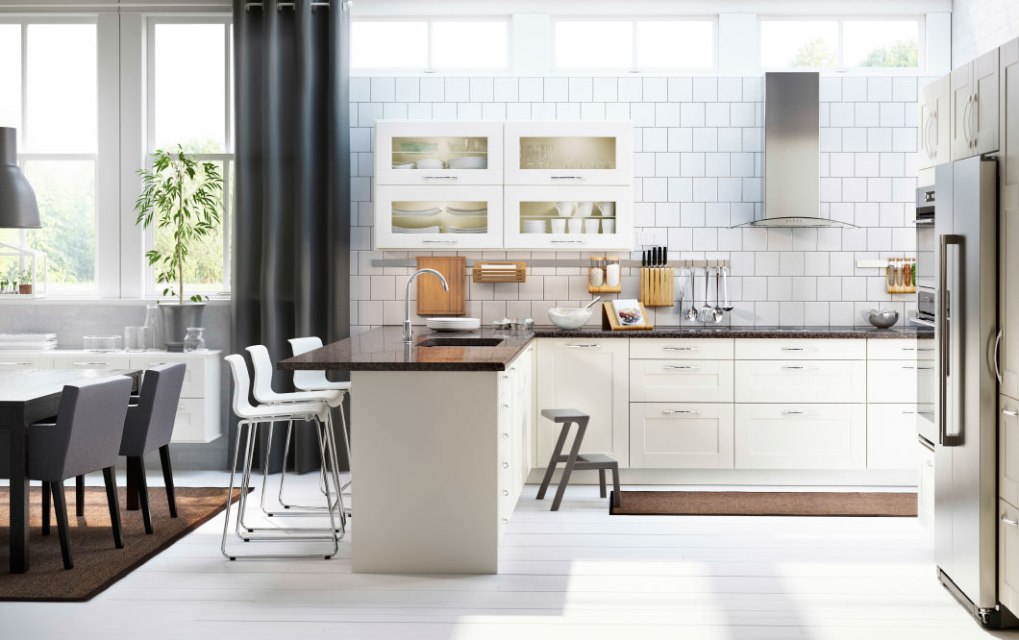
We also picked up on the fact that most of the kitchens we liked were white with wooden accents. We rarely chose a kitchen that had dark cabinets so we knew right away that wasn’t our style. We wanted clean and bright and cheery. Image credits: IKEA
IMG_20151125_194156

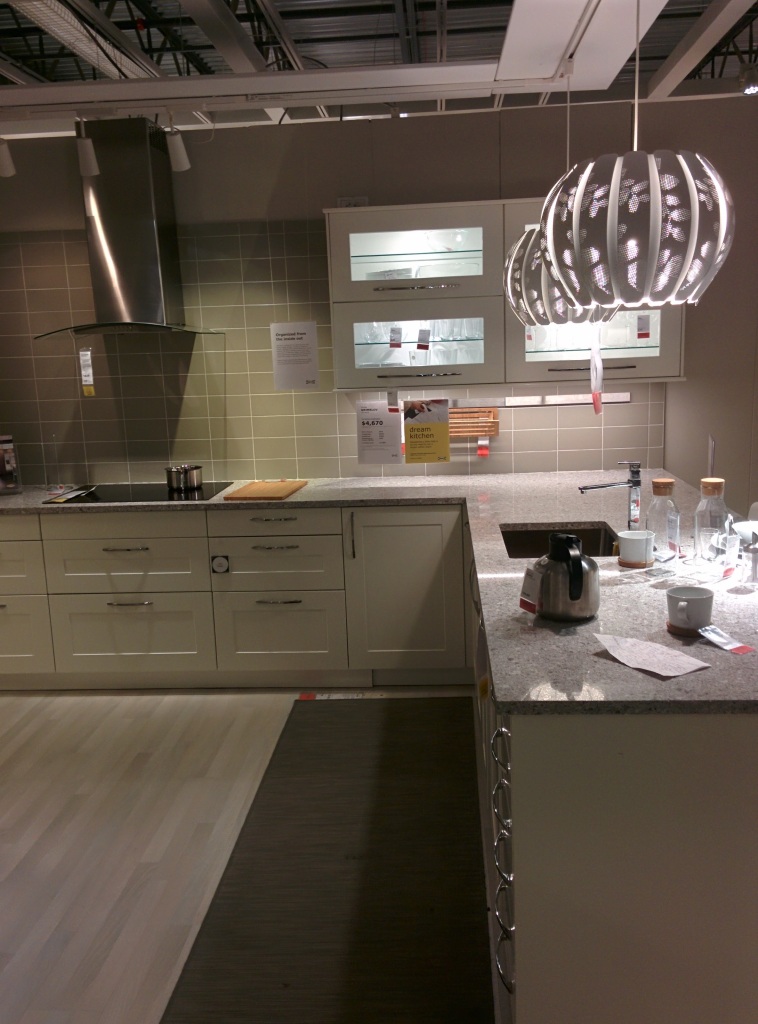
A few months earlier we had stumbled on a kitchen in one of IKEA’s showrooms that we found practical based on our dimensions and layout so we captured some pictures just in case we wanted to make it a reality (hint: we did). We also realized here we liked the idea of grayish flooring with white cabinetry.

White-Granite-Countertops

We really went back and forth on countertops because both light and dark work really nicely with white cabinets. To pull all the elements together including the stainless steel appliances and gray floors, we decided on a light countertop with splashes of gray and black. Image credit: Artszipper

Design

After the brainstorming stage, and once we were ready to put our imaginations onto paper, I measured our kitchen to get a sense of the dimensions we would be working with. I did this as thoroughly as I possibly could to ensure the correct fit for cabinets, shelving, and fixtures. Even if you feel like you’re just getting started and playing around, remember that accurate measurement makes for accurate budgeting.

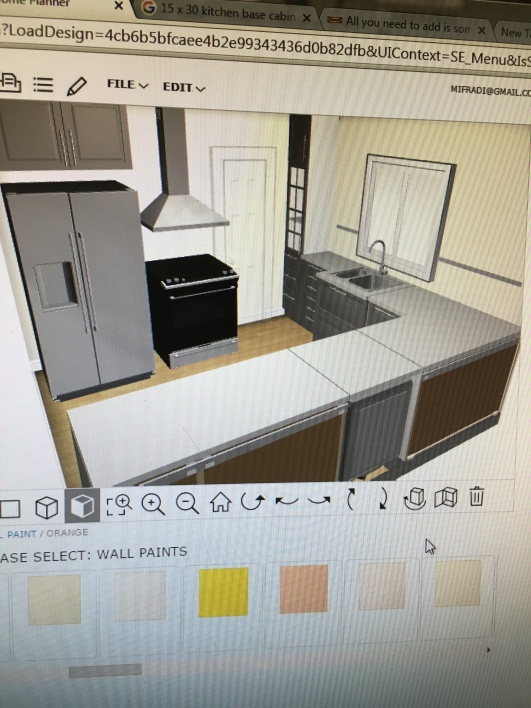
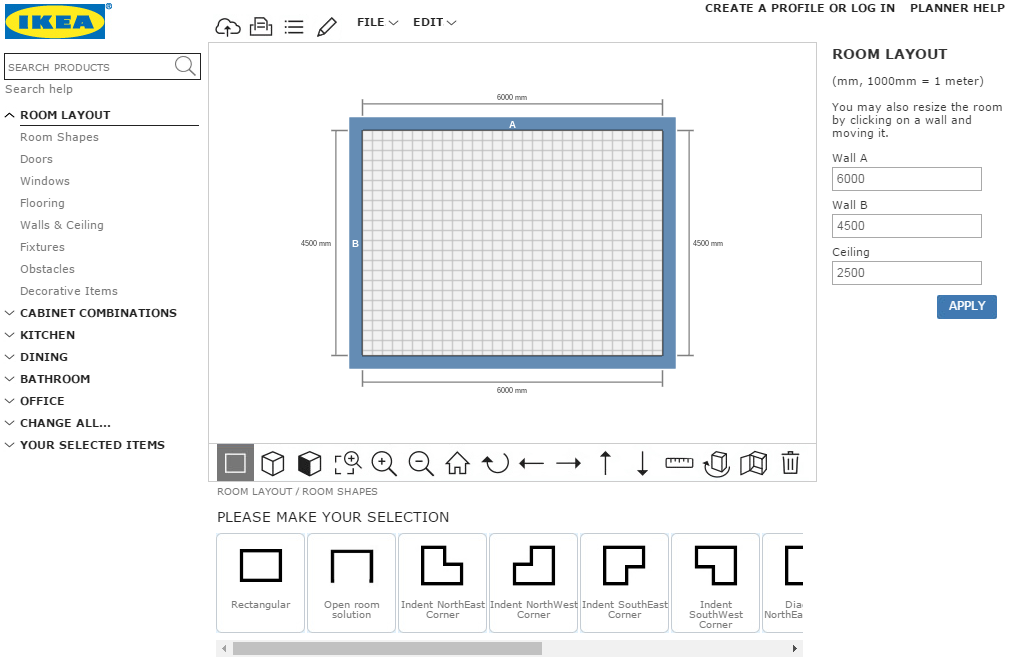
There are many planning softwares to choose from but I settled on using IKEA’s online Kitchen Planner software which is pretty user-friendly. Once I inputted the measurements for the walls, the windows, doors, ceiling, etc (see Figure 1) I began tinkering with the layout of the kitchen and adding cabinets like a madman. I managed to come up with my first design draft (see Figure 2) in no time and was pretty pumped to print it and review with my wife. Here is where the fun begins! Why, you ask? Because you will most likely change your first draft…many, many times.
ikea kitchen planner

Figure 1


IMG_0366

Figure 2

After many revisions we settled on a design similar to the model kitchen we liked in IKEA’s showroom. We then took our design to IKEA where we talked to one of their kitchen specialists who helped us remove unnecessary items and add cool little features like dampers so the cabinets don’t slam when you shut them. In the end, the final design we purchased was quite different from our initial draft and that’s completely okay. With a bit of number crunching, which I’ll talk about below, I realized it was cheaper to buy certain things externally so our Ikea purchase did not include a countertop, appliances, or flooring. For those looking for detailed information on what IKEA offers, follow this link to their informational PDF.

Budget Breakdown:

As a finance guy, I enjoy crunching numbers and shopping around to get the best possible deal. To be successful in that regard, however, it’s important to start with a clear maximum budget and have a 10% buffer for unexpected expenses that may arise. So for example, if you’re planning on spending 10k, set aside 1,000 for miscellaneous costs. We ended up going slightly over budget because of structural issues our engineer did not account for early on but I saved a lot by doing most of the labor. To give you an idea of where our money went, I’ve included a breakdown below.

1. Kitchen cabinets from IKEA (7 cabinets): $2,700
2. Appliances bundled from Lowes and Sears: $3,800
3. Granite countertop custom ordered from Home Depot with an undermount sink: $2,200
4. Flooring, drywall, paint, and misc. tools from Home Depot: $1,000
5. Outside labor for taking down a wall: $2,500
6. Permits: $900
Approximate Total: $13,100

Timeline

Finally, let’s talk about time. It can be very easy (unless it’s just me) to underestimate how long work takes. Sure, I can tile a kitchen in a day or two but not when I have a day job, a baby, and other endless responsibilities. This doesn’t even include the time for the ordering and delivery of cabinets, appliances, and countertops. On top of that you have to account for any hiccups you may face and be flexible so that you don’t get discouraged or burnt out easily. I know it’s laughable but I’m sharing this unrealistic timeline I had created so you don’t make the same mistake I did. Whether you’re planning on doing the labor yourself or hiring someone, make sure you are clear about your expectations and then ask yourself if you are being realistic. Many contractors don’t just take one job at a time so don’t expect a full kitchen to be up in a week. HGTV is not real life. In my case, I got stuck waiting a week to resolve the structural issues that came up and then another week to replace the subflooring when I attempted to remove the vinyl tile. It also didn’t help that my wife was going through terrible morning sickness so I couldn’t leave the baby with her to work on the kitchen when I got home.

Project Purchase Dates (Home Depot and IKEA): 3/19/2016
Project Start Date: 04/04/2016
Wall Removal: 4/9/2016
Wall Plaster and Cleanup: 4/9 – 4/10/2016
Floor Installation : 4/10-4/11/2016
Base Cabinet Installation: 4/12/2016
Countertop re-measurement: 4/12/2016
Backsplash tiling:4/15-4/16/2016
Shelf installation:4/18-4/20/2016
Appliance delivery: 4/23/2016
Countertop Installation: 4/26/2016
Project End Date: 5/01/2016

In the end, the month I had envisioned became three and I can confidently say it would not have been so stressful if I didn’t start out with ridiculously unrealistic expectations. So take it from me and go easy on yourself. It’s not the end of the world if you don’t finish within your time frame and if you don’t chances are your time frame was the problem, not you.

If you enjoyed this post then stay tuned for more in the Cozy Kitchen Series which will cover the order of operations and the big reveal 🙂 As always, if you liked this post please follow us and shareAnd if you have any questions or comments we would love to hear from you.
IMG_0878

Sneak Peek: Kitchen Tiling

Instagram


DIY Squeaky Bed Fix

IMG_3555

A squeaky bed can be a real nuisance. When my wife was studying for her PhD qualifying examinations this past winter, she would stay up really late while the baby and I would sleep together much earlier. When she would finally join us at 2 or 3 in the morning, she always woke us up crawling into bed with a loud creak. After weeks of interrupted sleep and having to soothe a disgruntled baby, I finally decided to look into resolving this rather “loud” issue.

A little investigation led me to the main culprit: the bed’s boxspring. When I opened up the boxspring, I was surprised by how flimsy it was. It was basically a big cardboard box framed with wood. The smartest option it seemed was to replace the cardboard and reinforce the structure of the box using sturdy, quality plywood and screws. It was a fairly easy and inexpensive project (under $40) that has successfully eliminated all squeaks and creaks (hooray!). You can even do it for cheaper if you go with a thinner plywood board but I wanted something a bit thicker. So if you’re looking to fix a squeaky bed and are not sure about completely replacing the boxspring or trying other suggestions like lubricating the springs, open the boxspring up first and see what you’re dealing with. If the material looks cheap, chances are this fix is the right one for you.

Supplies
(2) Sheathing Plywood Boards 
Wood or Drywall Screws
Liquid Nail 

Tools
Staple Gun
Gloves
Caulk Gun
Flat Head Screwdriver

Directions

1. Measure the boxspring and head over to Home Depot to purchase and custom cut the plywood for your bed frame size. I had the plywood cut for a queen-sized boxspring: 60 inches wide by 80 inches long (see Figure 1). For me to get an exact size I purchased 2 plywood boards and had them cut so each piece was exactly half (30in x 80in) of my queen bed frame size.

2. Remove your mattress and flip the boxspring frame over to remove the staples and nails from the corners of the cover attached to the frame along with the cardboard until all that remains is the wooden frame (see Figure 2).

3. Investigate the frame to make sure the studs are sturdy. Also, double check to see if the original nails/screws are in good condition. If you find any weak links go ahead and add more screws to tighten the joints.

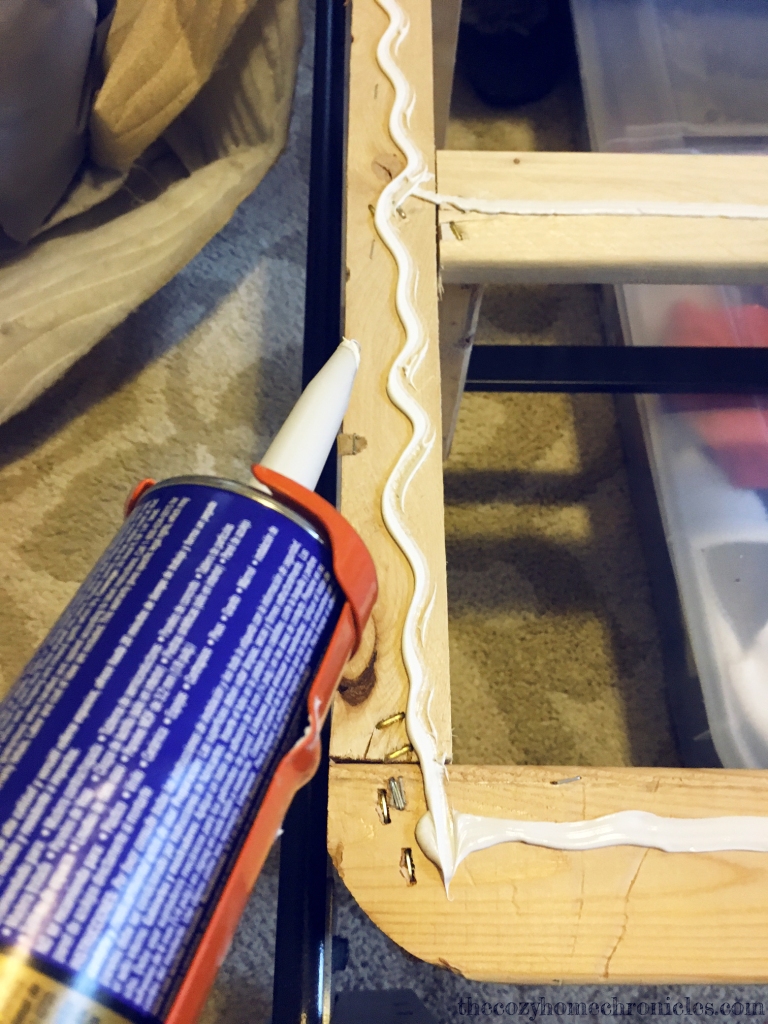
4. Apply liquid nail liberally along your frame taking care to stay in the center to prevent the glue from oozing out of the sides when you place the plywood boards (see Figure 3).

5. Immediately place the custom cut boards on the freshly glued frame. Do this one board at a time so you don’t make a mistake aligning the plywood to the boxspring frame (see Figure 4).

6. After you have placed the plywood boards on top of the boxspring frame, go ahead and secure the plywood to the frame using wood screws. I left a foot of space between each screw and made sure to drill the screws into the boxspring frame and not into empty space (see Figure 5 & 6).

7. Let the glue dry for at least an hour.

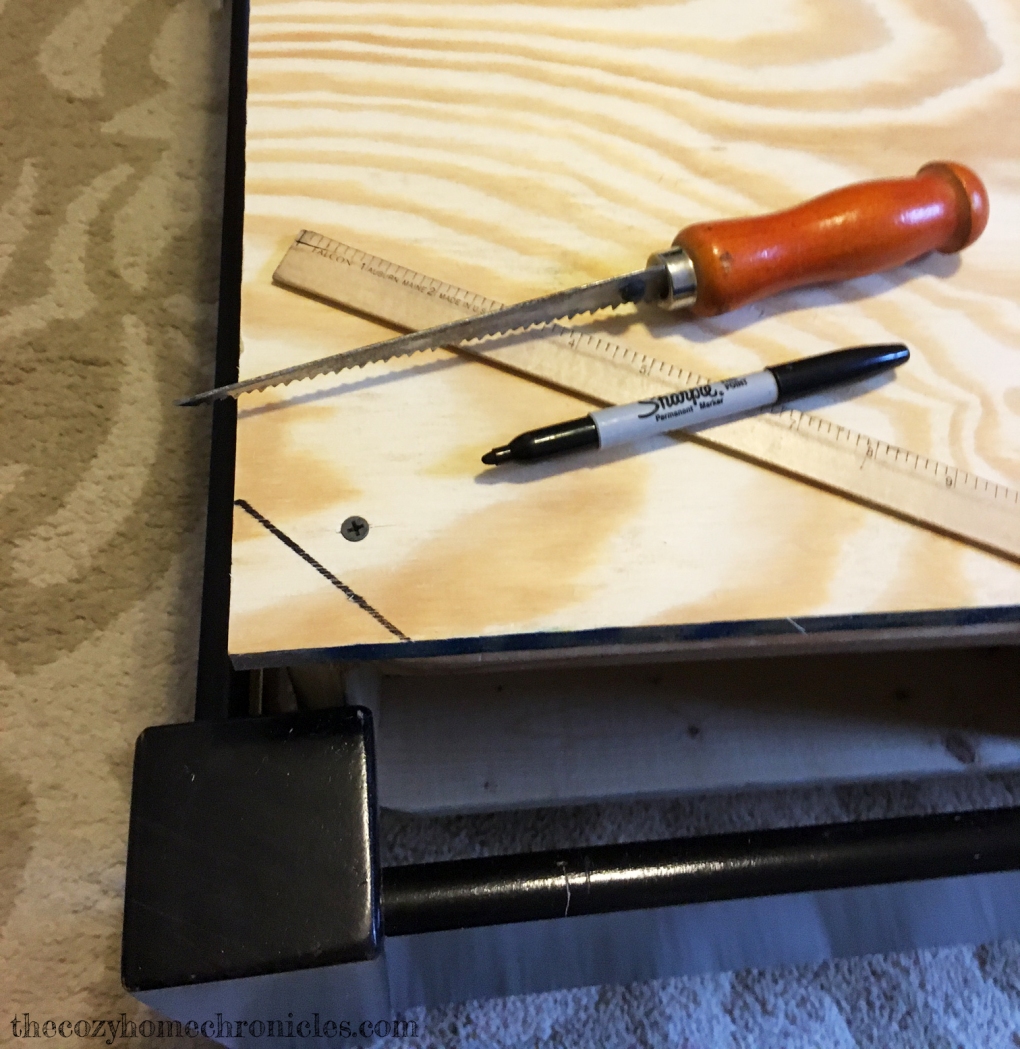
8. Cut the corners of the plywood off at an angle if they extend beyond the frame as it can be a hazard and get in the way of completing step 9.(see Figure 7a & 7b).

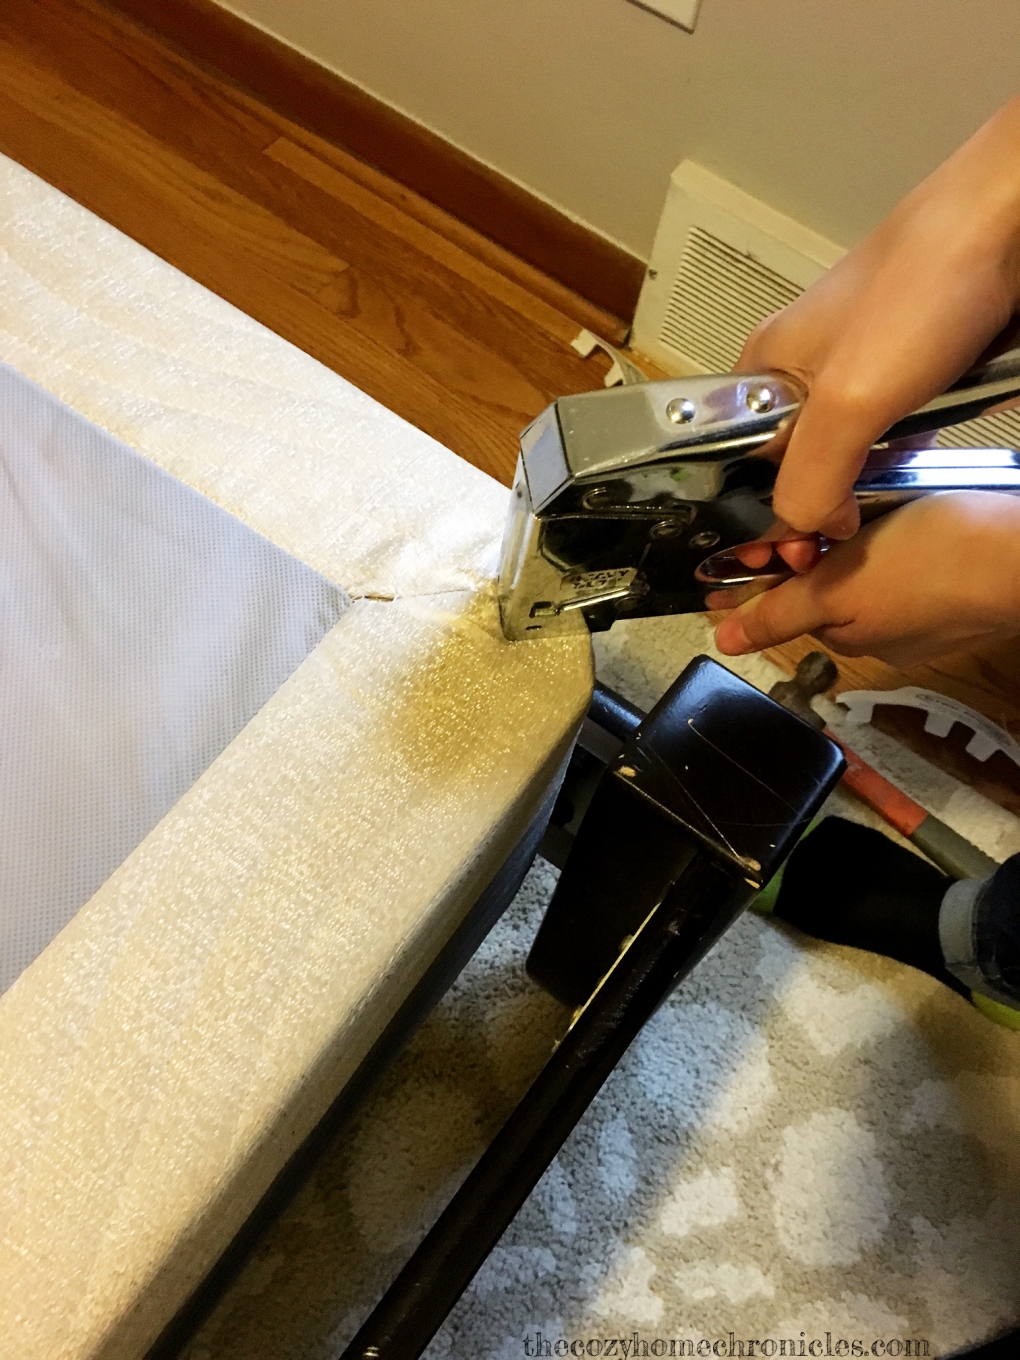
9.  Using a staple gun, secure the fabric cover over the boxspring (see Figure 8).

10. Catch up on your beauty sleep with squeak and creak-free slumber.

IMG_0497 copy

Figure 1

IMG_0498 copy

Figure 2

IMG_0501 copy

Figure 3

IMG_0502 copy

Figure 4

IMG_0504 copy

Figure 5

IMG_0505 copy

Figure 6

IMG_0506 copy

Figure 7a

IMG_0507 copy

Figure 7b

IMG_0509 copy

Figure 8

If you liked this post please follow us and share!

Instagram


Build your Own Garden Fence

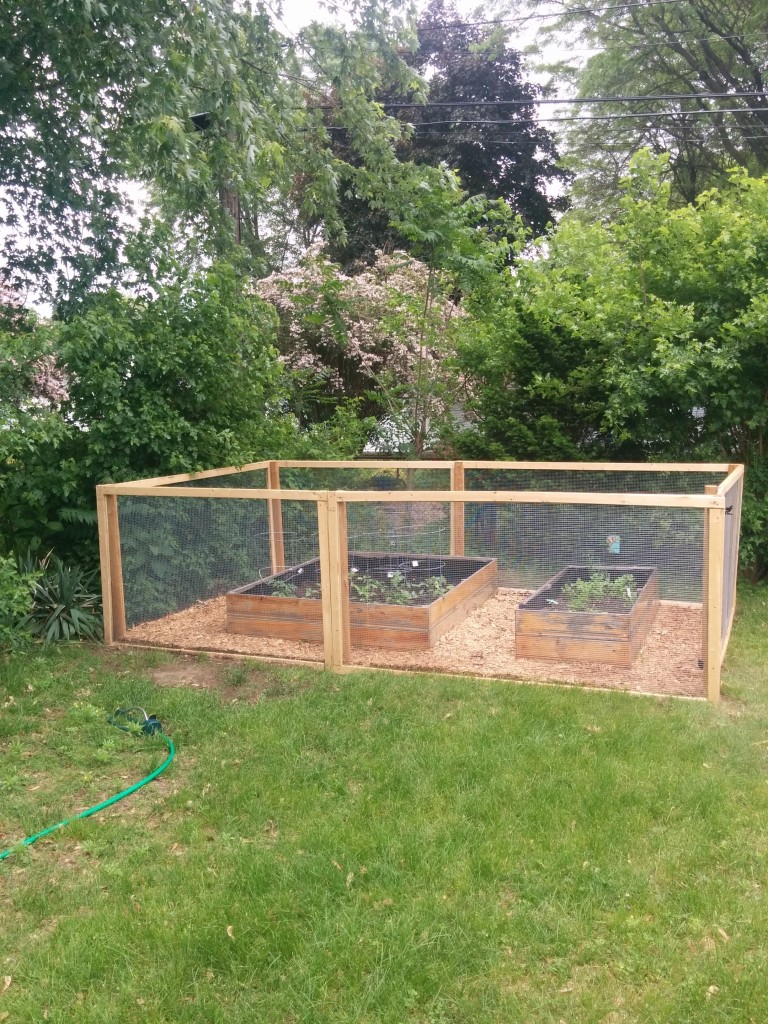
If you read our previous blog post on how to build a raised garden bed on a budget, then you might be wondering how we have kept our harvest safe from unwanted visitors. Initially we went with a cheap fence made of galvanized poultry netting but after many missing tomatoes and half-bitten squash we decided that the next year we would spend a bit more to have a quality fence. We wanted a roomy enclosed space with easy access for us to plant but sturdy and tall enough to keep the demon bunnies out. I soon sketched out a blueprint for my imagined firewall and got to work making it a reality. I will warn you that it is a bit on the pricier side but it’s a sound fence that’s practical and aesthetically pleasing. Shall we get to work?


IMG_20140720_201426

Our sorry excuse of a fence

Supplies for an 12ft x 8ft garden fence
2.5 x 2.5 x 8ft  ($27.79)
24 2 x 4 x 8ft ($80.88)
1/2 x 4ft x 25ft Hardware Cloth ($38.98)
1 box Wood Screws ($6.26)
1 Fence Door Hardware ($15.98)

Tools
Staple Gun
Post Hole Digger
Miter Saw or Hand Saw
Power Drill

Directions

  1. Design a template for your fence because this saves you on both time and money. The desired size of the enclosure will dictate how much wood you will need and in turn how much you will spend. I can’t stress enough how important the planning phase is for any successful project.
  2. Cut the 2.5 x 2.5 x 8ft timber to 7 ft. 5ft of the timber is for the fence sections since the hardware cloth is only 4ft tall and the remaining 2ft is going into the holes you will dig to secure the fence.
  3. Using the post digger, dig seven holes (3 on each side and an extra one for the door) about 2 ft deep. I did not use cement to secure the timber posts because I find it unnecessary but feel free to use cement if you like!
  4. Once you have dug your post holes, insert the timber poles leaving 5ft above the ground. Make sure the poles are level by laying a 2×4 or a longer piece of wood across the posts while placing a level on top of it.
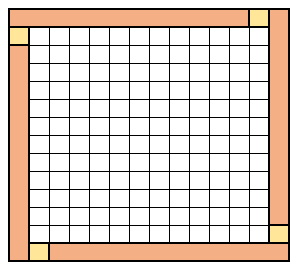
  5. The next step is to assemble the sides of the fence by using the 24 pieces of 2x4in x 8ft pieces to make rectangular frames:
    • Cut a total of four 2 x 4 x 8ft to a height of 5 ft (current they are 8 ft). These will be the vertical sides of your frame. The hardware cloth is 4 ft and that is your height unless you want the hardware cloth to be shorter.
    • Cut a total of four 2 x 4 x 8ft to your desired width. I cut mine to 6 ft because I needed the width of the fence horizontally to be 12ft.
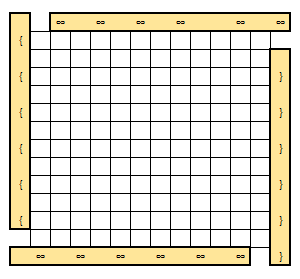
    • Now that you have four 4ft and four 6ft pieces lay them out according to the design in Figure 1.  You must follow that design if you want to keep the fence sturdily joined together. This also keeps the ends from bending.
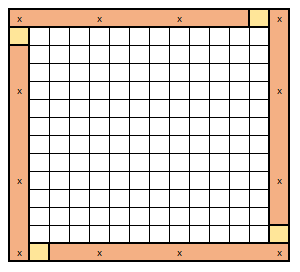
    • Lay the hardware cloth flat on top of your bottom piece of your boards (see Figure 2 ) and fasten using your staple gun.
    • Proceed by laying the top pieces of your board over the hardware cloth/bottom frame and join the boards together using wood screws (see Figure 3).
    • Flip the completed fence frame gently and screw the other side as well (see Figure 4).
  6. Repeat Step 5 until you have enough sections to enclose your garden. I needed to repeat the  step six times. If you are unsure about your calculations try attaching your fence side to the post first and proceed by building then attaching rather than building all the sides and attaching them at the end.
  7. Now you can attach the completed fence sides to your 5ft timbers posts using a drill and wood screws.
  8. Create a basic door using the leftover 2 x 4 x 8ft by cutting them until you have two 2ft and four 5ft pieces. Align the four 5ft pieces on the ground vertically and make sure the space between them is even. Place the two 2ft pieces one closer to the top and one closer to the the bottom, using wood screws to secure them. Last but not least cut a piece of hardware cloth to the size of your door and install it on the backside of the door. I used basic fence door hardware for the hinges and lock. Installation manual is included in the packing and is very straightforward.
  9. For an overall cleaner look, use mulch, wood chips or small stones between the garden bed(s) and fence.
  10. Enjoy the fruits of your hard labor without bunny or deer bite marks.
    newfence

    Figure 1 – Bottom, Top & Hardware Cloth

    fencedesign2

    Figure 2 (Spacing for visualization)

    fencedesign3

    Figure 3 (w/o spacing)

    fencedesign4

    Figure 4 (w/o spacing)

IMG_20150529_125008IMG_20150529_125016IMG_20150529_125023IMG_20150623_132751

If you liked this post please follow us and share!

Instagram


Don’t Fear the Tile

IMG_20140427_130054
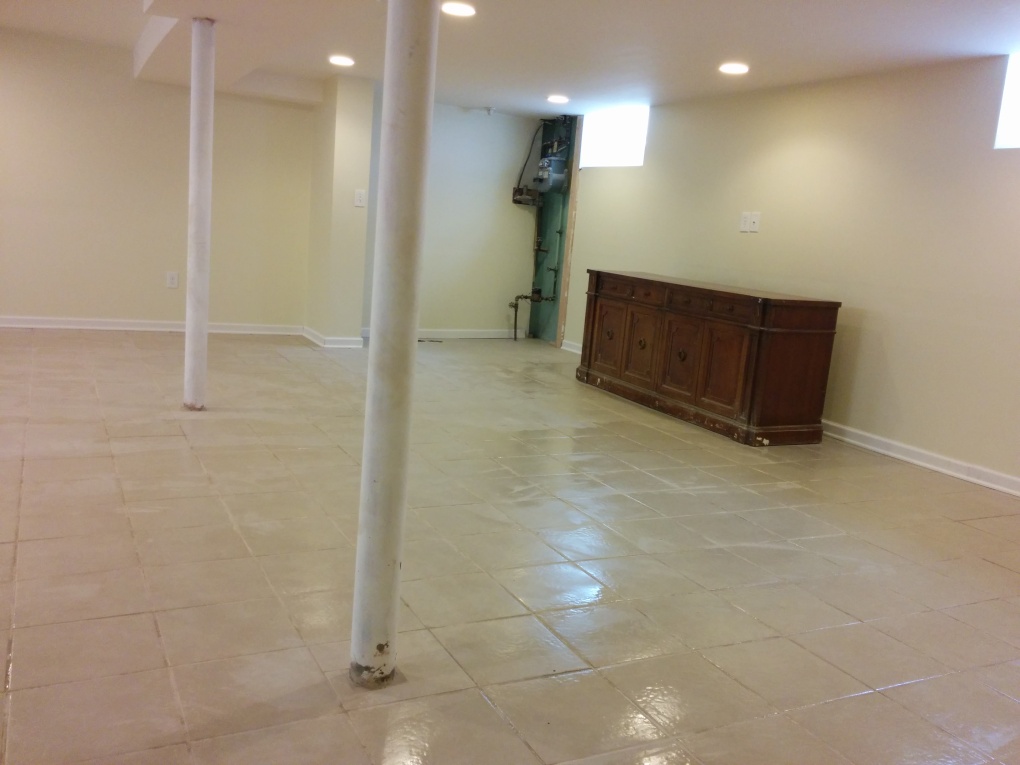
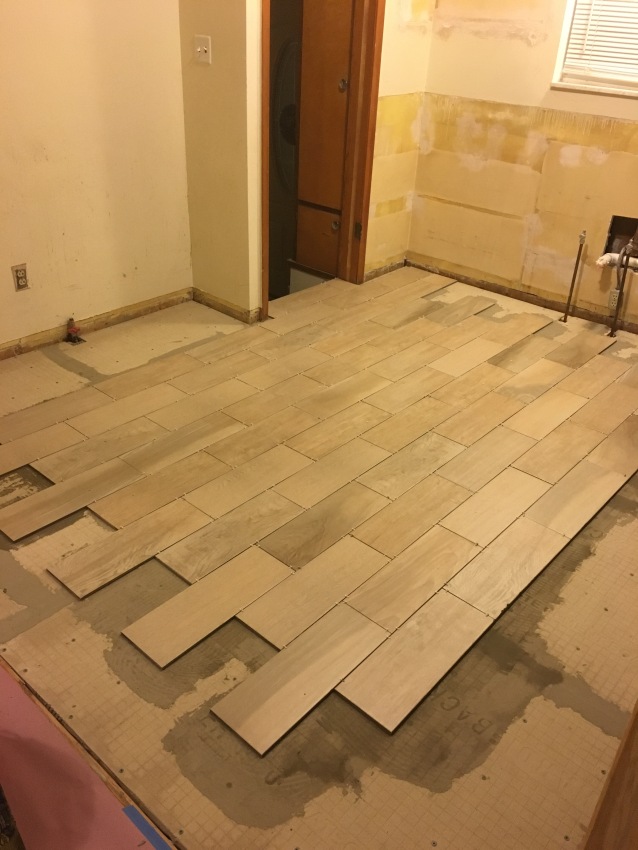
I know we have been MIA but for good reason. We recently started remodeling our kitchen and we are doing pretty much everything ourselves from demolition to tiling to cabinet installation (which means some fun new posts coming soon). This means writing has been on hold for the most part as we juggle chasing after our kinetic 10-month old in between piles of schoolwork and construction. This is a post we have been wanting to do for a while but we just weren’t sure how we felt about encouraging you to tile on your own. Maybe our first tiling success was a fluke, we thought. Considering how many people furrowed their brows over the thought of us tiling, you can’t blame us for being cautious. But having tiled our entire basement in 2014 and now our kitchen in 2016, we are confident enough to encourage you to skip the contractor and try tiling for yourself. So if you’re getting ready to start a major renovation and are thinking about picking up your phone to dial a contractor, stop for a moment and listen to what we have to say. It’s normal to be skeptical about your handy skills and worry that an attempted DIY would end badly for you. You know? That worst case scenario that pops in your head telling you your work will be so bad you’ll have to pay twice as much because you will need to hire someone to fix it up. While that might be true for some things, it is not the case for tiling. Yeah, yeah, we know what you’re thinking. We had plenty of people tell us we were crazy for wanting to tile the basement ourselves. “It will be so uneven,” they said. Not so. We are nowhere near professionals and prior to renovating our basement we had not installed a single tile in our lives. Not only were we able to tile a 1,000 square feet on our own but we did a dang fine job too. With the both of us (plus my father-in-law and brother-in-law helping on occasion) putting in a couple hours of labor after work hours, we were able to complete the project in 5 days. With our kitchen remodel, I was able to tile and grout a 10×11 kitchen in just 2 days working after work hours. Still not convinced? Keep reading to see just how easy it is. And if budget is important, get ready for some major savings!
Supplies
Tiles
Mortar
Grout
Tile Spacers

Tools
Power Drill
Mixing Paddle
Big Trowel
Small Trowel
Rubber Grout Float
Level
Cleaning Sponges
Grout Sealer
Empty Buckets
Clean towels or rags

Below is a more detailed explanation and cost-breakdown of the supplies we picked out:

Because we were tiling our basement, we wanted tiles that were both durable and inexpensive. After a bit of research, we settled on TrafficMaster from Home Depot for $0.57 a square foot.  For the 1,000 square feet area we tiled, we ended up buying 68 cases of tile, which put us at $582. Always buy an extra case of tiles to have as backup in case some break or you need to replace some in the future.

tiles

For the mortar, we settled on VersaBond Gray 50 lb. Fortified Thin-Set Mortar which cost us $14.47 a bag. Since each bag covers 100 square feet, we purchased 11 bags (to be on the safe side) for a total cost of $160. Below are the pictures from Home Depot’s website for this product.

The trickiest part about selecting grout (that stuff that goes between the tiles) is making sure that the color matches with the tile. After some back and forth, I settled on the Polyblend #380 Haystack 25 lb. Sanded Grout from Home Depot. Each bag ($14.49) covers around 680 square feet so I bought 2 of them for a total of $29.

Last but not least, I went with the 3/16 inch Job-Tough Tombstone Style Tile Spaces (500- Pack) from Home Depot for the cute little tile spacers. They go for $6 a pack and can be enough unless you plan on finishing the tiles in 1 day, then we recommend you buy 2 packs for a total of $12.

Labor: By putting in the elbow grease yourself, you can save anywhere from $2-3 a square foot. Just to give you an idea-for a 1,000 square foot space that amounts to $2000-$3000 in savings. For a smaller space like a kitchen, the savings can be anywhere from $200-$300. Hey, every penny counts when you’re dropping 10K on a kitchen right?

Note: If you need to cut any tiles you will need a small manual or electric tile cutter (ex. QEP Rip Ceramic Tile Cutter @ $30).

Directions

Read More