Deliciously Spicy Carrot Cake

IMG_0886

I recently kidnapped a juicer from my dad’s house (just kidding, he gave me permission) to juice some carrots and I was surprised by how much carrot pulp was created out of such a small glass of juice! I didn’t want to waste the carrot shavings so I decided I would make a carrot cake out of them. This time, though, I wanted something a bit different than the generic carrot cakes out there. I was craving a deep rich flavor with a little more kick. After several experiments (there was a lot of carrot pulp), I arrived at what I think is the perfect blend of spice and sweetness. Instead of using solely cinnamon as most recipes call for, this recipes makes use of a blend of beautifully aromatic spices including nutmeg, clove, cardamom, and ginger. It’s the perfect springtime cake and your kitchen will thank you for the aroma.

Deliciously Spicy Carrot Cake

  • Difficulty: Easy
  • Print

Ingredients:
2 cups all-purpose flour
1 1/2 cup dark brown sugar
3 eggs (room temperature)
1 teaspoon baking soda
1/2 teaspoon salt
1 tablespoon ground cinnamon
1/4 teaspoon ground cloves
1/2 teaspoon ground nutmeg
1/8 teaspoon ground cardamom
1/8 teaspoon ground ginger
2 cups shredded carrot
1 1/4 cup of vegetable or canola oil

Directions:

1. Preheat your oven to 350F and spray your cake pan with a non-stick spray. Set aside.
2. In a small mixing bowl, measure out and sift your flour, baking soda, salt, and spices. Set aside.
3. In a larger mixing bowl, beat your dark brown sugar, eggs, and shortening until the batter is smooth and a beautiful caramel color.
4. Slowly add in your dry ingredient mixture while beating on low (or whisking).
5. Once the batter is smooth and free of lumps, add in your shredded carrots and mix well.
6. Pour the batter in your sprayed cake pan and bake for 30-35 minutes or until a toothpick inserted in the middle comes out clean.
7. Let your cake cool on a rack and frost with a cream cheese frosting if you like or slice and serve with a cold glass of milk.

Processed with VSCOcam with f2 preset

Measure.

2016-02-27 09.59.13

Mix.

2016-02-27 10.07.43

Bake.

IMG_0848

Cool.

IMG_0852

Frost.

IMG_0885

Enjoy!

If you liked this post please follow us and share!

Instagram


Inspirational Wallpaper: March

IMG_2818

Happy 1st of March and National Reading Month 🙂 To celebrate our love for spring and reading, we have merged some of my photography with our favorite books to present you with some inspirational wallpaper. We hope this Lord of the Rings’ themed printable gives you happy spring vibes that will carry you through the month. Each month we will feature a new wallpaper for you to download and use based on what we find beautiful, inspiring, cozy, and noteworthy.

LOTR Wallpaper

If you liked this post please follow us and share! You can also find us on Instagram, Pinterest, and Twitter.

Instagram


DIY Hanging Vase

This DIY project is the culmination of 3 very random happenings:

1) One of our New Year’s resolutions for 2016 was to find ways to incorporate more plants in our home. We love the sense of peace and purpose our plants bring to our home and we simply wanted to diversify our jungalow.

2) I came across these hanging vases while browsing the Pottery Barn website and really liked the concept (just not the price).

artisanal-wall-mount-vase-o

3) We can never resist the dollar section at Michaels and *somehow* ended up with 4 adorable glass test tubes for $1.50 a piece. If you have tubes around in your home (think spice tubes) that you aren’t using, this could be the perfect way to upcycle them 🙂

A few visits to the garage later and we had the perfect design for a hanging vase we had pictured in our mind. The finished product involves 4 hanging glass tubes that, while certainly smaller than the Pottery Barn Wall-Mount Vase, are far more economical ($15 compared to $69) and just as dazzling visually. If you’re looking for a budget-friendly way to incorporate more foliage without cramping your space with pots, this is the perfect solution for you!

IMG_0680

Supplies
Glass Tubes
Scrap Wood
Copper Tube Straps
Screws
Hanging Kit or Command Hanging Solution

Tools
Drill
Hammer

Note: We did not list the dimensions of the tubes or the tube straps because that will depend entirely on what you find and decide to use. If you have your tubes just take them to Home Depot and you will be able to find the straps that fit them very easily. Also, you are not limited to scrap wood for the base; we just wanted to use what we have. If you’re looking for something less rustic, Michaels has a lot of nice wood pieces that could work. All in all, if you play your cards right, this DIY is very inexpensive and so easy to put together.

Directions
1.  Once you have all your pieces, all you will need to do is drill two holes (corresponding to the the holes in the tube straps) into your base. Make sure that your base is thick enough to withstand the length of the screws.
2. If you are choosing to hang these on your wall the old fashion way, go ahead and nail your hanger to the back of the base.
3. Once complete, drill the tube straps halfway into the base so that the straps are loose enough to adjust.
4. Slip your tube through the tube strap until it is positioned the way you like (we aligned our tubes so that the tube strap was the halfway mark). Once you are happy with the positioning of the tube, tighten the screws until the tube is secure (do this gently so as to not crack the tube).
5. Mount your completed vase to the wall and decorate with real or artificial flowers, grasses, or air plants.

Now kick back and enjoy the little pieces of nature bringing your space to life 🙂

IMG_0674

IMG_0955

IMG_0964

IMG_0714

IMG_1053

IMG_1044

IMG_1035

IMG_1063

If you liked this post please follow us and share! You can also find us on Instagram, Pinterest, and Twitter.

Instagram


DIY Wooden Backsplash

IMG_9720

Ikea trips are our favorite because they fill us with inspiration (and cinnamon rolls) and my husband gets to reminisce about his childhood. This past spring we were strolling through the lower level, when we came across a display for dinnerware that we really liked. I can’t find the picture I snapped of it but it was of a kitchen island styled with pretty dishes, hand towels, etc. sitting in front of a wall tiled with gray wood panels.  At the time we were working on our basement kitchenette and still didn’t know what to do for a backsplash. We loved the way the wood panels looked and decided to recreate the look in our home. If you’re curious about how to create this look either as a backsplash or accent wall then follow along to find out just how easy and budget-friendly this project is. Thank you Ikea!

Supplies
1in x 4in x 8ft Furring Strip Boards (They also come in 3″ and 6″ as well)
Thompson’s Aerosol Waterproofing Wood Protector 11 0z.
1/8 in. Tile Spacers 

Tools
Nail gun and nails
Miter Saw
Pencil

IMG_0708

Directions

First you will want to measure the space and draw out your design to know how much wood you will need, as well as how you will make the cuts. The area we were covering was approximately 7ft long by 2ft. For that size space, we used 6 1in x 4in x 8ft Furring Strip Boards and alternated in each row between 1ft long pieces and 1.5ft long pieces.You can cut them smaller if you want a bricked look or go for even longer panels; it’s really up to you! You can even mix and match various sizes and stains of wood for a cool design.

2016-02-22 15.25.09

Note: Make sure to take into account any cabinets, outlets, or other obstacles as you will have to make some special cuts to fit around them. Think puzzle pieces. We forgot to do this in our design so we had to play it by ear during the installation. Also don’t forget to account for the tile spaces either.

Once you have your design drawn out, go ahead and cut your lumber board into the corresponding sizes. Now it’s time for the installation.

IMG_0689

Start from the base and work your way row by row. Hold up your wood tile (or have a partner help you) and nail each of the four corners to the wall. Place a tile spacer before you nail the next wood tile. Continue until you have completed the row then place a spacer above the installed tile and begin the next row.

IMG_0690

If you have your design and pieces cut ahead of time, the installation is a breeze.

Once you are done installing the tiles, apply a generous spray (make sure you wear a mask, windows are open, and there is no food in the open) of sealant to the tiles. You will want to do this especially if you are installing the wood in a kitchen because if the wood is not treated, it can get wet and become smelly and rotten. Waterproofing will really protect and extend the life of the wood. On a side note, you can totally stain or paint the wood if you like. We like the raw wood, log-cabin look so we chose not to stain it but the possibilities are endless if you want to customize this project to a specific look or style. If we did this in our master bedroom or living room, we would have considered staining or painting.

IMG_0696.jpg

IMG_9717

If you have all the tools, the project will not cost you very much. For tiling a space our size with the wood that we used, it didn’t cost us more than $20 (each lumber board was $1.98 and the waterproofer was around $7). On top of that, installation didn’t take more than an hour. It is seriously that easy! Leave us a comment and let us know what you think. Is this something you would do for a backsplash or accent wall?

If you liked this post please follow us and share!

Instagram


5 budget-friendly DIYs that can transform your bathroom

We witnessed many horrible bathrooms during our house hunting phase so we were quite grateful about the state of ours. Still, the blue toilet, sink, bathtub, and walls had us grimacing every time we looked. If we focused on the blue it felt like the whole bathroom needed to be gutted and redone but when we focused, instead, on the neutral gray tiles we knew that a few changes and some fresh decor was all this bathroom needed. Here we present 5 budget-friendly DIYs and some bathroom inspiration based on our experience renovating our main bath. If you are a new homeowner and don’t know where to start, this post is for you. If your bathroom tile is in great condition, some fresh paint on the walls and these simple DIY projects can dramatically transform your bathroom and make it look brand spanking new!

Untitled-2

Untitled-1

  1. Why pay at least $200 to replace your tub when you can paint it for $25? If there are no major problems with it (mold, cracks, dents, etc.), some fresh white paint can really make a difference, especially when you step into the tub for your first shower as a new homeowner 🙂
  2. Replacing an old, worn-out toilet can not only brighten the appearance of a bathroom but is great for the plumbing and conservation of water if that is important to you (we hope it is).
  3. A new vanity can really set the tone of the space; serving as a nice focal point and adding some much needed storage if your bathroom is on the smaller side. It really doesn’t take much to install one either.
  4. If you are changing your vanity and sink, might as well pick out a new faucet to go with it. Goodbye leaky, mildewy faucet and hello pretty shiny metal!
  5. Not to make a lightbulb joke here but it really doesn’t take a seasoned DIYer to change the lighting. Choosing something that adds bright light to the room and accentuates the overall look can go a long way.

This is certainly not a comprehensive list of all the changes you can make but it does cover the largest and often most expensive features in a bathroom renovation. With any renovation, there will always be cheaper and more expensive options so what we have included here are the best of both worlds: good quality at a reasonable price. Not all of these changes are necessary either, as it will depend on the state of your bathroom and budget. Once you have completed any of these major DIYs, you can begin with the fun part of the renovation…decorating!

For instance, you could really add a cozy, rustic feel to the space by installing recycled wood for open wall shelves above the toilet.

REISBATHROOM9_R3A1432

Image via Jayadores

Top with pretty trinkets, baskets, plants, and natural stones to bring the walls to life.

geode-bookends-set-of-2-o

Image via Pottery Barn

Images via Ikea

Don’t forget some inexpensive Ikea wall art and mirrors to make the room look more expansive.

erikslund-picture__0290565_PE424883_S4ekne-mirror__0380427_PE555348_S4Last but not least, throw down some plush bath rugs and a pretty shower curtain for a splash of color and pattern.

And voila!

BATH AFTER

If you liked this post please follow us and share!

Instagram


Swedish Beetroot Salad (Rodbetssallad)

IMG_0653

As you will come to see, the menu here is very much international. We both come from different cultural backgrounds and have experienced different parts of the world. And because we strive to eat healthy (mostly), homemade meals and a variety of colors, tastes, and textures, I end up experimenting in the kitchen to recreate our beloved childhood meals, vacation eats, and random cravings. I will never forget the first time I had Rodbetsallad while visiting my husband’s family in Sweden. I had eaten beets before but never like this and never on top of a hot dog. Seriously, you must try it (and let us know if you do). With a new sense of appreciation for this beautiful root, I decided this was the perfect way to get more beet in our diet. A few attempts later and my husband will agree that this is pretty darn close to the real thing.

Swedish Beetroot Salad (Rodbetssallad)

  • Difficulty: Easy
  • Print

Ingredients

3 small-medium pickled or freshly boiled tender beets
1 small white onion
1//2 cup of Mayonnaise (Trader Joe’s Vegan Mayo works nicely too)
1 tablespoon yellow mustard
Salt and pepper to taste

Directions

  1. Dice the onion very finely and place in a mixing bowl along with mayo and mustard.
  2. On a cutting board, slice the beets into thin rounds and then shred the rounds into fine ribbons (see images below).
  3. Add the beets to the bowl and mix well, adding salt and pepper to taste. Make sure the beets are cool before you add to the mix as hot beets melt the mayo and alter the consistency of the salad.
  4. Transfer to a pretty serving bowl and chill for 1 hour or more in the refrigerator.
  5. Serve with Knäckebröd (Swedish crispbread) for a scrumptious afternoon snack or generously spoon over grilled hotdogs for sweet creamy deliciousness.


2016-02-11 16.05.45

Processed with VSCOcam with c1 preset

Processed with VSCOcam with c1 preset

IMG_0643

IMG_0658

Beetroot salad, dill potatoes, crunchy vegetables, and crispbread make a hearty Smörgåsbord.


If you liked this post please follow us and share!

Instagram


Bathroom Cabinet Decoupage Makeover

IMG_0539 copy

There are two ways to deal with an old and worn-down possession, furnishing, etc… One way is to toss it out and buy a replacement. The other involves putting on your creative cap and transforming it into something beautiful and functional. I’ll leave you to guess which is the boring option and which is the super fun and rewarding option. We opted for the latter and although we were hesitant about doing something so bold, we are really happy with the result.

This decoupage makeover was done to an old bathroom cabinet that hangs over our toilet in our main bathroom. It was one of those things we wanted to change when we moved in but we just never got around to because we were working on bigger and badder things (like finishing our basement by hand). I (Sammy) have been trying to organize the closets in the house recently and it hit me when I saw the cabinet empty that I could fix it then and there. I pulled out some paper scraps I had been wanting to use and the rest is history.

IMG_6204 copy.jpg

What you’ll need
Mod Podge
Foam Paint Brush
Pretty paper in the design and color of your choice
Scissors
Exacto knife
Books (to aid with the drying)

This makeover is very simple, inexpensive, and can be modified for any project, big or small. Obviously, the bigger the project the more paper and Mod podge you will need. For a cabinet this size and the type of thicker paper I used, I ended up going through half of an 8oz container of Mod podge.

Time
The design really dictates the amount of time this project will take you. If you’re just applying paper by the sheet it will take significantly less time than a collage. To make the collage a bit less tedious, I made use of larger strips of paper interspersed with smaller shapes and sizes. Overall, it took me about 5 hours to complete including drying time.

Directions

All this really involves is two easy steps: 1) Apply Mod podge and 2) Wait for Mod podge to dry. The application, however, must be done with care as air bubbles can form and ruin the surface.

  1. If you’re working with furniture, take apart any shelves or doors that can be done more easily if separated. Our cabinet had one shelf that could be taken out so I did that first and while it was drying, I finished the rest of the cabinet. It would have been easier to take the cabinet down but I just brought a stepping stool and finished it on the spot.
  2. Clean the surface you are finishing with a lightly dampened cloth and dry well.
  3. Once your surface is dry, dip your brush in Mod podge and apply generously to the back of your paper.
  4. Press the paper onto the surface and apply pressure with the palm of your hands until it sticks and there are no air bubbles.
  5. Here you can place a book or something heavy over the surface so that it dries flat.
  6. Once dry (1hr) you’ll want to remove any excess paper with a scissor/Exacto knife.
  7. Finally, apply a generous coat of Mod podge over your work to seal it and let dry for at least 1 hour.


2016-02-02 16.05.11

Taking the cabinet apart.

2016-02-02 16.35.16

For the shelves I applied whole sheets of paper because it would have taken way too long if I did all of the cabinet as a collage. Make sure your paper is large enough to wrap around the shelf. Apply Mod podge and paper on one side. Let dry. Apply Mod podge on corner, press paper down and let dry. Fold paper on the unfinished side, apply Mod podge, and let dry. It’s that easy!

2016-02-02 20.32.39

Getting the books out to help get a clean, flat finish.

IMG_05433

My hodge podge design, using vintage styled paper, sheet music, florals, and pastels. I know it’s a bit quirky but I wanted something like that since nobody else would see it but us. For the visible parts of the cabinet, I stayed with a “safer” paper design that tied in with the light gray color scheme of our bathroom tile.

2016-02-02 20.37.14

I used an Exacto knife here to remove the excess paper before I sealed the edges.

2016-02-02 20.37.09

2016-02-02 20.32.25

Time to clean up the scraps and put the shelf back in.

IMG_0530

For us, the final product is such a breath of fresh air compared to the eyesore that it was. What do you think? Is this a project you would do? Any comments and suggestions are welcome 🙂

If you liked this post please follow us and share!


Aromatic Fennel Biscotti

IMG_0416

I love experimenting with foods that have a simple base but can be customized and altered in fun ways. For me, biscotti is one such food. Once you have the dough, you can create any flavor profile your heart desires. It’s the stuff of dreams. Which is why you will probably see a good deal of biscotti on this blog as I have had my fair share of experimenting 😉 This recipe makes use of the beautifully aromatic fennel seed, which we picked up from a bazaar in Istanbul. Often confused with anise (which I am guilty of doing) and used in Indian and Middle Eastern sweets, this sweet spice boasts many health benefits from relieving anemia to indigestion. Not that we need anymore excuses to eat cookies. And because we take our hot drinks very seriously, we suggest you pair these beauties with a warm chai tea latte or sahlab and savor each crumbly dunk.

IMG_9428 copy

Aromatic Fennel Biscotti

  • Difficulty: Easy
  • Print

Ingredients
2 cups of all-purpose flour (and extra for kneading)
3/4 cup of sugar
1 1/2 teaspoons baking powder
1/4 teaspoon salt
1 stick of butter (room temperature)
2 large eggs
1 teaspoon of vanilla (we use Trader Joe’s brand)
1/4 cup of fennel seeds

Directions

  1. Preheat your oven to 350 degrees Fahrenheit and line a baking sheet with parchment paper.
  2. In one bowl, beat the sugar, salt, butter, vanilla, and eggs (one at a time) until smooth.
  3. Pour in the sifted flour and baking powder and mix well until it forms a dough-like consistency. As the mixing becomes more difficult, flour your hands and knead until smooth.
  4. Add in the fennel and knead by hand for a few minutes until the fennel seeds are evenly spread throughout the dough.
  5. Place your dough on the baking sheet and shape it into a log (about 12 inches long, 2 inches thick) using your hands.
  6. Bake until light golden brown about 30-40 minutes. Let cool for 20 minutes.
  7. On a cutting board, cut your log into 1/2 inch thick slices using a sharp serrated knife. I also cut these slices in half as I like my biscotti more bite size.
  8. Place each slice side-up on the baking sheet and return to the oven to bake for another 15-20 minutes or until a deeper golden brown.
  9. Move your biscotti to a rack and let them cool.
  10. Enjoy 🙂

IMG_0350

IMG_0382

IMG_0389

IMG_0391

IMG_0395

IMG_9436

IMG_0416

If you liked this post please follow us and share!


Cloth Diapering Newbies: Part III

IMG_8987

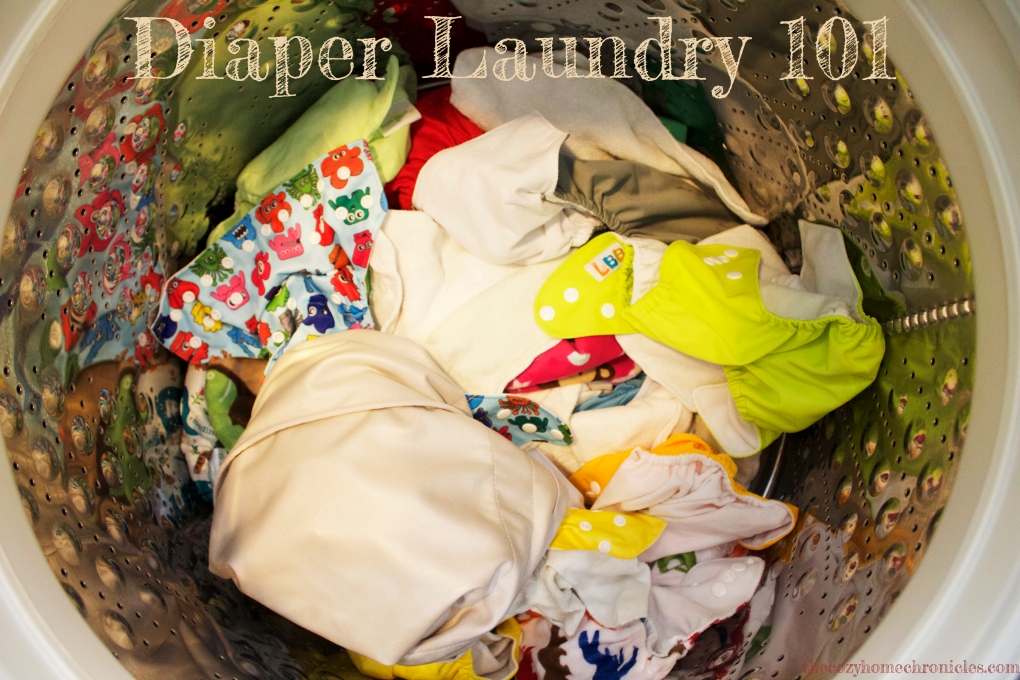
Time to dive a little deeper into the world of cloth diapering. In this post we will be discussing, in much greater detail, how to wash and dry cloth diapers, inserts, and wipes based on what has worked for us. The most important yet often overlooked step in diaper laundry is the daily maintenance of cloth diaper cleanliness. It’s like the unsung hero of cloth diaper laundry. If you want your diapers to last longer and look clean, the last thing you want to do is have poop dry and crust on them until laundry day. Anytime there is poop involved, we recommend that you rinse the diaper immediately. Not to mention how gross it would be having a bunch of poop sloshing around in the wash. This is why in our first post we mentioned having a diaper sprayer or bidet. We use the sprayer to rinse off any debris immediately into the toilet and let the diapers hang over our laundry sink until laundry day. As a result, we have not had any major diaper stains. In fact, the only stains we have are from Desitin, not poop. Basically, we never put poopy diapers in the diaper pail so what you will read below is based on care for diapers that don’t have a significant amount of poo on them. On a side note, if you have not read our previous post and are considering using flushable liners, we suggest you read it and think twice. Unfortunately, there is no magic way around getting your hands dirty if you cloth diaper…unless you are prepared to pay up.

Another part of daily diaper maintenance is something that will just make your life easier on laundry day. Instead of waiting until the day of to separate the inserts from the diapers (assuming you are using pocket diapers like us), try pulling out the insert immediately after you change the diaper as you put it into the diaper pail. We make sure to do that so on laundry day there is no extra sorting. We literally dump all the contents of the diaper pail bag (inserts, diapers, and cloth wipes) straight into the washer and toss the bag in right after. It can’t get any easier than that. So now that that’s squared away, let’s get to the washing details.

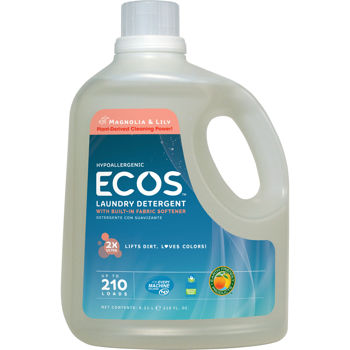
First things first. Laundry detergent. One of the things we wondered about was what kind of detergent to use especially for something going directly on baby’s bum. The options are many from Seventh Generation, The Honest Co., Burt’s Bees, Babyganicf, etc. and all have minimal ingredients (scented with essential oils) and no harsh chemicals, which is perfect for diaper laundry. We settled on a brand called Ecos because it fit the criteria of being chemical-free, it had built-in softener, and being available at Costco meant the price was just right. So far we have zero complaints; it delivers stain free laundry that smells great and is budget friendly. Score!

350-520576-847__1


Washing

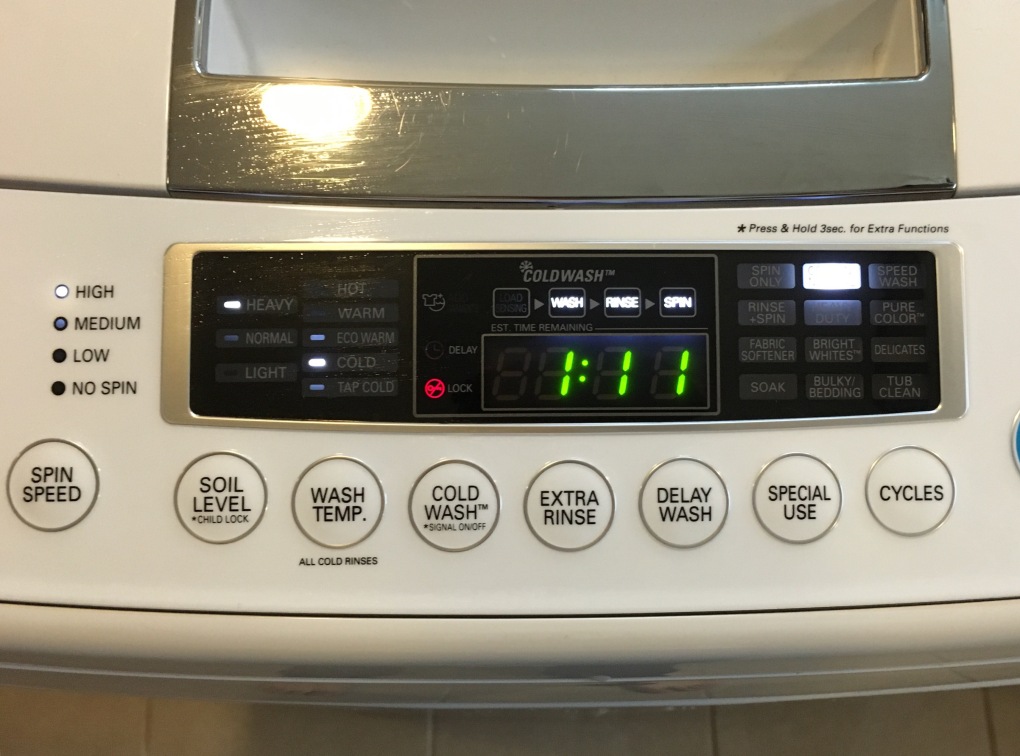
Cloth diaper laundry is surprisingly easy and straightforward. There is no special cycle or real need for several washes (unless you’re not rinsing the poop right way). The important thing to know here is that you should always wash your diapers, inserts, and cloth wipes on cold.  There is no reason to use warm/hot water unless you have some seriously messy diapers. Even then, try not to do that too often as frequent washing in warm/hot water can ruin the leakproof ability of the diapers. We did not try this to know, but if you’re spending all that money on cloth diapers you’ll probably want to play it safe and follow the manufacturers’ suggestions. Although it is subjective and hard to measure, we have not noticed any difference in absorbency (excessively leaky diapers or a drastic change in the number of diapers we use daily). Babies will always leak. Our baby leaked with pampers and seventh generation disposables and he leaks through cloth diapers. It’s just because he pees a lot and not because cloth diapers are not as absorbent.

Here are the exact settings we use for our wash cycle:

  • Wash Mode – Normal Cotton
  • Wash Time – 60-100 Minutes
  • Wash Temperature – Cold (30°)
  • Wash Soil Level – Medium or Heavy (depends on the situation)

img_0118

Drying

Once the wash cycle is complete you will want to separate the diapers from the inserts and cloth wipes. Go ahead and throw the inserts and wipes (and the diaper pail bags if you washed them) into the dryer. We set our dryer to 1 hour on medium heat and they turn out perfectly dry and smelling fresh. You really do not want to exceed medium heat because you can shrink and ruin your inserts. If you are in need of diapers immediately, toss them in the dryer afterwards on “Air Dry”. It will take time but not as much as hanging them to dry.

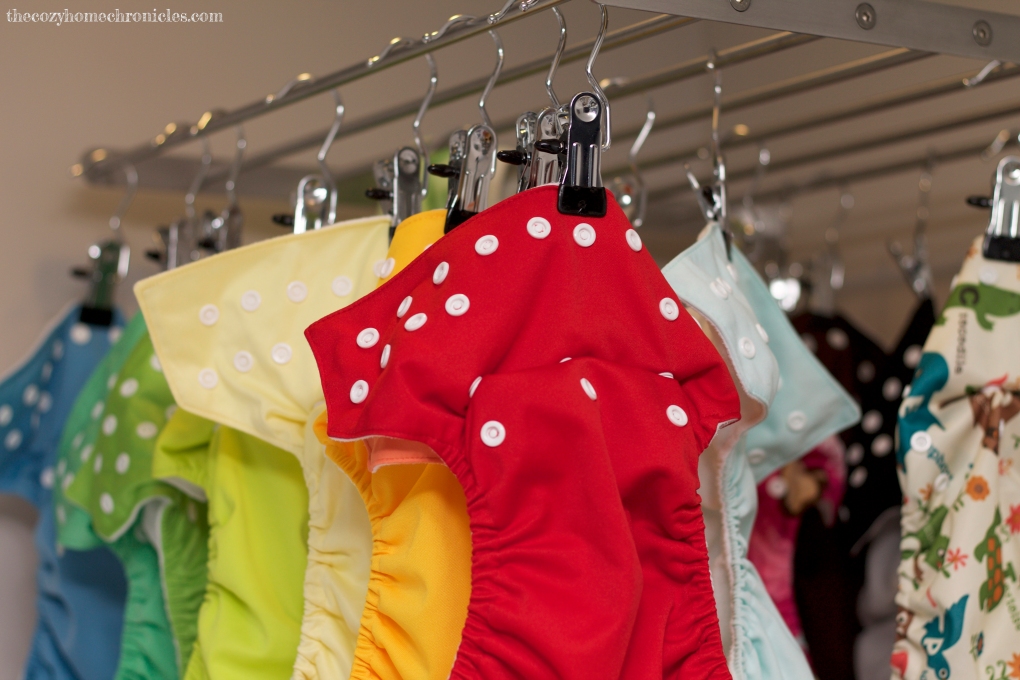
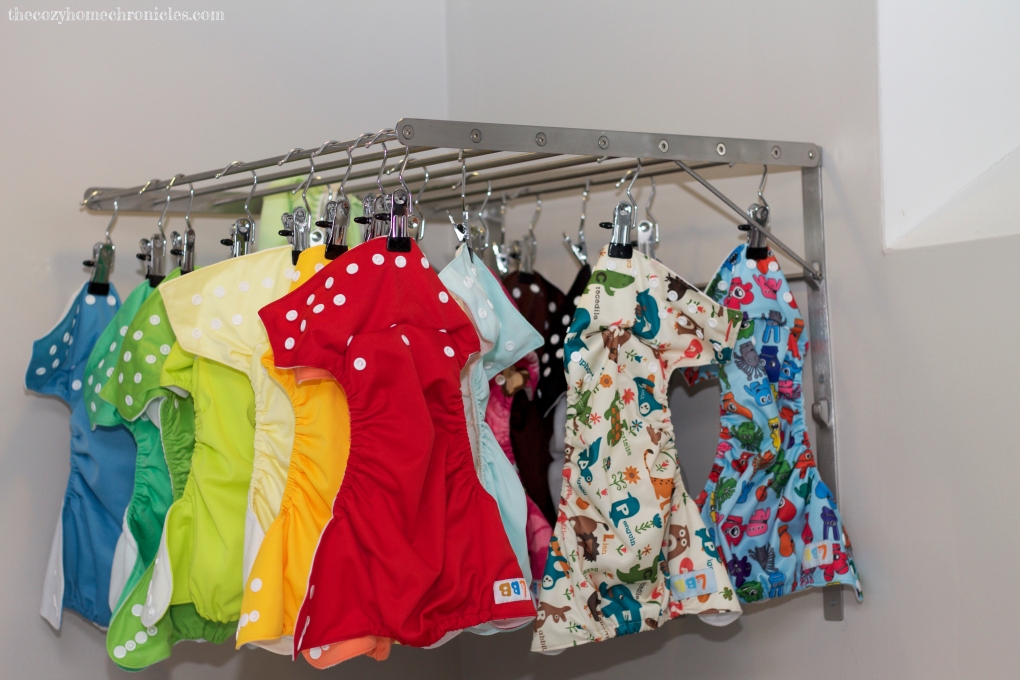
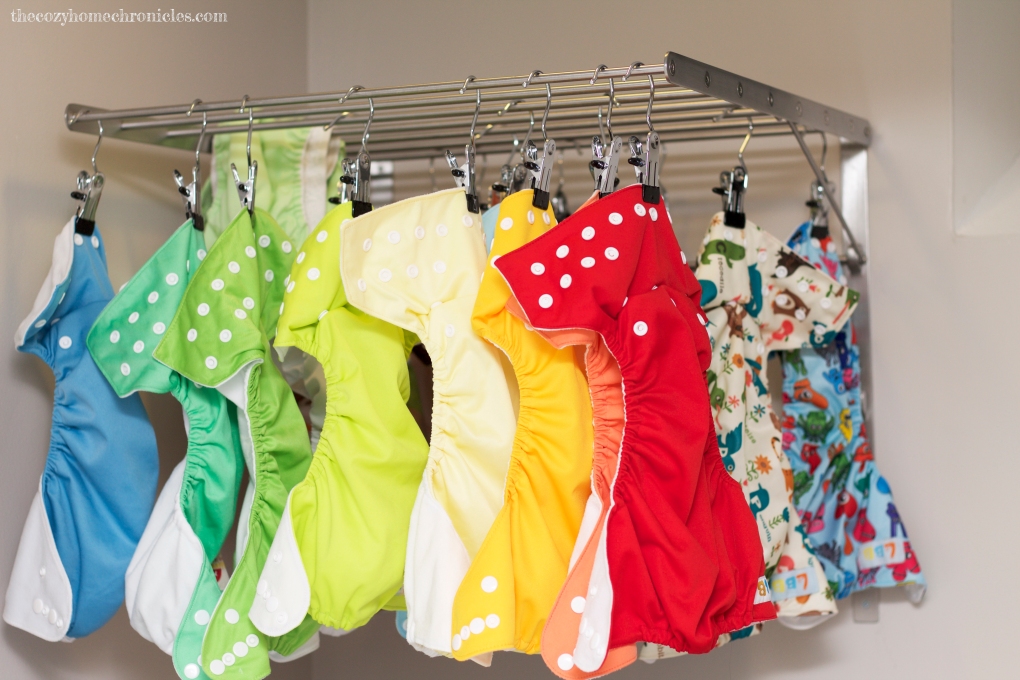
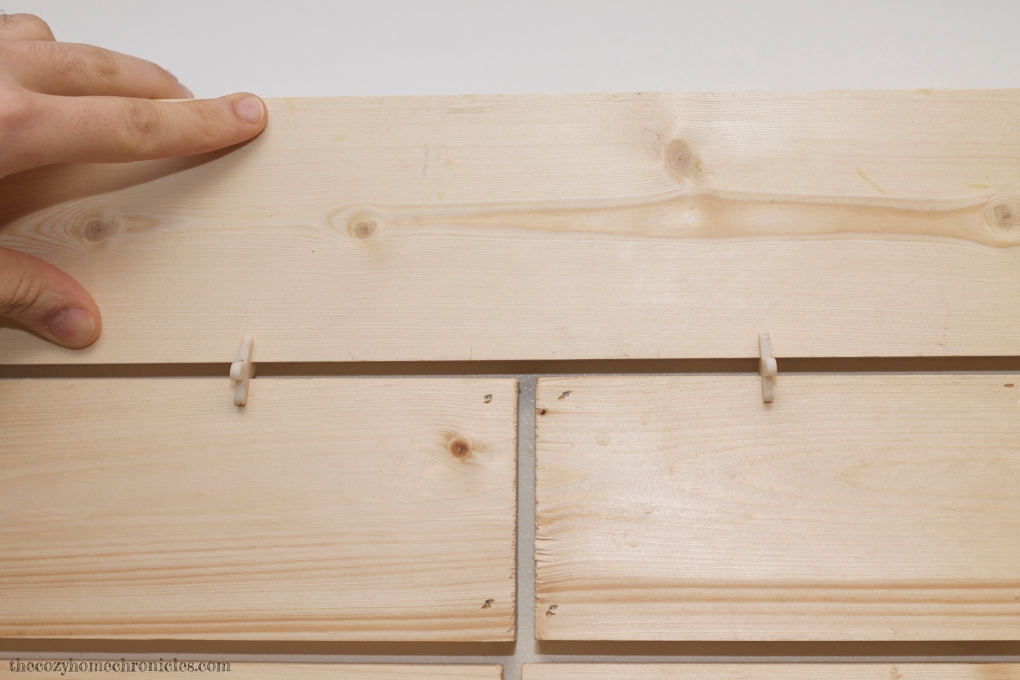
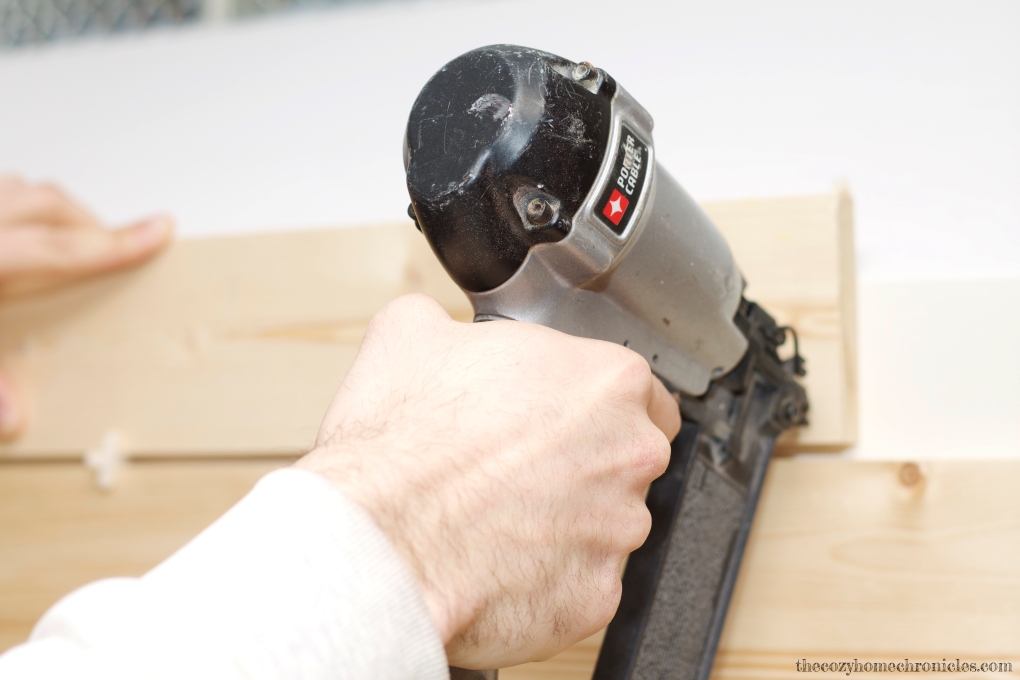
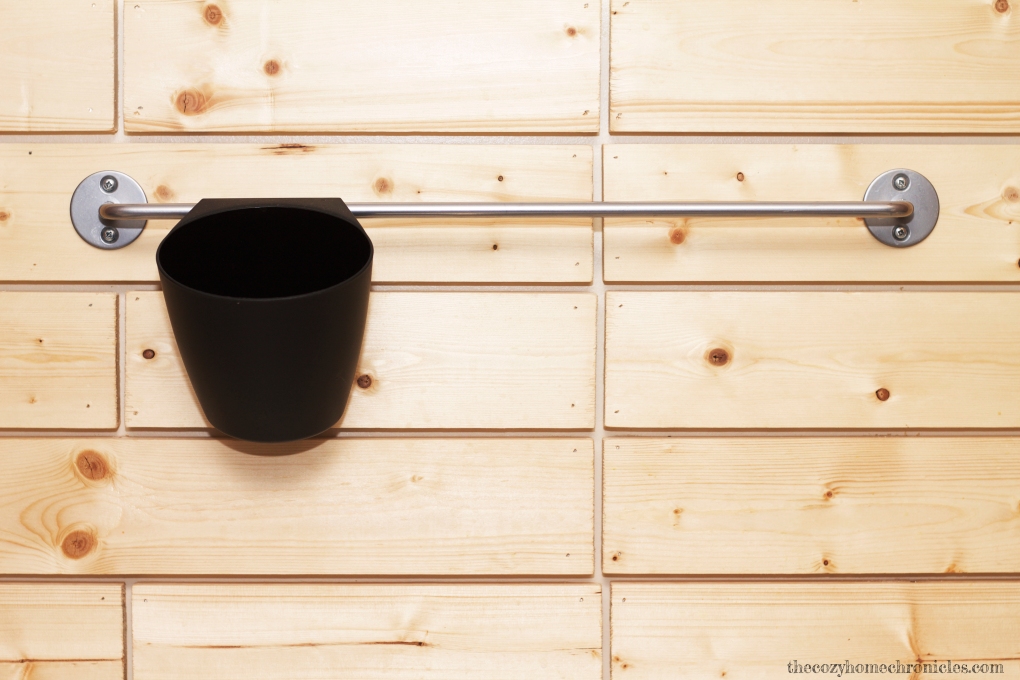
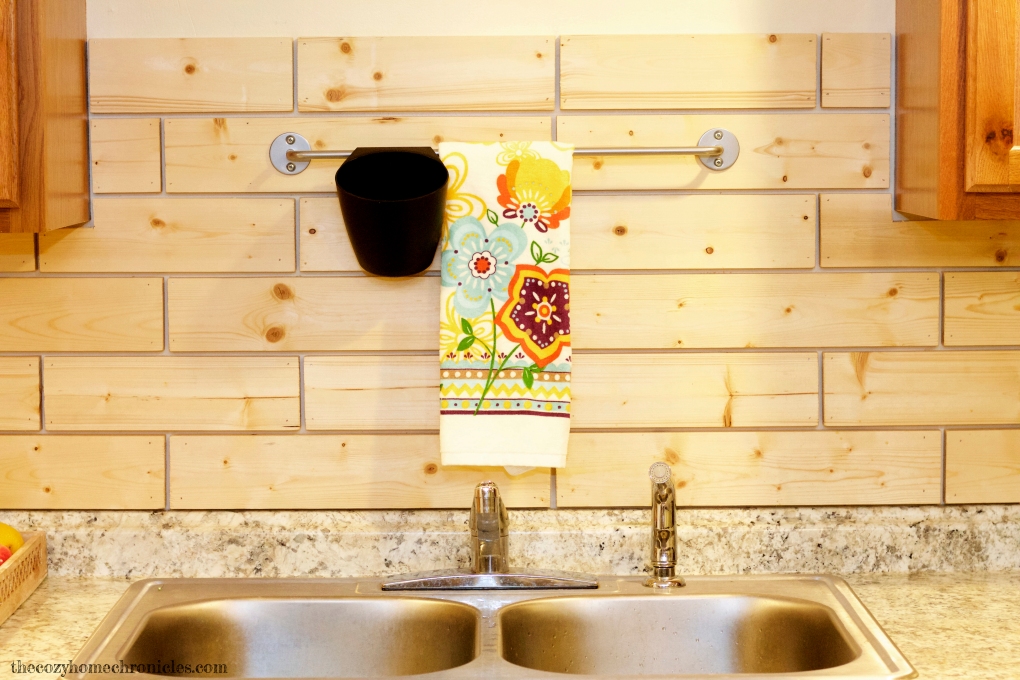
For drying the diapers, it is best to hang them on a rack somewhere where there is a draft or fresh air. If you are blessed to live where there is good sunny weather, you can hang them outside. Our weather doesn’t accommodate this luxury 8 months of the year so we installed a wall drying rack in our laundry room. Our setup (see below) cost around $40: $20 for the hook hangers by J.S. Hanger ( iPow is another good brand on Amazon) and $20 for the Grundtal Drying Rack by Ikea. Ikea has several cheaper options that are portable and foldable but if you’re looking to save space, a wall set-up is the way to go.

IMG_8356

IMG_8363

IMG_8359

Once your diapers have fully dried (around 3-4 hours), all that’s left to do is grab a helper, stuff your inserts back into the diaper, and lay your prepared diapers back on the changing table shelf for use again. Our baby loves the bright colors of his diapers so we usually sit all together in the nursery and talk about our day while we stuff the diapers and baby rolls around playing with his diapers. Cloth diapering is definitely not as “quick and easy” as disposable diapering but because it is meaningful to us we find ways to cultivate cozy moments around the routines that come with it.

IMG_9500

Our adorable helper

This concludes our cloth diapering series in terms of what you need to get started and how to maintain a cloth diapering lifestyle. Yes, it’s a bit of extra maintenance and laundry but it is not overly taxing or impossible. That is our takeaway message. We hope that if you are on the fence or hesitant about cloth diapering, you now feel it is something you can totally do (because it is)! While we have only been cloth diapering full-time for 6 months, we have had a very positive experience so far. There is still much to learn and reflect on and we will likely do a reflection/update post in the near future as we continue this journey. Until then, if you have any questions or comments we would love to hear from you!

If you liked this post please follow us and share!


Home Theater System on a Budget

IMG_9367

So after many years of renting apartments and one-story condos, I finally had my own place.  And what do you do when you discover that you have an empty basement? You build your own Home Theater! Right? Because, why not?

If you need more convincing, here are some reasons why building a home theater might be a great idea:

  • You enjoy television and gaming on big(ger) screens
  • You thoroughly want to enjoy your movie nights (think Lord of The Rings Epicness)
  • You don’t want a TV with average sound quality
  • You can’t afford a 120″ HDTV because last time you checked you didn’t have $130k to burnVizio 120 inch Tv.PNG

If any of those reasons resonated with you, you might be happy to hear that with a bit of elbow grease, you too can have the home theater of your dreams without the ridiculous price tag. Let’s get started!

Total Cost = $1,370 (tax not included)
Setup Time = 2-3 hours

What you’ll need

Note: You will always find “better” and more expensive products out there. What I have is a balanced system that allows for a great picture and sound at a very reasonable price.

Tools
Builder’s level
Pencil
Power Drill
Screws
Screwdriver
Allen Wrench
Drywall Anchors
A helping hand

Preparations and Planning

  • This design is for a 10×10 space and the sound system we chose has the perfect wiring for this size space. If you are working with a larger space you might want to pay attention to that.
  • Designate a location for your projector where you will have a distance of at least 7-10ft from the screen to ensure an enjoyable viewing experience. I positioned the projector 10ft away from the wall that I wanted to install the screen on and I am very happy with the quality of the picture.
  • Decide if you want to have your projector mounted to the ceiling or have it portable. If you choose the portable route, you will need some kind of stand to position the projector on when in use. I went with the ceiling mount for safety and aesthetic purposes so you will find directions for ceiling installation further down.
  • Make sure you have an electrical outlet to plug your projector into especially if you are going to mount it to the ceiling. I installed one while I was finishing the basement because I knew that I eventually wanted to put up a projector.
  • When it comes to adjusting distance, viewing angle, focus and such, the benQ projector I picked has an enormous amount of configurations. So why benQ, you ask? Because most projectors won’t be as flexible when it comes to positioning! This projector will allow you to zoom in/out and shift the lens, which is very helpful when you don’t have the perfect room or space to set up a projector.

IMG_20140427_130039

Directions

A. Projector (if you are not attaching it to the ceiling you can skip to part B)

  1. These steps will cover fastening the projector to the ceiling mount. Note that the mount bracket comes with two separate parts that connect (see figure 1). The top piece is for securing to the ceiling wall and the bottom piece (the mount arms) is for securing to the projector.
  2. The first step requires you to connect the projector to the mount arms very carefully [The entire mount bracket comes with an extendable metal bar that is helpful if you have a high ceiling. I installed this in the basement (low ceiling) so there was no need for the extender. If you look at the above picture for the mount, you can see that there are 3 mount options. I went with the first one which skips adding the extender to the mount and installs the bottom mount piece directly to the top piece]. This was by far the longest and most time consuming step in this project and requires a great deal of patience and care to install the screws, through the holes in the arms, into the projector. You will need to tighten them well without damaging the projector’s pre-screwed holes. I was able to install 3 screws on the arms and skipped the fourth because it was difficult to align the 4th arm to the projector. Is it sturdy though? Even with just two screws I wouldn’t be worried.

    Mount with new labels

    Figure 1

  3. After deciding on where you want to install the projector [I made sure there was a wooden bracket/stud where I was mounting the projector] you will need to hold the top mount piece in position and trace the holes with a pencil.
  4. Proceed to drill two small holes over your marks then hold up the top mount piece while you drill it securely in place with the screws. [Note that you can adjust the projector using the tilt and rotation adjustment options in the top piece so don’t worry if it isn’t 100% level as you are mounting it. As long as you are aligned with the wall in front of you, you will be fine.]
  5. Once you have finished securing the top piece of the mount to the ceiling you can hook the two pieces (top piece+bottom with projector) together and tighten using the allen wrench. Now on to the screen!

    Projection design.PNG

    Figure 2

B.  Projector Screen

  1. Next you will need to install the 120 inch projector screen. You first need to make sure it is positioned in the center focal point of your projector (see figure 2). Once you have your position all set, you will need to mark with a pencil the upper right and left corners of the wall where you will secure the projector screen ends.
  2. Drill a hole in each of the marks you made (2 total) and screw a drywall anchor in each hole.
  3. When you have finished you will need to use a screwdriver to gently screw two heavy duty screws in place, leaving 1/2 inch distance between the wall and the screw head. Now, with a helping hand, hook the projector screen end caps (see figure 3) onto the screws. Make sure the screen is level horizontally and vertically against the wall.

    Screen install.jpg

    Figure 3

  4. At this point you can turn on the projector and fine tune the alignment on the ceiling mount bracket. You can also fine tune the zoom on the projector. This will be different for every installation since the distance to the screen, the projector height and mount is never identical.

C. Surround Sound System

  1. Installing the 5.1 surround sound system isn’t complicated as the package comes with all the wiring you need. Here’s what comes in the box: 4 Satellite Speakers, 1 Center Speaker, 1 Subwoofer, 5 black & 5 red tip wires + Subwoofer Cable
  2. Connect each of the four satellite speakers to a speaker stand and place one satellite speaker in each corner of the space. Connect the wires from each speaker to your main sound system.
  3. Install the center speaker right below your projector screen and find a good location for your subwoofer. The manufacturer recommends a close (but not too close) location to your seating area. See figure 4 for reference on how I placed my speakers and subwoofer.

    Speaker setup

    Figure 4

  4. After installing and connecting all your wires back to the main system, you will have to turn it on and open the sound settings to adjust everything. This can take 15-20 minutes to get it right.
  5. Using your projector as a screen, assign every speaker a location. For example: Satellite speaker #3 is the Front Left speaker while Satellite speaker #4 is the Front Right speaker and so on. After doing this for all the speakers, you have to fine tune the sound by using a Sound Level device [or if you are a smartphone owner just download one of the many free apps on iOS or Android] to calibrate the speakers. To do this properly, you will need to be sitting in the middle of the space where you are installing the speakers. The Denon guide will walk you through this step-by-step if you get stuck.
  6. Last but not least connect the 15 ft HDMI cable from the projector to the Denon sound system. From there, connect the second HDMI cable from the Denon sound system to your Blu-ray, Apple TV, Xbox or whatever it is that you are using and turn on your devices to make sure it’s all working fine.

IMG_9141

Once you are done with the setup, all that is left to do is clean up and complete your space with a nice rug (to hide all the wires), comfy seating, decor, and a budget friendly Ikea TV stand (to hide your central speaker and organize any devices, games, or DVDs you have).

IMG_20140615_154914

Of course, don’t forget to take a moment to…

IMG_20140615_154901

Now call up some friends or family, pop some popcorn, pull out FIFA 16′ or Inception and revel in the thought that you will never need to spend money at the movies again. Seriously, we have only gone out a couple times in the two years since we put this together and that was for The Hobbit and Interstellar! Let us know what you think about this project and if it is something you would consider doing. Until next post, may an evening star shine down upon you 😉

IMG_9368

Below are two short clips showing the sound, picture and overall setup taken with an iPhone 6s.

Home Theater Demo #1 from sammyandsufi

Home Theater Demo #2 from sammyandsufi

If you liked this post please follow us and share!