Watercolor Painting with Beetroot

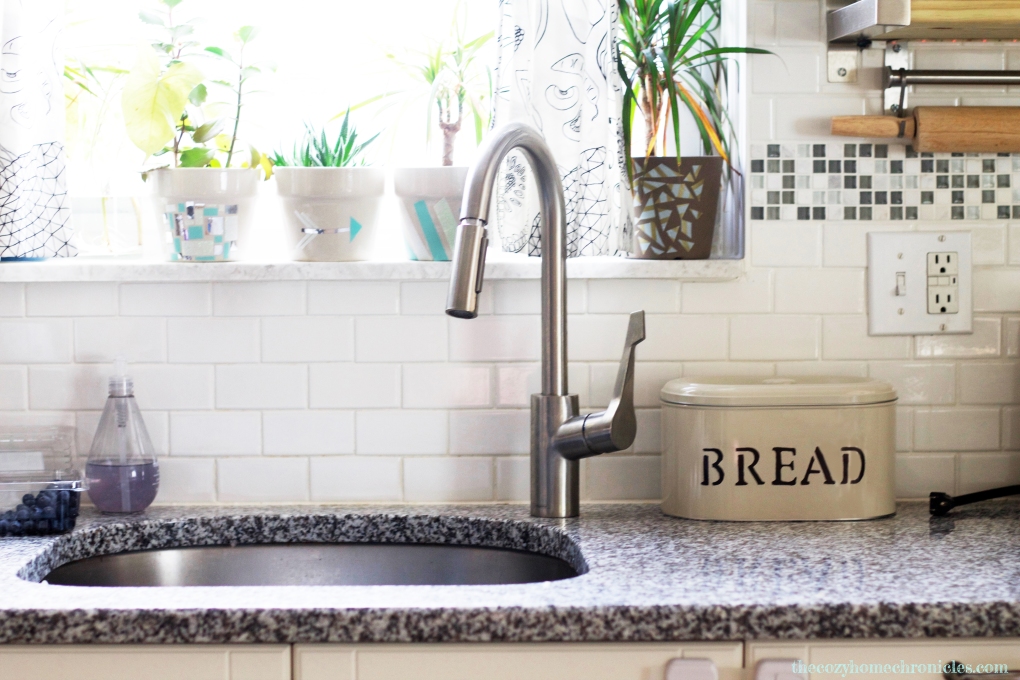
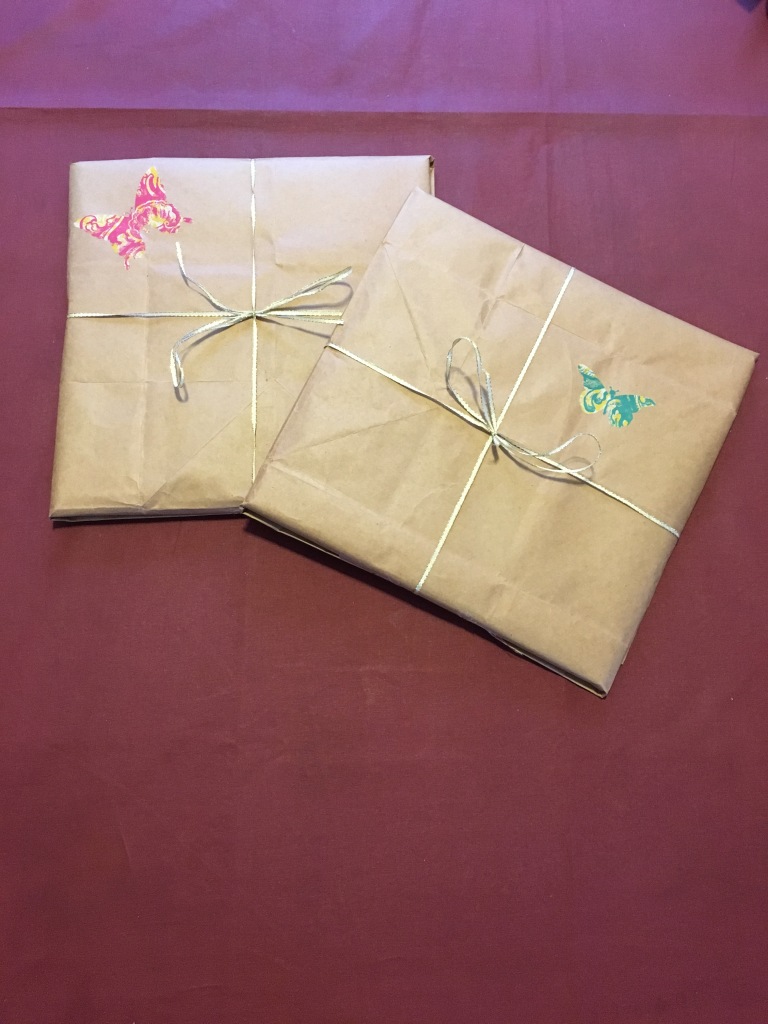
I am constantly looking for ways to reduce waste and simplify our life at home. Maybe I’m a little too determined. If I had things my way, we would probably be living knee-high in a collection of recyclable materials. Unfortunately there are not enough hours in the day to see all my ideas through and thankfully my husband is there to ensure that we do not become hoarders. Of course that doesn’t mean I don’t try to be resourceful within reason.

IMG_3754

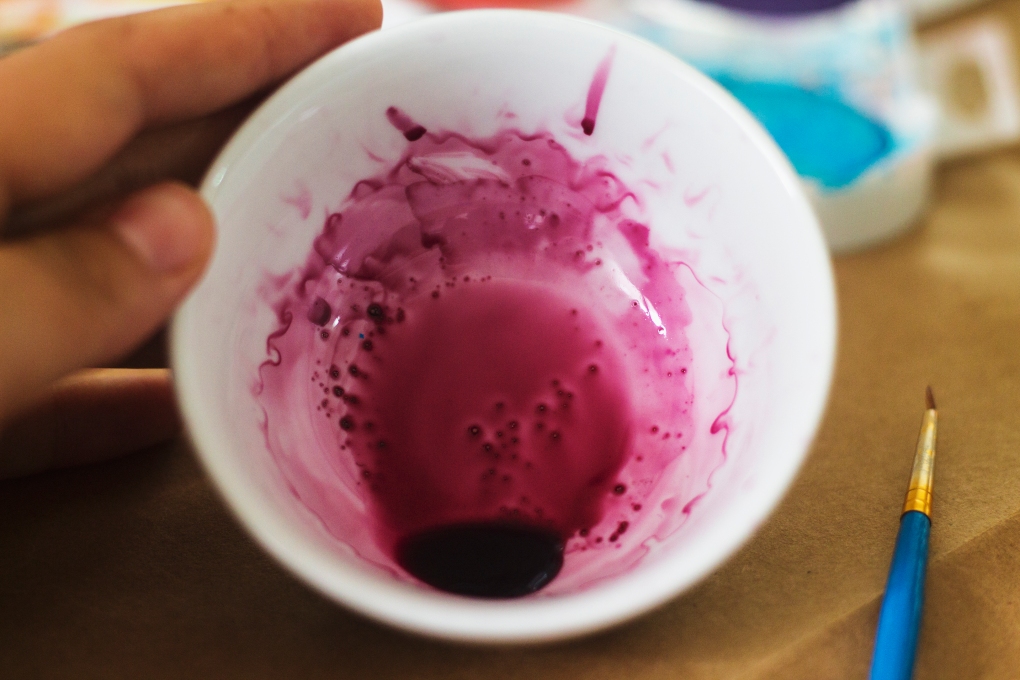
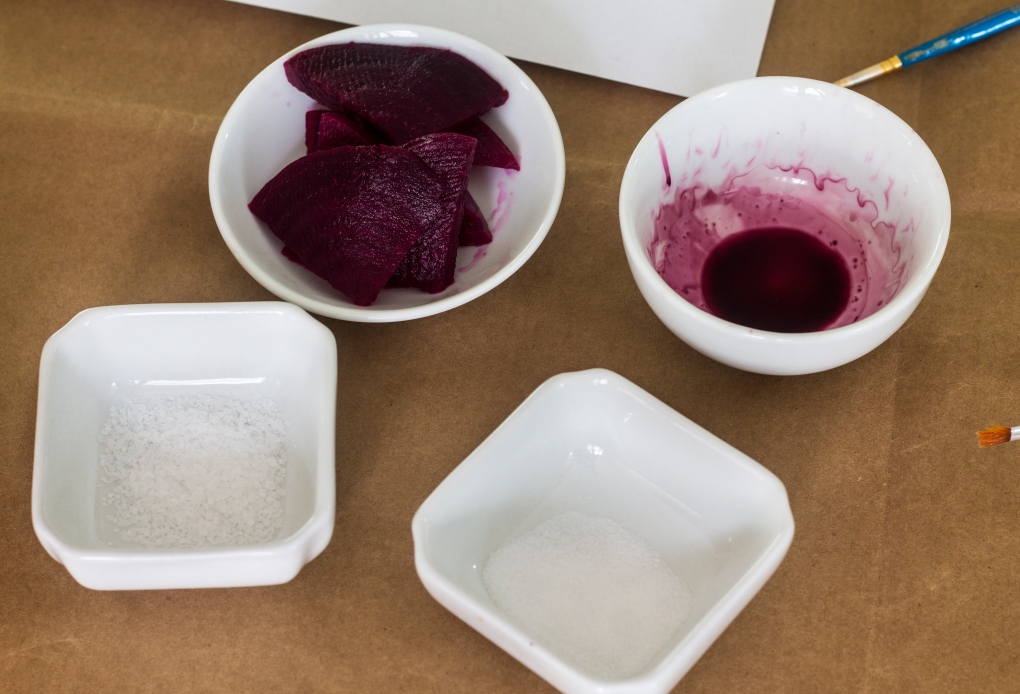
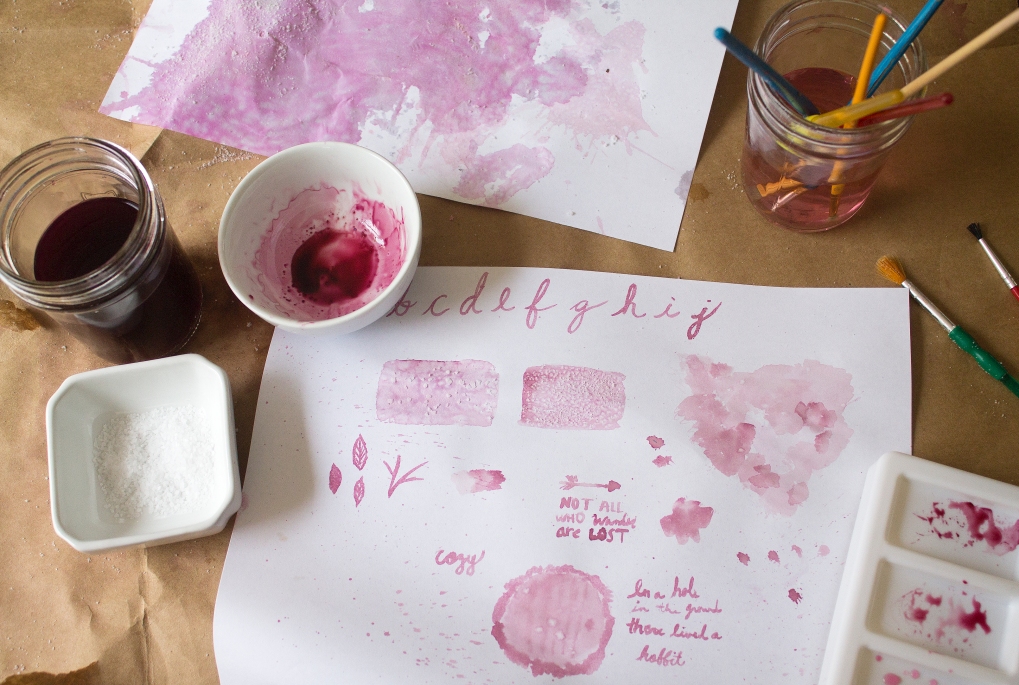
Beets are something we eat quite a bit of in our home. We love snacking on boiled beets with a splash of vinegar and salt or incorporating them in a meal like this side-dish of Swedish Beetroot Salad I posted some time ago. One of my favorite things about beets is their deep magenta hue. I imagine there was a time, before synthetic dyes, when beets were used to naturally color everyday items and it makes me feel guilty to throw away such a beautiful by-product. I have experimented painting with beetroot juice many times but this was my first time sharing this experience with my son who has finally learned to wield a brush (as good as any toddler will). The last time I boiled beets, I stored some of the juice in a mason jar in the fridge and saved it for a rainy day.  My favorite part about this activity is the fact that this paint is completely natural. My son can snack on beets and even take a lick of his “paint” and I would have no qualms about it. This activity is perfect for a rainy indoor day but you can also take it outdoors if you want to spare yourself preparing for the messy aftermath. All this is to say: If you boil beets, don’t throw out the juice. For this activity here’s what you’ll need:

  • paper, preferably watercolor paper
  • small paint brushes
  • beetroot juice ( to make it concentrated, simply microwave in a small container to evaporate the water)
  • glass of clean water
  • fine salt and course salt
  • old newspaper or something to protect your work surface

IMG_3745

IMG_3766
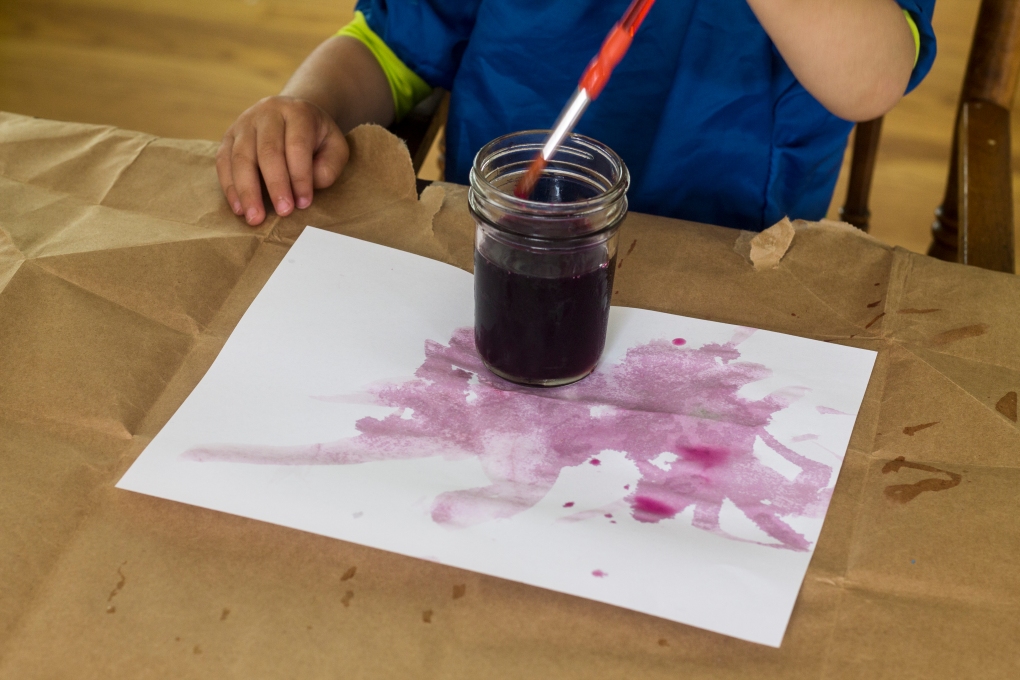
My son was ecstatic about pouring salt all over his painting (consider that he’s been attempting to dump salt out since he turned 18 months) but what he doesn’t know is that we were actually practicing a legit water color technique that I learned from Inkstruck Studio. As you can see this activity not only kept my toddler entertained but was a good learning exercise for me too. If you enjoy watercolor painting or hand lettering, you definitely could get something out of this activity if you plan ahead. Here’s a really good video tutorial that introduces basic watercolor and hand lettering techniques if you are interested. If you do try this activity be sure to share on Instagram and tag us @thecozyhomechronicles 🙂

IMG_3773

If you found this post helpful, leave a comment and tell us how we did!

Please follow us and share!

Instagram


IKEA Hack: DIY Rustic Bread Tin Box

img_9537

We eat A LOT of bread… possibly too much of it but we are hobbits so that’s probably not going to change anytime soon. Although we finished renovating our kitchen this past May, there is still some work to be done in terms of organizing and decorating. One of the things that needed to get checked off of our to-do list was finding a way to preserve and store our leftover bread. When we searched for bread storage online, we immediately fell in love with the charm of those rustic farmhouse bread tins. Of course it would have been easy to click purchase and have one delivered straight to our doorstep for $45 but where’s the fun in that? Instead we took our time getting ideas until we came up with an easy DIY bread tin. Not only is it way cheaper than any bread tin you’ll find in store but it’s super easy to make and customizable too. IKEA has two different tin options that you can use for this project and both are under $15. 

The Beromlig that we settled on came with two sizes for $8.99 and we used the larger one to make the bread tin box (we will probably turn the smaller one into a cookie tin). That’s a steal considering simple tins like the one pictured below on wayfair.com are going for $26.99 at sale price. Besides the choice of tin, you also have the option to pick any font you want. We went for a classic look with “Old School Alphabet” stencils that we found at a local Michaels. Lastly, you’ll need to settle on an ink color from the many pretty shades that are out there. Why permanent marker you ask? Well we did try acrylic paint and it peeled off too easily. Although permanent marker can come off with rubbing alcohol (we checked!), it does not come off with a gentle wiping using a wet cloth. I suppose you can use spray paint or some other fancy medium but for a simple and inexpensive home decor item,a  good old Sharpie will do the trick. Alright, let’s get started!custom_imageMaterials
Beromlig Storage Tin
 or Hemsmak
Letter stencils
Permanent marker
Washi or painter’s tape

img_9524-copy

Directions

1. Wipe the inside and outside of the tin clean with a damp cloth and dry thoroughly.
2. Arrange and level your letters on the tin and tape them in place using washi or painter’s tape.
3. Fill in the letters with any color permanent ink you choose.
4. Let dry for 10 minutes before removing the stencils.
5. Find a happy place for your bread box and fill with delicious breads 🙂

img_9485

img_9497-copy

img_9527

img_9515-1

What projects and adventures are you working on right now? Please join the conversation below in our comment section, we would love to hear from you!

If you liked this post please follow us and share!

Instagram


DIY Eid Stocking Stuffers

Untitled-2

Eid Al-Adha is less than two weeks away and I’ve been scrambling to get the house ready so that we can feel those celebratory vibes as summer comes to an end. I came up with the idea to make these Eid-themed stocking stuffers as both a way to fill with small gifts and eidiya (money)as well as decorate the home while marking the end of pilgrimage or haj that has come to pass. Despite brainstorming this project in advance, I am only now getting around to making them a reality. Now all that’s left for me to do is fill them up with some gift cards, sweet treats, and inspirational trinkets. If only there were more hours in a day! Thankfully these take only minutes to make so if you don’t feel like wrapping gifts, this is the perfect little project to make and the kids (and adults) will love having their own Kaaba filled with fun goodies. Let’s get started shall we!

Supplies
(6) 9in x  12in Basic Felt (black)
(1) 9in x  12in Basic Felt (white)
(1) 7/8in x 5yd gold sparkly ribbon
(1) 1/8in x 7yd ribbon (sub string)
Monogram letter stickers (gold)
Hot glue gun
Scissors
Hole puncher
Needle and thread (optional)

*Makes 3 stocking stuffers. To make 1 you only need 2 pieces of black felt. All of these materials can be purchased from Michaels or a local craft store.

Directions

  1. Begin by cutting one of your black felt pieces down from 12in to 9in so that you have a 9×9 square.
  2. Line up both black felt pieces and glue them together (carefully) using your hot glue gun. Start with the bottom and move on to the sides but leave the top open (this is where the awesome stuffing happens). You can also sew the felt together with needle and thread but hot glue works just as well and takes less time. Let dry for 5 minutes.
  3. Cut out a piece of gold sparkly ribbon 9 inches long and glue along the top of your 9×9 felt piece.
  4. Cut out a piece of white felt 2inches thick (2×9) and glue about 2 inches from the bottom of your 9×9 piece.
  5. Place your monogram sticker centrally between the white felt and gold ribbon strip.
  6. At the top of the 9×12 black felt piece, punch two holes approximately  3.5in from the ends.
  7. Thread any thin ribbon or string through the holes, stuff them with some fun trinkets and gift cards, and hang them up for the family to enjoy.

IMG_4490

IMG_4492

IMG_4500

Let us know in the comments below if you made these and what you stuffed them with. We are always looking for new, creative ideas 🙂 And as always, if you liked this post please follow us and share!

Instagram


Ramadan Decor: Moon-Phase Garland

The month of Ramadan is set to begin this week and I have been brainstorming countless ways to make it more special and festive for our family. Decorating is obviously one really fun way to do this (especially if you have young children) but it seems the selection of Ramadan decor out there is a bit too generic (think green and white and palm trees). Since as Muslims we follow a lunar calendar, and Ramadan begins and ends with the sighting of the new moon, I thought it would be really nice to capture the beauty of phases of the moon. Not only is this garland super cute and simple to put together but making it is a great way to bring the family together for a creative activity that inspires reflection on the wonders of astronomy.

IMG_2167

Supplies
Paper (plain white textured and assorted colors)
Acrylic paints (Any shades of gray, white, clear glitter, and yellow)
Paint brush and foam brushes
Scissors
String
Adhesives (tape and glue)
Mini clothespins
Glitter

Directions

IMG_2073

Gather your supplies

IMG_2087

On the textured white paper, paint with the foam brushes beginning with the darkest gray colors and ending with white.

IMG_2091

Make sure you let each layer dry before painting the next. By the time you are done, you will have a pattern that resembles the surface of the moon.

IMG_2092

Cut out  6 circles to the size of your liking. You don’t want them too big so the garland doesn’t droop when you hang it. My circles had a radius of about 2 inches.

IMG_2099

Cut 5 of your 6 circles down until you have the 9 moon phases. These pieces will be arranged just like this on the garland.

IMG_2105

Cut out some rustic looking stars and decorate with glitter (optional) and arrange the pieces for assembly.

IMG_2146

Using glue, tape, clothespins (or a combination of them), assemble your stars and moons on a sturdy piece of string, making sure they are evenly spaced.

IMG_2157

Hang up your beautiful garland prominently in your family room.


IMG_2167.jpg

Enjoy the lovely view!

“Indeed, in the creation of the heavens and the earth and the alternation of the night and the day are signs for those of understanding [3:190].”

If you liked this post please follow us and share!

Instagram


DIY Hanging Vase

This DIY project is the culmination of 3 very random happenings:

1) One of our New Year’s resolutions for 2016 was to find ways to incorporate more plants in our home. We love the sense of peace and purpose our plants bring to our home and we simply wanted to diversify our jungalow.

2) I came across these hanging vases while browsing the Pottery Barn website and really liked the concept (just not the price).

artisanal-wall-mount-vase-o

3) We can never resist the dollar section at Michaels and *somehow* ended up with 4 adorable glass test tubes for $1.50 a piece. If you have tubes around in your home (think spice tubes) that you aren’t using, this could be the perfect way to upcycle them 🙂

A few visits to the garage later and we had the perfect design for a hanging vase we had pictured in our mind. The finished product involves 4 hanging glass tubes that, while certainly smaller than the Pottery Barn Wall-Mount Vase, are far more economical ($15 compared to $69) and just as dazzling visually. If you’re looking for a budget-friendly way to incorporate more foliage without cramping your space with pots, this is the perfect solution for you!

IMG_0680

Supplies
Glass Tubes
Scrap Wood
Copper Tube Straps
Screws
Hanging Kit or Command Hanging Solution

Tools
Drill
Hammer

Note: We did not list the dimensions of the tubes or the tube straps because that will depend entirely on what you find and decide to use. If you have your tubes just take them to Home Depot and you will be able to find the straps that fit them very easily. Also, you are not limited to scrap wood for the base; we just wanted to use what we have. If you’re looking for something less rustic, Michaels has a lot of nice wood pieces that could work. All in all, if you play your cards right, this DIY is very inexpensive and so easy to put together.

Directions
1.  Once you have all your pieces, all you will need to do is drill two holes (corresponding to the the holes in the tube straps) into your base. Make sure that your base is thick enough to withstand the length of the screws.
2. If you are choosing to hang these on your wall the old fashion way, go ahead and nail your hanger to the back of the base.
3. Once complete, drill the tube straps halfway into the base so that the straps are loose enough to adjust.
4. Slip your tube through the tube strap until it is positioned the way you like (we aligned our tubes so that the tube strap was the halfway mark). Once you are happy with the positioning of the tube, tighten the screws until the tube is secure (do this gently so as to not crack the tube).
5. Mount your completed vase to the wall and decorate with real or artificial flowers, grasses, or air plants.

Now kick back and enjoy the little pieces of nature bringing your space to life 🙂

IMG_0674

IMG_0955

IMG_0964

IMG_0714

IMG_1053

IMG_1044

IMG_1035

IMG_1063

If you liked this post please follow us and share! You can also find us on Instagram, Pinterest, and Twitter.

Instagram


Bathroom Cabinet Decoupage Makeover

IMG_0539 copy

There are two ways to deal with an old and worn-down possession, furnishing, etc… One way is to toss it out and buy a replacement. The other involves putting on your creative cap and transforming it into something beautiful and functional. I’ll leave you to guess which is the boring option and which is the super fun and rewarding option. We opted for the latter and although we were hesitant about doing something so bold, we are really happy with the result.

This decoupage makeover was done to an old bathroom cabinet that hangs over our toilet in our main bathroom. It was one of those things we wanted to change when we moved in but we just never got around to because we were working on bigger and badder things (like finishing our basement by hand). I (Sammy) have been trying to organize the closets in the house recently and it hit me when I saw the cabinet empty that I could fix it then and there. I pulled out some paper scraps I had been wanting to use and the rest is history.

IMG_6204 copy.jpg

What you’ll need
Mod Podge
Foam Paint Brush
Pretty paper in the design and color of your choice
Scissors
Exacto knife
Books (to aid with the drying)

This makeover is very simple, inexpensive, and can be modified for any project, big or small. Obviously, the bigger the project the more paper and Mod podge you will need. For a cabinet this size and the type of thicker paper I used, I ended up going through half of an 8oz container of Mod podge.

Time
The design really dictates the amount of time this project will take you. If you’re just applying paper by the sheet it will take significantly less time than a collage. To make the collage a bit less tedious, I made use of larger strips of paper interspersed with smaller shapes and sizes. Overall, it took me about 5 hours to complete including drying time.

Directions

All this really involves is two easy steps: 1) Apply Mod podge and 2) Wait for Mod podge to dry. The application, however, must be done with care as air bubbles can form and ruin the surface.

  1. If you’re working with furniture, take apart any shelves or doors that can be done more easily if separated. Our cabinet had one shelf that could be taken out so I did that first and while it was drying, I finished the rest of the cabinet. It would have been easier to take the cabinet down but I just brought a stepping stool and finished it on the spot.
  2. Clean the surface you are finishing with a lightly dampened cloth and dry well.
  3. Once your surface is dry, dip your brush in Mod podge and apply generously to the back of your paper.
  4. Press the paper onto the surface and apply pressure with the palm of your hands until it sticks and there are no air bubbles.
  5. Here you can place a book or something heavy over the surface so that it dries flat.
  6. Once dry (1hr) you’ll want to remove any excess paper with a scissor/Exacto knife.
  7. Finally, apply a generous coat of Mod podge over your work to seal it and let dry for at least 1 hour.


2016-02-02 16.05.11

Taking the cabinet apart.

2016-02-02 16.35.16

For the shelves I applied whole sheets of paper because it would have taken way too long if I did all of the cabinet as a collage. Make sure your paper is large enough to wrap around the shelf. Apply Mod podge and paper on one side. Let dry. Apply Mod podge on corner, press paper down and let dry. Fold paper on the unfinished side, apply Mod podge, and let dry. It’s that easy!

2016-02-02 20.32.39

Getting the books out to help get a clean, flat finish.

IMG_05433

My hodge podge design, using vintage styled paper, sheet music, florals, and pastels. I know it’s a bit quirky but I wanted something like that since nobody else would see it but us. For the visible parts of the cabinet, I stayed with a “safer” paper design that tied in with the light gray color scheme of our bathroom tile.

2016-02-02 20.37.14

I used an Exacto knife here to remove the excess paper before I sealed the edges.

2016-02-02 20.37.09

2016-02-02 20.32.25

Time to clean up the scraps and put the shelf back in.

IMG_0530

For us, the final product is such a breath of fresh air compared to the eyesore that it was. What do you think? Is this a project you would do? Any comments and suggestions are welcome 🙂

If you liked this post please follow us and share!


You’ll never buy gift wrap again

IMG_8423

The holidays have creeped up on us once again (Seriously, where did the time go?) and for those of you who have saved shopping for the last minute, buying wrapping paper is the last thing on the endless list of to-dos that you want to make time for. In the holiday spirit of recycling (and saving you some time!) here’s a quick idea for a DIY rustic and personalized gift wrapping.

If you save gift bags and grocery store paper bags then you’re in luck!  We personally have a stash of Trader Joe’s paper bags that we keep around for multi-purpose use. But any large paper bag fits the bill.

  1. First, you’ll need to flatten the paper bags the best you can and gently open up the glued bottom flap of the bag. 
  2. Now flatten the bottom of the bag and the sides until you have a square shaped paper.
  3. Pick a folded crease and cut open the paper bag, flattening it once again. Also pull off any handles or straps. 
  4. Depending on the size of your gift, you’ll want to adjust the size of the paper accordingly. 
  5. Place your thoughtful gift inside and wrap nicely!
  6. For a personalized touch, use colorful stickers, ribbons, or even hand-drawn doodles to decorate your beautifully wrapped present. Here we went for a simple look but there are no limits to what you can design.

We found that even if we have the time to buy wrapping paper, we prefer doing it this way as it is 1) A great way to reuse and recycle, and 2) It looks awesome! You can even use the printed side of the Trader Joe’s bag since the art work is really pretty and wintery  and cover the “Trader Joe’s” with a gift label.

IMG_0068IMG_0078IMG_0070IMG_0071IMG_0072IMG_0073IMG_0074IMG_0075IMG_0076IMG_0077IMG_0079

If you liked this post please follow us and share!