Soy Chorizo Vegan Chili

We are so behind on our post schedule it’s not even funny but I figured as long as I’m not posting this recipe in June, we’re cool (your standards change when you’re a parent of two). So March is less than a week away but that means NOTHING here in Michigan because our weather is a wild card of unpredictability (sigh). I’m not totally complaining though because for those really chilly spring days, we have just the recipe to warm up our bones and souls. If you’re in graduate school like us or lead generally busy lives, this is another easy and delicious recipe to add to your meal plan during those really hectic weeks.

IMG_7650

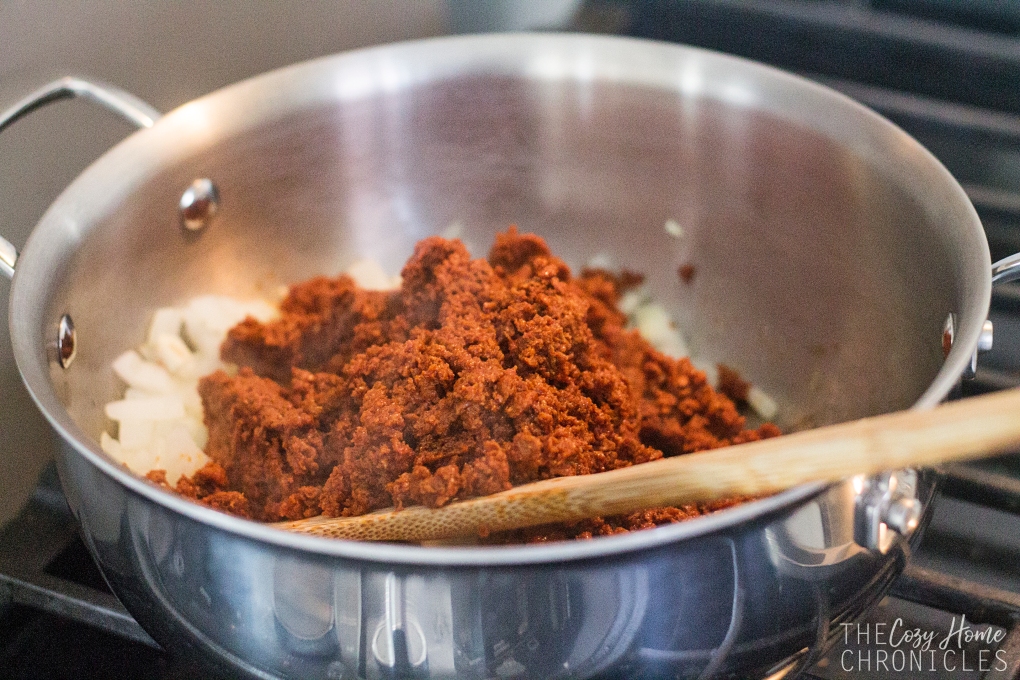
As I’m sure I mentioned before on here, we are always looking for ways to cut down on our meat consumption and a few years ago I stumbled across this pretty stellar soy chorizo at Trader Joe’s for just $1.99. I know, right?! At first we used it in our egg scrambles but one day it hit me that it would make a great meat substitute base for a vegan chili. Spoiler alert: It does! Not only does it have that perfect ground beef texture but it’s so spicy you may find you don’t even need to season your chili at all. You can also cut the preparation time for this recipe by opting for canned beans instead of dried beans but either way, your watch, wallet, and tummy will be satisfied with this hearty bowl of goodness.

IMG_7628

Soy Chorizo Vegan Chili

  • Difficulty: Easy
  • Print

Ingredients
1 large onion, finely chopped
1 cup of finely chopped carrots
1 cup black beans, cooked
1 cup kidney beans, cooked
1 12 oz. package of Soy Chorizo, casing removed and crumbled
1 15 oz. can  of tomato sauce
4 cups water or vegetable stock
2 garlic cloves, minced
Olive Oil
Salt and pepper to taste

Note: *If you prefer your chili to be less thick, you can add more liquid to water it down. *You can also tweak this recipe to your liking and include more vegetables such as bell peppers, tomatoes, and corn. *I find the soy chorizo makes the chili spicy and flavorful enough for our taste, especially with the kids in mind, but if you find the flavor isn’t cutting it for you, you can add the following: 1 teaspoon ground sweet paprika, 1 teaspoon ground cumin, 1 tablespoon chili powder, and 1/4 teaspoon cayenne pepper (optional).

Directions
1. In a deep pot, drizzle a bit of olive oil and sauté your onion, and garlic on medium heat until the onions are soft, about 5 minutes.
2. Next add in the carrots and soy chorizo. Cook for about 2-3 minutes until the ingredients are well incorporated.
3. Finally, add in the water/stock, beans, and tomato sauce. Bring to a boil then let simmer on low until reduced and thickened, about 20-30 minutes.
4. Taste the chili and season to your liking or adjust the thickness.
5. Ladle your chili into bowls and serve with vegan cheese, non-dairy sour cream, and crispy tortilla chips.

IMG_7632

IMG_7652

If you liked this recipe and tried it, we would love it if you would share or leave a comment below. For more related content, you can find us on Instagram where we share more of our day-to-day and Pinterest where we share our ideas and inspiration. And as  always…

signature3

.


Ashta-Inspired Overnight Oatmeal with Orange Blossom and Rose Water

My son, who will be turning three later this summer, recently started this weird picky eating phase some time in November. Where before he would eat EVERYTHING, he is now much more cautious and often downright rejective. One thing he has not lost, however, is his love for oats. Hot oatmeal, granola, overnight oatmeal, muesli….anything with oats (even with nuts and dried fruit), he will eat. For the sake of variety, I’ve been experimenting with different ways of preparing them and I’m happy to share today one of my successful creations that I’ve been meaning to post for quite some time now.

IMG_8038
This specific overnight oatmeal recipe was inspired by the flavor profile of Middle Eastern sweets, specifically that of Ashta; a Lebanese clotted cream used as a filling in phyllo pastries and other desserts. From the creaminess of the milk, the fragrant sweetness of orange blossom and rose water, to the nutty bite of the pistachios, this nutritious breakfast will feel like an utter treat. The best part is that it’s naturally sweetened and there is no cooking required; the oats soften overnight as they soak in the milk. You can make them in a bowl if you’re eating breakfast at home or you can pack them in little mason jars for a quick breakfast on the go. According to the Minimalist Baker, one of my favorite food bloggers, overnight oats keep in the refrigerator for up to 2 days, but are best eaten within the first 12-24 hours so you might not want to make them too far ahead of time. As long as you have your ingredients on hand, you can whip one up every night in well under 10 minutes. Alright, let’s make some Middle Eastern dessert for breakfast!

IMG_8011

Ashta Overnight Oatmeal

  • Difficulty: Easy
  • Print

Ingredients
1/2 cup of Old Fashion Rolled Oats (We prefer Bob’s Red Mill Regular or Organic)
1 cup of unsweetened milk of choice
1 teaspoon orange blossom water
1 teaspoon rose water
1 tablespoon honey (more if you like it sweeter)

Toppings
Quality Honey
Ground pistachio, unsalted
Dried rose petal

Notes:
*Serving size: 1.

*If you want your overnight oats to have a thicker, slightly gelatinous texture like pudding then add 1-2 tablespoons of chia seeds. My husband isn’t a fan so I leave them out.
*If you’re not a vegan and would like some extra richness and creaminess, you can add 1-2 tablespoons of ashta or greek yogurt.
* I purchase my pistachios whole  from Trader Joe’s and grind them myself in a small food processor.

Directions
1. In a bowl or mason jar, add milk, honey, orange blossom water, and rose water. Stir to combine.
2. Add in the oats and stir until all the oats are fully immersed in the liquid.
3. Cover securely and place in the fridge overnight.
4. The next morning, take your container out of the fridge and stir the mixture. . Drizzle with quality honey and top generously with crushed pistachios and rose petals. Enjoy

IMG_8022

IMG_8057

IMG_8049

What are your favorite ways to eat oats? We would love to hear from you in the comments below and if you try this recipe, share your thoughts  and tag us on Instagram so we can see. And as always if you enjoyed this post, please follow us and share.

signature3


Simple California Sushi Bowls

We LOVE sushi. What we don’t love, however, are all the dangerous ingredients hidden in restaurant-made sushi. The artificial colors in the surimi, the alcohol  and high-fructose corn syrup in the unagi, the MSG in the soy sauce. Many think of sushi as a healthy option but when you break it down, it becomes clear that these ingredients are far from clean and healthy. So what’s a sushi lover with little time to do? Make homemade sushi bowls of course!

IMG_7063

As you know, both my husband and I are in graduate school so the less time we can spend to have a filling and healthy meal on the table, the better! While I enjoy making sushi rolls every once in a while, I really don’t have time for it with my schedule. This is why I’ve been working on meal plans with little time investment but big impact. With a little bit of preparation, this meal can easily come together in under 30 minutes. 20 minutes for the rice to cook and cool while you cut up the vegetables and make the crab salad. That is it! For the crab salad, we use a surimi that is made from Alaska pollock and is free of alcohol, artificial colors, and phosphates. You can make this recipe even healthier by substituting the sushi rice with brown rice or cauliflower rice and using a larger variety of vegetable toppings including carrots and daikon. Either way you’ll have one amazing bowl packed with all the flavor of a California roll for a fraction of the cost and in no time at all!

IMG_7022

Simple California Sushi Bowls

  • Difficulty: Easy
  • Print

Ingredients
2 cups sushi rice (subsitute brown rice or cauliflower rice)
2 cups cold water
2 tablespoons rice vinegar
1 tablespoon sugar
1/2 tablespoon salt
12 oz. flake style surimi (we use Simply Surimi)
2 tablespoons mayonnaise (more if you like it creamier)
1 teaspoon Sriracha (more if you like it spicier)

Toppings
Cucumbers
Avocado
Scallions
Sesame Seeds
Nori

Note: This recipe makes between 4-6 sushi bowl servings depending on how big your serving size is. If you’re an individual making this recipe, it is enough to have you covered for a week of lunches. If you’re a family of four, it will take care of one meal time.

Directions

  1. Prepare your sushi rice by rinsing the rice in a bowl under cold water until the water becomes clear (about 3 times).
  2. In a medium saucepan bring the rice and 2 cups of water to a boil, then reduce the heat to low and cover. Cook for 15 minutes then remove from the heat and let stand for 5 minutes while you prepare the vinegar and sugar mix.
  3. While the rice is cooking you can dice your toppings and prepare the crab salad as outlined in step 6.
  4. Combine rice vinegar, sugar, and salt in a small bowl then pop it in the microwave for 30 seconds.
  5. Transfer the rice to a large wooden or glass bowl and add the vinegar mixture, folding gently to coat the grains. The rice is now ready for assembling the sushi bowls.
  6. In a food processor, pulse the surimi until you get a shredded texture. Then pour into a mixing bowl and add the mayo and Sriracha. Adjust to the level creaminess and heat depending on your taste.
  7. Assemble your sushi bowls by layering the sushi rice base and topping with the crab salad, nori, cucumbers, avocado, scallions, and sesame seeds. Serve alongside spicy mayo and soy sauce.

IMG_7002

IMG_7011

IMG_7053

IMG_7062

If you liked this post please follow us and share!

Instagram

signature3


Chickpea soup with tomato pickle salsa (Hummus M’Sabaha)

Ever since I purchased an Inkwell Press Meal Planner back in January and forced myself to commit to meal planning, we have been pretty consistent about practicing Meatless Mondays. Having a set genre for each day has really helped narrow down the selection for the menu, which is something I had a hard time doing prior because I enjoy making many different things. Today I’m sharing one of our favorite meatless dishes that’s nutritious and simple to make. It’s very similar to another Lebanese dish called foul and hummus except it’s without the foul or fava beans. Foul and hummus is usually eaten for breakfast and while I enjoy it now, I used to HATE it growing up. It was just too heavy for me and it wasn’t nachos or pizza so I was understandably upset when I could smell the distinctive aroma of garlic and fava beans wafting through the air. My father, the negotiator that he is, would allow me to leave out the fava beans as long as I ate everything else and that’s how my love for this dish of hummus m’sabaha blossomed. Traditional Lebanese hummus m’sabaha is much thicker and creamier than what I show here. Usually it’s roughly mashed and a little bit of tahini is added for creaminess. This spin on my childhood favorite is like a mix of hummus m’sabaha and lablabi, a Tunisian chickpea soup. We personally enjoy the combination of the light lemony, garlicky broth with the texture of whole chickpeas.  And speaking of broth, please don’t use canned chickpeas. Technically you can but if you do make sure to drain the chickpeas well and simmer them in a vegetable stock or bone broth. Starting with dried chickpeas is essential for getting flavorful chickpea broth that is not a metallic tasting goop.

IMG_3682

I always soak the dried chickpeas on Sunday evening and boil them first thing on Monday morning. My recipe calls for two cups because that’s what I soak but we don’t necessarily eat all two cups unless I planned to eat leftovers the next day {usually we don’t because it’s Taco Tuesday ;)}. Whatever I don’t use I will freeze for a rainy day. I grew up learning to cook from my father who never measured ingredients so I’m still working on how best to write and share these family recipes. Anyways, I hope you enjoy this as much as we do!

IMG_3708

IMG_3661

Chickpea soup with tomato pickle salsa (Hummus M'Sabaha)

  • Difficulty: Easy
  • Print

Ingredients
2 cups dried chickpeas
1 teaspoon baking soda
10-12 cups water
2-4 garlic cloves, minced*
1/2-1 cup lemon juice*
high quality extra virgin olive oil to drizzle
salt & pepper to taste

Salsa:
1 cup diced Lebanese pickled cucumbers
2 cups diced tomatoes
1/4 cup of fresh mint, chopped
1/4 cup of fresh parsley, chopped

To serve:
Radishes
Lebanese pickled cucumbers
Sweet onion, sliced
Pita bread
Lemon
Fresh herbs like mint and parsley

*Note: If you’re not afraid of flavor, you might consider adding more garlic and lemon juice.

Directions

  1. In a large bowl, add your chickpeas and baking soda and cover with water. Let the chickpeas soak overnight or for at least 8 hours.
  2. Drain and rinse your chickpeas and cover with 10-12 cups fresh water in a lidded pot. Bring to a boil then let simmer covered for 30-45 minutes or until tender.
  3. Using a mortar and pestle, mince your garlic cloves with salt until you have a smooth paste.
  4. In the meantime make your salsa by combining diced tomatoes, diced pickles, chopped mint, and chopped parsley.
  5. Once the chickpeas are tender, add in your garlic paste, salt, pepper, and lemon juice. You can use your pestle to give some of the chickpeas a quick mash for thickness if you desire. Let simmer for another 10 minutes then adjust seasoning to your taste.
  6. Ladle into individual bowls, drizzle with olive oil generously and top with sweet onions and salsa. Serve with fresh pita bread and garnishments of your choice.

IMG_3689

IMG_3739

Instagram


Lebanese Stuffed Eggplants (Sheikh al-Mahshi)

img_7052

Growing up in a Lebanese household meant that eggplant was no stranger to the dinner table. One of my favorite eggplant dishes was (and still is) Sheikh-al Mahshi; a Lebanese casserole made of golden fried eggplants topped with spiced beef or lamb and cooked in a light tomato sauce. My father, who loved to cook for us, would make this dish using large purple eggplant slices for the base, tender filet mignon chunks and Lebanese pine nuts for the topping, and fresh homemade tomato sauce. Delicious is an understatement.

A few months ago, I was at a local market when I came across these large 11-pound boxes of assorted baby eggplant for only $3. It was a total steal and I ended up taking a box home with me to experiment with the other colorful eggplant varieties. Although I ended up blanching and freezing many of them for a rainy day, I decided to recreate my father’s recipe using baby eggplants for dinner one night. I have always found the Lebanese dishes I grew up with simple to make but with graduate school and a household to tend to, any shortcut that doesn’t jeopardize taste is definitely welcome. While I prefer the taste of homemade tomato sauce, having a quality canned sauce on hand can really speed things up. Cooking with ground beef also saves you the hassle of having to prepare and cut your meat. Some of my modifications, however, are not just to save time but to make the recipe a teeny bit healthier. Instead of deep-frying the eggplants to soften them, I blanched them and then browned the skins in a bit of olive oil. The only issue was that I found the skins of the yellow eggplant variety too thick to eat. I personally would not use them again in a recipe like this even though the flesh had a very nice flavor. With that being said, this version was a huge hit with the family and we hope you’ll consider adding this simple, healthy dish to your recipe box.

img_6981

Lebanese Stuffed Eggplants (Sheikh al-Mahshi)

  • Difficulty: Easy
  • Print

Ingredients

10-12 baby eggplant
1 lb lean ground beef
1 medium yellow onion, diced
1/4 cup pine nuts
1 15 oz can of tomato sauce (we use Simple Truth)
1 teaspoon ground cinnamon
1 teaspoon ground all-spice
1/2 cup chopped parsley
Extra virgin olive oil
salt and pepper (to taste)

Directions

  1. Preheat oven to 350F. Rinse the eggplants and trim the stems, leaving the hulls.
  2. Bring a large pot of water to boil and blanche the eggplants whole for 8-10 minutes until tender. In the meantime, toast the pine nuts until golden and set aside.
  3. Once the eggplants have cooled, gently make an incision from the hull to the bottom of the eggplant.
  4. OPTIONAL: Drizzle a bit of oil in a deep pan and brown the blanched eggplants in batches for 2-5 minutes then set aside (see step 7).
  5. Drizzle a bit of oil in a deep pan and sauté the diced onions until translucent.
  6. Add in the ground beef, cinnamon, all-spice, salt, and pepper and cook until meat is well done.
  7. Ladle a few spoons of tomato sauce into the bottom of a glass baking dish and lay the eggplants slit side up.
  8. Spoon the spiced meat mixture into each eggplant and cover with the remaining tomato sauce. Top with half of the toasted pine nuts and half of the chopped parsley.
  9. Cover your baking dish and bake in the oven for 30 minutes until the sauce is simmering.
  10. To serve, garnish with remaining pine nuts and parsley next to a bed of steaming vermicelli rice.

Note: If you end up with extra meat, just spoon the remainder evenly on the top of the sauce before baking.

img_6997

img_6998

img_7009

img_7027

If you liked this post please follow us and share!

Instagram


Lebanese Cauliflower Stew

img_6825

As the weather has started to cool down, I find myself turning more to preparing soups and stews for dinner. Particularly Lebanese stews, which are flavorful and hearty, and have always been some of my favorite meals growing up. No matter what the main ingredient is, I can eat the leftovers for a week and not get sick of it. They are that good! If you saw our post on the Lebanese Beef and Potato Stew, you’ll notice that this recipe is very similar. The only difference is that the star of this dish is sweet, golden-fried cauliflower or arnabeet and the broth is much tangier due to the extra lemon juice. I hadn’t made this recipe in a while but when I saw large cauliflower on sale at the local market, I decided it was time for this stew to make a reappearance on our table and an appearance on this blog as I continue to share our favorite family dishes. I hope you enjoy this one as much as we do 🙂

Lebanese Cauliflower Stew

  • Difficulty: Easy
  • Print

Ingredients
2 large cauliflower heads
1.5 lbs beef stew chunks
8-10 cups water*
2 small bunches cilantro
1 garlic head, peeled
2-4 lemons
Vegetable oil for frying
Salt and pepper to taste

*I am very liberal when it comes to the amount of water I use in preparing the broth because I end up skimming a lot so naturally it gets reduced and concentrated as time passes.

Directions

  1. Thoroughly wash your cauliflower and cut them into medium-large florets. The smaller you cut them the more they break up in the stew and you definitely want some cauliflower bites.
  2. In a large stockpot, bring the beef stew chunks and water to a boil and then let simmer, skimming the fat and impurities continuously until the broth is clean. Once the broth is clean, reduce the heat, cover and let simmer until the meat is tender (about 2 hours).
  3. In a food processor, pulse the cilantro and peeled garlic until you have a rough paste. 1/2 of this will go directly into the clean broth. The other half you will save for step 6.
  4. In the meantime, prepare a pot for frying and a tray for draining the oil (paper towel works just fine).
  5. Once the oil is hot, begin frying the cauliflower in batches until they are a beautiful golden brown. Salt them as they come out and let them drain from any excess oil.
  6. Prepare a pan with a bit of vegetable oil and sauté the other half of the cilantro-garlic paste until fragrant. Do not let them burn. Fish out the beef stew chunks from the broth and toss in the pan with the sautéed cilantro-garlic paste. Once browned, return to the stock pot.
  7. Transfer your cauliflower into the broth and let simmer for another 30-45 minutes until the cauliflower are tender.
  8. Season the stew with salt, pepper, and lemon juice to your liking. The broth should have a mellow sweetness from the cauliflower and a vibrant kick from the lemon, garlic, and cilantro combination.
  9. Serve with a side of basmati rice and fresh crunchy radishes.


img_6797

img_9707

img_6821

If you liked this post please follow us and share!

Instagram


Mexican Rainbow Rice Bowls

IMG_3934

It’s almost the end of September and I’m starting to panic because my due date for baby #2 is less than two months away. I have no name picked out and I’m nowhere near as ready or organized as I need to be. Luckily, I am finding some success with meal planning in the sense that I’m getting better at making our favorite go-to recipes last longer and work better in conjunction with other weekly meals. Hopefully this will come in handy when I’m juggling a rambunctious toddler and newborn come November…but I’m not holding my breath.

My husband LOVES (probably more than me…okay maybe not but almost) Mexican food. I’ll admit, there is definitely something heavenly about the combination of savory beans or meats, fresh garden salsa, creamy avocados, and dairy. We find this combination works best in the form of a rice bowl because it’s easy to both make and assemble especially if you want a meal that will last longer than a day or two. However, I’ve been wanting a rice base that packs a little more punch and nutrition than the usual rice bowls call for. Armed with half of the rainbow in peppers and some fresh cilantro, I concocted this colorful rice that will no doubt take your rice bowl from meh to marvelous. The best part? You’ll never need to go back to Chipotle again.

Mexican Rainbow Rice Bowls

  • Difficulty: Easy
  • Print

Ingredients
2 cups uncooked long-grain rice
1 tablespoon vegetable oil
1 red pepper, diced
1 green pepper, diced
1 orange pepper, diced
1 yellow pepper, diced
1 medium white onion, diced
1 bunch cilantro, finely chopped
1 garlic clove minced
1 cup lime juice
3 1/2 cups water (sub broth)
1 tablespoon tomato paste
1 teaspoon chili powder
1 teaspoon cumin
salt and pepper to taste

Topping Ideas
Spicy Black Beans, shredded chicken, or thinly sliced steak
Avocados or guacamole
Corn
Green onion
Shredded Lettuce
Tomato
Jalapeño
Salsa
Sour Cream
Shredded cheese

Directions
1. Oil a medium, heavy-bottom pot and sauté the diced onion, minced garlic, cilantro, and peppers until tender.
2. Stir in the uncooked rice along with the spices, tomato paste, salt and pepper until fragrant and well-incorporated.
4. Pour in the lime juice and water/broth and bring to a boil.
5. Reduce the heat and let simmer covered until the rice is tender and the liquid is absorbed (approximately 15-20 minutes depending on the type of rice you use).
6. Once the rice cools, scoop into a bowl and load it up with your favorite toppings for a flavor-packed, hearty meal.

IMG_3909

IMG_3921

IMG_3931

What are your favorite rice bowl toppings? We would love to know in the comments below and as always, if you liked this post please follow us and share!


Summer Spring Rolls


IMG_3731

I don’t know about the rest of you but we have been having a HOT summer here in Michigan. It’s already unbearable with 90% humidity some days but add pregnancy to the equation and it’s a totally different ballgame. As a family we love having fresh, homemade food at the ready but when it’s that hot outside the thought of cooking can be a bit daunting. For those kinds of summer days, we have an easy solution and one of our favorite go-to meals: fresh spring rolls. Not only is there little to no stove-top cooking involved (which means no extra heat in the house) but the flavors are just so refreshing and energizing they will leave you feeling light yet fully satisfied.

And if it’s that time of the week where you’re ready to clear out your fridge or you’ve just harvested some delicious veggies and herbs from your garden then this is the perfect recipe to reduce food waste or showcase those beautiful summer flavors. You can replace the shrimp with tofu or skip the protein all together to create a scrumptious vegetable medley. The possibilities are endless and we hope that you do give them a try. If you do, be sure to let us know 🙂

Summer Spring Rolls

  • Difficulty: Easy
  • Print

Ingredients

Spring Rolls
1 lb of shrimp, deveined and cooked
10 spring roll rice papers
1 English cucumber
2 medium carrots
2-4 large red radishes (sub 1 daikon)
1 small cabbage (red or green)
1 bunch green onions
1 bunch basil
1 lime
1 minced garlic clove
1/2 teaspoon freshly grated ginger
Soy sauce
Sriracha or chili garlic paste

Dipping Sauce
2 tbsp Brown sugar
1/4 cup rice vinegar
1 teaspoon sesame oil
Sriracha or chili garlic paste to taste
Green onions and red pepper flakes for garnish

Directions

  1. If you don’t have shrimp that is already deveined and cooked then begin by peeling, deveining, and cooking your shrimp (do not overcook). Let the shrimp marinate in a bit of garlic, ginger, lime juice, and soy sauce for flavor while you ready the rest of the fillings.
  2. Prepare your vegetables by julienning or thinly slicing the carrots, cucumber, radishes, and green onions. Thinly shred the cabbage. You can also chiffonade your basil but I prefer to keep them whole.
  3. Bring 4 cups of water to a boil and pour into a bowl for dipping the rice paper. You want the water to be hot but not so hot that you burn your fingers.
  4. Optional: Use 1 cup of the hot water to shock and wilt the cabbage for a few minutes. Rinse with cold water and drain. Toss with soy sauce and Sriracha for an added kick.
  5. Prepare a damp working station such as a cutting board for stuffing and rolling the spring rolls.
  6.  Dip your rice paper in the water bowl until pliable and lay on your work surface.
  7. Place 3-4 pieces of shrimp in the middle followed by the shredded cabbage, carrots, cucumbers, radishes, green onions, and basil.
  8. Fold one end of the rice paper over, tuck in both edges, and roll over until sealed.
  9. Repeat steps 6-8 until you have filled all of your rice papers.
  10. Place the rolls on a serving platter and serve with a simple dipping sauce.

IMG_3649 copy

IMG_3691

IMG_3695

IMG_3745

If you liked this post please follow us and share!

Instagram