Ashta-Inspired Overnight Oatmeal with Orange Blossom and Rose Water

My son, who will be turning three later this summer, recently started this weird picky eating phase some time in November. Where before he would eat EVERYTHING, he is now much more cautious and often downright rejective. One thing he has not lost, however, is his love for oats. Hot oatmeal, granola, overnight oatmeal, muesli….anything with oats (even with nuts and dried fruit), he will eat. For the sake of variety, I’ve been experimenting with different ways of preparing them and I’m happy to share today one of my successful creations that I’ve been meaning to post for quite some time now.

IMG_8038
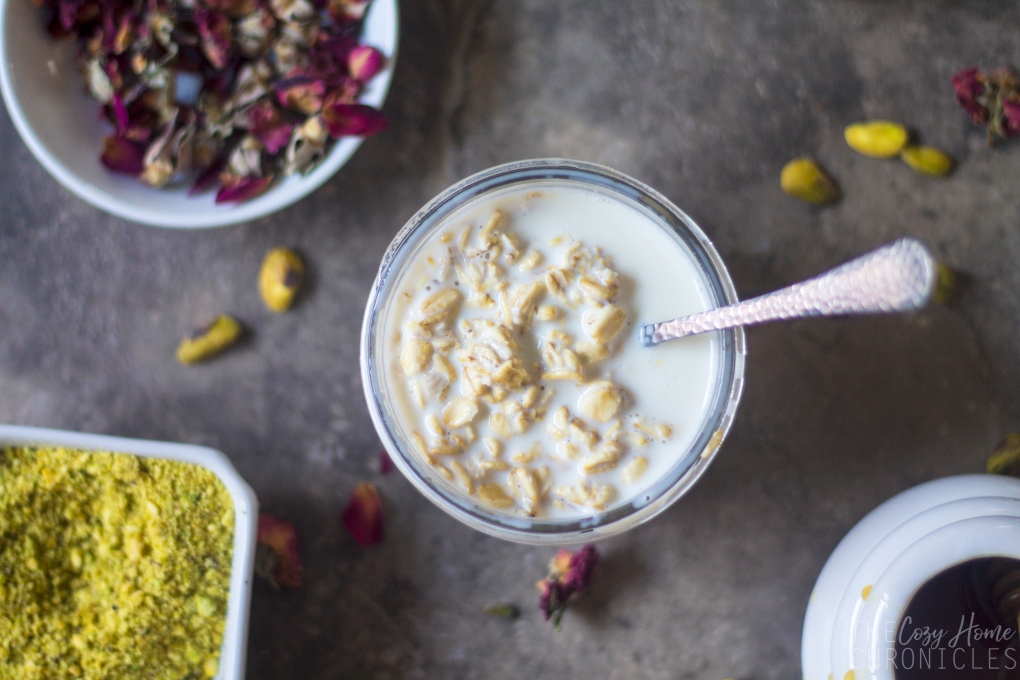
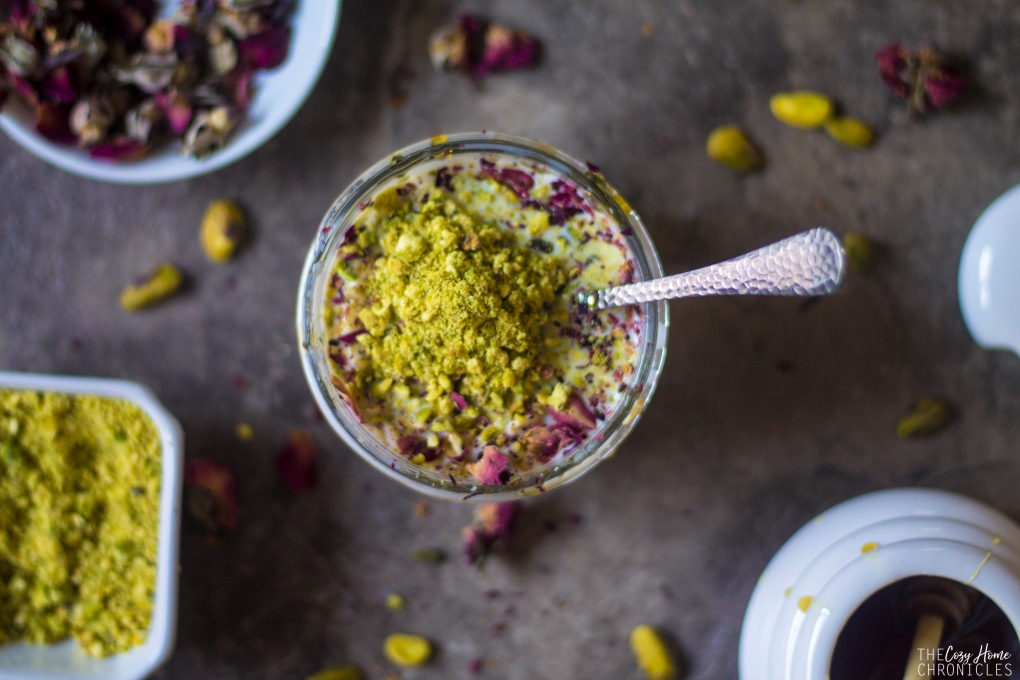
This specific overnight oatmeal recipe was inspired by the flavor profile of Middle Eastern sweets, specifically that of Ashta; a Lebanese clotted cream used as a filling in phyllo pastries and other desserts. From the creaminess of the milk, the fragrant sweetness of orange blossom and rose water, to the nutty bite of the pistachios, this nutritious breakfast will feel like an utter treat. The best part is that it’s naturally sweetened and there is no cooking required; the oats soften overnight as they soak in the milk. You can make them in a bowl if you’re eating breakfast at home or you can pack them in little mason jars for a quick breakfast on the go. According to the Minimalist Baker, one of my favorite food bloggers, overnight oats keep in the refrigerator for up to 2 days, but are best eaten within the first 12-24 hours so you might not want to make them too far ahead of time. As long as you have your ingredients on hand, you can whip one up every night in well under 10 minutes. Alright, let’s make some Middle Eastern dessert for breakfast!

IMG_8011

Ashta Overnight Oatmeal
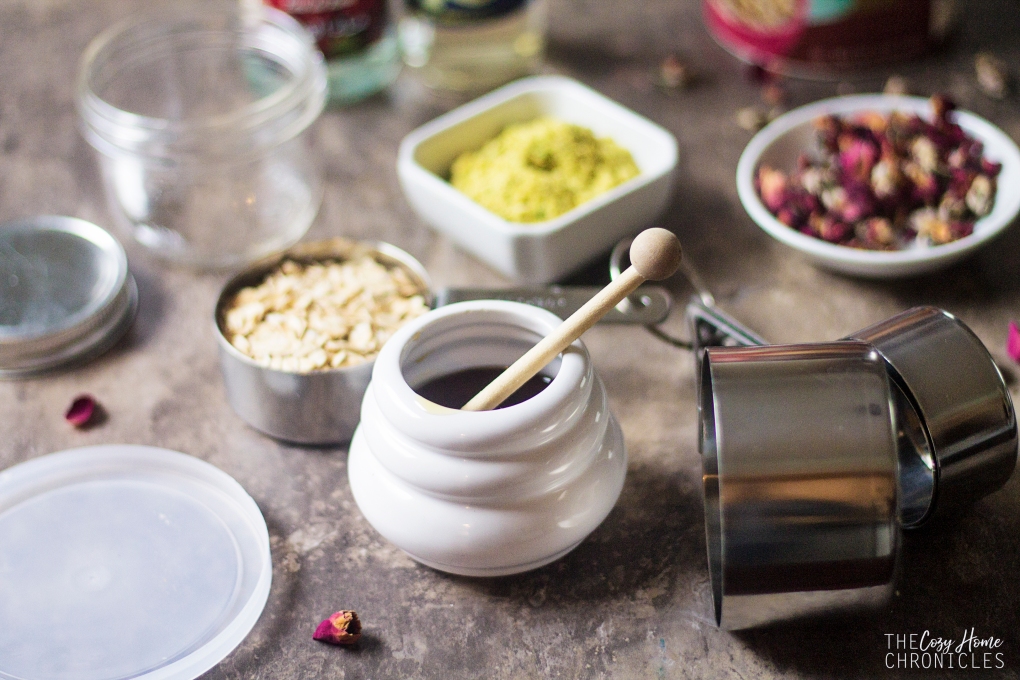
  • Difficulty: Easy
  • Print

Ingredients
1/2 cup of Old Fashion Rolled Oats (We prefer Bob’s Red Mill Regular or Organic)
1 cup of unsweetened milk of choice
1 teaspoon orange blossom water
1 teaspoon rose water
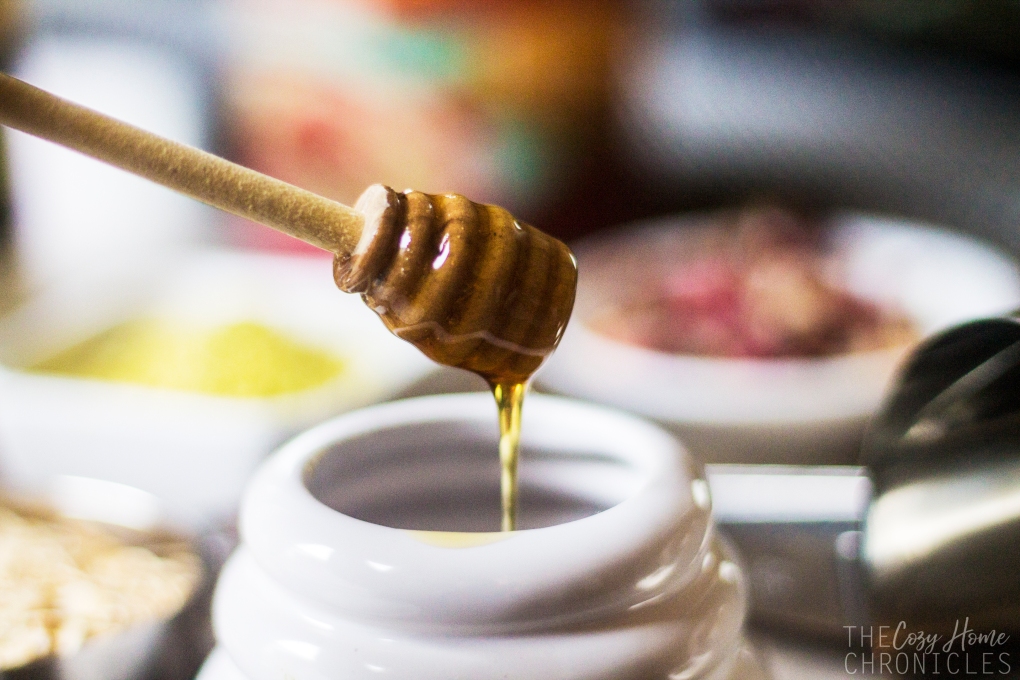
1 tablespoon honey (more if you like it sweeter)

Toppings
Quality Honey
Ground pistachio, unsalted
Dried rose petal

Notes:
*Serving size: 1.

*If you want your overnight oats to have a thicker, slightly gelatinous texture like pudding then add 1-2 tablespoons of chia seeds. My husband isn’t a fan so I leave them out.
*If you’re not a vegan and would like some extra richness and creaminess, you can add 1-2 tablespoons of ashta or greek yogurt.
* I purchase my pistachios whole  from Trader Joe’s and grind them myself in a small food processor.

Directions
1. In a bowl or mason jar, add milk, honey, orange blossom water, and rose water. Stir to combine.
2. Add in the oats and stir until all the oats are fully immersed in the liquid.
3. Cover securely and place in the fridge overnight.
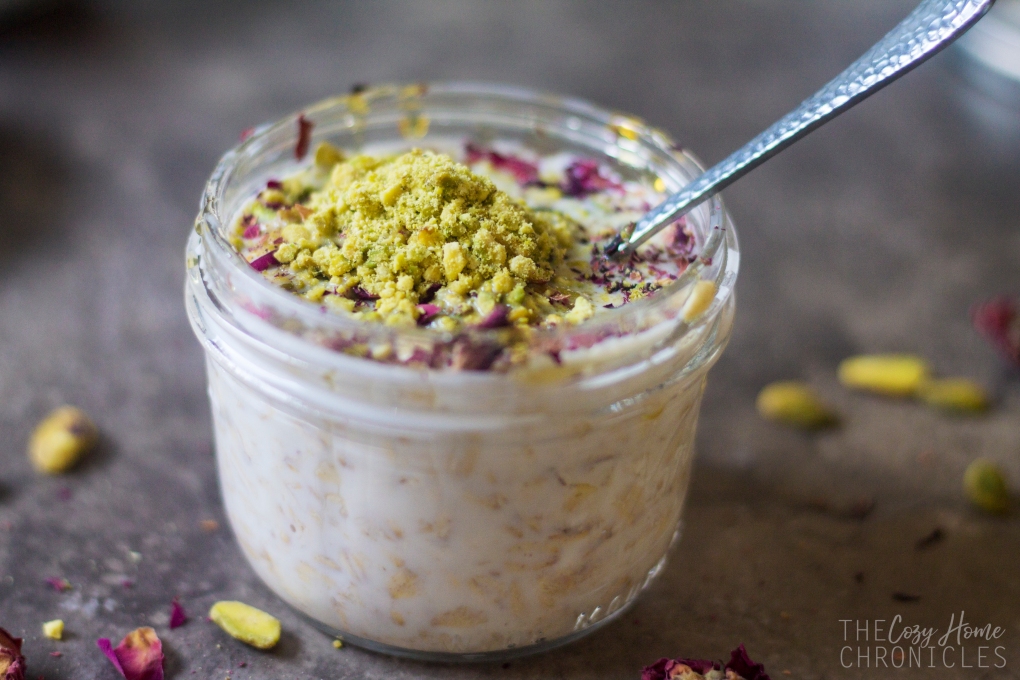
4. The next morning, take your container out of the fridge and stir the mixture. . Drizzle with quality honey and top generously with crushed pistachios and rose petals. Enjoy

IMG_8022

IMG_8057

IMG_8049

What are your favorite ways to eat oats? We would love to hear from you in the comments below and if you try this recipe, share your thoughts  and tag us on Instagram so we can see. And as always if you enjoyed this post, please follow us and share.

signature3


Tomato Parsley Rice Soup

IMG_5288

With colder weather finally on the horizon, I thought it would be a perfect time to share one of our favorite soup recipes. I wasn’t much into soup as a kid because I didn’t think it was a legit meal but this one always filled me up. I remember actually being happy coming home to see my dad standing over a large bubbling pot of his famous Tomato Parsley Rice soup. It’s the same look my husband gives when he comes home and sees it simmering on our stovetop. Pure joy. Because who doesn’t love a warm, hearty soup? The wonderful thing about this soup is that it is super easy to make with just a few simple ingredients you probably already have on hand. Although I call this recipe a tomato soup, it’s not so heavy on the tomato; the tomato paste is more for a bit of color. The real flavor lies in the broth; in the sweetness of the onion and richness of the beef. If you’re not into the meat scene, you can easily make this vegan by leaving the meat out and replacing the broth with a vegetable stock or tomato soup. I’ve made this meal countless times with a tomato soup base and it was a perfectly delicious, healthy, and filling alternative.

IMG_5809

Lately, I’ve been experimenting with boiling meat in advance and storing it with its broth in the freezer and I can happily report that it has not changed the quality of the meat. As long as you boil the meat until it’s tender you can have the base of a great stew or soup at the tip of your fingers. Simply defrost and add whatever flavoring, grains, and vegetables you like and you’ll have dinner ready in no time! This has been a huge time saver for me while my husband and I both navigate graduate school and homekeeping.

IMG_5814

Tomato Parsley Rice Soup

  • Difficulty: Easy
  • Print

Ingredients:
1 pound beef stew cubes
1 medium yellow onion, finely diced
1 large bunch parsley, chopped (plus extra for garnish)
1/4 cup uncooked rice ( I prefer long grain like basmati)
2 dry bay leaves
2 tablespoons tomato paste (more if you like it a deeper red)
8 cups water/vegetable/beef stock
2 tablespoons fresh lemon juice (more if you like it tangier)
olive oil
salt and pepper to taste

Directions:

  1. In a large pot, drizzle a bit of olive oil and brown the beef stew cubes and sauté the onions until translucent.
  2. Add your bay leaves and water/vegetable/beef stock and bring to a boil before reducing the heat. Be sure to skim any impurities that rise to the surface. Then cover and cook on a low simmer until the meat is tender (about 2 hours).
  3. Once your meat is tender, fish it out and shred it with a fork.
  4. To the broth, add in your rice, lemon juice, and tomato paste. Give it a quick stir and let it cook until the rice is tender (about 15-20 minutes). Stir in your shredded beef.
  5. Season with salt and pepper to your taste. Take the pot off the heat and add in the parsley, give it a gentle stir and let it sit for a few minutes before serving.
  6. Ladle into bowls, garnish with extra parsley and serve with a side of fresh crusty bread.

IMG_5820

IMG_5356

IMG_5840

If you do give this soup  recipe a try be sure to share with us. We love seeing our recipes on your table 🙂 And as always, if you liked this post please follow us and share!

signature3


Chickpea soup with tomato pickle salsa (Hummus M’Sabaha)

Ever since I purchased an Inkwell Press Meal Planner back in January and forced myself to commit to meal planning, we have been pretty consistent about practicing Meatless Mondays. Having a set genre for each day has really helped narrow down the selection for the menu, which is something I had a hard time doing prior because I enjoy making many different things. Today I’m sharing one of our favorite meatless dishes that’s nutritious and simple to make. It’s very similar to another Lebanese dish called foul and hummus except it’s without the foul or fava beans. Foul and hummus is usually eaten for breakfast and while I enjoy it now, I used to HATE it growing up. It was just too heavy for me and it wasn’t nachos or pizza so I was understandably upset when I could smell the distinctive aroma of garlic and fava beans wafting through the air. My father, the negotiator that he is, would allow me to leave out the fava beans as long as I ate everything else and that’s how my love for this dish of hummus m’sabaha blossomed. Traditional Lebanese hummus m’sabaha is much thicker and creamier than what I show here. Usually it’s roughly mashed and a little bit of tahini is added for creaminess. This spin on my childhood favorite is like a mix of hummus m’sabaha and lablabi, a Tunisian chickpea soup. We personally enjoy the combination of the light lemony, garlicky broth with the texture of whole chickpeas.  And speaking of broth, please don’t use canned chickpeas. Technically you can but if you do make sure to drain the chickpeas well and simmer them in a vegetable stock or bone broth. Starting with dried chickpeas is essential for getting flavorful chickpea broth that is not a metallic tasting goop.

IMG_3682

I always soak the dried chickpeas on Sunday evening and boil them first thing on Monday morning. My recipe calls for two cups because that’s what I soak but we don’t necessarily eat all two cups unless I planned to eat leftovers the next day {usually we don’t because it’s Taco Tuesday ;)}. Whatever I don’t use I will freeze for a rainy day. I grew up learning to cook from my father who never measured ingredients so I’m still working on how best to write and share these family recipes. Anyways, I hope you enjoy this as much as we do!

IMG_3708

IMG_3661

Chickpea soup with tomato pickle salsa (Hummus M'Sabaha)

  • Difficulty: Easy
  • Print

Ingredients
2 cups dried chickpeas
1 teaspoon baking soda
10-12 cups water
2-4 garlic cloves, minced*
1/2-1 cup lemon juice*
high quality extra virgin olive oil to drizzle
salt & pepper to taste

Salsa:
1 cup diced Lebanese pickled cucumbers
2 cups diced tomatoes
1/4 cup of fresh mint, chopped
1/4 cup of fresh parsley, chopped

To serve:
Radishes
Lebanese pickled cucumbers
Sweet onion, sliced
Pita bread
Lemon
Fresh herbs like mint and parsley

*Note: If you’re not afraid of flavor, you might consider adding more garlic and lemon juice.

Directions

  1. In a large bowl, add your chickpeas and baking soda and cover with water. Let the chickpeas soak overnight or for at least 8 hours.
  2. Drain and rinse your chickpeas and cover with 10-12 cups fresh water in a lidded pot. Bring to a boil then let simmer covered for 30-45 minutes or until tender.
  3. Using a mortar and pestle, mince your garlic cloves with salt until you have a smooth paste.
  4. In the meantime make your salsa by combining diced tomatoes, diced pickles, chopped mint, and chopped parsley.
  5. Once the chickpeas are tender, add in your garlic paste, salt, pepper, and lemon juice. You can use your pestle to give some of the chickpeas a quick mash for thickness if you desire. Let simmer for another 10 minutes then adjust seasoning to your taste.
  6. Ladle into individual bowls, drizzle with olive oil generously and top with sweet onions and salsa. Serve with fresh pita bread and garnishments of your choice.

IMG_3689

IMG_3739

Instagram


Lebanese Green Bean & Tomato Stew (Loubya Bi Zayt)

IMG_0887

Gardening season is officially in full swing and you know what that means, right?  Fresh, delicious vine-ripened tomatoes hand-picked from your very own backyard. After putting all that hard work into growing your garden, you’ll certainly want to savor the fruits of your labor.  Fresh tomatoes are perfect for salads, salsas, and sauces but why not try something new? Loubya bi Zayt, a Lebanese dish of green beans, onions, and tomatoes cooked in olive oil, is the perfect way to showcase your garden harvest. The tomato and olive oil combination is delightful and if stewed properly, results in a satisfyingly gelatinous texture. My father, whom I learned this recipe from, would cook the green beans with fresh finger peppers or jalapeños for a spicy kick. Since I have two little ones who eat with us, I don’t add any heat during the cooking of this dish but instead top my own plate with red pepper flakes for a nice kick. This dish is delicious on its own served with pita, green peppers, and sweet onions but it can also be treated as a side to a sizzling barbecued steak. In the past when my acid reflux was too much to handle, I would make basmati rice to serve alongside the green beans to break up the acidity of the tomatoes. Whichever way you serve this dish, you will not be disappointed. The best part? It’s super easy to make and requires just 3 main ingredients.

IMG_0863

IMG_0867

Lebanese Green Bean & Tomato Stew (Loubya Bi Zayt)

  • Difficulty: Easy
  • Print

Ingredients:
5 medium tomatoes, ripened
4 white onions, finely diced
2 pounds fresh green beans
2 tablespoons tomato paste diluted in 1 cup of water
1 garlic clove, thinly sliced
1/2 cup of olive oil, plus more
Salt and pepper to taste
Red pepper flakes to taste (optional)

Directions

  1. Clean and trim your green beans, cutting them into 1-2 inch pieces.
  2. Drizzle some olive oil in a large pot and sauté half of your finely diced onions until translucent and light brown. You can sauté all the onions at once to save time but the dish will be on the sweeter side no matter how much salt you add.
  3. While the onions are slowly caramelizing (careful not to burn), blend the ripened tomatoes in a blender with salt and pepper to taste. If you don’t want the tomato seeds or skin then strain before adding to the pot.
  4. To the pot, add in your green beans, garlic, and the rest of your onions and cook for 5-7minutes, stirring gently. You want the green beans to pick up flavor and color but make sure they don’t steam or they will taste rubbery.
  5. Finally, pour in the fresh tomato juice, diluted tomato paste, and 1/2 cup of olive oil and bring to a boil before turning the heat on low. Let it simmer uncovered on low heat for about 30-40 minutes until the green beans are tender and a thick gelatinous texture begins to form.
  6. Serve hot as the main dish or let it cool and serve as a side.

IMG_0879

IMG_0898

If you liked this post please follow us and share!

Instagram


Lebanese Lentil and Rice Pilaf (Mdardara)

img_0090

We know we haven’t posted in a while but we have been a bit busy working on some fun DIY projects around the house as well as an exciting project that we will be announcing next week. Although our lives are busy, we wholeheartedly believe in eating healthy homemade meals. It might seem difficult to strive for but there are plenty of healthy and simple meal options that one can make in a pinch. That’s why today I’m sharing one of our favorite vegetarian meal options that we enjoy almost every other week. I didn’t like this meal much when I was a child but it grew on me to the point that I now crave it as an adult. It’s a pilaf made of rice, onions, and lentils topped with more crispy caramelized onions and served with yogurt, crunchy radishes, and a side salad. It is both nutritious and delicious.

img_0099

To be honest though, there is one downside to making this dish. ONIONS. Your house will smell like onions, you will smell like onions, your car will smell like onions. The smell of onions will permeate your life for days. But I can promise you that it will all be totally worth it! I look back now and laugh but I remember in my early undergraduate days when I’d be getting ready to leave the house for my evening class and my father would start cooking this meal. I would try to race through the kitchen and out the side door but to no avail. That split second in the kitchen was enough to have me reeking. It’s funny to think that now, as a mom, I will be responsible for ensuring my family has their fair share of embarrassing, onion-filled moments. The circle of life. How beautiful 😉

img_0067

Lebanese Lentil and Rice Pilaf (Mdardara)

  • Difficulty: Easy
  • Print

Ingredients
1 cup brown lentils
1 cup white rice
2 medium yellow onions, diced
3 large yellow onions, cut into half rings (optional)
4-5 cups of water*
1 tablespoon extra virgin olive oil
1/4 cup vegetable oil
1 teaspoon salt
1/4 teaspoon black pepper

*Note: I use 2 cups of water to parboil the lentils and 3 cups to cook the onions, lentils, and rice together. Even on the lowest setting our stove gets very hot and cooks very fast. You may find you only need 2 cups of water rather than 3.

Directions

  1. Rinse your lentils under cold water and remove any small debris.
  2. In a small pot, parboil your lentils in 2 cups of water for 10-12 minutes. Drain and set aside for step 5.
  3. Meanwhile in a larger pot, begin caramelizing your finely diced onions in olive oil. This will take time so be patient. Keep the fire on low and stir every so often until you have beautiful golden brown (but not burnt) onions.
  4. Add the remaining 3 cups of water to the onions and bring to a boil. Stir well, reduce the heat, and let simmer for 2 minutes.
  5. Pour the rice, lentils, salt, and pepper into your onion mixture. Stir well, cover, and cook until all the water has been absorbed (about 15-20 minutes).
  6. While your rice and lentils are cooking, heat the vegetable oil in a saucepan and fry your onion rings in batches until crispy and golden brown. Let drain on a paper towel until ready to serve. This part of the recipe is a bit unhealthy and you can skip it though it won’t be the same. Or you can slow caramelize your onions (I have done this many times) but it will take more time and they won’t be as crispy.
  7. Top your mdardara with the crispy fried onions and serve with yogurt (to keep this meal vegan leave the yogurt out), radishes, mint, and a fresh salad.

img_0074

img_0083

img_0097

img_0090

What are some healthy meals you hated growing up but grew to love as adults? Let us know in the comment section below.

If you liked this post please follow us and share!

Instagram


Lebanese Stuffed Eggplants (Sheikh al-Mahshi)

img_7052

Growing up in a Lebanese household meant that eggplant was no stranger to the dinner table. One of my favorite eggplant dishes was (and still is) Sheikh-al Mahshi; a Lebanese casserole made of golden fried eggplants topped with spiced beef or lamb and cooked in a light tomato sauce. My father, who loved to cook for us, would make this dish using large purple eggplant slices for the base, tender filet mignon chunks and Lebanese pine nuts for the topping, and fresh homemade tomato sauce. Delicious is an understatement.

A few months ago, I was at a local market when I came across these large 11-pound boxes of assorted baby eggplant for only $3. It was a total steal and I ended up taking a box home with me to experiment with the other colorful eggplant varieties. Although I ended up blanching and freezing many of them for a rainy day, I decided to recreate my father’s recipe using baby eggplants for dinner one night. I have always found the Lebanese dishes I grew up with simple to make but with graduate school and a household to tend to, any shortcut that doesn’t jeopardize taste is definitely welcome. While I prefer the taste of homemade tomato sauce, having a quality canned sauce on hand can really speed things up. Cooking with ground beef also saves you the hassle of having to prepare and cut your meat. Some of my modifications, however, are not just to save time but to make the recipe a teeny bit healthier. Instead of deep-frying the eggplants to soften them, I blanched them and then browned the skins in a bit of olive oil. The only issue was that I found the skins of the yellow eggplant variety too thick to eat. I personally would not use them again in a recipe like this even though the flesh had a very nice flavor. With that being said, this version was a huge hit with the family and we hope you’ll consider adding this simple, healthy dish to your recipe box.

img_6981

Lebanese Stuffed Eggplants (Sheikh al-Mahshi)

  • Difficulty: Easy
  • Print

Ingredients

10-12 baby eggplant
1 lb lean ground beef
1 medium yellow onion, diced
1/4 cup pine nuts
1 15 oz can of tomato sauce (we use Simple Truth)
1 teaspoon ground cinnamon
1 teaspoon ground all-spice
1/2 cup chopped parsley
Extra virgin olive oil
salt and pepper (to taste)

Directions

  1. Preheat oven to 350F. Rinse the eggplants and trim the stems, leaving the hulls.
  2. Bring a large pot of water to boil and blanche the eggplants whole for 8-10 minutes until tender. In the meantime, toast the pine nuts until golden and set aside.
  3. Once the eggplants have cooled, gently make an incision from the hull to the bottom of the eggplant.
  4. OPTIONAL: Drizzle a bit of oil in a deep pan and brown the blanched eggplants in batches for 2-5 minutes then set aside (see step 7).
  5. Drizzle a bit of oil in a deep pan and sauté the diced onions until translucent.
  6. Add in the ground beef, cinnamon, all-spice, salt, and pepper and cook until meat is well done.
  7. Ladle a few spoons of tomato sauce into the bottom of a glass baking dish and lay the eggplants slit side up.
  8. Spoon the spiced meat mixture into each eggplant and cover with the remaining tomato sauce. Top with half of the toasted pine nuts and half of the chopped parsley.
  9. Cover your baking dish and bake in the oven for 30 minutes until the sauce is simmering.
  10. To serve, garnish with remaining pine nuts and parsley next to a bed of steaming vermicelli rice.

Note: If you end up with extra meat, just spoon the remainder evenly on the top of the sauce before baking.

img_6997

img_6998

img_7009

img_7027

If you liked this post please follow us and share!

Instagram


Labneh Pizza Toast

img_7449
Long before toast became a trend, my family had its own toast-y tradition. On weekend mornings that weren’t filled with scheduled activities, we would make these labneh “pizzas” using toasted pita rounds, labneh, and vegetable toppings. If you’ve never had labneh, you are truly missing out. A popular Lebanese breakfast staple, labneh is a strained yogurt that is thick and creamy with a deliciously tart taste that pairs perfectly with fresh tomato, cucumber, and mint. I always had fun making and eating these “pizzas” as a child and now I make them for my husband who really enjoys them (score!). This recipe is perfect for those family breakfast days and I guarantee you that children will love putting together their own pizzas. It even makes a wonderfully light and healthy lunch if you’re in a pinch and don’t know what to make. However you choose to make our Lebanese version of toast, we hope you’ll enjoy every bite of this creamy and crunchy, vegetarian deliciousness.

Labneh Pizza Toast

  • Difficulty: Easy
  • Print

Ingredients

Pita bread
Labneh
Tomatoes
Cucumbers
Olives
Scallions
Mint
Walnuts
Extra Virgin Olive Oil

Note: I did not include quantity because it really depends on how many you make and how loaded you prefer them. To give you an idea, I use one 16oz labneh container to make about 4-5 pizzas. 

Directions
1. Turn your broiler on low and toast the pita bread rounds until golden brown and crisp.
2. In a small bowl, whip the labneh with salt and spread evenly over the cooled pita rounds. If you don’t let the pita cool, the labneh will melt and you won’t get to enjoy that thick creamy texture characteristic of labneh.
3. Top your toast with diced tomatoes, cucumbers, scallions, olives, mint, and walnuts.
4. Drizzle with your best olive oil and enjoy every crunch.

img_7424

img_7432

img_7449

img_7465

How do you eat your labneh? Share with us your favorite labneh pairings in the comments below. And as always….

If you liked this post please follow us and share!

Instagram


Lebanese Cauliflower Stew

img_6825

As the weather has started to cool down, I find myself turning more to preparing soups and stews for dinner. Particularly Lebanese stews, which are flavorful and hearty, and have always been some of my favorite meals growing up. No matter what the main ingredient is, I can eat the leftovers for a week and not get sick of it. They are that good! If you saw our post on the Lebanese Beef and Potato Stew, you’ll notice that this recipe is very similar. The only difference is that the star of this dish is sweet, golden-fried cauliflower or arnabeet and the broth is much tangier due to the extra lemon juice. I hadn’t made this recipe in a while but when I saw large cauliflower on sale at the local market, I decided it was time for this stew to make a reappearance on our table and an appearance on this blog as I continue to share our favorite family dishes. I hope you enjoy this one as much as we do 🙂

Lebanese Cauliflower Stew

  • Difficulty: Easy
  • Print

Ingredients
2 large cauliflower heads
1.5 lbs beef stew chunks
8-10 cups water*
2 small bunches cilantro
1 garlic head, peeled
2-4 lemons
Vegetable oil for frying
Salt and pepper to taste

*I am very liberal when it comes to the amount of water I use in preparing the broth because I end up skimming a lot so naturally it gets reduced and concentrated as time passes.

Directions

  1. Thoroughly wash your cauliflower and cut them into medium-large florets. The smaller you cut them the more they break up in the stew and you definitely want some cauliflower bites.
  2. In a large stockpot, bring the beef stew chunks and water to a boil and then let simmer, skimming the fat and impurities continuously until the broth is clean. Once the broth is clean, reduce the heat, cover and let simmer until the meat is tender (about 2 hours).
  3. In a food processor, pulse the cilantro and peeled garlic until you have a rough paste. 1/2 of this will go directly into the clean broth. The other half you will save for step 6.
  4. In the meantime, prepare a pot for frying and a tray for draining the oil (paper towel works just fine).
  5. Once the oil is hot, begin frying the cauliflower in batches until they are a beautiful golden brown. Salt them as they come out and let them drain from any excess oil.
  6. Prepare a pan with a bit of vegetable oil and sauté the other half of the cilantro-garlic paste until fragrant. Do not let them burn. Fish out the beef stew chunks from the broth and toss in the pan with the sautéed cilantro-garlic paste. Once browned, return to the stock pot.
  7. Transfer your cauliflower into the broth and let simmer for another 30-45 minutes until the cauliflower are tender.
  8. Season the stew with salt, pepper, and lemon juice to your liking. The broth should have a mellow sweetness from the cauliflower and a vibrant kick from the lemon, garlic, and cilantro combination.
  9. Serve with a side of basmati rice and fresh crunchy radishes.


img_6797

img_9707

img_6821

If you liked this post please follow us and share!

Instagram


Simple Kafta Pita Pizzas

IMG_3639 copy

I’ve never been a picky eater and I enjoy many many foods but there will always be a special place in my heart for kafta pizza. For me, it conjures up memories of busy weeknights in high school filled with homework deadlines, violin lessons, and soccer practice. It was for those days, mom or dad would pick up fresh kafta from the local butcher and spread it on pita so that we could have dinner ready in no time. I’d roll mine up with a side salad of onions and tomatoes and savor every single bite. Mmmmmm.

Now that summer is ending and school is just around the corner it means plenty of busy days ahead. If you’re like me and looking to start the meal planning process now to get ahead of the game then this is the perfect midweek recipe to write in. With just a few ingredients you can have a delicious and filling meal for the whole family in a short amount of time. It’s also something different and variety is always nice to have in your meal plan 🙂

Simple Kafta Pizza Pita

  • Difficulty: Easy
  • Print

Ingredients

Kafta Pizza
Fresh pita bread
1 lb kafta (makes about 5 pizzas)

Side Salad
4 ripe roma tomatoes, cut into small wedges
1 medium sweet onion, thinly sliced
1 bunch fresh Thyme (sub parsley)
1 teaspoon sumac
1/2 lemon juiced
Extra Virgin Olive Oil
Salt and Pepper to taste

Sides
Homemade french fries
Lebanese yogurt
Lebanese pickles

Directions

  1. Turn your oven on the broiler setting and begin preparing any sides like frying your french fries (if you have some already cut up) or whipping your yogurt with a bit of salt.
  2. Make your side salad by gently tossing the tomatoes, onions, thyme, sumac, lemon juice, and olive oil. Finish off with salt and pepper to your liking.
  3. Open your pita bread at the seam so you have two evenly-sized thin pita circles.
  4. Using the back of a soup spoon, spread a tablespoon or two of kafta evenly across the inside part of your pita bread. If you put too much meat, it won’t fully cook and the bread will become soggy in the middle and burn on the edges.
  5. Place your kafta pizzas on a baking sheet and place under the broiler for about 5 minutes or until the meat is cooked and the bread is a nice golden brown.
  6. Enjoy!

IMG_3621 copy

IMG_3615 (1)

IMG_3630

If you liked this post please follow us and share!

Instagram


Lebanese Beef and Potato Stew

IMG_1102

If you live in the Midwest, you know that springtime isn’t all sunshine and butterflies. We have plenty of gray days that can feel like winter and sometimes all we want to do is curl up in a blanket with a hearty bowl of something and pray that 70 degree weather is right around the corner. This recipe is perfect for just those days. It’s personally one of my favorite Lebanese stews (or yakhnis) growing up and it’s super easy to make. However, this isn’t your average beef and potato stew. What makes this stew especially delicious is the flavor profile offered by a paste of fresh garlic and cilantro. This base, which is a feature of most Lebanese stews, makes for a uniquely savory broth that you will just have to try to understand. So if you’re looking to make a stew but want to try something new (ha! I rhymed!) this will not disappoint!

Lebanese Beef and Potato Stew

  • Difficulty: Easy
  • Print

Ingredients:
1.5 pounds of beef stew cubes
1 head of garlic
1 bunch of cilantro (plus some for garnishing)
3 pounds of potatoes
2 teaspoons tomato paste
Salt & Pepper (to taste)
Lemon juice (1 large lemon)
8 cups of water
Vegetable oil

Note: My recipes serve at least  4 people. While we are only 2 and a baby, I make enough of a meal to last a few days. I cannot stress how convenient it is to have a home-cooked meal without having to prep everyday when you’re juggling a million other things.

Directions:

  1. In a stock pot, bring your 8 cups of water to boil. In the meantime, make your garlic-cilantro paste by pulsing the cilantro and peeled garlic head (8-12 cloves) in a food processor. You will use this paste to flavor 3 different components of the stew:the meat, the broth, and the potatoes.
  2. Drizzle a bit of vegetable oil in a large skillet and add in 1/3 of your garlic-cilantro paste. Sauté for 1 minute until you smell the aroma of the cilantro and garlic. Be careful not to burn the paste.
  3. To the sautéed garlic-cilantro paste, add in your beef cubes, some salt and pepper to taste, and let brown on all sides.
  4. By now, your water should be boiling. Toss your browned and flavored beef cubes with another 1/3 the garlic-cilantro paste into the stock pot and allow to simmer on low for 2 hours or until your meat is very tender and the broth is flavorful.
  5. In the meantime, peel, rinse and cube your potatoes.
  6. Repeat step 2 with the remainder of the paste this time adding your cubed potatoes and browning them on all sides but not fully cooking them. Now toss the herbed potatoes into the finished broth and stir well.
  7. Mix in your tomato paste, lemon juice, and any salt and pepper then cover and cook on medium heat until the potatoes are nice and tender. I do this immediately after I add the potatoes in so that I’m not stirring and mushing the potatoes once they are cooked.
  8. Once your potatoes are fully cooked, ladle a generous serving of meat, potato and hearty broth into a bowl, garnish with freshly chopped cilantro and serve with a side of buttery rice, lemon wedges, and crunchy radishes.

Note: I grew up learning to make this stew by deep-frying the potato cubes and then sautéing them with garlic and cilantro. My dad will tell you that if it’s not made this way, it’s not authentic. And while it is super tasty made that way, the stew is just as tasty without frying. Whether you decide to bake, deep-fry, or sauté your potatoes, just make sure to add them in near the end when your meat is tender and your broth is richly flavored. If you add them in too early, they will turn to mush and you don’t want that to happen. Trust me.

2016-03-02 13.54.51

2016-03-02 13.57.28

2016-03-02 14.01.09 copy

2016-03-02 14.06.43

Processed with VSCOcam with m5 preset

2016-03-02 14.52.15

IMG_1098

If you liked this post please follow us and share!

Instagram