Tomato Parsley Rice Soup

IMG_5288

With colder weather finally on the horizon, I thought it would be a perfect time to share one of our favorite soup recipes. I wasn’t much into soup as a kid because I didn’t think it was a legit meal but this one always filled me up. I remember actually being happy coming home to see my dad standing over a large bubbling pot of his famous Tomato Parsley Rice soup. It’s the same look my husband gives when he comes home and sees it simmering on our stovetop. Pure joy. Because who doesn’t love a warm, hearty soup? The wonderful thing about this soup is that it is super easy to make with just a few simple ingredients you probably already have on hand. Although I call this recipe a tomato soup, it’s not so heavy on the tomato; the tomato paste is more for a bit of color. The real flavor lies in the broth; in the sweetness of the onion and richness of the beef. If you’re not into the meat scene, you can easily make this vegan by leaving the meat out and replacing the broth with a vegetable stock or tomato soup. I’ve made this meal countless times with a tomato soup base and it was a perfectly delicious, healthy, and filling alternative.

IMG_5809

Lately, I’ve been experimenting with boiling meat in advance and storing it with its broth in the freezer and I can happily report that it has not changed the quality of the meat. As long as you boil the meat until it’s tender you can have the base of a great stew or soup at the tip of your fingers. Simply defrost and add whatever flavoring, grains, and vegetables you like and you’ll have dinner ready in no time! This has been a huge time saver for me while my husband and I both navigate graduate school and homekeeping.

IMG_5814

Tomato Parsley Rice Soup

  • Difficulty: Easy
  • Print

Ingredients:
1 pound beef stew cubes
1 medium yellow onion, finely diced
1 large bunch parsley, chopped (plus extra for garnish)
1/4 cup uncooked rice ( I prefer long grain like basmati)
2 dry bay leaves
2 tablespoons tomato paste (more if you like it a deeper red)
8 cups water/vegetable/beef stock
2 tablespoons fresh lemon juice (more if you like it tangier)
olive oil
salt and pepper to taste

Directions:

  1. In a large pot, drizzle a bit of olive oil and brown the beef stew cubes and sauté the onions until translucent.
  2. Add your bay leaves and water/vegetable/beef stock and bring to a boil before reducing the heat. Be sure to skim any impurities that rise to the surface. Then cover and cook on a low simmer until the meat is tender (about 2 hours).
  3. Once your meat is tender, fish it out and shred it with a fork.
  4. To the broth, add in your rice, lemon juice, and tomato paste. Give it a quick stir and let it cook until the rice is tender (about 15-20 minutes). Stir in your shredded beef.
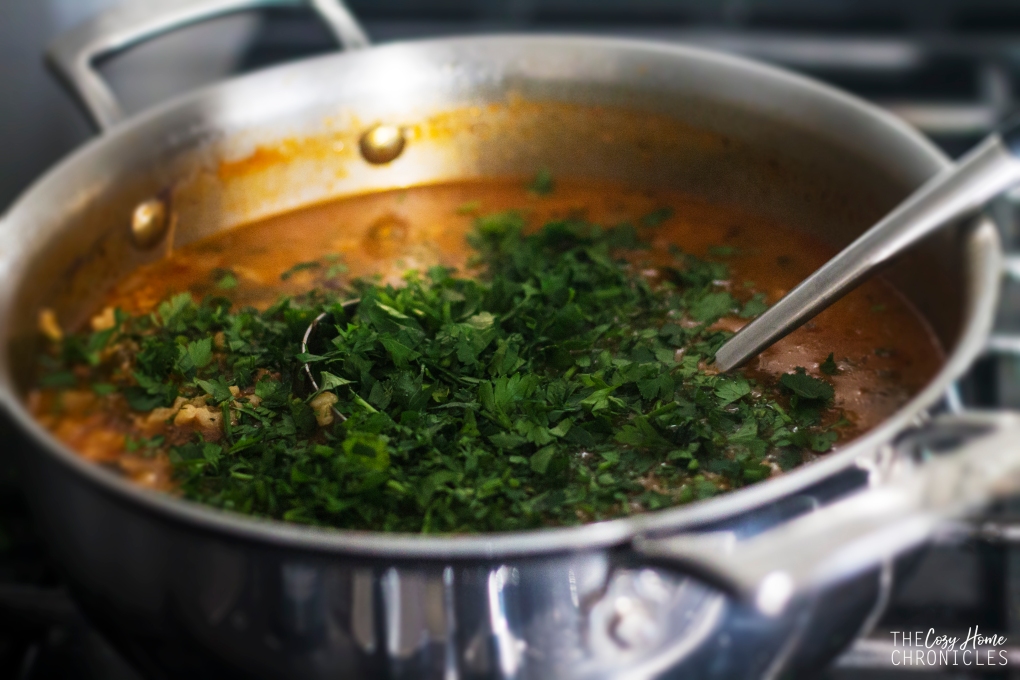
  5. Season with salt and pepper to your taste. Take the pot off the heat and add in the parsley, give it a gentle stir and let it sit for a few minutes before serving.
  6. Ladle into bowls, garnish with extra parsley and serve with a side of fresh crusty bread.
IMG_5820

IMG_5356

IMG_5840

If you do give this soup  recipe a try be sure to share with us. We love seeing our recipes on your table 🙂 And as always, if you liked this post please follow us and share!

signature3


Vegan Portobello Shawarmas

IMG_4131

I can’t believe how quickly the summer has ended! Although my husband and I both survived our first few weeks of the semester, we know that life is about to get  much busier and even more challenging. Blogging obviously isn’t going to be a main priority (booo, I know) but it will be nice to share some of our adventures as we trudge along through the rest of the school year. Some of the things that will still remain a priority, however, are eating clean and healthy and working toward a simple, sustainable lifestyle. To do that we will definitely have to become more efficient at organizing, meal planning, and prepping and that will certainly be easier with an arsenal of quick and easy recipes.

If you haven’t noticed, one of the things we’ve been trying to do around here is cut down on red meat. Sure there are many vegan dishes out there, including plenty of Middle Eastern options, but gosh darn it when you’re craving a shawarma, sometimes you really need to have your fix. Luckily, I found a way to have just that without the grease and fatty surprises and without all the baggage that comes with eating red meat. Eating portobellos as a meat substitute isn’t something new for us but incorporating meatless substitutes in very classic Middle Eastern recipes is. Who says you can’t have your cake and eat it too? I should note that this recipe has been tested and approved by my brother who leans toward carnivority (not sure if this is a thing). I won’t pretend that he was completely fooled but he had nothing but good things to say (he’s also a man of few words). I guarantee that you’ll be very pleased with this faux shawarma sandwich; the texture and flavor of the mushrooms combined with all of the vegetables and creamy tahini sauce, tastes pretty darn close to the real thing. Not only is it delicious but it is super easy to make and with minimal ingredients too. But you don’t have to take my word for it, try it yourself!

IMG_4108

IMG_4119

Vegan Portobello Shawarmas

  • Difficulty: Easy
  • Print

Ingredients
2 pounds portobello mushrooms
1 teaspoon shawarma spice (more if you like it spicier)
1/4 cup white vinegar
Olive Oil
Salt (to taste)

For sandwiches:
Pita bread
Tomatoes, diced
Onions, thinly sliced
Parsley, chopped
Pickled cucumbers or turnips, sliced
Sumac
Taratoor (tahini sauce)

Note: This recipe makes between 4-6 sandwiches depending on how stuffed you like them.

Directions

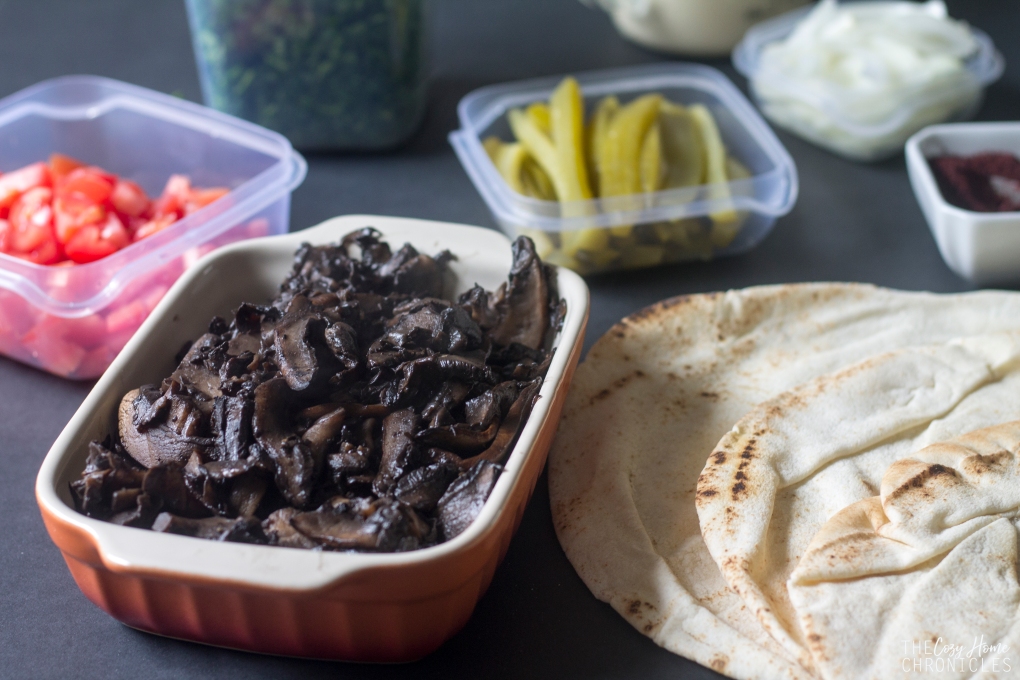
  1. Gently wash your portobello mushrooms and slice very thinly.
  2. In a large pan, drizzle olive oil and add in the mushrooms in batches. Each time the mushrooms start cooking down, add another batch to the pan.
  3. Once all the mushrooms are in the pan, add in the shawarma spice and vinegar, stir well to incorporate.
  4. Cook on medium-high until the liquid cooks off and the mushrooms begin to brown, approximately 10 minutes.
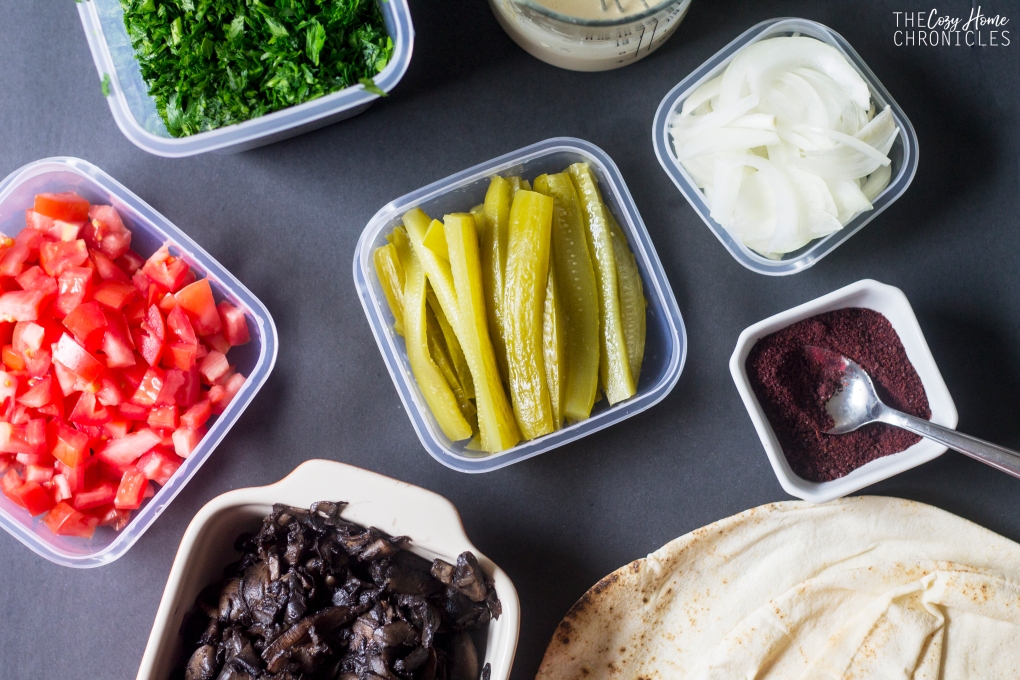
  5. In the meantime, prepare all your sandwich toppings and condiments.
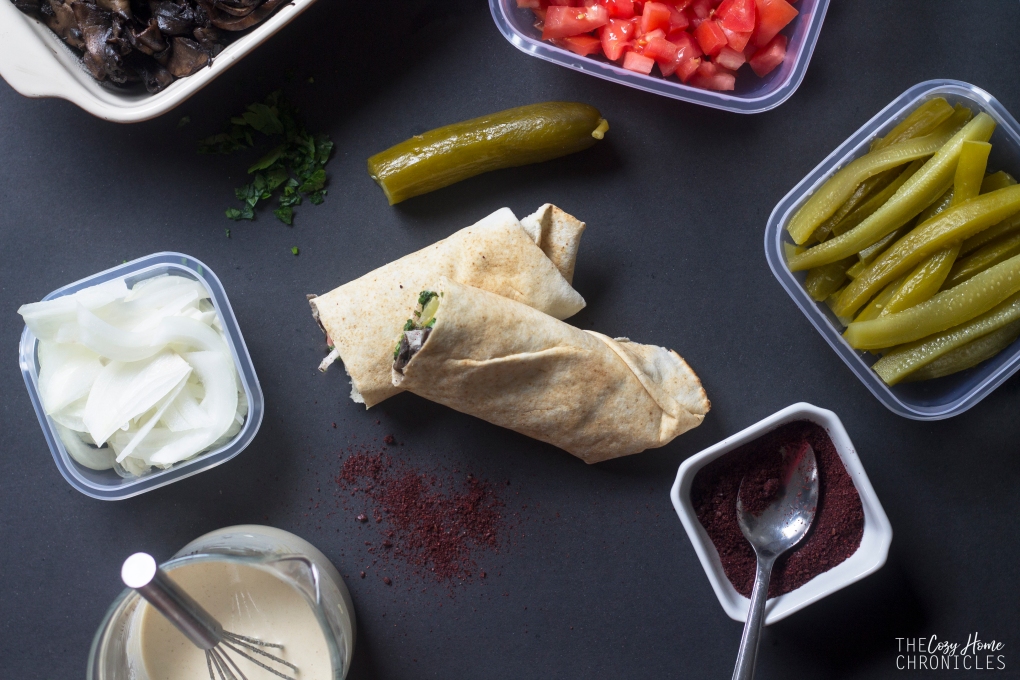
  6. Open your pita bread into halves and layer on the goodness: portobello shawarma, tomato, parlsey, pickles, onions, sumac, and a drizzle of taratoor.
  7. Roll up and enjoy!

IMG_4113

IMG_4125


IMG_4140

If you liked this post please follow us and share!


Instagram


Lebanese Green Bean & Tomato Stew (Loubya Bi Zayt)

IMG_0887

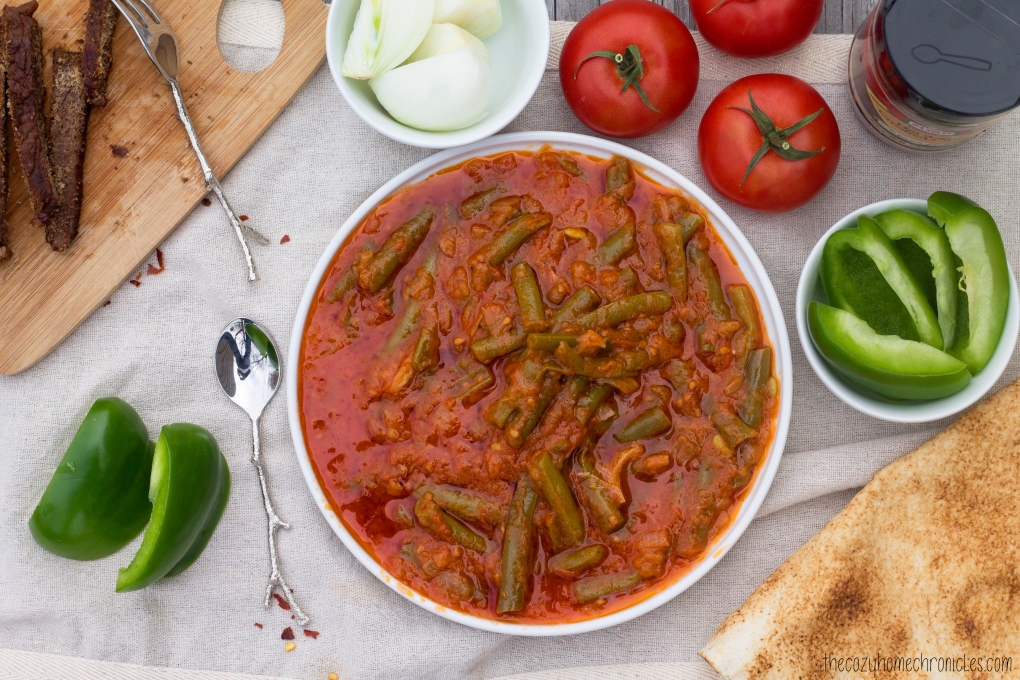
Gardening season is officially in full swing and you know what that means, right?  Fresh, delicious vine-ripened tomatoes hand-picked from your very own backyard. After putting all that hard work into growing your garden, you’ll certainly want to savor the fruits of your labor.  Fresh tomatoes are perfect for salads, salsas, and sauces but why not try something new? Loubya bi Zayt, a Lebanese dish of green beans, onions, and tomatoes cooked in olive oil, is the perfect way to showcase your garden harvest. The tomato and olive oil combination is delightful and if stewed properly, results in a satisfyingly gelatinous texture. My father, whom I learned this recipe from, would cook the green beans with fresh finger peppers or jalapeños for a spicy kick. Since I have two little ones who eat with us, I don’t add any heat during the cooking of this dish but instead top my own plate with red pepper flakes for a nice kick. This dish is delicious on its own served with pita, green peppers, and sweet onions but it can also be treated as a side to a sizzling barbecued steak. In the past when my acid reflux was too much to handle, I would make basmati rice to serve alongside the green beans to break up the acidity of the tomatoes. Whichever way you serve this dish, you will not be disappointed. The best part? It’s super easy to make and requires just 3 main ingredients.

IMG_0863

IMG_0867

Lebanese Green Bean & Tomato Stew (Loubya Bi Zayt)

  • Difficulty: Easy
  • Print

Ingredients:
5 medium tomatoes, ripened
4 white onions, finely diced
2 pounds fresh green beans
2 tablespoons tomato paste diluted in 1 cup of water
1 garlic clove, thinly sliced
1/2 cup of olive oil, plus more
Salt and pepper to taste
Red pepper flakes to taste (optional)

Directions

  1. Clean and trim your green beans, cutting them into 1-2 inch pieces.
  2. Drizzle some olive oil in a large pot and sauté half of your finely diced onions until translucent and light brown. You can sauté all the onions at once to save time but the dish will be on the sweeter side no matter how much salt you add.
  3. While the onions are slowly caramelizing (careful not to burn), blend the ripened tomatoes in a blender with salt and pepper to taste. If you don’t want the tomato seeds or skin then strain before adding to the pot.
  4. To the pot, add in your green beans, garlic, and the rest of your onions and cook for 5-7minutes, stirring gently. You want the green beans to pick up flavor and color but make sure they don’t steam or they will taste rubbery.
  5. Finally, pour in the fresh tomato juice, diluted tomato paste, and 1/2 cup of olive oil and bring to a boil before turning the heat on low. Let it simmer uncovered on low heat for about 30-40 minutes until the green beans are tender and a thick gelatinous texture begins to form.
  6. Serve hot as the main dish or let it cool and serve as a side.

IMG_0879

IMG_0898

If you liked this post please follow us and share!

Instagram


Healthy Homemade Butterfingers

img_9645

My brother recently brought over a PB&J  Chobani Flip for me because he’s experimenting with “healthier” snacking and wanted me to try it out. Ignoring the fact that it had 18 grams of sugar, the crunchy peanut topping was quite good and reminded me instantly of the popular candy bar Butterfinger; something I haven’t had in a long time. Although we both love all things peanut butter and chocolate, we have chosen to stay away from processed foods especially made by Nestle. Of course I couldn’t leave my sweet tooth hanging so I sought to create a healthier, homemade version of the candy bar. And that is exactly what I did… in the form of a granola bark.

img_9198-1

Plain granola bark without the peanuts or chocolate drizzle on top.  

img_9633

Granola and roasted peanut cluster bark

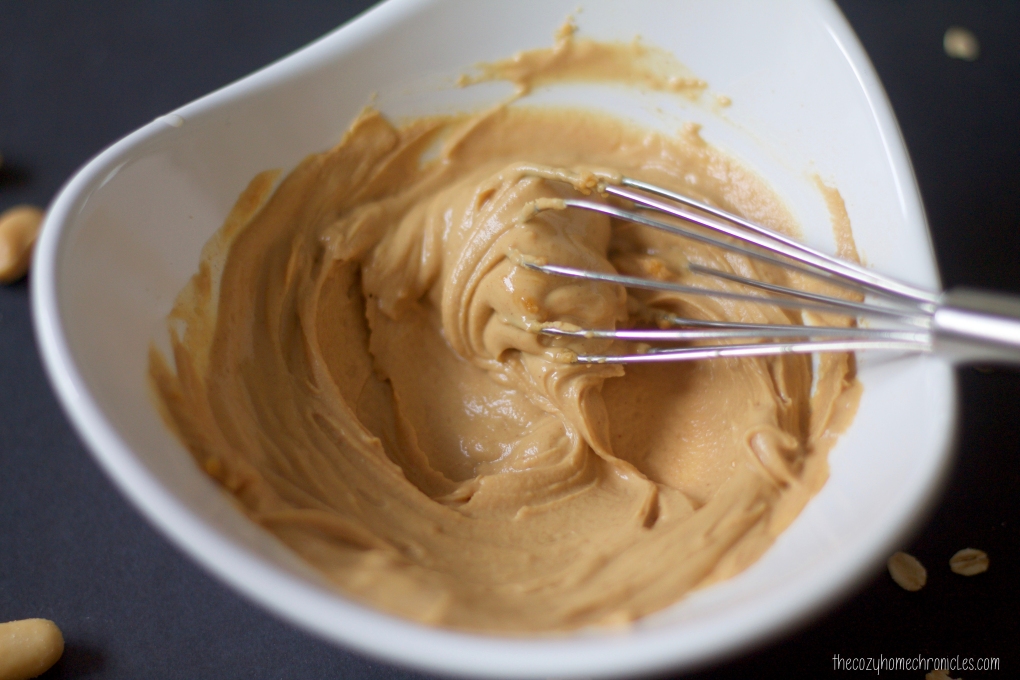
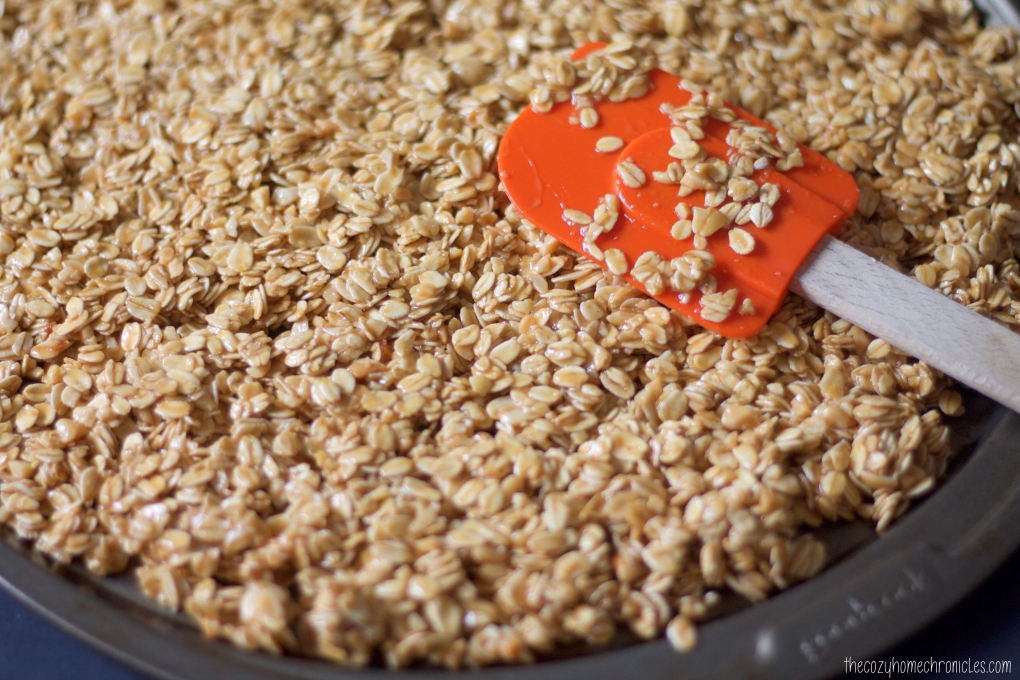
I did look up how to make homemade Butterfinger but all the recipes I found either required a candy thermometer or even unhealthier store-bought candy corn. Ain’t nobody got time for that! All I did for this recipe was create a sweet, nutty, and crunchy granola as a substitute for the crispy textured inside of the candy bar and made it into a bark for easy assembly. At first, I tried making a batch of granola with regular peanut butter but I felt that I could not control the flavor as I desired so I used PB2 instead and experimented with different combinations of maple syrup, vanilla extract, and salt until I felt I achieved that distinctive Butterfinger taste and texture. You’ll be pleasantly surprised at how simple this recipe is and the best part is that it has real wholesome ingredients and none of the preservatives! Just know that this bark is addicting but it does store well in the fridge so try to save some for your friends and family. They’ll be happy you did 🙂

Healthy Homemade Butterfingers

  • Difficulty: Easy
  • Print

Ingredients

Granola
1 1/2  cups rolled oats
1/2 cup coarse crushed salt roasted peanuts
6 tablespoons PB2 powder
3-4 tablespoons water
1/2 teaspoon salt
1 teaspoon vanilla extract
1/4 cup pure maple syrup
2 tablespoons vegetable oil

Butterfinger bark
1/2 cup of quality milk chocolate, melted
1 1/2 cups of crunchy peanut granola
1/4 cup salt roasted peanuts (optional)

Directions
1. In a mixing bowl, combine PB2 and water. Stir in the salt, vanilla extract, maple syrup, and oil until smooth.
2. Add in rolled oats and crushed peanuts and combine until evenly coated.
3. Spread mixture on a thin baking sheet and bake at 250F for 30 minutes stirring every 5 minutes until evenly golden brown and crunchy.
4. In a double boiler or in the microwave, melt your milk chocolate and spread half of it thinly and evenly on a silicone baking sheet or parchment paper.
5. Immediately top with a generous amount of crunchy peanut butter granola and peanuts  (optional) then drizzle with remaining chocolate. Refrigerate until firm before peeling off the silicone or parchment paper and breaking the bark into pieces. If you have extra granola you can store in an airtight container for snacking at a later time 😉

img_9154

img_9161

img_9165

img_9648

Have you ever tried to make a copycat candy recipe? Do share in the comments below. And as always…

If you liked this post please follow us and share!

Instagram


Pumpkin Spice Milkshakes

img_6903

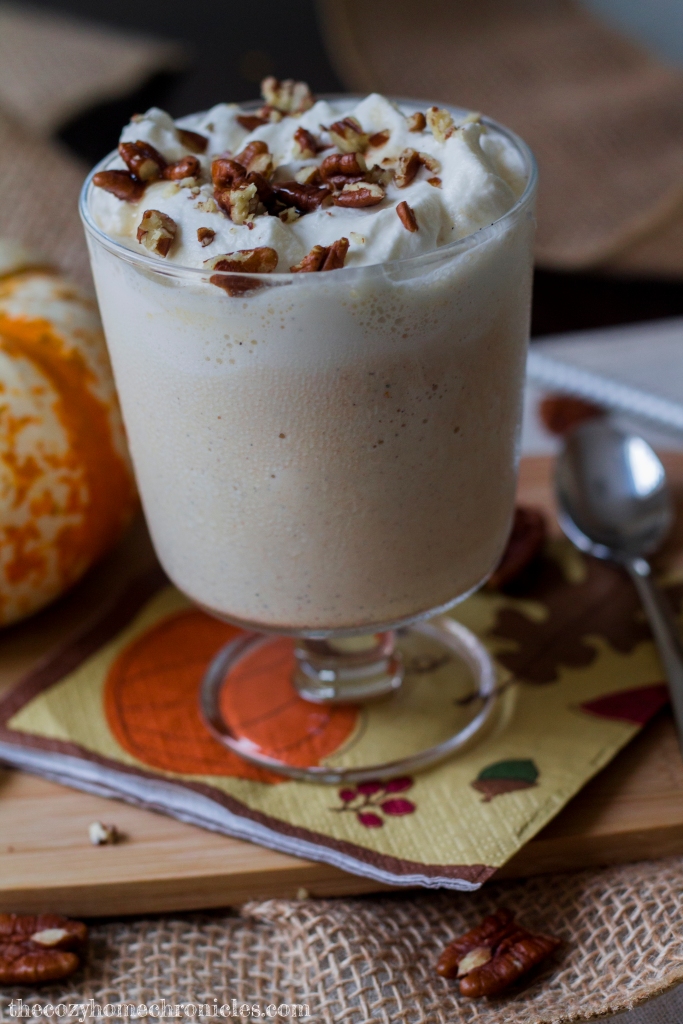
We love autumn and pumpkin spice everything just as much as the next person but this year we had a bad experience with a pumpkin spice latte. Weeks of anticipation ended in utter disappointment as we found ourselves with a beverage that was sickeningly sweet and unbearably oily. After a few sips we tossed it out. I said, then, that we would skip buying these specialty beverages from outside (along with all the sugar, fat, and calories that come with them) and try to make healthier versions at home. I haven’t attempted to make a pumpkin spice latte yet, but being that we are both ice cream fiends and Michigan weather can be unpredictably warm (it’s 80 degrees today), I put together this delicious milkshake that screams pumpkin pie and butter pecan ice cream in ice-cold fashion. This recipe makes enough for two servings but can certainly be adjusted if you want to make more and you can also tone down the spices as you fit. Now what are you waiting for? Your pumpkin spice sweet tooth is calling 😉

img_6915

Pumpkin Spice Milkshakes

  • Difficulty: Easy
  • Print

Ingredients
2 1/2 cups quality vanilla ice cream (we use Turkey Hill All Natural)
1 tablespoon pumpkin puree
1/2 cup milk*
1/2 teaspoon ground cinnamon
1/4 teaspoon ground nutmeg
1/8 teaspoon ground cloves
1/8 teaspoon ground ginger
homemade whipped cream
toasted pecans for garnish
pure maple syrup for garnish

*We like our milkshakes on the thicker side so feel free to adjust the recipe and add more milk if you like a thinner milkshake.

Directions
In a blender, combine ice cream, pumpkin puree, milk, and spices. Blend until smooth. Pour into glasses and top with homemade whipped cream, toasted pecans, and a drizzle of maple syrup. Serve and enjoy!

img_6932

If you liked this post please follow us and share!

Instagram


Mexican Rainbow Rice Bowls

IMG_3934

It’s almost the end of September and I’m starting to panic because my due date for baby #2 is less than two months away. I have no name picked out and I’m nowhere near as ready or organized as I need to be. Luckily, I am finding some success with meal planning in the sense that I’m getting better at making our favorite go-to recipes last longer and work better in conjunction with other weekly meals. Hopefully this will come in handy when I’m juggling a rambunctious toddler and newborn come November…but I’m not holding my breath.

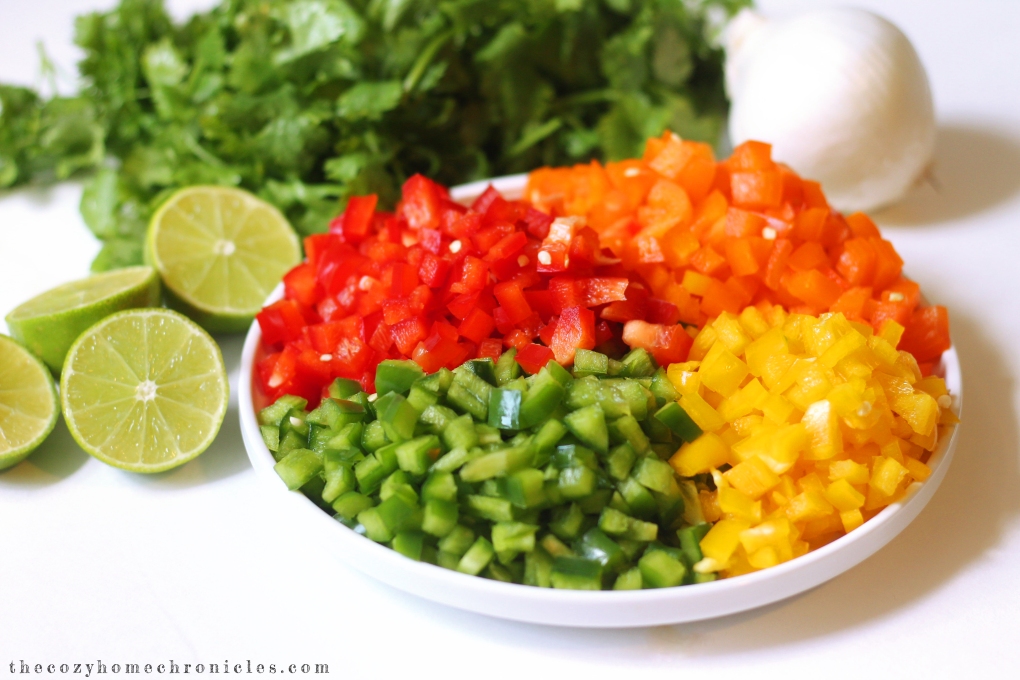
My husband LOVES (probably more than me…okay maybe not but almost) Mexican food. I’ll admit, there is definitely something heavenly about the combination of savory beans or meats, fresh garden salsa, creamy avocados, and dairy. We find this combination works best in the form of a rice bowl because it’s easy to both make and assemble especially if you want a meal that will last longer than a day or two. However, I’ve been wanting a rice base that packs a little more punch and nutrition than the usual rice bowls call for. Armed with half of the rainbow in peppers and some fresh cilantro, I concocted this colorful rice that will no doubt take your rice bowl from meh to marvelous. The best part? You’ll never need to go back to Chipotle again.

Mexican Rainbow Rice Bowls

  • Difficulty: Easy
  • Print

Ingredients
2 cups uncooked long-grain rice
1 tablespoon vegetable oil
1 red pepper, diced
1 green pepper, diced
1 orange pepper, diced
1 yellow pepper, diced
1 medium white onion, diced
1 bunch cilantro, finely chopped
1 garlic clove minced
1 cup lime juice
3 1/2 cups water (sub broth)
1 tablespoon tomato paste
1 teaspoon chili powder
1 teaspoon cumin
salt and pepper to taste

Topping Ideas
Spicy Black Beans, shredded chicken, or thinly sliced steak
Avocados or guacamole
Corn
Green onion
Shredded Lettuce
Tomato
Jalapeño
Salsa
Sour Cream
Shredded cheese

Directions
1. Oil a medium, heavy-bottom pot and sauté the diced onion, minced garlic, cilantro, and peppers until tender.
2. Stir in the uncooked rice along with the spices, tomato paste, salt and pepper until fragrant and well-incorporated.
4. Pour in the lime juice and water/broth and bring to a boil.
5. Reduce the heat and let simmer covered until the rice is tender and the liquid is absorbed (approximately 15-20 minutes depending on the type of rice you use).
6. Once the rice cools, scoop into a bowl and load it up with your favorite toppings for a flavor-packed, hearty meal.

IMG_3909

IMG_3921

IMG_3931

What are your favorite rice bowl toppings? We would love to know in the comments below and as always, if you liked this post please follow us and share!


Simple Kafta Pita Pizzas

IMG_3639 copy

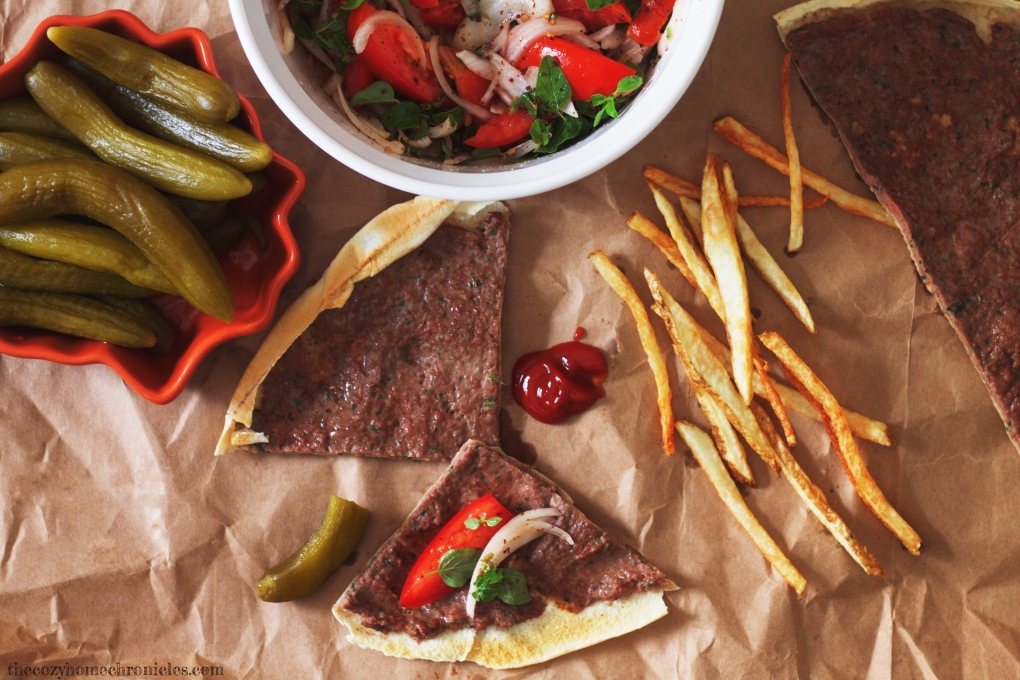
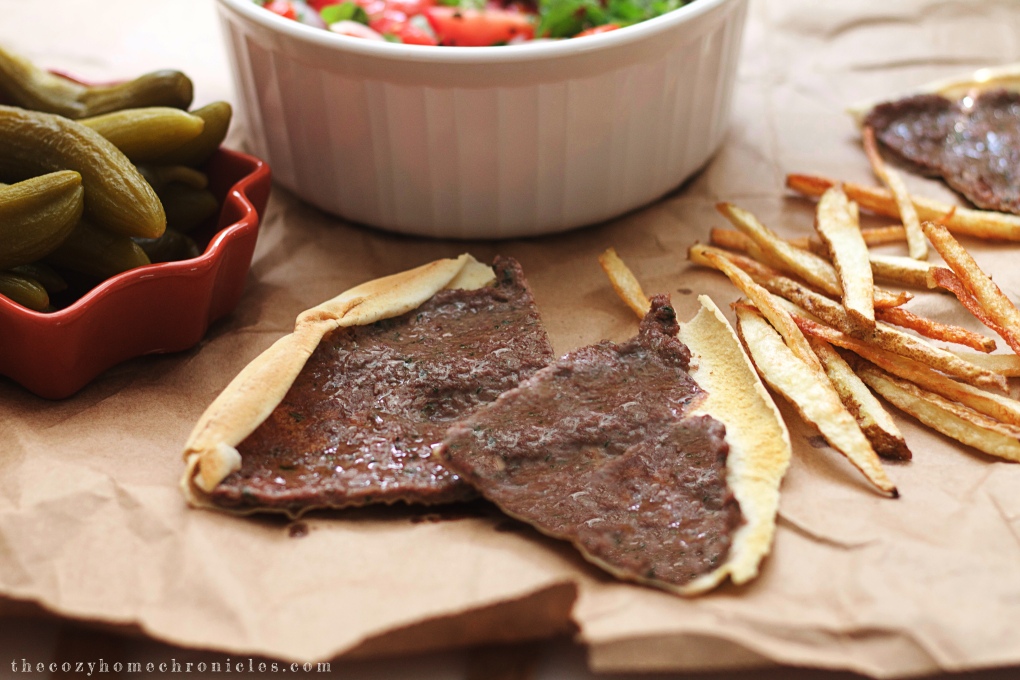
I’ve never been a picky eater and I enjoy many many foods but there will always be a special place in my heart for kafta pizza. For me, it conjures up memories of busy weeknights in high school filled with homework deadlines, violin lessons, and soccer practice. It was for those days, mom or dad would pick up fresh kafta from the local butcher and spread it on pita so that we could have dinner ready in no time. I’d roll mine up with a side salad of onions and tomatoes and savor every single bite. Mmmmmm.

Now that summer is ending and school is just around the corner it means plenty of busy days ahead. If you’re like me and looking to start the meal planning process now to get ahead of the game then this is the perfect midweek recipe to write in. With just a few ingredients you can have a delicious and filling meal for the whole family in a short amount of time. It’s also something different and variety is always nice to have in your meal plan 🙂

Simple Kafta Pizza Pita

  • Difficulty: Easy
  • Print

Ingredients

Kafta Pizza
Fresh pita bread
1 lb kafta (makes about 5 pizzas)

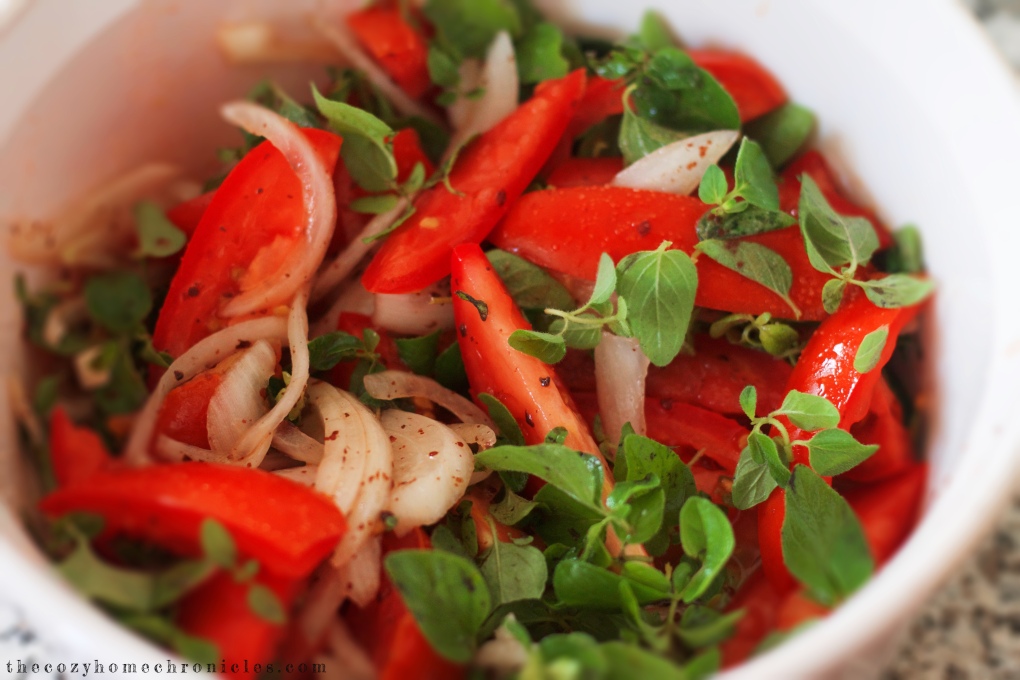
Side Salad
4 ripe roma tomatoes, cut into small wedges
1 medium sweet onion, thinly sliced
1 bunch fresh Thyme (sub parsley)
1 teaspoon sumac
1/2 lemon juiced
Extra Virgin Olive Oil
Salt and Pepper to taste

Sides
Homemade french fries
Lebanese yogurt
Lebanese pickles

Directions

  1. Turn your oven on the broiler setting and begin preparing any sides like frying your french fries (if you have some already cut up) or whipping your yogurt with a bit of salt.
  2. Make your side salad by gently tossing the tomatoes, onions, thyme, sumac, lemon juice, and olive oil. Finish off with salt and pepper to your liking.
  3. Open your pita bread at the seam so you have two evenly-sized thin pita circles.
  4. Using the back of a soup spoon, spread a tablespoon or two of kafta evenly across the inside part of your pita bread. If you put too much meat, it won’t fully cook and the bread will become soggy in the middle and burn on the edges.
  5. Place your kafta pizzas on a baking sheet and place under the broiler for about 5 minutes or until the meat is cooked and the bread is a nice golden brown.
  6. Enjoy!

IMG_3621 copy

IMG_3615 (1)

IMG_3630

If you liked this post please follow us and share!
Instagram


Summer Spring Rolls


IMG_3731

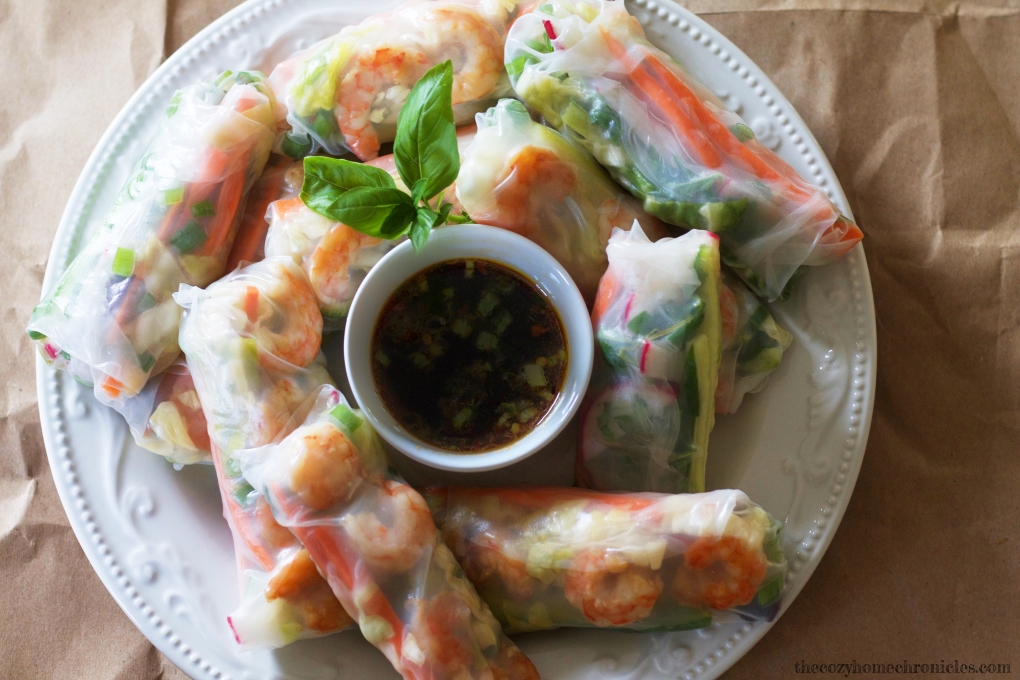
I don’t know about the rest of you but we have been having a HOT summer here in Michigan. It’s already unbearable with 90% humidity some days but add pregnancy to the equation and it’s a totally different ballgame. As a family we love having fresh, homemade food at the ready but when it’s that hot outside the thought of cooking can be a bit daunting. For those kinds of summer days, we have an easy solution and one of our favorite go-to meals: fresh spring rolls. Not only is there little to no stove-top cooking involved (which means no extra heat in the house) but the flavors are just so refreshing and energizing they will leave you feeling light yet fully satisfied.

And if it’s that time of the week where you’re ready to clear out your fridge or you’ve just harvested some delicious veggies and herbs from your garden then this is the perfect recipe to reduce food waste or showcase those beautiful summer flavors. You can replace the shrimp with tofu or skip the protein all together to create a scrumptious vegetable medley. The possibilities are endless and we hope that you do give them a try. If you do, be sure to let us know 🙂

Summer Spring Rolls

  • Difficulty: Easy
  • Print

Ingredients

Spring Rolls
1 lb of shrimp, deveined and cooked
10 spring roll rice papers
1 English cucumber
2 medium carrots
2-4 large red radishes (sub 1 daikon)
1 small cabbage (red or green)
1 bunch green onions
1 bunch basil
1 lime
1 minced garlic clove
1/2 teaspoon freshly grated ginger
Soy sauce
Sriracha or chili garlic paste

Dipping Sauce
2 tbsp Brown sugar
1/4 cup rice vinegar
1 teaspoon sesame oil
Sriracha or chili garlic paste to taste
Green onions and red pepper flakes for garnish

Directions

  1. If you don’t have shrimp that is already deveined and cooked then begin by peeling, deveining, and cooking your shrimp (do not overcook). Let the shrimp marinate in a bit of garlic, ginger, lime juice, and soy sauce for flavor while you ready the rest of the fillings.
  2. Prepare your vegetables by julienning or thinly slicing the carrots, cucumber, radishes, and green onions. Thinly shred the cabbage. You can also chiffonade your basil but I prefer to keep them whole.
  3. Bring 4 cups of water to a boil and pour into a bowl for dipping the rice paper. You want the water to be hot but not so hot that you burn your fingers.
  4. Optional: Use 1 cup of the hot water to shock and wilt the cabbage for a few minutes. Rinse with cold water and drain. Toss with soy sauce and Sriracha for an added kick.
  5. Prepare a damp working station such as a cutting board for stuffing and rolling the spring rolls.
  6.  Dip your rice paper in the water bowl until pliable and lay on your work surface.
  7. Place 3-4 pieces of shrimp in the middle followed by the shredded cabbage, carrots, cucumbers, radishes, green onions, and basil.
  8. Fold one end of the rice paper over, tuck in both edges, and roll over until sealed.
  9. Repeat steps 6-8 until you have filled all of your rice papers.
  10. Place the rolls on a serving platter and serve with a simple dipping sauce.

IMG_3649 copy

IMG_3691

IMG_3695

IMG_3745

If you liked this post please follow us and share!
Instagram


Potato Kibbeh (faux Lebanese steak tartare/kibbeh nayeh)

IMG_2396
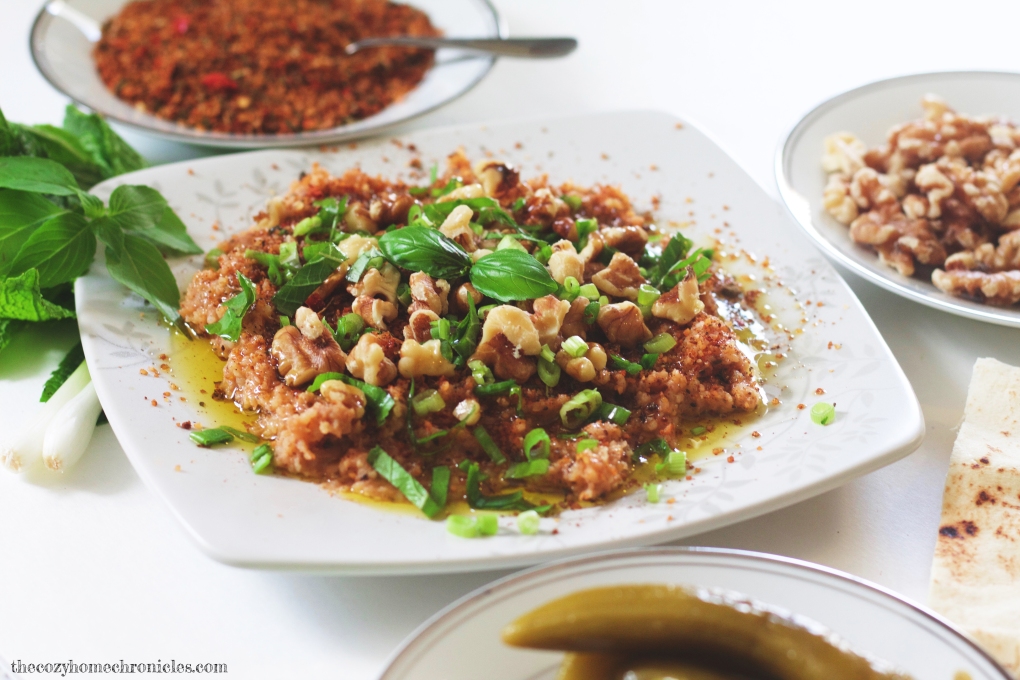
Oh pregnancy cravings. You always have a way of being exactly what I’m not supposed to have. While we don’t eat a lot of red meat in our diet, I repeatedly craved kibbeh nayeh (a Lebanese dish made of fresh raw meat, bulgur, and spices) during my first pregnancy and now find myself craving it with my second. For obvious reasons, raw meat is a no-no but I was determined to see my craving satisfied by creating a stellar vegetarian substitute. When I first attempted to make faux kibbeh during my first pregnancy, I happened to only have yellow potatoes on hand and this turned out to be the biggest blessing in disguise. I have since tried this recipe using your average Idaho potatoes and let me tell you it simply isn’t the same! The waxiness of the yellow potato gives you that authentic meat-like texture and flavor that other potatoes don’t. Just take my word for it and you won’t be disappointed.

We didn’t eat kibbeh nayeh much growing up but when we did it was an absolute treat. For many Lebanese, the highlight is the meat but for my dad the thought of devouring mouthfuls of raw meat was just unappetizing. We ate this meal a particular way: a light amount of meat thinly spread, heavily topped with crunchy bulgur, walnuts, and aromatic spices, drenched in olive oil so rich you could drink it, garnished with fragrant herbs like basil and mint, and served alongside fresh sweet onions, radishes, and other crunchy veggies and treats. This is what I have sought to recreate in this recipe; not just faux meat but an entire medley of exquisite flavors that make for a simple, nutritious, and delicious vegan lunch or dinner. This recipe makes quite a bit because we enjoy it so much that we have it for lunch for a few days. So if you’re looking for a recipe that makes weekly meal planning a bit easier, this is definitely a keeper!

Potato Kibbeh (faux Lebanese steak tartare/kibbeh nayeh)

  • Difficulty: Easy
  • Print

Ingredients

Faux meat base:
3lbs yellow waxy potatoes
1/3 cup fine bulgur
2 tablespoons tomato paste
1 to 2 cups of kammouneh*
Salt and pepper to taste
1 tablespoon high quality extra virgin olive oil

*Kammouneh:
3 cups fine bulgur rinsed and thoroughly drained and dried
1/2 tablespoon salt
1 teaspoon ground black pepper
1 tablespoon cumin
1 tablespoon ground allspice
2 tablespoons paprika
1 tablespoon dried ground basil
1 teaspoon dried marjoram
1 teaspoon ground coriander
1/2 tablespoon crushed red pepper flakes (more or less depending on how much heat you can handle)

**You can also get kammouneh for kibbeh nayeh from your local Lebanese butcher if you live in the Dearborn area. I have some stored in my freezer which I use to make this recipe.

For serving and garnishment:
Scallions
Basil
Mint
Jalapeno peppers
Sweet onions
Radishes
Walnuts
Lebanese pickles and olives
Pita Bread
High quality extra virgin olive oil

Directions

  1. In a small bowl, combine 1/3 fine bulgur and warm water. Set aside for 30 minutes until soft.
  2. Meanwhile, peel and boil your potatoes in a large pot until cooked and tender.
  3. While your potatoes are boiling, make the kammouneh in the food processor by mixing the 3 cups of thoroughly drained bulgur (remove any excess moisture) with the kibbeh spices. The bulgur will stay slightly crunchy and will take on a reddish hue.
  4. Once your potatoes are thoroughly cooked, drain and rinse with cool water.
  5. This step can either be done with a potato masher or handheld mixer in a large bowl or in the food processor. You will want to whip your potatoes while warm and incorporate the 1/3 cup of soft bulgur, tomato paste, kammouneh, olive oil, and salt and pepper until perfectly seasoned. The amount of kammouneh that you add is flexible-start with 1 cup and if you feel it needs a bit more flavor and texture then add a bit more.
  6. Spread the faux meat base on a plate, making grooves with the fork.
  7. Top your base in the following order: 1) kammouneh 2) walnuts 3) scallions and herbs
  8. Drizzle a generous amount of olive oil and serve alongside pita bread and fresh herbs and vegetables.

IMG_2366

IMG_2423

IMG_2370

IMG_2376

IMG_2398

If you liked this post please follow us and share!

Instagram


Cinnamon French Toast Granola

IMG_1324

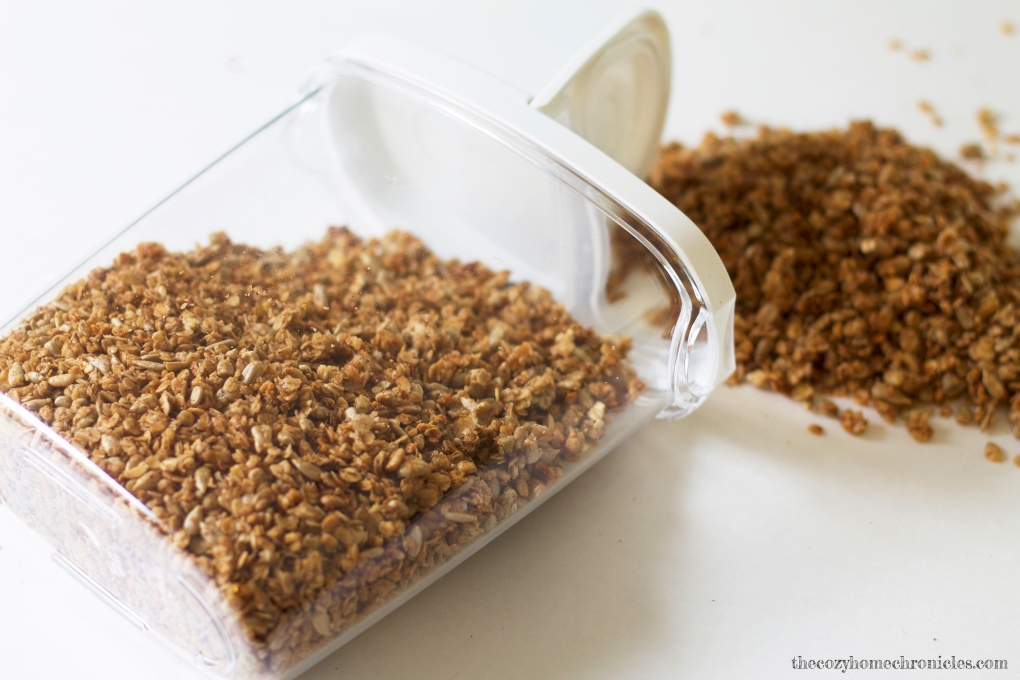
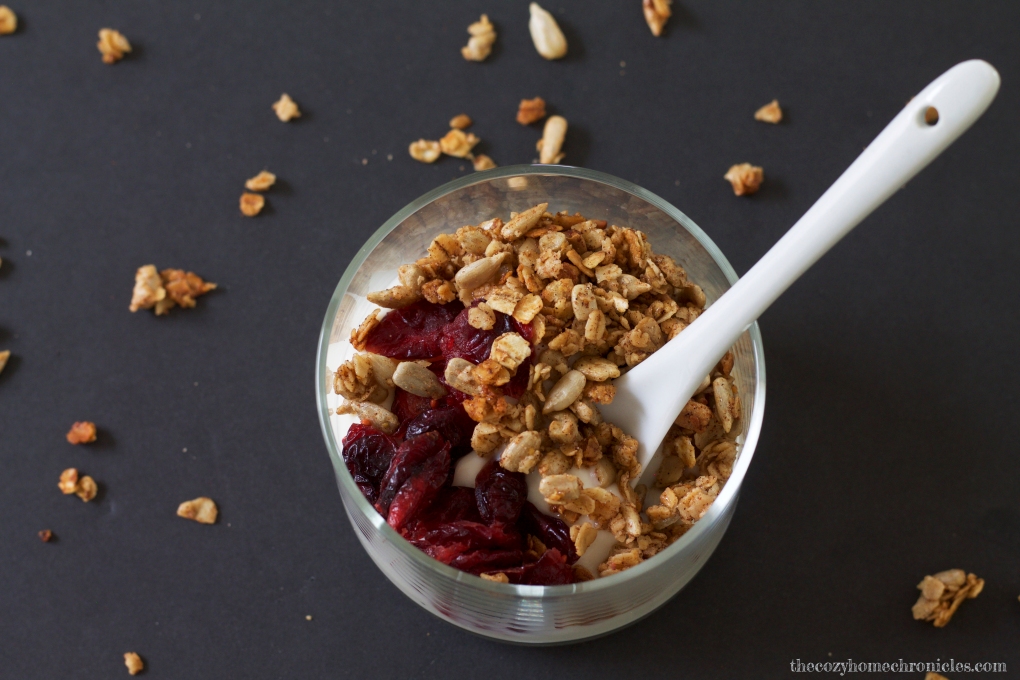
Who doesn’t like french toast? Cinnamon buttery goodness topped with sweet sticky maple syrup. Now imagine that same flavor in the form of a healthy snack. I recently started making my own granola and I just had to share how easy it is. Many recipes I found called for honey but I was craving the deep richness of pure maple syrup, which is how I ended up with a cinnamon french toast flavor (yum!). Quality store-bought granola can set you back anywhere from $6-9 a pound. Homemade granola, however,  is not only simple to make but it’s much more economical too. So here’s to healthy, homemade snacking on a budget!

Cinnamon French Toast Granola

  • Difficulty: Easy
  • Print

Ingredients
4 cups Quick Oats
2 cups raw sunflower seeds
1/2 cup pure maple syrup
1 tablespoon ground cinnamon
1/4 teaspoon ground nutmeg
1/2 teaspoon vanilla extract
1/3 cup vegetable or coconut oil

Directions
Preheat your oven to 325 F. Combine all your ingredients in a mixing bowl and stir well to coat. Spread the mixture evenly on two sheet pans and pop in the oven for approximately 20 minutes until golden brown. While baking, take the pans out every 5 minutes and move the granola around so that they cook evenly and don’t burn. Once the granola is done and cooled, seal in a airtight container and enjoy as a cereal, mid-day nibble, or as a yogurt topper.

IMG_1311

IMG_1321

IMG_1324

IMG_1334

If you liked this post please follow us and share!
Instagram