Taking the Necessary Steps in Becoming a DIY Home Gardener

To accomplish anything in life, you have to start somewhere. While the commitment to dive right in is necessary, knowing where to begin is arguably the most important part. Whether it’s deciding to tackle your own home renovation or even a simple endeavor such as gardening at home, you have to learn some basics if you want to taste success. Starting a vegetable garden at home is simple; all budding horticulturists need is a decent amount of space and the right materials to start laying the foundations. Before setting up your garden, here are a few things you should know.

IMG_2203
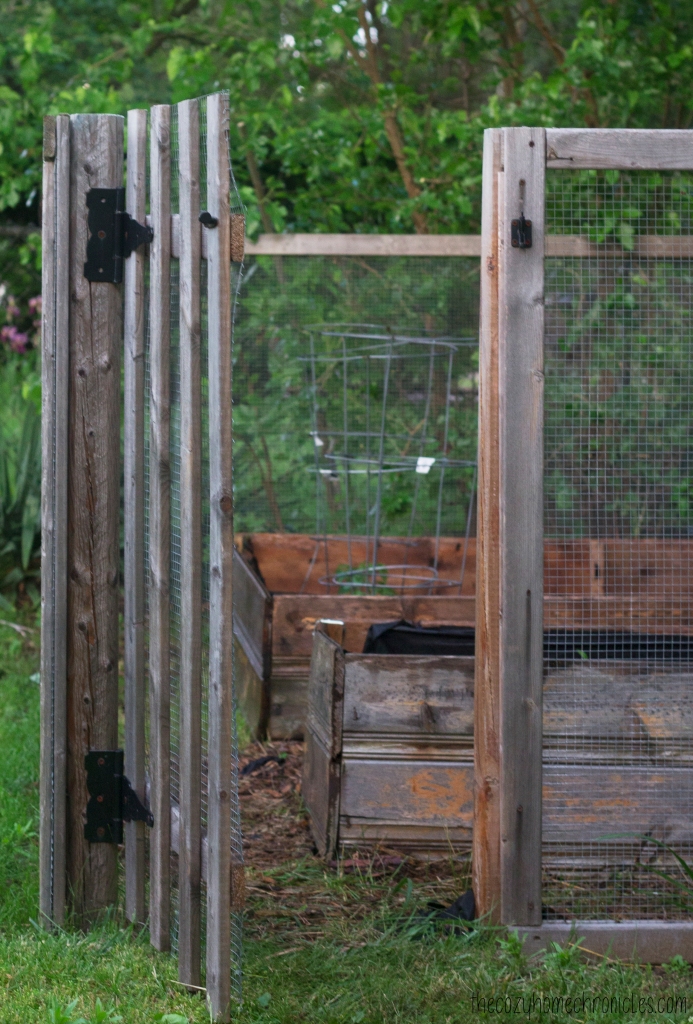
It’s vital to give plants the sunniest spot as possible in your yard. If you live in a place with unpredictable weather then investing in a greenhouse, regardless of the size, may be beneficial. As a benchmark, experts recommend using smaller framed models that feature clip-in glazing systems, as this type of greenhouse can fit in almost any corner of the garden. The wonderful thing about greenhouses is that you’re no longer limited by the weather but instead can grow all year long. If a greenhouse proves to be too tedious, do-it-yourself gardeners can get inspiration from home bloggers on how to build a raised garden bed from scratch. Raised garden beds may not offer protection from bad weather but they do keep away some pests, including weeds.

IMG_2166

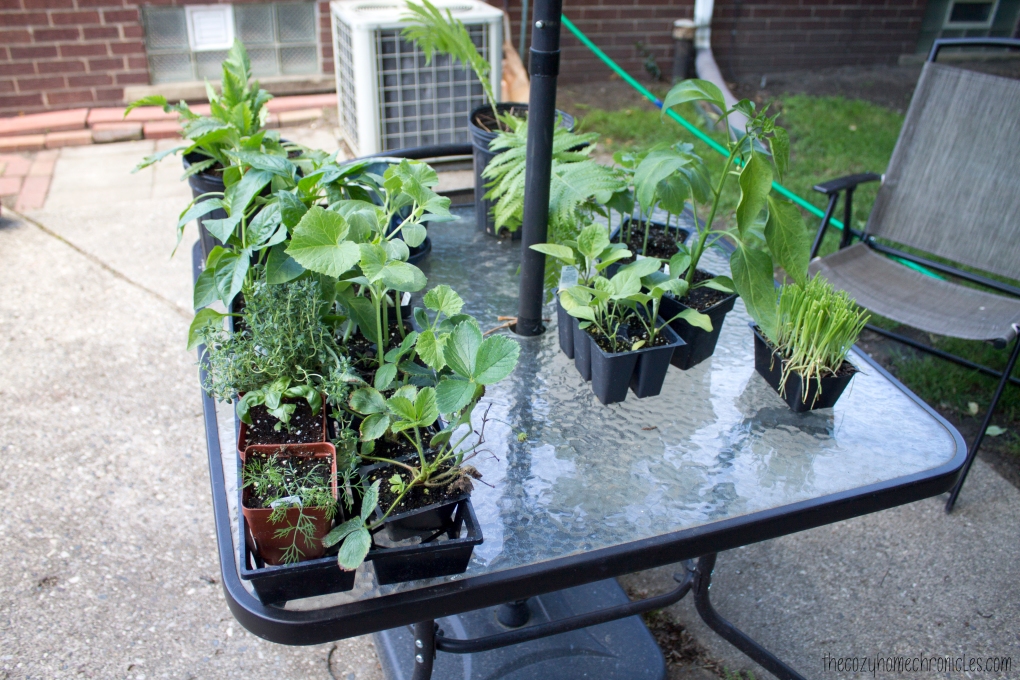
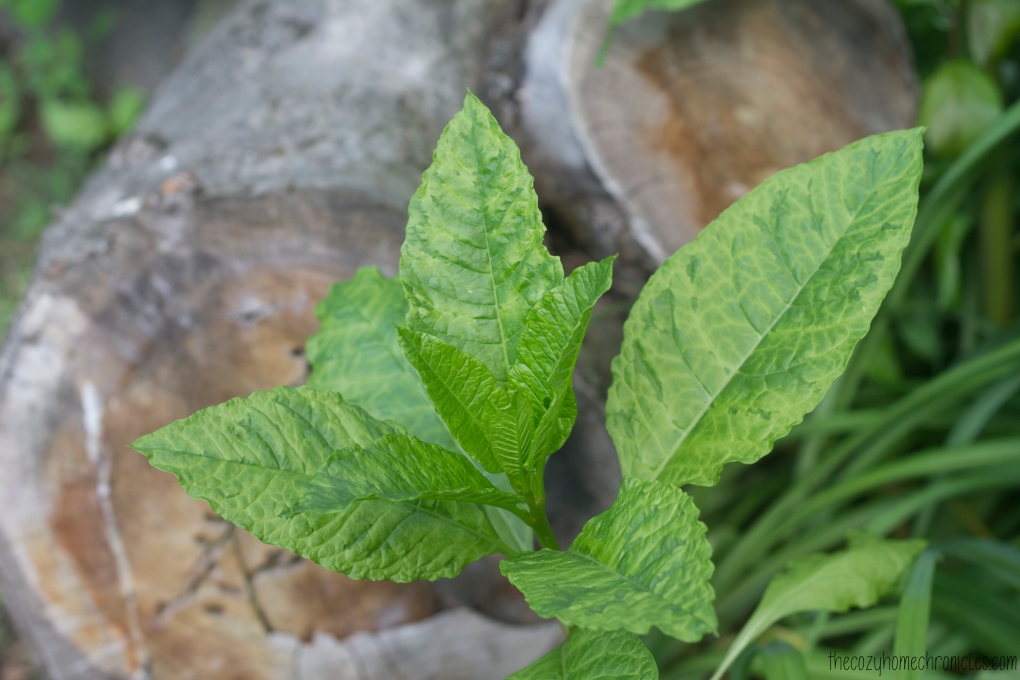
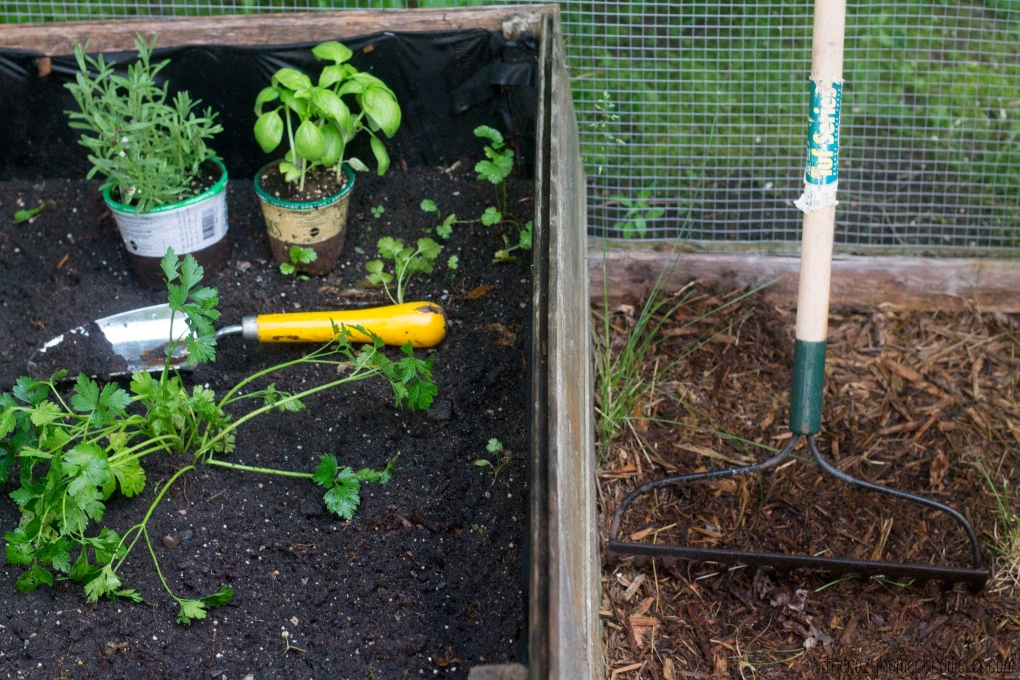
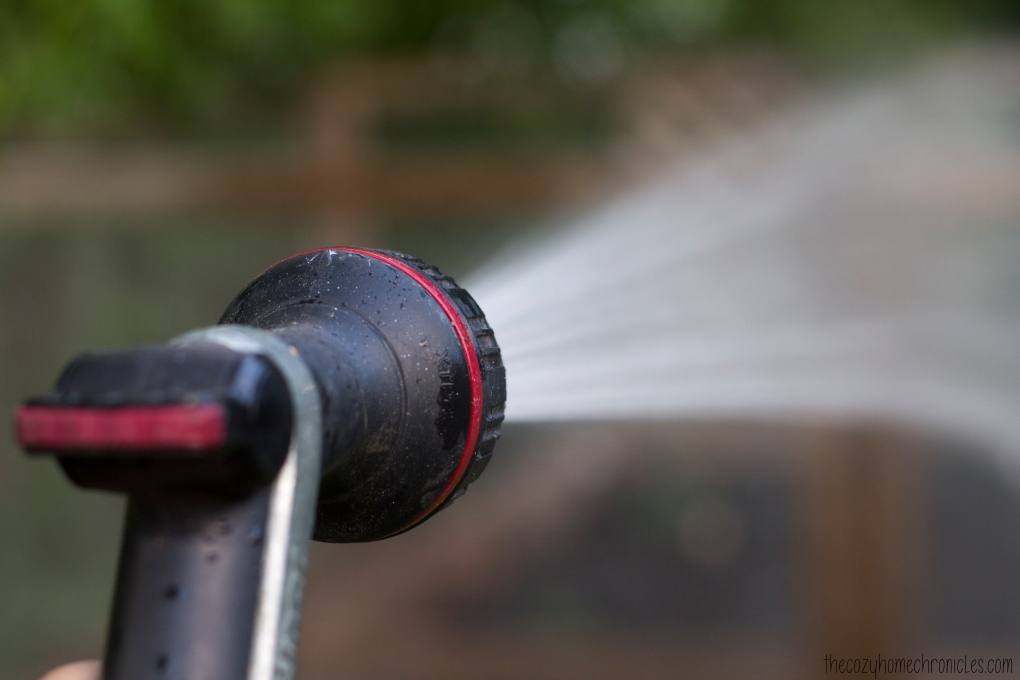
Once you have chosen the location and the material foundation of your garden, you can begin the fun process of planting. Not sure what to grow? The experts over at Thompson and Morgan have a list of the easiest vegetables to grow in your backyard. Of course planting is the easiest part. In order to ensure that you have a successful harvest, you will need to maintain your garden through watering and weeding. By not regularly cleaning your garden, you run the risk of entanglement or, worse, a gradual takeover of your plants. In terms of what to use when trying to get rid of weeds altogether, it’s better to approach this in a non-chemical sort of way by pulling out the roots using a shovel or trowel. On the other hand, if there are persistent wild plants with spreading wiry or deep roots, then there are some natural-based herbicides that can do the trick.

IMG_2195

It’s also best to cut the grass around the garden as this will keep your garden looking aesthetically appealing. Tending to long grass and dense flower borders, also reduces any viable areas where pests, such as slugs and snails, can hide and destroy your plants. This upkeep can be easily accomplished using your average lawnmower. By perusing through the extensive list of lawnmowers on Screwfix it’s evident how manufacturers have started to produce lightweight models ideal for the modern day gardener. These cordless mowers are ideal for getting into tight spaces and are easy to maneuver unlike the heavy duty mowers of the past. There are also plenty of eco-friendly electric options for those who want to reduce their carbon footprint.

IMG_2162

If you want to eliminate that kind of maintenance all together, you can opt to put a pathway made of pavers or woodchips in between your garden beds as suggested by Toby Buckland, a well-known English gardener, TV presenter, and author. For more gardening advice, including ideas about what to plant, check out his beginner’s guide in The Telegraph. The more you know, the easier it will be to dig right in. Happy Gardening!

IMG_2137

If you liked this post please follow us and share!

Instagram


Getting the heart and home ready for Ramadan

IMG_1964

It’s been a busy year for us and we are very grateful for all the fun projects and renovations we were able to do. However, with Ramadan just around the corner, we want to wind down a bit and focus on family and spirituality. It’s hard to believe that our babies are growing so fast (our son is turning two in just a month and our daughter will be turning 7 months) but now that they’re more attentive and communicative, we want to make the month extra special so they can grow up with fond and happy memories of our Ramadans together. For us, Ramadan is a month for reflection and growth. We enter this month as warriors, much like Paulo Coehlo’s Warriors of Light:

“Warriors of light are not perfect.Their beauty lies in accepting this fact and still desiring to grow and to learn.”

I wanted to capture this free-spirited approach in decorating our home and this sort of transformed into a colorful bohemian style tablescape since the dinning area is really where the family comes together to break bread and unwind after a long day of fasting. In this post I’ll be sharing some decor inspiration from our Ramadan preparations, including a family-friendly DIY project and a free printable you can frame to either hang up or place on your dinning table.

IMG_1898

This tablescape looks a lot fancier than it is. At the heart of it is a DIY Table Runner which is super easy to put together. I even had my son help out with the painting and he had a blast! All you’ll need is an inexpensive white table runner, a mandala or doily stencil, acrylic paint for fabric, and stencil brushes. The rest is self-explanatory. I probably could have done a much better job but I was painting with a toddler so we got a little carried away with dipping the brush in paint.

IMG_6103

Besides the table runner, all you’ll need to achieve this look are a variety of colorful vases (and/or ornate lanterns) filled with fresh summer flowers. The vases you see in the images are ones that I thrifted from a local Goodwill for $3 total. The spirit of Ramadan is also about humility so I didn’t want to create a space that was too extravagant or wasteful. I arranged the vases along the table, intertwined with crawling vine garland ( I bought on clearance) and in between these pretty palm leaf placemats. I also created a framed quote art out of one of our favorite supplications that we listen to just before iftar time. I wanted it to be a reminder on the table that aside from all the delicious food we get to eat, Ramadan is so much more than that. It is about reconnecting with God and softening our hearts so that we can be better, more empathetic human beings.

IMG_1969

IMG_1925

IMG_1900

In the home, I hung up lanterns and garland from the ceiling that I had purchased in a hanging decor kit from Michaels. The colors matched up very nicely with the bohemian color palette I had saved on Pinterest. Decorating with family is such a wonderful way to build memories and traditions. My son was very excited about standing on the table with me to hang these up and it put the biggest smile on my face seeing him gush with joy as he pulled out the tape from the dispenser in an effort to “help me.”

IMG_2024

On the wall behind the dinning table, I hung up a Ramadan advent calendar that I purchased from Handmade Beginnings. Not only is it beautiful but it’s perfect for making each day interactive and for making the countdown to Eid fun and exciting for little ones. Since my children are still young, I am choosing an activity that is simple and age appropriate. I found these free Ramadan coloring pages on Crayola’s website so what I plan to do is get a 30+ count marker or crayon set and put a different color in each  of the calendar’s pouches. Each day we will pull out a new color and work on our Ramadan page and hopefully by the end of the month (and just in time for Eid) we will have a pretty piece of art to hang up 🙂

IMG_1985

IMG_1994

There you have it. An expensive and simple way to add a colorful touch to your table and home for Ramadan. I really wanted a space that was special, vibrant, and cozy for our family and our dinner guests and I’m really happy with how it turned out.

IMG_2002

What do you think? What are your favorite ways to make Ramadan special for your family?

Free Download:  Ramadan Printable_Color |Ramadan Printable_Black


If you liked this post please follow us and share!

Instagram


One Room Challenge: Week 6|Bathroom Renovation Reveal

Yesterday marked week 6 of Calling It Home’s One Room Challenge™ and that means it’s reveal time! We are so excited to share the results with you and see what other awesome bloggers have done. Seriously, after you’re done with this post go check out some of the other transformations. You will not be disappointed!

ORC
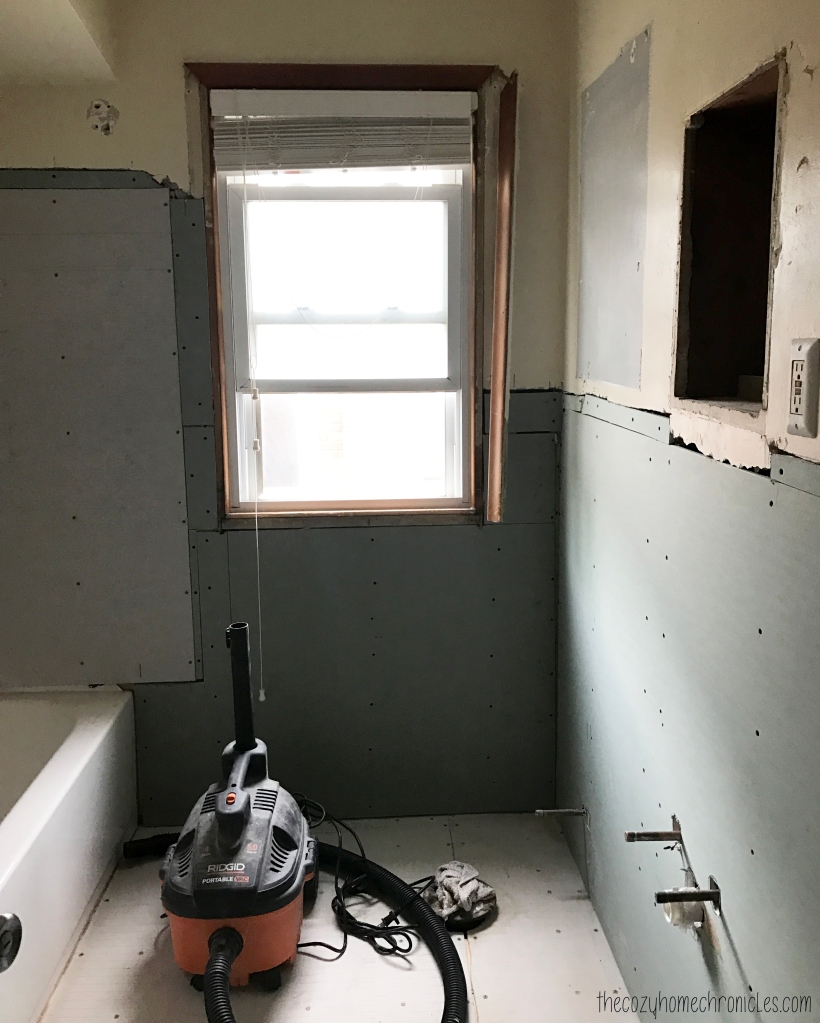
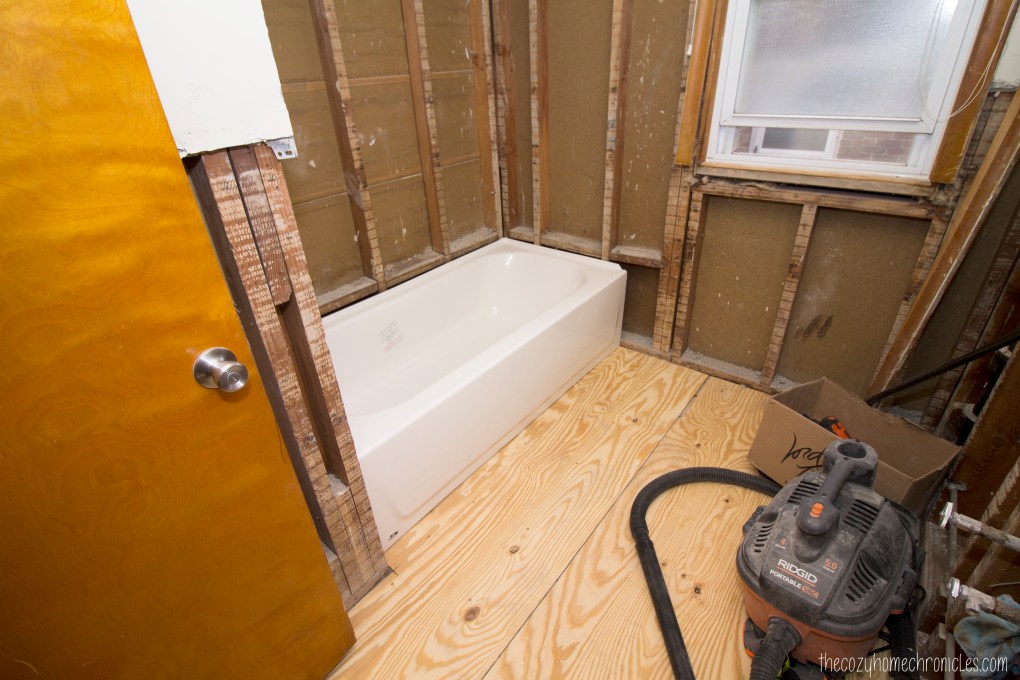
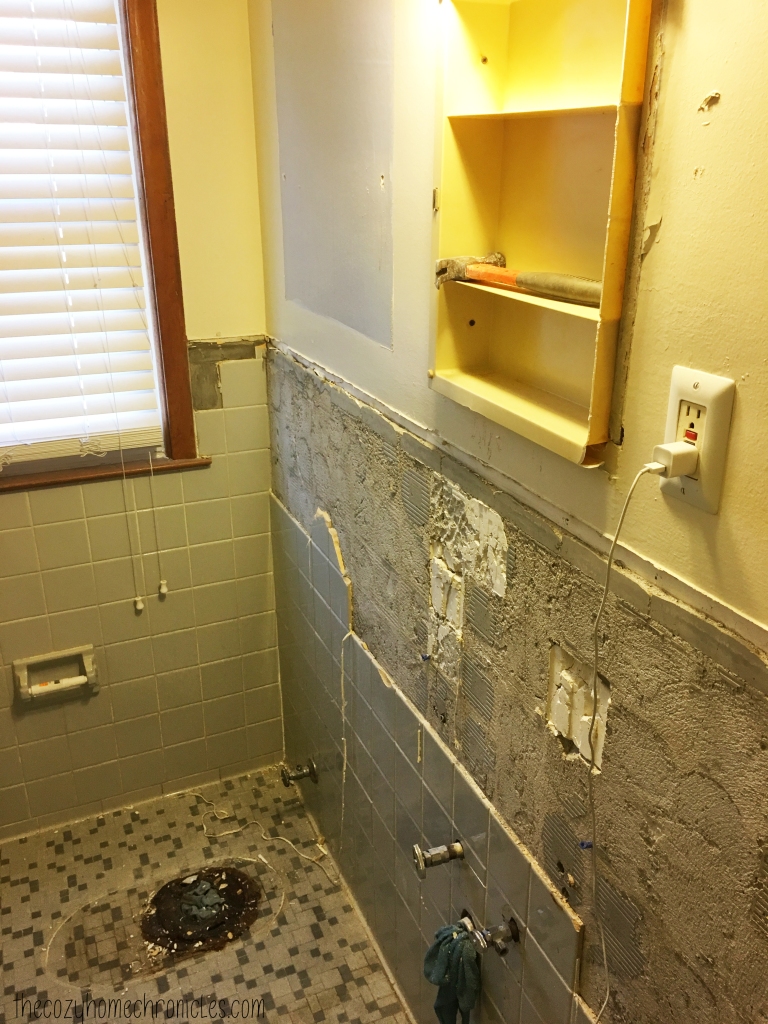
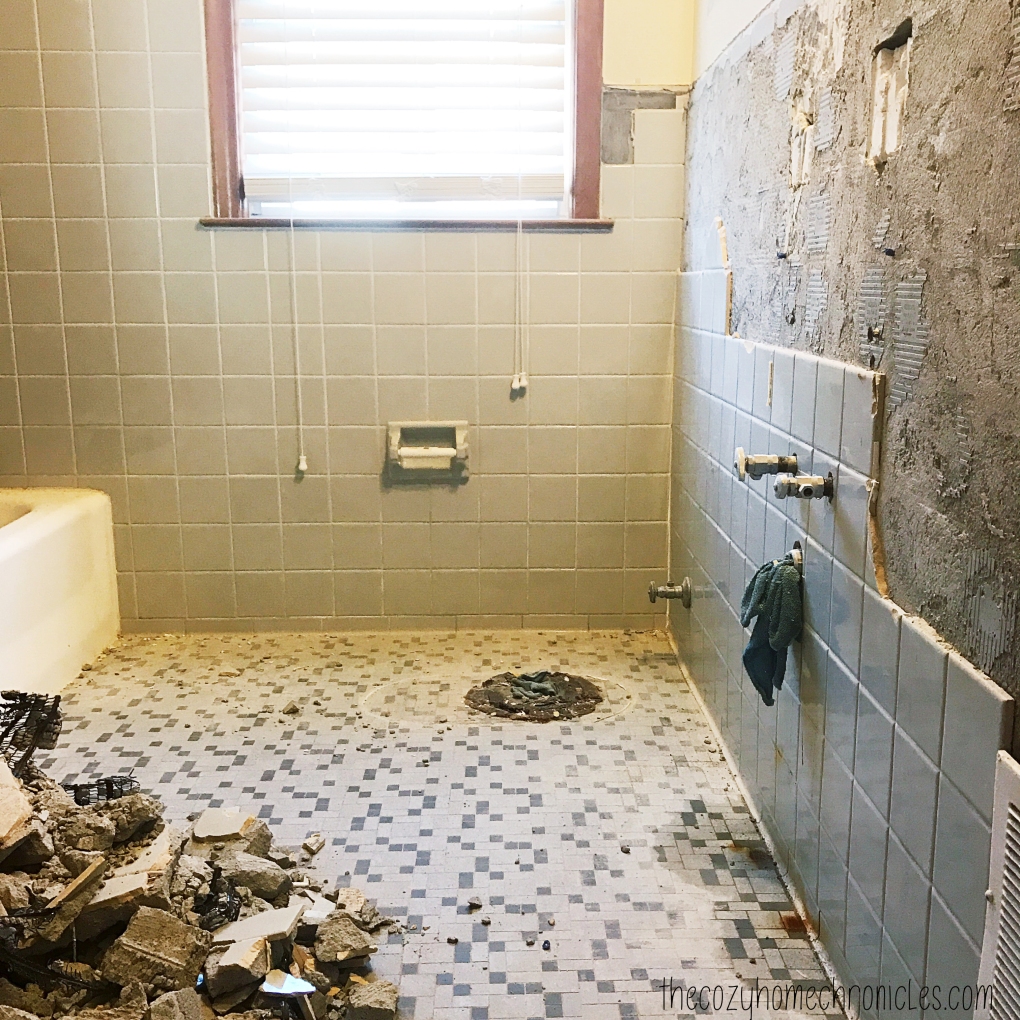
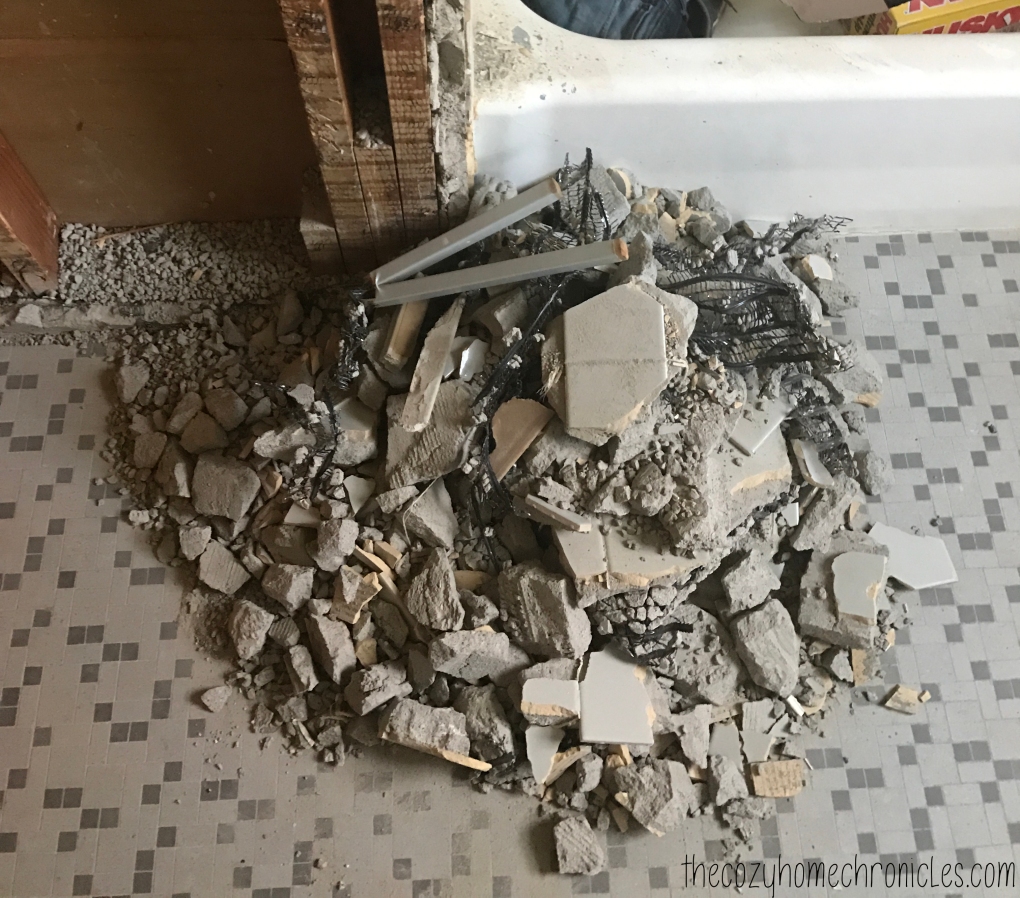
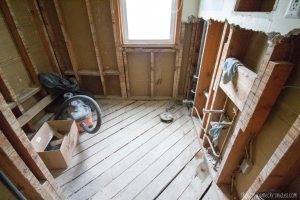
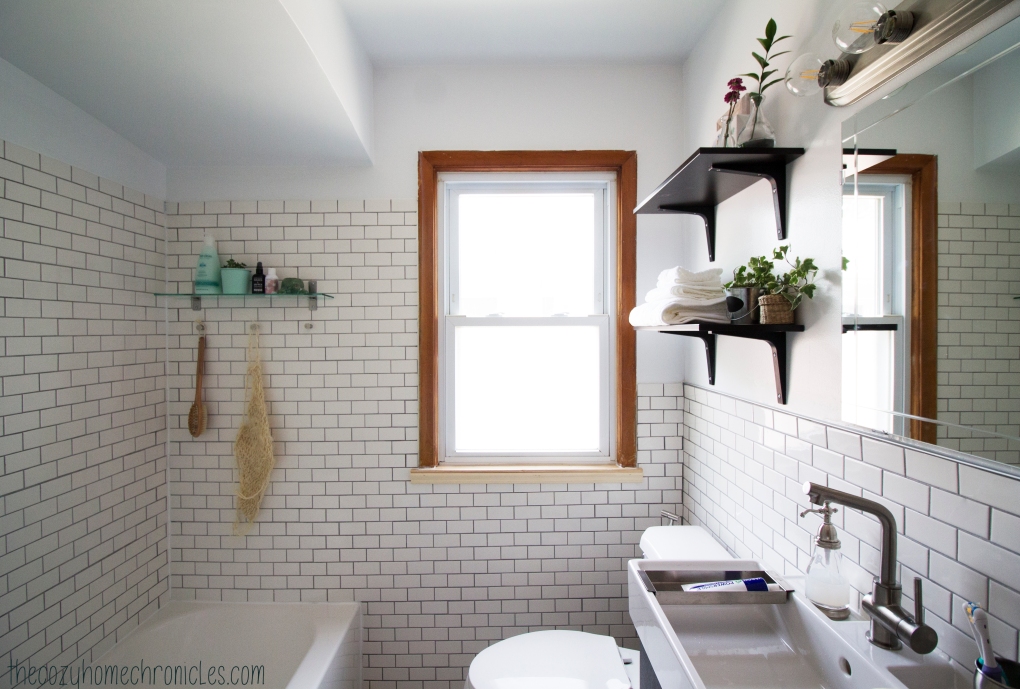
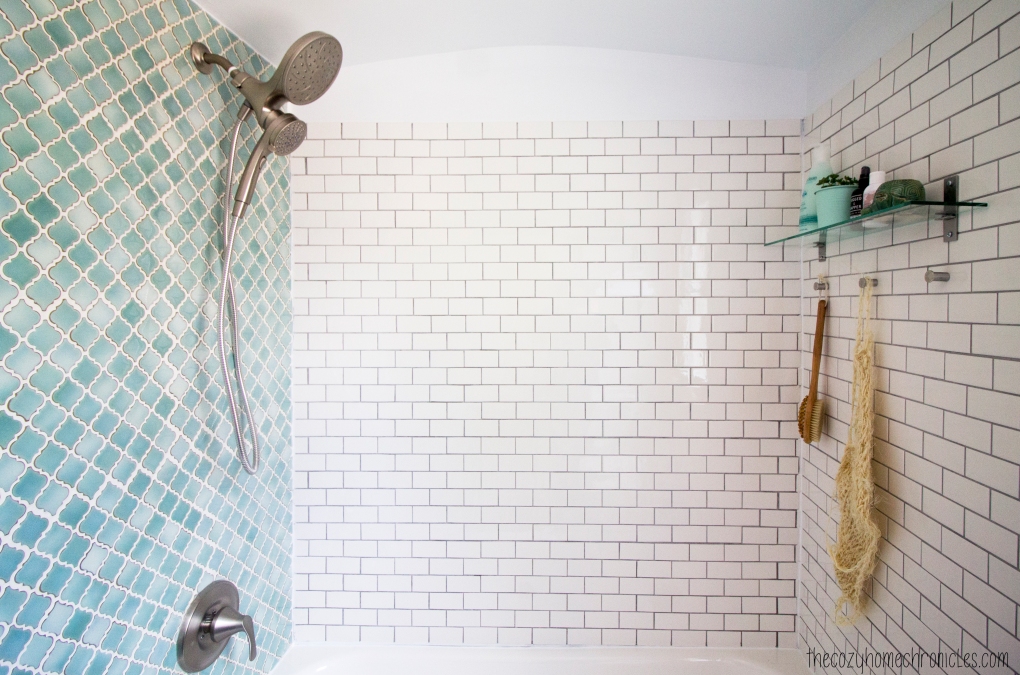
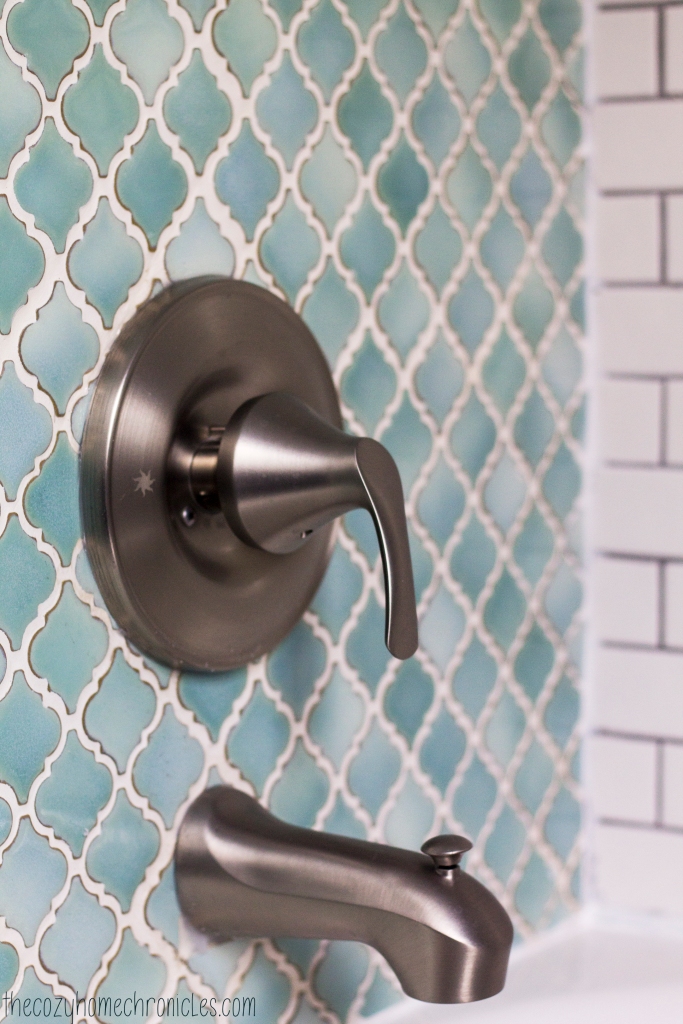
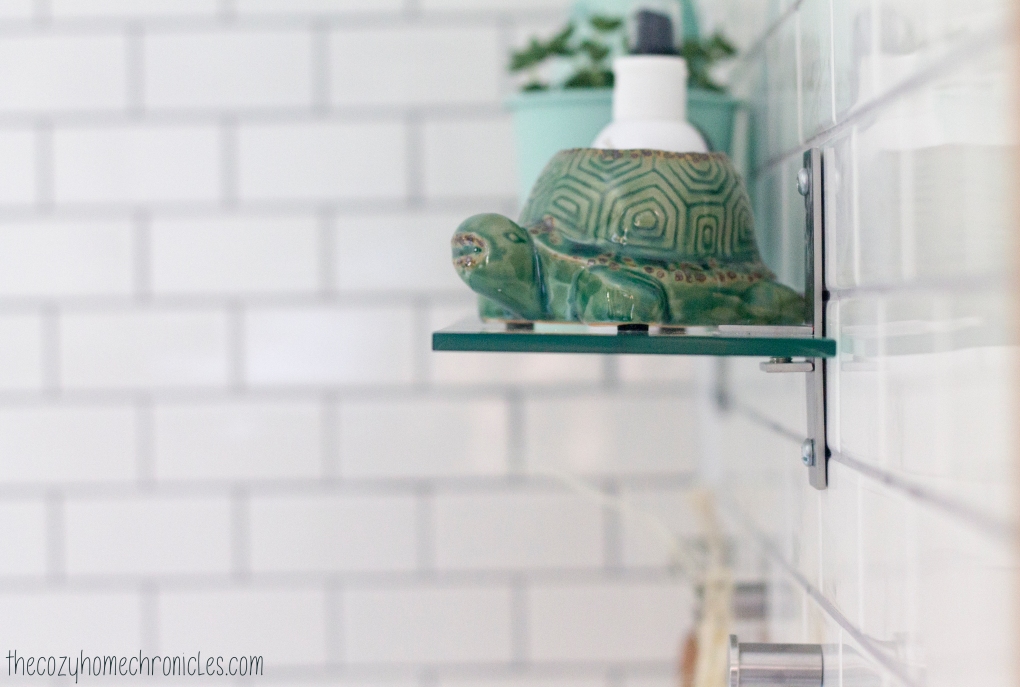
I wasn’t able to take pictures sooner because we were out of the house yesterday and we have guests staying with us but I finally got around to it this morning. We thought we would have a little more time to decorate but time is up! There are still a few things we will be finishing up this weekend including installing the glass shower door, putting in the toilet paper bar (which will be back in stock at IKEA on May 14th), and staining the new window sill moulding but the bathroom is fully functional and oh so awesome. We also realized that we had not been properly linking up our posts to the Calling It Home site and we were a little discouraged that we had done all this work for nothing. But this renovation isn’t for everyone else. It’s for us.  All the sweat and blood (literally) that went into this project was for our family’s comfort and so before we get to the reveal, we thought we would recap our six weeks of hard work.

IMG_1136

Week 1 | Bathroom Renovation Preparation

IMG_1590Week 2 | Bathroom Renovation Demolition

IMG_1597Week 3 | Laying the Foundation for Tile

IMG_6453Week 4 | Mudding and Tiling a Bathroom

IMG_6526Week 5 | Tiling and Decorating a Bathroom

If you’ve been following along, you’ll know that we ran into some issues that cost us precious time. Because of that, we literally spent every day this last week working well into the early morning hours in order to finish on time. In just one week, we grouted and sealed the entire bathroom, primed and painted the walls, assembled and installed the vanity and storage cabinet, installed shelving and lighting, cleaned and caulked everything, and had the plumber come and connect the plumbing. Was it worth it? Totally! Although some features were not our first choice, we are very happy with the results. As you will see soon, our bathroom is unrecognizable. The white subway and Carrara marble tile totally brightened up and opened up the space. It looks so much bigger! Our favorite part, however, is the accent wall in the shower. We cannot wait to bathe the babies and enjoy the beautiful view. Without further ado…

.

.

.

.

IMG_2123

IMG_2064

IMG_2034

IMG_2052

IMG_2037

IMG_2067

IMG_2058

IMG_2099

IMG_2093

What do you think of the transformation? We would love to hear from you in the comments below. You can also follow along on Instagram @thecozyhomechronicles for other fun DIYs and projects. Up next is our summer garden 🙂

If you liked this post please follow us and share!

Instagram


One Room Challenge: Week 5|Tiling and Decor Inspiration

Today marks week 5 of Calling It Home’s One Room Challenge™ and that means we are less than one week away from the final reveal. We thought we would have a little more finished this week but with a grant application deadline that my wife needed to submit for, things got pushed to the side. As of now, all the tile has been laid on the floor and walls and we are getting ready to grout tomorrow. We have had our fair share of cuts and bruises (not to mention fatigue) but we are finally nearing the finish line and are so excited to share with you.

All right! Here’s what we have left to do:

1. Grout and clean the haze

3. Prime and paint the non-tiled walls

4. Install vanity, toilet, storage cabinet, and other accessories

5. Decorate and style

ORC

Progress:
Einstein was really on to something when he came up with his theory of relativity. It’s seriously hard to believe that we have been working on this project for a month now! To recap: We demoed and gutted the bathroom, installed the new bathtub and had the pipes replaced, installed new cement boards and insulation, mudded and tiled everything. Tiling was not hard but it was tedious because of all the cuts I had to make. The good news is that grouting shouldn’t take more than a few hours (if we can actually settle on a grout color). After that the plan is to do minor touch-ups to the drywall and then prime and paint. If all goes according to schedule, we hope to install the vanity this weekend and get the bathroom ready for the final photoshoot.

IMG_6526

IMG_6537

IMG_6551

IMG_6608

IMG_6689

This past weekend we went and picked out our bathroom furniture from IKEA and it was a bit more difficult than we had anticipated. The vanity series that we really liked only came in two depths: 11″ and 19″. Both of these were on the extreme ends of what we wanted. Ideally, we were looking for something around 15-16″ to maximize storage efficiency and spaciousness. We found exactly that but in a color that we weren’t so sure about. In the end we had to make the sacrifice and go with this one in black-brown. The major upside to this was the vanity sink. Every single thing about the sink that comes with this vanity series is beautiful and perfect. Okay, I know I’m talking about a sink here but it truly is a thing to behold.

lillangen-sink-white__0381414_PE556140_S4
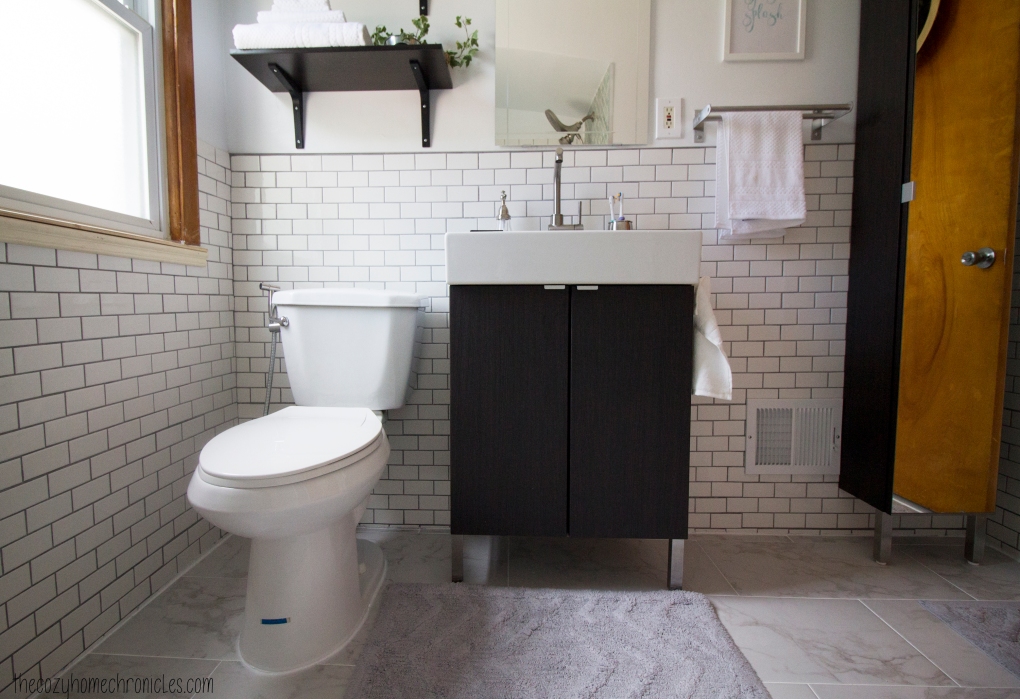
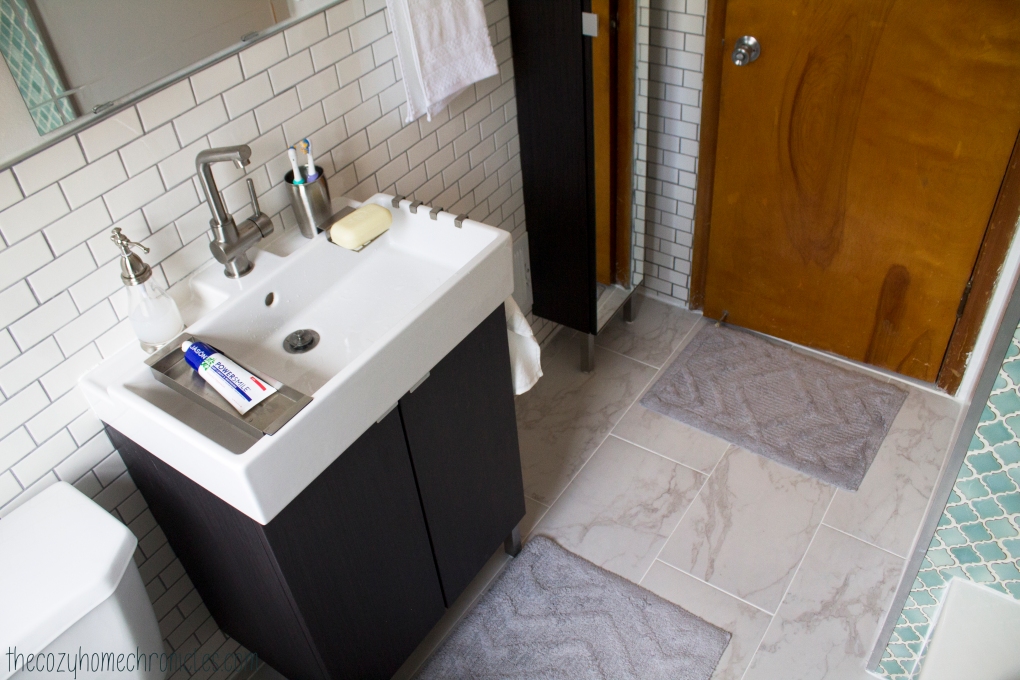
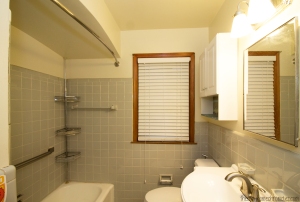
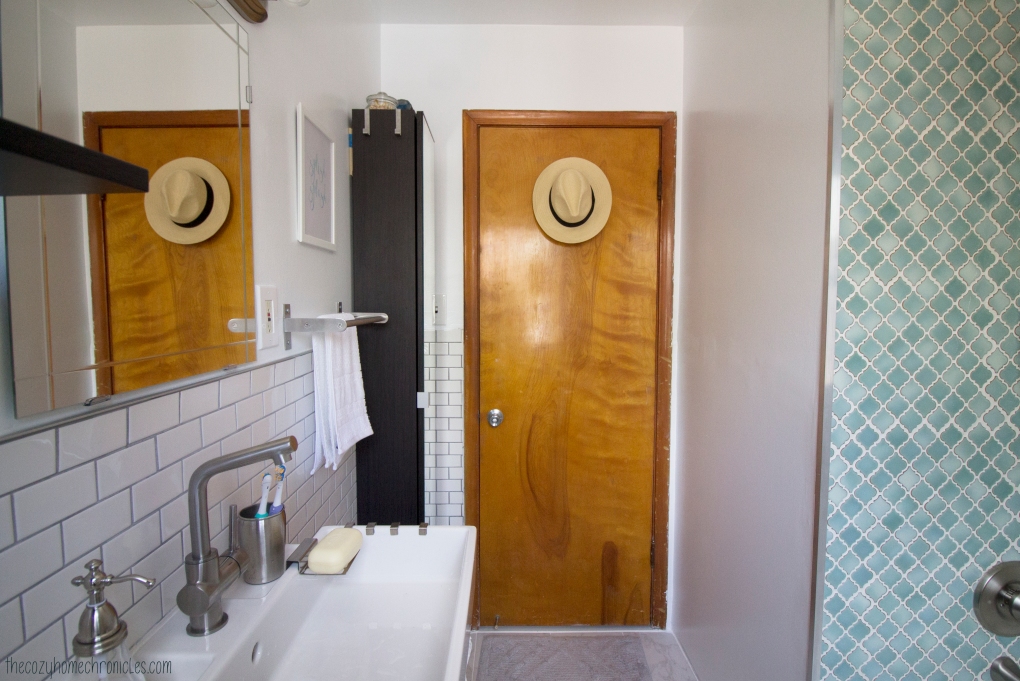
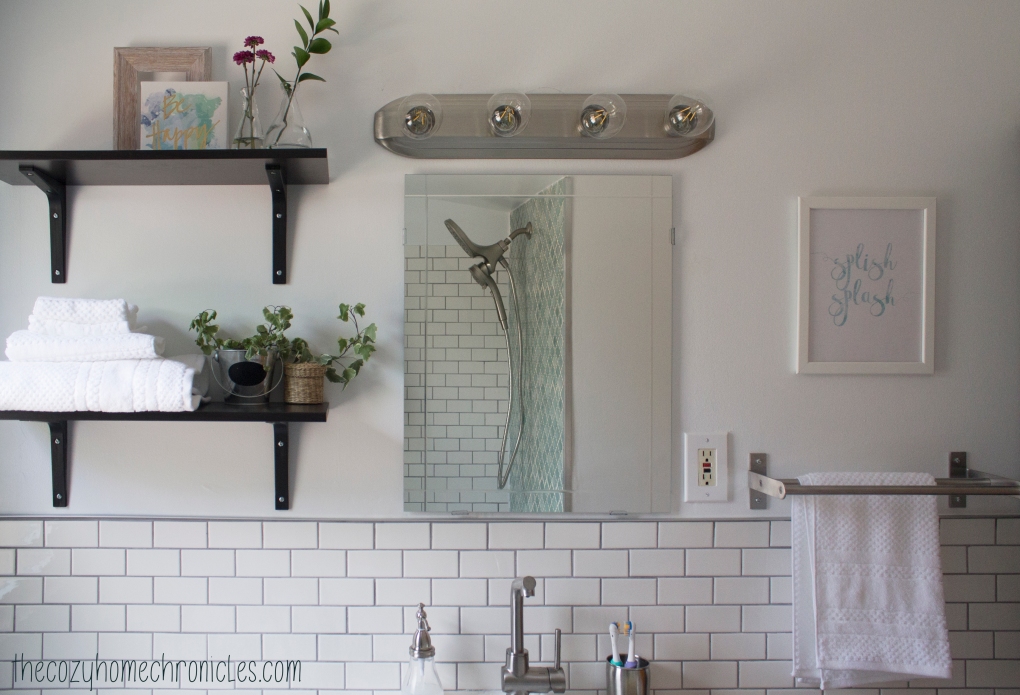
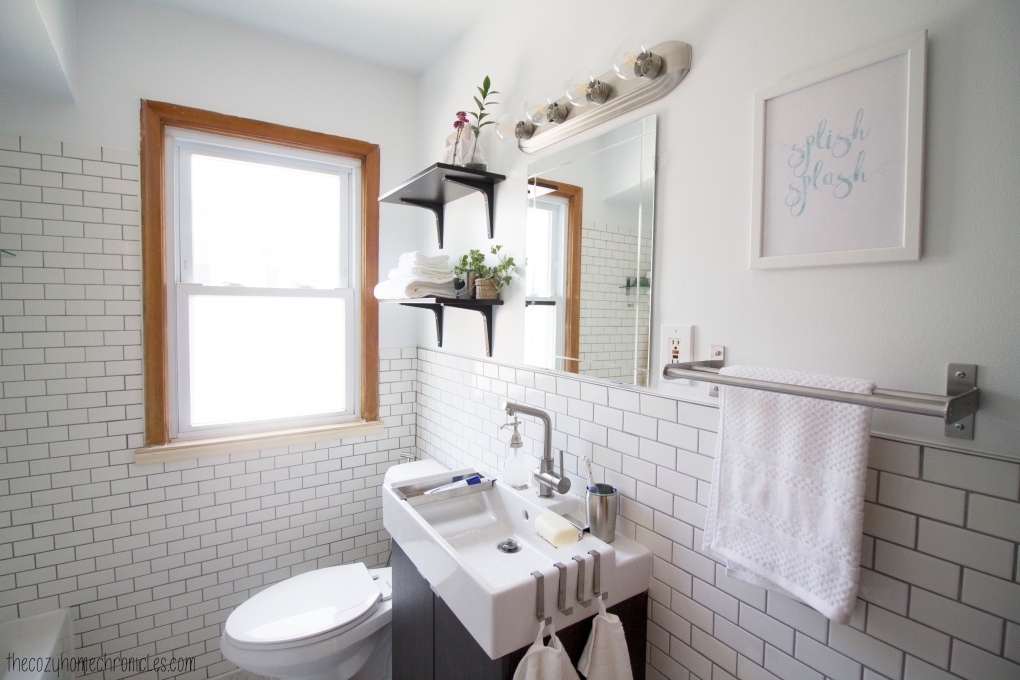
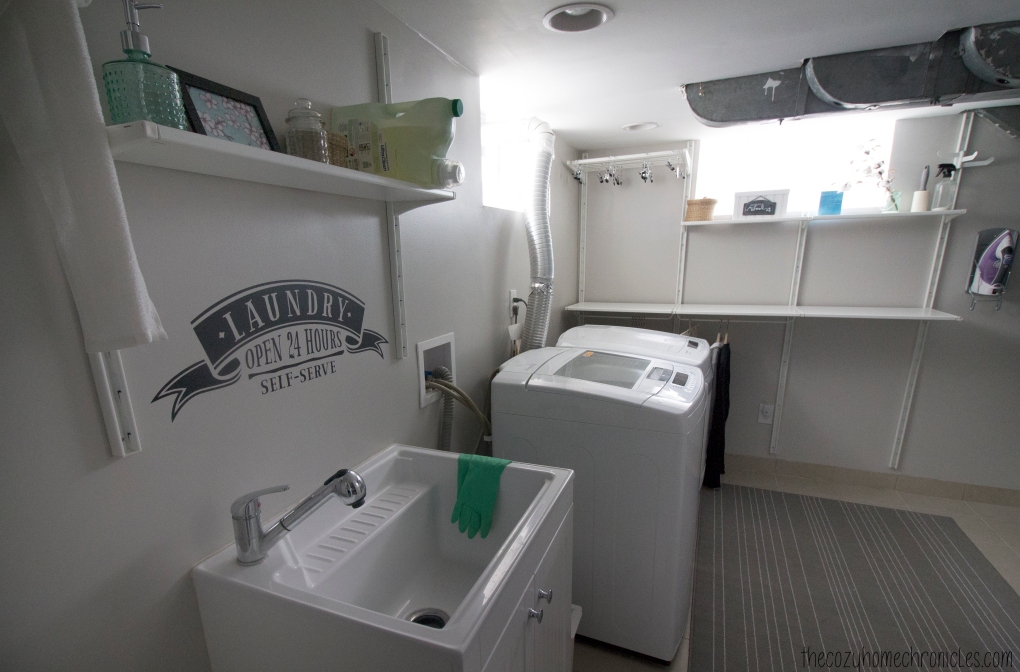
The light fixture was something else that we had to settle on this week and we went with an inexpensive bath bar light and these awesome filament globe bulbs. It might look simple but with the specific lightbulbs we chose,  it looks really cool.

Decor Inspiration:
We put together a mood board of inspiring decor items from IKEA, Target, Etsy, Urban Outfitters, and Anthropologie. We are not going to necessarily buy all of these things but creating this helped us decide on the look that we are going for: something earth-inspired, calming, and with a splash of color.

bathroom inspo

At the center of the mood board is a quote art that my wife made herself. It’s something our son always says when he’s splashing around in the bath and we thought it would make for a nice bathroom wall decor. We are also providing it to you as a free download printable. Think of it is a gift of appreciation for putting up with us and our crazy projects all this time 🙂

Printable Wall Art: splishsplash

Anyways, we could have shown you more progress shots but we will save that for next week. There’s nothing worse than a trailer that gives away a movie’s plot. The accent wall turned out more amazing than we could have thought so we will just let you revel in that thought until you can see it for yourself in next week’s final post.

Would you like to see our progress as it unfolds? You can also follow along on Instagram @thecozyhomechronicles for behind-the-scene videos!

If you liked this post please follow us and share!

Instagram


One Room Challenge: Week 4|Mudding and Tiling a Bathroom

We are hitting week 4 of  The One Room Challenge™ and that means we are less than two weeks away from the final reveal. Yikes! All the cement boards are completely up on the floors and walls and we are mudding as I speak (type). In other news, our accent wall tile arrived! And boy are we happy with the product. If you’ve been following along, you’ll know that we were torn about what color to go with for our planned accent wall in the shower. We had to order it online and we made the split decision to go with the mint green arabesque from Home Depot. It was a gamble to order online because pictures can be very deceiving but luckily these Merola tiles are more gorgeous than we could have imagined.

All right! Here’s what we have left to do:

1. Tile and grout
2. Install the vanity
3. Install the medicine cabinet
4. Connect the toilet and sink
5. Decorate

ORC

IMG_6449

Progress:
I know it’s been a slow first few weeks but we are feeling the fire now and desperately trying to finish on time. This past week was spent cutting and installing cement boards on the floors and walls. We also got rid of the debris from the demolition over the weekend. The city that we live in opens the dump to the public on the third Saturday of every month, which is awesome because you can dump all types of material except hazardous chemicals. It’s super convenient and the timing couldn’t have been more perfect. On the down side, I managed to get a nice scar on my jaw when a mesh wire from the cement boards caught my skin. Ouch!

Once the mud dries we will sand and then thoroughly remove all the dust so that we can begin tiling tomorrow. We will start with the floors first and then do the walls. Next week, we will be sharing a design board of some decor ideas and a fun little printable we have been putting together for wall art. Until next time 🙂

IMG_6453

IMG_6471

IMG_6469

Would you like to see our progress as it unfolds? You can also follow along on Instagram @thecozyhomechronicles for behind-the-scene videos!

If you liked this post please follow us and share!

Instagram


Spring and New Beginnings

Happy Thursday friends 🙂 Guess what? Urban Jungle Bloggers, hosted by the inspiring Igor and Judith, is back with another season and this month is all about celebrating the circle of life. As if right on cue, many of our indoor plants have begun to show signs of new life. Our windowsill basil flowered beautifully bringing with it the sweet aroma of summer pesto.

IMG_0737

Our fern and white elephant leaves are unfurling gracefully and it is such a joy to watch. Now that we are parents, we find ourselves more attuned to the growth surrounding us in our home. It is a bittersweet reminder that our little humans will continue to grow up but also inspiring to know that the world progresses through incremental changes. How can we allow ourselves to mentally and spiritually stagnate, when our physical body and surroundings are on a continuous path of growth?

IMG_0739

IMG_0729

We are especially happy with our rooting pothos. We now have two living separately in clear glass vases and they have successfully stayed alive in water for over a year now. Not only do they look beautiful but they require very little maintenance. If you’re thinking of bringing plants into your home but think you have a black thumb then this is definitely a plant you should consider starting out with.

IMG_9587 copy

Meanwhile outside, our backyard is blossoming with life. A variety of birds including woodpeckers, cardinals, and blue jays have returned to our feeder. We are really excited to finish our bathroom renovation and turn our attention to our garden and landscaping. We have a garden inspiration board on Pinterest that we have been adding to and we can’t wait to make our imagination a reality. Anyone have any grand garden/landscaping plans? We would love to hear from you in the comments below.

IMG_0919


IMG_0926

IMG_0936

 If you liked this post please follow us and share!

Instagram


One Room Challenge: Week 3|Laying the Foundation for Tile

We are hitting week 3 of The One Room Challenge™ and boy has it been rough! We just finally finished the demolition this past weekend and up until an hour ago our bathroom was completely gutted. Right now we are seriously questioning if we can finish on time and that’s been a bit disheartening but we are pumped to make it happen. It’s called a challenge for a reason, right?! In this post we will be sharing why our progress has been slow as well as some mistakes that we made so that you can avoid them.

ORC

IMG_6067

Progress:
As you know from last week’s update, we had some hiccups with the walls because the tile wasn’t chipping away easily so we made the decision to take everything out all the way down to the studs. If you follow along on our Instagram stories, you might have seen how we completely demolished the walls and the floor in the bathroom. We also took out that hideous 300-pound blue tub (with help of course…that is why you have brother-in-laws!). With the walls and floors gone, we layed down the moisture barrier and plywood so that we can install the cement boards and tile. We have our plumber guy coming first thing tomorrow morning to replace some corroded pipes and get the bathtub and shower head/faucets all set up. Replacing plumbing wasn’t in our budget but now that we’ve gotten this far it doesn’t make sense to build something new on a faulty foundation. And those pipes were clearly nearing the end. Once the plumbing is all set, we can begin tiling!

IMG_5931

IMG_5960

Issues & Concerns:
The reason that our demolition took two weeks (besides that we are doing this in the evenings with two kids) is that the removal of the tile proved to be much more labor intensive and involved than we had anticipated. This was an issue we had little control over. There is one blunder that we made, however, that cost us unnecessary delays. The bathtub. You see, there’s not much you can do without your bathub in place. During the entire brainstorming and design stage of this project, we focused entirely on the tile, vanity, and lighting and we completely neglected the bathtub! We just assumed that we could walk into a local Home Depot and leave with a reasonably-priced, 5-star tub. Yeah, no. Once we started looking into reviews and the different types (cast-iron vs. steel) we became so overwhelmed. Many of the good ones were not available in-store and would have cost us another 1-2 weeks of time if we ordered online. In the end we settled on a tub that had decent reviews and was available in-store. The awesome thing about it is that it is 2 inches deeper than standard bathtubs. It is now sitting in the bathroom so that the plumber can set it up and we can finally begin putting this room back together again. The lesson in all of this? If you’re ever considering doing a bathroom renovation on a tight schedule then have a bathtub selected and a plumber arranged to come before you start.

IMG_1590

IMG_6156

IMG_1597

Would you like to see our progress as it unfolds? You can also follow along on Instagram @thecozyhomechronicles for behind-the-scene videos!

If you liked this post please follow us and share!

Instagram


Laundry Room Remodel with IKEA’s Algot System

As you may be well aware of, maintaining a home requires not only constant work but some level of organization in order to cultivate a sense of peace and stability. Sometimes organization can be found through specific practices such as meal planning or journaling, other times it can be found in the design of a space that maximizes storage and efficiency. In our home we try to maintain a happy balance between both practice and design. Before having children, doing laundry was manageable because we could fold and put our clothes away in our bedroom without any interruptions. Now with two little ones, we can’t afford to bring the laundry up to fold unless we want our clothes scattered all over the main floor. We found that even though we had scheduled days for doing specific loads, our laundry room was just not equipped to deal with us sorting, folding, hanging, and ironing our clothing in one space. There was no counter-space to fold and no shelving to store laundry baskets and cleaning supplies. Something had to be done!

Here’s what our laundry room looked like before:

IMG_9673

IMG_9682

IMG_9680

IMG_9678

When we first bought our house, there was virtually no laundry room. There was just an old washer and dryer sitting in a dark and dusty, cement-walled basement. When we finished our basement in 2014, we made sure to include a space for laundry although we never put much more than a shelf and a sink cabinet. Fast forward to three years later and the realization that our laundry room was wasting valuable space. After much research and number crunching we decided that IKEA’s Algot system provided us with all of the features we were looking for at a very reasonable price. The Algot has a variety of options that accommodate any need from hanging rods to pull out drawers to drying racks. We are very familiar with the system because we had used it to replace our master bedroom and nursery closets but had never considered using it on an open wall. Until now.

In total, we spent $177 for the design we chose and we are very happy with the outcome. The system gave us the shelf space, hanging space, and counter space we desperately needed to deal effectively with laundry all in one space. If you are considering this system but are hesitant about what it will cost you, you can get 100% accurate pricing by designing your space through the Algot planner.

Here’s what our laundry room looks like after:

IMG_1006

IMG_1293

IMG_1355

IMG_1338

IMG_1344

Of course a remodel wouldn’t be complete without some fresh new decor. Not only did we want a space that is efficient but we also wanted one that is cozy and pleasant to work in. Below we are sharing some of our favorite, simple decor ideas.

IMG_1349

  1. Laundry Wall Decal: We had such a hard time settling on one from MyDandelionDecal’s impressive 5-star rated shop but in the end chose a piece that was classic and inviting. The lovely shop owner has set up a 20% off code exclusively for our readers so if you’re interested in supporting a small business while decorating your home, the code is COZYCHRONICLE20
  2. DIY Wool Dryer Ball Basket:  Since we do not use dryer sheets, we needed something to keep our dryer balls from rolling all over the place. Armed with a paint pen, a clearance-priced metal plaque, and a white crate, I was able to put together this adorable storage box for under $10.
  3. IKEA Ljusnan Seagrass Baskets: These baskets add such a rustic touch and are perfect for storing clothes pins and essential oils.
  4. DIY Framed Wall Print: IKEA’s $0.99 Fiskbo Frame meets Michael’s $0.69 scrapbook paper for an inexpensive pop of color and pattern.
  5. Cotton Stem Bouquet: Who else thinks fresh cotton when they think of laundry? This inexpensive mint green jar is the perfect pair to Kirkland’s cotton stem.

IMG_3532

IMG_1004

IMG_0997

As with all things in our home, this laundry room is still a work in progress. One thing that we still have yet to do is designate and design a corner for our cleaning tools. In due time! At this stage in our busy lives, however, this update gives us all the things we needed. It just goes to show you, a space doesn’t have to be fancy to get the job done.

If you liked this post please follow us and share!

Instagram


One Room Challenge: Week 2|Bathroom Renovation Demolition

Good evening friends! Today is exactly one week since we started our bathroom renovation project in conjunction with The One Room Challenge™ and so far we are still in the demolition stage. In this post we will be sharing our progress and where we stand currently. To be honest, I thought we would be done with the demolition by now but we all got sick and needed to take it easy. I didn’t want to be a hero and push myself past my limit so I took off the last two days. Slow and steady wins the race.

ORCProgress:
If you follow along on our Instagram stories, you might have seen that we already removed the toilet and the vanity over the weekend. The last major piece we need to take out is our bright blue 1950’s tub. We managed to remove the majority of wall tile from the existing cement boards only to realize that the mortar isn’t coming off as we had imagined. Considering the age of the bathroom, I’m not all too surprised. The good news is that we are a little more settled on the tile we will be using. After a recent trip to Home Depot, we really fell in love with this Carrara Matte tile for our floors. With white subway tile for the walls, it’s going to look great!

IMG_5529

IMG_5554

Issues/Concerns:
Since I will not be sticking to the original plan of leaving the cement boards, I had to purchase a new blade for the angle grinder so we can cut through the cement boards and take them out piece by piece. Removing everything all the way to the studs is both a good thing and a bad thing. The good is that we will redo the bathroom with all new construction materials, we will be able to do a clean, solid job from beginning to end. The bad is that we will have to spend more $$$ on purchasing drywall and new cement backer boards. Considering that this bathroom is a small space, the additional expenses shouldn’t exceed $250 (and this is considering that I will also have to remove and replace the subfloor with new plywood & moisture barrier). We just really wanted to challenge ourselves to do this renovation on an extreme (but realistic) budget so we could inspire others who might not otherwise consider renovating because of the cost.

All this fun stuff with the walls and floor removal, which I had hoped I wouldn’t have to deal with, will add between 1-2 weeks to the job. As is the case with any renovation project, you have to be prepared for stumbling blocks and plan accordingly. Despite our setbacks, I think we will still make it out in 6 weeks. We sometimes get discouraged thinking it will take that long, so we have to keep reminding ourselves that we have day jobs and two little ones and that’s why we can’t just finish it as quickly as we would like. Until next week 🙂

IMG_2598

IMG_3028

IMG_5470

IMG_5467

You can also follow along on Instagram @thecozyhomechronicles for the latest behind-the-scenes and videos of our progress.

If you liked this post please follow us and share!

Instagram


Iraqi Eggs in Tomato Sauce (Makhlama)

IMG_0982

We pride ourselves in our diversity as a family so this post will touch on that a little bit. Together, my wife and I, have roots from six different countries including where we were raised: Albania, Iraq, Lebanon, Poland, Sweden, and The United States. This specific recipe has been a breakfast staple in my household growing up and my father used to make it for us as far back as I can remember. Although the ingredient list is simple, this dish is truly a labor of love; from the slow caramelizing of the onions to the bubbling and simmering of the fresh tomatoes with turmeric and pepper. It’s the spiciness and subtle sweetness of the scrambled eggs that really sets it apart from its omelet cousin. Served with warm, freshly-baked samoon or sangak and sweet, mint-infused black tea, makhlama is sure to brighten any morning.

IMG_0984

In 2014, we visited my family in Sweden and my wife was able to taste the epicness (made-up word) of my father’s makhlama for the first time. Since then, it has become a highlight of our weekend breakfasts together. While in Sweden, we would eat makhlama alongside räksallad, a creamy shrimp salad, and knäckebröd (Swedish crispbread) and it was simply delicious. At home in the States, we eat it with buttery croissants, sharp Vermont cheddar or creamy labneh, and arugula. We consider ourselves very blessed that we have such diverse tastebuds and culinary menus to draw from when meal planning. There is never a dull meal. We eat and enjoy dishes from all around the world and we get to share with each other (and hopefully one day with our children) the memories of what those meals conjure up.

IMG_0952

Iraqi Eggs in Tomato Sauce (Makhlama)

  • Difficulty: Easy
  • Print

Ingredients
4 eggs
1 medium sweet onion
4-5 small ripe tomatoes
1 teaspoon Turmeric
1/2 teaspoon salt
1/4 teaspoon ground black pepper
1/4 cup vegetable oil

Note: Serves 2-4

Directions
1. Dice the onions very finely and sauté in hot vegetable oil on low until light brown and caramelized. This takes time so be patient and stir often so as to not let it burn.
2. In the meantime, dice your tomatoes and prepare your spices. Once your onions are slightly caramelized, add in the tomatoes and spices and cook off until thickened.
3. Crack your eggs into the pan and scramble them around until cooked.
4. Serve with warm delicious breads, cheeses, and fresh herbs. And of course a nice hot cup of chai!

IMG_0961

IMG_0967

IMG_0977

IMG_0991

What are some meals that remind you of your childhood growing up in a different culture?

If you liked this post please follow us and share!

Instagram