Falling into Autumn

Photo 2017-09-12, 4 12 12 PM

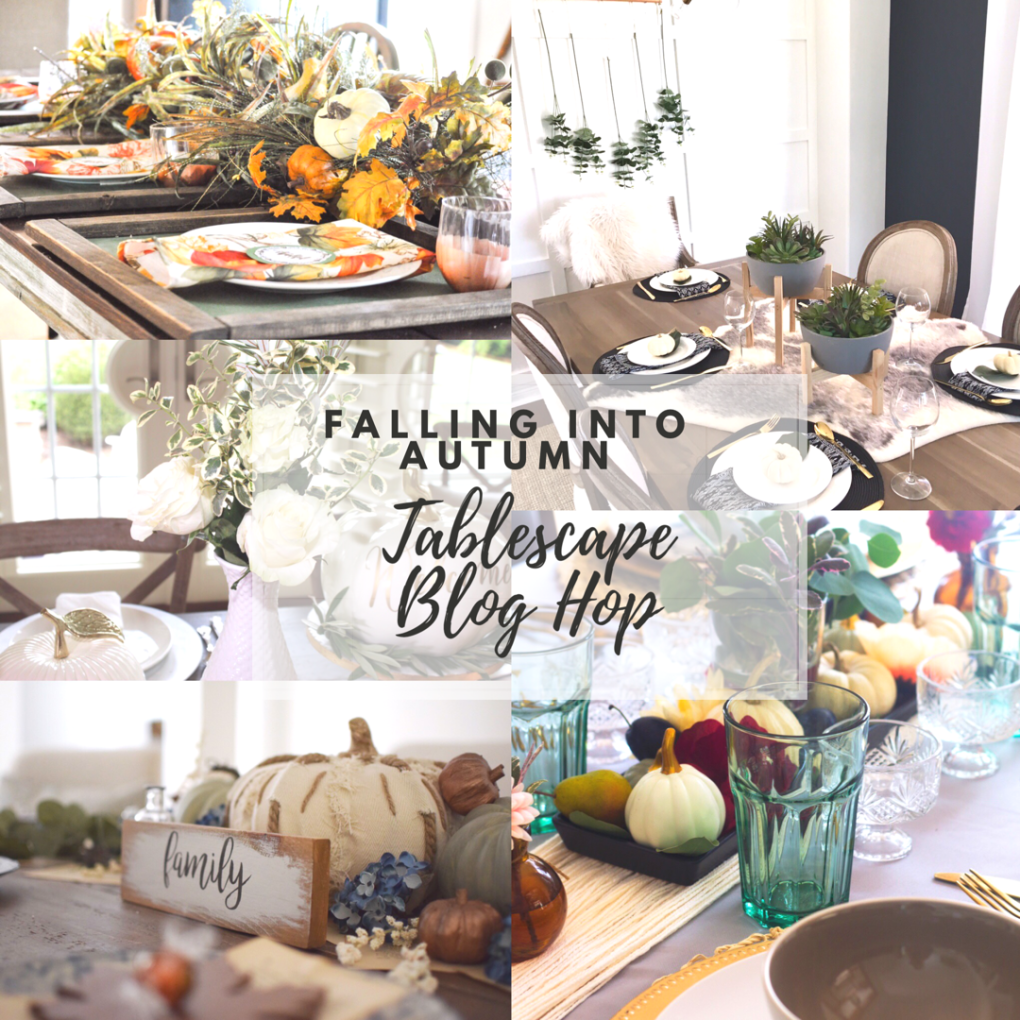
If you are coming here from Happy Haute Home, hello and welcome to our blog. It’s always wonderful to have new faces around here 🙂 Today we are excited to share with you our autumn tablescape which includes a fun and simple DIY table runner. Autumn is such a lovely time of year and I really wanted to create a space that celebrates the beautiful colors of the season while inspiring quiet introspection. Each season offers plenty to reflect on but there is nothing quite like reflecting on your harvest (physically and spiritually) and thinking about what can be improved upon for the next cycle when you begin anew.

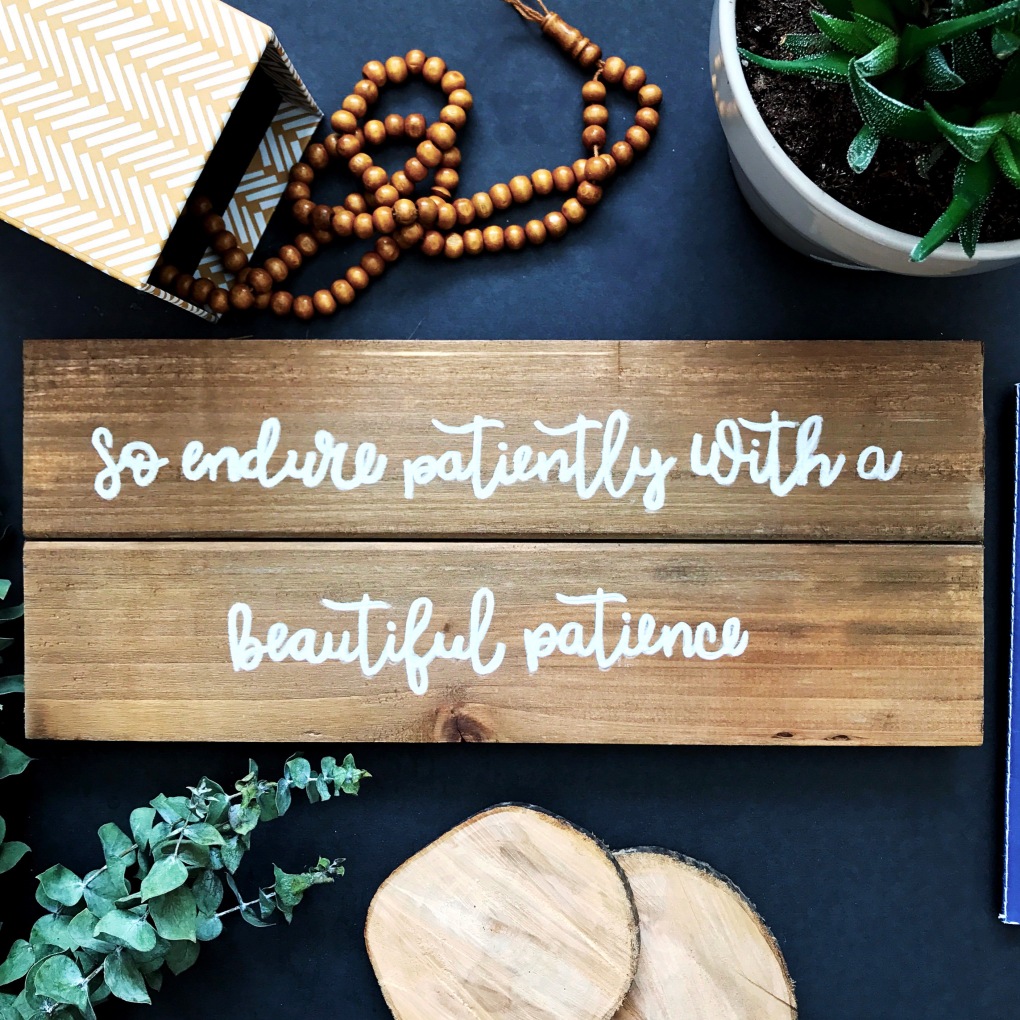
“Every tree, every growing thing as it grows, says this truth, you harvest what you sow.”-Rumi

IMG_4417

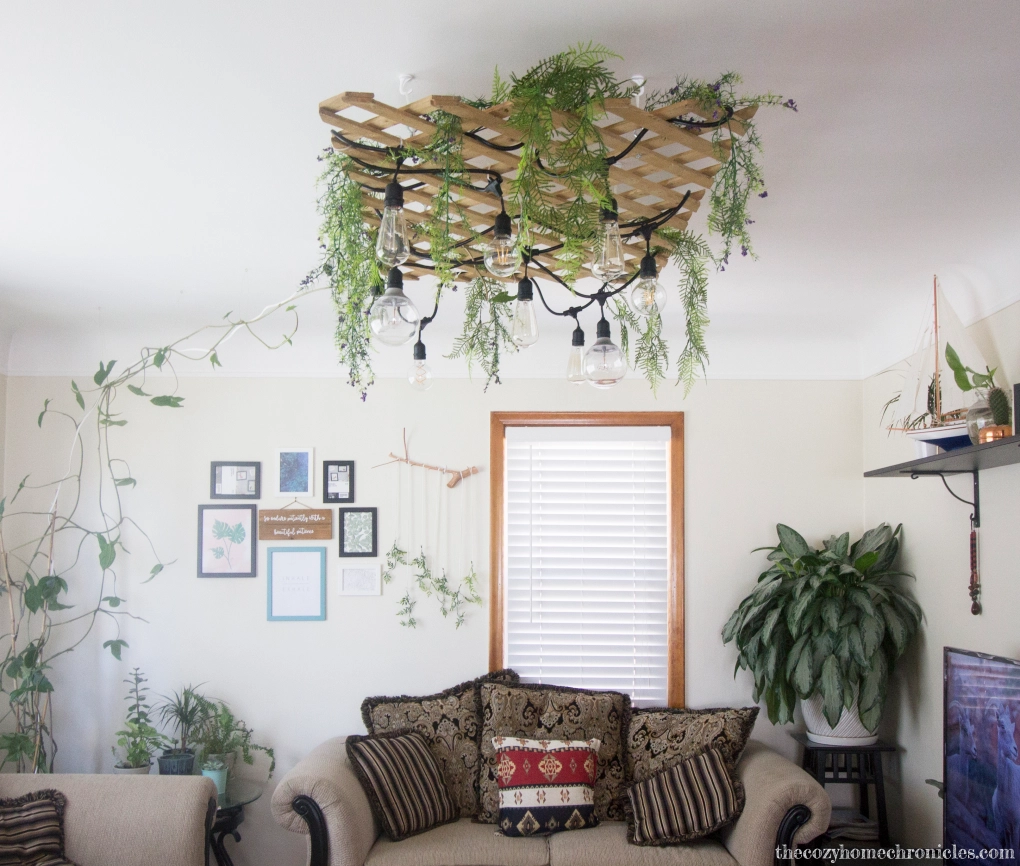
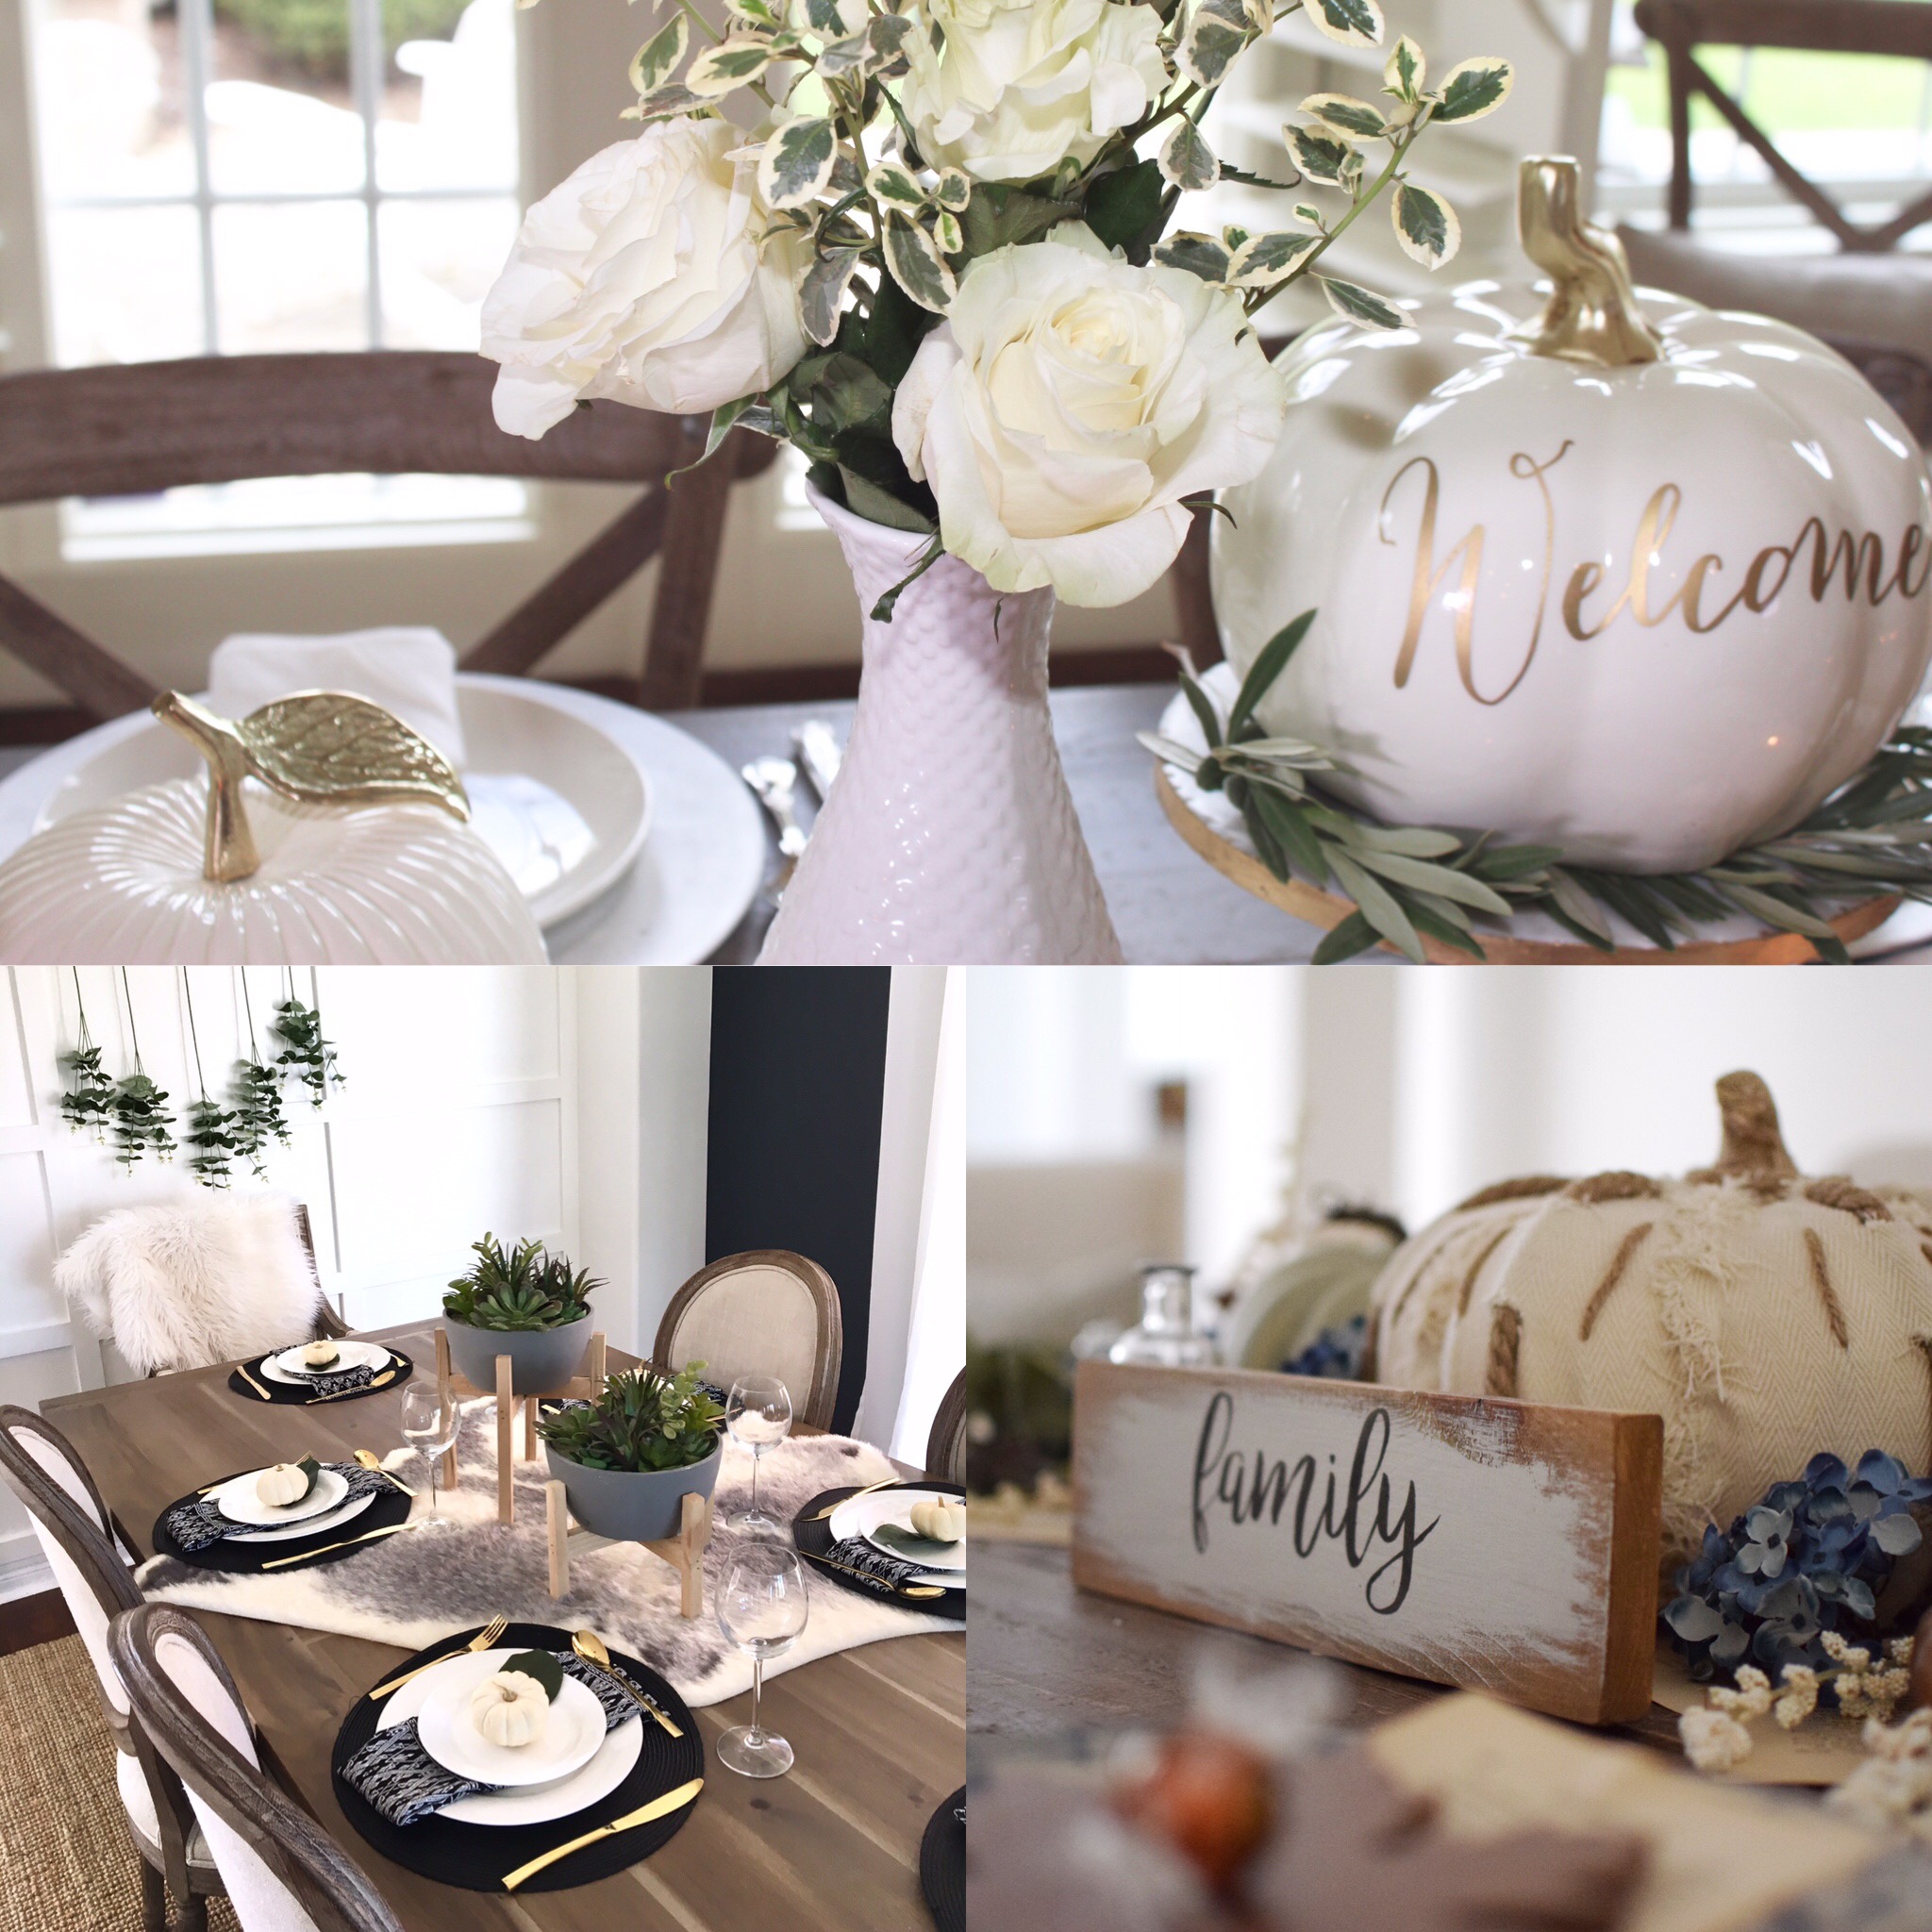
If you haven’t guessed already from our latest home decor posts and Instagram feed, we are a tad into the bohemian look. Taken to it’s extreme, however, the boho theme can tend toward maximalism and appear a bit cluttered for our taste so I sought to create a clean design based on some of our favorite bohemian colors and elements: greenery, gold, yarn, textured glass, palm leaf, and patterned fabric.

IMG_4363

IMG_4367

IMG_4415

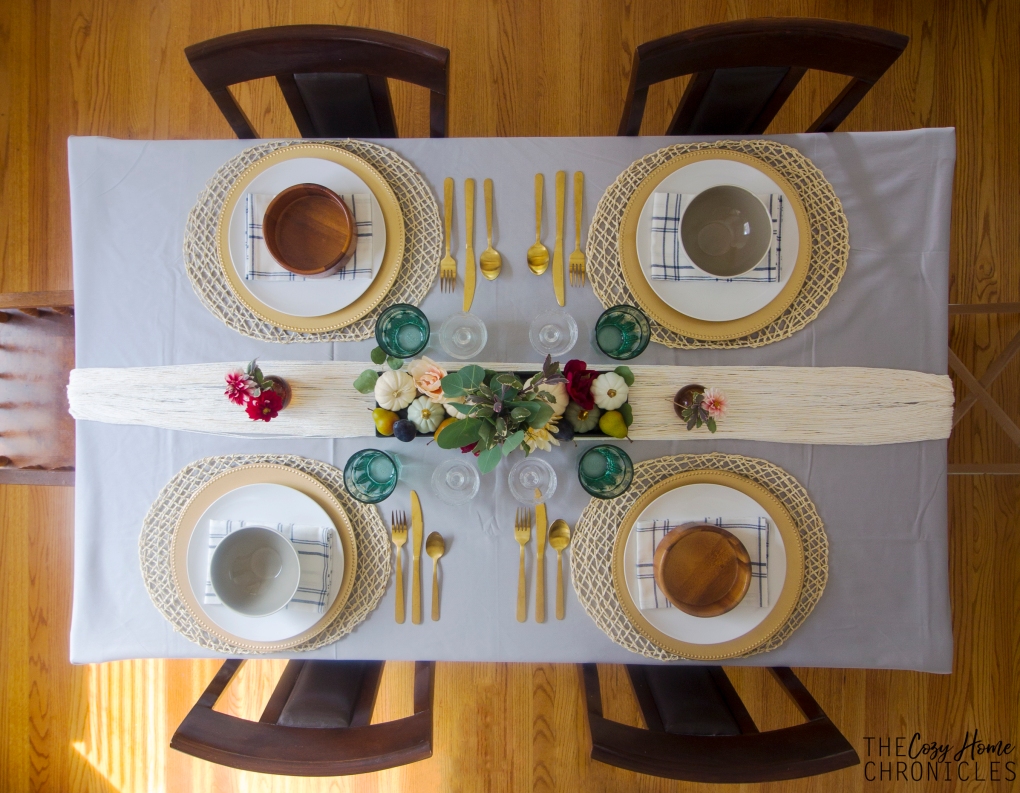
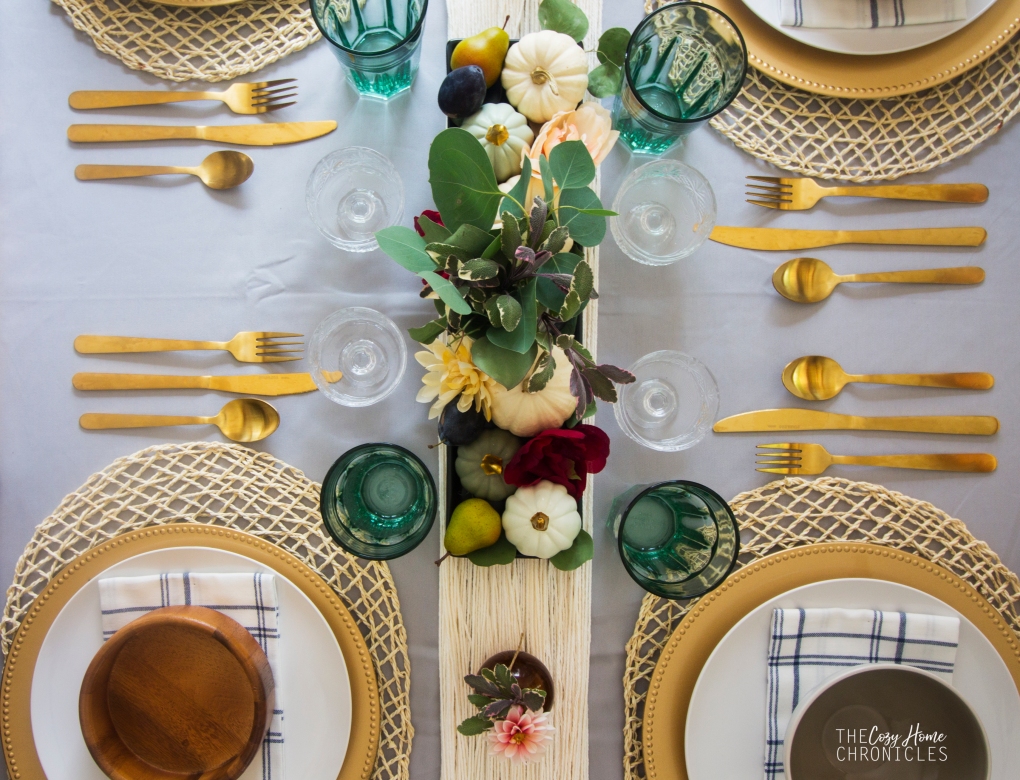
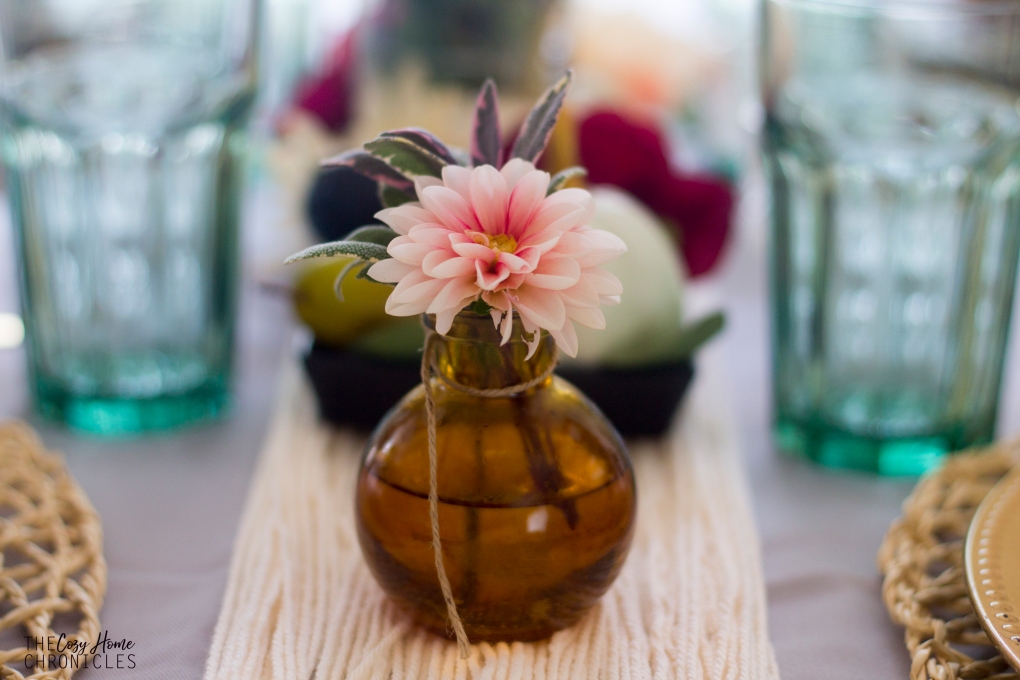
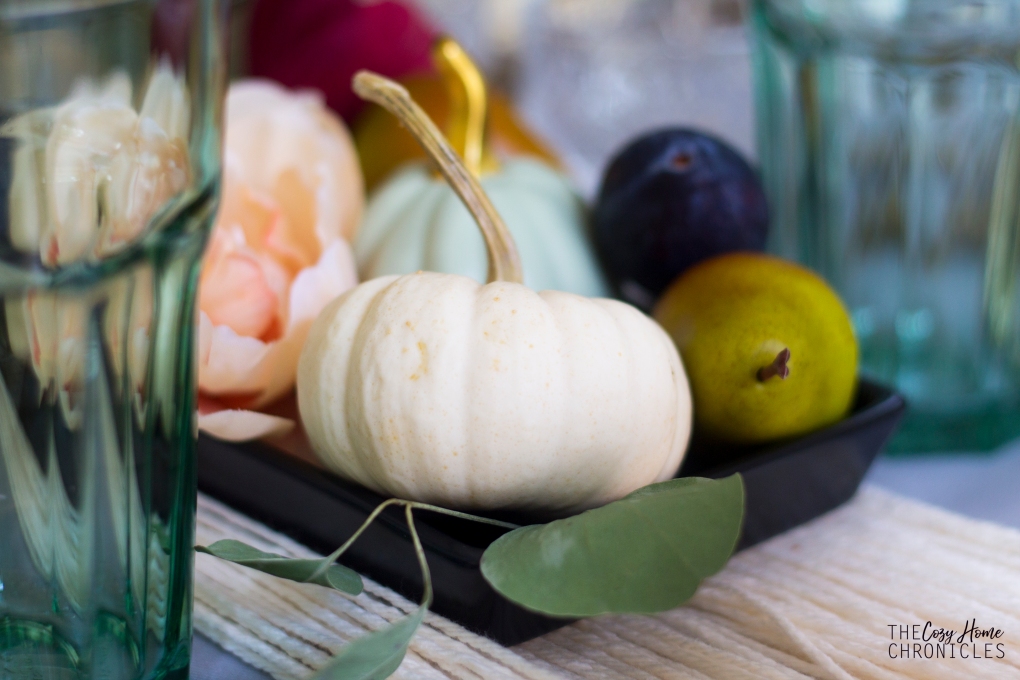
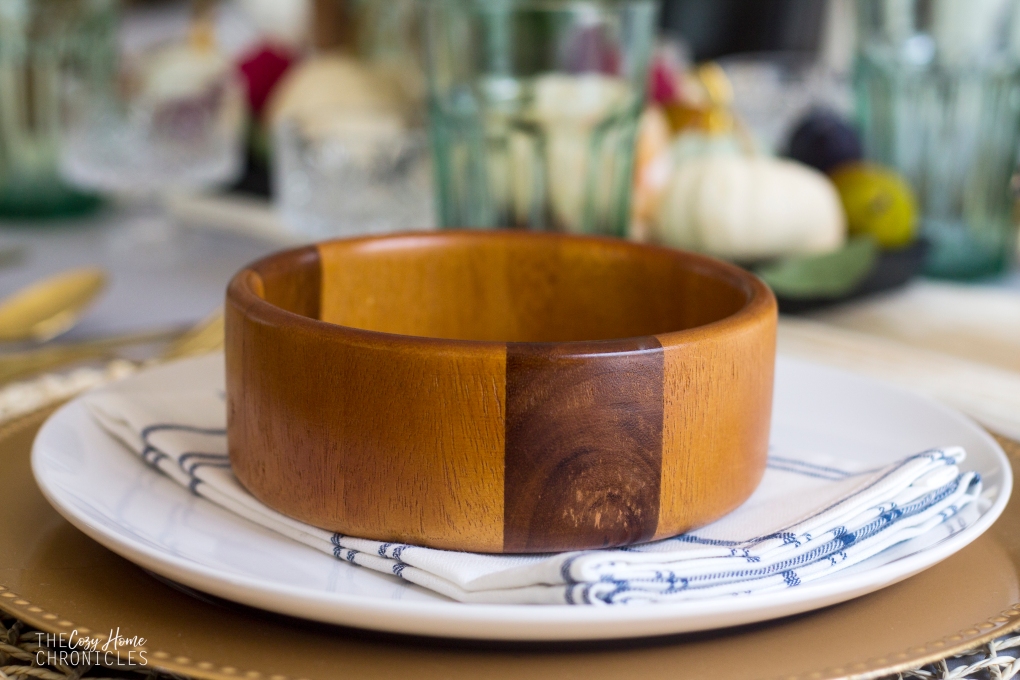
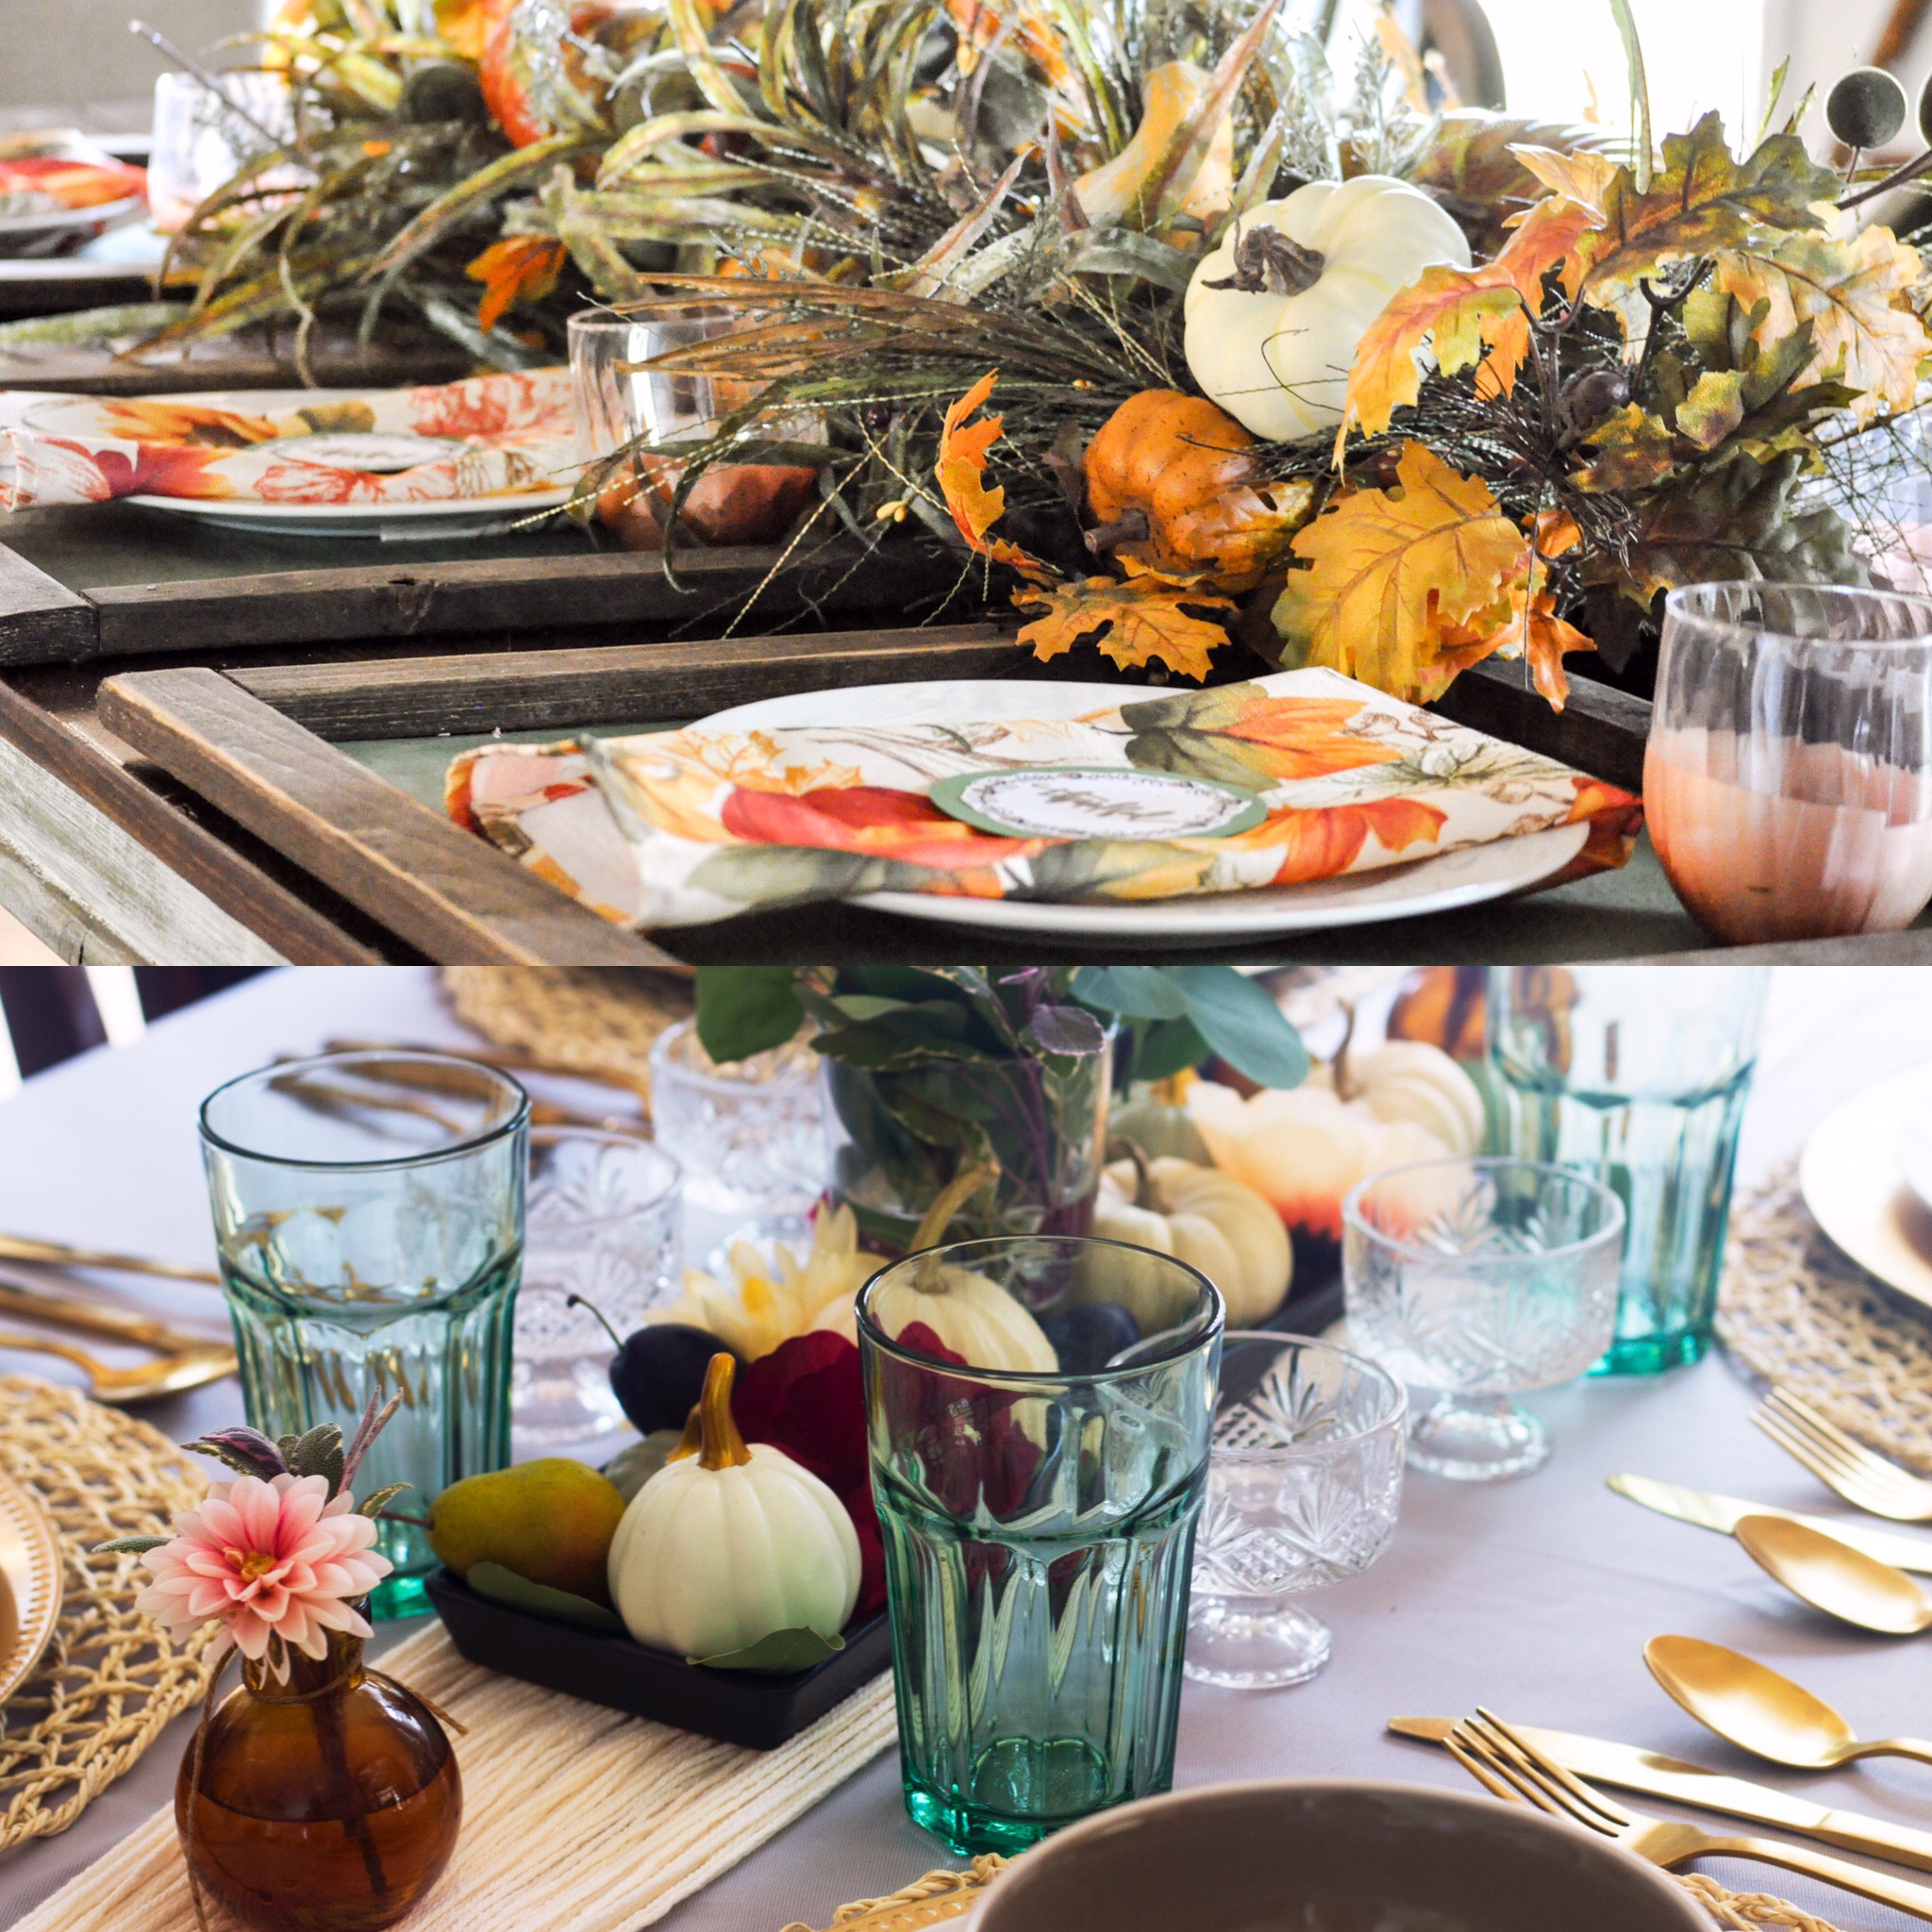
To pull this look together, I relied mostly on what I had lying around our home. For each place setting, I simply layered palm leaf placemats with gold chargers, white plates, and checkered napkins atop. For the centerpiece, I placed a small glass cup filled with eucalyptus and sage in the middle of a black candle dish and arranged white pumpkins, faux florals and pears, and real plums all around. For colorful touches, I included teal glassware, textured crystal, and gold flatware. I used my old amber essential oil diffuser bottles to showcase the dahlias and sage from our garden. The only thing I purposefully purchased for this tablescape (other than pumpkins) were the napkins. I really liked the flannel pattern and the farmhouse vibes they exuded, not to mention they were fairly inexpensive. For your convenience, I’ve included a list of the main sources down below for the all items I knew off the top of my head.


IMG_4397

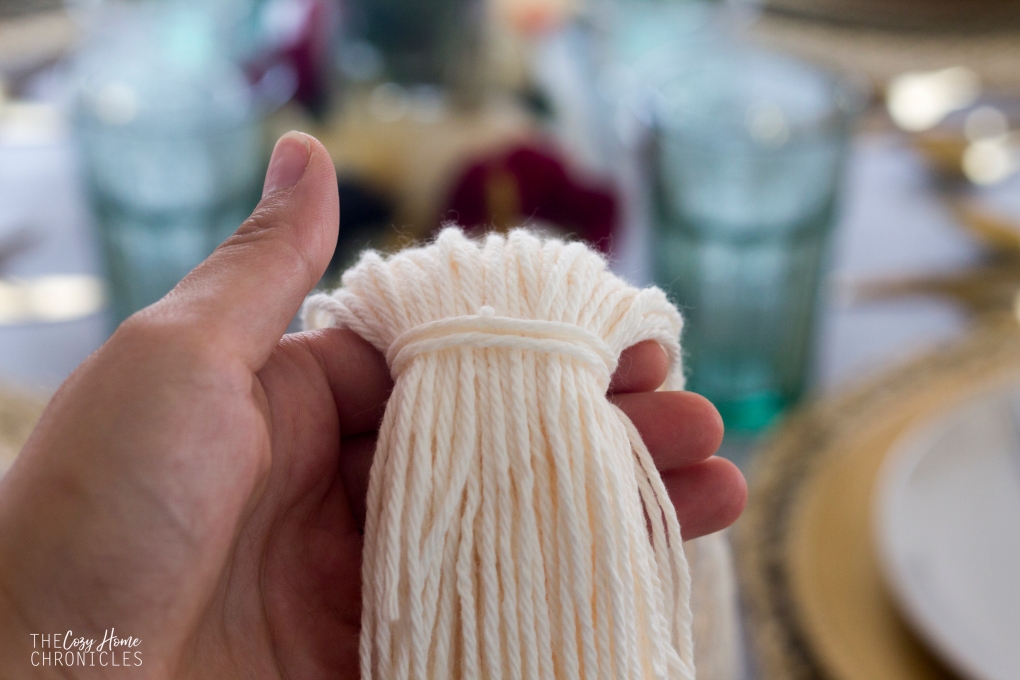
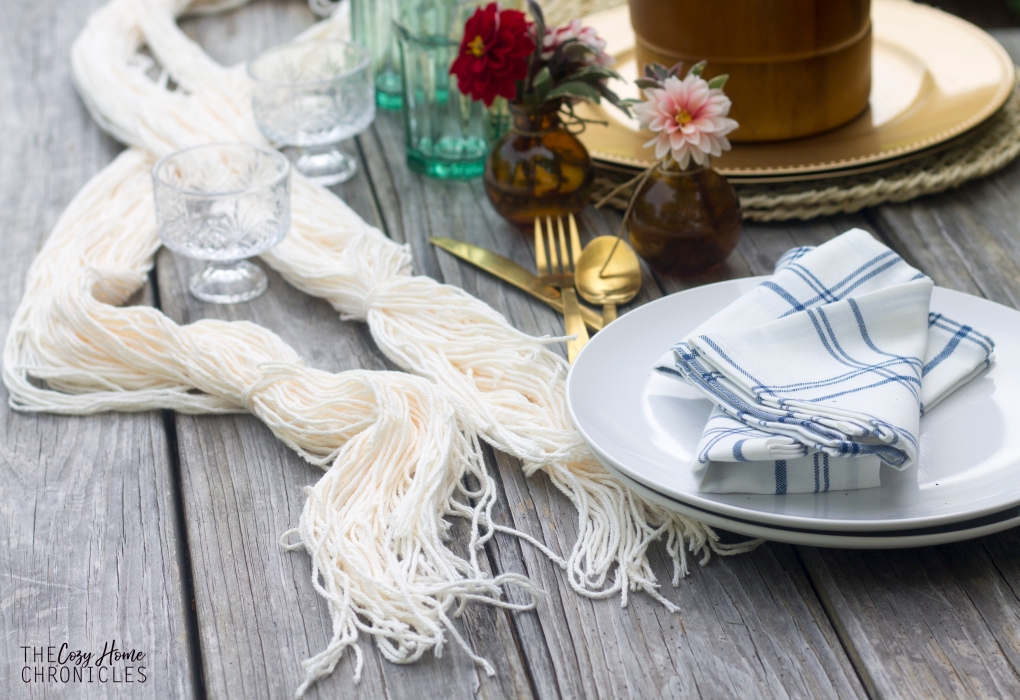
Of course my favorite part of this whole tablescape is the table runner that I made. I am happy to report that the finished product turned out exactly as I had pictured: an oversized tassel. All you will need to make this table runner is wool yarn and scissors. Simply unspool the yarn and cut into strips longer than the length of the table. The hardest part is making sure not to tangle the yarn as you lay the pieces side by side. When you’re happy with the width of your table runner (I used three rolls of yarn) then tie each of the ends together and voila!

IMG_4386

IMG_4428

Sources:
Checkered napkins: Target |$3
Faux Pears: Target|$5
Palm Leaf Placemat: IKEA|$3
Gold Charger: Dollar Store| $1
Eucalyptus: Trader Joes| $3
White Pumpkins: Farmers Market| $2

What do you think of the final result? I know it doesn’t include the fiery red, yellow, and orange hues normally associated with fall but we actually find it quite refreshing. I’ll be using this very same color palette to make an autumn wreath early next month so stay tuned for that. If you’re looking for more autumn decor inspiration that’s subtle and beautiful then you’ll definitely want to head on over to my friend at Harlow and Thistle and see her creative display. Also don’t forget to check out the rest of the stunning tablescapes in the Falling into Autumn Blog Hop linked below!


Happy Haute Home | Harlow and Thistle | Mint Candy Designs | Live Laugh and Craft | The Cozy Home Chronicles


Mindful Homekeeping: Ditching Plastic Bottled Water

A few months ago we started a series called Mindful Homekeeping in order to share simple homekeeping practices, DIYs, and products that we feel are mindful of the environment, body, and soul as we journey toward a more sustainable lifestyle. Because we live in a time where convenience and cost drive consumption, we really wanted a space to think critically about our practices and what we can do to make healthy, meaningful but also economical choices. Many of the topics we will cover are changes that we successfully implemented and wanted to share in the hopes of motivating you to consider making them too. In this post we will be addressing a practice that is commonplace in American households: buying and drinking bottled water. Now before you go off thinking that this is such an insignificant part of your life it isn’t worth examining…you are mistaken. Your actions can absolutely make a difference.

IMG_4071*This post contains affiliate links for your convenience.*

Bottled water has always secretly angered me. In an environmental anthropology class I took back in undergrad, we read and talked a lot about the environmental impact of Nestle and other companies that turned a free natural resource into a multi-billion dollar industry. It especially hit home for me because we live in the Great Lakes region and I was beyond bothered that a corporation could just own something that should belong to all people. And then the whole Flint water crisis and Dakota pipeline happened and it really brought the issue of clean, accessible water to the forefront. We pledged then that we would no longer purchase bottled water except on rare occasions {read as “never if we can help it”}. While we have always kept glass bottles filled in the fridge for ourselves, we were still keeping bottled water on hand for visitors. After our pledge, we invested in a larger collection of glass bottles to accommodate guests as well. Most of our collection is from IKEA and the carafes range anywhere from $1.99-$4.99.

IMG_4051

Why are we telling you this? Because with the cost being so cheap there’s really no reason not to completely make the switch. All you need to do is make a small investment in reusable bottles/carafes/pitchers {the cost will depend on the size of your family, we spent around $10} and then make a habit of filling them regularly. When one empties, you clean and refill it while you enjoy the next bottle. Expecting company? Fill a pitcher ahead of time and put it in the fridge. Going for a run? Fill up your canteen with cold water from the refrigerated carafes and refill the carafes for later. These simple practices can easily become habits that eliminate the need for drinking plastic bottled water. Heck you don’t even need to necessarily buy anything. I can think of plenty of glass you can upcyle {think milk jugs, cold-brew coffee, juice bottles} to use for the purposes outlined here. The best part about filling your own glass bottles ahead of time is that you can switch things up by making colorful and refreshing fruit waters. There’s no limit to what you can create once you start mixing up fruit, herbs, and citrus. I recently made a cherry, lime, mint water and it was DELICIOUS. Definitely beats boring plastic bottled water any day!

IMG_4073

If you are still not convinced, here are just some of the many reasons you should give up bottled water. You can read the sources for these facts in-depth here and here.

  1. The recommended eight glasses of water a day, at U.S. tap rates equals about $.49 per year; that same amount of bottled water is about $1,400.
  2. Eighty percent of the water bottles we buy end up in landfills, the absolute worst place for them to be.
  3. Plastic leaches into the water it holds, which has been linked to health issues like reproductive problems and different types of cancer.

Of course we don’t want to be too rigid. Plastic bottled water can have its time and place. We just don’t think it should be every time you reach for a drink of water. To conclude we will leave you with a goal and two action items that you can work toward:

Goal: Reduce plastic bottled-water consumption
Action item 1: Remove plastic bottled water from your grocery lists
Action item 2: Build collection of sustainable water bottles that you can refill over and over again

If you’re still thinking “it’s too hard to make the transition,” try starting with one glass bottle in your fridge and reach for that instead of your plastic bottle. Then as your plastic bottle supply depletes you can slowly build your collection of sustainable water bottles. We know that making these changes are not easy but they definitely make a difference and that is something you can feel good about.

IMG_4078

If you liked this post please follow us and share!


Instagram


Chickpea soup with tomato pickle salsa (Hummus M’Sabaha)

Ever since I purchased an Inkwell Press Meal Planner back in January and forced myself to commit to meal planning, we have been pretty consistent about practicing Meatless Mondays. Having a set genre for each day has really helped narrow down the selection for the menu, which is something I had a hard time doing prior because I enjoy making many different things. Today I’m sharing one of our favorite meatless dishes that’s nutritious and simple to make. It’s very similar to another Lebanese dish called foul and hummus except it’s without the foul or fava beans. Foul and hummus is usually eaten for breakfast and while I enjoy it now, I used to HATE it growing up. It was just too heavy for me and it wasn’t nachos or pizza so I was understandably upset when I could smell the distinctive aroma of garlic and fava beans wafting through the air. My father, the negotiator that he is, would allow me to leave out the fava beans as long as I ate everything else and that’s how my love for this dish of hummus m’sabaha blossomed. Traditional Lebanese hummus m’sabaha is much thicker and creamier than what I show here. Usually it’s roughly mashed and a little bit of tahini is added for creaminess. This spin on my childhood favorite is like a mix of hummus m’sabaha and lablabi, a Tunisian chickpea soup. We personally enjoy the combination of the light lemony, garlicky broth with the texture of whole chickpeas.  And speaking of broth, please don’t use canned chickpeas. Technically you can but if you do make sure to drain the chickpeas well and simmer them in a vegetable stock or bone broth. Starting with dried chickpeas is essential for getting flavorful chickpea broth that is not a metallic tasting goop.

IMG_3682

I always soak the dried chickpeas on Sunday evening and boil them first thing on Monday morning. My recipe calls for two cups because that’s what I soak but we don’t necessarily eat all two cups unless I planned to eat leftovers the next day {usually we don’t because it’s Taco Tuesday ;)}. Whatever I don’t use I will freeze for a rainy day. I grew up learning to cook from my father who never measured ingredients so I’m still working on how best to write and share these family recipes. Anyways, I hope you enjoy this as much as we do!

IMG_3708

IMG_3661

Chickpea soup with tomato pickle salsa (Hummus M'Sabaha)

  • Difficulty: Easy
  • Print

Ingredients
2 cups dried chickpeas
1 teaspoon baking soda
10-12 cups water
2-4 garlic cloves, minced*
1/2-1 cup lemon juice*
high quality extra virgin olive oil to drizzle
salt & pepper to taste

Salsa:
1 cup diced Lebanese pickled cucumbers
2 cups diced tomatoes
1/4 cup of fresh mint, chopped
1/4 cup of fresh parsley, chopped

To serve:
Radishes
Lebanese pickled cucumbers
Sweet onion, sliced
Pita bread
Lemon
Fresh herbs like mint and parsley

*Note: If you’re not afraid of flavor, you might consider adding more garlic and lemon juice.

Directions

  1. In a large bowl, add your chickpeas and baking soda and cover with water. Let the chickpeas soak overnight or for at least 8 hours.
  2. Drain and rinse your chickpeas and cover with 10-12 cups fresh water in a lidded pot. Bring to a boil then let simmer covered for 30-45 minutes or until tender.
  3. Using a mortar and pestle, mince your garlic cloves with salt until you have a smooth paste.
  4. In the meantime make your salsa by combining diced tomatoes, diced pickles, chopped mint, and chopped parsley.
  5. Once the chickpeas are tender, add in your garlic paste, salt, pepper, and lemon juice. You can use your pestle to give some of the chickpeas a quick mash for thickness if you desire. Let simmer for another 10 minutes then adjust seasoning to your taste.
  6. Ladle into individual bowls, drizzle with olive oil generously and top with sweet onions and salsa. Serve with fresh pita bread and garnishments of your choice.

IMG_3689

IMG_3739

Instagram


Watercolor Painting with Beetroot

I am constantly looking for ways to reduce waste and simplify our life at home. Maybe I’m a little too determined. If I had things my way, we would probably be living knee-high in a collection of recyclable materials. Unfortunately there are not enough hours in the day to see all my ideas through and thankfully my husband is there to ensure that we do not become hoarders. Of course that doesn’t mean I don’t try to be resourceful within reason.

IMG_3754

Beets are something we eat quite a bit of in our home. We love snacking on boiled beets with a splash of vinegar and salt or incorporating them in a meal like this side-dish of Swedish Beetroot Salad I posted some time ago. One of my favorite things about beets is their deep magenta hue. I imagine there was a time, before synthetic dyes, when beets were used to naturally color everyday items and it makes me feel guilty to throw away such a beautiful by-product. I have experimented painting with beetroot juice many times but this was my first time sharing this experience with my son who has finally learned to wield a brush (as good as any toddler will). The last time I boiled beets, I stored some of the juice in a mason jar in the fridge and saved it for a rainy day.  My favorite part about this activity is the fact that this paint is completely natural. My son can snack on beets and even take a lick of his “paint” and I would have no qualms about it. This activity is perfect for a rainy indoor day but you can also take it outdoors if you want to spare yourself preparing for the messy aftermath. All this is to say: If you boil beets, don’t throw out the juice. For this activity here’s what you’ll need:

  • paper, preferably watercolor paper
  • small paint brushes
  • beetroot juice ( to make it concentrated, simply microwave in a small container to evaporate the water)
  • glass of clean water
  • fine salt and course salt
  • old newspaper or something to protect your work surface

IMG_3745

IMG_3766
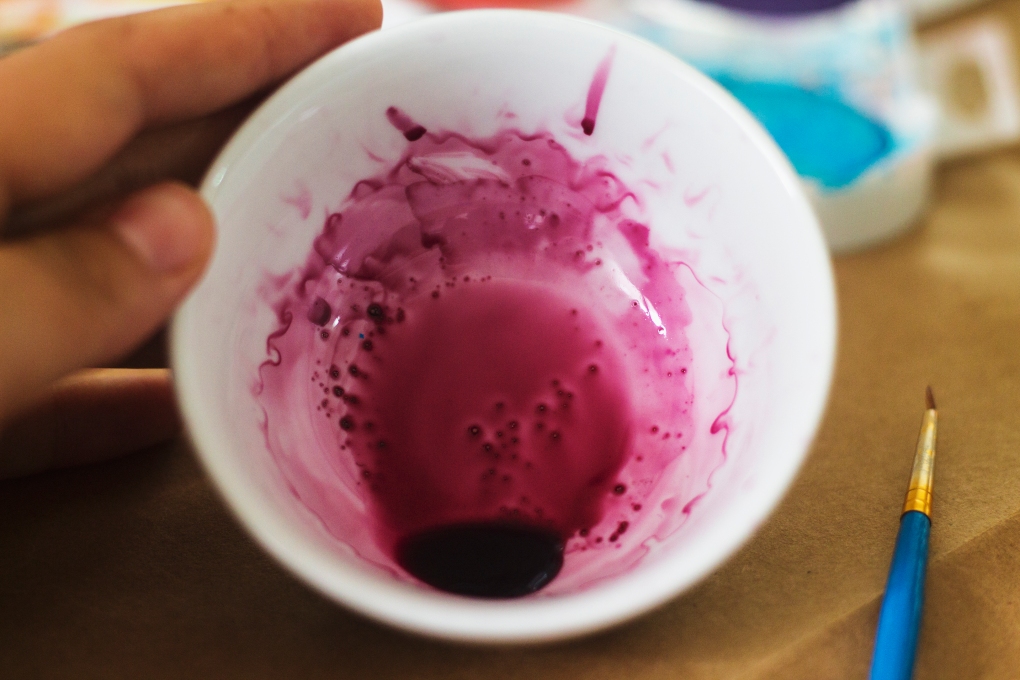
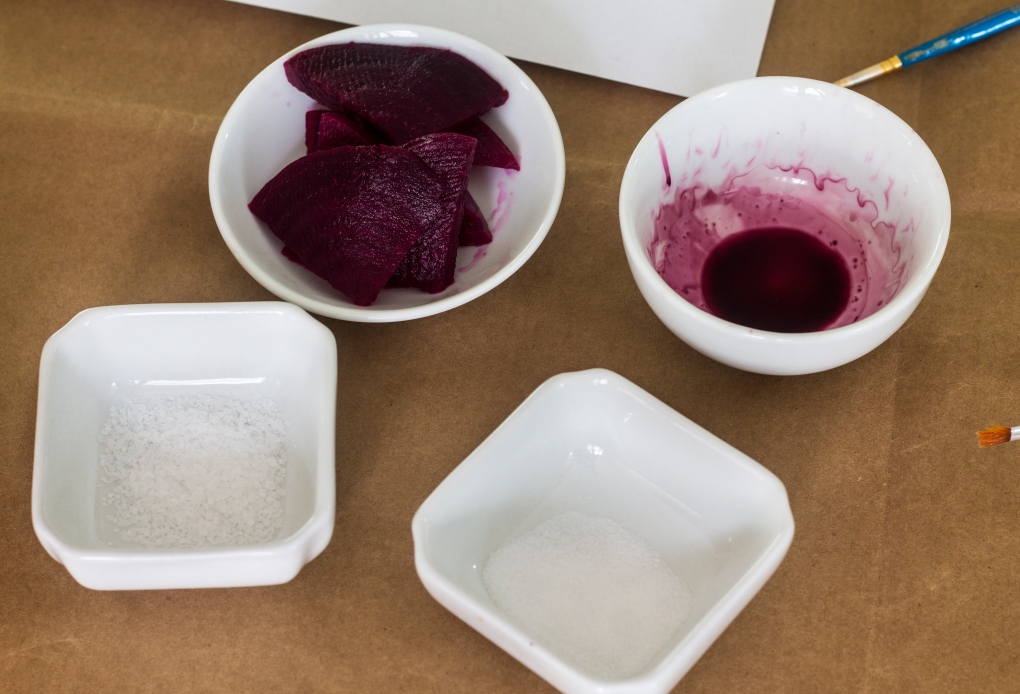
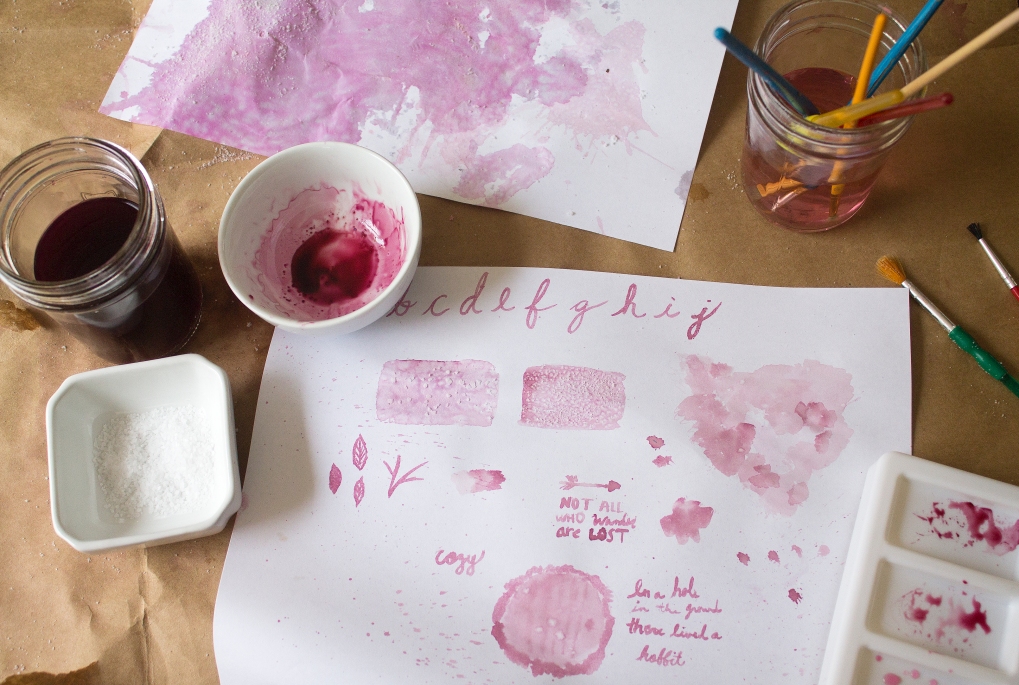
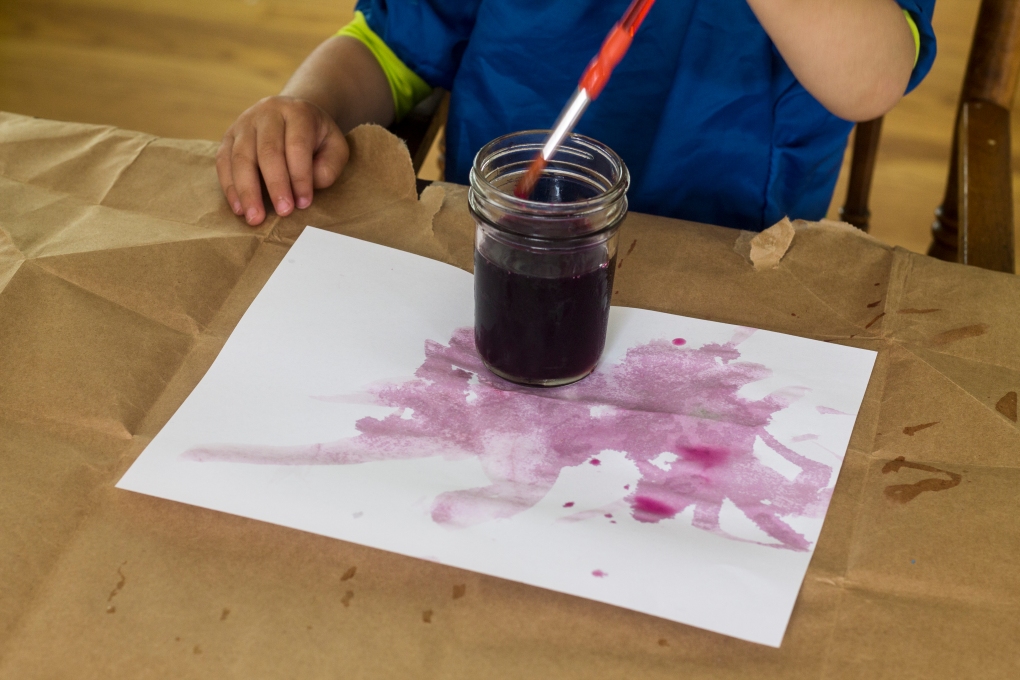
My son was ecstatic about pouring salt all over his painting (consider that he’s been attempting to dump salt out since he turned 18 months) but what he doesn’t know is that we were actually practicing a legit water color technique that I learned from Inkstruck Studio. As you can see this activity not only kept my toddler entertained but was a good learning exercise for me too. If you enjoy watercolor painting or hand lettering, you definitely could get something out of this activity if you plan ahead. Here’s a really good video tutorial that introduces basic watercolor and hand lettering techniques if you are interested. If you do try this activity be sure to share on Instagram and tag us @thecozyhomechronicles 🙂

IMG_3773

If you found this post helpful, leave a comment and tell us how we did!

Please follow us and share!

Instagram


3 Photography Backdrops under $3


IMG_5335 2
As an amateur photographer who has shot everything from engagements to family portraits, the switch to shooting flatlay scenes for our blog was a bit challenging because I had to create fun and engaging scenes in a tight space and on a small budget. The perfectionist in me believed that I needed fancy equipment and props to shoot beautiful pictures until I realized how expensive these items could get. Let’s just say things can add up real quick! I basically had to get creative fast, which isn’t hard to do when Home Depot and Michaels are your second home. I’ll never forget how excited I was when I came across these faux stone/marble laminate tiles at Home Depot. At the time we were shopping for our kitchen renovation and my husband was a bit concerned that I was purchasing laminate tile when we were in the process of getting rid of ours. But for the price, could you blame me? I had a similar epiphany at Michaels while browsing the paper aisle (yes I do this for fun) and realized I could get the rustic, wood-grain look that I love without breaking the bank.

img_9645

Why use backdrops might you ask? Well, if you’re someone who’s considering blogging or opening a business, one way you can grow your reach is by creating captivating photos to share your story or sell your product. We are by no means experts at this but we have certainly noticed more growth and engagement when we put more care into the images we created for our blogposts and social media accounts. Today, I’m sharing our favorite, inexpensive backdrops so that you too can make beautiful images for your blog or business. For your convenience, I’ve provided links to these backdrops below as well as examples of how I used them.

1. Woodgrain Scrapbook Paper: While not as durable as wood or stone, these papers offer a rustic, homey aura to the scene you are capturing. For only $.69 it’s totally worth getting a couple and experimenting with staging your products/recipes/art/etc…

IMG_3993 copy

IMG_2368 copy

2. Faux Stone/ Marble Tile: I especially love these for shooting recipes because I get that authentic countertop look with minimal effort and without having to replace our countertop 😉 The best part is they can be easily cleaned and can be picked up if you are chasing a natural light source. They also come in a variety of colors and textures some ranging from $0.89 to $2.98.

IMG_0952

IMG_1666 copy

3. Foam Poster Boards: Foam boards are the largest of these three options so if you’re looking to capture a bigger scene then they are your best bet. Solid boards are perfect for making the objects you’re capturing pop and they’re also handy for reflecting and directing light. Oh and you can find them for $1 at Dollar Tree.

IMG_1285

IMG_1642 copy

Of course you can also use these boards for more than just food photography. One thing I love to do is take everyday scenes that happen in our home and change up the backdrop. This allows me to share my vision and retell our story in a unique way. No fancy camera needed. Just your imagination, smart phone, and a backdrop for under $3.

IMG_3507

IMG_4283

If you found this post helpful, leave a comment and tell us how we did!

Please follow us and share!

Instagram


Banana Honey Walnut Toasts

IMG_2240

Although Ramadan ended over a month ago, we are still having a difficult time breaking some of our Ramadan schedule and habits. Not only do we still stay up pretty late (midnight is the norm for me), but we also eat like mice early in the morning because it feels strange to fill up right after we’ve woken up. With all the things we have going on in our life, we certainly can’t afford to skip out on the most important meal of the day so today I’m sharing a simple breakfast idea that’s sweet, crunchy, and filling. Banana sandwiches are something we grew up eating as a treat. My father would make it for us and share stories of his picky-eating days, growing up in Beirut, where all he would eat was bread and sugar to fill up. I guess you can’t really go wrong with bread and banana! Thankfully none of us turned out that picky but that doesn’t mean we can’t celebrate the product of my father’s resourcefulness 🙂

When I got married, I was introduced to a whole different world of foods I had never eaten. One of those things was geimar, a creamy Iraqi spread similar to clotted cream. It’s thick and rich in just the right way and it’s unsweetened which makes it the perfect base for a sandwich like this. We don’t eat it often but when my in-laws are in town we make sure to get our fill of geimar, samoon (Iraqi flatbread), and honey. When I photographed this recipe, I used sourdough toast that I had on hand but you can use any bread you like. If you desire more substance and less bread, you can cut the banana length wise and roll it up in a thin pita bread just like my dad used to do.

Ingredients
Quality artisan bread/toast
Salted butter or clotted cream
Banana
Honey
Walnuts

Note: You can use unsalted butter if you’d like but I find the saltiness works wonderfully with the sweetness of the honey and banana.

IMG_2245

Directions
Toast the bread of your choice and generously lather on some butter while it’s still a bit warm. Layer on banana slices and walnuts and then drizzle on some honey. Serve alongside a nice cup of piping hot tea.

IMG_2251

IMG_2253

If you liked this post please follow us and share!

Instagram


DIY Garden Lattice Light Fixture

IMG_3179

After finishing our crazy and exhausting 6-week bathroom renovation challenge in May, you would think we would wait just a littttle bit longer before DIYing again. But, nope. We just can’t help ourselves. It seems there is never a shortage of problems that need creative solutions and for us one of those problems has been the lack of adequate lighting in the living room. For the last four years we have made do with two lamps on our end tables and let’s just say, the amount of light they offered left much to be desired. Making our own light fixture has been a goal of ours and so we have been mulling ideas over for quite some time. All we knew was that we definitely wanted something that gave off rustic, jungalow, boho vibes. When I thought of inspiration that embodied these elements, my mind always went back to the same place: The lobby of a hotel in Philadelphia where I stayed for an anthropology conference.

IMG_6043

We also wanted something inexpensive; something we could make out of upcycled and thrifted materials. It didn’t take long for us to settle on the garden lattice sitting abandoned at the back of our garage. Not only did it give us the look we were going for but it also helped us solve another design problem: what to do with the overgrown arrowhead vine taking over the living room. And then, almost in what could only be described as divine intervention, something possessed my husband to stop at a garage sale where he found this set of 5 really cool Edison bulbs for $5 (normally they would go for around $7 a bulb). A few Home Depot trips later and we had settled on how to hang our new fixture. The funnest part of this whole process was seeing our random ideas become a reality. We are just so happy with the finished product and we love that it feels like a rustic garden in our living room. We like it so much, we just may consider putting another one up above the dining table 😉 Alrightie, here’s what you’ll need to make this fixture:

Supplies
Pressure Treated Lattice
(6) Ceiling Hooks – VersaHook
(10) Heavy Duty Cable Ties or Loop Wire and clamps*
(6) Metal Bolt – Everbilt 3/8 in. Eye Bolt with Nut
10 Vintage or LED Edison light bulbs
10 String Light socket
Faux Foliage

*Important: For safety purposes, make sure to use commercial cable ties with a tensile strength of at least 40 pounds or you risk the fixture falling down.

IMG_3170

Directions: 

  1. Cut the lattice to the desired size (we did 3ft wide by 5ft long) with a hand saw.
  2. On the lattice, choose 6 symmetrical points for hanging support and drill a hole for each. Secure the 3/8in eye bolts in each of the six holes.
  3. String the cable ties through the eye bolts and loop until completely secure. This is very important. You must not be able to open the loop or slide the tie back through the head.
  4. Measuring according to the location of the eye bolts on the lattice, drill 6 corresponding holes into the ceiling.
  5. Insert drywall anchors into the ceiling holes and secure the ceiling hooks by twisting.
  6. Just for a test run, install your fixture base by hanging the cable tie loops on the ceiling hooks. If everything looks good and sturdy then take it down and proceed with the next steps.
  7. Now for the fun part! Weave your string light sockets through the lattice and secure the wire in place with the remaining cable ties (you can use more if you like).
  8. Decorate your light fixture by arranging your faux foliage around the lattice either by weaving the stems through the lattice or using glue or a staple gun for a more permanent fix. Make sure to place the foliage a good distance away from the light bulbs or they can burn.
  9. Install your completed fixture by hanging the cable tie loops on the ceiling hooks.
  10. Finally, screw in your Edison bulbs, plug in the light, and enjoy the beautiful view!


IMG_3164

IMG_3171

With the lattice and the Edison bulbs as the base, you can customize this fixture for any home decor style with just a coat of paint and greenery of your choice. You can hang flower stems, eucalyptus, lavender, air plants, etc… The creative possibilities are endless. If you do attempt to make this, be sure to share and tag us so we can see 🙂

If you liked this post please follow us and share!

Instagram


Lebanese Green Bean & Tomato Stew (Loubya Bi Zayt)

IMG_0887

Gardening season is officially in full swing and you know what that means, right?  Fresh, delicious vine-ripened tomatoes hand-picked from your very own backyard. After putting all that hard work into growing your garden, you’ll certainly want to savor the fruits of your labor.  Fresh tomatoes are perfect for salads, salsas, and sauces but why not try something new? Loubya bi Zayt, a Lebanese dish of green beans, onions, and tomatoes cooked in olive oil, is the perfect way to showcase your garden harvest. The tomato and olive oil combination is delightful and if stewed properly, results in a satisfyingly gelatinous texture. My father, whom I learned this recipe from, would cook the green beans with fresh finger peppers or jalapeños for a spicy kick. Since I have two little ones who eat with us, I don’t add any heat during the cooking of this dish but instead top my own plate with red pepper flakes for a nice kick. This dish is delicious on its own served with pita, green peppers, and sweet onions but it can also be treated as a side to a sizzling barbecued steak. In the past when my acid reflux was too much to handle, I would make basmati rice to serve alongside the green beans to break up the acidity of the tomatoes. Whichever way you serve this dish, you will not be disappointed. The best part? It’s super easy to make and requires just 3 main ingredients.

IMG_0863

IMG_0867

Lebanese Green Bean & Tomato Stew (Loubya Bi Zayt)

  • Difficulty: Easy
  • Print

Ingredients:
5 medium tomatoes, ripened
4 white onions, finely diced
2 pounds fresh green beans
2 tablespoons tomato paste diluted in 1 cup of water
1 garlic clove, thinly sliced
1/2 cup of olive oil, plus more
Salt and pepper to taste
Red pepper flakes to taste (optional)

Directions

  1. Clean and trim your green beans, cutting them into 1-2 inch pieces.
  2. Drizzle some olive oil in a large pot and sauté half of your finely diced onions until translucent and light brown. You can sauté all the onions at once to save time but the dish will be on the sweeter side no matter how much salt you add.
  3. While the onions are slowly caramelizing (careful not to burn), blend the ripened tomatoes in a blender with salt and pepper to taste. If you don’t want the tomato seeds or skin then strain before adding to the pot.
  4. To the pot, add in your green beans, garlic, and the rest of your onions and cook for 5-7minutes, stirring gently. You want the green beans to pick up flavor and color but make sure they don’t steam or they will taste rubbery.
  5. Finally, pour in the fresh tomato juice, diluted tomato paste, and 1/2 cup of olive oil and bring to a boil before turning the heat on low. Let it simmer uncovered on low heat for about 30-40 minutes until the green beans are tender and a thick gelatinous texture begins to form.
  6. Serve hot as the main dish or let it cool and serve as a side.

IMG_0879

IMG_0898

If you liked this post please follow us and share!

Instagram


Potty Training Before Age 2

Happy Monday friends! Our little hobbit just turned two years old last week (sobs) and we are getting ready to take potty training to the next level. I’ve struggled to write about this topic for a while now because 1) The first time I told someone I was potty training it felt like everything went south, and 2) It hasn’t been completely successful. I am, however, trying to look at the positives as we take the next step, so I wanted to share what has worked and what hasn’t.

IMG_1171

We started potty training our son the week before he turned one. I was super determined (clearly) and our doctor had told us that some cultures were successful in training children by 15 months of age. I wanted to be that parent. And things, surprisingly, went very well from the beginning. We had used sign language with our son from a very early age and he had picked the signs up fairly quickly. The potty sign was no exception. It’s easy to start the association early on because babies don’t hide the fact that they’re going. So every time he would start turning red like a tomato or make pushing sounds, I would acknowledge the sounds he was making while signing for potty. After a few weeks, he was signaling to us whenever he needed to go. It was seriously the coolest thing ever until he started manipulating us and using the sign (and sound effects!) to try to get out of his highchair or nap time or anything really. Actually it was pretty hilarious but that’s beside the point. Anyways, the only problem was that his signing to go only covered pooping, which is where we are still at today. I think it’s just that peeing is so effortless, he doesn’t give it much thought or know how to make the distinction yet.

IMG_1169

It certainly has been nice not needing to change poopy toddler diapers (with the exception of a few accidents) but now that we’ve been going to the potty for almost a year, I really want to get him fully trained in the next few weeks. I try not to be too hard on myself but I do put the blame on me for not having fully trained him. I think what he really needed (and still needs) is a few days in just underwear so that he can make the mistake of peeing and learn not to. I was unable to give him that opportunity when the fatigue started kicking in during my second pregnancy and it’s hard now that I’m juggling life with another baby. I’d have to be constantly on top of him so he doesn’t pee on any rugs and with a 8-month old in my arms, that’s difficult to do. All this is not to say that we didn’t have any success at all. Many people don’t start until 2 or 3 so I’m happy with where we are at now. There are some things, besides the signing, that I know have made this journey much easier so if you’re thinking about starting to potty train you might want to consider these things.

Potty Training

  1. Create a happy space. This is something we try to do everyday in our home but we very consciously made an effort to create a comfortable space he could feel was his. Even though it was just a small corner of the bathroom, it was his potty haven complete with his own colorful hand towel and bathroom mat
  2. Make it fun. This goes hand in hand with the making of the space. At first we would keep and rotate a few special toys in the bathroom. That way, he was always excited to go to the potty so he could play with those specific ones. We would also play DJ and let him listen to a song of choice, which basically turned into “Ants Go Marching” on repeat all day, everyday. When he turned 18-months, my mom got him an Elmo and Superhero Potty Book which we have kept in there as well. Now he enjoys going to the potty because he loves being read a story. We also had a special soap dispenser just for him and he enjoyed using it to wash his hands after a successful go. These small and simple touches have made for a smooth potty training experience for all of us.
  3. Give encouragement and rewards. Stickers can be your best friend. We definitely didn’t want to bribe our son with sweets or toys but we did want to give him recognition that he was doing an awesome job. The potty book he received came with a sticker chart and stickers that we hung up behind the bathroom door. Each time he would successfully tell us and go in his potty, he would get to put up a sticker on his chart. This somehow grew into sticker collecting and whenever we go out to Michaels or Target, we let him pick out his own stickers to put up. High-fives, hugs, clapping, and calling dada to share in excitement over another bowel movement are also wonderful gestures that have allowed us to express how proud of him we are.

We did make the switch from cloth diapers (little sis is using them now) to pull-ups several months ago so we are hoping there is an end in sight. He does and can pee in his potty but he just hasn’t gotten to the point where he tells us each and every time he needs to pee. As he gets older and his vocabulary expands, we are sure it will be a matter of time before it clicks. We made plans for this weekend to finally remove all the rugs in the living area and have him in underwear for an extended period of time. Our fingers are crossed and we could certainly use all the luck we can get 😉

Have you tried potty training before the age of 2? What tips and tricks worked for you? Let us know in the comments below. And as always..

If you liked this post please follow us and share!

Instagram


Eid Festivities and Unicorn S’mores

Happy Wednesday Friends! It’s been a pretty uneventful month here on the blog. With fasting during these long summer days and two babies (and school and work), it has been difficult to find the energy to write. Hopefully that will change as the month of Ramadan comes to an end. There are definitely many things we are going to miss; the spiritual high, eating iftar with family almost everyday, the Dr. Pepper and homemade french fries (we make exceptions during Ramadan only), and the city buzzing late at night. Despite all these wonderful things, we are really looking forward to celebrating Eid with our loved ones. We are also definitely super excited to share our ideas for a fun and stress-free Eid. First on the agenda,  we teamed up with the wonderful Amanda Saab from Amanda’s Plate to bring you a colorful treat perfect for Eid and summer bonfires. Behold,  The Unicorn Marshmallow.

IMG_2407

IMG_2513

It’s beautiful isn’t it? Now the recipe, you will find on Amanda’s blog if you click here. We thought it would be fun to assemble it into a s’more kit for your Eid guests so we designed coordinating labels that you can download, print, and attach to your favors for a more personalized touch.

EidTags

Here’s what you’ll need to put your favors together:

Graham Crackers
Quality Chocolate Bar
Amanda’s Unicorn Marshmallows
Clear candy bags or small cupcake boxes
String
Labels (download here)
Hole Puncher

The assembly is super easy. All you need to do is pair some graham crackers with a square of marshmallow and a piece of chocolate and then wrap. Not sure what to do on Eid? Invite family over for a BBQ/bonfire in the evening and serve up these pretty s’mores. There are no guarantees in life but these treats may or may not make you the coolest Eid party host 😉

IMG_2495

IMG_2517

IMG_2643

If all this talk of Eid is starting to stress you out then consider planning your Eid a few days ahead with our Eid Planner. We know how stressful the day can be for us if we’re not prepared and so we already started taking notes of all the things that need to get done. There’s people that we will need to visit (and people that will be visiting us) which means we need to clean the house and bake (or purchase) treats for our visitors as well as purchase gifts/flowers (and take out cash from the bank), etc…Basically, there’s a lot to do! And if you find yourself in a similar boat then you may find jotting everything down will help you not just tackle the day but actually enjoy it 🙂 All you need to do is print and begin filling out the various sections. Knowing what you’ll be wearing or who you’ll be visiting will help you develop a more accurate checklist (like if you’ll need to shop for gifts AND Eid clothes for you and the kids).

IMG_2531

Okay, you’re in planning mode and you have “make unicorn marshmallows” on your checklist. What now? If you’re like us and scramble every year to get envelopes to put the Eideya in and then shake your head in dissatisfaction at the lack of creative Eid stationary then we got you covered with this printable DIY Eideya Envelope. All you need to do is:

  1. Print
  2. Fold
  3. Cut
  4. Tape
  5. Slip in the cash, gift cards, or sweets
  6. Seal


IMG_2532

You can even insert some crayons and you’ll have a coloring activity to keep little ones busy as you scarf down brunch. At the end of the day, however you choose to celebrate, we wish you a stress-free and blessed holiday. We look forward to resuming and sharing our DIYing and home projects with you after the festivities have ended.

Printables
Gift/Favor Tags
Eid Planner
DIY Eideya Envelope

If you liked this post please follow us and share!

Instagram